flashcards, wordcards, a page of the coursebook with all of the vocabulary to be introduced and practise
a board to display the category or a powerpoint to display them in an online less
Procedures:
Introduce and drill the vocabulary as usual, with flashcards, electronic flashcards or realia
When the kids feel comfortable enough with using and prounucing the word, move on to the second part of the presentation / controlled freer practice that this activity is
Display the question and ask the students to answer it. When we just get started with this activity or if the group is small, we do it together as a class, later on, the kids do it in pairs for a moment or two.
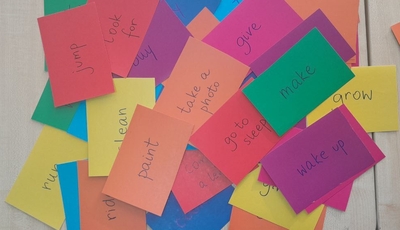
The whole activity is a categorising task, according to the kids’ preferences and opinions.
I started doing it with my online students and the questions were presented in the form of colourful clouds on the slides, hence the name of the activity.
All of the options that I have come up with and used with my kids include: I like / I don’t like, It’s interesting / it’s boring, I’ve got it / I haven’t got it, It’s made of metal / plastic / paper, It’s easy / it’s difficult, I always and I never, It’s big / small, Tell me more about…
Why we like it?
It is a low-key, (almost) no-prep activity.
It gives the kids an opportunity to use the new language together with the familiar structures, in a few different ways.
It is not quite creative but it is personalised because the students categorise the words according to their ideas and preferences.
The lower levels (i.e. pre-A1) can only categorise the words, the higher level kids (from A-1 upwords) can provide a simple justification for their choices.
The most productive of them is ‘Tell me about’ but it might not be feasible with all of the topics and vocabulary sets.
It is not very challenging so all the students can complete it.
31 words for December (yes, we are extending since we are learning almost until the end of the month and not until the 24th)
a noticeboard
a simple December calendar to cross things out
Procedures
As a part of our hello circle, we check the calendar and count the days since the last lesson. We have classes only twice a week so it is 2 (on Thursday) or 5 (on Tuesday) and we pick as many cards from the bag.
We read the words, the teacher writes the date on each card and the word (we are working on our literacy skills, too).
The teacher puts up all the words up on the board.
One of the students crosses out the days on the calendar.
Then we play with all the words we have so far.
Things that can be done: read all the words, mime the words for the kids to guess, play ‘What’s missing?’, read the words (if special word cards are prepared) and play riddles (It’s an object / person. It’s big / small / medium. It’s red and green. etc).
Why we like it
It is a great way to learn new vocabulary and to revise all of the words that we already know. It is not getting in the way of our regular vocabulary and topic. It is done on the side.
All the words are on display and we can see how we move through the unit and the month.
We are also learning about the calendar and the month.
We are preparing for the New Year’s Celebrations and by the time we get there – we will know all of the words.
It is a nice addition with new games, miming and, eventually, songs that are Christmas-themed.
This particular activity is very seasonal but even though we have just started, I can already see its benefits and the big picture and I really want to use the concept for some other topics. My first idea is the next seaon peak – spring and Easter. I am thinking.
Almost nothing, only a whiteboard and a marker. And, of course, a set of words that you are planning to practise. In case of all the young learners, they will probably be coming from one vocabulary set i.e. transport, pets, clothes, etc.
Procedures:
Teacher revises all of the words from the unit / set, using flashcards or the electronic flashcards.
Teacher writes only the three letters of the words, students guess the whole word. The easy version: the first three letters, in the correct order. The more challenging version: any three letters of the word in the order they appear in the word. The super difficult version: any three letters of ther words in a random order.
In the early stages of the game / unit, the teacher writes all the other letters of the word before moving on to another item.
Why we like it:
It is super easy and it requires no preparation whatsoever.
The length of the activity can be adapted to the needs of the lesson.
The level of challenge can easily be adjusted to the level of the students, the level of literacy and the level of familiarity with the particular set of words.
The game is challenging and it teaches the kids to focus on the accuracy and it helps them practise spelling accurately.
With the support of the coursebook or a set of flashcards, the students can play the game in pairs or small teams, with one student setting the task and the rest of the group guessing.
The game is fun, it is challenging but also achievable since we are working within one set of vocabulary or theme. It draws the students’ attention to spelling, all of the peculiarities of different words and their spelling.
Last year, the month of May was one crazy ride. We made madalas, we made dreamcatchers, we used salt dough and it very messy and it was lots of fun. Naturally, May 2025 also became the Materials May.
We started with clay. And with portraits.
The language
Actually, the language was not the main priority this time. Just like in our materials lessons last year, the absolute leader in the lesson, the first place, the right of way, all of that was the material, the medium. The language was just something I picked up because we needed it for this particular lesson. This time it was the body parts, especially the parts of the face. We revised them, made up a new chant and played a bit with tell me about your person / monster using a set of pictures.
The artist
The artist of the day was not the most important stage, either, but I am very happy with the idea I had for this lesson and how it worked out. Instead of one particular artist, I prepared a whole collection of portraits for all of us to understand how diferent they can be. We looked at them, one by one, and tried to look at what the focus was: the face, the body, the place, the colours or the technique. I was hoping that it would help the children see many various styles in which they could execute their own portraits.
The art
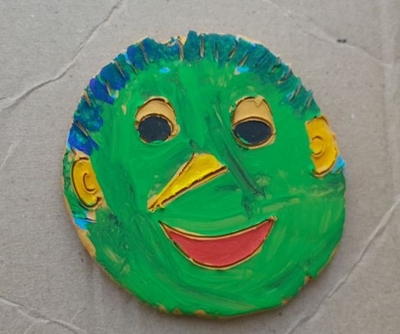
The main idea for the creative part came from Princess Artypants – a face made of clay. I told the kids that they could choose to create a face, any face they wanted, their face or someone else’s, in a style of their choice.
I showed the kids a face I made before the lesson and I outlined the steps (1. clay (form, roll, shape) 2. draw (with sticks and plasticine knives), 3. paint (acrylic paints).
Before the lesson, I prepared the tables and all the resources and I was handing them out and picking them up as we went through the task. I was also making one more piece of mine to better illustrate the instructions.
In terms of the resources we used: a large sheet of paper, fitted with the scotch as the main workplace, a rolling pin to prepare our circles, clay (self-drying, ochra colour), sticks, chopsticks and small plastic knives, paintbrushes and wet tissues, acrylic paints in tubs (everyone got their personal blob of the chosen colours on their A3 piece of paper aka workplace), pieces of cardboard to transfer the faces onto and as their frames.
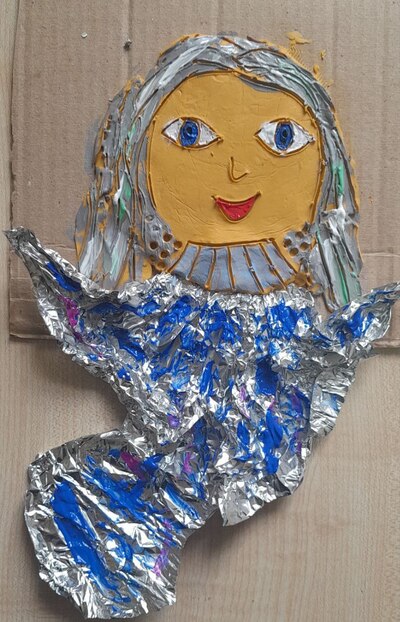
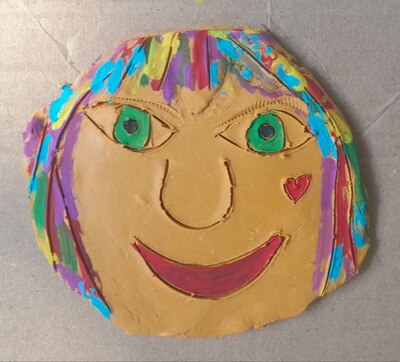
As can be seen in the photos, we created lots of different types of clay faces and, as usual, it was a joy to see how quickly everyone started to make their own decisions and to develop their own style. One of my students opted for creating the face of a cat, one made an absolutely beautiful abstract Pinocchio. One focused on the colours and one, completely out of the blue, asked for tinfoil because ‘I’ve got an idea, miss Anka!’
To be honest, the idea (for the dress aka the body made out of tinfoil) was so good that I wanted to make my own and this is how his ‘Mona Miss Anka’ was created and how my ‘Angel / Mermaid’ came to be, too.
I really liked the clay as the material because it is extremely flexible and user-friendly. It did require warming it up in the tub of hot water (I did it before the lesson, warmed it up and broke it up into blobs) but later on it was relatively easy to work with it. And it was easy to fix the mistakes in case they occured. We also did not have to wait for it to dry, we started to paint straight away.
It was definitely one of those lessons that finished with me, cleaning up the tables with a huge smile on my face. I loved it.
The pictures that were especially touching include the very basic Pinocchio. It was created by my youngest student and it was the first time this year that he prepared one piece and immediately asked for another piece of clay, to create more. I also love the coloured faced because it was created during a long process of collecting and combining different colours and shades. The outcome is the result of a lot of work and reflection. And, of course, the title piece here, that was a result of experimentation with tools and their opptions and the lovely print that came out of it.
I have already started to think about the adaptations and creating anything in clay, to use it with any EFL topic, fruit, food or animals. Body parts and faces, too, of course! Since it is so easy to create pictures with a stick, I was also thinking of a picture scene, a house, a Christmas tree or a dress. I am already looking forward to it!
the idea this time was taken from Global English 4, with the unit 5 whole focused on storytelling. There is an activity there with a framework to write a story: you roll the dice and choose one of the options for the time of the story, the setting, the characters and the dilemma. This grid gave me the idea for our lesson and it helped me shape the preparation stage to our writing. It can easily be replaced with a much easier vocabulary set, adapted to the level of the students. And a few die.
We started the lesson in our usual way, with hellos, our hello song and an exercise to practise past tense, our main grammar thing this month.
We revised the main parts of a story that we would use mentioned above and the dialogue and why we have it in the story (to help us express emotions in a story better)
I showed the kids the template written on the board and I read the story I wrote before the lesson using the dice and the framework from the book
We put together a few stories, using the same framework, and a variety of set-ups: everyone rolling and contributing one element at a time, everyone contributing an element each, in turns (i.e. 9 different days, 9 different locations etc), each child contributing their own element, without the support of the book etc.
Afterwards, we started to work on our own stories. I kept the coursebooks open for the kids to have some sources of support and ideas but even before I managed to finish giving the instructions, some of my kids were asking ‘Can we use our ideas, please?’
Everyone had a handout (see above) and we were going step by step, with me modelling and creating my second story on the board and making sure that everyone was on the ball as we went along.
In the end, we added the title and signed the story.
When the stories were ready, we had a reading session and all of them were read out loud. With one of my groups, I had to suggest three options: a) the story is read by the child, b) the story is read by the teacher, c) the story is read by the teacher only (for the sake of my shiest student). I introduced all the stories and we had a round of applause at the end, for everyone.
We haven’t done it yet but I want to type up and print all of the stories for the following issue of our school journal so next week I am going to ask each student to write a short description of the illustration they want the A.I. to create for their story.
Why we like it
The dice story was a perfect introduction to the lesson and an ideal idea-generator. I decided to use the coursebook as it is, in order to expose the students to the real un-graded language.
It was an easy thing to write (it was short) but it had enough for funny and entertaining stories which my kids’ work proved.
By adding two lines of dialogue to the framework in the coursebook, it became even easier and more fun to write and to read.
Initially, I planned it as a one-lesson event but seeing how much they benefited from extended practice and preparation, I extended it into two 45-minute classes.
All of the kids got really into writing their stories. One of my students literally dragged me into the classroom, from the break, as, in his opinion, I wasn’t walking fast enough and he wanted to start work as soon as possible.
All of the stories that were written are great and I am really proud of my students, but there are four or five that are really way above the average, with the funny dialogue and an unexpected ending, a really good piece of work!
I am planning to use the dice framework to prepare a similar but simpler sets for the everyday use, for us to tell little stories in the beginning of every lesson while we are still practising the past tense. I am hoping that now the kids will be able to tell these stories in pairs.
This post here is my response to the challenge set by my teacher-friend Michael. Challenge accepted. Let’s go, 5 steps.
Lesson aim
The first-est step. Always.
The session devoted to lesson planning on our YL course is called ‘What do you want teacher?’ and that is for a reason. Making a decision why we enter the room and what we want to achieve by the end of the lesson is key. Is the vocabulary the focus or is it a grammar point? Or any of the skills? What is the context? Do you want to focus on the language or the most important thing on the day is the work we put in developing social skills or building the routine? It might be something suggested by the book or chosen by the school curriculum but not always. And even it is, there is always room for adjustments and adaptation. At the end of the day, there is the teacher and there are the students in the classroom that matters most. The programme and the coursebooks are to be adapted.
After the aim is selected, there are more follow-up decisions to make, namely the selection of the focused task (aka the main productive activity) of the lesson?
That’s it, done. The main thing is done and it probably took about 5 minutes. The next step will be looking for things that will help make it happen.
Books basics
The coursebook and whatever it contains is already partially included in the previous step. Most of the time, this is what we use, for convenience and just because we can. The coursebook is not the enemy of course and there is a lot of useful material. Though, not all of it.
I presume the main activity has already been chosen and the next decision is regarding all the other exercises, activities, audio and visuals that are there (and in the workbook and teacher resource packs) that either match or don’t our aim and our focused task, or, in other words, our A or the lesson and our Z.
The most important thing to remember and the thing that is on constant repeat during our sessions and in my conversations with teachers is: the book is not there for us to follow to the letter and to cover and to include all the exercises.
Things you can repeat
In every lesson for YL there are certain elements that we can and that we should repeat because they help us construct the framework and the routine. They include either the elements of the routine: the hello song, the how do you feel today, the rules revision, the homework check, the goodbye as well the elements that are short-temporarily fixed: the songs we are singing in September, the games we are playing in the unit of toys, the story we are reading in the chapter on the jungle animals. All of these will feature in the lesson over a month. It is good to included them in the plan, keeping them on the side, in order to be able to use them.
The missing bits
Having got that far in the lesson planning, it might be the time to figure out how much time we have already taken out of the lesson time and how much time we already have left. Then, look at all the activities there are in the coursebook, all ready and waiting to be used, and, only if necessary, to replace them with some other activities, from another sources or self-designed.
Most of the time, the coursebook will do the job just fine.
Something for the balance (bits)
What I like to do at the very end, when the lesson is already ready, to have a quick look at everything, to check it for the contents and for the balance and variety
the ratio of interaction patterns
the ratio of different activities: songs, stories, creative and hard work
the ratio of new and familiar
the ratio of settlers and stirrers
And, when something is off, I fix it. Done!
Instead of a coda
Here are a few words of wisdom from a grandma teacher and trainer / mentor / observer:
we want good lessons to be our everyday but that does not mean that every single lesson needs to be an Oscar-worthy (or a Nobel prize-worthy) unit at the cost of the teacher’s sleep, peace of mind, family life or salary. Yes, I sometimes invest a little bit more into my teaching, in terms of planning, resources and time but, after all these years of experience, I also have lessons that are ‘just regular, no fireworks’.
we sometimes plan lessons and as soon as we get to school, out of the blue, we come up with something entirely different and it is the best lesson ever. Yes, that happens, but (here comes a very subjective line), it is the result of all the brainstorming and thinking that has already taken place. Otherwise, it wouldn’t have happened.
designing your own activites does not have to take ages and it does even require a teacher to be super creative. I personally find it much easier to prepare something for my lesson from scratch, rather than spend hours of looking through materials and resources to match the needs of my group and then, on having found it, still waste time on adapting it to what we (my kids, my course and our lesson) really need (here you can find some of the posts on material design).
our coursebooks have a lot of different resources and pictures among them which can be used in a million different ways with very little effort. A picture is an actitivity and you can read about it here, here and here.
in general, being a lazy teacher has a lot of benefits. You can read about it here.
here you can find another post about the everyday lesson planning
This lesson was a part of our autumn camp, with each day dedicated to a colour. For that reason, in the language part of the day, we worked with the things that are red. We revised and learnt new and we talked about things that we like and we don’t like. We did some literacy work, too.
The artist
I actually have no idea why it has taken so long for me to invite Banksy into our lessons but it was definitely worth the wait because this lesson turned out to be great.
I introduced the artist and showed the kids a few of his works. We also talked about the graffiti that can be art and the graffiti that is just vandalism (as brought up by the kids). Then we looked at the Girl with the Balloon and we talked about its different interpretations, sad or happy, and variations, with the balloon in red and in black.
I decided to present this work from the point of view of the red balloon and how the artist used it for the contrast and to draw our attention to the most important element. We also looked at the same effect that can be achieved in photography. For all of those stages I used a powerpoint. You can access it here.
The art
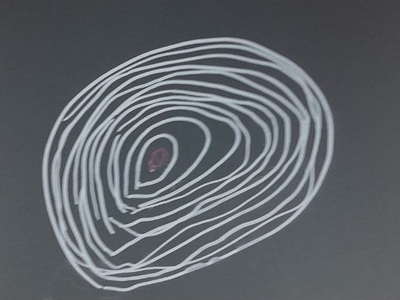
The task was very simple: white paper, black marker and a drawing of your choice, with one element of it in red. I suggested using a collage for the red but, in the end, most of my students went for the red marker.
I am really in awe with the results. The simplicity of the task and the basic resources gave the kids an opportunity to focus on the theme and the content (because, let’s be honest, sometimes, the resource and the method can be a bit disruptive) and they all chose their own way of dealing with it.
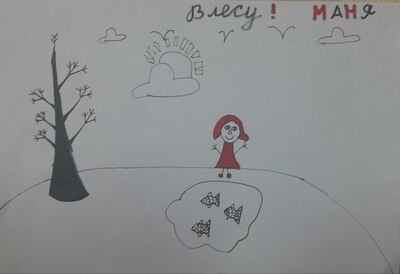
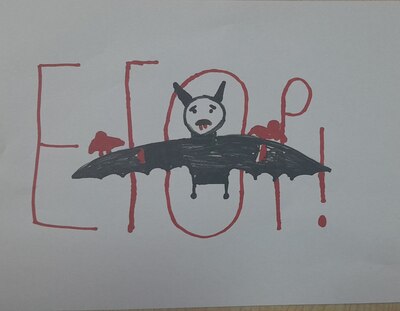
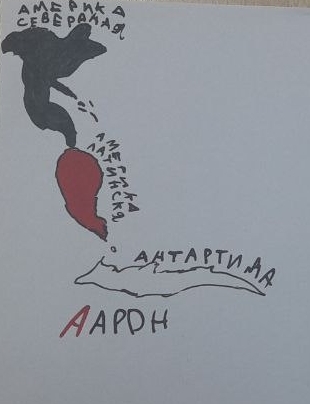
Among all the pictures created on the day, we have one copy of Banksy (with the author’s decision to make it a sad picture), we have a name logo (Halloween-style), a scene from the forest (in two copies because my student finished earlier and wanted to do the same picture on black paper), a map and a cartoon, on red paper.
It was lovely to see how involved my students were and how their creativity was taking flight, with every next step of the process as our lesson proceeded, how they moved from black on white to white on black or from black on white to black on red.
If you are looking for an easy lesson, with minimal resources and lots of opportunities, here is one for you!
The language in this lesson was not quite our priority. We did not introduce any new language items and I really wanted to focus on working with the colour and help the students see the variety of colours at their disposal. We sang the song, talked about how we are and we revised the colours, briefly.
We looked at different colours and their shades to understand that each colour is, in fact, a number of colours. My younger students counted the shades and the older ones had a lot of fun reading the names of the different shades of blue, red and pink. You can find my presentation here.
The artist
In this particular lesson we had a group of artists, to introduce a range of different paintings with one leading colour. We looked at van Gogh’s Starry Night (blue) and Sunflowers (yellow), we had Kandinsky’s Mit und Gegen (red), Levitan’s Forest Gave (green) and Sue Williams’ Pink Pentagon (pink). We called out the main colours in every painting and we called out the contrasting colours, too.
The art
I taught this lesson twice, with my younger group and my older group, with some differences.
The younger kids, pre-K and year 1, were working at a much slower pace. They needed more revision, they took longer to get into the task and they were
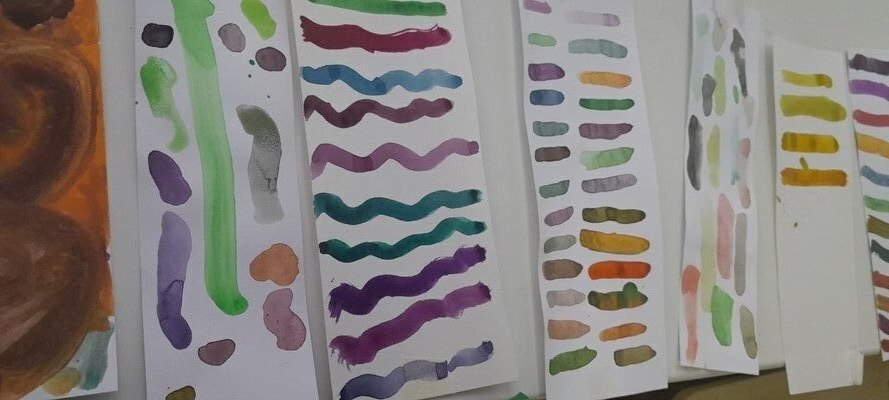
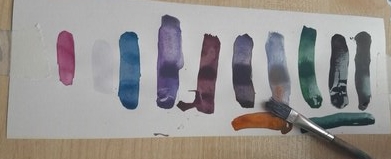
Everyone got a strip of paper, a mixing palette and a box of watercolours. The task was to create ten different shades of different colours. I showed them what I created for red at home and we also sat around my table for a moment to see in real time what happens if you mix yellow with brown and yellow with white or black.
They were involved in the task and they kept coming up with more and more unusual combination. Even those few kids who entered the room with ‘I will not paint today’ (there is always someone!) eventually got down to work and started to create. They kept calling me over and over again, to come over to check out the new shade. And we actually managed to get lots of language out of it. They were either telling me what they had mixed or I was trying to guess, judging by the final product.
The older students managed to complete two tasks: creating ten different shades of their chosen colour and then also creating a picture in their chosen colour. Looking at how it was going on, I decided not to speed them up and to focus and mixing the colours.
I think that next time I teach this particular lesson to the older students, I am going to focus more on the language and after creating our ten shades of X, we are going to come up with some interesting names for them. That will require preparing a slightly different page, with some room to write but it looks like a fun activity with a lot of potential. Especially that they already really enjoyed finding out about the official shades of different colours.
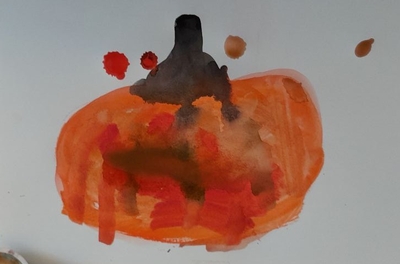
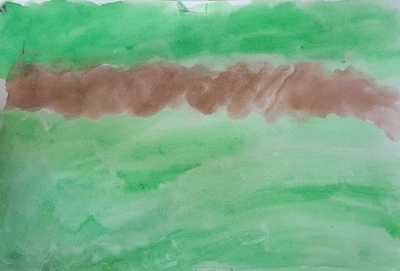
Afterwards, we went on to painting a picture with our chosen colour as the main theme. My model made at home was a picture of rowan, to showcase red. The one I did in class was a sunflower ready to bloom, to showcase green. We also talked about focusing on the main colour and choosing something of a different colour for contrast. My students decided to paint pumpkins (orange) and the forest (green).
The exercise of 10 Shades can be used as a warm-up activity to many other lessons. We used in our Turner lesson and in our green lesson, too. I am planning to do a lesson on red and still-life and I will include that element, too.
The funny thing is the mismatch between the actual lesson and how good it was and the photos and creations that we have to show. In case of my younger group, we ended up only with a few ‘dirty’ pieces of paper and nobody would even be able to guess that they were the result of experimentation and creative discovery. I wanted to display them on our noticeboard but what happened was that they were taken away from me, as soon as possible. Meaning? They were dear to the budding artists. As was the lesson, hopefully.
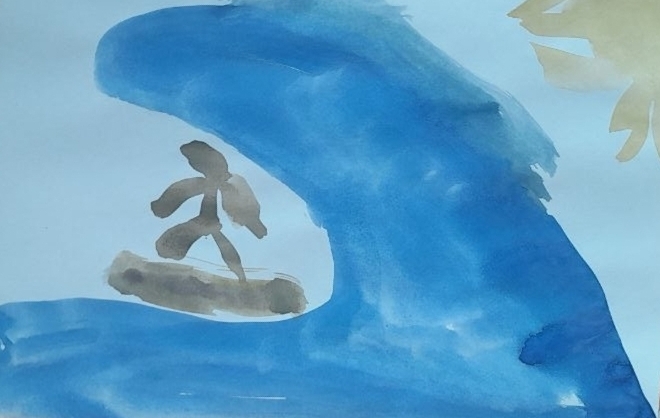
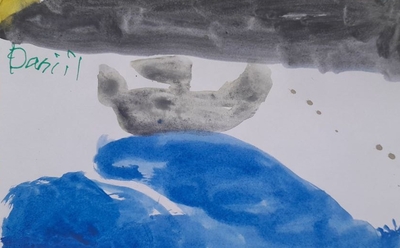
J.M.W. Turner is, hands down, one of my favourite painters and, definitely, one of the first ones that I fell in love with and it has taken way too long for me to introduce him to my students. But, finally, this day came. We are now in our summer camp ‘Travelling around the world’ session and we planned an England Day, there could be no other painter to bring to class. ‘It had to be you’, Turner, sir.
The language
On the day, we had to lessons which we could devote to England. The first one was a vocabulary lesson in which we learnt about the different things we can see and do in England, food, sports, symbols and sights. We also talked about the things we like and don’t like. We filled in another page in our ‘passport’ (every day we do one) we watched a short video about the top attractions in London to compare it with our city.
The artist
Introducing J.M.W. Turner was easy as we could compare him with Claude Monet and it went along the lines of ‘Claude Monet had a garden and there he went to paint and Turner lived in Margate, by the sea, so he went to the beach to paint the sea’. That is, of course, a huge simplification but it worked for my 6-8-year-old audience.
We looked at a few of paintings and talked about the colours and the sea (‘Is it day or night?’, ‘Is the sea calm / quiet or angry?’, ‘What colours can you see?’).
The art
This was the first lesson in which we had two separate creative exercises.
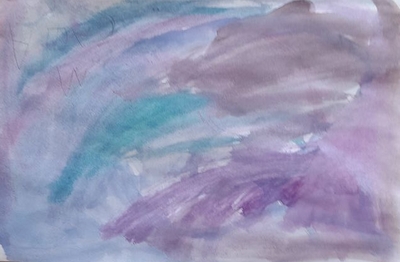
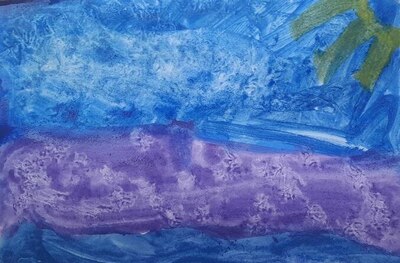
The first one focused on mixing the colours as I wanted the children to experiment with the paints we had in order to achieve a wide variety of blues which, later, would be used to paint the main picture. Everyone got a narrow strip of watercolour paper attached to the table, a box of watercolours, water, and a paintbrush. And the task: mix the colours in any way they want in ten different ways. I asked them to try out the paints on the paper.
Before we started, I showed them what I did for homework, namely about 20 different shades in my sketchbook. While I was monitoring and watching the kids, I realised that it was a great idea and that this could be a separate lesson. I just need to stage it in a slightly different way.
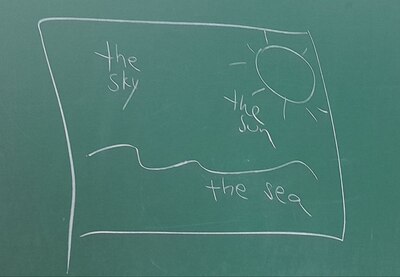
Turner in three short words
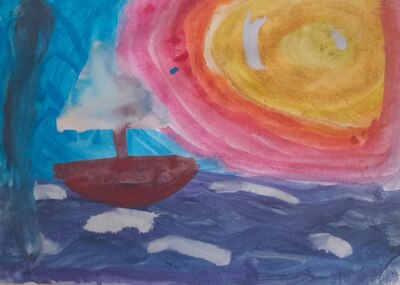
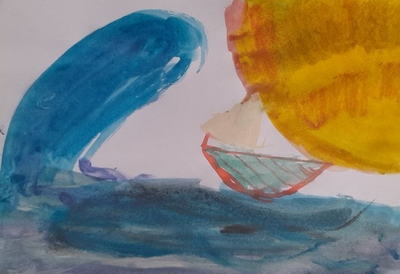
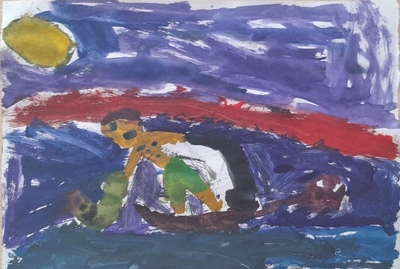
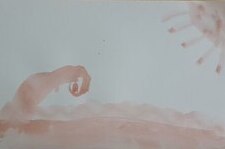
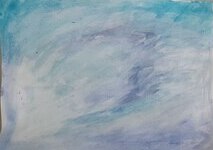
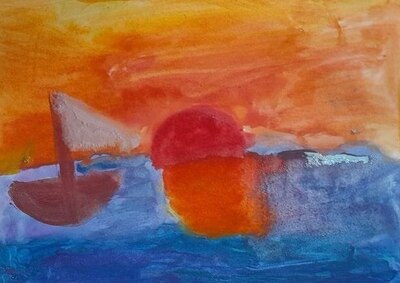
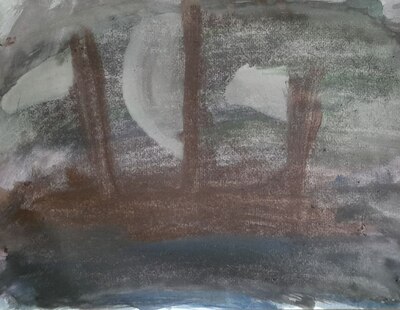
When everyone completed the task, ten different shades of blue, we got down to a real Turner. I drew a simple plan of what a Turner painting is (with all the love there is in the world): the sun, the sea, the sky and I asked the children to decide if it is a day or night, if the sea is quiet or angry, what colours they want to use and whether there is going to be a boat or not at all…
And we got down to work.
In methodology you call it ‘teacher monitoring the work of the students‘ and I do a lot of that but the truth is that I adore watching my kids work, take time to think, handle the materials, make decisions and focus on the beauty that they are creating. I cannot post the photos which feature my students, we take them only for the parents, but they are all so involved, so in the process, so concentrated, each in their own way.
What I noticed:
the 10 shades of blue was a great idea and it helped them see how many options there are and I could that they were using it later. One of our youngest ones also applied the same technique in the following day, with another teacher. He really learnt something!
everyone interpreted the topic in their own invidividual way
one of our oldest students was a beginner painter and looking at the way he held and moved the brush, I could tell that there hadn’t been much of painting in his life until our lesson. For him, this kind of an easy task was a good introduction into the world of Art and by the end of the lesson he seemed a bit more relaxed and confident.
the simple Turner was introduced to help the kids see the pattern in his paintings and to include all three elements.
it was an achievable task for the youngest (5 y.o.) and the oldest of my students (9 y.o.)
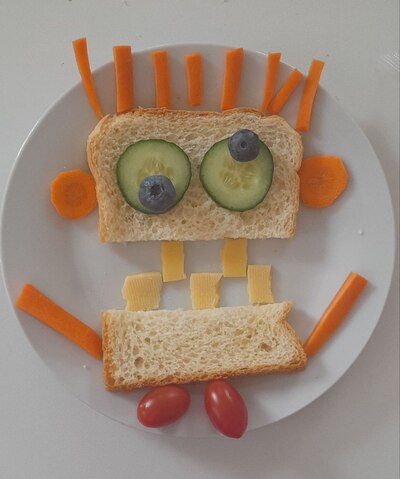
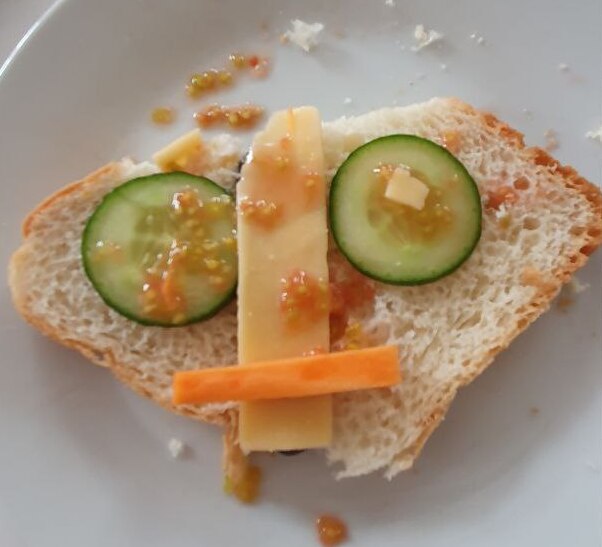
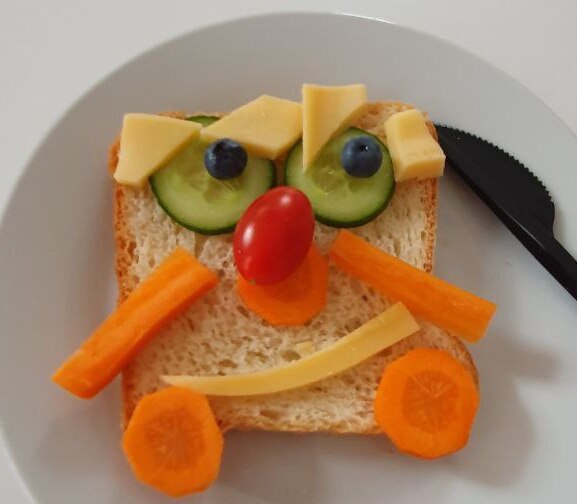
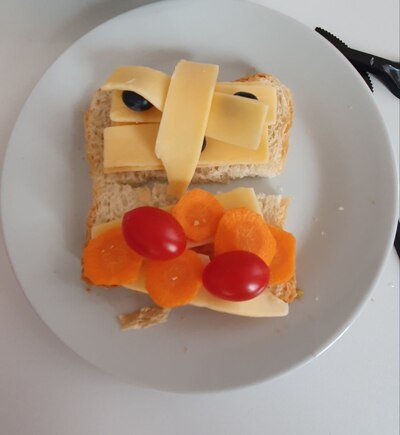
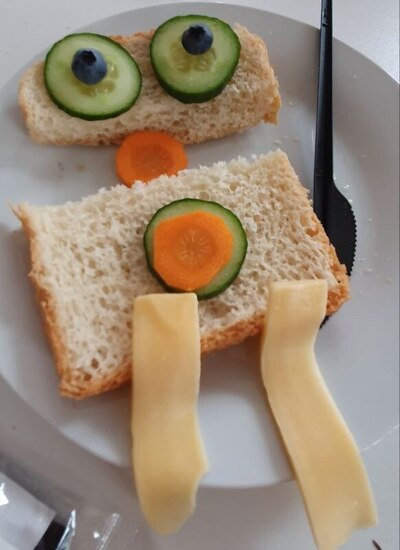
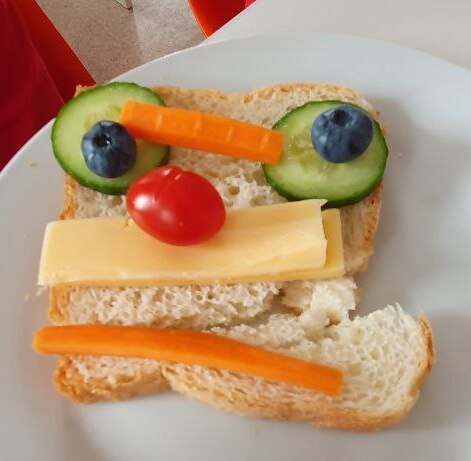
anything that you want to use to make sandwiches, we used: toast bread, blueberries, cucumbers, carrots, cherry tomatoes, cheese slices
a few pictures to get the inspiration from, for yourself and for your students. There are lots of websites with creative sandwiches for kids but I wanted something simple that we could all make and that is why I just looked for illustrations on google. If you are looking for something more intricate, you can have a look here and here.
two plates for each child and a small plastic knife
we made the sandwiches in our lunch room
Procedures
We started with the picture that I created during our previous lesson, my own vegetable print and I asked the kids to guess which vegetables I used in another lesson on the same day (here) and we connected them to the flashcards of vegetables we had on the board. Before the lesson I also put up more flashcards, of all the other items to be used in our sandwiches, and we spend some time working on those, drilling and playing a game.
Important: before the lesson, I sent the list of ingredients to my administrators to ask them to buy everything we needed and to inquire with the parents if everything was ok and to check against the allergies that our students might have.
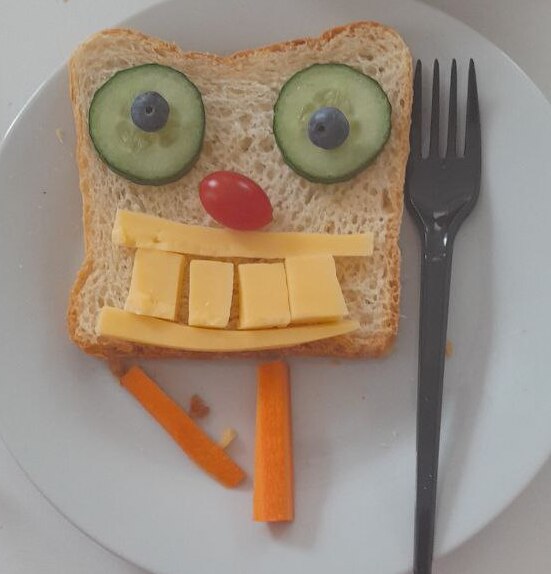
I told the kids that we would be making sandwiches and I showed them a few different patterns but I also stressed that everyone would be making their own monsters.
We relocated to the lunchroom, washed hands and sat down. The vegetables had already been washed and cut up: cucumbers into julienne and slices, carrots into julienne and slices, cheese into slices. Cherry tomatoes and berries were only washed and dried.
I was making my own sandwich, modelling what can be done and my T.A. was bringing plates with more and more veggies. I did my best to encourage the kids to ask for certain vegetables and we did it))
At the end, we went through all of the veggies to check that everyone used everything. (“Have you got any carrots?’)
Then, we went on to eat!
Why we like it
It was the most ideal follow-up of our lesson 1 (vocabulary) and lesson 2 (making print art with vegetables) and, finally, we could eat in class.
It was a great way of practising our target vocabulary, practical, hands-on, productive because we really, really used the language.
Apart from what I planned for this lesson, namely using the functional language in the context (‘Bread, please’), we also started to sing a new version of the Broccoli Ice-cream, using the combination of the things on the table and then tasting to check what we really think. And, guess what, it turns out that carrot cheese, blueberries cheese and blueberry carrot are all yummy!
The kids worked very well together, they reacted well to changing the set-up and the type of an activity. Nobody got overwhelmed or overexcited, they were patient and waited for their turn and they used the langauge. I was really proud of them.
Last but not least, we made sandwiches (some kids more than 1) and we ate A LOT of vegetables. I was worried for a while that dry bread might not be the most popular item but I did not want to include any spreads of any kind and it turned out not to be necessary. Actually, during the previous stages of the lesson, I asked whether the kids liked all of the items we had ready and I was lucky – everyone liked everything! But, even if not, they were not required to use or to eat all of the ingredients.
As for the creative element, I was laughing a lot during this lesson because my students and their monsters were just amazing and very creative. I showed just a model but I didn’t want them to follow directly in my footsteps. We all looked at our plates and everyone, clearly, had their own idea of what the monster should look like.