This article, just as the earlier post here, has come to be as a result of the many (many!) conversations with my trainees and what I observed in my own classroom. It is fair to say that it has become my latest professional passion / obsession / interest. The post that I have written here (‘A balancing act. Non-competitive EFL games for kids‘) is one of my proudest moments on the blog but was just the beginning of the whole story. And one of the top 10 articles on the blog!
The article that I wrote for the Modern English Teacher (Issue 33.6 Nov-Dec) is a continuation of this research anad the search for solutions. It is, unfortunately, only available to the MET subscribed members but I am really proud of it and I can definitely say that the solutions that I came up with and the ideas that I suggest really do work. After a year and a half pretty much all of my YL are now ready to play competitive games. I do recommend!
So, apart from being a teacher of English, a teacher of Art, a teacher of Science (occasionally), I am also (drum roll) a teacher of Maths, year 1 of primary (or Key Stage 3).
I am aware that perhaps not too many of my readers have Maths on their daily timetable but I decided to share these ideas nonetheless. It is because they are all rooted in the different ways of encouraging children to get involved in the activities that are challenging, tiresome and not always easy-peasy-lemon-squeezy.
For myself I simply wanted to leave a note and a record of the things we do, for future reference. On the other hand, I know that all of these activities have a lot of potential for the regular and the beloved ESL, for grammar and vocabulary practice or reading.
Treasure Hunt is a task that I have used many times over the years. It takes some time to prepare and to set it up, especially the first time, but once you do it and once everyone figures out the rules and procedures, it is a great task that my students have always loved and asked for if we stopped doing it for a while. The main idea of the task is that we go around the school, look for all the tasks hidden there and we solve them. Once all of them are completed, everyone returns to the classroom to check the answers. In the past, we used to collect new words, solve crossword puzzles with clues around the school. We used to look for answers to the quiz or instructions how to colour the picture. This year, we use it mostly for Maths, solving different addition, subtraction and multiplication tasks.
Usually, we go out as the whole class but this kind of a treasure hunt can be easily turned into a running dictation, with kids working in pair, one of them running, one – taking notes of the answers. This works especially well with really big groups.
As many as you can: most of my kids are huge fans of Maths and they approach the tasks with mountains of motivation. To be honest, I don’t really understand it, since my brain does not really feel happy around numbers and prefers words, languages and visual arts. But, I can almost risk saying it, my kids’ enthusiasm is infectious, so, in fact, I like teaching Maths.
‘As many as you can’ is one more task type that we do in class. It is super simple, it involves an A4 page of exercises that the kids work on individually. There is only specific rule and that is: everyone is allowed to do as many as they want or can.
I love this task because for the kids, it is an opportunity to approach a task without a lot of pressure and it works very well with a mixed ability group and for me it is an opportunity to see how well each and individual student feels about a particular topic. True, sometimes, the external factors get into the way and the number of exercises is affected by the kids’ mood or the levels of tiredness but, overall, it is a good indicator of how well everyone has learnt and how well they have assimilated the particular topic.
Oh, Petya: Petya is one of our invisible students and having him works very well in ‘find the mistakes and correct them’ tasks which we usually do at the end of the unit. I have already written about him before and you can find the post here.
Jigsaw puzzle is another idea that I have been using in our Maths tasks to encourage the children to go through the task from the beginning until the end. It is very easy to prepare because you basically need a page with the Maths tasks and another colouring picture (in the theme of the month, like Halloween or Easter). The colouring picture is cut up into pieces, into a number that corresponds to the number of tasks and they are put into separate envelopes. As soon as the kids complete one of the tasks, they can come up to the board, open the relevant envelope and take out one jigsaw puzzle. I also like to put the correct answer on the envelope, to give the kids a chance to also check their answers. Once all the exercises are complete, the kids put the jigsaw puzzles into a picture and we glue these into out notebooks. The pictures can be coloured in the end, as an option.
Password, password! is a variation of the previous task – we collect tokens for every exercise completed, only in this case, these are letters that, together, a part of a password. Kids work on their tasks, invidually but they take turns to come to the board to solve a task and to uncover one of the letters. This task works wonders for bonding and building the class community. Just like the colouring page, the password can be adapted in any way that fits the theme of the month, the number of the exercises or the number the kids in the class.
One of the first passwords that we did this year was: ‘We love Maths and we are fantastic!‘ I wrote it on the board, with the numbers for each letter and I used hyphens to break the sentence into words. But it can be anything!
Well, is it something that you could use in your lessons? Please let me know!
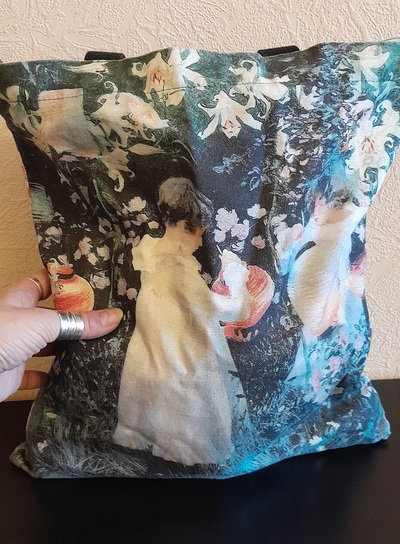
This year’s Magic Bag, Sargent-themed, courtesy of the Tate Gallery in London
Ingredients
a pretty bag, ideally cotton, or something that is not transparent. I am joking, of course, that it needs to be pretty, it doesn’t but it is true that it is better if it is appealing visually. I normally use one of my tote bags.
a set of interesting objects that are safe to touch that fit in.
Procedures
Students sit in a circle, on the chairs or on the carpet, with the teacher in the centre, at a small distance. The teacher revises the vocabulary in question.
I like to take out the bag and make a show of it – take it out of a cupboard or a box, show surprise, shake it perhaps if the content allows it, make a face and ask out loud ‘What’s in the bag?’ etc.
The teacher starts chanting, for example: ‘Anka’s got a secret, Anka’s got a secret!’ and this is a chant that we use for every student.
The teacher demonstrates how she puts the hand into a bag, finds one thing and tries to name it, for example: ‘It’s a lion‘ (topic: animals).
Afterwards, the object is taken out to check what it really is. The teacher asks ‘Is it a lion?’ and the kids answer. It can be also used as an opportunity for additional drilling of the key words.
The students take turns to play the game.
As a follow-up, the kids can do a simple listening activity and help clean up at the same time. The teachers says ‘Sasha, please put the lion in’ etc.
Why we like it?
The main reason is a very strong appeal of an activity that is involves motor skills, guessing, an element of mystery and fun. Kids love to put their hand it and try to recognise or to name the objects. It so happens that we use the same bag during the entire year so after the first time, the kids can recognise it and they look forward to it. This week I was walking in the school with my bag (that on that day was ‘just my bag’ and my kids walking past got excited and started to ask if this is what we would do in class on the day).
The other main reason is that this activity can be used with a wide range of objects and for a wide range of topics, from those more obvious ones such as school objects, toys or materials to some less obvious such as rooms in the house or comparatives. I have also used it for colours, in one of the first lessons of the course, although, of course, the children did not know many of the objects that we used and we focused only on sorting them out according to their colours.
There are plenty of variations of the activity and it can be repeated in a series of lessons. It has not happened yet, over all these years, that I would take out a bag and hear ‘Oh, no, not the Magic Bag again!’ from the audience.
As regards the chant, I like to use ‘Anka’s got a secret!’ or a simple question ‘Anka, what’s in the bag?’ which all the kids repeat and which is a great question to know.
As regards the procedures, the kids can simply take out one object or try to guess it in their L1, they can describe it with the adjectives that they have (for example pairs of adjectives such as big / small, heavy / light, smooth / rough, soft/ hard or the materials: it is made of plastic etc) for the class to guess. Recently, I have used it also to practise comparisons and every child had to take out two objects, to describe them and then to compare them when they were both out of the bag. If it is appropriate for the objects, the kids can also try to shake them in the bag to check what noise they make. Another option is of course the most tactile version of the game – kids touching the objects with both hands without taking the objects out, through the fabric.
The age range of the students can also vary. The youngest kids that I have used it with were 3 – 4 years old, the oldest were my teenagers and they also enjoyed it. The language that we expect the students to produce will depend on their level and age. When we played the game last week with my A1 primary year 1, they were able to produce a set of four sentences in one go because we used it in the final stages of the adjectives unit.
Naturally, the objects can be used to introduce the target langauge, to practise or to revise the language, verbally or in writing or even as an introduction to a listening or reading task.
As regards the less obvioustopics for example verbs or rooms in the house, it is still possible if the objects are used as symbols. ‘A spoon’ can mean ‘to eat’ or ‘the kitchen’, a pair of socks (a new pair!) can symbolise ‘to wear’ or ‘the bedroom’, ‘a tub of toothpaste’ can stand for ‘to brush your teeth’ or ‘the bathroom’ and so on.
During the pandemic, I also used the Magic Bag in class, although in the online version the bag was much thinner and I was putting one object at a time and demonstrating it to the camera. I also used to make noises with them, without showing them to the camera i.e. dropping them on the table, squeezing them, tapping on them etc or, as the last hint, showing only a tiny little corner of the object to the camera. It also worked very well! And, in the online world, it was also possible for my students to take part and do the same with things that they had at home.
Last but not least, this is a unique opportunity for the teacher to take the most random selection of things to school such as pasta pieces in a bag, a soap, a salt shaker, a spoon, a pair of socks, a tube of toothpaste, seeds in a bag, some flour in a bag, shells, stones, tomatoes, cucumbers, soft toys, an electric torch, a small jar, a pair of earrings, a ribbon, cones…
The question appeared in one of the groups on the social media and I realised that a) I have something to share here and b) I haven’t got any posts on the movement games for the little people.
One: Abracadabra
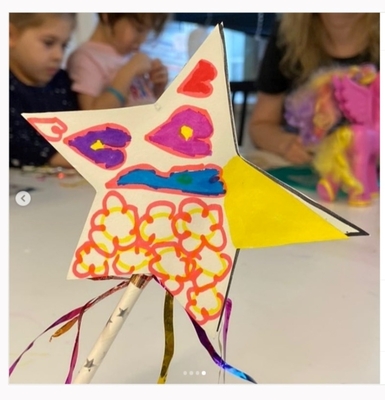
Resources: only a magic wand. It can be made at home and producing magic wands is now a real hobby of mine. The easiest version (in the photo below) can be even made with kids, in class. Some shops sell magic wands, too but, really, kids will respond well to a simple pencil if it is accompanied by some ‘Abracadabra’
How to play: We have been using the same line for many years now, with many groups: ‘Abracadabra, 1,2,3. You are….’. The game might be introduced with the first topic that lends itself to miming, for example ‘pets’ or ‘toys’. We start with the simple phrase ‘Abracadabra, 1, 2, 3. You are a cat / a dog / a frog etc’ and I support the language with the visuals namely flashcards displayed on the board and my own examples. The gestures we use for each of the pets, toys, fruit, transport, jungle animals, fairy tale characters, jobs are not universal, they are only our creation for that particular group. Please remember that the ability to represent characters and words through gestures is not a skill that children are born with. They are developing their symbolic representation and they might need the teacher’s support in the beginning of this journey. That is why the teacher’s example is so important.
After the kids have learnt their first adjectives, these can be extended into ‘You are a happy cat’, ‘You are a sad princess’ and so on. Naturally, the game is led by the teacher in the first lessons but later on, the children are invited to lead the game and to cast some spells in the classroom. They start with the very simple and basic combinations but with time they start to be really creative, both with the langauge and with gestures. Think about all these gems from the classroom: ‘a sad pumpkin’, ‘a sleepy cat’, ‘an angry princess’…How would you mime these?
A classroom-made magic wand
Two: Musical flashcards
Resources: only one set of flashcards, I normally use the set from the coursebook, A5 size.
How to play: We stand in a circle and the cards are lying on the floor, in the centre. We move around, in a circle, just walking. The teacher sings a song and my choice is usually ‘Happy Birthday’. As soon as stop singing, everyone stops and picks up one card from the floor. Afterwards we show what we have by using the word in a sentence. The simplest version is ‘It’s a cat’ but the structures can vary and be more closely connected to the vocabulary for example: I like + food, I’ve got + toys, I am wearing + clothes and so on.
After each child produces the sentence, we put the cards back on the floor and continue the game. It works well with all the groups although with my bigger groups, I encourage the kids to speak together, in kind of a messy choir, in order to save time and not to risk any dead moment in the lesson.
This is not a competitive game, no one is sitting down or dropping out, we all play throughout the game. No points are awarded either.
A classroom-made magic wand
Three: Everybody is dancing
Resources: None:-)
How to play: We stand in the circle and the teacher is chanting or singing the phrase (the melody is made up), and everyone is performing the actions. I normally start with the easy verbs i.e. clap, march, walk, eat, drink, dance and swim but we keep adding through the entire year, more complex and more creative verbs so by the end of the first year we have lots of them at our disposal because kids learn all of them just from this simple game.
The teacher is the one to lead the game for quite a long time but the kids can be slowly involved, too by giving them a choice of two verbs, for example ‘Sasha, everyone is singing or dancing?’, Sasha: ‘Dancing’, after which the teacher is singing or chanting what Sasha has chosen. Eventually, the kids are ready to make their own decisions and to produce full sentences. And Present Continuous (because that’s what it is) will come in really handy with storytelling and picture description.
Oh, one important thing: don’t forget to add ‘sleep’, it will work wonders to calm the kids down.
A classroom-made magic wand
Four: Snake!
Resources: a long snake made of paper aka a necessary number of scrap A4 pieces of paper glued or stapled together with a head of a snake drawn on the first one and the tail of the snake drawn on the last one. I actually like to use the A4 sheet cut in half for a thinner snake and I cut out the head and the tail. Perhaps a set of flashcards in the first weeks of playing the game or with younger students.
How to play: The teacher puts the snake on the floor, the kids come to the snake one by one and stand in a line on one side of the snake. The game is intended to practise one particular group of words with some distractors included, distractors here being any other words, not in the category. For example, if the main aim is to practise colours, the basic distractor can be numbers or even kids’ names if that is the beginning of the year and the children do not really know anything else.
The teacher calls out the words, in a random order. If the students hear the target vocabulary, they have to jump over the snake (or to step over if the kids are young and not very good at controlling their gross motor skills) every time they hear the target word i.e. a colour. If they hear one of the distractors, they don’t move. In a way, actually, it is a movement variation of ‘Simon says’ only no one is dropping out.
When we start playing, we line up and I show the kids all the flashcards and we revise all the words. I also tell them that today we play with colours. Later on in the year, when the kids have more vocabulary at their disposal, the teacher can raise the level of challenge and play with two or even three categories.
The game mostly focuses on listening for the target vocabulary and discriminating it from the distractors but it can easily be turned into a productive game with one of the students standing at the head of the snake, facing the group and calling out the words. In the early stages of the unit, when the kids still might struggle with remembering all the new words, it makes sense to let them look at the cards displayed on the board or on the wall or to even hold all the flashcards and to call out the words they want to use.
I created this game for my group in Pamplona in which I had 12 little kids and no room in the classroom apart from the relatively narrow aisle in the middle of the classroom. This is how the snake game was born. We needed something thin to fit in the aisle and I chose a snake because I hate them personally and stepping over a snake is a good move, very conducive to survival. But the kids accepted it and we loved the game.
The snake itself needs to be made but it is easy to store it and to recycle it and if it gets destroyed during the game, it is also easy to fix. Or to be recreated. During one of my training sessions, one of my teachers suggested using a skipping rope and that, of course, is a solution. However, I still prefere the paper because in case of a mishap and a kid tripping over the snake, the paper seems a safe option. If it gets torn, we can fix it, no harm done. A child tripping over a skipping rope, however, might result in a child falling down. Typing that up here I realised that if the classroom has the appropriate floor, the snake can also be drawn on the floor, with chalk for example…
A classroom-made magic wand
Five:I like cats, I don’t like cats
Resources: one set of flashcards, the regular A5 set that normally come with the coursebook and two cards with symbols for I like / I don’t like, for example a heart for ‘I like’ and a crossed heart for ‘I don’t like’
How to play: Before the lesson the teacher puts up the I like / I don’t like symbols on two walls in the classroom, on the opposite ends. In the real life, these two simply stay there for the rest of the year as we use them all the time. The kids get up and stand in the middle of the room, half-way between these two signs. It is good to put there a small stool or a table with all the cards, for example all the toys, pets, colours etc.
The teacher picks out one card, for example ‘green’, calls it out and the students go either left or right, depending on whether they like it or not. The teacher points at one of the group and says: ‘Green!’ and the kids reply ‘I like green’ and ‘I don’t like green’ together with the rest of their group. Afterwards, they come back to the centre (aka the stool) and the game goes on with a different word.
This is another stirrer that gives the kids a chance to move around a bit and to produce the langauge, with the additional support since they have the flashcards to reinforce the meaning of the word and since they produce full sentences with approximately half of the group. The kids can also be invited to lead the game by choosing the words to use.
The game can be used throughout the year with almost any vocabulary and there are a few adaptations possible especially as regards the settting. If the group is big or if the kids are too energetic and too tricky to control, the same game can be played with the kids sitting on the carpet or even on their chairs. Instead of walking to the left and to the right, they can stand up and sit down or clap their hands and stomp their feet or raise one arm or two arms for ‘I like’ and ‘I don’t like’ respectively. This will make the classroom management a little bit less challenging for the teacher.
A classroom-made magic wand
Bonus activities: My favourite movement activies
Resources: the access to the internet and youtube
How to play: All of these songs here have been created specifically for the purpose of ensuring some movement in the classroom. The main aim here is not the langauge production although they do include some language but, of course, the movement is the star here.
Move by Super Simple Songs – a real hit, nothing more to say.
The Rolly Polly Roll by Super Simple Songs – another hit but only if you have a carpet because kids might actually try to roll or to crawl. You’ve been warned:-)
The Jellyfish Song by Super Simple Songs – I love it and it is quite a challenge to turn yourself into a jellyfish
Head, shoulders, knees and toes – this is the first song we sing in the classroom, mostly because kids can participate without any language production, just by doing what the teacher is doing. I like to sing this one myself, without the audio, in order to be able to control the speed and the activity. There is a version by Super Simple Songs, of course.
Shake your sillies out by Jose Paolo Liwag – I love to use this one with my older students, actually when they can appreciate the need to shake our sillies out and to clap our crazies out…
The Dance Freeze Song by Scratch Garden – the hit of this summer camp. There are some cool verbs and dance movements and we just LOVED to dance! You can also teach your kids the most important verb in the world: FREEZE.
Action Songs for kids by The Singing Walrus – one more fun song, with the basic verbs.
Make a Circle by Super Simple Song – it is a very popular song, I have seen it in many lessons that I observed but, somehow, I have never used it myself a lot.
A classroom-made magic wand
Some things to remember
Before you start any movement games, make sure that the kids are ready. Ideally, these games can be played in the part of the classroom where we have more room, only the carpet, no or fewer pieces of furniture. If that is not possible, please make sure that you create this space, with the kids’ help, possibly, to make sure that it is as safe as possible.
It is also a good idea to introduce some rules related specifically to this movement part of the lesson and these will depend on the classroom and on the group. In my classroom, we used to do all the movement games on the carpet by the window and for that reason our only rule was: We stay on the carpet, to ensure that the kids do not wander around, run around and leave the safe space.
Make sure that you move to this other place of the classroom in an organised manner. In the beginning it might be necessary to call the kids one by one, by the name to avoid a situation in which we have to control a stampede of five-year-olds there and back. With my groups (the maximum number of students in our pre-school groups is eight), we have our chant. I like to go to the carpet first and singing, call all the kids one by one (‘Sasha in the circle, Sasha in the circle’) and to wait, holding hands with all the kids, as they arrive. The child who is just joining is the one to choose the next child (‘Sasha, who’s next?’) and for the last one to join us we all call out loudly (‘Sasha, come here’) so that nobody feels unwelcome. Some kids actually love to be the last ones to join the circle because it is a lot of fun to be called by the whole group.
When the movement game is over, we go to our tables and desks, one by one or in pairs and the teacher is the one to make a decision about the order, at least in the beginning when the kids are still getting used to the new element of the routine.
Bigger groups can use the same pattern, but the kids move in groups of two or three so that the preparation for the activity does not last longer than the game itself.
One of the other things that I always do as the first activity on the carpet is to make a circle, holding hands and run a few rounds of ‘big circle’ (we stretch our circle), ‘small circle’ (we gather in the centre), a few times with these two adjectives and with the other ones, too for variation, for example a low circle (we bend), a high circle (hands up in the air, still holding hands), a wavy circle, a shaky circle and so on. It is an easy, risk-free activity, the kids love it (especially when everyone is present and we can really make a big circle) and, most importantly, after arriving one by one and being individuals, we can do something as a group, something super easy, before we get on to the more creative and productive things.
These games are not only about movement, although this is their reason for being in the classroom and in the lesson. However, as always, the main aim is language production and for that reason the students as the teacher, leading the activity have been included in all of the games presented above.
Here is a situation that I witnessed many times during an observed lesson with young learners: a teacher and a group of kids start playing a game, for example riddles. The teacher models, then the kids take over. One student sits in front of everyone, chooses a card for the other students to guess or to identify. Kids start shouting out words, one of them gets it and the teacher takes the flashcard and hands it over to the student who shouted the correct word. The game goes on and it takes about three rounds more for one of the students to get offended / upset / angry / sad about not winning. More often or not, someone starts crying. Oups.
It is not only about losing, although, to be honest, this is a serious problem, too. Here, however, the ‘failure‘ of some kids is clearly visualised with a flashcard. Frequently, it is also very unfair because it is the faster and louder kids that get the point and these are not necessarily the kids who really know the answer. Also, there is another dilemma in a situation when two students shout out the correct answer at exactly the same point. Will the teacher tear the card into halves? No, of course not. Sigh.
That issue, frequent as it was, was always addressed during the feedback session and I am pretty sure every session on games for VYL and YL included the commandment compressed down to ‘Don’t use flashcards as reward points’. This was the bread and butter of a trainer / VYL ados.
My real shock to the system was an invitation to volunteer at Sheredar, our rehabilitation camp for children who went through serious diseases a few years back. I had a chance to go there a few times and teaching kids was an amazing experience. However, before I went, our contact and coordinator, Ksenia, said: ‘They will be one big mixed ability group but you can choose any topic you want. Actually, do whatever, just don’t play any competitive games. These kids have fought enough’. It took me about a minute to understand that I have no games to play. All my favourite activities, those that I frequently used in my lessons, with kids, juniors and teens, all of those favourite ones were competitive. ALL OF THEM.
Should kids even be playing competitive games?
I have been looking for sources on competition in the EFL classroom and I have found…nothing. I started to look around for any texts on kids and competition and it turns out that getting engaged in competitive activities such as sports, for example, can be very beneficial for children.
competitive activities can be motivating and encourage kids to improve their skills
playing and losing and winning helps children to learn how to deal with competition and with the fear of losing
they are also an opportunity to learn how to deal with pressure and how to win and how to lose
they are good for building self-confidence
they teach kids about the existence of the rules that need to be obeyed
they can help form friendships and relationships, with peers and adults
and, also, even if they are sports, they can lead to improving academic performance in children
Although, of course, they can also have some drawbacks, such as too much pressure, negative feelings in children and for their self-esteem.
On the whole, competition is a good thing, although it is not a given that all the children take to it naturally. Some of them might struggle, which is natural, bearing in mind that not all the adults have learnt to deal with it successfully, and they should be given help and support.
EFL and competition
As regards our EFL classes, especially those with the younger learners, primary and pre-primary, it would be just reasonable not to abandon all the competitive games althogether but to keep an eye on the balance and on avoiding a situation when all the games and activities that comprise a lesson have promote competition. Apart from competition, there are the other beautiful C-words such as: cooperation, colaboration, cognitive skills development that can and should be the foundations for our classroom life.
Not to mention that everything that we do in our lessons, namely learning a language, is against the very idea of competition. All the kids learn for themselves and although they have the same linguistic aims, their overall results or results in certain areas of language learning do not depend on the results of the other participants. What is more, their progress is measured against their previous results and achievement, although, admittedly, the situation is slightly different when it comes to learning a langauge in the context of a state school where kids’ progress is graded at every step of the way.
Things to consider
The most important thing to remember seems to be the fact that we, as teachers, should not take things for granted and assume that all the kids in our group like competition and competitive activities and that all of them are equally prepared to win and lose with grace.
The other factor to take into consideration is the age of the students. The younger the students, the less likely it is that they have already had a chance to participate in those kind of activities and acquire these skills and that they have enough life experience to be mature about it. It is a combination of their age, cognitive and social development as well as life circumstances such as having a chance to attend kindergarten, playing at home with parents and relatives, having older siblings and so on.
Equally important is the bond between the students. A group of children starting to learn together in September is a completely from the same group in January or even in October, especially in the context of after school groups or afternoon language schools where children might land in a group of complete strangers with whom the only thing they have in common is the age and the level of English, not the family ties, the address or the school. The more they get to know each other, the more they bond, the easier it will be for the teacher to set up activities, including competitive games, and for the kids to handle ‘failure‘. After all, it is easier to lose and get over it when you play with friends.
What it comes down to in real life, with real children, is keeping an eye on the kids, checking how they react to different stimuli and then introducing some competitive games, carefully, step by step. However, with my youngest students, this non-competitive period may span over the entire length of the pre-school EFL. With the most recent group, we started to play only half-way through our third year together and even then it was the whole group vs the teacher (who always lost).
Every little helps
Here are some of the tricks and techniques that a teacher can use in the classroom while introducing competitive games or taming of the competitive games we often include in our lessons (tired and tested):
Playing the familiar games such as riddles or pelmanism in a less competitive way. First of all, we do not award points for the boardrush OR we award points to both teams for competing the task, not only to the team who is faster (especially that with boardrush at least it is sometimes very tricky to establish who really was the first one to touch the board). Points here can be pluses or hearts on the board or flashcards given out to the winner in a particular round. Instead, we finish the round, the praise everyone and we simply move on. The game itself (the fun of participating, the language produced or used) is the reward itself.
We do not determine the order of participation based on the successful participation, for example in riddles, when the student who guesses the word is the next one to play. Instead, all students take turns, one by one to make a riddle for the whole class, regardless of how good they are at guessing.
Playing ‘Simon Says’ without excluding the losers by asking them to sit down after they make a mistake, especially that a growing number of non-participating students is very bad for the overall classroom and behaviour management. Or, in the same way, playing the Treasure Hunt without establishing who the winner is. We all look for clues around the classroom or the school, we all participate for ten minutes and in the end all check our answers, without counting the points or the number of the elements or stages completed.
With pelmanism, instead of playing 1-1, with kids uncovering two cards at a time, the whole group can do it in pairs, with two kids always participating, ideally in different combinations. As soon as a pair is found, the teacher and the kids cheer for everyone, and the cards are put aside or given back to the teacher.
Play the game in the format of the teacher vs the whole group, to create the support for the individual child. If they win or if they lose, they will do it together, with all their friends, nobody will be singled out. Ideally, in such a situation, the teacher loses and has a chance to model the mature behaviour and how ‘a failure’ can be handled, but, of course, bending the rules in order to ensure that might not always be easy to do. If you are looking for ideas, I would recommend pelmanism. It is very easy to get distracted and to forget (or ‘to forget’) where the other card from the pair is located.
Any game can be played in teams, a team vs a team, instead of individuals competing with each other. This way, again, the support, the safety net or the safety blanket is created. Enjoying the victory or handing the loss is easier with your team. Even if there is one child who does not handle ‘the failure’ very well, there will be other children in this situation, too. They will serve as role models.
Having the teacher participate, as one of the teams, can also help soften the blow of the defeat. Again, the teacher will be the one to model the langauge use, the game rules application and the player’s behaviour, too.
If possible, talk to the parents whose children struggle with controlling their emotions while losing the game. If nothing else, it would be great to find out whether there have been any factors that could have played a part, whether the child reacts this way in other situations and to simply inform them what happened in class. Perhaps parents will be willing to discuss this topic at home, to reinforce what the teacher does at school and, perhaps, to also play games at home, to help the child tame that beast.
In one of the posts (see bibliography), I found another great tip. What is necessary is a quick game that can be played a few times, in a quick succession, in the same lesson. Some of these will be won, some will be lost, but the quick pace and the repetition will make either of the results, the victory or the defeat, not so relevant anymore and easier to deal with and to even forget.
Another approach that I have been using in some of my summer camp groups was the Points Poster that we used throughout the entire camp. It was very simple, only an A3 piece of paper, with the team’s name, displayed on the wall. Every time we played a competitive game, there were points, for example two or three stickers for the winners, a star for everyone else. All the kids took very well to it because winning the stickers was great but the joy lasted a brief moment only and very quickly the stickers won today would quickly get lost among all the other stickers won on all the other days. The defeat, on the other hand, was perhaps not the most pleasant thing in the world but it didn’t matter much because the students knew that they would be another game on the same or on the following day. What is more, because I was using some leftover stickers, of all kinds, sometimes it was more fun to choose one huge sticker for your team rather then three little ones…
Finishing each game with the teacher and the kids thanking each other for the game, with a simple handshake and ‘Good game‘, just like all the football or volleyball players do at the end of the match.
Any activity that can work towards bonding and building a community is also welcome
If there is the students who struggle with dealing with their own emotions while playing games, I have so far tried two things. One of them was pairing this student up with myself, in 1-1 games, in order to be better able to model, to monitor and to help the child control their emotions during the game. I have also experimented with pairing up with this child in the games that we played in teams because, again, losing (or winning) in one team with the teacher was easier to deal with.
Non-competitive EFL games
First, an anecdote. The heading of this paragraph is what I put into my google. Would you like to guess what the amazing Uncle Google came up with? Nothing.
‘Fun games’ – yes, ‘no prep games’ – yes, ‘exciting games’ – yes, sure. There was random post but nothing for kids and not many are actual games. And one article about an activity that still has winners and losers…Nada, nada, nada.
Here are some suggestions from the non-competitive games that I have played
Musical flashcards: a simple movement game, an adaptation of the musical chairs game, only without any kids dropping out. The teacher puts out all the relevant flashcards on the floor, kids move around with some music playing. When it stops, every child picks up a card and makes a sentence for example: I like bananas (topic: food), I haven’t got a cat (topic: food), I am wearing a blue t-shirt (topic: clothes) etc. Afterwards, the flashcards go back onto the floor, the teacher puts the music on for another round of the game.
All the logical games such as Find the difference (for example those that we have in the YLE Movers and Flyers) or Odd one out (for example YLE Movers) that can be easily adapted to any topic. A similar activity will be also based on the silly picture scenes that I described in an earlier post here.
I Spy: a variation of the game with a set of visuals such as a poster or an illustration from the coursebook. Kids work together as a group (in the early stages) or in pairs, they describe something in the picture, with the relevant sentences, depending on the age and level (I spy with my little eye something. It is big, it is green. It is next to the cat. etc). The student or the students who listen find the relevant object. This game is not competitive because there are no winners / losers and the game goes on until the child / children guess. As the game proceeds, the kids can offer more information and support to help their partner, for example the first letter / sound, the gestures etc.
Riddles: the same principle and procedure as above but it can be played with flashcards or a set of word cards or a set of words prepared by the kids.
Back to the board: it is a very popular game that can easily be played in a non-competitive way and this way it can go help build and develop a sense of community and give the whole group a chance to work together. One of the students sits on a chair in the centre, facing the group. The teacher writes a word or a simple sentence on the board and signals how many words it includes. The group work together to help the one student guess and recreate the word on the board. With the lower level kids, flashcards can be used instead of words although using simple sentences works wonders for the students to learn and to work better with the grammar, the sentence structure and, progressively, with the meta language.
Monster game aka Hangman aka Let’s save the little human: I love playing Monster Game with the lower levels because it helps the students work with literacy, spelling and blending and we always play it as a whole group with all the students contributing and working together to guess the letters and the words and to help the little human who is slowly losing parts of the ladder, the boat or the hotair balloon. To make the game less cruel, the element of getting points can be added (i.e. when the kids guess a part of the word or when they guess the most common letter or when they get all the vowels etc) and with my summer camp group the game finished with the kids drawing some food for the hungry monster because they developed empathy for someone hungry, even though it was a monster.
Telephone: this game is a variation of something known as ‘Whispers’, with the whole group sitting together and passing a word or a simple phrase, from the end to the beginning of the chain. This is not a very generative game or a very communicative one but it helps the kids work together towards one goal and it is easy enough even for the youngest kids.
Stations in the classroom: this is not really an activity but a format of completing tasks with kids. The teacher sets up a few stations in the classrom, for example in the four corners of the room. Kids move from one station to the other and complete the task such as unscrambling words, completing a simple handout, matching words and pictures, playing a round of pelmanims and many more. Kids complete a few tasks during the lesson and their job is done when they complete a full circle but they do not compete with everyone else in the group. It is up to the teacher to decide when then task is done and they can move on and in this way, even the ‘weaker’ students can play and participate without any pressure from the group.
Community building games: on of the 30 Creative Team Building Activities. I haven’t tried these yet but these definitely caught my eye: Cross the Line (22), Paper Chain Race (30), Shrinking Classroom (18), Building a tower (6 and 10). Or 22 Fun Team Building Games and Activities for Kids. Here I really liked: Forehead Dots (4), Some of them have the ‘choose the best / fastest team’ element which works to some extent as it helps the kids to bond within their team but I would still skip this element altogether.
Last but not least, among the things that has been on my wishlist of the things to try out in the classroom is the parachute and all the parachute games. Some ideas can be found here.
Coda
But, perhaps, the situation is a little bit better than it seems. While working on this post, I asked my audience on the social media about their opinion and I was very happy to find that those who responded use a mix of competitive and non-competitive games. At the same time, the teachers admitted that they have to deal with the competition-related stress in the EFL classroom, although not all the time and ‘some games, some days, some kids’ was the most popular answer.
What about you, dear reader? Do you play any non-competitive games with your YL students?
If you are interested in the topic (and a subscribed reader of the Modern English teacher), I do recommend reading my article from Nov – Dec 2024 that is the continuation of that post. You can find it here.
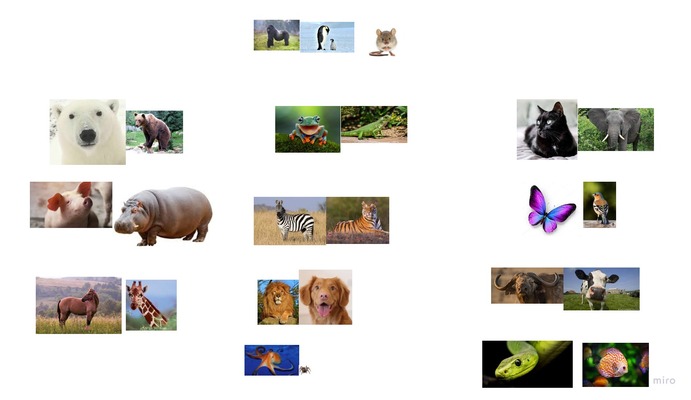
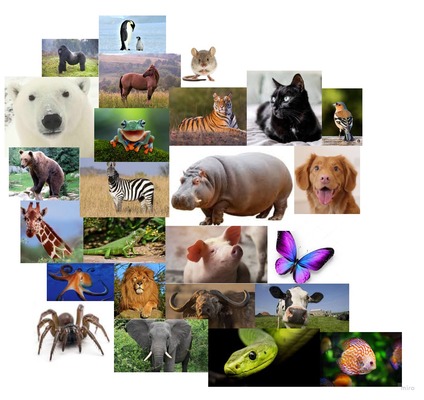
All the pairs. Somehow the penguin, the gorilla and the mouse got left out.
Ingredients
A set of pictures of animals, flashcards or on Miro. That’s it.
Procedures
Revise the vocabulary and ensure that all the cards are displayed at the same time for the kids to be aware of all the options
Model by choosing a pair of animals and putting these cards aside and justifying your choice. With my pre-primary kids, I like to use the first person statements (I’ve got 4 legs etc) as this is what we do with the younger kids (to enable the kids to talk about themselves and the animals without having to introduce the additional structures and to keep it coherent with the songs that we use ie Little bird or As quiet as a mouse). I also tend to vocalise the language ie I’ve got 4 legs (for the cat), I’ve got 4 legs (for the elephant).
Invite the kids to take turns to make their own pairs and to describe the rationale behind it.
This is what our Miro board looked like before we started
Why we like it
An opportunity for the kids to use and to develop the higher order thinking skills in the EFL context
The students are in charge of what they want to talk about and what they can talk about. It is appropriate for mixed-ability groups.
Little or no preparation as the flashcards are already there, the physical cards in the offline classroom or the set of pictures on Miro which, once prepared, can be doubled easily and used only for that activity.
A great variety of structures that can be revised and some opportunity to learn the new ones as the kids might have the ideas that they cannot express in English yet and this game can be the springboard which will help to introduce these. If the teacher speaks the kids’ L1.
Lots of opportunities for adaptation and using them with different sets of words such as toys, fruit, food, transport and, naturally, the relevant structures. I like to start this game with animals because of the range of easy structures that even the very young beginner students can use in order to complete task and because of the variety of topics that can be included (the colours, the number of legs, what animals can do, what they eat, where they live etc)
The level of challege can also be easily adapted, for example, the set of cards can include only 8 items or the teacher can focus on putting the animals into pairs basen only on the colours or the size which are probably the two most achievable categories, both cognitively and linguistically.
This is a neverending activity because the cards and the animals can be grouped and re-grouped over and over again to let the students create new and less obvious links between the items. Conversly, it can be shortend as needs be.
As regards the interaction patterns, this activity can be used with groups, with kids working together, at least in the beginning, or in pairs if we have the appropriate number of sets of cards as well as with 1-1 students, both online and offline.
There is also some potential for adaptation in the area of materials. The most obvious choice are the flashcards, the mini-flashcards or the Miro board. The teacher can also create a handout with the animals pictures and/or names which the students can colour-code as they are putting them in pairs. This might be a good solution for the kids to work in pairs in the offline classroom.
Last but not least, this activity is an opportunity for the kids to develop the listening skills (as they want to find out the justification for their peers’ choices) and the speaking skills (as they want to present their own reasoning, too). I simply love to observe how my students start with the simplest and most obvious connections and how they venture out into more and more creative ones.
Any role-play or a dialogue i.e. a transcript of any listening task which is a dialogue (i.e. Movers listening part 2, part 3), any written dialogue (i.e. Movers reading and writing part 3), any functional langauge introduced in a dialogue or a role-play
A pencil or a highlighter for each child
Procedures
Start with the main aim of the task is, ie listening in case of task 3 of Movers or reading in case of Movers, introduction of the functional language, etc. Go through all of the stages outlined in the teacher’s book or whichever ones you see fit in your teaching context.
Give out highlighters or pencils, ask the kids to open the books and look at the text again.
Introduce the concept of a banana (or whichever random word you want to use). Explain (and demonstrate!!!) that you will read the text slowly with some bananas in it and that if the students hear the word ‘banana’ they have to highlight or underline one word that comes immediately afterwards. Model with a few words.
Read the text with the bananas as the kids listen, follow and underline or highlight. The words chosen to be highlighted are the key words for each specific dialogue and their number depends on the dialogue and on the age and level of the students. With the older students and the more complex texts and language, the students can highlight two or more words that constitute a phrase or a collocation. This can be signalled with a repeated number of bananas ie banana banana for a two-piece phrase or banana banana banana for a three-piece phrase.
Ask the students to work in pairs and read the dialogue again and to use their own words and phrases instead of every banana.
Afterwards the kids can change roles and read it again or change the partners.
If the kids are ready, in the final (and optional) stage of the activity, they can close the book and role play and recreate the dialogue and the converation based on what they remember.
Why we like it
It requires no preparation, unless by preparation you mean opening the coursebook and finding the role-play or finding the teacher’s book and making copies of the transcript of any listening activity
It offers a great opportunity for the students to practise their speaking skills in an activity that is both controlled (as we have a framework) and free (as there are quite a few options to choose from)
It also offers a chance to work on the grammar accuracy and the transformation skills
It can be done online or offline
It can be done with a variety of levels. The highest level I have used it with was B1 (teens), the lowest level, so far, was A2 (primary).
So far, I have only tried it with dialogues but now, writing that post, I started to wonder about the potential of that activity for discourse building and creation. The original text could serve as a potential framework and support for the students to use. I am yet to experiment with that option.
All the letters of the alphabet written in one or two columns, with some space to write, next to each letter
Procedures
The teacher divides the students into pairs or teams and gives out the paper with the letters of the alphabet or asks the kids to write these down.
Step 1: The teacher announces the topic i.e. Clothes and asks the kids write one word (or phrase) for each letter of the alphabet or, more realistically, for as many letters as they can. The teacher gives an example. Ideally, the teacher creates her/his own list in order to have a set of words to model the other stages of the activity.
The teacher sets the time limit (i.e. 5 minutes for the younger kids and 3 minutes for the older kids). It might be a good idea to use a song instead and after the song finishes, the activity does, too.
The kids work in teams and make a list of the words within the vocabulary set. After the time is up, the teacher stops the game.
Step 2: The kids exchange the lists and count the words or phrases which their friends have managed to write within the set time limit. The teacher writes the results for each team on the board.
Step 3: The teams read the words on the lists and choose: the most interesting word, the most unusual word, the funniest word, three words you also have, three words you don’t have, any word you don’t understand or remember etc. The teams work in pairs and find out why their partners put these words on the list. If possible, the kids exchange the lists with another team and repeat the procedure once or twice.
Why we like it
For the students it is a great opportunity to revise and recycle vocabulary. All the beginner levels aside, even when the main lesson aim is to introduce and to practise new vocabulary, chances are the kids have already learnt, heard, used or seen some of the words. After all, the vocabulary sets are repeated and extended from level to level, not to mention that most kids have more than one source of English in their lives: the state school, the language school, a private teacher, brothers, sisters, parents, videos on youtube, cartoons, stories, computer games online…This game is one of the easy ways of revising all this vocabulary to prepare for ‘something new’
For all the reasons mentioned above, it is an absolute necessity for the teacher to find out how much the kids already know as regards a certain area in order to do a very focused (if a very contained) needs’ analysis and to adjust the volume, the level and the intensity of the new material presentation later in the lesson
It is very easy and requires no preparation whatsoever.
It helps to improve the students’ self-confidence because it gives them an opportunity to see how much they know already.
It can be used with any set of vocabulary, either thematic (i.e. clothes, food, animals) or content-related (i.e. the words necessary to describe a picture, the words used in a certain text or a listening task, a video)
The final task can be easily adapted i.e. choose 5 words to describe yourself, choose 5 words to use in a story or in a dialogue, choose 5 and describe them for your partners to guess, use a dictionary to find the words or structures for the missing letters, compare the lists with your friends to find the words or the structures for the missing letters, use the words to describe a photograph, use the words to talk about your day today etc.
I have a small problem: my brain does not like dealing with written instructions and, really, any instructions whatsoever. I cannot make myself. What that means for my life is that I use devices instead of reading the manuals, I prefer to watch cooking videos rather than reading any recipes (and, indeed, no matter how exciting the food, if the instructions for cooking are longer than four or five lines, I immediately lose interest). In my teaching life, that means never reading any teachers’ books (if I can help it and most of the time I can). If I find an activity that I like, in a resource pack, for example, and I cannot figure out how to use it only from the game itself, well, I just never use it at all.
Or I make up my own rules. That’s exactly what happened with this game.
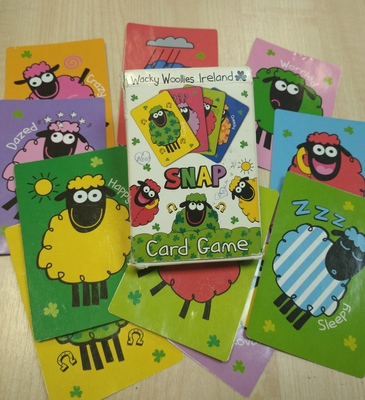
It actually makes me giggle. I have had this game for about three years (a lovely present from Chee-Way) and it was only this week that I noticed the name of the game. Apparently, it is called Snap. Oh, well.
This morning I was finally inspired enough to google how to play it and I found it easily enough, only to find out that I had never played it the right way. Oh, well.
Actually, I had some suspicious that what we were playing was inspired by another game, that I once heard about but when I bothered to find out, it turned out this morning that I couldn’t have been more wrong. Oh, well.
The Sheep Game (as we know it)
There are 12 different emotions / feelings / adjectives in the set. We started to play with those that the kids knew already and, then, we kept adding one or two with every next game. At this point, they know all of the adjectives and we play with the whole set.
There are 4 cards of each adjective but in any real game, we use only two of each. One is displayed on the floor in the middle of the circle. The other one we deal among the teams. Usually each team ends up with four cards.
The students keep their cards secret from the other teams.
We sit in a circle, students ask the questions to the team sitting on their left or on their right but the questions are always travelling in one direction.
The main question is ‘Are you happy / sad / angry?’
If the team have this one particular card, they have to answer ‘Yes, I am’ or ‘Yes, we are’ and give away the card.
If the team don’t have this particular card, they have to say ‘No, I am not’ or ‘No, we are not’ and then it is their turn to ask the team on their left / right.
The game can be played for a certain number of rounds or until one of the teams loses all their cards. Then the winner is announced and that is the team has the biggest number of the initial set left.
It is a great game to practise the key vocabulary, in a sentence and although the students play in teams, they can win the game only when they pay attention throughout the entire game, listening to all the teams and keeping track of all the cards (or words) that were mentioned and lost, too.
Variations
Blue, please – one of the first games that I normally play with my primary students, in the first weeks of the course, as soon as we feel comfortable with the basic colours or numbers, we play with flashcards that we usually hide inside of the book, to make sure that the cards remain a secret. As soon as the kids progress, we replace the simple ‘please’ with a full question ‘Can I have blue, please?‘ and we play it this way with any set of vocabulary
Do you like… – another variation of the game that we play with the beginner primary students, we normally switch into that version when we start the topic of food and drink. If the students / teams have this particular flashcard in their set, they have to answer ‘Yes,I do‘ and they have to give the card away. If not, they answer ‘No, I don’t‘ and they continue playing.
What’s the matter with your…– a version that we played with my teens while working on the health / medical vocabulary which turned this game into a mini dialogue with different yes and no answers (yes = I need to have it / them checked, no = nothing I am fine) or Excuse me, where is the check-in gate? while we were working on the travelling / airport vocabulary (yes = it is next to…, no = sorry, I don’t know).
Any other set: the vocabulary set + the structure that would be used with this set
Whole class vs groups of three? With the younger kids we normally play whole class, in small pairs because it helps them learn the rules of the game much faster and because the game is easy to set up and you need no other materials apart from the set of flashcards normally used in class. With the older students, I use words on small cards and we normally play it with the whole class only in the beginning, later on they play in groups of three.
And the winner is… Well, there are at least two options here. For a very long time we played it in such a way that the winner was the team who had the biggest number of cards left at the end. Until my kids suggested that perhaps the winner should be the team who managed to get rid of their cards first and we played it this way, too. On the one hand, it makes the game less competitive and it is not a real shame to be ‘losing’ a card but we have had a situation when a team avoided asking the right question not to help their opponents win…I suppose the game can be played as normal and it can be decided only in the end who the winner is (all the cards lost vs all the cards saved) but we haven’t really tried it in the classroom. Not yet anyway.
Leftovers. We normally deal out all the cards available but keeping a few cards away and keeping them secret adds up to the challenge. These leftovers are going to be automatically the incorrect questions and the players will have to figure out first which ones these are and secondly, which ones not to ask anymore.
Here is a pumpkin flower: simple and unexpectedly beautiful, just like this game.
Ingredients
A piece of paper and something to write with
For younger students – somewhere to keep the paper safe and secret i.e. inside a coursebook
Imagination
The whiteboard to put the target language on
Procedures
Kids work individually, keeping their cards secret from their friends but if the game is played for the first time, they can work in pairs, this will be their natural support and the source of creativity because two heads are better than one.
Teacher ask the students to write numbers from 1 to 5, in a column. When they are ready, teacher asks the kids to write 5 words, one at number 1, one at number 2, etc. Teacher monitors and prepares her/his own set to use in modelling. It might be also a good idea to write a few examples on the board although these are just for modelling and they will not be used in the real game. The target structures should also be displayed on the board.
Teacher demonstrates how to play the game – she / he describes the first word on her / his list for the whole class to guess. It might be necessary to play a few rounds with the whole class, with the teacher leading the game or with one of the strongest students leading the game.
The game can be played until all the words are described and guess OR for as long as there is time.
Important: It is absolutely necessary to carefully combine the vocabulary and the target structure to make sure that the set is used naturally and that it matches the context, too. Some of the examples of the activities we used below
Places in the city (ie bank, post office, school) + I can see…I can hear…I can smell…Where am I?
Professions + I am going to work, I am going to do…Who am I?
Animals + It is big / small, It can run / fly / swim, It has got…
Body parts + I need it / them when I write, swim, play
Objects + passive voice ie It is made of…, It is used for…
Personal characteristics + Present Simple, 3rd singular, This person always does something, This person never does something
Why we like it
The biggest advantage of the game is that it can be adapted to almost any set of vocabulary and any structure.
It can be used with the lower-level and the higher-level groups, with the younger and the older students.
The game requires no preparation for the teacher and it is SS-generated which means that it is personalised and motivating for the kids to play.
It is a perfect controlled practice activity as the kids are using the target langauge and the target vocabulary.
It is a guessing game and because of that it is both achievable and challenging.
With the younger kids we play the game of 5, with the older ones we usually prepare 10 words.