Back to the future
It just happened: a dedicated YL teacher (and a teacher who spent the last ten years doing her best to stay away from teaching adults (minus the trainees!) all of a sudden found herself in the classroom with some serious corportate clinets and their Business English, General English, English for Finance and Banking, A2 – C1. Full time.
It has to be said out loud: that was not a direction that this teacher dreamed of or the developement that the teacher planned or solicited but, at the same time, there is absolutely no need to wring hands or shed tears over such a giggle of the Fate. After all, the teacher is an experienced one, with an oh-dear number of years in the classroom (and different types of classrooms, everywhere) so the teacher will be just fine. After all, teaching is teachings, the students are great, the fun is being had. All the details are here just to set the context.
The old dog aka the adult classroom through a YL teacher
This particular started with a most random thing. I don’t even remember what we were doing and with whom, but, suddenly, I caught myself thinking ‘Blin, even my kids can do THAT‘. There was no anger in it or desperation, only curiosity and bemusement. I started to analyse the details and bits and pieces of this THAT and the reasons for that. It started with a sigh but it got interesting very quickly.
Here is a new post and an attempt at looking at the adult EFL learners through the eyes spoilt by her young students.
One. Inhibitions
This is something that is almost non-existant in the YL classroom. Minus all these cases in which the kid have had a negative first experience with English, at school, with the tutors or parents or when they are naturally introvert and shy and they simply need more time to settle in the group and to feel comfortable enough to talk. Most commonly, the kids enter the room, eyes wide-open, ready to discover and to enjoy the world of the English language.
Then, there are adults, a completely different picture. Naturally, there are quite a few factors that can contribute such as a lower level, a long break in learning or using the language, some negative previous learning experience or studying in one group with colleagues from the same company or being a low-level speaker of English when you are already a top manager.
The result? Silence in the classroom.
I guess that is the silence that is the time they need to think about their answer, to choose the words, to gather the courage to let them out and, naturally, they get it. They do have the right to the freedom of silence. For me, the teacher, it is also an interesting exercise in patience. I realised that I have been spoilt with hands shooting up into the air and the opinions voiced almost instantly. Here, I am getting used to breathing more and waiting for the students to be ready.
I am beginning to think that building up the students’ confidence suddenly gets the priority among the lesson and the course aims as regards the adult learners of English. Everything else, the vocabulary, the structures and the skills development will follow. Hopefully.
Two. Teacher-oriented communication
On the one hand, the YL classes are definitely more teacher-centred than the adult classes. That is, to some extent, fully justified. Students, especially the younger ones, are in need of the teacher and the adult as the lesson leader. But only to some extent. I strongly believe that this should be one of the main aims of the course to create the conditions in which the students will be learning to interact with the teacher BUT also giving them a chance to learn to interact with each other. After all, whatever happens in the classroom is only a warm-up, only the preparation, only the training before the real life interaction. In which, most likely, the teacher is not going to take part. For that reason, the students should be given the tools and opportunities to talk to each other, to lead the activities, to take part in pair-work. There is no need to wait with it until they turn ten or fifteen. Some elements of that can be introduced even much earlier and pair-work is feasible in pre-school.
Somehow, it is not a given with the older students. Adults, either because they are more inhibited or because they see it as a sign of respect towards the teacher, they hold back, they wait, for the teacher to call their name out or for the teacher to at least signal that it is their turn to speak. I have realised that sometimes I have to specifically highlight that I am stepping out of the conversation, that the students, in pairs or as a whole group, have to take responsiblity for the interaction and that I will not be encouraging, keeping it up and, of course, leading it. We have been studying together for about three months now and I can already see some improvement in that area. Hooray to that!
Three. Communication strategies
Communication strategies is one of my true professional passions and that is why it was chosen for my first research within the MA programme. Inspired by Haenni Hoti, Heinzman and Mueller (2003) (or, rather ‘taken aback by the comments of’) that claimed that young learners use a very limited range of communication strategies, basically limiting those to translation and code-switching (aka using a combination of L1 and L2), based on the gut feeling from the classroom, I decided to check it out. And, to prove them wrong. Hopefully.
Although my research was a very small scale and low-key and by a beginner researcher, I found out enough evidence to get me even more interested in the topic. My little students proved to be already effective communicators who work hard and who have a good range of different techniques to get the message across such as all-purpose words, approximation, direct appeal for help, indirect appeal for help, self-repair, other-repair and mime. The range was much wider. Translation and code-switching were used, too, and they were the most frequent ones, however, they were not the only ones.
Then, there are the adults and guess what, these adults, ‘Come as you are’, before I get to work on them, they know only one communication strategy and that is ‘translation’. falling back into their L1, straightaway, whenever something is unclear, unknown and uncertain. I am not even sure why it is assumed that the learners (let alone the young ones) will use these strategies of their accord. I haven’t researched that properly, yet, but perhaps it has got nothing to do with the age of the student or, rather, not only with the age of the student, and more with the learning experience and the opportunities to be acquainted with and to develop these strategies.
The adult students (my adult students) struggled in that area and if they didn’t know, they would immediately switch to L1 and they would expect an answer. Working around that by delaying the translation, encouraging them to try something else or, also, providing both, the L2 only and the translation was quite a challenge and I know that some of them were surprised that I don’t just provide the required service aka translation, that I am trying something else. They had it written all over the face. I can’t say my job is done here, far from it but we are working on it. And it is a bit better now.
Four. Sharing ideas
Teacher beliefs are a slippery topic and most of the time we don’t even think about them. It was only last year (and somewhere by the end of it) when I realised why I am a teacher and what I want from my lessons.
Everything happened thanks to one Sasha who joined our group and who, despite the eight months spent with the rest of the team, in a very welcoming and friendly environment, despite the fact that she got on with everyone, Sasha still would keep quiet in class unless I asked her a question and unless I called out her name. I had never even thought about it and only then did I understand that I want to create such an atmosphere in the lesson in which my students feel free to talk because they have something to share with the rest of the group, not because they have to, not because the teacher made them, not because the teacher asked the question or because the teacher is testing them. They talk because they have something to say. And I want them to feel that they can. This is something that we have been working on from the very beginning.
It was one more thing that was ‘not so obvious’ for my adult students. They stalled. They do, still, sometimes. Again, it might be due to a whole range of factors, the natural shyness, the lack of confidence, the level of English, the relations in the workplace, if they come from the same company, or even the natural politeness. It is not a given that everyone will be speaking during the lesson time because speaking and developing the communicative skills is the reason why we come to class.
Five. All ideas are good ideas.
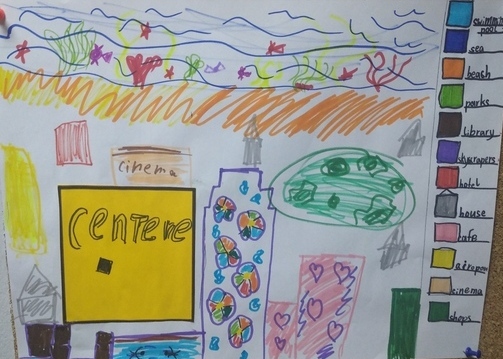
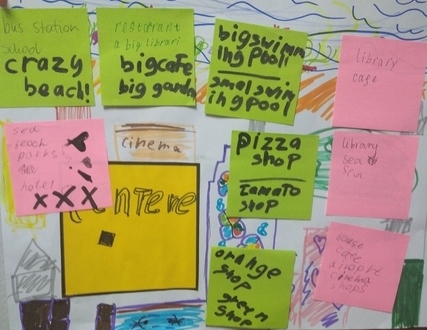
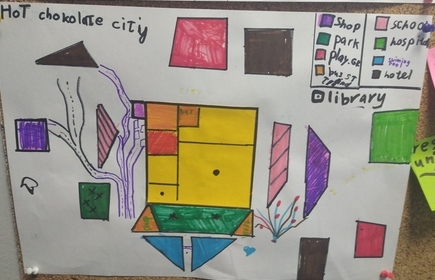
That is a sad fact: adulthood and reality kills creativity and imagination. Long gone are the days of fairy tales and fantasy travels with Frodo or magical battles with Harry. Well, in most cases. For that reason, if the question is about playing football and the student does not play football, the rest, dramatically, is silence…With kids silence never ever happens, and that is especially amazing, because, more often than not, we do things that have nothing or very little to do with the real life. All these menus for the monster cafe, all these school trips around the world, or to the moon or, our life as pirates…Silence is a rare event. Thank heavens.
This post is not to be read as a huge, one thousand word, complaint about my adult students. It is certainly not. I am doing a good job, I like them and we are making progress. I am just positively amazed that with my young learners, we have done SO MUCH (and to be honest, so much we have done by accident, unwillingly, joyfully, just for laughs) to enable the kids and to ensure that they are effective communicators.
I would like to think that my kids are not in danger of being scared to scared, inhibited, with a strong affective factor. This ship has sailed.
This line, so frequently used in my kids classes, started to appear in my adult classes.
See this is basically what happens when you send a YL teacher into the adult classroom. There is a lot of dedication, professionalism and lots of good lessons are happening. But the teacher has a one track mind and everything is somehow YL-related:-)
Bibliography
A. Haenni Hoti, S. Heinzmann and S. Mueller (2003), I can help you? Assessing speaking skills and interaction strategies of young learners, In: M. Nikolov (ed), The Age Factor and and Early Language Learning, De Grutyer.
Happy teaching!