Adults learning from kids. Or how I accidentally formulated my teacher beliefs

I have already been writing about ‘the shock’ of a teacher of YL going back into the adult EFL classroom in an earlier post ‘What an old dog learnt?‘.

A message to the parents

Two weeks ago, after one of the lessons, I sat down to write to the parents about the homework, the upcoming test and some feedback. It was just a lesson and a busy one because we were doing a lot of preparation for the test. ‘Nothing special’ you might say because we didn’t have any amazing activities, no ‘fireworks’ or ‘surprises’, only a lot of hard work and practice. And yet, somehow, the lesson was just beautiful, so great, in fact, that I decided to write about it to my educational parents, too. I just wanted to tell them that the kids were amazing (they are!) and that we had a speaking activity and it all went very well. ‘You know, I wish I could show our group to some of my adult students to show them what communication might and should look like‘, I typed, and it was only then that I did sigh, in awe at my own wording and the very idea.

Oh, how I wish I could do just that.

What would my adults see…

First of all, they would see children of different ages, aged 10 in this group, but also 3 or 17 in my other groups, kids studying together, in groups or individually. If they came, they would be surprised at the level of English the kids already have at this point. Or, rather, as a proud teacher of my kids, I hope they would be impressed. Just a little bit.

I would also hope that they could notice how comfortable the kids feel in their other language version. It is not an accessory that you carry around in your hand, a tool that you try to use although you are not quite sure how to. Nor is it a costume that you have to put on and become something else, a dragon, a princess, a cat, something that you are not. On the contrary, I would love them to see how, regardless of the age and the level, English can and does feel like the second skin. Something that is just you, the other version of you but also the very self that you are.

I would love my adults to be inspired by the open-mindedness and the general attitude to anything that is new and out of the box, especially the readiness to see, to try, to experiment. That does not mean that everything that I bring into the lesson and everything that I dump at them, grammar, tests, exam preparation, all the games are welcomed with the open arms and everyone, but absolutely every single person jumps at the opportunity of diving in. It is absolutely not the case. My kids are ‘normal’ kids who get tired, who have lots of homework, who sometimes, I bet you, would be doing something else entirely, not the things we are dealing with in the classroom. And, consequently, they are looking for the ways out, for the ways of cutting the corners, for taking a time out. Which, to be honest, is something that I secretly admire them for, although I will never own up to it. But, even so, overall, they are ready for a challenge.

I would love to the adults to notice the egalite as one of our rules and standards that everyone has the right to and that everyone has to learn to accept, because, indeed, sometimes this is something that we have to work on, although for kids the reasons are slightly different. The younger kids are developing their social skills for the first time, as it were. The adults hide either behind their personality or good manners or, perhaps, the corporate culture that might be developing the habits in some relation to the hierarchy in the company. Although here, I don’t know, I am just guessing.

Last but not least, it would be very interesting to have my adult students see that the teacher is not some kind of an air traffic controller, deciding who goes next but more of a head chef, the individual, who, although fully present and involved, is only keeping an eye on the process and making sure that the food is made and served or, in other words, that the aims are met. What is more, and very closely related, is that everyone gets to execute their freedom of speech, or in simple and less grandiose words: that people talk whenever they have something to say, not only because the teacher asks a question and when she does it.

I have no idea why but with every word typed up here, it started to feel more like typing up a teaching manifesto, my own teaching commandments almost. I can promise that I will leave it here as it is and I will get back to it in a few weeks to see if it still feels like that and if I still believe in it.

As a result…

The truth is that I wouldn’t really do it. The kids’ need to stay protected, in the precious coziness of our online classroom and without any ‘invasions’ from strangers. The adults, on the other hand, might not appreciate having their teacher suggest that their new role models in communication are some ten-year-olds. Everyone will stay in their own classroom and I will just continue doing my job and learning from observing and reflecting on two different environments and types of lessons.

And using them as a source of inspiration for new activities, like this new series on the blog Discourse Development. Here’s to hoping that staging, scaffolding and practising will lead to automacy and to the development of new habits and even my adults, all my adults, will be interacting with more freedom and ease.

So far, there have been four but I got a feeling that there will be more coming up

There is definitely more to come!

Happy teaching!

Crumbs #52 Discourse development: All your thinking hats

Ingredients

  • A set of cards with opinions, for example those that have been used with adults or those that have been used with teenagers.
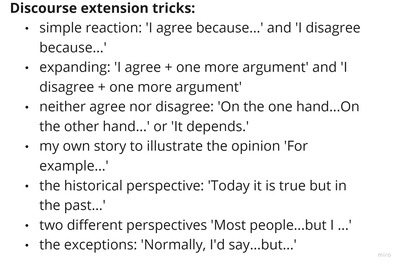
  • A list of the discourse tricks displayed on the board or on the screen (see below) if the activity is done in pairs OR a set of six thinking hats if you want the students to debate in groups of 3 – 6 people. I have created two versions of these here and here. If you are interested in the orignal thinking hats that this activity was inspired by, you can start here.

Procedures

  • Pairs: student A expresses an opinion which, in the earlier stages, can be limited to only reading the opinion off the list or cards) whereas student B reacts to it using one of the approaches. Afterwards, they swap roles. It is good to highlight that student B has to use a different approach in every round.
  • Small groups: student A expresses an opinion (see above) and the other students in the group react in accordance with the hat that they are wearing in this round. Afterwards, they swap roles and the new hats are assigned. In the original activity, in the real classroom, we have been using dice. In the online world these have to be replaced with the wordwall spinner.
  • Regardless of the format, it is better to play the first few rounds with the whole class and with the active participation of the teacher to show the students that it is in fact easy to switch from one hat to the other and that the hats really help to generate ideas.

Why we like it

  • The main aim of this kind of an activity is for the students to develop the habit of reacting to what their interlocutors say and to give them a range to tools (or tricks) to contribute and to develop the contributions of other students. Hopefully, with time, my students will be able to participate in a debate and opinion exchange without any support of the spinner or the display.
  • This activity also encourages the students to listen to what their peers are saying. This has been more useful with the teenagers and juniors who are more likely to space out and start daydreaming in class.
  • The list of all the tricks can be limited to only the two basic ones (I agree / I disagree) and, later on, when the students are ready, further extended.
  • The wordwall spinner in the online classroom was a bit time-consuming for my liking but it turned out to be very beneficial for my shy / withdrawn / panicky adult students because it gave them the additional time to think and to assume the new role. Later on, we were able to switch to a simple list which served only as a reminder of all the options out there.
  • The same goes for the whole class and teacher participation. With some of my adult groups, I had to be involved more in the beginning, to model both the activity itself (to help with the speaker’s block (does it even exist) and, at the same time, to model the ways of getting involved in a debate. Otherwise, they would be just ‘politely’ waiting to be nominated to speak, even at the C1 level.
  • I have been using these with my adult groups and with my young learners, too, with teens and with juniors, when appropriate.

Happy teaching!

Crumbs #51 Peppa Pig in the VYL classroom

Lisbon

Ingredients

Procedures

  • Work with the vocabulary and structures of the unit, here the weather and the clothes
  • Introduce or revise all the weather accessories and all the other key words (i.e. umbrella, hat, warm milk etc)
  • Watch the video, with pauses to ask short questions about the video and the story. These will depend on the level of the children and their ability to produce. In the beginning we often talk about the emotions of the characters and about everything that we can see. As soon as students can use some elements of the Present Continuous or to evaluate the behaviour and the actions of the characters, the conversation really takes off.
  • We follow-up with a speaking activity. The yes / no quiz is an easy version and it is based on the students comprehension and the listening skills. They listen to the teacher and react with a simple yes or no, but, with time they will be also better able to produce simple sentences. The other activity, the reordering, was created for a more advanced pre-school student and we retold the story together, with the teacher reorganising the cards and helping the student produce the sentence. Sometimes it was a full sentence (‘It is raining”), sometimes, the teacher started a sentence and the student finished (‘Dr Brown Bear it talking…’ ‘to George’)
  • The activity can be repeated in the following lesson to give the students an opportunity to participate with more confidence and, hopefully, more language produced.

Why we like it

  • Kids already know and watch Peppa and it is fun to bring her into the English lessons, too.
  • The episodes are relatively short (around 5 min) and it is an amount of time that will not be a challenge for the students and it can be relatively easily included in a typical lesson for pre-schoolers
  • Although the language of the cartoon is not graded and it is possible to find the episodes that will be easy to understand also for the very young students who have just started to learn English as the foreign language.
  • The videos can be shared with parents and watched again at home.
  • In my classes, we use the videos in the final stages of the unit, as one more source of the target language and of the target langauge in context and to create some opportunities for production.
  • Usually, I don’t watch the videos twice in the same lesson. It might have been beneficial for the general comprehension but I am not sure about the effectiveness of such an approach. Ten minutes is a large chunk of a lesson with pre-schoolers and I doubt the kids would be still interested and focused. I prefer to pause and to chat getting the kids ready for a more communicative video-watching. In the beginning, our conversations are quite simple, very often limited to calling out the words we can see in the video or discussing ‘Is that a good idea?’, a phrase that we frequently use in our classes anyway but it helps kids reflect on the story and perhaps predict the events to follow.
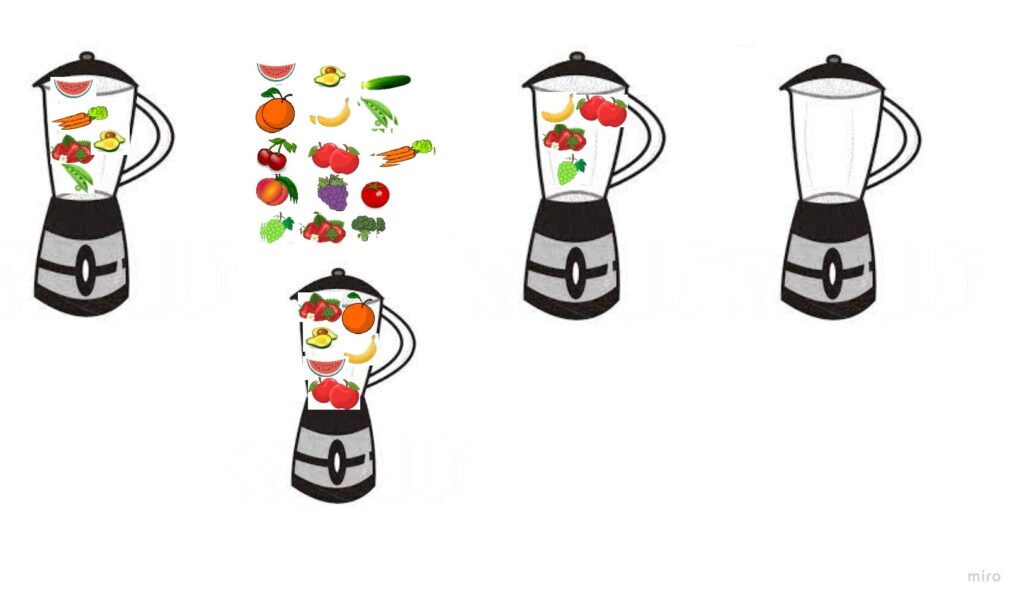
  • Some other episodes that we used in class included: Peppa Pig and the Pet Day, followed-up by matching the kids and their pets, Peppa Pig Lunch followed by a Yes / No quiz, and Peppa Pig and the Fruit Day followed by an activity in which we made our own smoothies on our Miro board.

Happy teaching!

I am a lazy teacher and why you should be, too!

Two weeks ago I was invited to present at the monthly meeting of the Teacher – Mentor Learning Community which was founded by Anna Kashcheeva who, over the years, has been my fellow teacher, ADOS, trainer, my trainee and my trainer and supervisor. Oh, what a lovely list))

I prepared a session on laziness, one of my professional passions. The session went well, the audience were amazing and I got a lot of positive feedback. We were not recording but the presentation was followed up by a post on the community’s blog and you can find it here. Once you get there, don’t forget to have a look at all the other posts and materials.

Happy teaching!

Crumbs #49 Linking words and developing discourse

It is actually funny that this particular post makes an appearance as only the third one in the series, although it should definitely be the Number One as I do it with my youngest students and with the lowest levels. That is the Beginning of Discourse.

Ingredients

  • A set of cards with some opinions or statements. These are some of those that I put together for this exercise: 4 Magic words (used with my A2 primary kids), I can speak (prepared for my A2+ juniors) or just a set of topics (used with my B2 teens and adults).
  • With my offline groups we also use a dice with a linker assigned to each number (i.e. 1 = but, 2 = because, 3 = for example, 4 = and, 5 = so, 6 = or)
  • A model sentence for presentation, i.e. It is raining.

Procedure

  • Presentation starts with the model sentence on the board or on the screen and the teacher introducing different linkers with different follow-up sentences, for instance ‘It is raining…’ ‘…because it is November’, ‘…but I am going to the park’, ‘…so I am not going to the park’, ‘…and it is cold’ and so on, for the kids to understand the meaning of the linkers and the differences between them. Depending on the age, the number of linkers can be limited to the most basic ones i.e. because, and, but. The others will be added later.
  • Controlled practice: kids try to come up with their onw follow-up ideas, still working with the same model sentence and different linkers. This is done together, as a whole class, for the teacher to be able to monitor closely.
  • A slightly freer controlled practice activity can go towards students using a selection of other simple sentences.
  • Freer practice is the first activity that is done in pairs or small groups. If this is an online class, one of the students opens the cards, reads one of the sentences. The other student chooses the linker to use and only then the first student continues the sentence. Afterwards they swap. If this is an offline class, the kids work with pairs and with a pile of cards with these sentences and they use the dice to decide which linker to use. The dice is also an opportunity to award points as the number is not only the linker they should use but also the number of points they get in this round.

Why we like it

  • It is definitely one of the activities (or topics) that, for me, personally, are the breakthrough and the first step in the transition from the baby English, pre-A and A1 level towards more linguistic freedom and fluency. Instead of ‘I like apples’, we get ‘I like apples because they are yummy’ or ‘I like apples but I don’t like pears’ or, even the simplest ‘I like apples and bananas’.
  • First of all, it leads to more production since the students are producing two sentences instead of one in the form of a complex sentence and they get more power as regards the profile and the angle of the message. It is not only ‘I like apples’ and it can develop this into ‘I like apples but only fruit. I don’t like the apple pie or the juice’, ‘I like apples so I buy them every week’, ‘I like apples but I didn’t like them when I was a child’ and ‘I like apples but my brother likes watermelon’ taking the entire conversation towards providing details, comparing the present and the past or including other subjects in it.
  • Naturally, sometimes these basic and more complex linkers are included in the coursebooks and they do include great practice activities. However, I like to introduce it early in the game, when the students are ready, regardless of the curriculum. This set of activities allows for a lot of flexibility and it is easy to use with a variety of levels, age groups and topics.
  • I have started including all the key words in the name of the activity for the sake of my online kids working in the breakout rooms, only partially supervised. When we practice in the common room, I leave the key words on the side of the screen or in the chat, for the kids to remember. It is a little bit more challenging in the breakout rooms. But, with the key words in the name, the kids can still see it even in the breakout room. The teacher only need to work a bit on developing the habit on remembering about them and on paying attention to them.
  • The student or the dice making decisions about the linking word to use makes it a bit more challenging but also a bit more fun. It is also a guarantee that a wider range of linkers will be used, rather than ‘but’ or ‘and’ in every single round.
  • The main sentence can be further extended if we ask students to produce not one but two or three sentences or if the other student is required to comment on what they have heard.

Here you can find the two other posts in the series on developing discourse through sentence adverbs and via one-minute essays. There is also one of the older posts on the many ways of developing discourse for the youngest students.

Happy teaching!

Crumbs #47 Our Weather Book

Ingredients

  • 6 pieces of paper, A5-size aka 3 pages of A4 cut into halves.
  • glue
  • drawing materials: crayons, markers, felt tip pens, coloured pencils

Procedures

  • Introduce and practise the weather vocabulary as usual. This is not our first year of English so we have been using the extended set of words and phrases. Over the series of lessons we have been describing the weather, miming riddles (and yes, I have come up with the gestures for ‘it’s foggy’ and ‘it’s cloudy’, it is not impossible:-) and we have also watched an episode of Peppa Pig, George catches a cold, because it gives us an opportunity to practise the weather, the clothes, some Present Continous and the feelings. Here you can find the set of wordwall cards that we use for the retelling exercises. As you can see, the weather topic became the opportunity to introduce and to revise a whole range of vocabulary sets and structures and it will be reflected in the Weather Book. We are also using the songs and here are our three favourite ones: How is the weather?, What’s your favourite season? and Put on your shoes.
  • First it is necessary to make the book itself. We study online so I asked the parents to prepare the materials before the lesson (six pages, glue, markers), in the offline classroom there is the option of making the book first or the teacher preparing the booklets before the lesson, depending on the age of the students.
  • Making the booklet in class is easy if you follow these few steps: check that everyone has all the necessary materials (‘Have you got the glue? Show me!’), counting all the pieces of paper together etc. Then we draw the line alongside the edge of the paper, page by page and putting the ready pages away. These lines will be help the kids to apply the glue and stick the papers together. The teacher needs to model all the stages and it is absolutely necessary to wait up for the kids, to make sure that everyone is on the same page (no pun intended:-). Afterwards, the teacher shows how to apply the glue (‘Put some glue on the line’) and how to add another page on top, repeating until all pages are glued together into a book (‘Look, we’ve got a book!’)
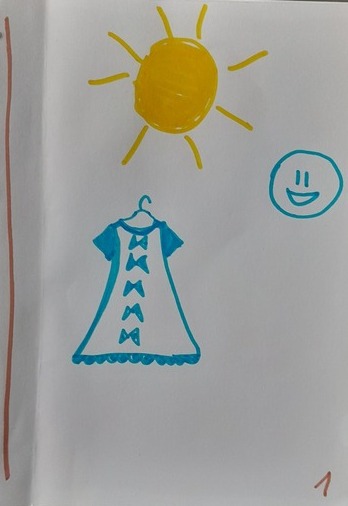
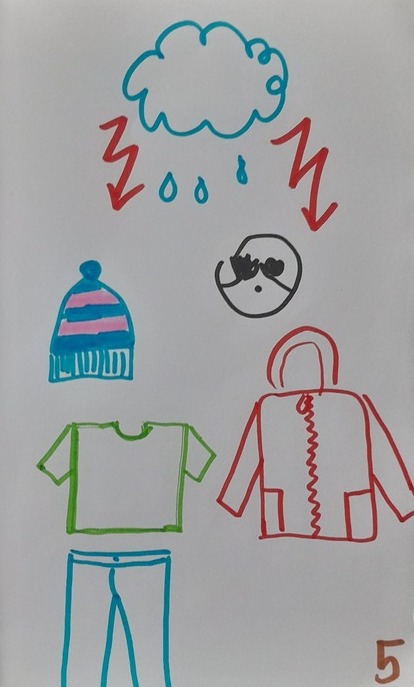
  • Kids, together with the teacher, number the pages. The numbers will help the teacher and the kids to navigate the booklet throughout the activity. We also write our names on the front page.
  • The next step is to start filling the booklet, one topic per lesson. When we are ready, we put the books away until the next lesson. Once there is something in the book, we start the activity with talking about what we already have got.
  • The topics that we have included so far include: the weather, the emotions (‘It is sunny, I am happy’), the clothes (‘It is sunny, I am wearing a dress’). In the future, I would like to add to it some basic accessories (‘It is sunny, I’ve got my sunglasses’) and some basic Present Continous (‘It is sunny, I am riding a bike’).

Why we like it?

  • There is a lot of potential for craft as the book activity can be extended over a series of lessons.
  • The book also allows for personalising the topic of the weather by associating it with emotions, clothes etc.
  • And, last but not least, it gives us a lot of opportunities for producing the language and, since a large part of the content is revised and repeated over and over again, the kids become a lot more confident at producing it and becoming creative with it, too. After a few lessons, we started to make up silly sentences not matching the weather for the other student(s) to correct the information that they have already heard and have become familiar with.
  • It can be used with a variety of topics, not only the weather, for example food (with pages devoted to fruit, vegetables, drinks, lunch and desserts) or animals (with pages devoted to big and small animals, animals which can fly, swim, run etc) although so far, I have been using the weather book only as a long-term project, with my 1-1 online student. We made the food book with my online group, as a one-off project. It was also a success.
  • There is more flexibility as regards the format, too. We made the booklets and starting filling them in in the same lesson because my kids were ready but it is also possible to divide it into two stages: lesson 1: making the book, lesson 2: start filling it in.
  • The same can be done with all the other lessons. The weather words and the emotions are quite easy to write and adding these in is feasible enough, one lesson (or a ten-minute slot) is going to be enough. The clothes or the accessories might take longer and it can be divided into two lessons to avoid the risk of the activity taking too long and the kids getting bored.

Happy teaching!

Wordwall activities Vol. 2

This is the second part of the post first published in November 2021 with my Top 10 Favourite Wordwall activities. Don’t forget to check it out here! Lots of ideas there!

  • One or many?

Materials: A set of cards, specifically prepared for this game. This is the one we were using in our Christmas lessons.

Activities: You can read more about it in one of the earlier posts.

Works well with: pre-primary, online and offline, individuals and groups

  • Song follow-up exercises

Materials: As part of our Christmas lessons, we were practising the basic prepositions and singing Santa, Where are you? from Super Simple Songs. The following set of cards was used in a follow-up activity.

Activities: Teacher sings or asks the question ‘Santa, Santa, where are you?’, with every card. The kids answer, either chorally or individually, taking turns. There is also an option of extending it further, by adding how Santa is feeling or what exactly he is doing.

Works well with: pre-primary, online and offline, individual and groups

  • Story follow-up exercises

Materials: This particular set of cards was used as a follow-up activity to a video lesson with Peppa Pig in which George catches a cold. It is a great episode to practise the weather words, the emotions and some present continuous, if the kids are familiar with it. I have used the ‘rank the order’ template, with very simple sentences to describe the actions of the story. Here you can find the final version and another one with ‘answers’.

Activities: In lesson 1, the kids watch the video with the pauses, and the teacher encourages them to produce simple sentences about the story. In lesson 2, the student watch the video again and try to retell it by choosing the order of the pictures and describing them. If the kids are not ready, the teacher can support them by choosing the pictures and giving the students all the sentence starters.

Works well with: pre-primary and primary, online and offline, probably easier with individual students or with students taking turns, in a group.

  • Early reading exercises

Materials: A variety of cards for different activities. The first one was used as a part of the Christmas lessons with my ‘advanced’ pre-primary. The other two, Yes or No and Usborne rhymes were used as part of a series of lessons with Usborne’s Ted in a Red Bed and Fox on a Box.

Activities: In the first activity, the teacher is introducing the kids to the written form of the words. The teacher reads the first sound or the first syllable and asks the kids to continue. Afterwards, the card is flipped. The other two activiites use the target language and the rhymes from the two Usborne stories. The kids are encouraged to see the sentences themselves and say whether they match the illustrations (Yes or No). The other activity is a revision game for the main rhymes from both stories.

Works well with: primary and some of the older pre-primary students who are learning to read.

  • Draw it!

Materials: This particular set here was used as a follow up of the Usborne Phonics Story mentioned above, Ted in a Red Bed. We were also practising furniture and colours.

Activities: The students need a piece of paper, A4 or A5 and a set of pencils or markers. The teacher demonstrates the cards on the screen, starting from the first one (START: I can see a room, which unfortunately is not always the first one in the deck, I set it up before the lesson and then we go through all the cards anyway, to check that we have included everything). The kids take turns to read the simple sentences and to draw elements of their room. In the online lessons, it is a good idea to ask them to show the card to the camera after each step. It is a great activity that encourages the kids to read and to create. It can be made more complex for those of the students who know prepositions (The lamp is on the table). The same kind of a game was used to practise the school vocabulary, toys and colours (starting with a shelf), things in the park etc. The activity can be stopped whenever necessary, after 5 or 8 cards, depending on how focused and interested the kids are.

Works well with: primary, online or offline, I have only done it with individual students but I suppose that it could be adapted to the needs of a group of primary kids, too. I would start with cutting down on the number of pictures, during the first few games.

  • Teaching English through Art

Materials: I have found wordwall extremely useful in creating materials for my Art Explorers lessons. They can be simple flashards that use traditional photographs and paintings to introduce a new set of vocabulary for example Animals in Art. It is also easy to find beautiful materials such as these Pumpkins which we use to express opinion.

Activities: Pumpkins are displayed on the screen, one by one, with the teacher or one of the students asking ‘Do you like this pumpkin?’ and the group answering. It is also possible to include some other elements ie the colours, the basic adjectives, the numbers to encourage kids to produce even more language. I would like to encourage everyone to use paintings to introduce and practise vocabulary even if you are not teaching English through Art. And not only paintings! There is such a beautiful variety of visuals that can be used – photographs, drawings, clip art, paintings, symbols and so on. This will help develop symbolic representation and the general visual intelligence. And it is fun!

Works well with: pre-primary and primary, both online and offline, individual students and groups.

  • Pairs

Materials: We used this set in the unit devoted to weather, with the aim to extend it beyond the single words or even simple sentences, for example to talk about the things we do when it is sunny, when it is raining etc.

Activities:

Works well with: pre-primary, online or offline, individual and groups.

Only 7 new entries here but worry not! I am still working, I am still creating and I will be adding things here. I am sure. Until then!

Happy teaching!

Crumbs #45 Five ways of personalising content

In this post I would like to share a few activities that I came up with for my students that turned to be very effective as regards students’ involvement, the amount of language generated and the opportunities for the target language practice.

All of these are only samples, activities and materials to serve a very specific purpose with a very specific group of students. However, I do believe that they can serve as five case studies that help to create the framework for creation and adaptation of such materials.

#1 You today and you in 2017

This is the activity that we used with my teens, in a freer practice activity focused on comparatives on the B2 level, including simple comparatives, less, as…as and the comparatives quantifiers. The kids were working in pairs, they were answering the question: ‘You today and you in 2017. How different is your life?‘ and they used the wordwall cards to guide them in their discussions.

When I was planning this activity, I prepared 15 cue cards but we barely got through half of them in each pair because the students really wanted to share their experiences and, surprisingly, they did not need any follow-up questions, they were simply talking and talking and talking.

#2 The future us

This activity and the materials were intially created for a group of teens but later I adapted it to the needs of my junior group and to a group of ‘advanced’ primary kids, too in the lessons whose aim was to introduce and to practise ‘will’ and ‘might’ to talk about the future.

Intially, many years ago, when we were still in the classroom I created a handout with all the situations, one per each student in the group because I wanted to do it in the format of a gallery walk. The kids had to move around the room, read the situations and decide who will achieve what. In the end, the students picked up the cards with their names and told of us which of the predictions are most likely to happen in the real life.

Later on this activity had to be adapted to the format of the online classes and I decided to turn it into a simpler speaking activity, again with a set of wordwall cards. The students worked in groups three and they took turns to uncover the cards and to discuss who in the group is most likely to get a new haircut, start wearing glasses, write a book or win an Oscar. They had to justify their answers. During the feedback, we brought back some of their ideas and the students whose names were called out were to comment on these predictions.

Although this is one of the flexible activities (no specific ending, can be stopped at any given point), I abandoned the initially planned timing because the students got really involved into it and I allowed them to go through all the cards. We had a laugh and we produced a lot of language. It is worth mentioning, though, that this activity was done in group that had studied together for a few years and that knew each other very well. This meant that they had enough data in order to be able to make their prediction and, also, there was very little risk that someone will be offended with anyone else’s ideas. Perhaps this kind of an activity would not be a good choice for newly formed groups.

#3 Quiz: How well do we know each other?

I prepared this kind of an activity to practise the target langauge in a personalised way with my primary A1 students and the structure used in this particular game was the combination of ‘How often do you / does X do it?’ and the basic adverbs of frequency (always, often, sometimes, never).

The students were given a set of questions for homework about all the random habits of everyone in the group, such as ‘How often does Sasha play computer games?’. They were supposed to think about them and make their decisions. In class, I was asking the questions and everyone, apart from the student in question was sharing their answers. Afterwards, the student would tell us how often they do it (Sasha: I never play computer games) and sometimes provided some additional information.

#4 Personalised reading

This is a trick (or an activity:-) that I learnt in one of the training sessions about a million years ago (and I do not remember whose it was!) that a text (or a listening task) should be treated in a way that more resembles the real life reading (or listening). That means that we approach the text not to be able to answer all the comprehension questions in the coursebook but to take it very personally. The task is to go through the text, labeling the text with the marks: (+) for all the things that we agree with, (-) for all the things that we do not agree with, (!) for all the things that we find surprising or (?) for all the things that we would like to find out more about and so on and so forth. In the feedback session, students simply compare where they put all the specific marks and discuss why such were their choices. Simple and effective.

There are a few variations of this approach. Students can write their own questions to the text / the listening text and then deal with the text with the focus on these questions. In the feedback session, they share their answers and why they have chosen these particular questions or what their answers would be if the text does not include them, which, actually, is something that happens frequently.

Another way was letting the students decide for themselves which items / parts they want to read and talk about. While we were reading a text on ten different factors to take into consideration while choosing a job (based on Gateway B2, Macmillan). First, the students got only a list and they were asked to choose the five that are most important for them and compare their lists with their friends. Afterwards, they were asked to approach the text, comprising of ten short paragraphs, one per factor, and discuss these. They were instructed to go through all of the items, one by one but they could make decisions as regards the order so that the most important ones were dealt with in the beginning when everyone was at the peak of their focus and involvement. Interestingly enough, some students were choosing to read about the factors that were their priority whereas the others wanted to read more about the factors that they would never take into consideration because they were curious about the other people’s rationale.

#5 The Messy Choir for controlled grammar practice

This is a lovely activity that we are using, with my younger and older kids and sometimes with adults, too. I have already written about it and you can find the original post here.

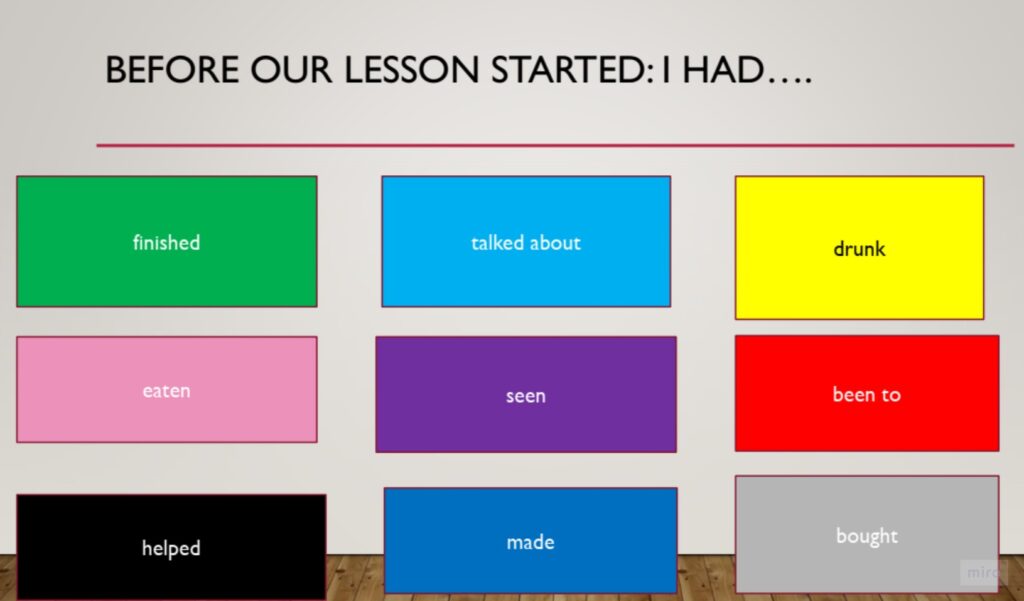
Today, I would like to share the version of the activity with my B2 teens while we were learning / revising the narrative tenses and the Past Perfect among them. I wanted the students to start using the structure straightaway and in a familiar context. Since the class starts at 18:45, there are plenty of things that everyone would have already done and could talk about.

The boxes with the past participle were appearing one by one and everyone was invited to contribute their sentences, the teacher and the students. Some of the verbs generated more answers, some fewer but, overall, all the students participated and practised the new structured.

We used the same activity in the beginning of a few lessons later on, as a warmer / hello / revision activity.

I hope that you have found something useful here to use with your students or to inspire you to create. I also hope that this post will have its part two. And sooner rather than later!

Happy teaching!

Crumbs # 44. One or many? A vocabulary game for preschoolers.

Ingredients

  • A set of wordwall cards with the vocabulary such as Christmas words, fruit or animals or the physical cards such as those used here in the unit on farm animals.

Procedures

  • The teacher introduces and practices vocabulary first and make sure the kids are familiar with them.
  • The teacher shows the kids different variants, introduce the idea of ‘one’ and ‘many’ or ‘one’, ‘two’ and ‘many’.
  • In the offline classroom, the teacher shuffles the cards, looks at one of them in secret and says: ‘I can see some pens. One pen or many pens?’ with the gestures.
  • The kids are guessing and after a while the teacher shows everyone the card and asks the question again: ‘One pen or many pens?’. The kids answer and if the card shows ‘many’, they also count how many exactly.
  • If the game is played online, there is side A of every card that presents the word and side B with the actual visual with the answer. When the kids have shared their guesses, the teacher flips the card and asks the question again.

Why we like it?

  • It is a simple yet effective activity that helps to practice any vocabulary. We usually use it in the second or third lesson of the new unit.
  • It is a real game as it includes the element of luck and anyone can guess it as well as the element of logic if you try to remember which cards you have seen (there is only one of each).
  • The number of items can be adapted ie only a set of five words, with two (one pencil, many pencils) or with three (one pencil, two pencils, many pencils) variants for each word.
  • We use gestures to clarify the meaning, to support production or, even, to answer, as some kids use words and gestures when they guess. I have used the following gestures: one – the index finger up, two – the index and the middle finger together up, many – all the fingers of one hand, up and moving.
  • It is not competitive as we never count the points for the correct answers and its pace is so fast that the kids do not have the time to focus on the cards that they got wrong or didn’t guess which also helps them to learn to win and to lose.
  • It can help practise singluar and plural forms of all the nouns and structures. So far, I have used it to reinforce the knowledge of the vocabulary only, there is some potential for adding structure here, too, for example is / are.
  • This game can be used to practise the plural form but we have actually learnt and used the singular and plural forms through playing the game. This concept was not introduced separately before.
  • It works well with individual students as well as with groups as all the kids can guess at the same time before the teacher reveals the card. I have been using it with my pre-primary students but, I suppose, the younger primary would enjoy this activity, too.
  • The game is open-ended, it does not have any specific number of rounds that have to be played or a definite end. The teacher can stop it at any given point, before the kids get bored.
  • The physical cards can be easily produced, using the google images and clip art and copying and pasting. To make them more effective, I used to glue them on some coloured paper, in order to make them more durable and to make sure that the kids can’t see through the pictures. It is important that all the cards have the same size and that they have the same colour.
  • Last but not least, my students really like it and this game has become one of our Bread and Butter set. We play it in every unit, with new vocabulary)

Happy teaching!

Crumbs #42 One-minute essays

November raspberries

Ingredients

  • A set of topics. We have used a set of wordwall cards. You can find them here.
  • A timer, more or less formal and strict, depending on the group.
  • Students divided into pairs.
  • A list of the linking words typical for an essay, more or less extensive, depending on the group

Procedures

  • Teacher presents the framework of the one minute spoken essay and the four stages: introduction, arguments to support one side, arguments to support the other side, conclusion as well as the introductory phrases. The basic set of these included: Nowadays, On the one hand, On the other hand, All in all
  • Teacher models the activity: chosing the topic, expressing opinion following the framework and using the key structures. Students time the teacher and signal when 1 minute is up. Afterwords they react with their opinion.
  • Students go into the breakout rooms and continue in the same way.

Why we like it

  • I used this activity first with my teens, as part of the preparation for the essay writing, the first serious essay ever. I wanted them to practise expressing their opinion in a certain format and I wanted to encourage them to use a variety of appropriate cohesive devices which were introduced in the coursebook. It was a much more extensive list than the one provided here.
  • Later on, I used it also with my adult groups as a an opportunity and a tool to work on shaping the discourse, at this point – without the follow-up of the written essay.
  • The activity is generative as student A has a chance to produce a mini discourse and communicative as student B also has a chance to react and to provide additional arguments to support their partner’s ideas or disagree with them.
  • The main aim of the activity is the development of the speaking skills but the students are also required to listen, in order to be able to contribute their arguments in the follow-up stage. I am hoping that, in the long run, it will lead to students managing their spoken contributions much more effectively.
  • It is a very flexible activity. It can be used as a warmer or as an end-of-class activity. It can be also extended into a proper activity. The length of each discourse can be kept at one minute or it can be extended to two or three minutes. The topics can be varied, as in the set above, or they can be associated with one specific topic and it can be used as an opportunity to generate ideas for the essay that the students will be writing later on.

Here you can find one of similar discourse development tricks.

Happy teaching!