Damien Hirst and butterflies! Teaching English through Art

The artist

It was interesting this time. The spring came and I really wanted to a related theme. It is true that at the time the snow was still lying around or still falling but I just wanted bees, butterflies and flowers. And caterpillars, of course. Only later did I start to look for an artist who could help us with it. Believe or not, dear reader, I found one! Just to prove that with this Art and English, if only you try hard enough, you can connect any two dots, even the most random ones.

I have heard about Damien Hirst before. He is, after all, one of the leading British artists and his name pops up here and there. But only now was I able to see his art in all its beauty, the dots that I had seen in so many places without realising what they were and the butterflies!

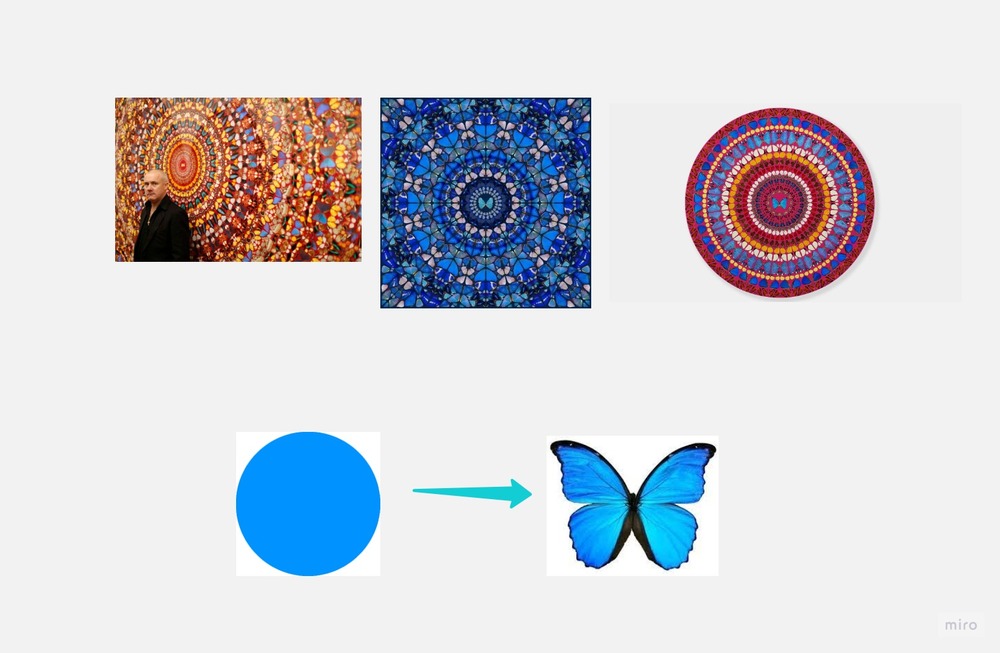
As usual, we introduced the artist, the photogragraph, the country and his two favourite things and we looked at his butterflies. And our Miro board was just perfect for it. We looked at the circles first (‘Can you see the circle?’, ‘Can you see the butterflies?’) and then we zoomed in (‘Can you see the circle?’, ‘Can you see the butterflies?’) as the circle disappeared and a multitude of butterflies emerged. Almost like magic).

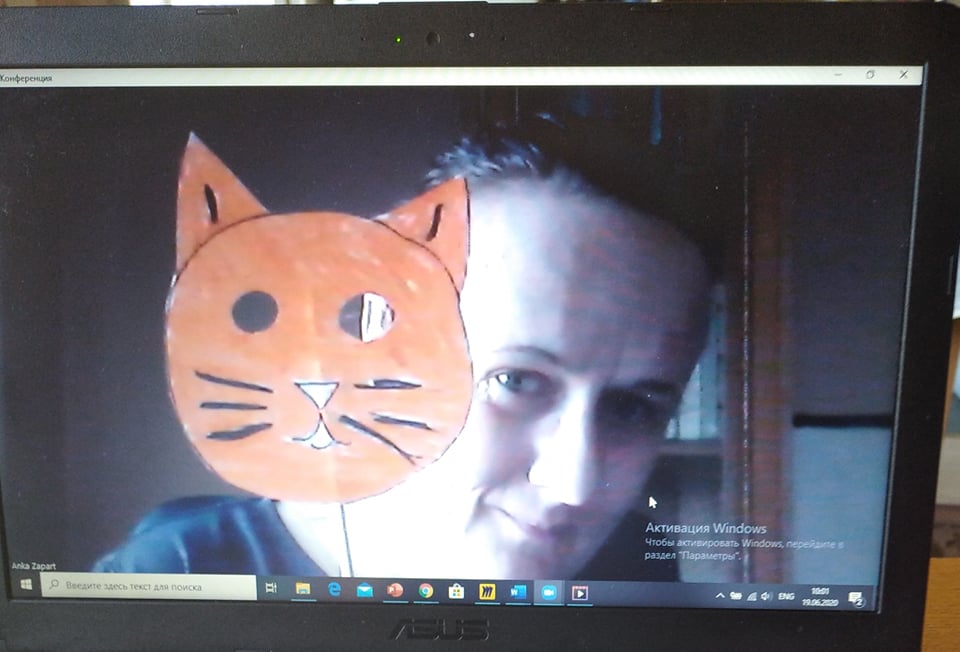
Afterwards, I showed them my mini-graph and moved it around to illustrate how Damien turned butterflies into a circle and how we are going to turn circles into butterflies.

The language

This whole unit and the lesson revolved around spring, gardens and all the garden creatures, insects and not only. We have practised our vocabulary, we were describing gardens (‘I can see’), we practised numbers 1 – 20 and we sang a song about gardens, too.

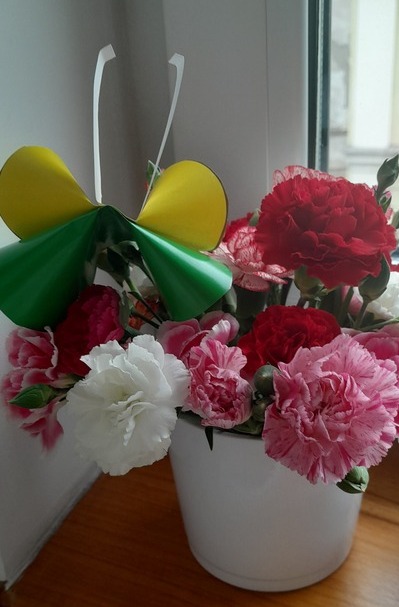
We watched and tried to retell the cartoon about Six Hungry Caterpillars from Playway to English and a series of lessons we made a garden (see the photo below) and our own caterpillars which you can find out about in this post here. We also looked at different gardens in art and we talked about those that we like and don’t like.
The craft

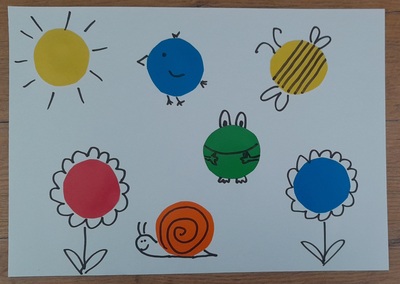
My main inspiration for our butterflies was the video from World of Art and Craft because it is supereasy and very effective. However, because our classes take part online everything has to be made achieveable for the kids to do on their own and on the other side of the screen. For that reason I gave up on the stapler and experimented first with paper and glue. It worked.

As usual we went through the list of all the resources (‘Have you got the glue?’ ‘I’ve got the glue’ with showing it to the camera) to make sure that all the parents prepared what I asked for in a message before the lesson.

We started with choosing the two colours of the coloured paper, drawing the circles (‘not very small, not very big’) and cutting them out. I was a little worried about that bit but the thing is that even if the circles are not very regular and even the butterflies will be pretty. I was using the craft paper (one sided, the white inside), the kids were using some double-sided coloured paper, thinner and thicker, everything worked.

Afterwards we drew a line across each circle (to make sure that we don’t spread the glue all over the circle) and put some glue on the line. We closed folded the circles in half, and pressed in the middle. Afterwards, we fluffed up the sides a little bit. After both parts were ready, we put some glue in the middled and pressed the two halves together.

In the end we cut out a thin strip of paper, folded it in half and glued it as the butterfly’s antennas.

And then the second version of the butterfly appeared. I could not reuse the 3-D butterfly because while making the caterpillar, we had some problems with the glue and the paper which was just too thick and so another butterfly had to appear.

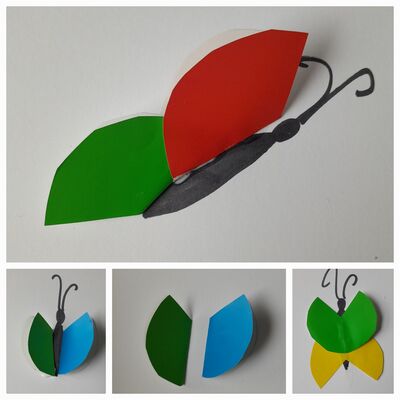
This one started with us going over the resources and choosing two colours of the coloured paper. We drew a circle on each, again, not too small, not too big and we cut them out. Afterwards, we drew the line across each circle, on the B side, and we folded each circle into half. The next step was to cut off a slice of the folded circle (‘Look, it is like cutting off a slice of cake’), to create the edge to shape the wings. Afterwards we drew the body of the butterfly on a piece of A4 paper, and we glued the wings on. We made only one butterfly in class but, of course, depending on the skills of the children, there is definitely a potential for more.

In the photo, you can see the intended butterfly and what happened in the classroom because students started to play with the materials and experiment how you can turn them into a butterfly.
Footnotes

It is only now that I have found out about the many surprises that Damien Hirst has up his sleeve. It turns out that his mandalas are made out of dry butterfly wings from real butterflies and that he himself is the biggest importer of butterflies in the UK. And I have to admit, I feel a little bit less enthusiastic about it all.

Happy teaching!
Crumbs #51 Peppa Pig in the VYL classroom

Lisbon

Ingredients

Procedures

  • Work with the vocabulary and structures of the unit, here the weather and the clothes
  • Introduce or revise all the weather accessories and all the other key words (i.e. umbrella, hat, warm milk etc)
  • Watch the video, with pauses to ask short questions about the video and the story. These will depend on the level of the children and their ability to produce. In the beginning we often talk about the emotions of the characters and about everything that we can see. As soon as students can use some elements of the Present Continuous or to evaluate the behaviour and the actions of the characters, the conversation really takes off.
  • We follow-up with a speaking activity. The yes / no quiz is an easy version and it is based on the students comprehension and the listening skills. They listen to the teacher and react with a simple yes or no, but, with time they will be also better able to produce simple sentences. The other activity, the reordering, was created for a more advanced pre-school student and we retold the story together, with the teacher reorganising the cards and helping the student produce the sentence. Sometimes it was a full sentence (‘It is raining”), sometimes, the teacher started a sentence and the student finished (‘Dr Brown Bear it talking…’ ‘to George’)
  • The activity can be repeated in the following lesson to give the students an opportunity to participate with more confidence and, hopefully, more language produced.

Why we like it

  • Kids already know and watch Peppa and it is fun to bring her into the English lessons, too.
  • The episodes are relatively short (around 5 min) and it is an amount of time that will not be a challenge for the students and it can be relatively easily included in a typical lesson for pre-schoolers
  • Although the language of the cartoon is not graded and it is possible to find the episodes that will be easy to understand also for the very young students who have just started to learn English as the foreign language.
  • The videos can be shared with parents and watched again at home.
  • In my classes, we use the videos in the final stages of the unit, as one more source of the target language and of the target langauge in context and to create some opportunities for production.
  • Usually, I don’t watch the videos twice in the same lesson. It might have been beneficial for the general comprehension but I am not sure about the effectiveness of such an approach. Ten minutes is a large chunk of a lesson with pre-schoolers and I doubt the kids would be still interested and focused. I prefer to pause and to chat getting the kids ready for a more communicative video-watching. In the beginning, our conversations are quite simple, very often limited to calling out the words we can see in the video or discussing ‘Is that a good idea?’, a phrase that we frequently use in our classes anyway but it helps kids reflect on the story and perhaps predict the events to follow.
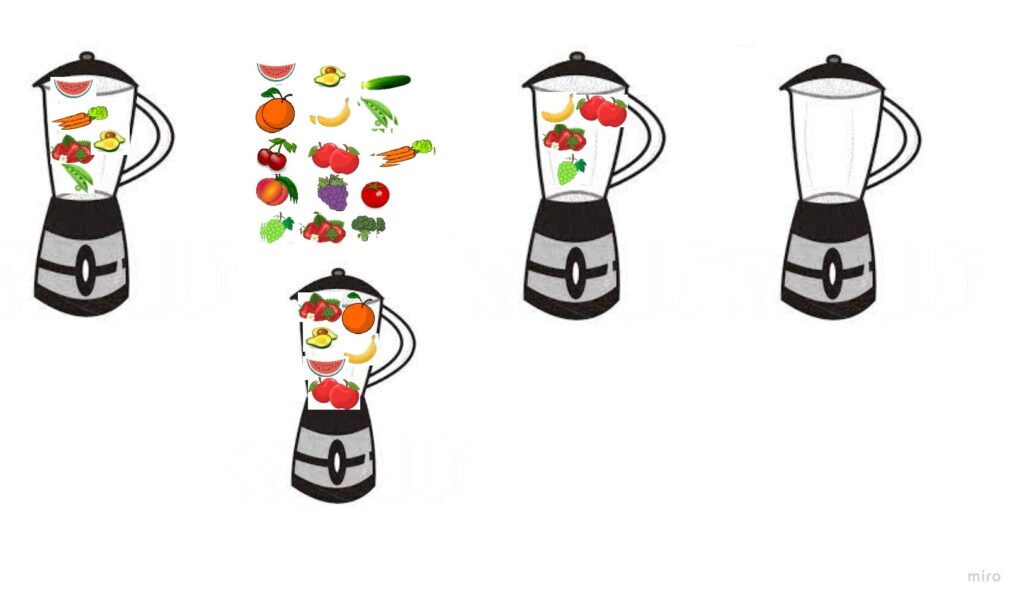
  • Some other episodes that we used in class included: Peppa Pig and the Pet Day, followed-up by matching the kids and their pets, Peppa Pig Lunch followed by a Yes / No quiz, and Peppa Pig and the Fruit Day followed by an activity in which we made our own smoothies on our Miro board.

Happy teaching!

Crumbs # 50 Vyacheslav or about getting ready to tell a story

Ingredients

  • a group of A2 or A2+ kids preparing for the Cambridge Flyers or the Cambridge KET exam
  • a set of the storytelling pictures from the exam writing materials
  • a piece of paper and a pen

Procedure

  • The teacher displays the visuals on the screen and tells the kids that they will be used to tell a story.
  • The teacher asks the kids to look at the visuals and decide what their character is going to be called. Everyone writes the name down on their piece of paper.
  • The teacher tells the kids to write down ten numbers, 1 – 10, and, when everyone is ready, to write ten things that they can see in all the pictures. These can be only nouns or a selection of nouns, verbs, adjectives etc.
  • The teacher asks the kids to decide what kind of a story they are going to tell: a happy story, a sad story or a scary story. Everyone decides and draws a relevant smiley at the bottom of their list.
  • The teacher divides the kids into pairs and sends them into breakout rooms to tell their stories. They have to use the name, all ten words and they have to make sure that their story has the mood they have chosen for it.
  • Back in the common room, the kids give the group a summary of their story (‘It is a story about a boy who…’)

Why we like it

  • The main aim for me in this particular lesson was to show the kids that even such uninspiring illustrations as the ones we used (and sadly, they were really boring this time) can be a start of a fun storytelling activity and that the final product’s quality depends only on the writers that is us.
  • We are preparing for a progress test and a mock test and I am hoping that an activity of that kind will get the students ready for the independent work during the test itself. Looking at the visuals and making the list helped the students think of the words that they see and it helped to assure that they will be closer to getting to the required wordcount (35 words). If they have ten on their list already 30% of the way there. It also gave them the time necessary to really look at the pictures and to start thinking of what might be happening.
  • From the word ‘Go’ the stories became personalised because the character got a name and became six different boys instantly, Fred, Bob, Tom and Vyacheslav among them. (‘Anka, but why Vyacheslav?‘ ‘I am not sure. I looked at him and I just thought he looks like a Vyacheslav‘).
  • Deciding how the story will end in the beginning also helped to shape it. It was the first time we did it and for that reason I only offered three options: a happy story, a sad story and a scary story but that list can be easily extended. We shared how we were planning to tell the story before we went into the breakout rooms and among our six stories there were three happy stories, one sad story, one scary story (mine) and one ‘ill story’ because one of my students decided that his character is going to catch a cold in the end. Anyway, from the very beginning the kids knew where they were taking their Fred and their Bob. They also knew that their partner’s story will be a bit different so, hopefully, they were more interested in listening to it. There was some variety in the group so I could put them up in a pair whose angle was different.
  • It can be easily done in the classroom but it works amazingly well in the online classes and this is how it came to be. I wanted to avoid sharing the visuals and wasting time on opening them.
  • It is easy and it can be a speaking activity in its own right or it can work as a story-writing preparation task as it was in our case. Consequently, a set of three pictures can be used (Flyers and KET writing tasks) or a set of five pictures (Flyers speaking tasks).
  • As a potential follow-up, the kids can write the story for homework.
  • Next time (and there will defnitely be another round of this activity), I am going to add a more communicative element that will give them a proper listening task and that will give them an opportunity to interact with their partner’s story such as retelling the story they have heard in the breakout rooms, creating a title for their partner’s story or continuing it (‘The next day…’). I know that choosing the best story is sometimes suggested with this kind of an activity but, to be honest, I am not a fan. Not everything needs to be a competition.

Wordwall activities Vol. 2

This is the second part of the post first published in November 2021 with my Top 10 Favourite Wordwall activities. Don’t forget to check it out here! Lots of ideas there!

  • One or many?

Materials: A set of cards, specifically prepared for this game. This is the one we were using in our Christmas lessons.

Activities: You can read more about it in one of the earlier posts.

Works well with: pre-primary, online and offline, individuals and groups

  • Song follow-up exercises

Materials: As part of our Christmas lessons, we were practising the basic prepositions and singing Santa, Where are you? from Super Simple Songs. The following set of cards was used in a follow-up activity.

Activities: Teacher sings or asks the question ‘Santa, Santa, where are you?’, with every card. The kids answer, either chorally or individually, taking turns. There is also an option of extending it further, by adding how Santa is feeling or what exactly he is doing.

Works well with: pre-primary, online and offline, individual and groups

  • Story follow-up exercises

Materials: This particular set of cards was used as a follow-up activity to a video lesson with Peppa Pig in which George catches a cold. It is a great episode to practise the weather words, the emotions and some present continuous, if the kids are familiar with it. I have used the ‘rank the order’ template, with very simple sentences to describe the actions of the story. Here you can find the final version and another one with ‘answers’.

Activities: In lesson 1, the kids watch the video with the pauses, and the teacher encourages them to produce simple sentences about the story. In lesson 2, the student watch the video again and try to retell it by choosing the order of the pictures and describing them. If the kids are not ready, the teacher can support them by choosing the pictures and giving the students all the sentence starters.

Works well with: pre-primary and primary, online and offline, probably easier with individual students or with students taking turns, in a group.

  • Early reading exercises

Materials: A variety of cards for different activities. The first one was used as a part of the Christmas lessons with my ‘advanced’ pre-primary. The other two, Yes or No and Usborne rhymes were used as part of a series of lessons with Usborne’s Ted in a Red Bed and Fox on a Box.

Activities: In the first activity, the teacher is introducing the kids to the written form of the words. The teacher reads the first sound or the first syllable and asks the kids to continue. Afterwards, the card is flipped. The other two activiites use the target language and the rhymes from the two Usborne stories. The kids are encouraged to see the sentences themselves and say whether they match the illustrations (Yes or No). The other activity is a revision game for the main rhymes from both stories.

Works well with: primary and some of the older pre-primary students who are learning to read.

  • Draw it!

Materials: This particular set here was used as a follow up of the Usborne Phonics Story mentioned above, Ted in a Red Bed. We were also practising furniture and colours.

Activities: The students need a piece of paper, A4 or A5 and a set of pencils or markers. The teacher demonstrates the cards on the screen, starting from the first one (START: I can see a room, which unfortunately is not always the first one in the deck, I set it up before the lesson and then we go through all the cards anyway, to check that we have included everything). The kids take turns to read the simple sentences and to draw elements of their room. In the online lessons, it is a good idea to ask them to show the card to the camera after each step. It is a great activity that encourages the kids to read and to create. It can be made more complex for those of the students who know prepositions (The lamp is on the table). The same kind of a game was used to practise the school vocabulary, toys and colours (starting with a shelf), things in the park etc. The activity can be stopped whenever necessary, after 5 or 8 cards, depending on how focused and interested the kids are.

Works well with: primary, online or offline, I have only done it with individual students but I suppose that it could be adapted to the needs of a group of primary kids, too. I would start with cutting down on the number of pictures, during the first few games.

  • Teaching English through Art

Materials: I have found wordwall extremely useful in creating materials for my Art Explorers lessons. They can be simple flashards that use traditional photographs and paintings to introduce a new set of vocabulary for example Animals in Art. It is also easy to find beautiful materials such as these Pumpkins which we use to express opinion.

Activities: Pumpkins are displayed on the screen, one by one, with the teacher or one of the students asking ‘Do you like this pumpkin?’ and the group answering. It is also possible to include some other elements ie the colours, the basic adjectives, the numbers to encourage kids to produce even more language. I would like to encourage everyone to use paintings to introduce and practise vocabulary even if you are not teaching English through Art. And not only paintings! There is such a beautiful variety of visuals that can be used – photographs, drawings, clip art, paintings, symbols and so on. This will help develop symbolic representation and the general visual intelligence. And it is fun!

Works well with: pre-primary and primary, both online and offline, individual students and groups.

  • Pairs

Materials: We used this set in the unit devoted to weather, with the aim to extend it beyond the single words or even simple sentences, for example to talk about the things we do when it is sunny, when it is raining etc.

Activities:

Works well with: pre-primary, online or offline, individual and groups.

Only 7 new entries here but worry not! I am still working, I am still creating and I will be adding things here. I am sure. Until then!

Happy teaching!

Crumbs #23 OR 5 ways of using video in class

These are not all the activities that you can do with a video, these might not be the best activities for your groups. These are just some approaches that we like. Maybe you will find them useful.

Prediction

Procedure: The teacher introduces the topic of the video and gives the students a set of key words that appear in the video. The students discuss why these words might appear in the video and why they might be important. After a whole class feedback, the class watch the video to check whether they predictions were correct. As a follow-up, the students discuss the most (or the least) surprising / unusual / weird facts they have found out about.

Example: We used this video to accompany a reading on extreme adventures and survival in which making a snow cave helped the people survive. We watched a real tutorial on making a snow cave and the key words we started with were: a candle, the letter T, the stick, a saw, the flat ceiling.

Back to the board

Procedure: The teacher divides the group into pairs, one student in each pair sits facing the TV, the other one sits with their back to the screen. the teacher plays the video, students work in pairs and they retell each other what is happening on the screen. Depending on the video, the students can watch the video with the sound on or with the sound muted. After a while, the students change seats and continue watching. Finally, they talk together and answer some questions related to the video. Usually it is a mix of questions, some of which check comprehension and some which help the students see the big picture or express opinion.

Example: We did this kind of an activity while discussing sports and unusual sports. The students watched the muted video on extreme extreme ironing, in two halves, about 60 seconds each and afterwards answered the following questions: What do you think is the name of this sport? How do you think Phil Shaw came up with the idea? What can be easy and difficult about this sport? Would you like to try? Which was the strangest place in which this sport was done? In the end, we watched it together, with the sound on and we compared ideas.

Pause and talk

Procedure: This is a great activity for the videos that consist of short blocks or include a set of examples of a certain item. The teacher writes the key question on the board, usually only one, and plays the video. The students watch a short clip. The teacher pauses the video and students discuss what they have just seen by answering the question. The biggest advantage of this approach is that the teacher is in charge as regards the duration, the activity can be stopped after only three items or the video can be played until the very end. As a follow-up, the students choose their favourite / their least favourite item and justify their choices. As in all of the other activities, there is also an option of the students changing partners and sharing their ideas with someone else in the group.

Example: While discussing food, we watched the video about school lunches around the world, we watched it bit by bit (after each item) and the students had to answer the following question ‘Would you like to try it? Why?’. Actually, this particular lesson included the video because we followed up with a video on American kids trying Russian food and we paused right after the food was introduced and we try to predict if the kids are going to like it or not.

Read my lips

Procedure: It is used with the video with a very clear narrative that can be interpreted without the audio version as the students watch it muted. The teacher can start with the title of the film and ask the students to predict what they think it is about. Afterwards, the students watch the film and try to figure out what is happening, who the characters are, how they are feeling. The teacher can ask them to take notes while they are watching. Afterwards, students compare their notes in pairs or in groups of three. The teacher can also ask them about the main events or to try to connect the clip to the title of the film. Afterwards, the students watch the video again and as a group discuss their guesses. The teacher clarifies the main points, without going into too many details. The final activity is predicting what happens next.

Example: One of my top ten for this kind of an approach is a video like this excerpt from Big Fish, or actually a set of clips from the same film, for example this one here or this one here. In this one case, we did not really talk about the title of the film. After watching the film, the students were discussing what they saw but I also asked them to think about the following questions: Who was the big man? Why did he look scruffy? Why did the boy throw a stone at him? Why did the boy reach out a hand and closed the eyes? Why did they shake hands in the end?

After we finished watching and discussing, we also looked at the quote from the clip ‘You are a big man. You should be in a big city.’ and we talked about what it might mean and whether it is true.

Categorise

Procedure: The students are given a list of all the items that are shown in the video ie some extreme sports, some unusual holiday destinations, exotic animals etc. The students watch the video and they take notes about all the items, ie putting (+) and (-) next to those that they like or grading them from 1 – 5, depending on how interesting they are. After watching the video, they make their own list, organising all the items from the most to the least interesting one or dividing them into categories (like – don’t like, useful – not useful, interesting – boring) and so on. They work in pairs or small teams and compare and explain their decisions.

Example: This video was used in a lesson on technology as it presents the list of 10 Coolest Gadges. Some of the gadgets in the video have unusual names so we started with looking at these, trying to figure out what these might be. We actually divided the video into two and we discussed the first five gadgets and then, after the second half, the other five and then all ten, to round up. The students were choosing the most interesting gadgets that they might want to buy and those that they would not really even consider. In the end, we choose the most and the least popular gadget as a group.

None of the videos I use as examples were graded or created with the EFL /ESL learners so they can be considered authentic materials. I found all of them on youtube while looking for videos that would match the topic we were working on. I did not introduce any vocabulary, focusing rather on listening (or watching) for gist and general understanding, rather than on any specific details. Unless, of course, the students had any questions.

If you want to find out more about using authentic materials, have a look at some of the many resources online such as these post here: how to choose and adapt them, here from the Britsh Council, and here.

I have also found out a few posts on using video in class. If you are interested, you can find them here and here and this one here, although it has a wider scope and does not really focus on videos in the EFL/ESL classroom.

Happy teaching!

Don’t Box Me In! Teachers Who ‘Bent’ the Zoom Square…

Just a lesson…

…is the name of the series of great posts collected by Naomi Epstein in her blog. Naomi asked a great bunch of people about their Teaching During the Pandemic Experience and I had the pleasure of being one of these teachers. You can find my post here.

Don’t forget to check out her other posts, too! Highly recommended!

Crumbs #4 Sheppard Software

Are you thinking what I am thinking?

Does the name in the title look to you like the most uninspiring name and something that in no way could be related to teaching English to children or to children in general? Yes, same here.

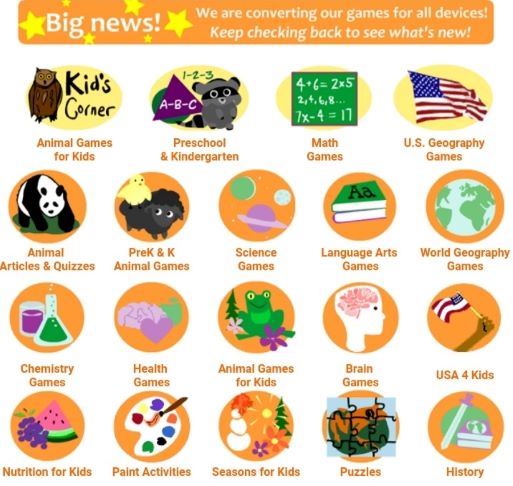
Sheppard Software is a perfect example of how a random name can be a perfect cover up for a treasure chest, full of amazing tools that will make a VYL and a YL teacher happy.

www.sheppardsoftware.com

Instructions

Go to https://www.sheppardsoftware.com/ but first make sure that you have at least an hour to kill. There is so much there that even an adult (who is definitely NOT a fan of computer games) gets glued to the screen and wants to try out and play and play and play. Now that you have been warned, you are ready.

The VYL teachers: start with the preschool section https://www.sheppardsoftware.com/preschool/preschool.htm and start discovering. You can find here some games to practice colours, numbers, alphabet, shapes and animals.

The primary EFL teachers: you can start anywhere. It will all depend on what topic you are planning to teach. The website has a lot to offer to anyone who is teaching CLIL, for example Maths, Science, Art, Geography, Chemistry, Seasons, History… If you don’t have any specific idea in mind, you may as well start where I started at the Food Chain Game https://www.sheppardsoftware.com/science/animals/games/food-chain/ and think of all its potential while having fun playing. Then, slowly, bit by bit start browsing through the other gems

All the teachers: do yourself a favour and start with the sound off. It is great that practically everything on the page has got the audio added on, instructions, noises for animals and so but I can tell you that even a tiny little movement of the mouse/ cursor on the screen can lead to a lot maddening noise, so beware and tread lightly.

We loved it because

  • It it is beautiful
  • It has a lot of potential for speaking activities.
  • It can be used to teach a great range of CLIL topics but it can also be used to supplement any vocabulary / structure lessons with primary and pre-primary, online and offline.
  • the games can be shared with parents after the lesson and the students can play all of them at home again (and again and again)

The Unthinkable or About choosing to stay online with VYLs.

To online or not to online, that is the question?

No, not really. That, for sure was never a question!

Not for me, that is. I am a dinosaur teacher and I had always been against teaching pre-schoolers online. Or, actually, teaching online in general. If, before the 15th of March 2020, you had asked me what I thought about it, my answer would have been as short as it would have been decisive. No.

No. No. No.

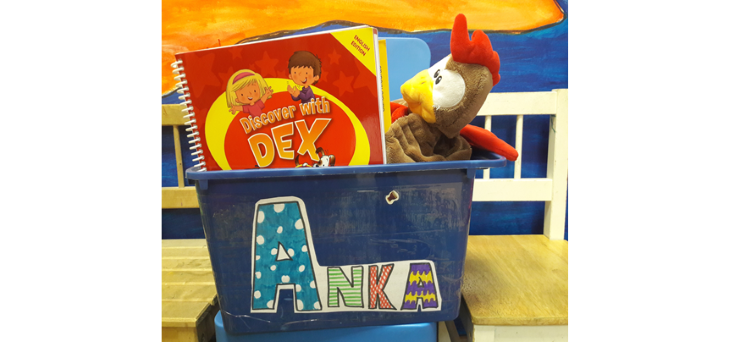
I love my beautiful classroom, all the puppets, the flashcards…My rucksack that makes me look and feel like a proper Mary Poppins, the box with all the precious junk. How we sit in a circle to read a story and how we make stuff or play with a Magic Bag…

But, then, hey-ho, the pandemic happened and I and we just moved online. Just like that. Just to prove that the EFL teachers are the most amazing species. Just to see whether one can, in fact, develop professionally, at a head-spinning pace, learning about new approaches, techqniues, platforms, games, tools, tricks, websites, solutions…and about their effective use in the online EFL lesson.

Yes, indeed, one can. In March many of us (including myself) had very little or no idea about the online classes but look at us now. Superheroes!

But guess what? The Universe had other surprises in store for us (I mean, of course, it is 2020, the year of surprises), like this idea, here…

‘Can we just stay online?’

I don’t know about you but I have spent the last 100+ days dreaming and daydreaming of going back offline. But while I was doing this, the other stakeholders had their own ideas and this is how we (the parents, the admin and the Mary Poppins here) found ourselves discussing the options and, actually, willingly, considering choosing to stay online with the youngest children, regardless of the situation in the city.

Well, that was a bit unexpected, to put it mildly. However, once I got past the stage of the initial shock, I was able to look at it all in a more objective way (as in: not blinded by my own old age and stubbornness:-) and actually see some of the benefits, for all of us.

So here goes, in no particular order

Pre-primary online is better because…

  • We can do it! A good quality online classes for pre-schoolers are not a marketing spin. Impossible is nothing! We learn, we are engaged, we have fun, we produce, we develop, we bond. We are loving it and we are looking forward to the next one. You only need to want to make it work and just like with the regular classes, everyone needs time to get used to each other, the routine and the rules of the game.

  • It’s virus-free. Covid 19 aside, little children get ill more frequently. That’s just the way it is. It does happen that they might not be entirely healthy when they come to their afternoon English lesson or that, being ill, they miss a lesson here and a lesson there and they do not make as much progress as they could have. The online classroom is a perfect solution here: we can all participate, even if we sneeze and cough and the school and the teacher do not lose money over the classes that would have to be cancelled.

  • It lowers the affective filter. There were a few students in my groups this year who definitely benefitted from moving online. In the classroom, they were amazing and a pleasure to teach. They participated but at the same time struggled, now and again, with being separated from mum. They simply flourished in the online classroom. I can see how much more confident and at ease they are, sitting in their own chairs, in their bedrooms, with cats, toys and, most importantly, with Mum at an arm’s reach. What’s not to like here?

  • It is less stressful for the teacher. It is a little know fact that VYL teachers, in the course of their career, develop a set of eyes around their heads and can produce a pair of additional arms, on request. They are ready for everything that is happening, for everything that is to happen and for everything that might potentially happen, too. Why? Because acting in loco parentis is a huge responsibility. And a lot of stress, even for those experienced teachers. The online classroom comes with an army of the best teaching assistants there are: mums, dads, grandmas, sisters, brothers and nannies. The kids are safe, every single one of them.

  • Parents like being in the classroom. So far, the classroom has been this galaxy far-away which the parents had no or very little access to. Of course, teachers talk to parents, they explain the homework, they give feedback. They share songs and send out the invitations to the open lesson, twice a year. Now, however, the whole course is one big open lesson and the parents are a part of it. More even, they are having fun. Not because they want to interrupt or tell the teacher off, not to take over and not because they do not trust the teacher and would rather keep an eye on things. It’s because they can finally see how their children operate in the world of the foreign language, how they become more independent and how they are learning new things and making progress.

  • Parents can get properly involved now. The parents are there, they learn our songs, they play our games and they see exactly what we practise and how. If there is time and willingness, they can easily extend the English lesson time, take it ‘out of the classroom’, this way contributing to their children’s progress. During the lesson time, they can be involved in too, helping the teacher model the activity but also helping their child understand that, yes, you can sometimes speak to your mum in English, too.

  • Flexibility and frequency. 45 minutes in the real classroom is just enough for the little people. 45 minutes in front of the computer screen might be a challenge, especially if they audience is only 3 or 4 years old. For that reason, we decided to experiment and chop the lesson time into smaller bites. Now we meet for thirty or even fifteen minutes at a time but more often. The students are involved throughout and stay focused, the financial expenses or profits are the same, and such lessons are very easy to plan. The most important thing, however, for me as a teacher, are the benefits for the learning process. When you are 5, you learn quickly but you also forget quickly, so by increasing the frequency of the lessons, we create better conditions for learning and can expect better results. It is already happening!

  • The lesson time = the speaking time. The ‘time constraints’ mentioned above as well as the online format had an impact on the lesson structure and routines. The students have the coursebooks but it is used only at home, for revision and for homework. When we meet in our online classroom, it is to learn new things, to listen, to sing and to speak and speak and speak. And I really like that way.

Much to my amazement, I am a happy online teacher but that doesn’t mean that I have stopped dreaming about the offline world or that any decisions have been made. It’s too early, anyway, so I am still on the fence, just ‘sitting, waiting, wishing’, like in a song.

What about you? Has this been your experience, too? Have you noticed any other benefits of the pre-primary EFL online classes? I would love to hear from you.

Happy teaching (online or off:-)

Early literacy online: when technology is on your side. Part 1: Reading

Switching to the online and making it your place could be, in my case, described as flying colours or one step forward two steps back, on different days. Nothing wrong with that, a new reality, transitioning is a part of the game.

But, surprise surprise, I love teaching literacy online!
1. It is easier to get the kids focused.

2. It is easier to keep the whole group on the task.

3. Adapting activities to the requirements of the online classroom is not that difficult.

4. I have been forced to get interested in many apps, online games and programmes that I have, stubbornly, avoided so far.

5. We are improving and are better at reading.

The wonders of the Miro board, any level of literacy skills.

My Big (online) Book of Words: first letter level

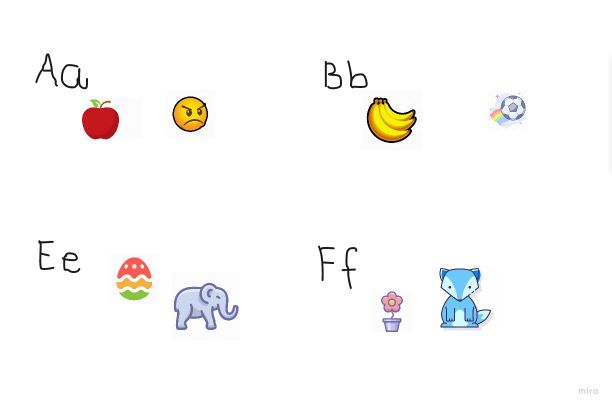
It has been our tradition with all the pre-primary groups to start our class Big Book of Words where we collect all the words we know, gluing new cards (word+image) at the end of the unit and choosing a letter to read in every lesson as a part of our class routine. Since we’ve moved online, this little tradition had to be updated, too, but it was quite easy because on the miro board you can pick any image and quickly, too. Whatever word your students bring up, you’ve got it!

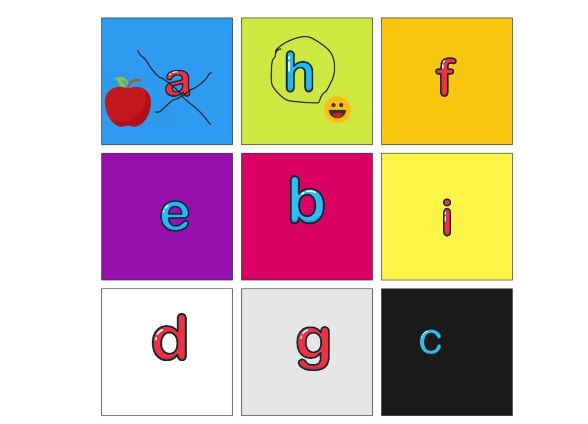
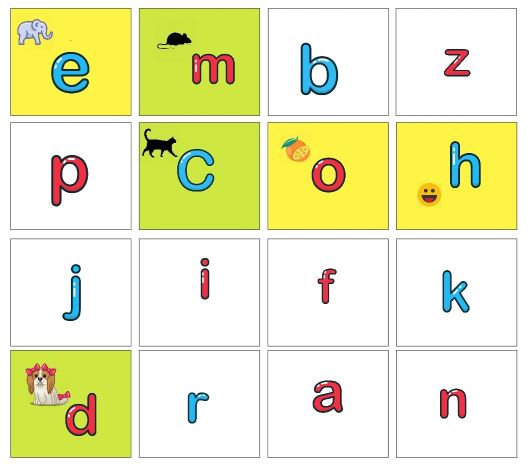
Noughts and crosses online: the first letter/sound level

It is one of my favourite games and so no wonder that there must have been a way to adapt it to the needs of early literacy and, then, to the needs of early literacy online.

The advantages are obvious: the older kids are familiar with the game and its rules and it tasks only a moment to prepare, online or off and you can easily focus on the chosen letters or phonics. With the older students in groups we play in teams, the kids choose the box and give a word that starts with that sound/letter. Some of them still struggle, that’s why each box contains not only a letter but also a number. This is what we use to choose.

With the younger kids, we keep the competitive element out, we use a bigger grid and we simply colour it in.

Phonics stories: sentence level

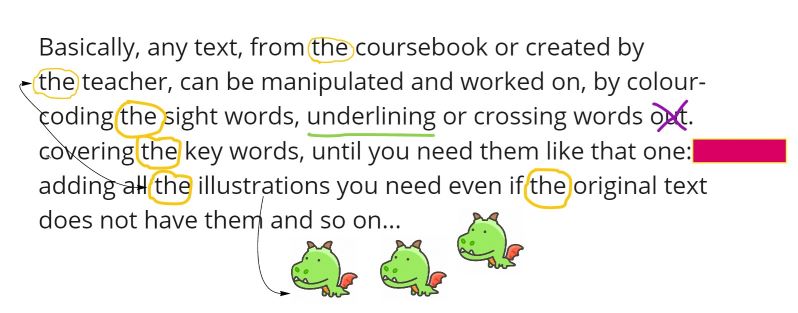
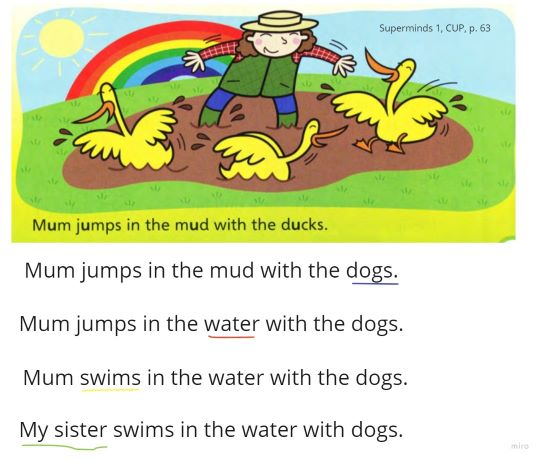
Before the kids get to read for real, they need to practice on simple phonics stories. They are inlcuded in every coursebook, some of them are more interesting, some are less but there is always a way of getting a little bit more of them. After a few rounds of listening and reading the story from the coursebook (‘Mum jumps in the mud with the ducks’) and then words in different order, the teacher does a sort of a ‘substitution drill’, revealing more and more sentences with one different word to really encourage them to read. The key words can be underlined, too.

This activity can be followed up by the students creating their own similar sentences and the teacher typing them up on the whiteboard.

Quizlet quiz: sentence level

Instead of putting single words and images or single words and translations, we use definitions. Students read them together and try to guess what it is. Then we check! To make it more challenging and to turn it into a real quiz, you can ask the kids to write the words and check at the very end, award points.Or not.

True or false: sentence level

It only takes an illustration, one of the pictures in the coursebooks or in the Cambrige YLE Wordlist Picturebook or anything else available online and a set of sentences that the teacher prepares beforehand.

They can be written on post-it notes or have them covered by shapes to be removed, one by one and ask the kids to react to the text. If the sentence is true – they clap their hands, if the sentences is false – they raise a hand.

The activity can be extended into a writing a activity, too. If nothing else, they can type them up into the chat box for the rest of the group to read and react.

Shared reading: text level

Shared reading was one of our favourite activities this year, until we had to move online. Doing it online is a bit challenging since not many storybooks are available online.

Online phonics stories like those from the youtube channel English Singsing https://www.youtube.com/watch?v=9C1qj06xduo&t=104s might be a solution but I have also started to use Barefoot Books, also on youtube https://www.youtube.com/watch?v=Lrd0TiER_J0. We use them with the sound switched off and at the lower speed. This and the bouncing ball really helps the kids to focus and to follow the text with ease.

Useful websites

  1. Phonics Bloom https://www.phonicsbloom.com/
  2. Oxford Owl https://www.oxfordowl.co.uk/for-home/find-a-book/library-page
  3. Starfall https://www.starfall.com/h/ltr-classic/
  4. Reading A – Z https://www.readinga-z.com/phonics/decodable-books/
  5. Kidz Phonics https://www.kizphonics.com/materials/