All photos dedicated to the city. Happy Birthday, Moscow!
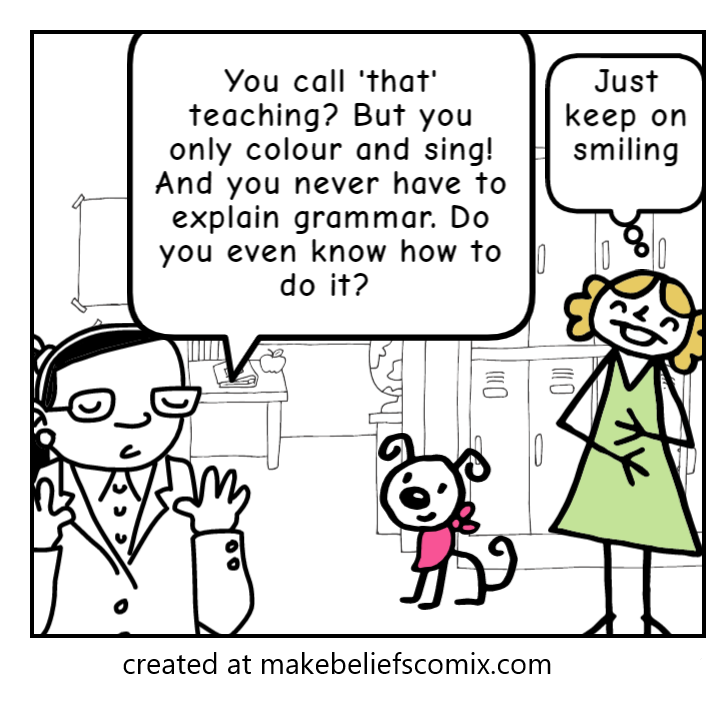
Everyone gets to answer the question, at one point in one’s life, at least once. ‘What do you want to be when you grow up?’ On my personal wishlist, over the years, there were the following: a ballerina, a doctor, a woman (the first one), a plumber (that is the latest, my plan for the retirement years) and…a teacher. No idea if that means ‘no ambition whatsoever’ or ‘achievable aims’ but nevermind that. I am a teacher. Yay to these dreams that come true, tick!
I have been planning to write this post for a while but I’ve been struggling and what I ended up with was either a lot of sentimental waffle or some lofty speeches worthy of an educational Thomas Moore. No, thank you. Instead, I am going to hide behind a few stories, hoping that they will collectively illustrate why one might want to become a teacher.
There is a boy in this story, a local troublemaker, who actively spent his school time making his teachers’ life ‘interesting‘ for three years straight. There is always one of these in every class and someone has to be their teacher. The teacher and everyone else survived.
The same boy, fifteen years on (15!), meets the teacher’s brother at some kind of a social do in the hometown. ‘I was a nightmare at school‘, says the boy, already an adult, ‘Say hello to your sister and pass on my apologies‘.
There is another student, a girl this time, that the same brother meets at another do in the hometown. This student, years on, also asks the brother to pass her regards. ‘I don’t remember many teachers from the school.’, she says, ‘I do remember her. She was cool.’
There is an adult student, Olga, who gets in touch via Instagram and it turns out that she is also a teacher now and that seems to be inspired to become a teacher of English in the teacher’s classroom, about ten years earlier. And it nothing short of touching…
There is the first student ever, her own cousin, Magda, and the lessons which were based on pure enthusiasm and on intuition because the teacher was more of an ugly duckling and not yet a real professional. Now, imagine this teacher’s emotions when, a few years later, she was sitting in the hallways of the university, waiting for Magda to pass her final exams and to be awarded an MA in English and Translation.
There is a teenager, only a year ago, at the summer camp. This teenager fills in an anonymous feedback form and in her commentaries on the English lessons writes ‘I’m not scared anymore‘. To be honest, that reduces the teacher to tears because, really, although the lessons were good, she thinks ‘Ihave not done anything special‘, and yet, that seems to have made a difference.
There is the little girl, Sasha. After one of the lessons, this little girl comes up to her teacher, looks at her with a very serious face and says: ‘Anka, thank you very much for preparing such interesting activities for us‘.
It’s been a good few years already but the teacher still hasn’t recovered from the happy shock that this conversation was. The little people hardly ever do that. They will go for it, they will take part and leave the classroom happy. Sometimes, they might bring you a dead ladybird or donate the only balloon they have. Sometimes they may actually confess ‘Я Вас люблю‘.
Very often, though, as soon as they leave the group or change the school, they simply forget. Just forget. I like to think that they make room for new memories and new information. Out of sight, out of heart, without any metaphors. And no honourable mentions on the social media. But that’s ok, that’s simply how it is and it doesn’t matter. The teacher knows anyway that maybe she will not be remembered, but she did make a tiny little bit of a difference.
But there is more than just the blast from the past, more than just memories. There are the kids in the classroom, here and now. It is a good feeling to be looking at their progress test results. It feels great when they come back in September and proudly show the certificates they got from Cambridge.
It is even more beautiful when during the most regular lesson, you realise that the shiest and the quietest teenager in the world now leads the debate and presents winning arguments, with the confidence that could move the mountains. Or, that the student who entered the classroom five years ago to learn her first words, now is telling everyone about something that happened at school that morning, a hilarious story from the cafeteria, with the narration and the dialogue, with only a few grammar hiccups which are still to be expected since it is only A1 and she is only 9.
So, for a moment like one of these, the teacher is still a teacher.
And, now, as a reward, since you have lasted until the end of this post, here are all the articles that might come in handy in September.
This post is dedicated to all the teachers who soon are going to be entering the VYL or YL classrooms for the first time ever and are now wondering how to prepare for that.
Why?
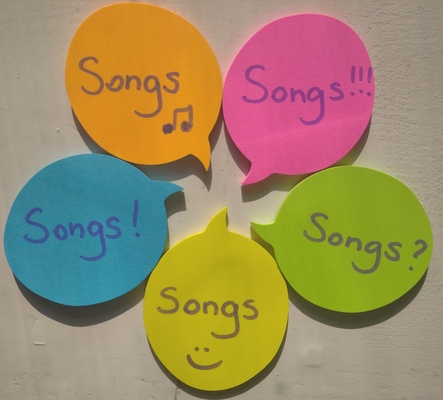
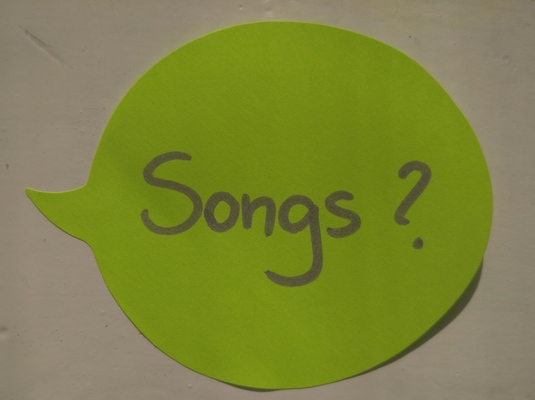
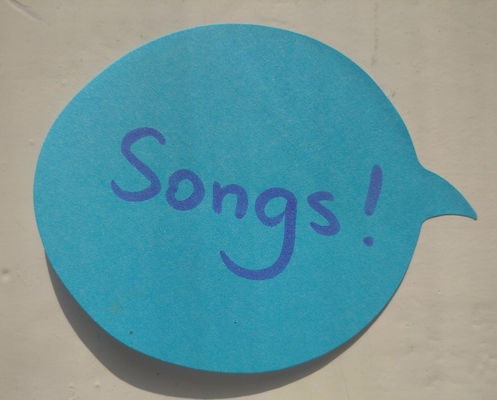
Songs are definitely the resource that a teacher should use while teaching primary or pre-primary. A while ago I have tried to collect all the reasons to sing a song in one post (the full list here) but if you have never sung before in the classroom, here are the five most important reasons
songs will help you create a framework for the lesson, something to begin with, something to finish with, some nice punctuation marks in the lesson
they will be the easiest way of changing the pace of the lesson. Even if the kids don’t participate fully from the very beginning by singing, the song itself will work as a stirrer (or a settler, if you choose a very calm and peaceful one)
they will create an opportunity for the children to participate, at least with movement and gestures and, depending on the song, even with a few words or structures
songs are something that we all do together so they will help you ‘unite’ the group after the tasks on which the kids work individually and they will help to create a community
you can share them with the parents, to listen at home, this way taking English out of the classroom
Some do’s and don’t’s
Staging a song lesson for pre-primary or primary should, in fact, be a separate post, because there is a great variety of techniques and activties that can be used. For now, I can recommend having a look at this post here as well as the five tips.
Listen to the song before the lesson and get ready. Plan how you are going to introduce it. Simply pressing the PLAY button and saying ‘Let’s sing’ is not going to do the job with songs in the EFL / ESL classroom.
Play the video. It will really help the kids understand what the song is about.
Sometimes they are already in the song and in the video, sometimes not and we have to come up with a set to use with each song. It is something worth investing your time in because the gestures will help the kids understand and remember the lyrics. What’s even more important, especially in the first lesson with a new song – gestures will give the children a real opportunity to participate.
Sing yourself, do all the gestures yourself. And with a smile, too! Even if you are the only one and even if the students don’t join you straight away. It is perfectly natural, they need time to get used to the music, the lyrics, the gestures, the rhythm. Plus, you are the leader! If you don’t get involved, why would your students?
Share the song with the parents and use it again. A song is never just for one lesson.
My favourite hello songs
Hello. Super Simple Songs – a real hit and a good start, with 6 emotions, including ‘not so good’, to show the kids that it is ok to feel not happy, sometimes.
Hello Song. Fun Kids English– another good one, with monsters, there are actually two parts of it, each with 4 emotions. It is good to have a new version when the kids get bored with the first one.
Hello Song For Kids, The Singing Walrus – I love it because it includes not only the hello questions but also some Present Simple sentences and questions about the everyday school routine (‘Everyday I go to school) and each of them is repeated twice, in the classroom it can be T and then kids. Lots of potential.
Hello Song for Kids, EFL Kids Videos – very simple but very energetic, lots of repetition but also a nice variation of verses sung loudly and quietly. We loved it.
Hello Hello! Can you clap your hands. Super Simple Songs – another simple one with a few movements, perfect if you want to get up and move a bit
My favourite goodbye songs
Goodbye to you! EFL Kids Videos – using the same melody and the same pattern as the hello song from EFL Kids Videos, helps to save the time and works both as ‘something old’ and ‘something new’
Bye Bye Goodbye Super Simple Songs – a kind of a follow-up to the Hello Hello Can you clap your hands, the music is different but the song uses some of the verbs.
Goodbye Song for Kids, The Singing Walrus – this one is a bit more complex, but again, as their hello song, it uses full sentences. Lots of potential.
See you later, aligator, Super Simple Songs – a very short one, includes gestures for alligator and butterfuly and if you want, it can go on forever.
My favourite movement songs
Head, shoulders, knees and toes, Super Simple Songs – everything you may need in your first lessons, just getting up and moving a bit, even if the topic of body parts is scheduled for some other day
Move. Dance Song For Kids. Super Simple Songs – my latest discovery, lots of movement (verbs), a great melody. It can be used partially ie the first three parts of as a whole. It can be also extended if kids have their own ideas.
Jump, Run and Shout. The Singing Walrus – another energetic, rock song with movement. Just like Move, we like to sing it in the beginning of the lesson. It helps to get rid of lots of energy.
The Jellyfish Song. Super Simple Songs – a simple but effective song, very little langauge here, you are going to be pretending that you are jellyfish. Somehow, the kids get a chance to move but also to calm down.
Shake Your Sillies Out. Brain Breaks For Kids. – this is one is for older kids, lots of great ideas here and quite tiring, when used from the beginning until the end, but my kids loved the idea of ‘shaking the sillies out’ or ‘clapping our crazies out’ (very necessary on some days) so we only used the movements, not the song.
My favourite randomness
Open Shut Them, Super Simple Songs– one of my favourite songs ever because it teaches adjectives and opposites (somehow neglected by many of the coursebooks and programmes) and you can easily include gestures. Plus there are four parts of it which means that a new one can be added as soon as necessary. Open Shut Them can almost become a part of the classroom routine for the whole year and later on, the teacher can even extend it by creating own versions.
Hickory Dickory Dock, Super Simple Songs – some counting, some animals and an unexpected ending.
What’s your favourite colour? Super Simple Songs – first of all, it can be inroduced from the beginning of the course (colours), it can be used as a game (to point at different colours in the room as the come up in the song) and, last but not least, it contains a great Q&A set (‘What’s your favourite…?’ ‘I like…’) and it can be turned into a real conversation and easily extended into other topics, as they come up i.e. toys, numbers, pets, letters.
My name is Vader, Darth Vader. I am a teacher and a teacher trainer, I work with VYL and YL teachers.
Well, not really. I would like to think that, as a trainer, I smile a lot, I am supportive and open to questions and debates and I only shout at football matches. But there are those moments, on the courses that I teach or just in the everyday mentoring life, when I feel I am taking on some of Mr Vader’s traits. Although even then it is more in the style of the Darth Vader in the photo above.
One of those Darth Vader moments is defnitely induced by some of the concepts and beliefs related to teaching English to young and very young learners. They are out there, in the world, and although they are entirely ‘wrong’ or ‘incorrect’, they have already become some EFL YL clichés that can cause more harm than good.
In the post below I will share with you my top five ‘Think Twice Concepts’ in the early years EFL. A very subjective approach, I must warn you. Are you ready? Fasten your seatbelts! Let’s go!
courtesy of Юлец
Bad behaviour
There is nothing that could be labelled as ‘bad behaviour’, not in the EFL classroom full of pre-schoolers. There is curiosity put to practice, there are emotions in action, there are boredom- induced replacement activities. There is fear that materialises itself as agreession and a general lack of goodwill. There is tiredness, hunger, possibly, or, on the contrary, the high levels of sugar from the chocolate bar eaten five minutes right before the lesson or the memory of the morning visit to the doctor and the unpleasantness of it that still lingers in the air (although the arm really did stop to hurt after a jab about three hours ago). There are, also, plenty of examples of ‘I will do what I have always done in such situations and if it has always worked so far with mum, with nanny, at home, at pre-school and at the playground, it is bound to take the required effect here, too!’
There is no bad behaviour, although sometimes we get to deal with ‘the unwanted behaviour’, that might be getting in the way of our lesson or other children’s physical or mental well-being.
Solutions: first of all, react, ideally to stop this unwanted behaviour, or, at the very least, to signal that it is not what we want to have. If one thing is certain, it is that it is not just going to happen, all by itself. Then, after the lesson, when everyone has already left and when the dust has settled – reflection. Was the first time that it happened? Does it always happen? Is there any chance that some triggers could be identified? Was it in anyway related to the activities, to what the teacher did, to what other children did? What happened later?
It is always a good idea to talk to the parents or carers, too. Not to complain or to blame the child or the adults but mostly to understand what really happened and why. And perhaps (but just unfortunately ‘perhaps’) this information will come in handy the next time it happens.
Egocentric
I don’t think I will ever be able to forgive Piaget for using this particular adjective to describe the little kids’ attitude to the world and to the people in it. It is a perfect example of a concept created by adults and used to refer to people who are not adult yet and whose attitudes and reactions are what they are simply because they have not had a chance yet to grow and to develop fully. In the EFL terms, it would be like sending a seven-year-old beginner to take an FCE exam and then scolding them for failing while they are simply not there, not yet and they should be seen nowhere near the exam room.
Of course, pre-schoolers might struggle with sharing the box of crayons, they might want to always be first and always hold the teacher’s hand. They may not like to sit next to Pasha today and they will not want the other children to touch the car they brought to class, to show off a little bit. They will not be happy about leaving their picture in the classroom for the teacher to display on the noticeboard. And they will all want the princess flashcard. But all of that happens because they are just learning how to be a person in the world full of people and a person in that particular group of children learning English.
Solutions: The most important of them comes from Mick Jagger because, indeed, ‘Time is on my side, yes, it is!’. The group of children starting to study together in September will be changing, from lesson to lesson, and even after a week or two or three, they will be a completely different bunch, only because they have had a chance to interact with each other, to do something together and to find out that a group is not Anka and five other someones but Anka and Sasha, Pasha, Kirill, Mitya and Olya, some of whom we like a little more, some of whom we like a little bit less.
Apart from that, there are also all the tricks that the teacher can use throughout the course, to help the little people bond and start noticing the other children and start to learn how to share the lesson with them.
So, no ‘egocentrism’ but ‘social skills that are still developing’.
A typical five-year-old child…
Apart from the knowledge of the language and the knowledge of the methodology, the knowledge of the child development stages is one of the three areas that an EFL teacher working with young learners needs to be familar with (Mourão, 2018: 429) and it is great to see that a summary of these characteristics have made it into the professional literature ( Mourão, 2020: 33 – 39) and are easily available online.
At the same time, there is a danger that teachers will be looking into these and applying them too religiously, without considering the differences between the individual children. As Mourão (2020: 215) says ‘Children develop holistically, show individual differences in development and progress at different rates’. That means that even if we had a group of only five-year-olds, all of them coming from similar environmenta and all of them provided with the same opportunities and, even, why not, all of them born on the same day, they could all develop their cognitive, motor, social or linguistic skills at completely different rates. As a result, despite the fact that the group would be theoretically homogenous, a teacher would still have to deal with a mix of abilities. It seems that a teacher equipped with a little knowledge and induced by this knowledge expectations of the children and of the lesson might be even more damaging that no knowledge at all. Because typical five-year-olds don’t exist.
Solution: an open-mind and an organic approach to the little people sitting in the classroom. Instead of applying strict frameworks and checklists and trying to make the kids fit in the tables (which they are more than likely not to be able to do, as a group or as individuals), reading and researching the age group in a close connection with the specific students whom we teach at the moment.
Short attention span
This is, without any doubt, one of the most important differences between an adult and a child learner and this is the one that gets highlighted most frequently. For a reason, too.
However, at the same time, any attempt at specifing what that attention span is or, even more, at quantifying is, simply, pointless. Much as it may give the (false) impression that once the concept has been assigned a number, it is not as scary and it will be easier to deal with, especially for those of the teachers who have little or no experience of working with the younger children. It is from them that I often hear that ‘an activity should not take more than five minutes’ or, even, ‘it is the child’s age plus one minute’.
Well, I wish it had been that straightforward.
In real life, the attention span will be very much dependent on a number of factors that nobody is able to predict or enlist, and, as such, it is simply impossible determine once and for all. Children’s attention span will be related to their age, to some extent (although it will materialise itself in a way unique for each child) but it will also be affected by absolutely everything that might have had an impact on the children’s mood before and in the lesson and the teacher’s mood before and in the lesson. Such as? Such as the first snow of the year, a spider in the classroom, a visit to the doctor just before the lesson, a swimming lesson just before the lesson, a birthday party attended, a grandma’s visit, candy eaten before the lesson…Or a teacher who has had an especially tiring or stressful day, any malfunctioning technology or a handout lost. Any of these and the tried and tested activity that has always worked with the same group or the same age group, that has had the kids in awe and involved for five or even ten minutes, can quickly turn into a failure or the most boring and unappealing activity in the entire world.
Solution: first and foremost, switch off your adult thinking of what happens in the classroom. The kids, young or very young, they will not be just sitting behind the table, patiently waiting for you to start what you have prepared for the day AND they will not stay involved in it for a prolonged period of time as long as you think they should. Second, while planning a lesson, think about it from your student’s perspective and ask yourself what your students might find interesting about an activity. Is there anything that would motivate them to engage in in? Anything else that just the mere fact of this being an activity done in a lesson.
Then, in the lesson, itself, keeping your eyes open and adapting to who (and in what state) you have in the classroom on the day is the best way of dealing with all the implications of the short attention span. And, although I would argue that this applies to all the age groups and levels, being ready to let go and teaching the students and not the plan, not the coursebook, not the handout and not the activity.
‘They don’t like singing’
Sorry, permission to disagree here and yes, even before I have seen you in the classroom and before I have met your little students. I don’t think it is true, simple as that. Why do the teachers say that then?
Partially, it is because, again, the adult perception of what song and singing is and should be gets in the way. On the one hand, when we listen to songs in our non-teaching life, we do just that, we listen and take pleasure in it, hopefully. There is nothing wrong with it, and, indeed, I believe that listening for pleasure should be sometimes included in our lessons, too. The only ‘problem’ with very young learners is that they might not be familiar with that kind of an exercise and after a minute or two, with no other task, they will be getting bored and distracted. And, possibly engaging in other, unwanted, activities.
On the other hand, when we use songs in the EFL lessons, we expect the students to sing these songs and in case of pre-schoolers or even primary school children, it will take them for them to master all the elements of the song, the music, the rhythm, the lyrics, before they are actually ready to sing. If the teacher expects a real performance in the lesson in which the song was introduced for the first time, they will be disappointed. Again, the children might remain focused for a minute or two and then, again, they will find something else to do and the teacher will arrive at a conclusion already mentioned in the heading to this paragraph.
It is true, that the word ‘singing‘ could be replaced with absolutely any type of a YL activity, ‘craft’, ‘miming’, literacy’, ‘animals’, ‘this game’ and the implications would be the same or almost the same. It is also true that music-related activities are more likely to feature here. Mostly because teachers often worry that they themselves cannot hold a tune or that they are not confident enough to sing in front of others.
Solution: forget about you and your pre-conceptions, your teacher previous knowledge and try. It might be that you yourself are not the world greatest fan of Baby Shark and of pretending that you are a…melting ice-cream (btw, one of the real ideas suggested for the miming game by my students) but the simple truth is, if the teacher does not make an effort and if the teacher does not get properly involved in a song or in an activity, it is almost a given, that the students will not, either. Especially, the little ones. And, really, the most amazing thing about the VYL audience is that they really do not care whether their teachers sing well or badly. The only thing that matters is whether they put their hearts in it or not.
And as for the other problems, be it music or craft, scaffolding and lesson planning is the answer and no two ways about it. If you need any more convincing to why we should use songs with children, please have a look here and if you are looking for some ideas of what can be done with a song to maximise language production, you should definitely look at this post here.
Coda
This post is not only about me having a little venting session on a Monday morning. It is not a critique on the people who use these terms and it is definitely not about my ‘What not to say’ list that I will be handing in to all my teachers and trainees from now on.
I decided to put this post together because it seems that all these clichés start in the very same place and that is when adults try to apply adult categories, labels and concepts to children and to how they see the world, how they learn and how they grow which might lead to misunderstanding, confusion and frustration in the classroom.
Perhaps there should be one more thing added to the list of skills and areas that a VYL or YL teacher should be equipped with, apart from the three mentioned by Mourão (2018)? The knowledge of the subject and of the appropriate methodolody is absolutely crucial and so is the awareness of the child development stages. They are an absolute must and a starting point. Still, they are going to be of little use in the real life if a teacher is not going to be willing to switch the perspective and to try to see the lesson and everything that happens in it from the point of view of a three-year-old or a seven-year-old.
As everything in teaching, nothing happens overnight, and it takes time to develop the ability to observe and to analyse your students and their behaviour and to learn from that. The good thing is that the very willingness to accept the fact that a different perspective is needed is already a big step towards success.
Sometimes, changing the perspective physically can make a real difference, too. In our teacher training courses, we sit at the big tables (of course, we are adults!) but there always comes the time when we transfer to the little stools in a small circle. We do it to practise different games and to reflect on them but this is also a great opportunity to experience how the furniture and the set up can influence the activities and the emotions.
This blog post can hopefully be a good first step, too!
What do you think, dear reader? Are there any other terms that you would add to this list? Please leave your commetns below!
Happy teaching!
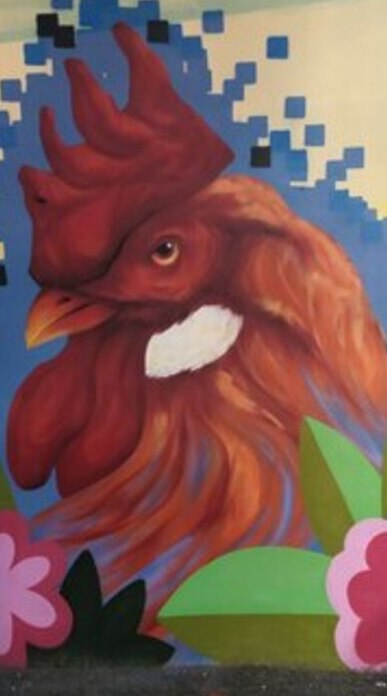
P.S. All the amazing animals in the photos live in the streets of Yaroslavl. Mr Vader found a home in a coffee shop Free-da there. All photos – mine, apart from the rooster taken by Юлец and used here with her permission.
References
Development Matters in the Early Years Foundation Stage (2012), to be downloaded here
Mourão, S. (2018), Research into teaching of English as a Foreign Language in early childhood and care, In: S. Garton and F. Copland (eds), The Routledge Book of Teaching English to Young Learners, Milton Park and New York: Routledge, p. 425 – 440.
Mourão, S. & G. Ellis (2020), Teaching English to Pre-Primary Children, Stuttgard: Delta Publishing
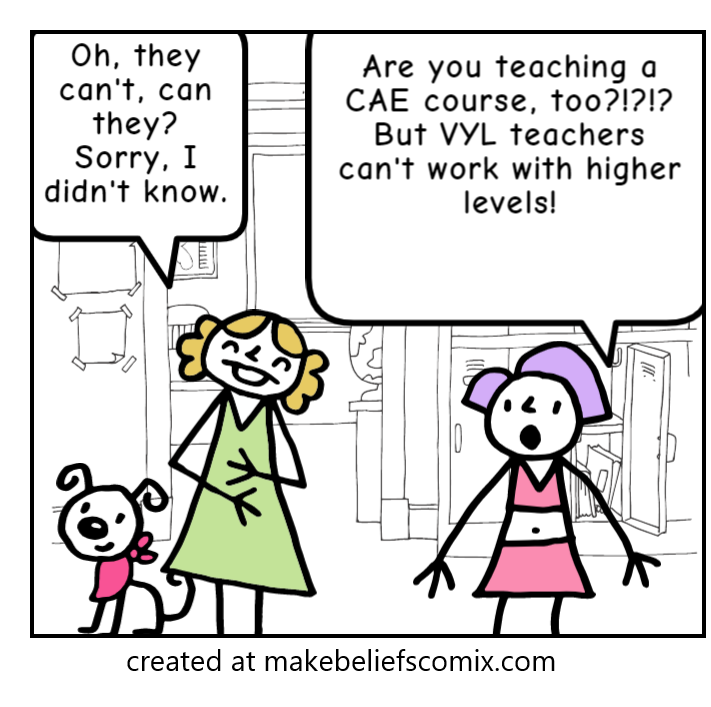
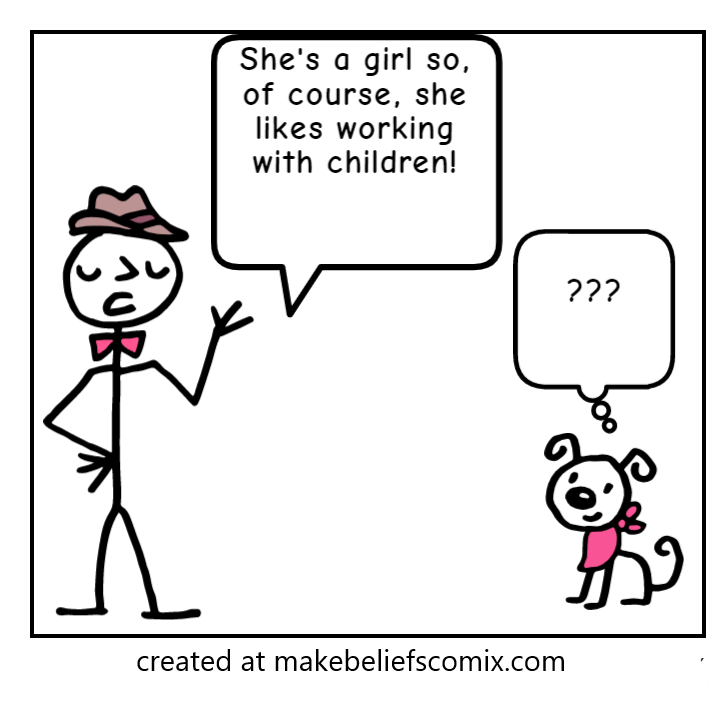
Most of the time, it is fast asleep, lying peacefully somewhere in the attics of my heart, covered in dust bunnies. Until, all of a sudden, it is rudely awaken because I find myself in the middle of one of the following conversations…
And that’s not everything. There’s more, lots more. Sometimes there are no (silly) questions but what happens is a rather intensive listening / lip watching event, in order to evaluate my presumably low level of proficiency in English or to detect some serious issues with pronunciation which, potentially at least, could justify the VYL-ness or YL-ness of me.
Why? Who knows.
The funniest thing is that, usually, it is not the parents, the students themselves, the HR or the admin of the schools but our own EFL nation, the fellow teachers, the colleagues who initiate these threads in the conversation. And it is not even the trolling on the social media or remarks whispered behind one’s back, no! More often than not, these are the things that people just throw right into your face…They have just met you, you have just been introduced, they don’t know a single thing about you, apart from ‘Anka, I teach VYL and YL‘ and yet, here we go…
Although, really, it would be very easy to turn the tables and start asking questions such as those ‘What?! You are NOT teaching YL?’ or ‘So you only teach (insert any non-YL area of ELF)? Doesn’t it get extremely boring and repetitive?‘
Only of course, I would not do any such thing. Because it is rude and/or unnecessary…And, no, I do not want everyone to be passionate about teaching children. We all have our own preferences and areas of expertise, things that we like and things that we hate, things that we are amazing at and things we’d rather not do.
Guess what? People choose to teach kids.
It is 2021. Out there, in the big, wide world, there are fully-educated, native speakers or non-native speakers teachers of English, male and female, mums and non-mums, private language school teachers and state school teachers who choose to focus on and to specialise in teaching English to children.
Because it is… more interesting, exciting, creative, inspiring, rewarding, fun…Despite the fact that ‘you can’t really have a conversation with them‘ or despite the fact that ‘you can’t ever teach Present Perfect Continuous Passive‘.
Even as I type these words, I can see a long list of names, my friends, colleagues, mentors, trainees who I have had a chance to meet and to work with, people who are amazing professionals, able to work with any level and any age group but who have found their true calling in working with the youngest of the EFL learners.
Many of them have already build their professional portfolio and, on the way, have grown a thicker skin. Comments and questions, as those quoted above, annoying as they are, will not really cause much damage to the system. ‘Sticks and stones can break my bones...’and all that. These teachers will be able to come unscathed by casually mentioning the years in the classroom, the feedback from their students or parents or maybe also a DELTA, an MA degree, Cambridge exams passed, IELTS bands received, publications, conference presentations and what not. Thus signalling that there are some alternative conversations to be had. With some alternative interlocutors, perhaps.
These experienced teachers I am not concerned about. They are and they will be fine. More than fine, in fact.
What worries me is that somewhere out there, there are novice YL teachers or newly-qualified teachers or, indeed, some would-be teachers, having been exposed to this kind of narrow-mindedness, will get into thinking that an English teacher first of all has to choose only one area of specialism and that a choice between ‘a teacher of English to adults/exams/IELTS/Business’ and ‘a teacher of English to YL’ is also a choice between qualifications, professionalism, respect and the lack of them. Which it is not.
Dear colleagues, dear amazing VYL and YL teachers! Thank you for being in the world! Thank you for your enthusiasm, dedication, ideas, creativity and energy. Thank you for caring.
And don’t forget – you rock!
Happy teaching!
P.S. What a rant, hey?:-) If you want to read some more positive notes on being a VYL teacher, check out this post on the hidden perks of working with the little people.
As soon as I said it out loud, it turned out that in my classroom is a crowded place. Apart from the teacher (that would be me), my students (older and younger), there is a whole bunch of characters who simply are there.
There is Pasha (the invisible student), there is Angelina (our class puppet), there is Mr Milk (the little-known-superhero), there is the Flying Cow…And there is also general Kutuzov. To whom this game is dedicated.
The thing is, general Kutuzov is a personal hero of mine. Every time I find myself in the middle of a big project, with one million areas to oversee and to manage, while on the verge of going crazy (because I multi-task well only in the classroom and in the kitchen), I think of general Mikhail Illarionovich Kutuzov, one man managing troops, camps, provisions, civilians, and all that in the face of the approaching enemy (aka Napoleon). This thought calms me down.
But not only that.
We sometimes play games with my kids (duh!) and sometimes they get very competitive (duh!) and sometimes, instead of ‘just playing’, some of them take time to think, to ponder, to come up with some very clever strategies in order to win…Which, on one occasion, resulted in me saying ‘Oh, look, here is general Kutuzov, planning something’ and ‘General, Kutuzov, please, can you make a decision? Today?’
They giggled. They are eight but they got the reference. And general Kutuzov stayed with us. So now, when they want to comment on someone taking their time to think or someone coming up with a strategy, they call him or her ‘general Kutuzov’ which, to be honest, I am rather proud of.
And that’s what I called that game:-)
www.wikipedia.com
How to play?
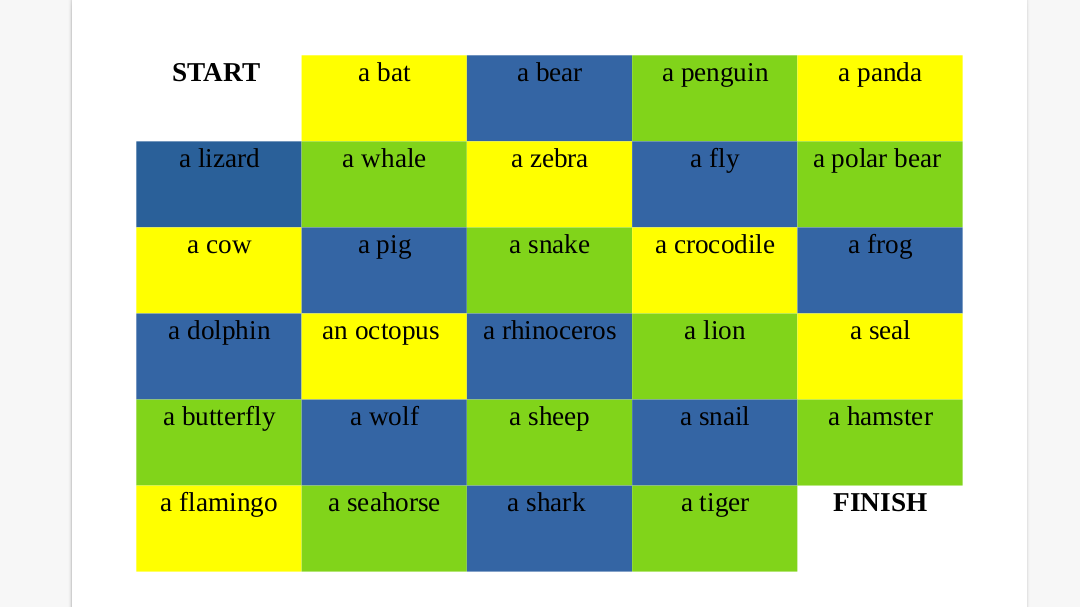
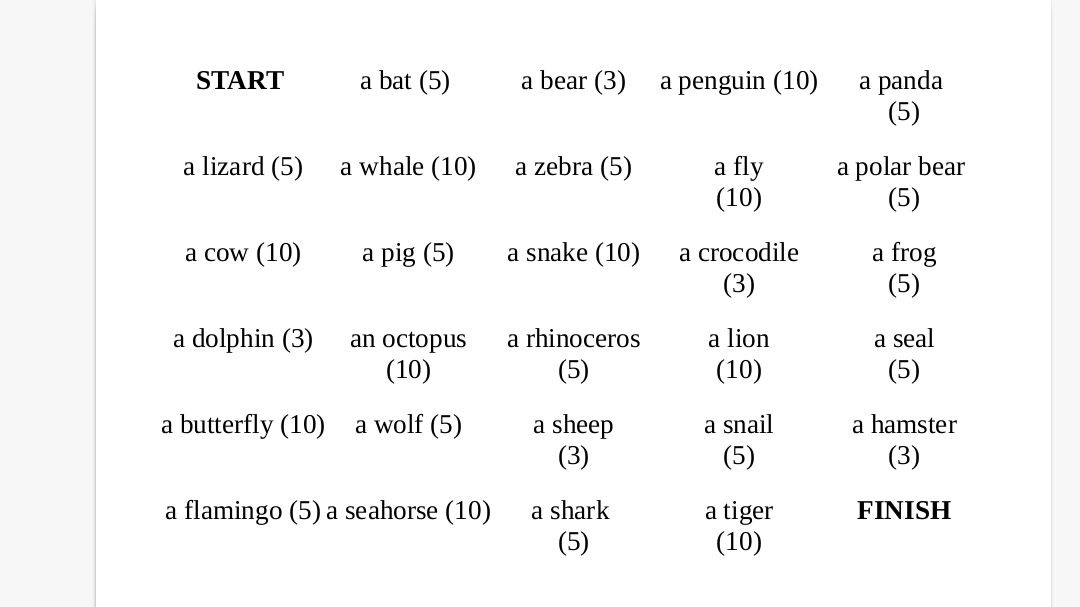
The main aim of the game is to get from the START to FINISH, choosing your own route on the board.
Players move across the board and as they do, they have to explain the word in each box. They answer the question ‘What’s…?’ or ‘Tell me about ….’
It’s always good to put the key structures on the board, to support the production. In the animals game, with my A1 students, we used ‘It has got…(body parts)‘, ‘It can…(verbs)’, ‘It likes to eat…(food)‘ and ‘It lives in… (habitats)’.
Students play in pairs or groups of three per board.
Players move one box at a time, to the left, to the right, up, down or diagonally up or down.
Each box has a number of points assigned and the students collect the points throughout the game.
I give the kids small cards, folded, on which they are to write their points and to keep them secret until the end of the game.
In the end, each player adds the points and we announce who the winners are, in each pair and in the class.
Why we love it
The game generates a lot of language and it keeps the students motivated and involved.
It is a competitive game but you can win it not because of good or bad luck but because you plan your movements well.
It is suitable for mixed ability groups as the students choose their route themselves and can, if necessary, avoid using the words they don’t know.
We played it in our offline lessons but it can be also used online, with the kids annotating on the screen. It would work best with individual students, small groups or big groups playing in teams.
It depends only on the players (or their teacher) how long the game is going to last. Naturally, the kids will try to get from start to finish and as soon as one player does it, the game is stopped and the points counted. At the same time, the teacher can set the timer at ‘ten moves per player’ or, simply, stop it at any given point in the game (with the same number of moves per player, of course), announce the end and count the points.
It takes a few minutes to prepare and it can be used with any kind of vocabulary, a thematic set (lower levels) or any random set of vocabulary taken from a story or a listening task.
The first time we play it, the game is teacher-led and we play with teams of students, on the board but once they get the idea, they can play in pairs.
No dice is necessary. Kids can either use checkers or colourful markers to draw their route across the board.
I have played it with primary school students (A1) and with my B1 teens, too.
The game can easily be made more or less challenging by keeping only two types of boxes (1 and 5 points, for example) or by adding more of those (1, 3, 5 and 10 points) and the number of points can reflect the level of difficulty of the word or phrase.
Players can move in any way they choose, one box at a time, but to make it more challenging, the teacher can exclude moving diagonally or any other of the movements.
The same can be applied to the rule of using the same box twice. It can be allowed or not.
I have thrown my kids at the deep end but I think that if I were to introduce the game again, in a new group, I would probably create a board of boxes worth only 1 point to highlight the importance of strategic thinking here. The kids figured it out themselves, though: the longer the route, the more points (the kids’ aim) and the more language produced (the teacher’s secret objective:-)
The board can be colour-coded. It will make it more attractive visually and it will help the kids understand where to move next, for example: a green box = 1 point, a blue box – 3 points and a yellow box = 10 points. Having said that, the black and white simple chart with points works equally well.
P.S. The inspiration for the game might have been a listening activity in one of the old coursebooks by OUP called ‘I Spy’ which had a listening activity in each unit called ‘the maze’. Maybe or maybe not))
Welcome to my favourite art project: The United Buddy Bears. I first met the bears face-to-face (almost because they are 2 meters tall so face-to-face, eye-to-eye is not so easy to do) in Sofia because we all happened to be visiting the city in spring 2011. They were an art project back then already (since 2002 actually) but after our encounter they also became an EFL Art Project.
The United Buddy Bears: Brazil
Ingredients
First of all, if you have never heard about the project, start with this article on wikipedia or the bears’ own website.
A set of photographs of some of the bears that I use in a quiz. The students are shown the photos and they are asked to look at them and guess the name of the country. Naturally, the set should include the kids motherland.
Depending on the age and the level, the follow-up stage might involve describing individual bears, especially the bear representing the students’ country or symbols in general, as well as talking about the bears they like or dislike.
The main objective of the project for the younger students (primary) is to draw their version of the bear to represent their country. First, it might be necessary to brainstorm and to introduce the vocabulary and concepts that people normally associate with the children’s country. In case of Russia, it is especially interesting as it creates an opportunity for the students to learn that they already know many of these words, for example balalaika, borscht, matryoshka and they only need to learn how to write them in the Latin alphabet. Then, the students decorate their bears using the template provided by the teacher and, eventually, present their bears to the group.
The older students are invited todesign a bear that represents them. It can be a bear that will show their hobbies, personality, favourite sports, school subject or a band, or, really, any concept that they consider important. The sky is the limit here. The students present their bears to their friends, ideally in a mingling activity.
In the end, all the bears are proudly presented on the walls of the school or the classroom.
In both cases, it might be necessary to start drawing and decorating in class, to make sure that everyone is on the task but to set the task for homework, with the presentation scheduled for the following lesson. Some students might need more time to complete their drawings or to prepare their presentation and that might help to solve this problem.
The United Buddy Bears:Poland
Why we like it
It works like magic. Or almost. Some of the bears are easy to interpret, some of them require a bit more of background information but this way they can serve as a springboard to learning about different countries. The set of bears used in the quiz can be easily adapted by choosing the more straightforward bears for the younger students.
Regardless of which project you choose, the students get a wonderful chance to personalise the content, either because they will be drawing to reflect their own interests and hobbies in the bear or because they will be creating their own version of the Russian bear. It is a very happy coincidence that the Russian bear (or the first Russian bear because later I did find some other versions) is rather ugly. As a result, all my students with whom I have ever done that project, all of them without exceptions, were deeply offended that it is supposed to represent their country and were more than eager to create their own, better and more beautiful bears. The one you can see below is the more beautiful, later version of the bear.
It can be adapted to different levels and age groups. I have done it with elementary primary students and with advanced teenagers.
It is an opportunity for the students to express themselves, to create and to produce the language.
It can be used to supplement the coursebooks and it can be done as a part of the extra-curricular programmes such as summer camps, CLIL etc.
The United Buddy Bears: China
Happy teaching!
The United Buddy Bears: Russia (the beautiful one) from www.buddy-baer.com
Here is my favourite character who would be a perfect amabassador for ‘We want more‘, my professional obsession (you might have noticed:-) and some of my favourite solutions for the classroom.
Trick number 1: The language
Regardless of what coursebook is used or what curriculum is followed, there are certain language items that can be included even in the pre-primary programme that will enable children to communicate and produce more language.
Some of these language items include:
descriptive adjectives, such as big – small, long – short, happy – sad, beautiful – ugly, serious – funny, old – new, etc. Introducing them in opposites will make it easier for the students to understand and to remember
simple linkers, introduced gradually, starting with ‘and’ (‘blue and green’, ‘cats and dogs’, ‘I like bananas and apples’), then moving on to ‘because’ ( starting with ‘I am happy because it is sunny’) and perhaps even ‘but’ (‘I like dancing but I don’t like dancing with a bear’, like in the song from Super Simple Songs).
introduce Present Continuous, because it will be easy to play with it in all the miming games and it will come in very handy while describing pictures and telling stories.
talking about other people. Personalisation is very important while learning language, not only with the little ones, but it is also a good idea to start introducing other people and the language we need to talk about them such as ‘she/he is / has got / can / likes’
Trick number 2: The freedom of speech
This freedom of speech has got very little with the civil rights. It is all about the degree of freedom that the students are given or, in other words, about the scaffolding and the support that are slowly removed in order not to limit the students and to enable them to choose what they want to talk about.
One way of doing it is shifting from closed yes/no questions towards more open-ended questions. ‘What do you like to eat?’ is more likely to generate more language that only ‘Do you like bananas?’ which will lead to one-word answers or maybe even only gestures. ‘Tell me about‘ will be a lot more generative.
Using this approach while working with illustrations, pictures or any kind of visuals will give students the opportunity to choose for themselves what to talk about. And it is quite likely that they will pick the topics (elements or aspects of the picture) that they are either more interested in, have more knowledge of or are better prepared to discuss. In any case, more language is likely to be generated.
Examples or real activities? Here you are:
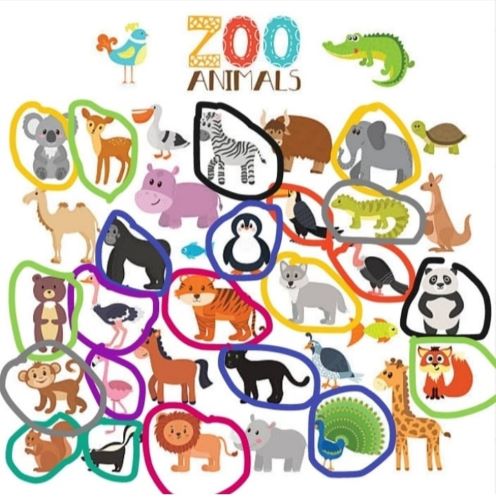
Pairs is a speaking activity that uses a simple material of a set of pictures. The students put them in pairs, in any way they want. They also have to justify their choice. In case of the younger learners, this principle can be the colour (‘Panda and zebra. They are black and white’) but kids can also choose any other reason for that, like ‘Zebra and horse, they have 4 legs’ or ‘Bear and deer. They live in the forest’.
This activity can be also used with the older students who are given a list of words and have to put them in pairs, according the knowledge and the language they have.
Below you can see the end of the game with my pre-primary student. It started off slowly, with simple sentences about the colours that the animals have in common but as the activity progressed, the categories changed, too and we have here an example of animals that have a long tail (a lizard and a monkey), animals that live in the forest (a bear, a fox and a deer) or animals that like meat (a tiger and a lion).
This is the final product of our Pairs activity, using the visuals on Miro
Tell me about is another activity that uses a visual, for example a set of pictures with animals or a picture scene. Students choose an element for their peers to describe, for example Tell me about this boy’ and it is easy to imagine the variety of responses that these can generate. Students can choose to talk they boy’s clothes, feelings or actions.
Trick number 3: The appropriate activities and materials
Our students do what we want them to do. It is assumed so, precisely because we are teachers and they are students. The roles have been assigned once and for all. The question to ask yourself, though, is Would they really want to do it, if they had a choice?Is there anything in the task itself that would encourage them to? Or not.
Certainly, it does not meant that all those less-exciting-but-crucial activities will be renounced forever, because even though they are not always fun from the point of view of our students, they might still be necessary and useful, but it is an interesting aspect to start taking into consideration while lesson planning.
Here a few activities that use that principle
Yes or no? This is an activity that also uses visuals as the basis. In the first stages of the activity, the teacher describes the picture using very simple structure ‘I can see’ when some of the sentences are true and some are false. Students listen to the sentences and correct the sentences. In case of the pre-primary students, this is likely to be one-word production but with time, they are learning to respond in full sentences. Later on, when the students are familiar with the format of the activity, they are invited to take a leading role in the activity, also producing true or false sentences about the picture for the teacher and their peers to correct.
Kids love the game because they can correct the teacher’s mistake and they are allowed to create their own un-true sentences about the pictures and to try to trick the teacher. I have used it both with primary and pre-primary students. The younger kids, naturally, needed more time to adjust and to start producing full sentences, in the beginning they would only provide the key information, for example the colour or the number of objects but, eventually, they were comfortable enough with producing full sentences. At approximately the same time, they were ready to lead the game, too. The older, primary students could make this transition within a lesson.
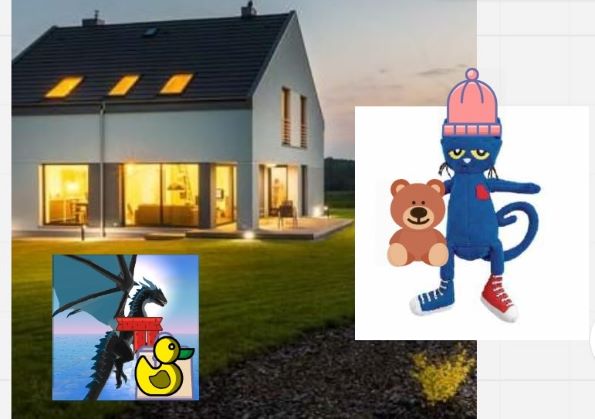
This is how we were telling our own version of ‘Pete the Cat. I’m rocking in my school shoes’ using the visuals on Miro
Storytelling for pre-primary is based on picture description. Here, the easily available materials might involve the stories from the coursebooks for pre-primary, retelling together any other story used in class or even any of the materials in the YLE Starters materials. In this case storytelling is scaled down to simple picture description, in the appropriate sequence.
Storytelling for primary can also use the visuals but it can be more challenging with the use of storydice or a storytelling treasure hunt (see here)
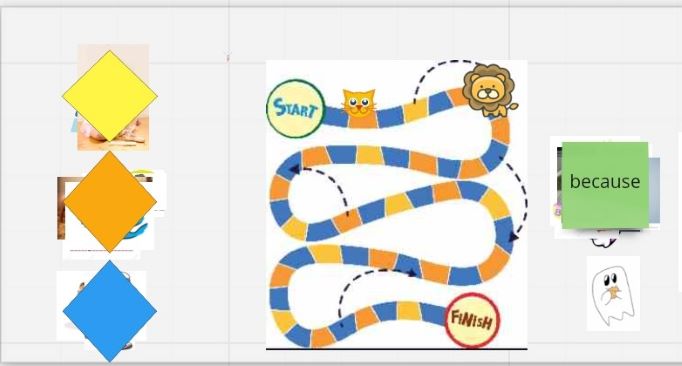
The lion and the kitten is a simple boardgame that has been very helpful in encouraging the students to produce the language. It was created and used with the online 1-1 pre-primary students. The game does not use a dice. Instead the students can choose the box where they want to go next and in each round, they have to talk about one of the pictures hidden under the yellow, orange and blue diamonds. In the beginning the sentences are very simple and focus on simple vocabulary (‘It’s mommy‘), later on these can be exchanged for a more detailed description (‘Mommy is happy‘ or ‘Mommy is dancing‘) and even further extended with the use of ‘because’ (‘Mommy is dancing because she is happy’) or in any other way that is within the children’s linguistic ability.
This game gives children a lot of freedom and almost a guaranteed victory. The cards can be changed easily, especially in the online format, and even if not, new sentences can be made every time the game is played. With a group of children, a dice would probably have to be used.
This is the board for our boardgame, also created using the visuals available on Miro.
Are you in the park? is a simple guessing game turned into a role-play. Each student has a city plan (since this was the language that we were working at the time) and three stickers which they glue somewhere ‘in the city’. They keep their picture secret and they try to guess where their partner is at the time.
Student A: Are you at the bank / park / market?
Student B: Yes, I am / No, I am not.
After a while, they can ask for help.
Student A: Please help me.
Student B: I can see…I can hear…I can smell….
Student A: You are…
Initially, the stickers were introduce only to prevent the kids from ‘cheating’ but they absolutely loved having random leftover stickers all over the place. In the first lesson we play, it was pirates, in the second one, it was farm. They laughed a lot about having little pigs and chicks all over their cities. The other incentive was the opportunity to imagine and to describe the places from the angle of what they saw, heard and smelled in different places in the city. The kids had the full control over the game and they were making the decision themselves when to move to the second stage.
This post started with a line, one of those things that one says, casually, in a conversation with a teacher or at a conference. ‘There are many reasons to use a song…’ , I said and my brain, always ready for this kind of a challenge, took over. ‘How many? Can you count?’
I accepted the challenge. I have found sixty. For now:-). Not all of them are mine, of course but since this post is meant for teachers, not researchers and since I am on some kind of an academic holiday, no proper referencing. This time.
Now, fasten your seatbelts and let’s go! 3…2…1…
We are using songs with the primary and pre-primary EFL learners because:
Kids like them
They are a part of the kids’ world, regardless of the language.
They help to reduce stress.
Songs create a positive atmosphere.
They can help set the context of the lesson.
The kids don’t care if the teacher does not have a really beautiful voice but they care about a teacher who does not really sing.
Singing and music are present in many areas of our everyday life.
They can be used differently, depending on the day and how the children feel – to calm them down, to cheer them up, to wake them up.
They can be used to develop motor skills, gross motor skills (jumping, dancing, skipping) and fine motor skills (finger play).
They lead to personalisation for example by choosing favourite songs and expressing opinion on songs.
Using different types of music develops children’s musical taste.
They provide the exposure to the target language.
They help to remember the vocabulary and structures
They help with pronunciation, rhythm and intonation.
And with the early literacy development, by developing the ear, rhymes recognition.
They use a natural language
The traditional rhymes, chants and songs carry the culture of the country.
Songs are an opportunity for expression.
They help memory development.
Singing games usually involve a group or a team and so they help to develop social skills.
They can be used to develop turn-taking and other social skills.
They can help the kids to settle in the lesson and in the L2 environment.
It is something that we do together, it helps to unite the kids after they have taken part in pair-work, team work or individual activities.
They are a nice change of pace in the lesson, a punctuation mark.
They are an easy-to-use stirrer.
They are an easy-to-use settler.
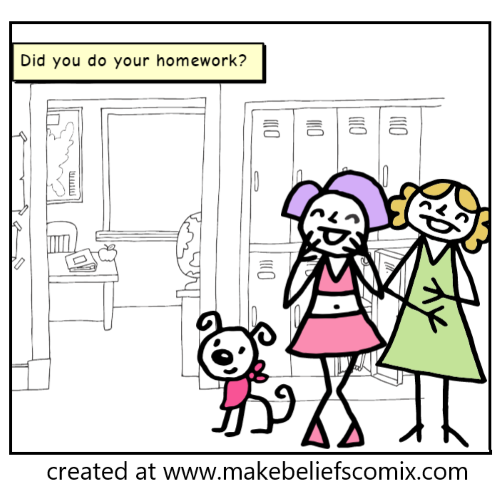
They give the lesson a frame (Hello song, How are you chant, Did you do your homework chant, storytime song, table time).
They help the kids to move from one stage of the lesson to the other.
They help to create a community.
They help to take the language out of the classroom. The kids can sing the songs at home, in the car, on holiday.
They are one of the few tools that help to involve a variety of learning channels: auditory (because we listen and we say), visual (because we can use flashcards to help kids remember the lyrics) and kinesthetic (because every song can be and should be accompanied by gestures)
Thanks to music they remember the language better
They are the first step language production; a song is basically a lot of discourse with some music.
They are great for beginners, children can participate in a song, even if only through the gestures.
They are great for shy students; singing is not scary if you do it in a crowd.
They help to create routine and balance the ration of the new (material, songs, activities) and the familiar (all the favourite songs).
Kids learn how to make decisions – choosing which song to sing next.
They can be used as an activity timer (you have one song to finish colouring)
Songs often tell a story this way creating the context for the language.
They can be used to introduce new vocabulary and structures.
They are great for recycling vocabulary.
They can be used as background music during craft activities, to encourage the kids to sing rather than just chat in L1.
Songs and chants can be used to give instructions.
They can be used during any stage of the lesson.
They can be used to get the students’ attention.
They are easy to use and do not require a lot of preparation.
There are plenty of songs to choose from.
It is easy to make up your song or chant that can be used for one specific reason.
They contribute to the variety of resources used in the lesson.
They can contribute to the development of the cognitive skills, such as attention and focus.
Children learn to take responsibility for the lesson and to lead by choosing the songs to sing.
Songs can lead to creativity in the language. Once the song become familiar, they can be the stepping stone to creating own versions of them.
They can ‘just be sung’ or they can become the theme of the lesson, if accompanied by the vocabulary introduction, craft, story.
Singing a song can be a reward for good behaviour or special achievement.
Some songs can contribute to learning other subjects such as art, maths, science etc.
Parents like when their children sing so songs might be used during parents’ days, end-of-year performances.
They help to motivate the kids to learn the language.
They give the kids the sense of achievement, as even after a few lessons, they can feel like the speak the language, because they can sing the songs or recite a rhyme.
Learning through songs is fun and memorable.
Because, finally, adults, also get an excuse to sing!
It looks like, for now at least, all the reasons to use a song = 60 reasons to use a song. If you have any more ideas to add to this list, please let me know in the comments!
And may the VYL and YL classrooms be alive with the sound of music, like this or like this!
If you want to learn how to move from singing a song to a discourse, have a look at the earlier article on How to un-sing a song.
If you are new to teaching and you are not sure where to start
have a look at some of the coursebooks and teacher’s books for primary and pre-school to see how the authors suggest dealing with a song in class
Today about a little and very un-revolutionary change in the routine that has, nonetheless, made a huge difference to my VYL and YL classes.
Instructions
Make sure the door to your classroom is closed and that the children wait for the lesson outside.
When it is the time to start, come out and line them up, perhaps with the parents’ help in the beginning, until they get used to the new routine
Wait for them to be ready, say hello to everyone and count together how many students are present
Say hello to the first student, ask how they are, let them into the classroom, wait until they book the books and bags away, choose their seat and sit down.
Let the second student in.
If setting homework is a part of your routine and programme, this is when you can check the homework, asking each student a few questions about it.
If there is no homework, this time can be devoted to a short individual conversation with each student. It can be a short revision of the vocabulary, talking about a picture or, if the students are already in one of the primary levels – some reading practice with flashcards or a few questions about any material covered in class. We often use it for practice with ‘Tell me about…’ with the use of a picture.
When the students get used to the first part (entering the room), you can add the second element and make sure that the students already sitting in the classroom are occupied, too. They can either play a simple guessing game if this game has been practised in class and if they have been given a set of flashcards. They can also play some games on the phone or the tablet, for example to practise reading with phonics. Again, they have to first to try it under your close supervision, to get used to taking turns etc.
Why we love it
It helps to introduce the order from the very start of the lesson since the kids are not waiting in the classroom and the teacher’s arrival is not an interruption of something that they are doing.
It is obvious who is responsible for the students during that time, the teacher’s take-over is clearly marked. It might not be as obvious if the kids enter the room during the break or before the teacher, especially if the teacher wants or has to spend the break time outside of the classroom, for whatever the reason.
The parents are of a great help in the beginning of the course, they can help explain what the kids are supposed to do, they can help with the name etc.
This part of the lesson is a fantastic opportunity for the 1-1 conversation with each child. Regardless of whether the teacher uses this time to check the homework or to ask and answer questions or to read, they are giving each child all their attention (almost all, the eyes at the back of the teacher’s head are watching the kids already in the room, of course:-) and they can check the progress and language use.
For the parents, this is a wonderful opportunity to find out how their children are interacting in English, without the parents’ supervision and this is how they can, indirectly find out about their child’s progress, before every single lesson if they wish to do so.
For the parents, this is also a chance to find out how the homework handouts or materials are used, what questions the teacher asks and how much language can be generated out of a page that, to the untrained eye, looks like a simple colouring page. If they want to and they have have the time, they can later use this knowledge to practise English at home.
In the beginning, when the children are just getting used to the new routine or if they are really young, this part of the lesson can be kept short, later it can be made longer. Similarly, in the begining, the T leads the activity but, later on, the kids can ask each other at least some of the questions, too.
I have been using this technique for about six years now. My first ever group for which this has been created (because there were ten of them and we hardly ever got to talk 1-1 in class), now in the third year of primary, still line up to chat with me on entering the room. I have been using it with my pre-primary students, too, groups and individuals, too. The parents always wait in the hallway, at the back of the line and they always wait to hear how their children talk to me. If they leave the school, it is only after their kids have walked into the classroom. They always wait and not because they don’t trust us/me but because they are curious and want to know how it goes.
Meet Ela, a newly qualified, inexperienced VYL/YL teacher, from Poland, who has just completed her CELTA course and who is about to start a new chapter of her life, as a teacher of English.
Ela is lucky. She is starting not only one but two new jobs next week and both will involve working with very little people. One is in her hometown and it will be face-to-face, the other one online, in China. Ela is a bit nervous, because it is a new job and because she has never really worked with kids before. There will be some induction or orientation at both places but it is only to take place next week.
She is also lucky because there is still some time left AND she has got access to more than just google. Her teacher training centre is in her hometown so she can just walk in and do a bit of research and reading in the library there. She hasn’t even started to teach and she already has lots and lots (and lots) of questions.
What about the L1 for example, the students’ mother tongue? Should the teacher use the L1 in class? Or outside of class? Should the kids been allowed to use L1 in class? Should they only use English? Should the teacher know the students’ first language?
Ela is a newly qualified teacher and so her way of compiling a reading list is not a perfect one but here some of the ideas that she has come across…
Herbert Puchta and Karen Elliott, Activities For Very Young Learners
This publication is a compendium of activities and ideas for the classroom but it includes a brief introduction with some of the principles that should be taken into account while working with the pre-school children. Puchta claims there that the knowledge of the L1 on the C2 level is absolutely necessary in order to help clarify any problems with comprehension as well as to assist the children in case a problem occurs.
What does Ela think now? Well, she is grateful for all the practical advice on how to avoid using the L1 in class but, at the same time, feels like she is doing something wrong or even illicit. After all, she was offered this job in China and not one person ever asked any questions about her level of Chinese. Then, she is thinking of her best friend, Kasia, who left for Japan and taught kids there, and Anya who landed in South Korea…her CELTA tutor who used to teach in Mexico and one of her CELTA peers, Jessie, who worked in Poland and that none of them spoke the langauge of the country where they worked and definitely not on a C2 level. Not even on an A2 level, to be honest. Ela is confused.
Opal Dunn, Introducing English to Young Children: Spoken Language
No, scratch that. Ela only thought she was confused earlier. Now she really is, after having gone through a few pages of the Opal Dunn’s publication.
First of all, it is because she has found out that children cannot bond with a monolingual teacher (that is a teacher who does not speak the children’s L1) and that they might get disappointed and frustrated. It does not bode well for that online job in China or for any other future positions abroad but at least that’s some good news for the groups she is going to teach in her hometown.
The rest, however, is a bit more difficult to digest because translation, at the same time, must be and mustn’t be used in the classroom. ‘Only English’ should be one of the rules but the teacher should explain it both in English and in L1. The same can be done whenever a new concept is introduced but should be done quickly and in a different voice.
There is also the issue of the kids translating from one langauge to the other. It should at the same time be encouraged (‘as being able to translate is a skill that needs to be encouraged’ p. 134) and discouraged as kids might not tune into the English version waiting for translation (‘the habit to translate should be broken’ p. 136).
Ela is beyond confused. She wishes she had stopped reading on page 134. Or that she had only limited her reading to page 136. Too late!
Vanessa Reilly and Sheila M. Ward, Very Young Learners
Reilly and Ward’s publication is the oldest resource available on the market devoted solely to teaching VYL and for some time it was the only published resource for the teachers who work with the pre-primary children.
Probably the most important line that Ela finds there is the following quote: ‘if we tell the children that they can only speak in English, it is as good as telling them to be quiet’ (p.5), followed by the list of reasons to accept the L1 in the classroom and some practical ideas on how to avoid using it and how to gradually replace it with English.
Ela is somewhat relieved to have found a note that the attitude to the mother tongue in the EFL/ESL classroom might depend on the country and the particular school’s policy. She thinks that perhaps that might, at least to some extent, explain the fact that she and her colleagues were hired to teach despite the lack of knowledge of the children’s L1, although, the authors here, just like everyone else she has read so far, seem to assume that all the teachers working with YL and VYL speak the children’s mother tongue.
Ela is, admittedly, more peaceful now, although she still does not quite understand she even got the job if the L1 proficiency is such an important requirement.
Sandie Mourão and Gail Ellis, Teaching English to Pre-Primary Children
Ela might not know it yet but she is really lucky: as a newly qualified teacher, at the very beginning of her career, she had a chance to read this particular book.
The authors outline ten principles of teaching English in the early years and the principle number 2 refers to L1: ‘Children will sometimes use their home / school language when learning English, which is viewed as part of the natural process of language aquisition and evidence of learning’ (p. 214) and they provide a list of situations in which both the teacher and the students might feel the need to resort to the L1 in the EFL context. Ela takes notes as she might need this knowledge to understand what is going on in her classroom. She especially likes the questions for self-reflection, such as ‘Why and how did I use the L1?’, ‘Could I have done it differently?‘ (p.215) or, as seen from the child’s perspective ‘What steps did I take to help the child move from L1 to English‘ (p.215).
Elat is happy, she finally feels like she has learnt something. She is not as nervous as she used to be. There is only one question that has been left unaswered and that refers to al these teachers who teach preschoolers without speaking their L1. They exist and Ela is one of them. Only now, she is too excited and she only wants to go on reading. This is where we are going to leave her now… Enter the Dragon (teacher/trainer), me with only a few facts from the VYL kingdom with a few summarising comments.
At the moment, there are altogether 4 volumes devoted to teaching pre-schoolers. Reilly and Ward published their compendium in 1997 and it took twenty years (as in 20, as in two decades) for another title to appear on the market in 2017 when Puchta and Elliott came out. All that despite the fact that this area of the market has been growing in strength all this time (Garton and Copland, 2018).
The latest addition, by Sandie Mourao and Gail Ellis has just been released and it willl take some time for it to make it to all the libraries, teacher training courses reading lists, bookshops so it might be that some newly qualified teachers will be walking into their first lessons without having read it. But the good thing is – the book existis and it is available. The newly qualified VYL and YL teachers, the VYL and YL novices, the Elas of today are indeed lucky. They have a lot at their disposal and a lot more than the Elas of five or ten years ago.
Even in the areas that are and have been ‘hot’, ‘popular’ and well-researched, it takes forever for the findings to permeate into the coursebooks and the mainstream consciousness, let alone areas like ours that is considered ‘a niche’, at least by some. As Sandie Mourão writes (2018) ‘Precious little research involves pre-primary FL learners, so research in any direction would be welcome’. Yes, ‘precious little‘ and ‘any‘…Things have started to change, slowly so it will probably take another twenty years and a few more dedicated teachers and scholars before we have answers to some more of the VYL questions. Those related to the presence of the L1 in the EFL classroom but not only those, of course.
In the meantime, there is still more to come in this series here, some studies that I have come across as well as the findings of my own small scale study on what the VYL teachers think of the L1 and what they do…See you in a bit. Oh, and if you haven’t done it yet, check out the introduction, too!
PS I am really interested in the attitudes of primary and pre-primary teachers to using the kids L1 in class, by the students and by the teachers. This was one of the beliefs that I was researching in my MA dissertation (the post on that coming up in this series). The MA is done (yay) but the research continues so if you have a few minutes to spare and you don’t mind taking part in the survey, please follow the link and answer a few questions here.
Bibliography
Photos courtesy of Юлец
* )W.Shakespeare, Much Ado About Nothing, act II, scene I
O.Dunn (2013), Introducing English to Young Children: Spoken Language, Collins
Garton, S. and F. Copland (eds), (2018), The Routledge Book of Teaching English to Young Learners, Routledge.
S.Mourão and G.Ellis (2020), Teaching English to Pre-Primary Children, Delta Publishing
S.Mourão (2018), Research into teaching of English as a Foreign Language in early childhood and care, In: S. Garton and F. Copland (eds), The Routledge Book of Teaching English to Young Learners, Routledge, p. 425 – 440.
H.Puchta and K.Elliott (2017), Activities for Very Young Learners, Cambridge University Press
V.Reilly and S.M.Ward (1997), Very Young Learners, Oxford University Press