Ingredients
- A4 paper, one sheet (for the leaf) and some coloured paper, I have tried both cardboard and regular craft paper and they both worked very well. The smaller caterpillar in the photo was done with the cut-up cover page of the drawing album and it works well, too. Some of my students were using ultra-thin craft paper and it worked, too so I presume cut up colourful pages of glossy magazines could be recycled this way, too.
- Glue, scissors, markers and crayons.
- This lesson was a part of the series of lessons devoted to spring so among all the other materials that can be used there are: The Very Hungry Caterpillar, the book or the video, the story or the video from Playway to English 3 about 6 Hungry Caterpillars, a video about the life cycle of a butterfly, the garden craft and the butterfly craft. It can also be a part of the Art lessons on the topic of weather and seasons. More about it – soon!
Procedures
- Check that we all have all our resources, one by one showing them to the camera and, more often than not, finding the missing bits.
- Show the kids the final product. This is not something that I do in every lesson, sometimes this element is left out for the surprise element. This time, however, I wanted the kids to understand exactly what we are doing and why.
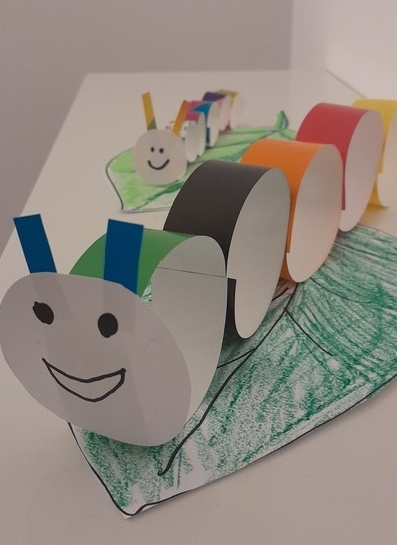
- Draw the leaf on the A4 paper, colour it green and cut it out. Demonstrate each step to the camera and wait for the kids to complete it before moving on to the next one. During this particular lesson I have also came up with a little chant that we started to sing while colouring and cutting (‘It’s a big, big leaf for a very hungry caterpillar’)
- Ask the kids to prepare the strips of the coloured paper, of any colour they want. The paper can be cut sideways (probably the easier option as it involves less cutting) or lengthways (in this case each strip needs to be cut in half). I didn’t tell the kids how wide the strips should be. We have been doing craft online for a few months now and my kids are now able to make such decisions themselves. I assumed that everyone will choose the width themeselves (as wide as they can handle).
- We glue the strips into a ring by putting the glue on one end and shaping it into a circle. We glue all the rings first.
- Glue all the rings together by applying the glue and attaching the rings and pressing them with two fingers.
- Cut out one circle for the face, draw the eyes and the smile, glue the circle onto the caterpillar. If possible, the little antennas can be added, too.
- Sit the cateripillar on the leaf, introduce the caterpillars, say hello, use them in a dialogue etc. We sang the song about the garden that we had been practising for a week then.

Why we love it
- It is very easy to make.
- It is beautiful and sweet. Whenver I choose and prepare activities for my groups, I always wonder if my kids will simply approve of it, if they just like it. When I showed them the caterpillar, simple as it is, I got this very special ‘Ahh!’ and big smiles.
- It can be done in the offline classroom but it is also possible in the online classroom.
- It gives the kids some opportunities to make decisions about the creative content, the size of the leaf, the colours for the caterpillar etc.
- It can be easily combined with any spring lesson or with any story lesson.
- The level of challenge can be adjusted. In the classroom the teacher can prepare the strips of paper or the parents can be asked to pre-cut them if the lesson is taught online. We used five strips / rings but the caterpillar can be made longer or shorter.
- There is some potential for the literacy skills development – kids could write the key words on the outside or on the inside of all the strips before glueing them together.
Happy teaching!