The Gesture is King!
How can you tell a VYL teacher?
It could be the Mary Poppins’ bag full of markers, stickers, a storybook and random treasures that they carry. It could be because you can catch them hum ‘Baby Shark’ or ‘Broccoli Ice-Cream’ while they think no one’s listening. It could be also that it is difficult to catch them in pretty tights and dresses because many an outfit was destroyed by clumsy little hands. By accident but irreversibly, too.
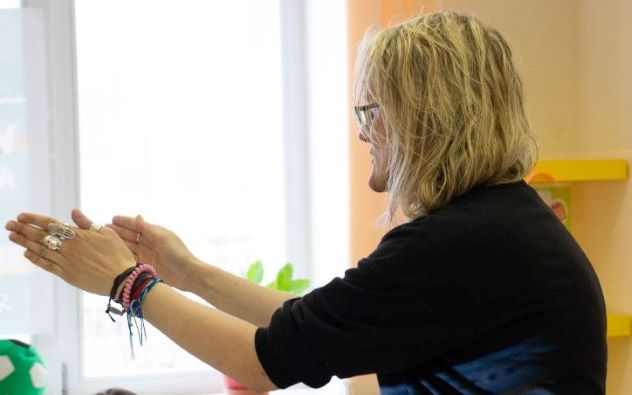
Look at the hands, too, a lot more expressive than those of an average teacher, hands that constantly gesture and motion, a habit that is difficult to drop even outside the classroom.
It is true that Total Physical Response stopped being the new black a few decades ago and nowadays referring to learning styles is looked down on or even mocked. Nonetheless, the gesture is one of the vital components of the pre-primary classroom, simply because it works and it helps the teacher and the students to communicate more effectively, especially if the students are 5-year-old beginners.
One: participation
Throughout their pre-primary adventure with English, the students will always be pre-A level but as the course progresses, their vocabulary range will grow. But in the first few weeks of the course those kids really are a clean slate. Thanks to gestures, however, they can participate and be involved in class activities.
They can for example wave ‘Hello’ and ‘Goodbye’ to the teacher or other children, silently, they can participate in ‘Head, shoulders, knees and toes’, touching or pointing at the correct body parts because they will be mimicking the teacher’s gestures and not because they know exactly which part of the body is the head and which ones are toes.
That is why including gestures will be important in the beginning of year although they can be used to the same effect at the start of each unit. Students, still not familiar with the new vocabulary, will react to it by miming ‘cat’, ‘dog’, ‘princess’, ‘sheriff’, ‘book’ etc. Before they are ready to produce the words orally.
Two: clarification
Little students cannot use a dictionary or translation into L1 because sometimes the teacher does not speak it. In that case, the teacher has limited resources to clarify the meaning of the new words. The visuals and the realia will help, of course, but adding gestures is definitely going to reinforce the meaning. Two hands together with palms touching and moving apart (a book), fingers of one hand scratching the air (a cat), the arm touching the nose and waving (an elephant and its trunk), a hand cupped around the nose (a clown), two hands touching above the head (a house) and so on…
Three: memorising
Almost automatically, adding these gestures will help to ensure that the kids will remember the words better. There is evidence that suggest that sign language and gestures in general active additional neurons and the information can be stored and retrieved more effectively.
Four: support for production
Once the gestures have been introduced and become a part of the classroom reality, they can be used by the teacher to support the language production by the students. While they are trying to answer a question or to make a sentence and if they experience any difficulty retrieving the word or the structure, instead of whispering the word or giving the L1 equivalent, the teacher can hint at the word by producing the familiar gesture, assisting the student but not actually saying the word.
Five: asking for clarification or support
Similarly, their use can also be extended to asking for clarification or support by the students themselves. Chances are that after the children have become familiar with the gestures used in class on daily basis, they will be using them actively, too.
This was one of the surprising discoveries I made during a classroom research for my MA degree. When a communication breakdown occurred, my five-year olds did resort to familiar gestures to ask for a word they wanted to use but forgot. They still remembered that the word ‘long’ was accompanied by two hands flying apart or that the word ‘sandwich’ was demonstrated by pressing two hands together, one on top of the other, even though the words themselves had not stuck in memory. The produced the gestures asking for my assistance and then, provided with the word, went on with the sentence.
Six: imagination, creativity and symbolic representation
The development of symbolic representation in pre-primary children is an important stage of their growth as human beings (Bruce 2004, p. 170) and introducing and using gestures is one of the ways in which a teacher of English can also contribute to it.
It is fascinating to observe how, at first, very young learners only imitate the teacher and reproduce the gestures exactly, as they are introduced and how, later, they move on to creating their own ways of representing certain words or phrases. And how the teacher can actually learn from the students here because their 5-year-old ways of miming a clock, a flower, a pumpkin or a melted ice-cream are much better and much more interesting!
Seven: instructions
This is, probably the most straightforward way, used from the very first minute of the course. The students, entering the classroom don’t know any English and can’t react to all the teacher’s instructions if they are not accompanied by some gestures: one or both hands being lowered for ‘sit down’, hands palms up being raised for ‘stand up’, waving the hand towards the chest for ‘come here’.
Eight: classroom management
Naturally, gestures can be used to praise the students or to show disapproval for any unwanted behaviour. Both thumbs up or a high five (or a double high five for really special occasions) show the teacher’s approval, both palms crossed at wrists might signal ‘stop’, the index finger put across the lips will work as ‘silence please’.
The gestures may vary, from class to class or even from culture to culture. What matters is that the teacher is consistent with the gestures they use with a specific group. Examples? For my youngest students the small waving hand (something similar to the way the Queen would wave hello) became a sign of warning, although I seriously doubt that anyone else would ever read it this way. For my group, however, it was closely related to our rewards chart, kids’ names on it and stars or smileys drawn next to them. Sometimes, during the lesson, I would indeed wave my hand slightly, to remind them that if they don’t stop misbehaving, I might erase one of their stars. And it worked, for us.
Nine: emotions
Knowing how your students are feeling is very important in general, but especially with the pre-primary children as their reactions and participation will be closely connected to whether they are happy, sad, angry or scared. The teacher should be able to read those emotions but children will also be taught to recognise and to express them, in English.
The first lessons will start from the the basic adjectives accompanied by gestures (a big smile and arms up in the air for ‘I’m happy’, a sad face and fingers drawing the tears rolling down the cheeks for ‘I’m sad’, a frown and stomping for ‘I’m angry’, eyes covered with both hands for ‘I’m scared’) but then more and more of them can be added. These emotions can help the teacher, too, for example to signal that they are happy with students’ achievements or sad when they are misbehaving…
Ten: bonding and creating a community in the classroom
Last but not least, everything that we do together in class, helps the children to bond and to create a community in the classroom, with its own rules and ‘traditions’. Not only songs or stories can be used that way but also all the miming games. They are easy, everyone can participate and they are a great stirrer, too.
After the teacher’s modelling and after everyone becomes familiar with the game, the kids, one at a time, are allowed to lead the game and to suggest what you all could mime. And this is when the real fun begins.
It doesn’t have to be very complicated, only the emotion adjectives and fruit, pets, school objects, anything you are studying at the moment. Have you ever tried to mime a cat? Probably yes. Have you ever tried to mime a happy cat, a sad cat, a sleepy cat? Yes? Then you should definitely try to mime an angry pencil then!
I wonder if I have managed to convince you, dear reader, that the gesture is the absolute king of the VYL world…
Happy teaching!
T.Bruce (2004), Using symblos,in: T. Bruce, Developing Learning in Early Childhood, London: Paul Chapman Publishing, pp 170 – 195