I suppose that, on some level, the idea of including the storybook illustrations and their creators into my English through Art curriculum has always been there and it was just waiting for its turn. The first lesson devoted to that happened somewhere in December 2020 with my juniors and you can read about it here. Including it in the series of lessons with my primary kids was just a matter of time. Ed Emberly (and his bestiary of monsters)* is the first one to have a lesson dedicated to. The first of many, I hope!
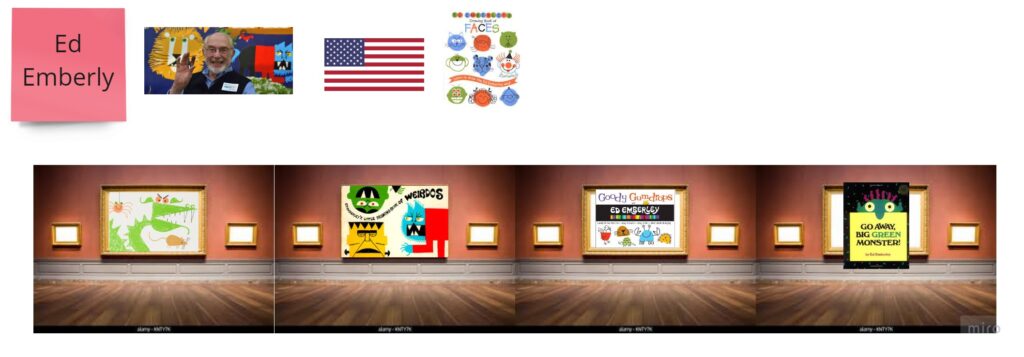
The artist
The idea to base the whole lesson on Ed Emberly and his art came from the Big Green Monster storybook which has been my go-to resource in all the body parts / monsters lessons for a very long time now. The kids absolutely love the fact that they can control the monster, make it appear or disappear and this way deal with the fear. I used to have students who would sneak into the storybook room before the lesson and ‘read’ the book on their own or run a reading sessions for their friends who also wandered in, both in English and in Russian.
But then, as I started to look through everything that Ed Emberly produced, it turned out that monsters really were his favourite thing and that he wrote a few books on how to create your own illustrations using finger paints and markers. ‘I want one of those!’ was the brain’s initial reaction.
First of all, we introduced Ed as our artist of the day (name, face, country and his favourite thing) and we talked a bit about the monsters which he drew, including the Big Green. The gallery walk was a very brief one this time but that is because Ed was present throughout the lesson, with the story and the craft. It was probably the most consistent and artist-focused lesson of all of those that I have ever taught on this course.
The language
This part was very simple and very straightforward – as much of the body parts practice as possible. It was the first lesson with this topic and we did a variety of exercises related
- Introduction, repeating, a bit of drilling (I do less and less of that, as a teacher and I have begun to wonder why. The post will be coming soon).
- Pointing and moving of the said body parts which could perhaps go under the TPR label
- Introducing the song ‘My teddy bear’ by Super Simple Songs
- And a selection of the wordwall games such as matching the human body parts and the animal body parts, pelmanism (only in zoom we write the numbers first on all the cards) and describing monsters using ‘my monster has got…’ and similar structures, also with the use of a set of wordwall cards. This last one is the most generative activity and I have high hopes for her in terms of the amount of the language produced in the long run. Usually it takes a few lessons for the kids to get used to it and to become comfortable and this time round was not an exception. With my current group, the Ed Emberly lesson was chronologically the first one and it was only in the Degas lesson, two weeks later that the kids were ready to produce lots of language.
- Last but not least, we watched and participated in the storytelling and it was, of course, Ed Emberly’s ‘Go Away Big Green Monster’, this time in the video format, although, ideally, we would have used a storybook only I did not have it at home at the time.
The craft
Originally, Ed Emberly monsters (and other creatures) were done with a combination of two techniques – finger paint prints and drawing with markers. For anyone willing to use this approach, his books are full of ready made ideas. However, finger paints are a tricky resource to use in the classroom, especially if you want to finger print and draw, and I just did not want to bother with the logistics of it in the online world, especially that our group is now located in three different countries. Solutions had to be found.
It does help, I suppose, that I am a lazy teacher and I have noticed that with all the obstacles of the online Art class I am blossomig and I end up with the ideas that I like. This was the case here and that’s what we did:
- The first step – produce own monsters in order to test and trial and to understand how much time is required and how many monsters can be created during the ten minutes that we hae assigned for the craft activity.
- Write to the parents, to inform them what resources will be necessary: a sheet of A4 paper, a marker, glue, old newspaper and magazine pages OR coloured paper.
- Show the kids the finished product and describe all the monsters (colour and body parts). I did it holding the picture in front of the camera but it was not as effective as I would have wanted it it to be. Next time, I will keep the paper on the desk and I will move the camera above it, in order to make sure that the kids see only one monster at a time and that it is clear and big enough.
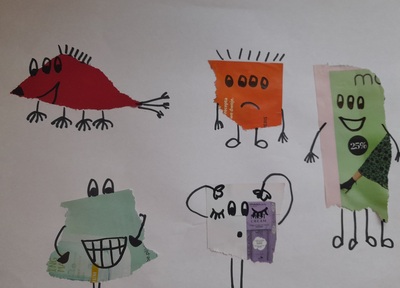
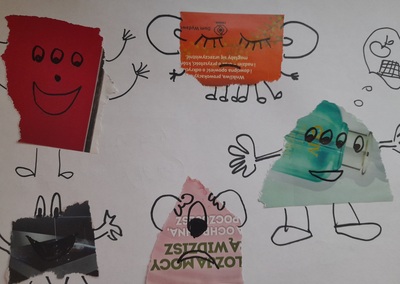
- The monsters are super easy to make and the one thing that is necessary is a piece of paper (the more recklessly torn off, the better). It is then glued onto the paper and the body parts are drawn. Then the kids describe their own monster, ideally using full sentences but, since it is the first lesson with the new vocabulary, I accepted simple ‘three eyes’, ‘one nose’, ‘two legs’. The number of the monsters produced in class will depend on the age and the skills of the kids.
- My students are already quite ‘advanced’ when it comes to craft and after they figured out how to make the monsters, they were on producing more and more of them, focused more on the craft than on the speaking (ouch!). For that reason, when I teach this lesson again, I will want to scaffold even more carefully and introduce the following tricks a) ‘dictate’ the colour for the monster, b) promote production by guessing how many legs their monsters will have, hoping that even if I don’t guess, they will want to correct me and c) introduce a punctuation mark between the monsters ie a proper introduction (My name is Polly. I am a happy monster)
- I personally adore the fact that the monsters are made from newspapers and that they have the most irregular shapes, the more reckless, the better. However, I noticed that some of my parents were reluctant to the idea of letting the kids work with old newspapers and magazings, preferring the regular and pretty craft paper. I have also noticed that some of my students did not quite like the idea of the torn paper and while I was happily tearing the resources for my monsters, they simply picked up their scissors and started to cut out square, circles and triangles. In the offline classroom, I simply wouldn’t have given out scissors, trying to encourage them to work with a new resource. In the online classroom I could not control it but the monsters turned out pretty anyway.
*) I cannot NOT share this amazing article with the funny and weird collective nouns. Enjoy!
Happy teaching!
1 thought on “Ed Emberly and Monsters. Teaching English through Art”