English, kids and Igor Stravinsky

There are many roads that lead to Rome which here will be a synonym of a good lesson. Sometimes it is boredom, when the teacher cannot even bear to look at the coursebook and the official educational materials. Sometimes it is the students, when they bring their world with them, when they learn quickly or, why not, when they don’t behave in the way that we would dream of. Sometimes, it is a random resource, a storybook or craft materials, that you really (really!) want to use.

Sometimes, however, you also find yourself in the middle of a film, Off the Record, a documentary on Laurent Garnier, the DJ, and you gasp because you find out how among all the other things cool that he has done and does, he also takes part in music lessons in a small school, somewhere in a French village, and there, with teens, he explores the meaning of different music styles, he gives them a chance to experience different kinds of music and he guides them into translating these impressions into visual art…

I gasped because I could not decide which reaction I should go for first. Shout out loud ‘Laurent, I love you!’ (just because he finds time to do something for his community and because of all things, he chooses to teach)? Shout out ‘Laurent, me, too! We do it, too!’ (because we entertain ourselves with my students with a similar exercise, albeit on a much smaller scale, when we play the Musical Challenge)? Or shout out ‘Pause the movie, for a moment, for heavens’ sake! I am being flooded with ideas and I need time to take notes!’ Because the Musical Challenge I have put together, good as it was as a warmer or a speaking activity, turned out to have a lot more potential and it be a brand new direction and at the same time an opportunity to combine teaching English through Art that I have been toying with for years now, craft and project work that, I was sure, could help me generate lots and lots of English. What’s not to like?

Crumbs # 19: Teaching English Through Music: Igor Stravinsky

The notes below constitute the outline of a 45-minute lesson I taught during the summer to my primary students aged 8 – 9, of a strong A1 / YLE Movers level whose speaking and listening skills are closer to A2 / YLE Flyers. I had only two students on the day so we did all of the activities whole class.

Revision

  • A revision game: adjectives – opposites, with the wordwall cards and then a miming game (one of the students choosing the word to mime for the other kids to guess). Another option are the present tenses or the verbs that the kids might need for storytelling.

Russian fairytales

  • Illustrations of the four traditional stories : About the Fisherman and the Goldfish, the Three Pigs, The Hen Ryaba and The Firebird
  • Kids turn turns to retell the stories. There is no pre-teaching of any vocabulary, the teacher feeds in the words on the go.
  • Kids choose their favourite story and talk about their favourite Russian story

Listening number 1

  • Teacher shows the photograph of Igor Stravinsky, introduces him briefly
  • Teacher tells the students that he wrote music for one of the four stories
  • Teacher plays a short piece of the Firebird (for example 38’40 – 40′) and asks the students to guess which of the stories the music could illustrate
  • Feedback, teacher tells them that the music they heard is called ‘Firebird’ and that it is one of the most popular pieces of modern music.

Listening number 2 / Art

  • Teacher gives out the template and tells the students that it is a cover of a record / CD with Firebird and that they they are going to design the cover and the illustration.
  • Teacher says that they are going to listen to another piece of music and draw what they hear. Teacher tells them that perhaps it will be for people who don’t know the story of the firebird, who don’t know Russian fairytales at all and that we need to help them understand what kind of music they might hear.
  • ‘All ideas are good ideas’ is the motto of all of our creative projects, it is good to bring that up again.
  • Teacher puts the drawing materials and ideally there would be a choice of pencils, markers, crayons, finger paints, watercolours etc. Each student can choose their own.
  • Teacher plays the final piece of the Firebird (40′ – 46′) and the students are creating their piece. The length of the listening can be extended, either a longer piece can be chosen or the another excerpt can be added, depending on the group and their involvement.
  • If possible, the kids can be involved in discussing what the music might be illustrating. The Firebird is very energetic and varied, there is a lot of potential for that.
  • If there is time, kids can prepare two covers, based on two different excerpts from the suite.

Presentation

  • Kids take turn to present their album covers. They can use the following questions as framework: What is there in your picture? Why? Do you like the music? Why? What are you thinking about when you are listening to it? Kids can either ask each other these questions or use them to prepare a discourse.
  • All the album covers are displayed on the walls. If there is time, the group can listen to the chosen excerpt again.
  • Feedback and error correction.

How it went and what I learnt

  • In short: we loved it.
  • The kids produced a lot of language throughout the lesson (the teacher is happy).
  • The kids loved the fact that they could talk about the stories they knew and that they could paint (something that we rarely do). They seemed to enjoy listening to the music, too.
  • Observing how their ideas are born and shaped was a fascinating experience for the teacher, too. The first impulse was to draw a bird made of fire but, as they listened on, the other, better, more individual and special things began to appear. And they kept working on them, as the music led them.
  • Afterwards, they talked a lot about their pictures and the creative process. Normally, I ask if I can take the final product, if it is ok to photograph it or to put it on display. This time they were the ones to ask whether I was going to put them up on the noticeboard. It was a lovely moment.
  • The thing that surprised me most and that was the biggest challenge (or ‘challenge’) was the same thing that made the activity meaningful, motivating and generative, namely the fact that we used the Russian traditional stories as the basis. First of all, they had a lot to say about them and cutting corners (aka a short summary of the story) was out of the question. They wanted to tell me everything (as in: every little detail, significant or not). Second of all, because they were retelling the stories as they knew them, in Russian, they were very reluctant to give up on the beautiful, literary language for which they are not ready yet, in English and looking for those higher-shelf equivalents did get in the way and it did slow them down. Sometimes they were so unwilling to abandon the beauty that they used Russian. It was touching and it was beautiful and I still have not decided what I can do about it and how I can overcome this ‘problem‘ in the future. Because, of course, I want more!
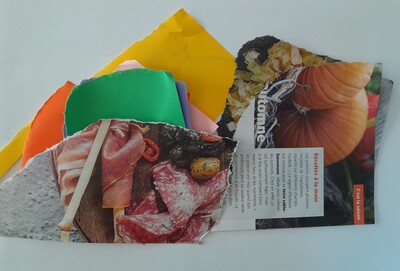
  • What you can see in the pictures is a beautiful birch tree Daria and a tsunami, to which a sunrise was added, as an afterthought, a few notes later belongs to Antonina. Mine is the sunset which, lame as it is, I am quite happy with because only now did I make a connection between the firebird and the sun. Let it be.

Happy teaching!
P.S. Why Stravinsky? Apart from the fact that “Firebird’ is one of my favourite music pieces ever, it happened so that a few months ago, I used him as a reference with my young teens and their brains just went blank. They had never heard of him. Naturally, I decided to fix that. I rather like the idea that in about twenty years from now, my kids will hear the name Stravinsky in the conversation and their first association will be ‘Yes, we had this lesson once with our English teacher, Anka…’

Malevich and his Black Square are next in line, for the same reason.

So, Teaching English through Music anyone?

How to read storybook illustrations? Teaching English through Art #2

The background

There are eight students in the group with whom I trialled this lesson. They are about 12 – 14 years old and we are now finishing the A2 level. The inspiration for this very lesson (apart from my own personal obsession with storybooks and storybook illustrations) was one of the reading tasks that we did cover, taken from Prepare 3 2nd edition by Cambridge University Press in which we discussed books and everything we read in general. The thing that really inspired me to put together this lesson was one of the follow-up questions asked on page 104 and it went: Do you think that books with illustrations in them are just for the little kids? and, which came as a surprise, this was the question that generated a real discussion.

Almost at the same time, I received a delivery from a bookshop with as many as eight new storybooks and that basically was it. I wanted a new lesson, a different lesson.

If you are interested in storybook illustrations but you are not quite sure where to start, I would like to suggest watching an amazing webinar by Mathew Tobin on ‘Exploring Pictures in Picturebooks‘ as well as having a look at the PEPELT webiste and all the videos they have posted, especially as regards the peri-textual features of picturebooks.

Introduction

The teacher brings up (or brings up again, as in our case) the topic of illustrations and drawings in books in general. Students discuss in pairs or teams.

  1. Are the illustrations and drawings only for the little kids?
  2. Are the photographs only for adults?
  3. What do the teenagers like then?

The teacher regroups the students, to make sure that each student has a new partner. The students, now in new pairs, report what they have discussed. Afterwards, the teacher asks each pair ‘Do you have the same opinion as your partner?’, this way summarising the entire discussion so far.

Where’s my baby? by Julie Ashworth and John Clarke

Setting the context

The teacher shows selected illustrations and the titles of the storybooks to be used in class. I have used the covers but these might not always be appropriate. It might be a better idea to choose one of the illustrations from the story. The students discuss the following questions:

  1. What can you see in the picture (on the cover page)?
  2. What can the story be about?

An open class discussion follows. At this point the teacher does not reveal anything about the plot of any of the stories. The students will be able to figure it out for themselves in one of the later stages of the lesson.

I’ve seen Santa! by David Bedford and Tim Warnes

The storybooks selection

When I taught this lesson for the first time I used the following coursebooks

  • I’ve seen Santa! by David Bedford and Tim Warners from Little Tiger: I have chosen this because they are cosy and warm, something that might be an example of typical, obviously beautiful storybook illustrations which are there only to accompany the text.
  • Where’s my baby? by Julie Ashworth and John Clark from Longman. This book is a good example of a basic framework chosen to tell the story. All the pages are basically the same scene: Mr Monster Officer and Mrs Monster looking at yet another monster baby. The baby is the only element that is changing from page to page, as the officer’s confusion and Mrs Monster’s desperation grow.
  • Mr Noisy and the Giant by Roger Hargreaves from Mr Men and Little Miss Magic. This might be a good example of simple and uncomplicated, illustrations that might have been drawn by little children.
  • Perfectly Norman by Tom Percival from Bloomsbury. This is a gem of a book where the story is told through the words and by the visuals, both of these being separate entities in their own rights, complementing each other.
  • A Child of Books by Oliver Jeffers and Sam Winston from Walker Books Ltd. This title is unique, like all the books by Oliver Jeffers and here a story of the importance of books is told and illustrated by pictures made of words (which are also the quotes from the classic child literature, all titles acknowledged in the inside covers).

Vocabulary

We have looked at some of the vocabulary related to storybooks that the students might need in the following stage. In a way, for my students, it was the follow-up on the vocabulary presented in the coursebook, and for that reason I decided to include the following: cover, text, illustrations, writer, illustrator, reader, character, background, details, plot, dark, bright, easy, complex, drawn, printed, painted.

The students were working in pairs, matching the definitions with the terms, follwed by a whole class feedback and an exercise in which we talked together about one of the books, using these words. For this exercise it is best to choose the title that is the biggest in size so that it could be comfortably demonstrated by the teacher and seen by the students. By discussing the storybook together, the teacher can also guide the students and ask some follow-up questions, to model what the students will be requested to do in the following stage. One or two questions from the set below can also be used.

A Child of Books by Oliver Jeffers and Sam Winston

Discussion

The students work in pairs or groups of three. Each team gets one of the storybooks and a set of questions to discuss, based on what they see in the storybook. The teacher sets the time limit and when the time is up, the students exchange the storybooks and the procedure is repeated until all the teams have had a chance to look at all the books.

We worked in four teams and we used about 5 minutes per book.

The questions the students were asked to answer were as follows:

  1. Please describe the book using the key words.
  2. Look at the illustrations only. What is the story about? Can you ‘read’ the story only by looking at the illustrations? Why? Why not?
  3. Look at the text (some or parts). What is the story about? Do you like it?
  4. Do you like the illustrations? Are they simple or complex? Beautiful or ugly? Dark or bright?
  5. Do the illustrations make you feel happy / sad / angry / bored / ? Why?

After all the students have looked at and discussed all the storybooks, the teacher asks them to answer the following questions

  • Which book has got the best illustrations? Why do you like them?
  • Which book has got the worst illustrations? Why don’t you like them?

The teacher monitors and helps to keep the discussion going. A whole class discussion follows. The teacher may highlight the main points, as outlined above (the storybook selection) but, really, the main aim of this kind of a lesson and this kind of a discussion is the opportunity for the students to look and to draw their own conclusions and formulate their own opinions. There are no correct or incorrect answers and interpretations.

Mr Noisy and the Giant by Roger Hargreaves

Conclusions

This was the first lesson of this kind with this particular group. It was obvious that, at the very beginning, some of the students did not feel very comfortable with expressing their views and even with formulating them. However, even as we went through the task, it all got easier, with the second or third book and they were all involved in the discussion. It was great to see how they ventured out into evaluating the illustrations and uncovering their meaning for themselves.

Their answers in the final survey on the favourite set of illustrations were also unexpected because of them could not really make up their mind and they chose two, very different books: the more conventional ‘I’ve seen Santa!’ and the more unusual ‘Perfectly Norman‘.

All in all, I did decide to give myself a pat of on the shoulder for that lesson and I am already planning the next one. Maybe it will be devoted to storybooks, maybe not.

If you, dear reader, have any storybooks lying around and no idea for a lesson, here is your lesson plan!

Bonus: an easier start

I have written the post and only then did I realise that, perhaps, not all the teachers will feel perfectly comfortable and ready to enter the world of the storybook illustrations at a full throttle, especially if they have not dealt with this approach to language teaching.

Storybook illustrations can be used on their own, as visuals, only slightly different visuals, as an alternative to photographs or YL scene illustrations. In this case, the teacher can choose any storybook illustrations, in no connection to the story itself or the entire book.

The teacher gives them out and uses them as the basis for one of the following exercises

  • YLE Starters, Movers, Flyers speaking such as answering questions about pictures, talking about differences
  • PET speaking picture description
  • FCE or CAE speaking (compare the pictures and answer the questions)
  • some of the ideas I shared in my post on using illustrations to develop speaking skills ‘All you need is…a picture’

This way the students (and the teacher) will get introduced to the storybooks illustrations and using drawings will be a lovely and an interesting alternative to the visuals that we usually encounter in our lessons or coursebooks. I promise that it will make a difference! And, on top of everything else, you will be developing your students’ visual literacy!

Happy teaching!

How to see a city. From the series: Teaching English through Art

source: www.izi.travel

A while ago, I was teaching my first teens group in Moscow, an amazing bunch of students that I had a privilege to take from A2 to FCE and that I referred to as ‘my monsters’, though never to their face. And this is how this project came to be.

It could be called an attempt at a CLIL lesson. It could be said that the not-yet-dead-historian in me was behind that project but the truth is that, at the time, I was simply bored out of my wits the coursebook we were ploughing through and I wanted something else.

And, inspired by Kenneth McHoan, a character from the Crow Road by Ian Banks and one of his lines (‘He is my son. I’ll fill his head with anything I like’), I decided to teach Art.

The lesson that I am sharing today is the first in the series of ten lessons ‘How to see…’ that I taught as part of our general English course. The group that I trialled it with were B2 young teens but, since then I had a chance to teach it both to adults and pre-teens, C1 and end of A2 levels.

Why we liked it:

  • I had lots of fun, accompanied in the classroom by my favourite artists.
  • I did enjoy the change, in the curriculum and the pace, and it did feel great to be teaching a subject, in English, not just the language.
  • The students did enjoy it, too, being given a chance to have an opinion and to express it, freely and the fact that one painting could generate so many different views. 
  • Last but not least: although it did not happen overnight, I did realise that when my students were given a chance to talk about Art, all of a sudden, they were using the vocabulary from a higher shelf and really working hard on communicating what they thought in a beautiful way.

Lesson 1: How to see a city

Language focus

Aim: to introduce the language and the approach the students will need to be able to deal with the task. Normally introduced in the lesson beforehand, to allow sufficient time for practice and to make sure the students feel relatively confident using in the Art lesson itself.

  • language to express opinion / to agree / to disagree
  1. expressing opinion: I think, In my opinion. The way I see it.
  2. agreeing: I think so. I agree. Exactly. That’s true.
  3. disagreeing: I don’t think so, I don’t agree. I am not sure.
  • Three sheep: the name I gave to a trick I learnt from Rafael, to teach your students how to construct their discourse, how to express and justify opinions, even for the lower level
  1. Sheep 1: the opinion itself (I think)
  2. Sheep 2: reasons etc (because, so, and, but)
  3. Sheep 3: an example from the real life

Setting the context

Aim: to help set the context for the Art lesson

  • T shows the students a few photographs from New York
  • Questions to discuss
  1. What can you see in these photographs? Do you know the city?
  2. What is New York famous for?
  3. Have you ever been there? Have you seen any films set in New York? Have you read any books set in New York?
  4. Is New York similar to or different from Moscow? Is it similar to or different from any other cities you know?
source: wikiart.org

Interacting with the artwork: stage A

Aim: to provide an opportunity for the students to interact with the painting in a freer way, to provide opportunities for speaking

  • T divides the students into two groups and assigns a painting, group A to work on Frida Kalho’s painting, group B to work on Georgia O’Keefee’s painting
  • Each group can be divided into pairs, depending on the group dynamics
  • The students are discussing their painting, answering the following questions:
  1. What can you see in the painting?
  2. Is it a happy / sad / angry / depressing / scary painting? Why?
  3. In your opinion, how did the artist feel about New York? Did they like the city they lived in? What makes you think that?
  4. Could this image be used in tourist brochures to promote the city? Would it make a good postcard or a souvenir?
  5. How does the painting make you feel? Would you like to have it on the wall in your room? Where could it hang, in an office, in a hospital, in a shop or in a museum?
source: museothyessen.org

Interacting with the artwork: stage B

Aim: to provide an opportunity for the students to interact with both paintings

  • T mixes the students so that students from group A can work with students from group B, in groups or new pairs
  • Students show each other their painting and report their personal and their group’s opinions
  • T gives out new questions for the students to discuss
  • Which of these two paintings do you like more? Why?
  • Both of these paintings show New York in a very different way. Why do you think these artists had such a different view of the same city?

Open class feedback

Aim: to report back to class, to compare views

  • T leads the open class discussion, all the groups present their views, focusing on the two different ways to portray the same city. The teacher reveals that both paintings were painted at approximate the same time (1933 and 1925)
  • Error correction

The mini-lecture

Aim: to present the background information to provide the background for both paintings

  • T gives a short lecture, adapting it to the level and the age of the students, highlighting the main points
  • Both painters were not New Yorkers by birth, they came to the city with their husbands, one from exotic Mexico, the other from a small town in the prairies in Wisconsin.
  • Frieda felt alienated in the city, she didn’t like it, she missed home, she stayed only to accompany her husband
  • Georgia lived with her husband, in Manhattan, on the 30th floor, in Hotel Shelton and painted and sketched what she saw from her window.
  • Perhaps these are the factors that influenced both artists.
  • Questions from students
  • Error correction

The follow-up

Aim: to give the students an opportunity to look at their own city and reflect on how their feelings might influence the way they see the city

Part A

  • T divides the students into new teams / groups of 3
  • Students discuss the following questions about Moscow / own city:
  1. Do you like Moscow? Is it a good city? Would you like to live here in the future?
  2. What are the main tourists’ attractions?
  3. What are your favourite places in the city?
  4. If you could change something in the city, what would it be?
  • Open class feedback

     Part B

  • T gives out different paintings / photographs of Moscow / own city
  • Students discuss the following questions
  1. Look at these three different ways of showing your city in a painting/photograph. Which one is the best? Why? Which one is your least favourite?
  2. If you painted a picture of the city or if you were to take a photo to represent it, what would you include?
  • Open class feedback
  • Error correction

The follow-up: homework

Aim: to present an alternative way of looking at a city: through its inhabitants

Option A: Based on the photographs by Stan Raucher who photographs people on the metro in different cities

  • T selects the photographs / a photograph, appropriate for the age/ level of the students, hands out
  • SS at home prepare to talk about the photograph
  1. Who are the people in the photograph?
  2. What are they doing?
  3. What are they wearing?
  4. How are they feeling?
  5. Where are they going?
  6. Which city are they from? Why do you think so?

Option B: Based on the stories from Humans of New York, a project that interviews the people in the streets of New York and retells their storiesT selects the story/stories, appropriates for the age/level of the students, grades the language, if necessary, hands out to students

SS at home read the story and prepare to talk about their character:

  1. What is the name of the person?
  2. Where is he/she from originally?
  3. What does he/she do?
  4. What do we know about this person?
  5. What makes this person special?
  6. Would you like to meet this person?

In the following lesson, students report back, in pairs/teams and they choose the most interesting story / person / photograph.

Resources:

Frida Kalho, My dress Hangs there, 1933

Image and the basic information about the painting:

https://www.fridakahlo.org/my-dress-hangs-there.jsp

For more information on Frida Kalho see:

https://en.wikipedia.org/wiki/Frida_Kahlo

https://www.wikiart.org/en/frida-kahlo/my-dress-hangs-there-1933

https://worldhistoryproject.org/1933/3/frida-kahlo-paints-my-dress-hangs-there

Georgia O’Keefee, New York Street with Moon, 1925

Image and the basic information about the painting

https://www.museothyssen.org/en/collection/artists/okeeffe-georgia/new-york-street-moon

https://www.wikiart.org/en/georgia-o-keeffe/new-york-with-moon

For more information on Georgia O’Keefee see:

https://en.wikipedia.org/wiki/Georgia_O%27Keeffe

https://www.artsy.net/artwork/georgia-okeeffe-new-york-street-with-moon

Yuri Pimenov, New Moscow, 1937

Image and the basic information about the painting

https://izi.travel/en/3185-yuriy-pimenov-new-moscow-1937-the-state-tretyakov-gallery/en

https://en.opisanie-kartin.com/description-of-the-painting-by-yuri-pimenov-new-moscow/

For more information about Pimenov https://soviet-art.ru/soviet-artist-yuri-pimenov/

Stan Raucher

https://www.dailymail.co.uk/news/article-3615702/Photographer-Stan-Raucher-captures-everyday-lives-ordinary-people-metro-systems-world.html

Stan Raucher’s photography https://stanraucher.com/metro

Humans of New York

https://www.humansofnewyork.com/