The artist
It was interesting this time. The spring came and I really wanted to a related theme. It is true that at the time the snow was still lying around or still falling but I just wanted bees, butterflies and flowers. And caterpillars, of course. Only later did I start to look for an artist who could help us with it. Believe or not, dear reader, I found one! Just to prove that with this Art and English, if only you try hard enough, you can connect any two dots, even the most random ones.
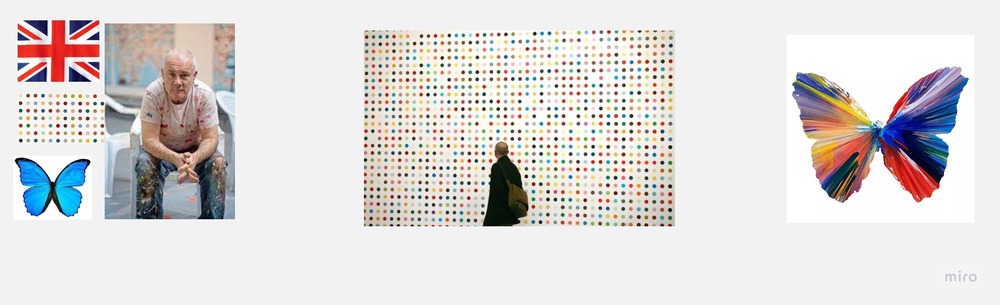
I have heard about Damien Hirst before. He is, after all, one of the leading British artists and his name pops up here and there. But only now was I able to see his art in all its beauty, the dots that I had seen in so many places without realising what they were and the butterflies!
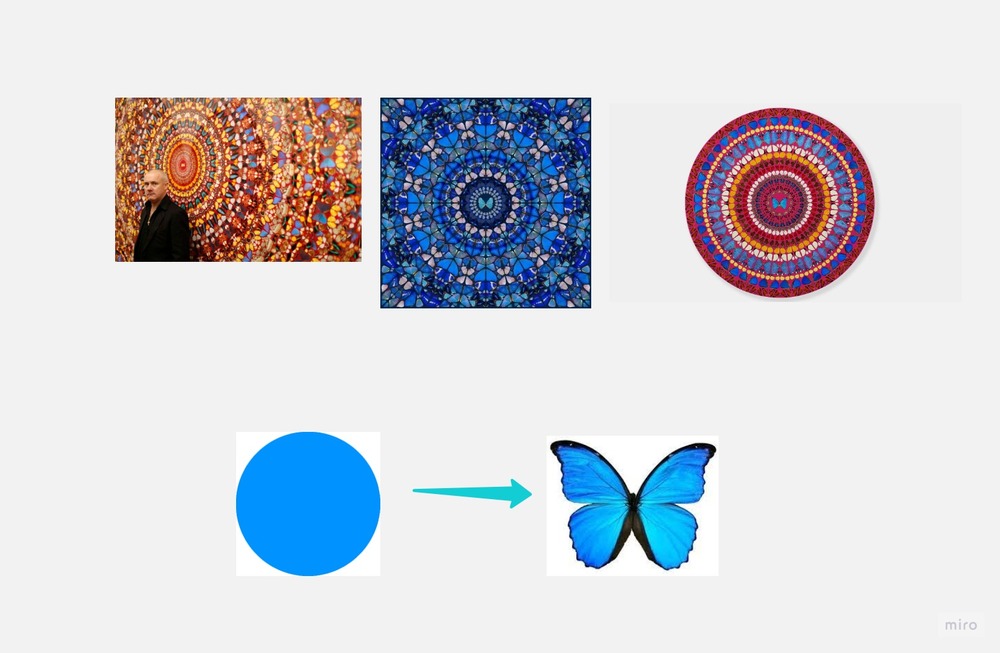
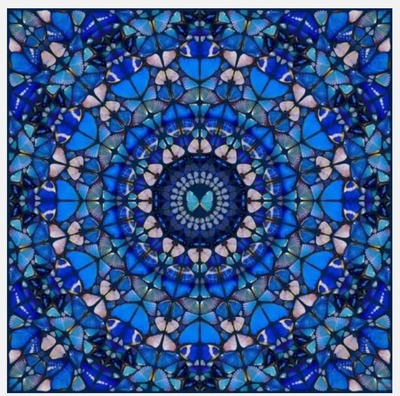
As usual, we introduced the artist, the photogragraph, the country and his two favourite things and we looked at his butterflies. And our Miro board was just perfect for it. We looked at the circles first (‘Can you see the circle?’, ‘Can you see the butterflies?’) and then we zoomed in (‘Can you see the circle?’, ‘Can you see the butterflies?’) as the circle disappeared and a multitude of butterflies emerged. Almost like magic).
Afterwards, I showed them my mini-graph and moved it around to illustrate how Damien turned butterflies into a circle and how we are going to turn circles into butterflies.
The language
This whole unit and the lesson revolved around spring, gardens and all the garden creatures, insects and not only. We have practised our vocabulary, we were describing gardens (‘I can see’), we practised numbers 1 – 20 and we sang a song about gardens, too.
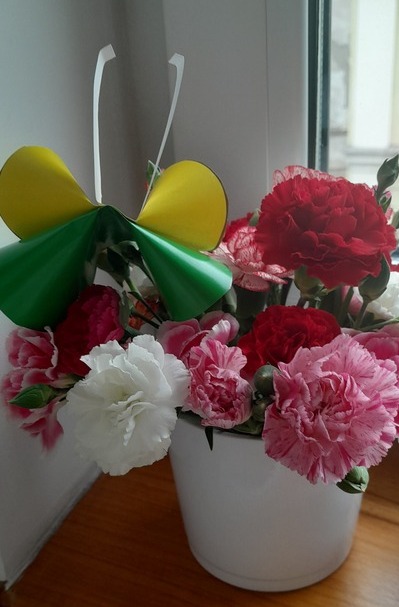
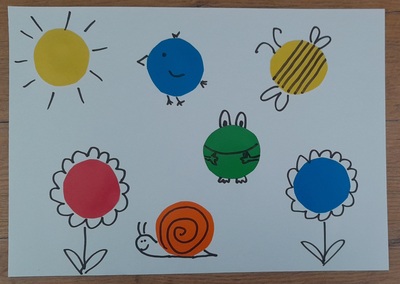
We watched and tried to retell the cartoon about Six Hungry Caterpillars from Playway to English and a series of lessons we made a garden (see the photo below) and our own caterpillars which you can find out about in this post here. We also looked at different gardens in art and we talked about those that we like and don’t like.
The craft
My main inspiration for our butterflies was the video from World of Art and Craft because it is supereasy and very effective. However, because our classes take part online everything has to be made achieveable for the kids to do on their own and on the other side of the screen. For that reason I gave up on the stapler and experimented first with paper and glue. It worked.
As usual we went through the list of all the resources (‘Have you got the glue?’ ‘I’ve got the glue’ with showing it to the camera) to make sure that all the parents prepared what I asked for in a message before the lesson.
We started with choosing the two colours of the coloured paper, drawing the circles (‘not very small, not very big’) and cutting them out. I was a little worried about that bit but the thing is that even if the circles are not very regular and even the butterflies will be pretty. I was using the craft paper (one sided, the white inside), the kids were using some double-sided coloured paper, thinner and thicker, everything worked.
Afterwards we drew a line across each circle (to make sure that we don’t spread the glue all over the circle) and put some glue on the line. We closed folded the circles in half, and pressed in the middle. Afterwards, we fluffed up the sides a little bit. After both parts were ready, we put some glue in the middled and pressed the two halves together.
In the end we cut out a thin strip of paper, folded it in half and glued it as the butterfly’s antennas.
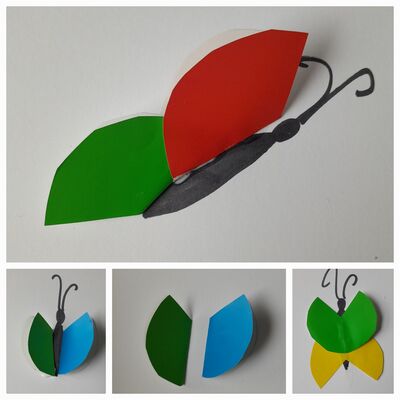
And then the second version of the butterfly appeared. I could not reuse the 3-D butterfly because while making the caterpillar, we had some problems with the glue and the paper which was just too thick and so another butterfly had to appear.
This one started with us going over the resources and choosing two colours of the coloured paper. We drew a circle on each, again, not too small, not too big and we cut them out. Afterwards, we drew the line across each circle, on the B side, and we folded each circle into half. The next step was to cut off a slice of the folded circle (‘Look, it is like cutting off a slice of cake’), to create the edge to shape the wings. Afterwards we drew the body of the butterfly on a piece of A4 paper, and we glued the wings on. We made only one butterfly in class but, of course, depending on the skills of the children, there is definitely a potential for more.
In the photo, you can see the intended butterfly and what happened in the classroom because students started to play with the materials and experiment how you can turn them into a butterfly.
Footnotes
It is only now that I have found out about the many surprises that Damien Hirst has up his sleeve. It turns out that his mandalas are made out of dry butterfly wings from real butterflies and that he himself is the biggest importer of butterflies in the UK. And I have to admit, I feel a little bit less enthusiastic about it all.
Happy teaching!