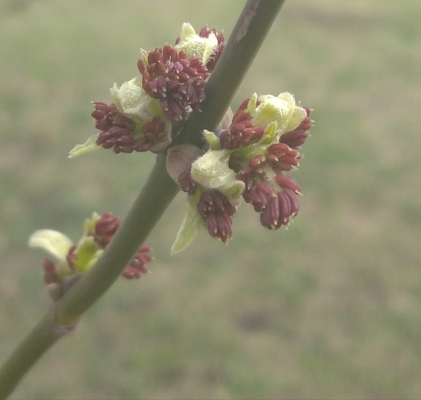
Here is a pumpkin flower: simple and unexpectedly beautiful, just like this game.
Ingredients
A piece of paper and something to write with
For younger students – somewhere to keep the paper safe and secret i.e. inside a coursebook
Imagination
The whiteboard to put the target language on
Procedures
Kids work individually, keeping their cards secret from their friends but if the game is played for the first time, they can work in pairs, this will be their natural support and the source of creativity because two heads are better than one.
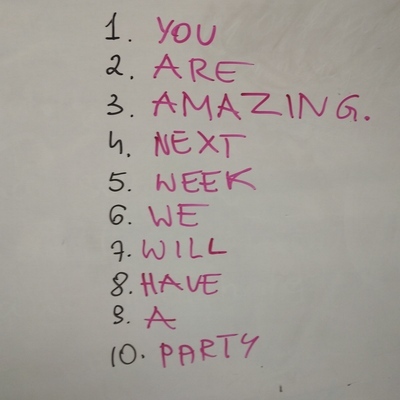
Teacher ask the students to write numbers from 1 to 5, in a column. When they are ready, teacher asks the kids to write 5 words, one at number 1, one at number 2, etc. Teacher monitors and prepares her/his own set to use in modelling. It might be also a good idea to write a few examples on the board although these are just for modelling and they will not be used in the real game. The target structures should also be displayed on the board.
Teacher demonstrates how to play the game – she / he describes the first word on her / his list for the whole class to guess. It might be necessary to play a few rounds with the whole class, with the teacher leading the game or with one of the strongest students leading the game.
The game can be played until all the words are described and guess OR for as long as there is time.
Important: It is absolutely necessary to carefully combine the vocabulary and the target structure to make sure that the set is used naturally and that it matches the context, too. Some of the examples of the activities we used below
Places in the city (ie bank, post office, school) + I can see…I can hear…I can smell…Where am I?
Professions + I am going to work, I am going to do…Who am I?
Animals + It is big / small, It can run / fly / swim, It has got…
Body parts + I need it / them when I write, swim, play
Objects + passive voice ie It is made of…, It is used for…
Personal characteristics + Present Simple, 3rd singular, This person always does something, This person never does something
Why we like it
The biggest advantage of the game is that it can be adapted to almost any set of vocabulary and any structure.
It can be used with the lower-level and the higher-level groups, with the younger and the older students.
The game requires no preparation for the teacher and it is SS-generated which means that it is personalised and motivating for the kids to play.
It is a perfect controlled practice activity as the kids are using the target langauge and the target vocabulary.
It is a guessing game and because of that it is both achievable and challenging.
With the younger kids we play the game of 5, with the older ones we usually prepare 10 words.
Or about my favourite resource in this academic year, hands down.
Ingredients
A notebook for each student and a box to keep all the class notebooks. These notebooks don’t travel home, they live in the classroom.
Some writing materials: pencils, markers, crayons.
Why we love it
For all of the students in all the groups where I introduced notebooks (and that’s everybody, pre-primary, primary, juniors and teens, apart from my pre-primary level 1 and 2, who are still only 3 and 4 years old, they are going to get theirs a bit later in the year), this has become a surprisingly wonderful way to express their personality and to become even more present in the classroom. When I gave these out, many of my students of all ages were inquiring what they should write on the front page or on the cover page. I suppose it is because there might be some specific regulations at their schools regarding what needs to be and what can be written there. When I just shrugged my arms and said ‘I have no idea. It is your notebook. Write what you want‘, many of them looked at me in disbelief and then started to write some elaborate names in Russian or some made-up names and nicknames or just their names, in a variety of fonts and styles.
Equally, the format of the note-taking is highly personalised, too. There are certain activities that we use these notes for (see below) and sometimes they involve a structure or a format which is the same to everyone but, at the same time, the kids are in charge as regards the choice of the writing materials, colours or the ratio between text and the drawings.
It is the students’ personal space in the classroom, too. We share what we have written but I hardly ever look into those notes, unless they ask me to or unless they need help with some vocabulary or structures. Since this is a new project and since I am just developing it and discovering its potential and its potholes, I have just realised that I will have to include some kind of delayed error correction in the process, for instance by reading the entries and contributions to fish out some of the spelling or grammar mistakes.
It give the students an opportunity to write and to read more.
It is an opportunity to keep all the notes and all the ideas in one place and to go back to them, to review, to remember, to reminisce or to recycle.
Notebooks for the high level students (C1) are our way of breaking into the least favourite skills ie writing. After we have finished a receptive skill task such as exam reading and exam listening, we follow it up with a 50-word (plus) summary in the notebooks, steering away from any specific genre or format, just simple note-taking that now compliment our regular ‘What do you think?’ speaking sessions. We go back to these notes in the following lessons, to check whether our views have changed in any way, whether they have developed but also, very importantly, to edit and to improve, when possible.
Notebooks for juniors(B1) have been used in a variety of ways related to the vocabulary we study. First of all, they are the opportunity for the students to reflect on the vocabulary they have learnt. At the end of the unit, we look at all the phrases, structures and words and categorise them. The categorise we use change all the time and have included the following: easy words and difficult words, useful words and not-so-useful words, interesting words and not-so-interesting words and I am hoping to add more to this list. In the future I would also like the kids to use their own categories in the future. This kind of an activity also involves a discussion and sharing the rationale for our choices (and that is my favourite part of the whole activity). We use the notebooks also to work on the additional vocabulary, not included in the coursebook but still worth knowing. Sometimes we create the lists ourselves (ie while describing the objects, we also revised a list of materials) or we work on the lists that I prepare (ie a few weather idioms that we discussed while going through the topic of ‘extreme weather’). Last but not least, this is also where we take note of the emergent language, in the section at the end of the notebook called ‘Our special words’. I keep track of these on the whiteboard (the left margin) but I encourage the students to take a note of these (or some of these) in their notebooks.
Notebooks for primary (A2) are probably the most multi-functional among all the age groups. First of all, we use them to complete our portfolio tasks that are included in our coursebooks, one task for every two units. For these, each student gets a pre-prepared template, a notebook-page size, which they glue in and then use for whichever task we have such as the personal file (used in an interview) or the list of the adjectives to describe animals (used later in Our Big Animal Quiz) and so on. We use it also to personalise the vocabulary that we learn, for example after we have learnt the jungle vocabulary, the kids were asked to arrange all the new words in the order of their own preference, number 1 being their favourite word, number 9 being their least favourite. As with the older students, we later talked about the reasons for our arrangements. Last but not least, we use the notebooks to prepare for any student-generatedgames that we play. They are especially useful in all the guessing games and are much better than any small cars because the notebooks are not transparent and, because of their format, they help the kids to keep their secret words really secret. You can find out more about this game here.
Notebooks for pre-primary (pre-A1) is a serious step towards developing reading and writing skills. Now, I am not sure whether it is going to fit all the pre-primary classes (because some children are not ready and some programme do not even include any literacy elements) but this is what works for us. My students are 5 and 6 at this point and we have been doing a lot of literacy activities for about a year now. We started relatively early simply because the kids showed interest in the written word and I realised they were ready. We went slowly but with great results and I can safely say that now it is their favourite part of the lesson. Last year we did a lot of writing on the laminated erasable pages, with whiteboard markers, this year we moved on to notebooks. We use the notebooks to copy the words that we learn, in two or three batches, with only four or five words per lesson, not to overwhelm the kids. Kids usually choose to add little drawings to these so our notebooks are slowly becoming picture dictionaries. Our notebooks are also used in pairwork, for example in a survey on the food we like and we don’t like in which the students used a pre-prepared chart (printed, cut out and glued in by the teacher) to interview their partners and to ‘take notes’ in the form of pluses and minues. I found out that the notebooks really help to set-up and to run a pair-work activity. The notebooks are also going to help us to maintain continuity with the longer-term projects such as the reading of a phonics story such as ‘A fat cat on the mat’ by Usborne and all the related activities. They will be completed over a series of lessons but thanks to the notebooks we will be able to get back to them and to revise in a more SS-centred way. Or so I am hoping.
There is no other way of putting it is: it is a proper Notebook Love (or Тетрадка Love) and it is almost ridiculous that such a tiny and irrelevant thing, at RUB 40 a piece (about 50 cents) could have such an impact on our lessons with its potential for creativity, reflection, personalisation…And, mind you, it’s been only two months. Something tells me, the best is yet to come.
Happy teaching!
P.S. Of course I have forgotten to take proper photos in the classroom, of all the cool things in our notebooks. I will try to make up for it, at one point. For now, just some cool notebooks that are kicking about the house.
I did not ask them to write my name here. I feel honoured they decided to include me here))
*) Тетрадка – a dimunitive of the word тетрадь (notebook)
This started as an activity for the CLIL lesson devoted to space and Yuri Gagarin but after I published it on Instagram, one of my friends suggested that it might be a great idea for the end-of-year revision activity. And it is that, indeed. Thank you, Rory!:-) Hence this post.
Ingredients
An A1 piece of paper although, to be perfectly honest with you, it never is that. Every time I have made any murals (and that’s what this activity really is), the preparations started with a pile of A3 sheets of paper, a roll of scotch or a glue stick. It is easier and faster (no shopping trips) and more adaptable (because the teacher is in charge and the poster can be made bigger or smaller, depending on the size of the group or the theme of the project).
Creative materials of your choice – pencils, markers, finger paints or watercolours. This time we used markers, in my opinion better suited to the age of the kids and the task.
A place where all the students can draw simultaneously. In my classroom, we use the space in which we normally do the movement activities because we have a big carpet there and it is always a lovely variation to our everyday routine, both for the little kids or the teenagers that like visiting another classroom from time to time. A big conference table or a set of desks put together will be a great solution, too.
A decision as regards what language, vocabulary and structures, you are going to focus on in the task. In the original task, we created our planets with all our favourite things, our favourite number, colour, food, drink, animal, transport etc.
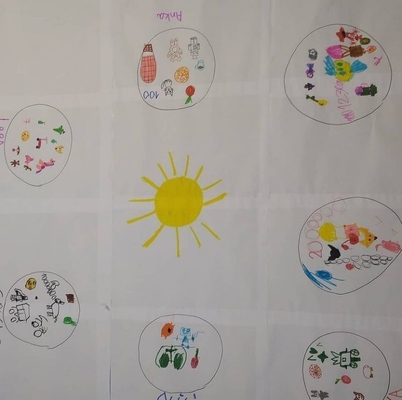
It is necessary to stage the activity carefully. The kids sit down on the floor around the poster, the teacher draws the sun in the centre and counts the kids and then draws one planet for each child around the sun. In the first step, each child chooses a marker and writes their name. Then the teacher ‘dictates’ the first topic and the kids draw it and say what they are drawing. In my classes, we use the song for that ‘What’s your favourite colour?‘ by Super Simple Songs and its variations because it offers the question – answer set (‘What’s your favourite…?’ ‘I like….‘). For some kids it is necessary to sing, some are better prepared to respond to questions without the support of the music. The teacher waits for everyone to finish each stage and the fast finishers can be encouraged to draw more than one item, to look at other students’ drawing, react to them (‘Do you like…?’) etc.
Round-up: If there is time, the students stand in a circle around the poster, first at their own planet and then, on ‘1..2..3! Let’s fly!‘, they move one planet to the left. Everyone reacts to what they can see on the new planet, for example ‘I like…‘ This stage can be repeated a few times, depending on the time available. Afterwards, the poster is displayed on the wall. It can also be used as part of the presentation for the parents in the following lesson.
Why we love it
First and foremost, it is a great project for the whole group and it really does contribute to building the community and that is because of the fact that we all sit around one big piece of paper and because of the concept of this activity – a solar system of which all the students and the teacher are a part.
It might be especially suited as the first project work for a pre-school group as everyone has a chance to contribute to the project but it is automatically clear that no one can take the final product home, as first of all, from the very beginning it is obvious that there is only one copy, that it is too big and that all the planets stay a part of the system and cannot be separated. Frequently, this issue can be the biggest problem with the project work for the youngest of students as they become attached to their creations and the first question they ask is ‘Anka, but can we take it home?’. Not this time.
The activity itself in its original version is very flexible as its timing will depend on how long the children are interested. Perhaps only three elements will be included, perhaps ten. The format of the activity also helps with staging as the children do not know what is to come and will not start going ahead of the group.
The song format helps to encourage the kids to actually produce the language, especially that in our case we used this question-answer set beforehand so at the time of this particular lesson, the children were already used to it and used to responding to it.
It can be used with all age groups and levels as the language content can easily be adapted either to more complex ways of discussing favourite things, drawing their own planets to practise the vocabulary of the natural world (with a more extensive presentation at the end of the project), creating a planet which is a symbolic representation of each student. For the older students, the planets can be filled in with words, rather than with images.
They are growing up. My students are no longer the little babies they were when we said our first ‘Hello!’. Six years is a long time, after all. And because they are changing, the lesson is changing, too. I like to think that, in a way, we are growing together.
An example? For five years and five months my students would wait for me outside of the classroom, in a neat line and we would check the homework and have a little chat, 1-1, with them slowly entering the classroom (more about it here). Well, not anymore. Two months ago we stopped. For good.
Because it turned out that, all of a sudden, the kids like to be in the classroom before the lesson. The choose their seats, take out their books, draw on the board or show each what they do in Maths classes at school. They also like to hide to surprise me (if I happen to leave to get some water or flashcards), walk around to inspect what I prepared for the day or just sit down and read they books.
And because over those six years we have managed to establish what’s OK and what’s not OK in terms of behaviour and because they have grown up and become more mature, I just let them do it and take over the classroom during the break. Plus, let’s be honest, they seem to be enjoying it a lot and I just don’t have the heart to forbid them and to continue to impose lining up.
Instead, I had an idea: how about a before-the-lesson activity for the early comers? It turned to be a very good idea indeed!
Ingredients
A whiteboard and a set of markers.
An activity that can be prepared on the board before the lesson for the students to work on potentially unsupervised (although in real life it differs, depending on whether I can be in the classroom during the break or not)
A set of easy instructions written on the board and an example
A longer break before the lesson – not obligatory but highly recommended
It might be necessary for the teacher to hint that there is something on the board that needs dealing with, at least when this part of the routine is introduced. It is quite likely that the kids would just not approach the board if there are any notes on it.
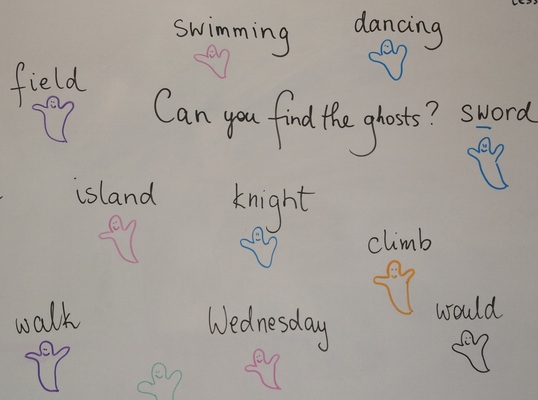
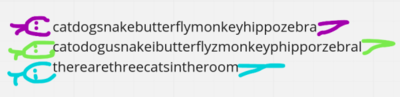
Ghost letters, focus: pronunciation. Students underline the silent letters in the words written on the board
Letter snake, focus: reading / writing. Students divide the chain (or a snake of letters) into words. Each snake can be made as challenging as necessary ie only the words themselves, the words with letters-distractors, the words in a sentence.
Letter stories, focus: reading/ writing. Students divide the very long chain (or a snake of letters) into words and sentences. I used a different colour for each line of the story and neat breaks between the lines, too, not to overwhelm the kids. Forgot to take a photo:-(
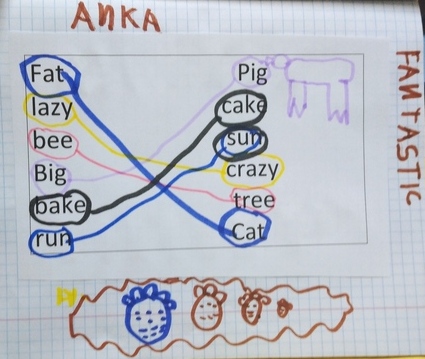
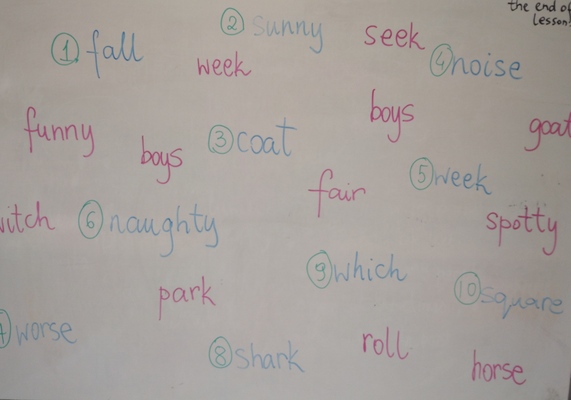
To rhyme or not to rhyme, focus: phonemic awareness. Students put the rhyming words into pairs. Again, colour-coding is supposed to be make is a bit more achievable and visually appealing.
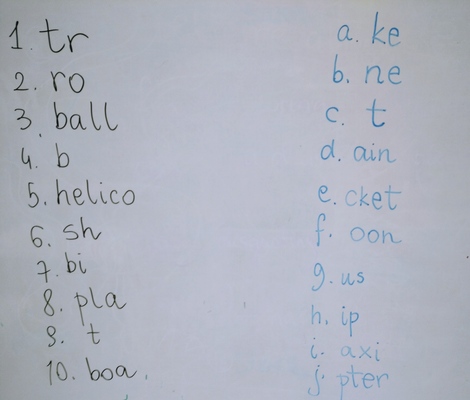
Messed-up, focus: vocabulary revision. Students put the halves of words together.
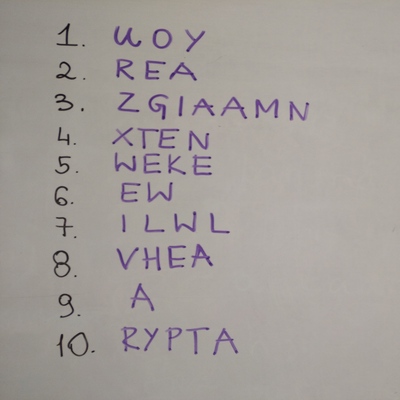
Angrams (and Secret Messages): These are just silly anagrams which are a nice task, more necessary for the Starters students but fun for everyone. It can be a set of random words, connected by the topic (or not) or sentences, especially if there is an especially important message that the teacher needs to pass on to the students. The message below appeared on the board before the second lesson with the mock Movers test, in an attempt to praise the kids and to motivate them. It worked!
Why we like it
Those who come early can wait for the lesson doing something in English.
They provide additional practice and revision in different areas and skills: reading, writing, vocabulary, pronunciation
Different kids come early on different days so they get to work in different pairs and teams which seems to strengthen the sense of community in the group
It seems to have become ‘fashionable’ to arrive early for class (not that it has even been a problem) but it is obvious that they have already developed the habit of walking in and checking what’s on the board
The teacher is applying all her creative powers to come up with more and more pre-lesson activities
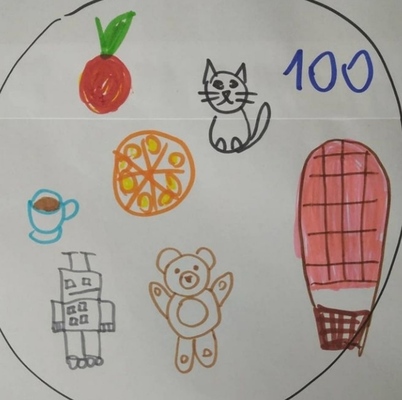
Today about an activity that requires almost no preparation and is a nice break from the coursebook and from the everyday. Plus – you can draw. Ready? Let’s start the Musical Challenge!
Ingredients
A piece of paper, some drawing tool and a few tracks.
The choice of the tracks will depend on the teacher but it is good to include a variety of genres, songs or music with different tempo and instruments. I like to pick songs with a long intro and in a language that the students do not speak, not to let them be influenced by the lyrics.
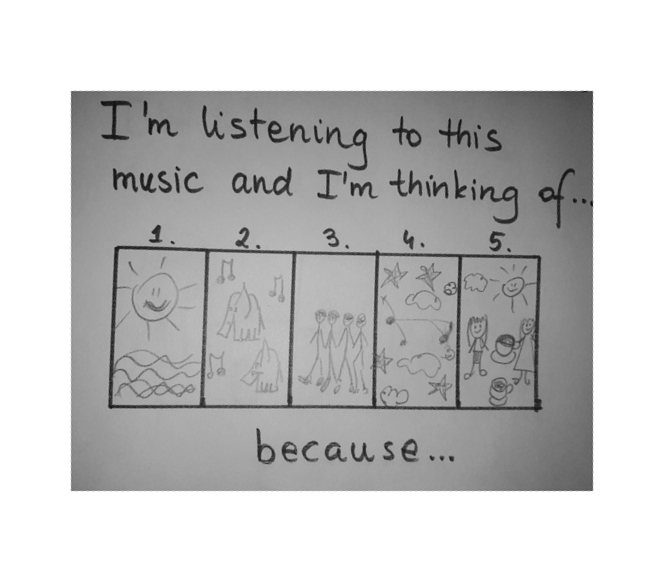
Tell the students that you are going to play a short piece of music and they have to draw what they are thinking about when they hear this music. Highlight that all ideas are good ideas. Give the students an opportunity to include words, for example is some concept are difficult to draw.
Model, with a sample track.
Play about 30 – 60 seconds of a track and give the students up to a minute to finish drawing after the track stops. However, this is a fast-paced activity and its main aim is to provide material for speaking, not the drawing itself. Some students might want to make their drawings too pretty and too detailed and that will take time.
Put the students in pairs, let them discuss the songs. If possible, it might be a good idea to play the track they are discussing in the background to create the appropriate atmosphere.
Remember to put the questions / structures you want the students to answer / to use on the board. It will help them produce and stay on the ball.
Final feeback can include choosing the favourite and least favourite song.
Why we like it
It is very easy for the teacher to set up. It is enough to play the audio from the phone or even from youtube, pratically no preparation is necessary. It is possible to prepare a grid with numbers but it is much easier to give out an A4 or an A5 piece of paper that the students are asked to fold into halves until you get eight or six boxes. It works well, too. Because of that, it can easily become your go-to last minute, no-prep activity that can be added to any lesson.
It works well with different ages, not only with higher-level students, although, obiously, they will be able to produce more langauge and to discuss their own associations, metaphors, using more advanced language such as modal verbs for deduction. At the same time, even the younger and lower level students can describe their illustrations using simpler structures (I can see, he is wearing, he is happy) and to express their views (I like this song, I don’t like this song because…). The youngest students that I have done this activity with were about eight years old and studying in the A1 level.
The teacher has a lot of flexibility, this activity can be stopped whenever it is necessary, after four, five or eight tracks. The activity does not really have an end so it does not matter when it is stopped, for example when the students are not quite interested.
It can be further extended into a homework task. The students can be asked to choose a song, prepare their drawing at home and then play the song for everyone in class and either draw or just talk about their associations before presenting their original picture. If the songs are played in other than L1 or English (or if the beginning of the song does not include any text), the discussion can go in the direction of the story that the song is telling, based on the title, the summary or the single quotes.
It gives the students a chance to express themselves through drawing. We do a lot of that with the younger students but as we go, higher (level) and older (age), drawing and colours do disappear from our lessons, sadly. It is good to bring these moments back. They students do enjoy these.
It is a fascinating opportunity to see how music can be seen by a group of people and how different these associations can be.
It is highly personalised and open-ended, all ideas are good ideas
As a result, that kind of an activity generates a lot language.
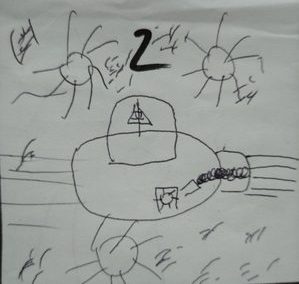
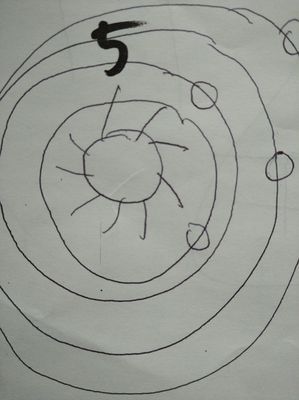
The last time we did it a few week ago, we used the following tracks (we also read a text in our coursebook on music and fashion in the last 70 years, this is how all of the songs appeared here and how I listened to Ed Sheeran for the first time in my life:). Now, have a look at the pictures illustrating this post and have fun guessing which song inspired them. The Joni Mitchell, River
As soon as I said it out loud, it turned out that in my classroom is a crowded place. Apart from the teacher (that would be me), my students (older and younger), there is a whole bunch of characters who simply are there.
There is Pasha (the invisible student), there is Angelina (our class puppet), there is Mr Milk (the little-known-superhero), there is the Flying Cow…And there is also general Kutuzov. To whom this game is dedicated.
The thing is, general Kutuzov is a personal hero of mine. Every time I find myself in the middle of a big project, with one million areas to oversee and to manage, while on the verge of going crazy (because I multi-task well only in the classroom and in the kitchen), I think of general Mikhail Illarionovich Kutuzov, one man managing troops, camps, provisions, civilians, and all that in the face of the approaching enemy (aka Napoleon). This thought calms me down.
But not only that.
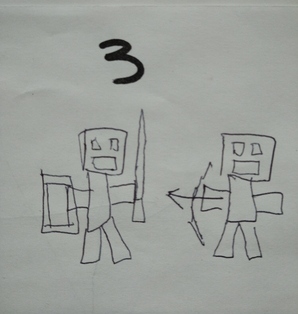
We sometimes play games with my kids (duh!) and sometimes they get very competitive (duh!) and sometimes, instead of ‘just playing’, some of them take time to think, to ponder, to come up with some very clever strategies in order to win…Which, on one occasion, resulted in me saying ‘Oh, look, here is general Kutuzov, planning something’ and ‘General, Kutuzov, please, can you make a decision? Today?’
They giggled. They are eight but they got the reference. And general Kutuzov stayed with us. So now, when they want to comment on someone taking their time to think or someone coming up with a strategy, they call him or her ‘general Kutuzov’ which, to be honest, I am rather proud of.
And that’s what I called that game:-)
www.wikipedia.com
How to play?
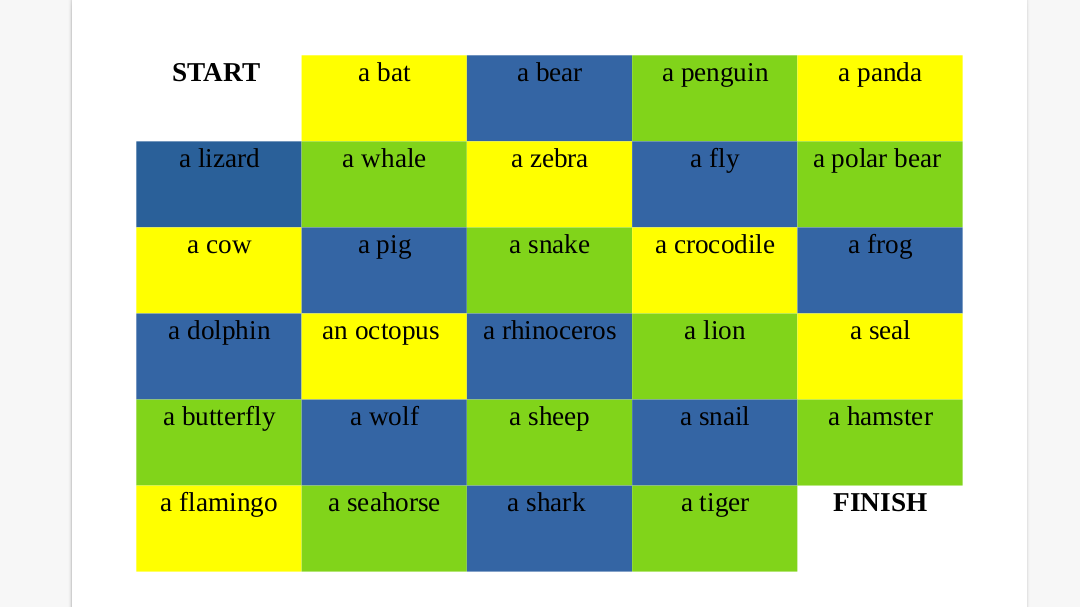
The main aim of the game is to get from the START to FINISH, choosing your own route on the board.
Players move across the board and as they do, they have to explain the word in each box. They answer the question ‘What’s…?’ or ‘Tell me about ….’
It’s always good to put the key structures on the board, to support the production. In the animals game, with my A1 students, we used ‘It has got…(body parts)‘, ‘It can…(verbs)’, ‘It likes to eat…(food)‘ and ‘It lives in… (habitats)’.
Students play in pairs or groups of three per board.
Players move one box at a time, to the left, to the right, up, down or diagonally up or down.
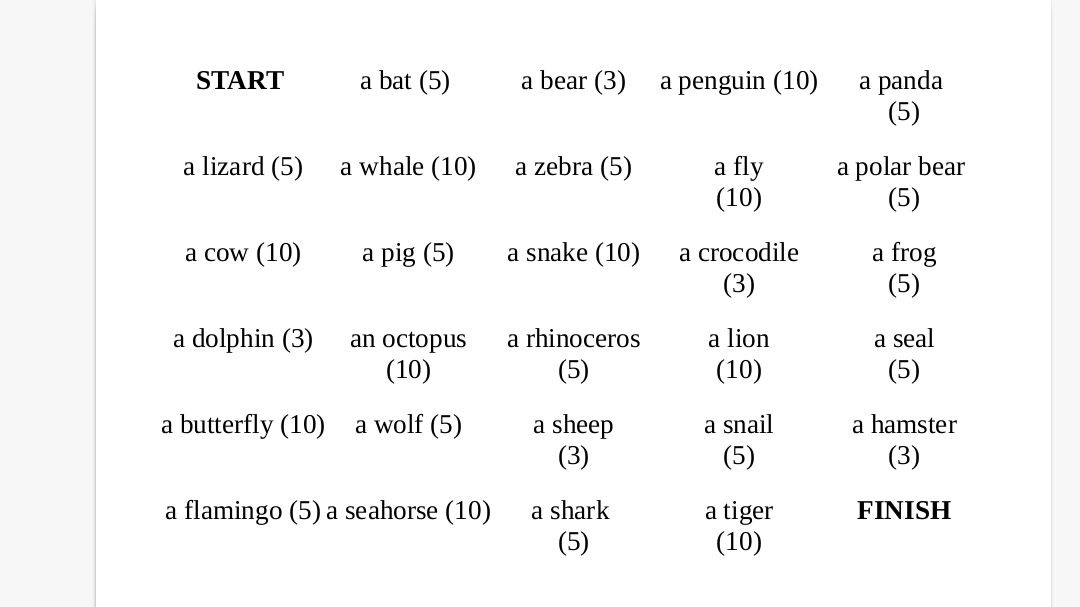
Each box has a number of points assigned and the students collect the points throughout the game.
I give the kids small cards, folded, on which they are to write their points and to keep them secret until the end of the game.
In the end, each player adds the points and we announce who the winners are, in each pair and in the class.
Why we love it
The game generates a lot of language and it keeps the students motivated and involved.
It is a competitive game but you can win it not because of good or bad luck but because you plan your movements well.
It is suitable for mixed ability groups as the students choose their route themselves and can, if necessary, avoid using the words they don’t know.
We played it in our offline lessons but it can be also used online, with the kids annotating on the screen. It would work best with individual students, small groups or big groups playing in teams.
It depends only on the players (or their teacher) how long the game is going to last. Naturally, the kids will try to get from start to finish and as soon as one player does it, the game is stopped and the points counted. At the same time, the teacher can set the timer at ‘ten moves per player’ or, simply, stop it at any given point in the game (with the same number of moves per player, of course), announce the end and count the points.
It takes a few minutes to prepare and it can be used with any kind of vocabulary, a thematic set (lower levels) or any random set of vocabulary taken from a story or a listening task.
The first time we play it, the game is teacher-led and we play with teams of students, on the board but once they get the idea, they can play in pairs.
No dice is necessary. Kids can either use checkers or colourful markers to draw their route across the board.
I have played it with primary school students (A1) and with my B1 teens, too.
The game can easily be made more or less challenging by keeping only two types of boxes (1 and 5 points, for example) or by adding more of those (1, 3, 5 and 10 points) and the number of points can reflect the level of difficulty of the word or phrase.
Players can move in any way they choose, one box at a time, but to make it more challenging, the teacher can exclude moving diagonally or any other of the movements.
The same can be applied to the rule of using the same box twice. It can be allowed or not.
I have thrown my kids at the deep end but I think that if I were to introduce the game again, in a new group, I would probably create a board of boxes worth only 1 point to highlight the importance of strategic thinking here. The kids figured it out themselves, though: the longer the route, the more points (the kids’ aim) and the more language produced (the teacher’s secret objective:-)
The board can be colour-coded. It will make it more attractive visually and it will help the kids understand where to move next, for example: a green box = 1 point, a blue box – 3 points and a yellow box = 10 points. Having said that, the black and white simple chart with points works equally well.
P.S. The inspiration for the game might have been a listening activity in one of the old coursebooks by OUP called ‘I Spy’ which had a listening activity in each unit called ‘the maze’. Maybe or maybe not))
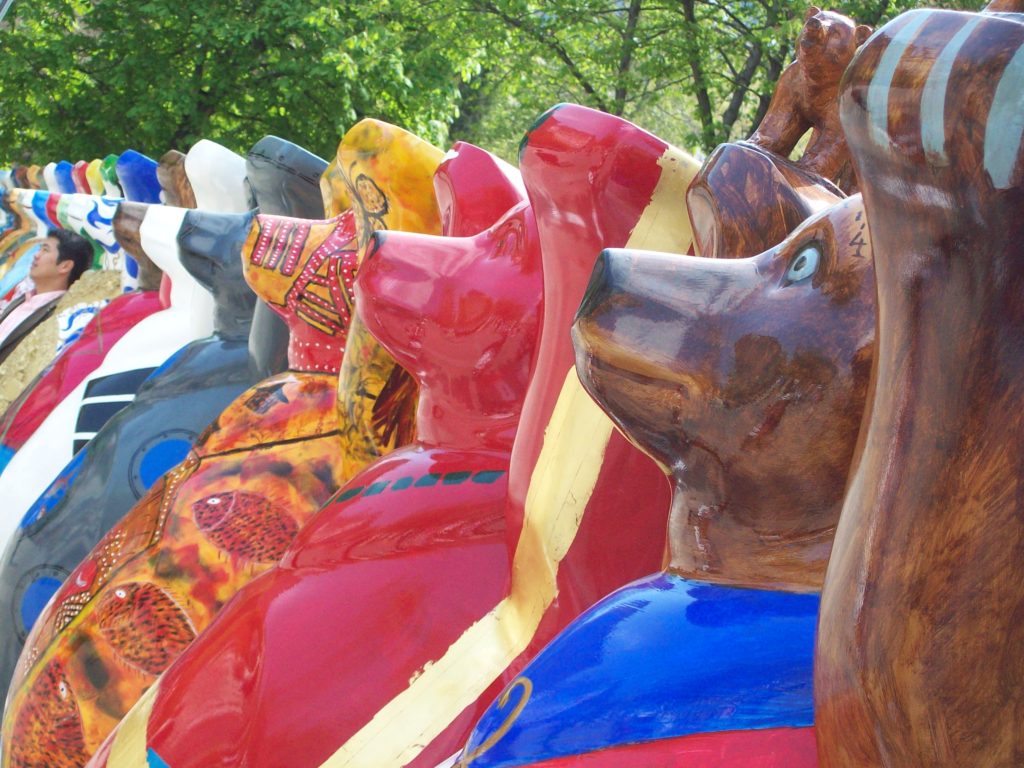
Welcome to my favourite art project: The United Buddy Bears. I first met the bears face-to-face (almost because they are 2 meters tall so face-to-face, eye-to-eye is not so easy to do) in Sofia because we all happened to be visiting the city in spring 2011. They were an art project back then already (since 2002 actually) but after our encounter they also became an EFL Art Project.
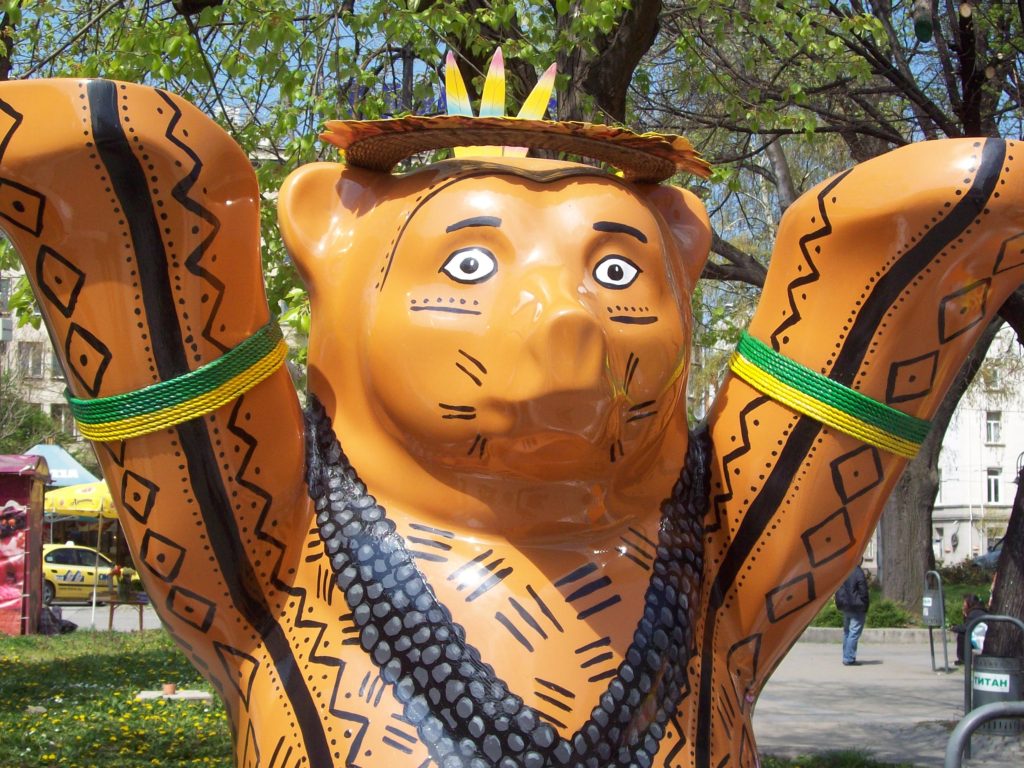
The United Buddy Bears: Brazil
Ingredients
First of all, if you have never heard about the project, start with this article on wikipedia or the bears’ own website.
A set of photographs of some of the bears that I use in a quiz. The students are shown the photos and they are asked to look at them and guess the name of the country. Naturally, the set should include the kids motherland.
Depending on the age and the level, the follow-up stage might involve describing individual bears, especially the bear representing the students’ country or symbols in general, as well as talking about the bears they like or dislike.
The main objective of the project for the younger students (primary) is to draw their version of the bear to represent their country. First, it might be necessary to brainstorm and to introduce the vocabulary and concepts that people normally associate with the children’s country. In case of Russia, it is especially interesting as it creates an opportunity for the students to learn that they already know many of these words, for example balalaika, borscht, matryoshka and they only need to learn how to write them in the Latin alphabet. Then, the students decorate their bears using the template provided by the teacher and, eventually, present their bears to the group.
The older students are invited todesign a bear that represents them. It can be a bear that will show their hobbies, personality, favourite sports, school subject or a band, or, really, any concept that they consider important. The sky is the limit here. The students present their bears to their friends, ideally in a mingling activity.
In the end, all the bears are proudly presented on the walls of the school or the classroom.
In both cases, it might be necessary to start drawing and decorating in class, to make sure that everyone is on the task but to set the task for homework, with the presentation scheduled for the following lesson. Some students might need more time to complete their drawings or to prepare their presentation and that might help to solve this problem.
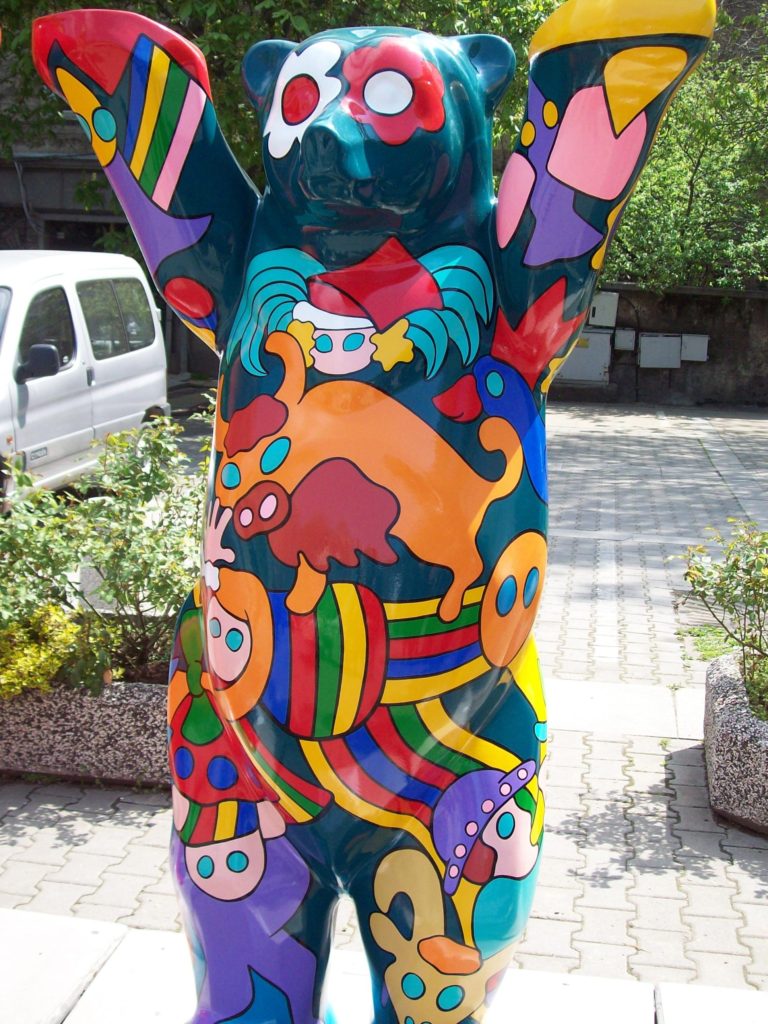
The United Buddy Bears:Poland
Why we like it
It works like magic. Or almost. Some of the bears are easy to interpret, some of them require a bit more of background information but this way they can serve as a springboard to learning about different countries. The set of bears used in the quiz can be easily adapted by choosing the more straightforward bears for the younger students.
Regardless of which project you choose, the students get a wonderful chance to personalise the content, either because they will be drawing to reflect their own interests and hobbies in the bear or because they will be creating their own version of the Russian bear. It is a very happy coincidence that the Russian bear (or the first Russian bear because later I did find some other versions) is rather ugly. As a result, all my students with whom I have ever done that project, all of them without exceptions, were deeply offended that it is supposed to represent their country and were more than eager to create their own, better and more beautiful bears. The one you can see below is the more beautiful, later version of the bear.
It can be adapted to different levels and age groups. I have done it with elementary primary students and with advanced teenagers.
It is an opportunity for the students to express themselves, to create and to produce the language.
It can be used to supplement the coursebooks and it can be done as a part of the extra-curricular programmes such as summer camps, CLIL etc.
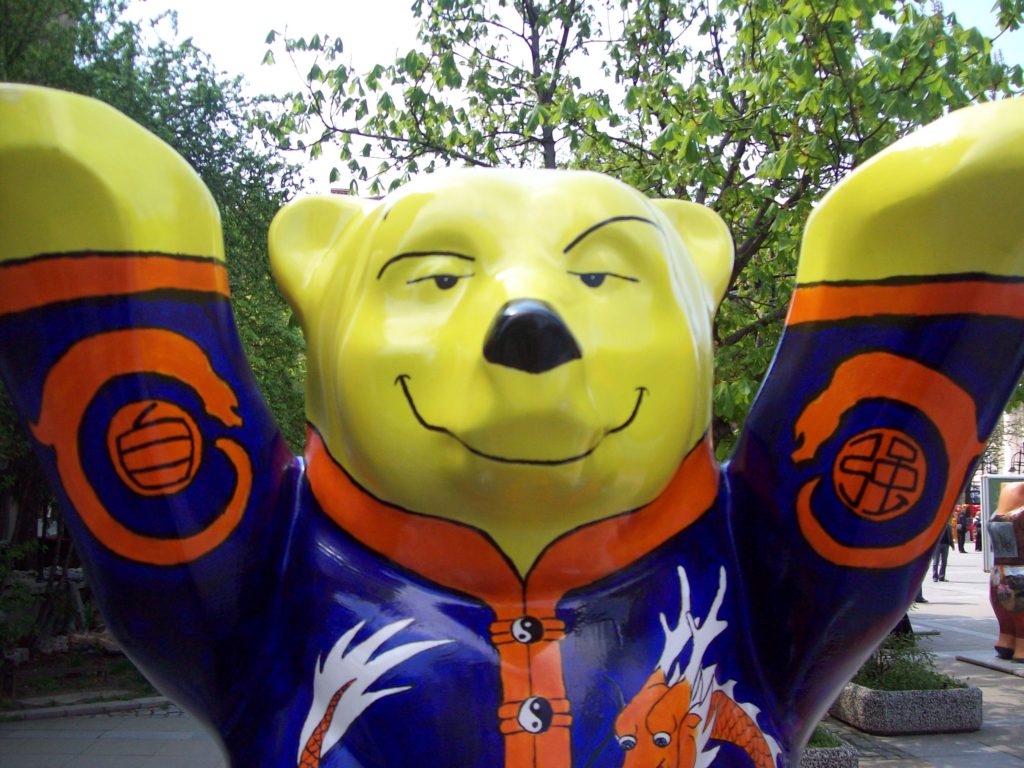
The United Buddy Bears: China
Happy teaching!
The United Buddy Bears: Russia (the beautiful one) from www.buddy-baer.com
If I had to choose only one craft activity for all my classes, a proper all-rounder, for the younger and for the older, to serve a hundred purposes – that is the one!
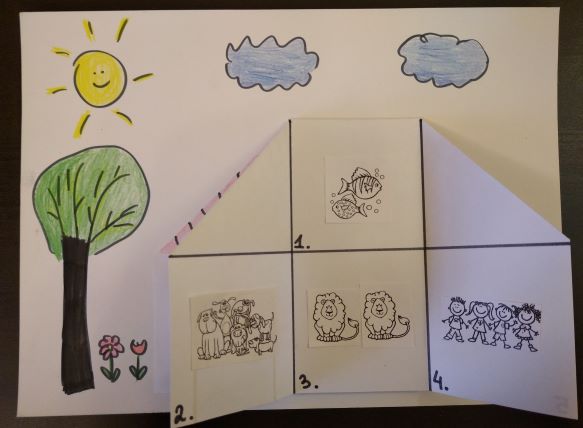
Welcome to my little house!
First of all, I really did try hard, very hard to remember where and when I learnt how to make it and how to use it and who taught me and I can’t. I don’t know. For sure, it was Moscow, definitely my first year here but who and how? No idea. The only thing that I can do now is to say ‘Thank you!’ to this forgotten and now anonymous benefactor. I am, indeed, much obliged. Now, I am sharing.
Instructions
Two pieces of paper per student / house. In the samples in the photos I have used A4 but in the classroom, with my kids I tend to use both A3 and A4, depending on the main aim. If we are just glueing things, A4 works just fine. If we draw – A3 is bigger and offers more room for the kids’ drawings.
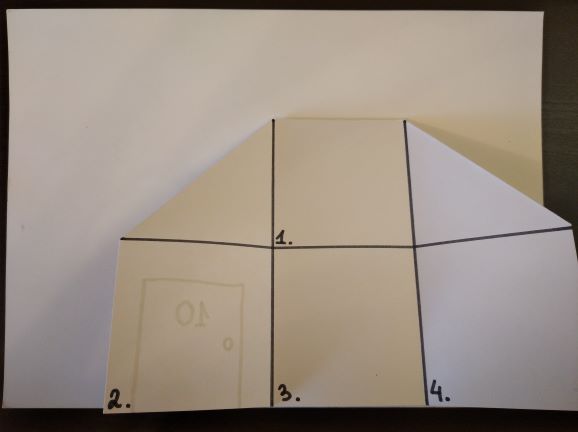
Fold the house. It is pretty easy and you can watch this video here, from Inner Child Fun to see how it is made. Emily is using origami paper but a regular A3 or A4 will work just fine!
Important: I normally do it myself, for all my students because even adults (like my trainees) might not be very good at origami-like activities and the house, although it is relatively simple, it does require some precision and if it is not applied, it is not going to look very well, unfortunately. Preschoolers will not be able to fold it and when I once tried with my primary school kids, I immediately began to regret it because some of them took the responsibility of the taks too seriously and were getting very nervous, predicting that they might not be skilled enough to manage the task. They did, in the end, with a lot of encouragement but I think it is just not worth it. We can still teach them how to do it, for them to practise and play at home but if you think of the lesson itself, the timing and the aims – just not worth it.
In my case, depending on the aim of the particular house (see below, there are plenty of options), I make one house myself, as a template, hand-drawn or using clip art images, and then I photocopy it to fold for each student. The advantage of it is that you can put in your house whatever you want. The basic design involves only the lines inside the house and the division into rooms, with numbers. That helps during the activities because you can ask your students ‘Go to room number 1’ and this way you make sure that everyone is on the ball and that they don’t glue pictures wherever they should not, for example, on the lines as that would get in the way of the house closing and opening.
Also, before the lesson, I glue the houses onto the garden page. This is especially useful in the case of the pre-primary students and in the case of those of my primary kids who have not done the activity before. Being glued on, the house is not as easy (although not impossible) to be dismantled and unfolded and it is just easier to manipulate in class.
I start with demonstrating my house, with all the theatre that I can muster. We look at it, we knock at the door, we open it and look inside. This can be done on the carpet or with the kids gathered around you so that everyone can see all the details.
I give out the houses and we start with drawing the door and writing the number (ask talking about them) and then drawing the windows (and talking about them). Make sure that all the students are more or less in the same place here. I normally only give out one colour per child (although they can ask for a different colour for the door and a different colour for the windows) or, with the older kids, with a pencil only. They will want their houses to be really pretty so erasing might be necessary and I really don’t want to waste time on colouring, this can be done at home.
The main task usually involves glueing things in different rooms, for example pets. For that, I prepare small pictures of all the pets, one set per child, on a tray (or whatever works as a tray) and a poster to put up, for everyone to see all the options. We start with room number 1 and I say, ‘Go to room number 1’. ‘I can see a cat (in my room number 1)’ after which I glue there the small picture of a cat. Then, the kids take turns and make similar sentences choosing their own animal from the set. They only receive a picture to glue after they make their sentences. When everyone is ready with room 1, we show our pictures, we say ‘I’m ready’ and move on to room number 2. And so on.
In the end, if there is time, we draw the sun, the tree and the flowers in the garden and we colour the house for homework. Also, if there are any leftover animals, these can be given out to glue at home (although, yes, that involves some more complex logistics, paperclips, small envelopes, not impossible though).
In the following lesson, we look at our houses and describe the rooms, the colours etc.
Variations: there are many of these. The house can be anything you want it to be. Here are some of my favourite ones:
Any set of vocabulary and almost any set of stucture, starting with ‘I can see’ and ‘I’ve got’, with some less obvious ones like the pictures of activities to practise Present Continous (‘I’m jumping in the kitchen’) or even words or word cards with the Past Tense forms which can be used later to tell stories for example ‘A strange Sunday’ (‘My brother slept in the garden’, ‘My dad danced in the kitchen’ etc)
Halloween or Christmas house – with the characters and symbols of each holiday
Rooms of the house – template is prepared with some furniture typical of each room, students can place pets in rooms (‘Where is the cat?’ ‘It is in the bedroom’) or family members (‘Where is mum?’ ‘She is in the living room’), add small objects to each room (‘Where is the lamp?’ ‘It is in the kitchen’, it is best to choose things that could be in any room such as lamps, pictures, chairs, rugs) and this version can be also further extented (‘Where is the lamp?’ ‘It is in the kitchen. It is on the cupboard’). The older kids can also draw these, making a regular or a silly house, too.
Secret Room – this was a follow-up activity in which I used the template which I drew with one empty box (empty, only because I could not, for the life of me, draw anything resembling a dining room). We did one of the activities mentioned above but the last room was to be drawn at home and it could be anything – a space room, a swimming pool, a library, an ocean zoom, a pirate room…
Where are you? – a template with the rooms, pre-prepared, each student gets a set of the leftover stickers or small cards, they put them somewhere in the house, in secret and afterwards they guess where their objects are. It can be used to practise simple prepositions and the rooms (‘Is it in the kitchen?’) or more complex ones (‘Is it in the living room?’ ‘Yes’ ‘Is it on the sofa / behind the chair?’etc)
Put your penguin in the living room on the sofa – a template with the rooms, pre-prepared and a set of stickers or small cards. The kids dictate to each other where to glue them, again, it can be used for simple or more complex prepositions, to get the kids ready for the Starters speaking exams. Later on, we compare our houses.
Why we love it
It is relatively easy to make and the kids love the fact that it is a real house.
It can be used with any vocabulary or structures (or almost)
It can be used with pre-schoolers and primary
It has to be prepared before the lesson for all the students but it is a good time investment
It is at the same time a focused task to be done in class and a homework task. The homework can involve only colouring and decorating it, talking about it in class but a writing task can easily be added for the older students (any template to be printed on the back of the garden, for example the focus can be such structures as there is, I can see, colours and furniture, my favourite room etc
It encourages the students to produce the langauge and it is easy to stage since you go from room to room
Lots of opportunities for adaptation, even if you repeat it with the same group. Every single time, it will be a different house.
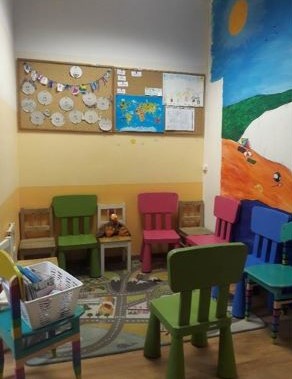
Set-up: a set of small chairs in a circle, in one super cozy corner of the classroom. This is where always start the lesson before we move to the serious part of the classroom and the lesson, with big tables, big chairs and coursebooks.
Time: 5 – 10 minutes in the beginning of each lesson
Materials: Angelina, dice and any visuals, especially flashcards, EFL posters (and at the school we do have a big and the most random collection of these from long-forgotten publishers and coursebooks), Starters, Movers and Flyers wordlist picturebooks which you can be easily downloaded (although we are lucky to have a few paper copies, too) and sometimes a whiteboard or a set of mini-whiteboards
Interaction patterns: all the new activities are first tried and tested with the whole group, to support production and to make sure that all students feel comfortable to be creative and to share their ideas. Later on, we split and continue in pairs or in teams.
Here a confession: ideally, of course, all of the interaction should be taking place in pairs to ensure that everyone has a go and produces as much language as possible but it is not what we always do. I have noticed that first of all, the children really do enjoy the whole group discussion, when everyone can contribute and when we do something together. I cannot quite describe it but it is almost palpable, this ‘team spirit’ and it does have a positive impact on them and on the atmosphere in the group. Plus, they are always curious about everyone else’s creative (aka crazy) ideas so they pause to eavesdrop, especially when there are giggles coming up from different parts of the circle. Because of that, we do both, a lot of whole class and a lot of pairwork.
Some of the activities to use in the Speaking Circle:
Tell me about that boy: the kids choose a person, an animal, a character or an object in the picture. The kids choose themselves what they want to conversation to be about and what information to include. The basic information usually includes emotions, clothes, activities or location.
Yes or no: the kids use the picture as the basis to make true or false sentences about the picture. The other students listen and correct the sentences when necessary.
Riddles: the kids describe something in the picture (the colour, the size, the location and the activities) for the others to guess
Which one is better?: the kids draw two cards out of the pile (animals, gadgets, food or anything else that we are studying) and they choose which one is better.
It’s a pair: the kids look for associations among different objects, people, animals in the set and they have to explain why they have put them together
Silly pictures: the kids talk about different silly things they see in the pictures
Silly stories: the kids come up with a character and they take turns in coming up with the adventures based on the set of verbs and / or other words that the teacher prepares in advance (displayed on the whiteboard or on the mini-whiteboards).
Angelina: the kids chat with the class puppet, ask and answer questions (pre-primary groups)
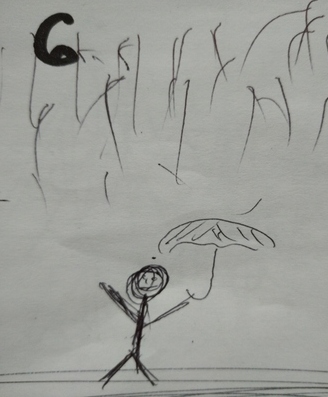
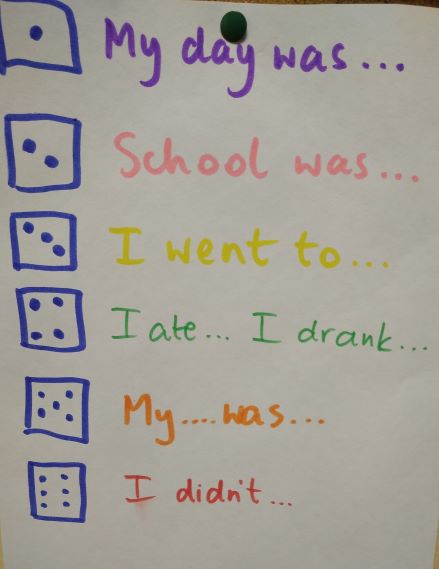
Hello dice: a new variation of the hello circle that can be introduced long before the kids actually study the Past Simple. They roll the dice, once, in turns and talk about their day, starting with the key phrase and we try to encourage including justification (‘School was easy because I have only 4 lessons on Tuesday’) or evaluation (‘I ate soup and it was very yummy’) etc. Sometimes we also play with the imaginary dice which basically means that everyone can choose what they want to talk about. Somehow, then number 6 is the most common choice. Perhaps because it is most generative of all of them and it is fun to say that ‘I didn’t go to Mars’, ‘I didn’t eat a fox’, ‘I didn’t dance in the park’ and what not. Not to mention that they just LOVE rolling the imaginary dice.
I kept it colour-coded to help them navigate among the verbs in the early days of this game.
Why we like it
The kids love it
They are very creative, they have great ideas and they want to share them
By being creative, they also develop their creativity, there are new ideas, new approaches and even more fun
Endless opportunities for revising without focusing too much on any specific vocabulary or structures.
Some potential for accidental learning and emerging vocabulary (although to make it work properly, I should start keeping track of it)
The activities do provide lots of opportunities for spontaneous (or almost spontaneous) language production where the only scaffolding devices are just the resources prepared by the teacher for the day and the langauge that the kids have at their disposal and, in many ways, we are just having a chat, despite being only A1 level.
Really, the part of the lesson that I really look forward to, every Tuesday and every Thursday.
www.seanparks.net, also reproduced by allisonfors.com and aulap.org
Can you see what I see? Are you thinking what I am thinking?
This adventure started like many others, really, with google and one of those straightforwardly mindless searches and a hope that the engine can actually pleasantly surprise you once more. this time it was ‘silly pictures for kids, clip art’ or something similar.
When I came up, I tried to take in all the absurdities all at once but at the same time, my teaching brain was firing at me with the many ideas of how I could use it in class. If I had been an ancient Greek philospher, most likely, I would be running around shouting ‘Eureka’ but since I am only a humble teacher, the only reaction was a rather excited mumble ‘THIS is going to be SO good!’
Now, this Crumbs post is going to be slightly different. We are still in the middle of winter holidays so there hasn’t been a chance to properly trial and test it with mu kids. but I am going to share it anyway, now, and the real classroom experience is going to be added in a week.
Here are the activities I am planning for next week
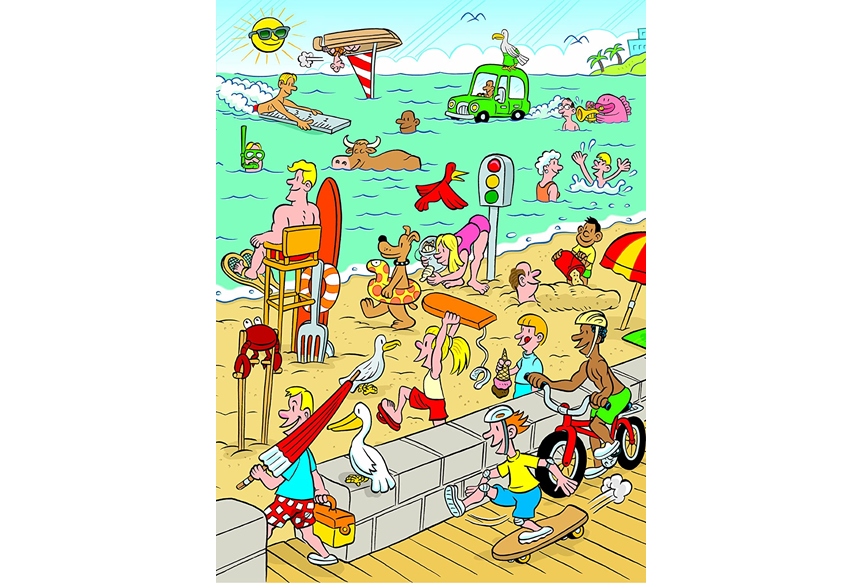
Preschoolers: Yes and No.
With my second year preschoolers, we are going to use the winter scene as this one is most relevant due to the what’s happening in the world outside of our windows and because the vocabulary and structures that we are already familiar and this picture has a chance of being most productive.
Yes and No is a game that my kids are familiar with. The teacher makes a sentence about the picture, which can be true or false and the kids have to react to it and correct it, using either a full sentence or only a phrase, depending on their abilities.
For example:
T: I can see a girl. She is sliding on a doughnut.
SS or S 1: Yes / Yes, it’s true.
T: I can see a girl. She is wearing one yellow hat.
SS or S: No. She is wearing 5 hats.
https://www.pinterest.ru/pin/96686723224800785/
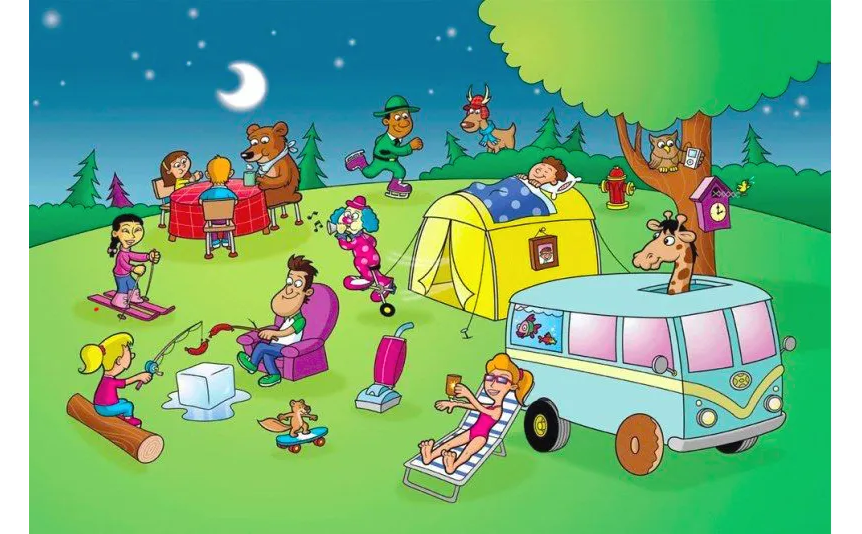
Primary: Can you see something really silly?
Step 1: Prediction
T tells the kids that they are going to see a picture of a campsite. T asks the whole class to guess what might be in the picture. To make it even more dramatic, T can ask the kids to close their eyes, imagine that they are in the forest and say what is happening. T may preteach some of the campsite-related words that kids might not be familiar with yet.
Step 2: Silly campsite
T tells the students that the campsite that they are going to see is a little silly. Kids work in pairs. T gives out a copy of the picture per pair. Kids circle and describe all the silly things they can see.
Step 3: What’s the silliest thing in the picture?
To round up, each student chooses one thing in the picture that they think is the silliest one.
www.seanparks.net, also reproduced by allisonfors.com and aulap.org
Primary: Silly pictures reading practice
This one was inspired by an activity I found on aulapt.org and, automatically, I wanted to have my own with sentences about the scene.
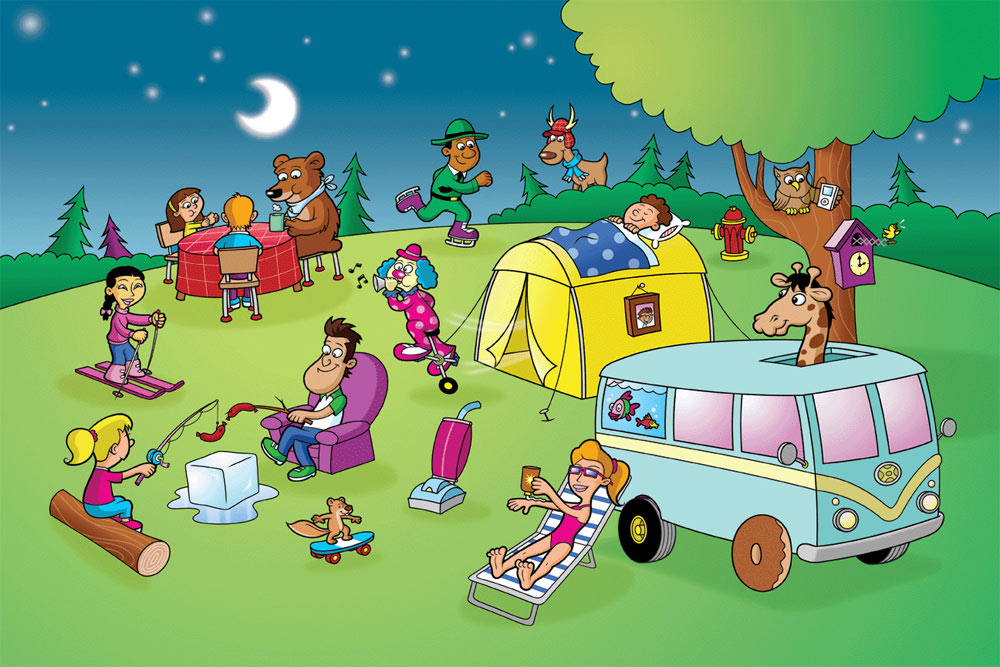
Primary: Tell me about this boy…Because
All these silly picture scenes are going to be the main character in our free speaking activities that has become a regular feature in our lessons recently.
One of the easiest activities to apply here is ‘Tell me about this boy‘. In the beginning, the teacher is leading the activity, chosing the people, animals or objects to describe and the students, in turns, decide what information they want to share. Now we have reached the stage when the kids are comfortable enough with working in pairs and taking turns in choosing the parts of the illustration for their partners and describing what was selected for them.
Now, with this new resources and all the absurdity, I would like to go in the direction of looking for rationale for their actions. We will try to play ‘Because‘. It might not always be easy but since the students are in charge of their discourse (well, ok, their mini-discourse), they can focus on how the people are feeling, what they like or don’t like or what they did before that might have had an impact on their non-standard behaviour now. Especially that we have just started talking about the past, using was/were and the affirmative forms of the regular and irregular verbs so that might be just a perfect opportunity to practise these.
Stage 1: Extended modelling
T: Tell me about this animal.
S1: It is a bull. It is swimming.
T: Because he likes water.
T: Tell me about this man.
S2: He is sitting. He’s got a big fork.
T: Because he is very hungry.
Stage 2: Because
Since this is a new kind of an activity and it might quite challenging to find the rationale for all the actions, we will play it together, to ensure a good brainstorming session. Kids will be choosing what they want to talk about and the whole class will try to say what everyone is doing and why.
In the worst case scenario, we might resort to our ‘Because because’ answer which they sometimes use or we might just go for a simple ‘Because it’s fun’.
This ia brand new adventure for us. I will be back in a few weeks to let you know whether it was a story of success or yet another epic fail story to post on this blog, too.
If you are interested in our free speaking practice circle, have a look at this post and if you would like to know more about what EFL teachers can learn from speech therapists – here is another post to check out!
If you are looking for more ideas on using pictures in speaking activities, here are two posts from the series of ‘All you need is…a picture’ and, its Volume 2 (because activities are accumulating:-)
PS A word of confession: it was very difficult to resource these illustrations. They have been posted, reposted and shared a million times, sometimes losing the artist on the way. I did my best!