This is a lesson I taught with the older YL which started in unit 1 of the National Geographic coursebook, Life that we are using with the summer courses for teens. If you are interested in the original lesson, you can find it in the coursebook, in the second edition.
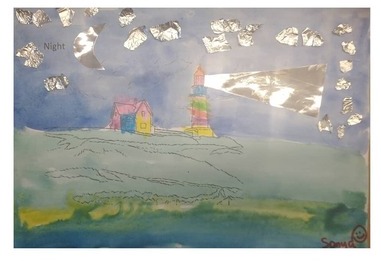
My brain tends to walk its own ways so pretty quickly it became aparent that much as it is inspiring, we have our own plans (btw, I am really looking forward to teaching the rest of the unit). Since I have already put together bits and pieces that were inspired and dedicated to Andy, this lesson was a step further, to take Andy into the classroom with the older students, too.
So, Andy.
Two pretty girls in puffs posing for the camera in the studio. Blonde and brunette in stockings look confident in front of the camera, hugging each other
Colour. Two pictures aka introduction
Two illustrations (see below). Students work in pairs or small teams and discuss the questions below. Afterwards, they compare the ideas as a class.
Talk about these pictures.
Are they similar or different? What is similar? What is different?
Do you like them? Why?
How do they make you feel? Would you hang them in your bedroom or in your house?
How do the artists use the colours in both pictures? Which one do you prefer?
Would these pictures still be interesting in black and white? Why?
Colours. New idioms aka new language
Students work in small teams. They match the the idiom in the sentence with the meaning.
Check the answers as a class, additional clarification.
Students go back to work in pairs. They come up with the examples to illustrate each idiom and tell mini-stories.
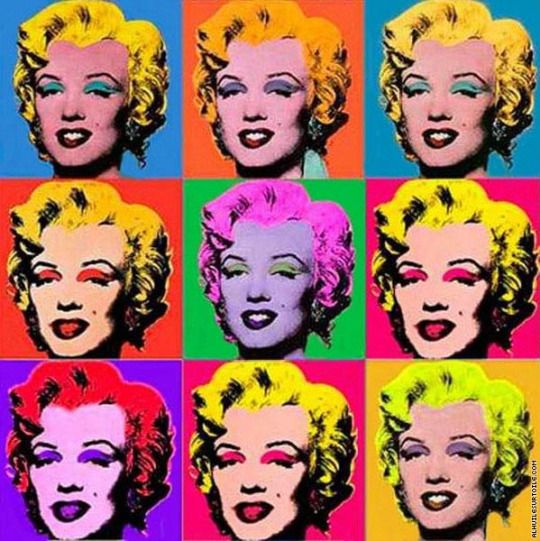
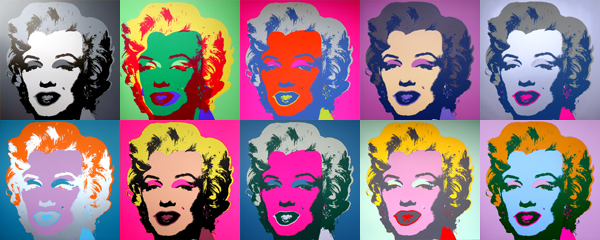
A mini-lecture on Andy Warhol and the way he used to work (Marylin Monroe and the Cambpell Soup)
The whole class works on eliciting the associations with one of the colours, in our case it was grey. The teacher shows some of her associations with the colour. The students try to guess the rationale behind each of the ideas.
The students prepare for the main speaking task: they write the numbers 1 – 10 and they notes about at least three associations for each of the colours
The students work in pairs or small groups. Each of the students presents their associations for the partner to guess the colours and afterwards they explain their choices.
During the feedback session, the students share the most interesting or the most unexpected associations.
Any photograph can be used to accompany Andy’s Marylin. I have used the one that we had in the coursebook, one of a scene from a traditional Indian wedding. Today, if I taught this lesson again (or when I teach this lesson again), I would like to use even a wider range of colour such as a painting by Kandinsky, a a painting by Rothko, a storybook illustration, a child’s drawing etc.
The lesson was taught online so the craft / creation component had to be limited to a speaking task. I was tempted to use a variation of the craft activity we used with my younger students but it was simply impossible.
The aim of this post is the following: by the end of the post, the readers will be more familiar with the concept of connecting the EFL with the elements of Art Exploration and the appropriate craft activities.
As a source of potential inspiration for anyone who might want to try it.
The group
The kids for whom this course has been designed were a group of preschoolers, aged 4 – 6, who are and were part of a greater project at MAMM with Fun Art Kids and I was responsible for the English language slot. I taught them from October 2021 until February 2022 and we had lots of creative fun in English. I used to joke that these classes were the reason for me to wake up on Tuesdays.
My students were beginners and for many of them, if not for all, those sixty minutes of English were the only real exposure and the only real lesson and, despite the fact that it is not a lot of time (at all) we made progress that I was really happy with.
The format
The whole idea behind the Kids in the Avangard programme was that children should be given an opportunity to experience art and all the many ways of creative communication, through music, through dance and movement, through theatre, through visual arts and through English. The programme was run in module, each with their own theme (colour, shape, line etc) and within those modules the kids would participate in lessons that were separate entities devoted to an artist, an artistic movement etc. At the same time, kids work on a performance which takes place at the end of the ‘term’.
It was not easy to nest the English classes in that format but it was not possible. The main idea is that the English classes in which we deal with the beginner students (or a mixed ability group), it was impossible to aim for a very content-rich input and some adaptations had to be made for that. What I decided to do is to focus on giving the kids a good basis of English, including the vocabulary and structure from the pre-A level (although not necessarily not synonymous with and not in the order of the ‘typical pre-school curriculum’) and to combine it with the introduction to the world of the world Art and related craft activities. Just like in the case of all the other classes of the programme, our lessons were connected but each of them was a separate module, too.
The format of the lessons followed a typical EFL pre-school lesson with the hello circle, revision, new material introduction, movement and table time and it was supplemented with and built on songs and stories, too.
The palette of ideas
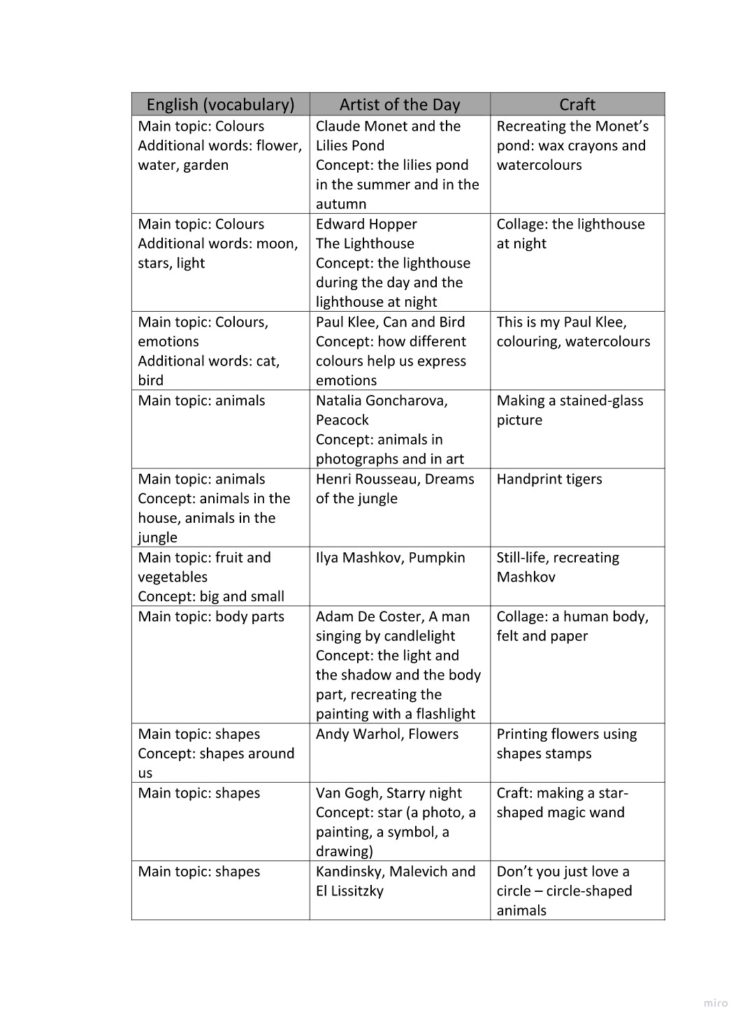
In the chart below you can see the content and the ideas for some of the lessons I ran as part of the course. In many ways it was an experiment, this whole course and, overall, it was a very successful experiment, the kind that makes you shout out ‘I want more of that!”. However, it was an experiement and, naturally, some lessons were more effective than others, and some ideas better than others.
In the chart below, I have decided to include those that I have tried and tested and loved, as those that I can strongly recommend, ready to use almost. All the misshaped ones will be worked on and developed and presented at a later date, when I have improved them a tiny little bit at least. But, in order to be honest and to share the experience as it was, I have also decided to include some of the things I have learnt by making the mistakes I did make. All of those you will find in the final section of this post aka What not to do.
Thegallery
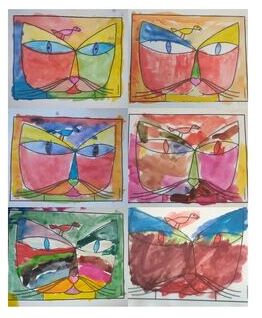
KleeGoncharovaKandinsky, Malevich, El Lissitzkyvan GoghWarhol De CosterMashkovMonet
Thenot-so-successful sideof theexperiment
The time allowances: either because it is a brand new thing for the kids (aka the entire course) or because it is a new element to the everyday class routine, the students need time to figure things out, to learn how to navigate around it and to make it familiar. Once they do, the whole programme will be a lot more effective and enjoyable. Don’t be upset if it is not an instant success.
The high expectations regarding the content and the input: the main aim of this programme is not to provide the kids with any substantial input on the artist’s life and career. Instead, they are supposed to be given an opportunity to be exposed to the world art and to interact with it.
Kids will produce the language, however, it is most likely to happen during the English language part of the lesson (introduction of the new vocabulary, practice, language games)
Each lesson has three separate objectives (language, Art and craft) and it is perfectly natural that only one of them will be given priority in a lesson and that English and the language production will not always be the main focus. If these classes are taught as a part of the general English course, then it is assumed that they will be balanced with the regular, more productive English lessons. In case of a separate course, this aspect (and potential parents’ expectations) are even easier to manage by outlining the course objectives beforehand.
Many craft activities look good on paper but they might not be easy to implement and to manage in a group of pre-schoolers. Trying, trialling and testing (aka making it first at home, before the lesson) is the best way to avoid and to get ready for at least some of the potential problems.
Time is on your side. Fnding a strong link between the three elements and preparing a coherent lesson gets easier with time. And more and more enjoyable.
There are plenty of things that can be done just with the simple resources such as markers, crayons or watercolours and paper but don’t forget that there is a lot more that can be done! Experimenting is fun!
Why?
If you are still wondering whether to start including art in your EFL lessons, please have a look at this earlier post and here you can find a great website with lots and lots ideas for art activities.
Dear reader! I hope you are here because you have been in search of ideas for a lesson on Art and English for primary school children. If so, you are in the right place! I would like to share with you a lesson that I taught a few months ago as a part of my Art Explorers programme. I would like to start with some blowing my own trumpet in an attempt to inspire you and to think ‘I want one ofthose!‘
our group of Art Explorers was a mixed-age, a mixed-level and a mixed-ability group, with some pre-A, some A1 and some A2 children and we were all united in art. Everyone was involved, everyone was producing as much as they could and everyone had fun.
the kids who took part were the members of five different groups at the school and it was the first time they had a chance to interact with each other, in English.
the children had a chance to revise and practise English, to find out about Andy Warhol, to talk about feelings, emotions and associations and to exercise their creativity in the craft task.
it worked very well as an introduction to our Art Explorers programme
it was relatively low-key as regards the preparation and craft materials as we used the simplest things available: a powerpoint, a handout, a few sets of vocabulary flashcards, a few sets of watercolours, paintbrushes and cups.
it lasted 60 minutes but it could easily be adapted to 45 or 90 minutes, depending on the needs of the group and the age of the students.
We said hello, introduced ourselves and we had a small ‘get to know each other’. Each pair of students got a pile of flashcards (food, toys, sports, colours, animals etc). The students were supposed to pick out one card and to ask each: Do you like…. There was a model question and answers on the board, together with ‘because’ which the older students were already familiar with in order to encourage more developed answers.
Stage 2: Colours and emotions
We revised the emotions and a set of the basic adjectives was displayed on the board as a point of reference. Afterwards, we revised the colours and I introduced the idea of associations. The key word here (‘associations’) is actually quite similar to its counterpart in the kids’ L1 but I decided to use even a simpler structure ‘Green is a happy colour because…’
The kids were put into pairs, for another speaking activity and they were comparing their own associations related to each of the colours. At this point we did not use the flashcards. Instead, eaach pair got a set of markers and they were asked to discuss all the colours in the set. Afterwards we compared our ideas.
Stage 3: The artist of the day
We moved to the TV room to meet the artist of the day. At this point I was using the powerpoint which you can find in the attachments.
First of all we looked at the photo of Andy and the kids said as much as they could, about his appearance and character. Only later did I introduce him properly, albeit briefly – as artist, from the US, a very creative person.
I showed the kids a few paintings and asked what they thought of them. They were using the simplest structures of ‘I like’ and ‘I don’t like’ and, in the case of the older and more advanced students, to provide a rationale for their views.
The Campbell soup was especially interesting. First of all, because we compared it to the local brand of ready made food that the kids could relate to and it was a huge surprise that such a usual item can become an artifact. Second of all, this particular painting was how we transitioned into the theme of the day: how the same item, represented in different colours can create different associations.
Stage: The colours and the emotions
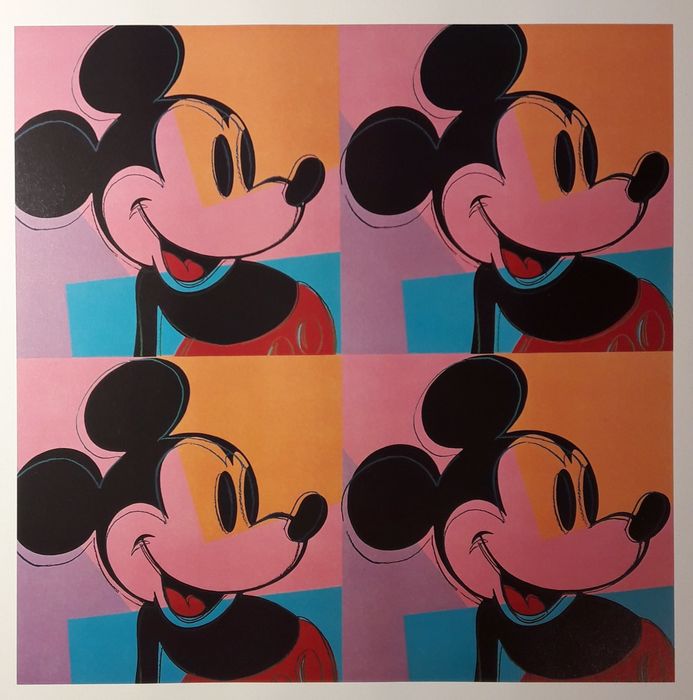
We looked at the photograph of Marilyn Monroe and one of the most famous paintings by Andy Warhol and at the similar painting of Mickey Mouse. We worked as a group and we talked about the different emotions related to different versions of Marilyn and Mickey Mouse and how they made us feel. I wanted to keep it open class in order to give the students a chance to hear as many different versions and ideas as possible to show them that the same painting can generate a great variety of emotions.
Stage: Let’s create
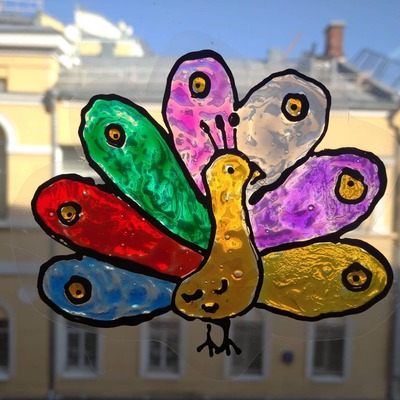
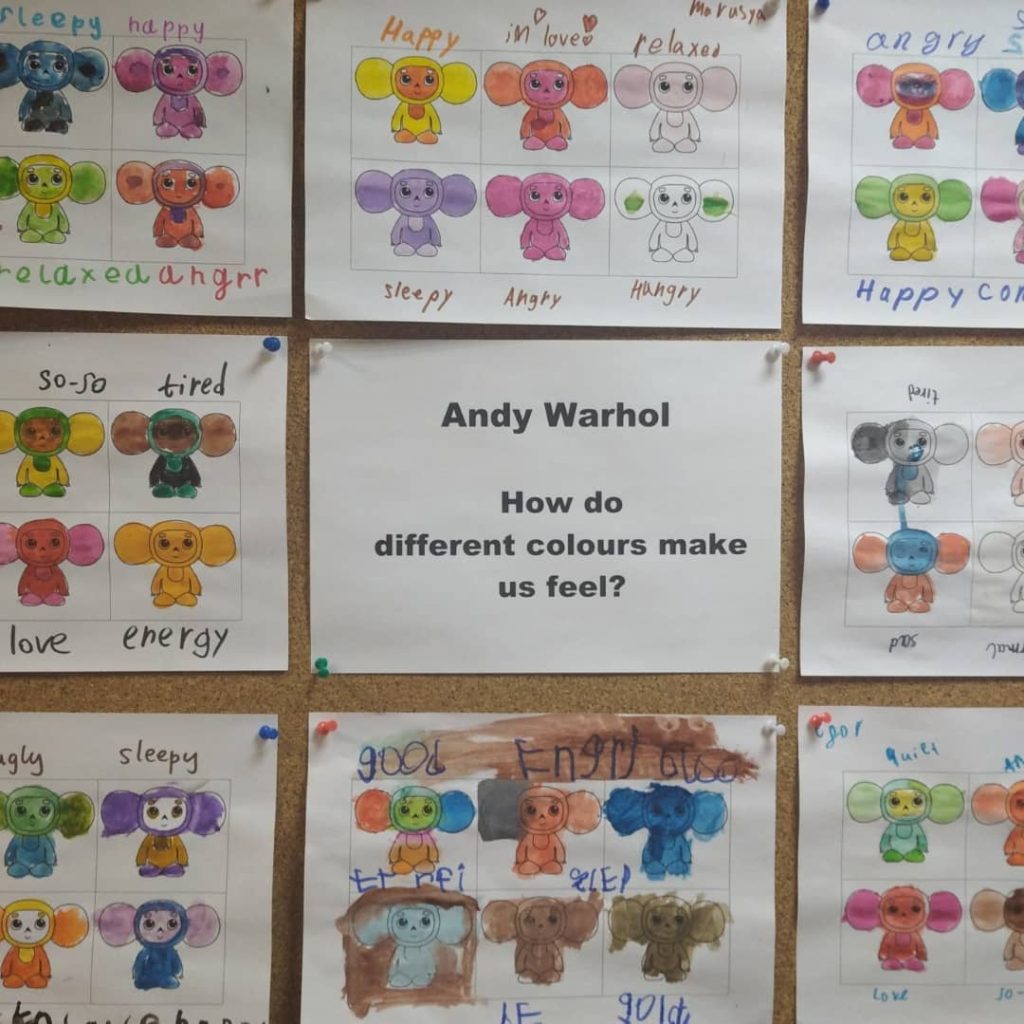
I told the kids that we are going to try to express our emotions and that we are going to be like Andy Warhol. I added that to Andy, Marilyn and Mickey were important symbols because he was American and that we would use some other symbols. At this point, the kids were already shouting out the name ‘Chebourashka’:-)
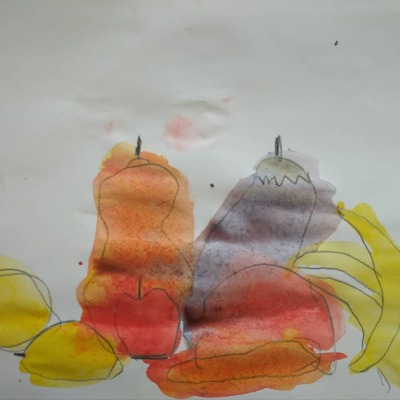
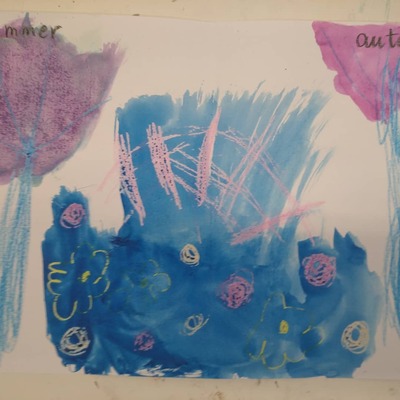
We went back to the other classroom. Everyone got a handout (see below) and a pencil or a marker. First, we all decided what feelings and emotions we wanted to represent and we labelled all the sections of the handout.
Afterwards, I gave out the painting materials and we sat down to work. The kids were given time to paint and I was painting my own and monitoring and chatting to the kids and asking the follow-up questions.
Stage: Tell me about your Chebourashka
The kids worked in pairs and told their partner about their pictures and the emotions they represented and, whenver possible, provided rationale for that. In that particular lesson, we only had enough time to talk to one partner but, in theory, there is a lot more potential and it is more than recommended for the kids to swap pairs and to talk to as many peers as possible.
Stage: Goodbye
We finished the lesson with cleaning up, with a round of stickers and with a song.
There are eight students in the group with whom I trialled this lesson. They are about 12 – 14 years old and we are now finishing the A2 level. The inspiration for this very lesson (apart from my own personal obsession with storybooks and storybook illustrations) was one of the reading tasks that we did cover, taken from Prepare 3 2nd edition by Cambridge University Press in which we discussed books and everything we read in general. The thing that really inspired me to put together this lesson was one of the follow-up questions asked on page 104 and it went: Do you think that books with illustrations in them are just for the little kids? and, which came as a surprise, this was the question that generated a real discussion.
Almost at the same time, I received a delivery from a bookshop with as many as eight new storybooks and that basically was it. I wanted a new lesson, a different lesson.
The teacher brings up (or brings up again, as in our case) the topic of illustrations and drawings in books in general. Students discuss in pairs or teams.
Are the illustrations and drawings only for the little kids?
Are the photographs only for adults?
What do the teenagers like then?
The teacher regroups the students, to make sure that each student has a new partner. The students, now in new pairs, report what they have discussed. Afterwards, the teacher asks each pair ‘Do you have the same opinion as your partner?’, this way summarising the entire discussion so far.
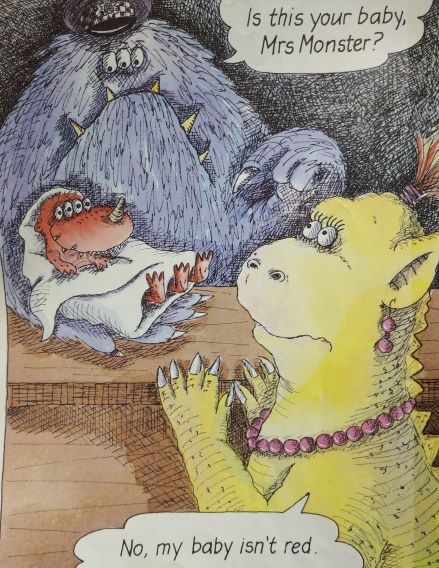
Where’s my baby? by Julie Ashworth and John Clarke
Setting the context
The teacher shows selected illustrations and the titles of the storybooks to be used in class. I have used the covers but these might not always be appropriate. It might be a better idea to choose one of the illustrations from the story. The students discuss the following questions:
What can you see in the picture (on the cover page)?
What can the story be about?
An open class discussion follows. At this point the teacher does not reveal anything about the plot of any of the stories. The students will be able to figure it out for themselves in one of the later stages of the lesson.
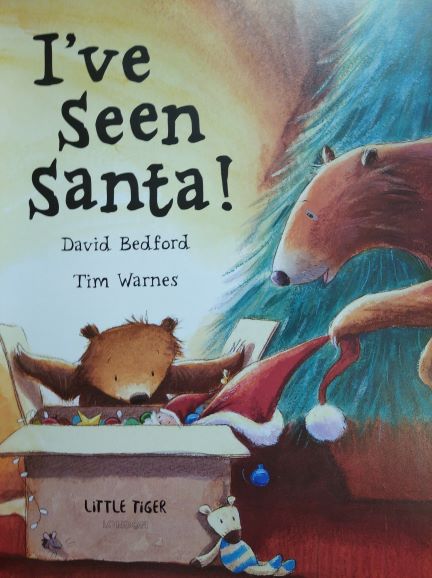
I’ve seen Santa! by David Bedford and Tim Warnes
The storybooks selection
When I taught this lesson for the first time I used the following coursebooks
I’ve seen Santa! by David Bedford and Tim Warners from Little Tiger: I have chosen this because they are cosy and warm, something that might be an example of typical, obviously beautiful storybook illustrations which are there only to accompany the text.
Where’s my baby? by Julie Ashworth and John Clark from Longman. This book is a good example of a basic framework chosen to tell the story. All the pages are basically the same scene: Mr Monster Officer and Mrs Monster looking at yet another monster baby. The baby is the only element that is changing from page to page, as the officer’s confusion and Mrs Monster’s desperation grow.
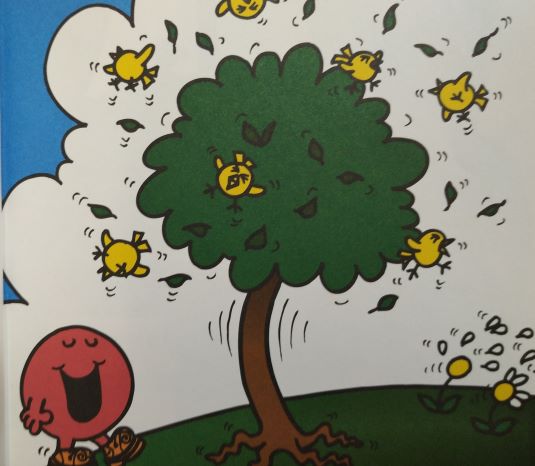
Mr Noisy and the Giant by Roger Hargreaves from Mr Men and Little Miss Magic. This might be a good example of simple and uncomplicated, illustrations that might have been drawn by little children.
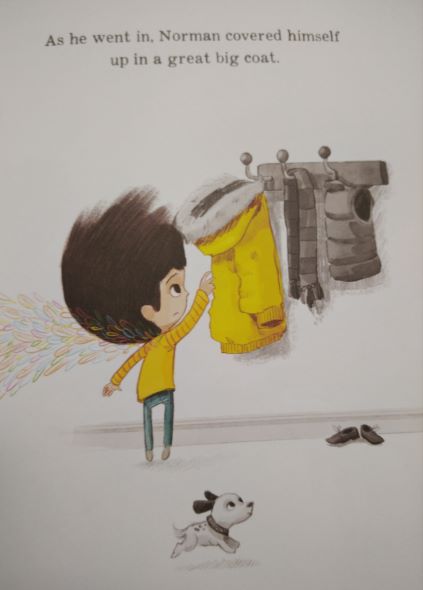
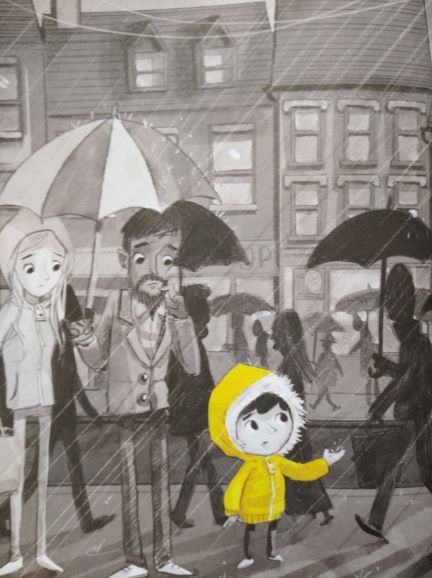
Perfectly Norman by Tom Percival from Bloomsbury. This is a gem of a book where the story is told through the words and by the visuals, both of these being separate entities in their own rights, complementing each other.
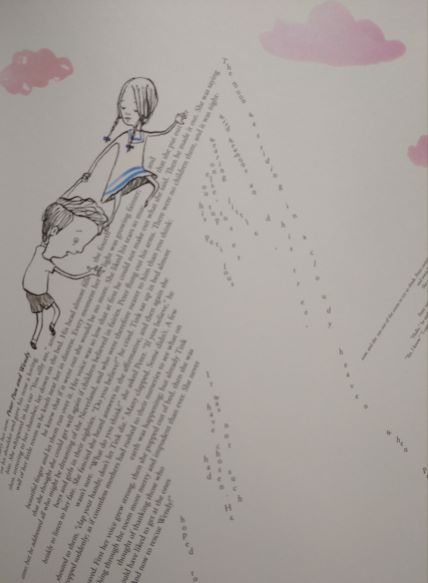
A Child of Books by Oliver Jeffers and Sam Winston from Walker Books Ltd. This title is unique, like all the books by Oliver Jeffers and here a story of the importance of books is told and illustrated by pictures made of words (which are also the quotes from the classic child literature, all titles acknowledged in the inside covers).
Perfectly Norman by Tom Percival
Vocabulary
We have looked at some of the vocabulary related to storybooks that the students might need in the following stage. In a way, for my students, it was the follow-up on the vocabulary presented in the coursebook, and for that reason I decided to include the following: cover, text, illustrations, writer, illustrator, reader, character, background, details, plot, dark, bright, easy, complex, drawn, printed, painted.
The students were working in pairs, matching the definitions with the terms, follwed by a whole class feedback and an exercise in which we talked together about one of the books, using these words. For this exercise it is best to choose the title that is the biggest in size so that it could be comfortably demonstrated by the teacher and seen by the students. By discussing the storybook together, the teacher can also guide the students and ask some follow-up questions, to model what the students will be requested to do in the following stage. One or two questions from the set below can also be used.
A Child of Books by Oliver Jeffers and Sam Winston
Discussion
The students work in pairs or groups of three. Each team gets one of the storybooks and a set of questions to discuss, based on what they see in the storybook. The teacher sets the time limit and when the time is up, the students exchange the storybooks and the procedure is repeated until all the teams have had a chance to look at all the books.
We worked in four teams and we used about 5 minutes per book.
The questions the students were asked to answer were as follows:
Please describe the book using the key words.
Look at the illustrations only. What is the story about? Can you ‘read’ the story only by looking at the illustrations? Why? Why not?
Look at the text (some or parts). What is the story about? Do you like it?
Do you like the illustrations? Are they simple or complex? Beautiful or ugly? Dark or bright?
Do the illustrations make you feel happy / sad / angry / bored / ? Why?
After all the students have looked at and discussed all the storybooks, the teacher asks them to answer the following questions
Which book has got the best illustrations? Why do you like them?
Which book has got the worst illustrations? Why don’t you like them?
The teacher monitors and helps to keep the discussion going. A whole class discussion follows. The teacher may highlight the main points, as outlined above (the storybook selection) but, really, the main aim of this kind of a lesson and this kind of a discussion is the opportunity for the students to look and to draw their own conclusions and formulate their own opinions. There are no correct or incorrect answers and interpretations.
Mr Noisy and the Giant by Roger Hargreaves
Conclusions
This was the first lesson of this kind with this particular group. It was obvious that, at the very beginning, some of the students did not feel very comfortable with expressing their views and even with formulating them. However, even as we went through the task, it all got easier, with the second or third book and they were all involved in the discussion. It was great to see how they ventured out into evaluating the illustrations and uncovering their meaning for themselves.
Their answers in the final survey on the favourite set of illustrations were also unexpected because of them could not really make up their mind and they chose two, very different books: the more conventional ‘I’ve seen Santa!’ and the more unusual ‘Perfectly Norman‘.
All in all, I did decide to give myself a pat of on the shoulder for that lesson and I am already planning the next one. Maybe it will be devoted to storybooks, maybe not.
If you, dear reader, have any storybooks lying around and no idea for a lesson, here is your lesson plan!
Bonus: an easier start
I have written the post and only then did I realise that, perhaps, not all the teachers will feel perfectly comfortable and ready to enter the world of the storybook illustrations at a full throttle, especially if they have not dealt with this approach to language teaching.
Storybook illustrations can be used on their own, as visuals, only slightly different visuals, as an alternative to photographs or YL scene illustrations. In this case, the teacher can choose any storybook illustrations, in no connection to the story itself or the entire book.
The teacher gives them out and uses them as the basis for one of the following exercises
YLE Starters, Movers, Flyers speaking such as answering questions about pictures, talking about differences
PET speaking picture description
FCE or CAE speaking (compare the pictures and answer the questions)
some of the ideas I shared in my post on using illustrations to develop speaking skills ‘All you need is…a picture’
This way the students (and the teacher) will get introduced to the storybooks illustrations and using drawings will be a lovely and an interesting alternative to the visuals that we usually encounter in our lessons or coursebooks. I promise that it will make a difference! And, on top of everything else, you will be developing your students’ visual literacy!