This is a double lesson, actually. Right now my Art Class has been divided into two, the younger and the older. Sometimes they take part in the same project, graded to their level, sometimes the project takes two different directions. This is what happened to Isaac Levitan this week. Here are all the ingredients and all the activities. Feel free to mix and match as you see fit.
Ingredients
- Winter vocabulary: we used the following Art Winter, as the theme for the entire month.
- A recording of Vivaldi’s winter, the first few minutes.
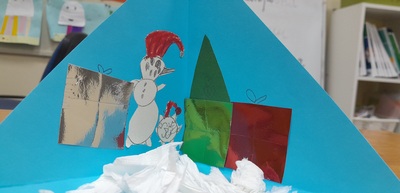
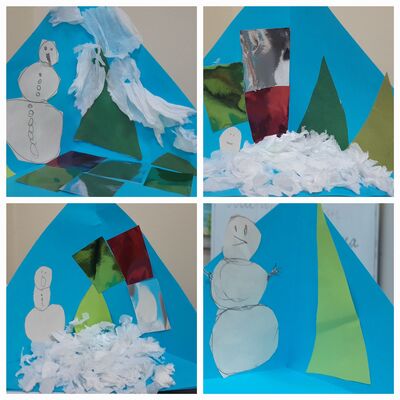
- The winter scene craft: glue, scissors, pencil and paper: one big square for the box, green for the trees, white for snowman, colourful for presents and white tissue for the snow. I was considering the following version here but it was too complex for my kids. Instead I recycled what I did last year. You can read about it here.
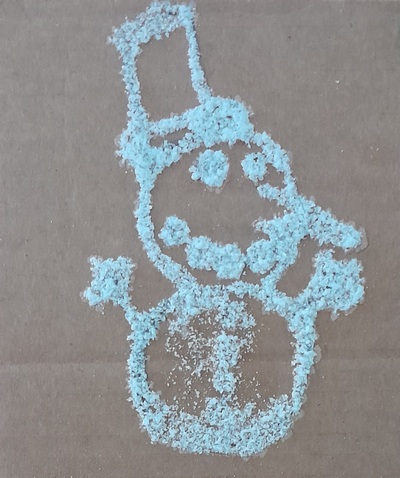
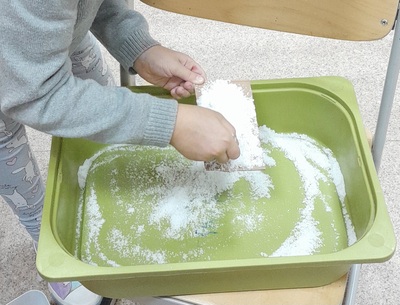
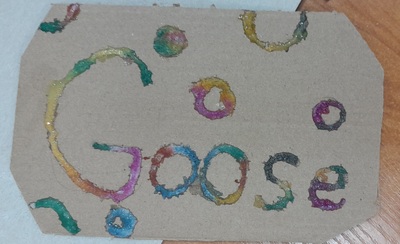
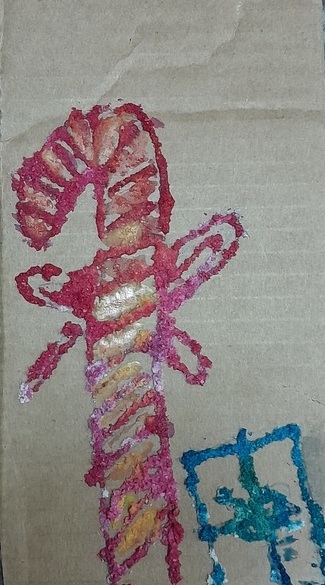
- The raised salt painting: pencil, cardboard, pvc glue, salt, watercolours. You can see the tutorial here.
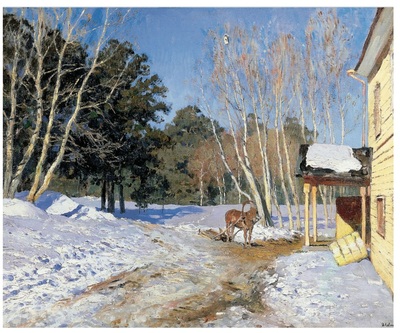
- And, of course, a few of the copies of the winter wonderland according to Isaac Levitan.
Procedures
- The lesson for the younger kids started with the vocabulary introduction and practice. We did a bit of drilling and some miming. We are going to be working on these in the weeks to come. So far we have only used the simplest ‘it is’ and ‘they are’ but I am hoping to take it further as regards description (It is big / small. It is hot / cold) and Present Continuous (Santa is running, reindeer are jumping) and hopefully towards picture description.
- With the older kids, I wanted to introduce a new element, namely music. I told them about Vivaldi and his ‘Four Seasons’ and then we listened to the first two minutes of ‘Winter’. The kids were asked to listen and to think about their associations with the music. Afterwards, in the open class discussion, we talked about their impressions (Do you like the music? Vivaldi thought that it show what winter is like. Do you agree with his vision?).
- Afterwards, we introduced the Artist of the Day and both groups looked at a few examples of the winter landscapes painted by Levitan. As usual, we talked about our impressions (Do you like it? Is it sad / happy? What colours can you see?)
- Next, I presented the finished product to the kids. I showed them how the winter scene can be changed by adding kids’ toys, with whatever the kids had on their tables and in their bags.
- With the older group, I showed the kids the final product and showed all the materials needed to complete the task.
- We made the scene in the following stages: drawing and cutting out the snowman, drawing and cutting out two Christmas trees (aka triangles), drawing and cutting out the presents (aka squares). We prepared the pyramid (cut and glue) and started glueing in the figures. The task finished with tearing up the tissue to glue it on the floor.
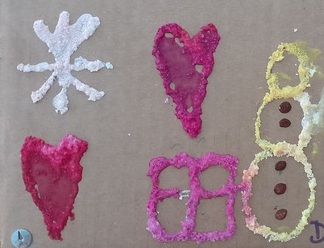
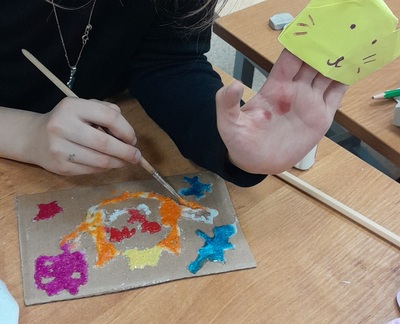
- The older kids were given a complete freedom as regards the choice of the design. I prepared a snowflake but they were more interested in representing their favourite things in this drawing, and I allowed for that. We did everything in a few simple stages: giving out the cardboard, drawing the design in pencil, covering the lines with the glue, sprinkling it with salt, using watercolours to add colour and leaving them to dry.
Why we like it
- Both lessons were successful and, again, we managed to combine English, creativity and some interesting techniques. I used two different approaches with both age groups but I am actually very curious how the younger ones might react to Vivaldi and what kind of winter wonderland my older students might create. There is the following week, so who knows? And, naturally, when my little kids saw the drying salt paintings on the window sill, they immediately started to demand that we do it, too so we will have to. I have already promised.
- The winter wonderland is relatively easy to prepare. To make it more achievable for my younger kids, some of whom are preschoolers, I prepared and folded the squares before the lesson. All of the parts of the picture are simple shapes (circles, squares and triangles) and, if the kids are ready, they can add the little elements themselves or just draw them with a pencil, for example the ribbons on presents. We didn’t do it but snowflakes can be added to the picture, too, for example with a white marker or a pencil. That has to be done before assembling the pyramid, though, otherwise it is a bit tricky to draw on and it can be destroyed by accident.
- I was demonstrating the activity, step by step and we took our time, to make sure that everyone could finish their cutting, before moving on. If the kids are younger, the task can be made much simpler by limiting the number of trees, the teacher preparing a simple snowman cut-out beforehand. If the kids are ready, Santa or the reindeer can be added to it.
- The raised salt painting was a lot of fun to create. No matter what you draw, the colours seeping through the salt make it all look amazing.
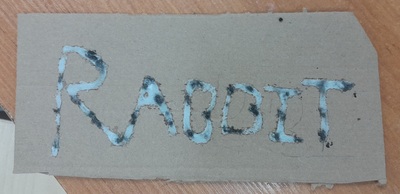
- The process is easy to stage and to manage as the teacher gives out and collects materials needed for every stage and kids themselves can grade it to their level by drawing something very basic or something more intricate. They drew their favourite animals, they wrote their names or prepared signs with their favourite things.
- There is a danger that the salt will make it a bit messy but if you have a big box, a bit bigger than the size of carboard you are using, everything will be great. With the older kids, we used paper plates, from which we took the salt and where it shook off the excess. Please don’t remember that it is not a good idea to touch the paint and the salt, turning the paper upside down and gently patting on it will make the excess salt fall off without destroying the picture.
- The watercolours can be added before the glue dries which makes it all feasible within a lesson time. The pictures can be left to dry overnight and taken home or put up on the following day.
- Upd: I did the activity with the younger kids, too and I simply loved how teacher friendly it is. Because of the number of the materials needed and the process, the activity practically stages itself.: cardboard and pencils for everyone, pencils away, glue for everyone, glue away, salt for the kids, one by one (I did use a big box! See the photos.), watercolours for everyone, watercolours away.
- The finished product (especially if done on the recycled carboard) looks like gingerbread cookies. So pretty!
- I really liked how the older kids interacted with the art and the artist. I have a very creative group and some independent kids who already have developed a taste for Warhol and Malevich. For that reason, I was a bit worried that they might find Levitan, well, boring and too unimaginative. However, that’s not what happened. My kids were stunned that a painting so realistic could even be created and some of them came up to the screen to check and to confirm that it was, indeed, a painting and not just a photo.
- I was also very happy that we added music to our lesson. They listened with interest and they were involved in the discussion later on, sharing their views, although, actually, they did not agree with Vivaldi’s interpretation of the winter-themed music. Apparently, it is too energetic and too loud and winter requires peace and silence. I will be experimenting with adding music to our lessons. The younger group first, with Vivaldi himself, and then some other tunes for the older group, too. I hope that, eventually, we will be able to find someone who wrote the good winter music that matches my students’ tastes. I will be very curious to find out who that is, because I, myself, love Vivaldi’s winter.
Happy teaching!