Teacher down, dear teacher!

The Bosphorus

This post starts in the classroom (Surprise, Surprise!) and they are generated by me but only in connection with what I do in the classroom and how my audience reacts to it. This is everything, aside from the thoughts of the experienced teachers, aside from what we find in the coursebooks, aside from what we learn about in different workshops and lectures. How the kids react to what happens in the lesson…

And since most of my professional life is spent in the presence of the very young one, the reaction and the feedback is immediate, without the intermediary help of the admin, parents or educational supervisors or trainers. If the lesson is good, you know it. If the lesson is bad, you will know straight away. If you can read the signs and reading there must be a special part of the brain devoted to looking out and reading these signs, while teaching, learning, monitoring, supervising and growing goes on happening.

Hence this post.

Teaching the whole child

This is definitely one of the key words in the EFL / ESL methodology, which teachers, trainers, bloggers, authors are more than eager to recite, together with the ZPD, scaffolding, short attention span and many more. ‘Teaching the whole child‘ will also be on that list.

In order to understand what might be hiding under this term, it is necessary to have a look at the list of the key development areas outlined by Sandie Mourao and Gail Ellis: personal, social, emotional development, communication, language and literacy, problem soling, reasoning, numeracy, knowledge and understanding of the world, physical development and creative development. These are naturally the areas, typical for the early years child development, first and foremost age-related and not specific for any particular context, L1 education or the EFL/ESL education. But, especially, because of that, they need to be included in both and in teaching of any subjects to the early years children, be it their L1, a foreign language, Maths, Art or judo.

Carol Read can also be a point of reference. She has quoted her C-Wheel in quite a few sources and apart from the overlap with the areas mentioned above, she also included a few others that would help to better understand the idea behind the whole child. These are: care, community as well as context and connections (i.e. family and school), coherence and challenge as well as the cultural context. The most important factor, the child, is in the centre of the wheel.

But the quote that really made an impression on me comes from a post I found on Teaching Channel where, on top of some practical solutions for implementing the approach, I have also found this way of explaining what it means to be teaching the whole child: ‘by being responsive to children’s understandings, interests, and abilities, allowing them to deepen their natural curiosity and their eagerness to want to discover and learn more’.

It deeply resonates with me because of the conviction that I have held for a long time (and which I have tried to brainwash my trainees with over the years) that the most important thing that a primary or pre-primary school teacher can do is to sit on the carpet with the kids, literally and figuratively speaking, too, in order to change the perspective and to try to see the world from their point of view. This change of the point of view is absolutely crucial when it comes to classroom and behaviour management, staging, lesson planning, craft, literacy skills development and many many more.

That is very well but what is your point here?you might be wondering.

It seems that, sometimes, regardless of our good will, professionalism and even experience (yes, I know what I am talking about), we, the teachers tend to allow our methodological principles take precedence over the child in the classroom and choosing between ‘what I need to do today‘ and ‘what the room needs‘, being the professionals that we are, we choose the standards and the rules, not the audience, not the child. It is all well-intentioned and well-meant, of course, but it might not mean that it is also the best decision as regards the said audience.

In this post today I would like to call the teachers to teacher down a little bit! Remember about the standards, methodological, institutional, cultural and what not, but to put them on the back burner and to focus more on the six-year-old beloved crowd insead.

Below, the three areas and some classroom stories from yours truly.

Storytelling

A story first. It was a lesson with my adorable monsters, in our fifth or sixth year together and it was a story lesson. I got everything ready, the audio, the text, the words to be pre-taught, the comprehension task, a game and, most importantly, a while-reading task. I wanted to be very clever and, since the story had a repetitive element and it was perfect for prediction. I wanted to have us read and listen to it but with pauses, with the kids discussing every stage (‘What happened?’ and ‘What will happen next?’). I thought it was a brilliant idea and, perhaps, it really was. However, once we started to go through the story, after two ‘episodes’, one of my students, one of the more confident ones, looked at me and said: ‘Anka, can we just listen to the story?

And I don’t know what it was, the tone of voice or how effectively she used intonation to convey meaning, carefully stressing ‘listen’ in the whole phrase, or maybe it was the faces of the rest of the class showing a mix of dedication but this simple human fatigue that made me realise that I overdid it.

I took a story, a great story, that we would be interested in listening to or reading, something humanly exciting and fun and I turned it into an exercise, a learning activity, a task, at the same time, and totally unwillingly, making it dull and tiring, simply because of the context – our classroom. That made me gasp in shock.

Naturally, we read to learn, to extend our vocabulary and to practise grammar and to develop the reading comprehension skills and all the other skills, too. However, a story is still a story and it deserves to be enjoyed, in a human way, even if we are in an A1 classroom full of kids, at least to some extent, at least in a balance with all the very teacherful activities with a clear learning focus.

In the classroom that can be done through: including a variety of stories, coursebook stories, YL exam stories and storybooks, traditional stories and videos, including elements of reading for pleasure, a school or class library, just listening to a story for fun before any reading comprehension tasks are introduced, giving the students an opportunity to express their views about the story and accepting different opinions, also those negative ones, basically anything that we might do with a story in our real L1-life.

‘My students don’t like to sing!’

It is one of the most common comments that my trainees make and one of the most common questions they ask right afterwards and that is: ‘Should we make them if they don’t? How?’

Well, the short version according to Murao and Ellis is 8 reasons to bring songs into the classroom. Carol Read mentions a few more in her book. In an earlier post here, written based on the materials I found in different sources, there are 60 reasons, for the kids and for the adults. There are so many of them that we have enough justification to change the famous song’s title into ‘The classrooms are alive with the sound of music!’ Or, at least, they should be!

But, with all that in mind, or, almost against all that, what we do with a song in our L1 life, as adults or kids, is to simply listen to it and to enjoy the fact that it is on. Sometimes we dance to it, sometimes we might sing some lines, sometimes not. As people, we are not expected to know all the lyrics, to like all the songs and to sing along every single time. We definitely do not listen to complete some comprehension tasks or to focus on a particular structure or an idiom. There is a danger, then, that by imposing all of these on our students we will be destroying the organic character of this resource.

Again, it would be a good idea to remember the need to teacher down songs in the classroom a little bit. Accepting that not all the students will love all the songs equally and that not all the students will want to sing all the songs every single time seems to be the first step here, although that does not mean that songs will disappear from the coursebooks, curriculums and lesson plans. In the everyday teaching, it might mean simply starting with ‘Let’s just listen to the song!’ before we get down to the vocabulary, grammar, lyrics and all the follow-up activities and asking the kids whether they like the songs or not. Getting the students involved in the song selection is another important way of teachering down here and either focusing on those that they actually really do like and including their suggestions in the lessons, too.

‘We have so many things to do today!’ or about the lesson plan

This time the story took place in my Playway 1 lesson, at the end of the year, somewhere in the food unit. Those who have used the book might remember the listening activity in which students have to listen to a boy, one of the charcacters from the coursebook, who talks about his likes and dislikes and mark these accordingly in the picture. One of my students, Sasha, a 6 y.o. boy, didn’t deal with the task very well. ‘I like pears’, would the character say and my Sasha would say: ‘I don’t like pears’ and then, to my horror, he would cross the heart in the book, instead of colouring it in. Every single time Sasha did not agree with the character in the recording, he would loudly comment and then mark the answers according to his preferences.

I was watching him thinking the following thoughts: Oh, Lord, he is not following instructions, he does not understand what to do, he will not pass any of the exams and, in general, I failed as a teacher. None of which is true. I am happy that, despite the way I felt in the lesson, I reacted as a true educator, I went for the child’s well-being and I did not insist on the ‘correct’ answers. Thinking of the lesson afterwards, I was laughing out loud at my professional silliness. My little student told me, in English, what he thought of certain food items, he clearly understood what he listened to and he reacted to the content. The problem was not me or the child but the activity itself that assumed that the little people are able to disentach themselves from the activity and to de=personalised the content in order to complete a task. This made me look in a completely different way at the YL coursebooks content and it has been a turning point for me.

This same approach can be applied to any lesson plan. We go to school not to teach the lesson plans or the coursebooks but to teach the kids, the particular kids in our classrooms. Not everything that the great authors at the famous publishing houses thought of for the particular lesson, unit, activity will be appropriate for Masha, Katya, Sasha, Tomek, Agnieszka, Juan and Pierre that are entering our classrooms. Not everything that we have prepared for the lesson might not be the best idea on a Monday morning after a long break etc.

In the everyday life teachering down might mean:

  • evaluating the coursebook material carefully as regards its relevance for the particular group of kids and appropriate adaptation and adjustments as regards the content, the cultural context, the emotional context, the personalisation or the lack of, etc
  • adapting the lesson plan on the go, depending on how the students are feeling on the day. Pushing the day agenda at all cost will not be effective and might result in frustration.
  • putting yourself in the kids’ shoes while preparing the activities for the lesson and trying to answer this simple question: Why would they want to do it?, apart from the obvious, the fact that a person in the position of authority, older and taller than them, someone that knows their parents and is also able to assess them is bringing this to class and tells them to do it. Is there anything in the exercise, activity, story, listening, song that they would want to do anyway? And if it is not there, can we add it?
  • while things are not going to plan, looking at the situation through the kids’ eyes to better understand what is going on in order to deal with it more effectively.
  • involving the kids in the decision making process about the lesson, as regards the songs to sing, the games to play, the stories to read or even the order of the activities (when possible), to share the responsibility for the learning but also to find out more about the audience and their preferences.

Coda or what this post is NOT about

I wouldn’t want anyone to think that I am calling for a complete abandonment of all the methodological principles, present-practice-production, good teaching standards. Far from it. ‘Organic’ is a nice word to use to describe a lesson and a teaching approach as long as it is not synonymous with ‘I didn’t bother with planning the lesson, we’ll just go for it!’

It is an invitation to keeping your eyes open and to not forgetting that our students are very young and that the age will be very often the most important factor behind their behaviour and attitude. On the one hand. On the other hand, they are people, too and that we can act as people, too, instead of being teachers 24 / 7.

What do you think? Share your thoughts in the comments!

And make sure you come back for more because the second part of this mini-series is coming up! ‘Teacher down!’ is ready now. The post about the need to teacher up is already being written!

Bibliography

Sandie Murao and Gail Ellis (2020) Teaching English to Pre-primary Children, Delta, page 10 – 11.

Carol Read (2007), 500 Activities for the Primary Classroom, Macmillan, p. 7.

More than a grade! Teaching the whole child from the Teaching Channel.

How to use songs in the English language classroom from the British Council.

Celebrating 23 000 hits with my favourite posts ever*)

*) Not any more. It is 25 000 now. OMG.

Well, it is one of my guilty pleasures to open the blog dashboard to have a look how many hits, visitors and visits there have been since the last I check. I do it regularly, of course, sometimes a few times a day, but I write down only the certain hoops, like every thousand of views. Recently, in the last few months the blog has been very active and I have registered a whole thousand of views within two weeks only…

I have just checked the most recent ‘celebration post’ and it turns out that it was written in January this year and I was rejoycing the fact that I crossed the line of 15 000 visits. Which means 8 000 since. Not too bad, I have to say!

It’s been very rewarding to see that the blog has had a growing number of readers and that, perhaps, there is something useful and necessary about what I do in the classroom and at the keyboard.

The most popular posts so far

In the post mentioned above, you can check the top ten most popular posts in January 2023. Today, this top 10 includes:

My favourite posts…

Here are my top ten favourite posts and why I really like time out of those 246 posts committed so far:

  • Much Ado About Nothing: realistic flashcards vs illustrations in the EFL world: I love it because it started with a not very pleasant conversation on the social media but because what I said was met with derision and mockery, I decided to prove to myself that, indeed, I am right. And a lovely and very interesting research followed.
  • All you need is…a picture! This is a post that was written after an online conference presentation which had my biggest audience so far (almost 700 people) but I really like because it is the post that really reflects what I do in the classroom. I love using pictures and visuals and illustrations and I am happy that I can share my ways of doing that. There is also the part two because the new ideas keep coming!
  • Setting up the routine. A diary, week 1. This is one of the newest post because this one (and the whole series) was created at the start of the current academic year, in September. I started two new groups of primary, of brand new kids, in a brand new context, for them and for me, and I thought that it might be a good idea to keep track of what we do in the classroom during those first weeks. I am hoping that it might come in handy for all the teachers who start in the area and are on the lookout for ideas and solutions but, surprise surprise, it was also an amazing opportunity for me to reflect on the activities and to understand the process even better. I loved writing it so much that I decided to keep this series going, only now the reflection takes places only once a month, at the end of it. If you haven’t read it yet, please check it out! It definitely deserves more hits than the 33 it has got so far.
  • Tell stories! Please do! This is another post that was written with pure love and this time the object of my affection was storytelling and I wrote it for all the teachers who need a little bit of convincing to start using stories in the classroom or to start using them more, not only because of their impact on the students emotional and cognitive development but, mainly, because of the amazing potential for the linguistic development.
  • A balancing act. Non-competitive ESL games for kids. This post started in the teacher training classroom during the YL course this summer. I shared my long-held opinion that our lessons are overflowing with games that are competitive and that there is no appropriate balance of games and activities that promote cooperation and collaboration. And in response to my trainees’ slightly desperate question (‘But how to do it?!’), I did another research and an article came out of it.
  • What an old dog learnt. A YL teacher goes back to the YL classroom. This post came about as a result of one of the adventures (or, rather, ‘adventures’) of my professional life and a real case of making lemonade of the lemons that the world throws at you. One of the things that I learnt in this Lemonade Year was that my classroom is the classroom full of kids and, I suppose, it is amazing that I was given a chance to check and to double check it, to confirm and to confirm it again.
  • A lesson in structures. Notes from the classroom. Here is a post for all the VYL teachers and for anyone who is wondering how much language pre-schoolers are able to produce in the EFL setting. In one word: LOTS. If you are intereted in details, please have a look at the post. These are simply the notes I took about our everyday lesson procedures at the end of the academic year with my level 2 kids. A lot of possible if you want to and if you apply appropriate techniques. Really. I loved writing this post not only because it gave me an opportunity to be really (really) proud of my babies and myself for doing a good job, but also, because only through this reflection and the list, I could really understand the progress made. I have said it here, on this blog, but I will say it again – there is so much happening in the classroom that we simply forget! It is good to take time to look back at your lesson and lessons to remember and to see it in a better light and in a more realistic way.
  • Jerome et al or how the EFL world started to scaffold. This is one of the oldest post, one of the 2020 lockdown posts and one of the first research posts. It is dedicated to one of my professional gurus, Jerome Bruner and the original research done together with Wood and Ross, about the role of tutoring in problem solving (which is the actual title of the article). I do believe that all the YL teachers need to read this one and my post can be the first step to it.
  • How to see a city. From the series: Teaching English to Art. This one is where it all started for me, with teaching English through Art. It involves the following: a long, long time ago, my teenage group, Georgia O’Keeffe, Frida Kalho and New York. If you haven’t used any Art in class, this is a good place to start.
  • And I love absolutely all of the posts in the Crumbs series, the little ideas from the classroom. These are just the activities that I have created or adapted for my classroom and things that worked with my students. I have to admit that I am quite proud of the format of a recipe with the ingredients and the procedures but upgraded with the ‘why we love it’ section. So far, there have been 72 crumbs worth sharing.

A few words from the human behind the words

I love teaching and I love writing and it is a just precious that I can combine these two things here, on the blog and I have been doing it for almost four years now (short of a few months). The funny thing is that I started this post as a way of celebrating another benchmark, 23 000 visits, but, somehow, due to the magic in the world, before I was able to finish it those 23k turned into almost 24k overnight. And, over the next two weeks (as in: 14 days) it became 25 000.

I don’t get it but I am happy)

That means, that somewhere out there, in the US, India, Canada, Russia, Spain, Hong Kong, Japan, Egypt, the UK, Germany, Finland, Israel, Cambodia, Italy, Latvia, Taiwan, Australia, New Zealand, Argentina, Brazil, Kuwait, Poland and Ghana, there are people who decided to click and to read about my classroom life. And I hope that they took something out of it.

Thank you, dear readers!

Tea for two! Teacher training courses and individual consultations

A new idea?

Every time we run a course at our teacher training centre, regardless of how formal or informal it is, we always give out a feedback form and ask our questions how useful they found the course and all its components.

‘We want to know what you think’ is not only a nice marketing phrase that should be a part of the end-of-course email. Neither is it a request for only positive feedback, a puff that will make us, the organisers, feel better. For me, personally, it is an opportunity to check and to confirm that I haven’t gone rusty or complacent as a trainer and that we still offer a good product. At the same time, it is also a way of brainstorming ideas for how we can further improve the course. This is post is going to be about one of the examples how these ideas are put into practice.

A few courses ago (a new, teacher training time expression), one of our trainees mentioned in the feedback form that they would really appreciate an opportunity to talk to trainers individually to ask some of more personal questions. It sounded like a great idea and that is what we did.

Tutorials and consultations

Individual communication between the trainees and the trainers hasl always been a part of our courses. We always chat before or after the sessions, regardless of whether they are run online or offline and many of my trainees keep in touch either via social media or via email. Some of the courses also include tutorials but their format and aim is a little bit different. They are run usually half-way through the course, they are obligatory and their main aim is for the trainees to reflect on their progress on the course and for the trainer to run a preliminary evaluation on the said progress.

We added the consultations as an optional individual meeting with the tutor, 30-minutes long, to be used in the way that the trainee chose, to discuss the issues of the particular interest. We arrange these meetings during the time that the course is run, usually before or after the input session.

Topics that were of the particular interest

  • a variety of questions that came up in the course of the reflection on the particular sessions
  • focused lesson planning
  • lesson planning and classroom management for the online YL
  • working with large groups
  • using L1 in the YL classroom
  • designing a curriculum and planning for a year
  • choosing a coursebook
  • bilingual education
  • problematic students and individual case studies
  • support for the novice YL teachers

What do our course participants say?

  • Love this idea! Yes, I did. Find personal consultation very useful, cause we could discuss our issues and challenging situations.
  • To my mind, the additional session is a perfect option that gives an opportunity to ask a question or discuss something.
  • The 30-min consultation helped me, too. I noted down some great ideas about the cases we discussed.
  • I had a chance to share my difficult students’ cases during our consultation and got useful advice.
  • As for the consultation, I prepared a list of questions and got really valuable answers from Anka. I really appreciate her help and encouragement. I feel much more confident and enthusiastic before starting a new page in my career (working with YL).
  • The additional session felt more personal and I believe I could participate more freely. And without being worried about judgmental eyes (not because anyone would judge me, I am just a bit shy) it was easier to ask questions that I had to ask.
  • It’s great to be able to talk about things where i don’t feel very confident (like bilingual kids) sharing experience is priceless ; it helps reminding myself that we all learn all the time and it’s ok to struggle and try. thanks for the meeting!
  • I could only participate in the 30-min individual session. That was really helpful as it helped me clarify a few questions I had about my teaching.
  • This is a very cool addition. The opportunity to ask questions that arose after the course.

What do I get out of it?

  • An opportunity to really meet my trainers. We talk a lot during the discussions in the breakout rooms and in the common room, before and after the sessions. However, the consultations are an opportunity to take it to another level.
  • It gave me a chance to cater for the needs of all the trainees even better. It is obvious that the more extrovert and confident students take part in the whole class discussions more freely and more frequently and that some trainees prefer to share their views only while in the breakout rooms. By adding the individual consultations to the mix helped me ensure that even the shyest and the least confident teachers will have their chance to talk to the trainer comfortably.
  • It is a fascinating diagnostic tool that helps us adapt and improve our courses because they show the fuller range of topics that might be interesting to teachers that are not always included in the current programme. It is a signal that some areas or aspects need to be incorporated in the existing sessions or that, perhaps, we need to start thinking about revising our courses and adding some new sessions. And, as such, they are just precious.

A bonus track, Tea for Two that lent the title to the post here, with Ella Fitzegrald.

Crumbs #72 Teaching design to kids aka some magic with a paper towel and water

Page 1 and Page 2 of the Rainbow Volcano

Ingredients

  • Paper kitchen towels, cut up into rectangles. It might be a good idea to test and trial, always, but especially here, not all the kitchen towels have the appropriate density. They cannot be too thin or too thick, for the kids to be able to draw with markers and for the water to wet them fast and efficiently enough.
  • Markers. I am using the thick ones but their tip is not to thick. Roller pens might be too thin.
  • Some water. In order to be able to use it in the classroom, we used a big plastic box. Ours is not very deep and it does not have to be. At home kids can use the washbasin, the sink or even the soup plate.

Procedures

  • This was one of the three experiments I planned for our Science lesson devoted to water.
  • Apart from everything else that we did on the day (which you can read about in an earlier post here), this part of the experiment was called the Surprise Experiment. We started with looking at the materials which I demonstrated and we watched a short but very informative video from the Messy Little Monster that I found on youtube.
  • While in our lab (aka the dining room), I showed the kids the box filled with water and, together, we looked at the pictures I prepared and tried to guess what we might see once they land in the water. These included: Hello – kids! (the visible part – the part that appeared while in the water), a simple sun – a smiling, yellow sun, my name is – miss Anka, you are – fantastic.
  • Then we were dropping cards into the water one by one and checking the full picture.
  • Afterwards we went back into the classroom and started to create our own pictures. I showed the kids two cards and drew one picture with everyone looking, as a model. It was absolutely important that they understand that page 1 is only a part of the picture and that page 2 is going to be more detailed. While we were working on the pictures, we developed a few useful techniques: checking the design against the light, drawing with the picture on the window pane, tracing the lines twice or three times (on page 1) to ensure that they seep through onto the page 2, to facilitate making sure that the pictures match. I was also showing the kids’ ideas to the room as soon as I spotted something interesting, for example the use of the words, the use of the colours or the elements.
  • We established in the beginning that in class we are only going to watch a few examples and create our own, to take home and to surprise the parents.
  • After the lesson, I sent a message to the parents in the messenger to tell them about the surprise coming from school and how they can use it, where they can pour water etc.

Why we like it

  • Apart from the fact that this activity was a great puzzle piece in the lesson and on the Blue / Water day, I loved the fact how it worked.
  • The activity itself is very simple and requires only the minimal resources.
  • All the kids, our preschoolers and primary students, could create it, with varying degrees of detail and complexity. It worked very well with a mixed ability group. Although, of course, I can be further adapted with the teacher starting the activity i.e. drawing circles on both pages or other shapes to which the kids could only add the detail on page 2.
  • It gave everyone an opportunity to design something and I was really impressed that they got the idea of how this simple toy works and what is required to make it. To be honest, I was truly impressed with the kids took to it and how creative they became in the process. The first designs were very simple, a circle that turns into a smiley and so on but, as the time went on, their creativity was simply snowballing and more and more amazing ideas started to pop up, also because everyone was observing everyone else and sharing ideas. The mountain that turns into a volcano (in the photo), a girl that turns into a princess, cards to say hello to mum, dad, grandma, the house that gets all its details…It was amazing and I am just sorry I did not take more photos. And I did not take more photos because I was busy cutting up more and more pieces of the paper towels. I planned to give everyone three bits for three mini-projects but I underestimated my kids, their creativity and the speed with which they started to draw.
  • I was also very happy with my being clever and announcing that all the kids’ experiments will be carried out at home only. Doing it in class could become very messy, especially with the big groups because the pictures need to be taken out of the water as the colours start to run, they get the water dirty. Taking the pictures out means that there are wet balls of paper around…I decided that the kids would enjoy it a lot more at home, especially that they could also take pleasure in showing off what they have learnt at school.
  • The langauge production was a bit limited but, to be fair, for us, it was spread throughout the day. We talked about the pictures while they were being designed and there was a lot of focus on instruction and the functional langauge. There was also some opportunity for the language of prediction / guessing and I would definitely like to explore it more in the future.
  • This experiment can be a part of a lesson on the colour blue, on the topic of water or perhaps also in a lesson on conditional and the langauge of prediction with the older kids. It can be also a very simple craft activity with all age groups.

Happy teaching!
Crumbs #71 Refraction aka Catching up on Physics in the YL classes

Ingredients

  • A glass of water, if you have a big group, the bigger the glass the better.
  • A set of visuals (I prepared my own based on what I found googling refraction), you can see them in the photographs. I used an A4 piece of paper, folded in half as I wanted it be able to stand on its own on the table.
Through the glass and On their own

Procedures

  • Before the Science / Lab lesson, we started the day with the poem dedicated to colour blue, modelled on the poems from the Little Learning Corner, we looked for the blue items around us and we had a whole section of the lesson devoted to adjectives, describing and guessing the objects in our Magic Bag. All of which were blue, of course. In the Art lesson, the kids also made a beautiful craft with the bottle caps.
  • In the beginning of the Science lesson we talked about water and the clever ocean animals. We watched some cool videos about the clever octopus, the flying birds and the orca.
  • Afterwards I presented the three experiments. The first one was the experiement with the cold and hot water (aka Melting the Skittles aka Checking How Skittles Are Made of Sugar and Food Colouring). More of it in an older post here. The there was the Surprise Experiement (check it out here) and the Illusion Experiment aka refraction.
  • We went into our Lab (the dining room) where I prepared all the ingredients and tools.
  • I showed the kids the glass of water and the first picture with the arrows. We talked about the direction of the arrows and we demonstrated and practised ‘left’ and ‘right’. Afterwards I showed the picture through the glass of water and, of course, the arrows changed the direction, almost magically. We learned the term ‘refraction’.
  • Afterwards we proceeded with the other two pictures.

Why we like it

  • Just like the previous crumbs post, devoted to red, fire and volcanoes, this one is about the experiments we did as part of our Autumn Camp. The second day was devoted to the colour blue and water. This was one of the experiements we did.
  • It is a super simple experiment, in its simplest forms it involves only a glass of water and a piece of paper with two arrows.
  • Again, it was fun. For me, because I could realise that I never ever heard about it in my Physics classes in high school and it felt good to be catching up on my primary or secondary education. For the kids, because it looked like magic)
  • It helped to make this whole experiment kinesthetic by showing the direction of the arrows with our arms, by naming the colours of the clouds or by holding the side of the card where the blue cloud was with my hand and checking how the cloud moved to the other side or by showing the direction of the stripes, on the paper and as seen through the water.
  • It was also a lot of fun to experiment with the distance between the glass and the paper to find the best angle.
  • As with the other experiment (Crumbs #70), this one also can be used with a variety of topics and lessons: water-themed classes, blue-themed classes, black and white and optical illusions lessons or, simply, Physics that, can, actually, be fun! Basically, you can make it as scientific or as magical as you want!
  • We did not have time for that but this lesson also has some potential for creating our own drawings that can be used in the experiments to give the kids an opportunity to be creative and to experiment with different designs. It is also possible to dip the pictures in water and see how they change. See the links here and here, here (experiment at 2’04) and here (really cool ideas!) Next time!

Happy teaching!
Crumbs #70 The many uses of a volcano!

Ingredients

  • A bottle, plastic or glass, we have used the small ones.
  • Vinegar (a few spoons, I did not measure), baking soda (again, did not measure) and a few drops of the washing up liquid for the foam
  • Different websites usually advise using food colouring for the beautiful lava but I didn’t have any so I just used a few drops of the regular guache paint
  • A big plastic box or a tub (if you are doing it inside)
  • A few pieces of A4, an old plastic bag and a piece of scotch for the outside of the volcano
  • Someone to help you film or photograph because it happens very fast
  • Anything accompanying elements: I have used a short cool video about volcanoes for kids, my personal photos from Kamchatka and an episode of Peppa in which Peppa (hooray) is making a volcano at school (hooray hooray)

Procedures

  • For us, this time, this was a part of the Autumn Camp with every day dedicated to one colour. Monday was ‘red’ and before the got to the Science / CLIL part of the day, the kids had a chance: to talk about all the things red, they wrote their own poems modelled on the poems I found here which were perfect for our pre-school and year 1 kids (and here are the more complex ones, for the older kids). They also had a proper Art class in which they made very simple but amazing collages of a volcano.
  • By the time we got to the Science slot, the topic was already familiar to them. We looked at the video, we watched my photos from the trip to Kamchatka, including the volcanoes and the black sand on the beach and we watched Peppa. During the entire lesson, I wanted to draw their attention to some of the elements / words related to volcanoes especially: magma, lava, gases, temperature.
  • I also introduced all the ingredients and I explained that we will try to create the gas and the lava.
  • Afterwards every child prepared an A4 piece of paper by colouring it with black and brown crayons and then by crumpling it. Afterwards we relocated to our Lab (aka the dinning room).
  • I divided the group into three teams and each team prepared their own volcano: a bottle, wrapped in a plastic bag (for volume), scotched around, then the A4 pieces of paper, wrapped around and scotched over. Even if in the clumsiest of ways. While the kids were preparing the mountains I prepared three jars of water with the colouring (aka paint).
  • I showed the kids all the ingredients and I demonstrated the experiement the first time, trying to encourage the kids to help me name the ingredients. Afterwards, we repeated it with the other volcanoes.

Why we like it

  • Well, simply, it was a lot of fun, especially in connection with all the other things that the kids did on the day.
  • It is a very simple project, with minimal resources (although, yes, I am aware of the fact that vinegar or soda is not something that is normally available at school). All class is involved, everyone is putting their shoulder to the wheel and it is feasible even with the youngest kids as everyone can colour a piece of paper and crumple it. I had the help of my TA with building of the volcano so that’s why we could do it with three volcanoes simultaneously but they can be dealt with one at a time or all the kids can build only one big volcano, together.
  • We have three different volcanoes with three different colours but I have also found the version of three bottles scotched together with a tri-colour lava…
  • If you have an opportunity to do the experiement outside, you can build a mountain around the bottle using sand or snow but our camp falls in the middle of a very rainy autumn week so we had to do it inside. I have to admit, though, I liked it even more as we turned it into a team project and it worked really well.
  • This same experiement can be used with the older students and they can benefit even more from the vocabulary input or learning about the whole process in a Science lesson. Essentially, by mixing vinegar and baking soda, we are producing some CO2 which is one of the gases produced during the volcano eruption, too. There is also some potential of including it in a regular EFL course. Superminds 5 by CUP has a whole unit devoted to volcanoes and the history of Pompeii.

Happy teaching!
Paul Klee, the cat, the bird and the accidental stained glass. Teaching English through Art

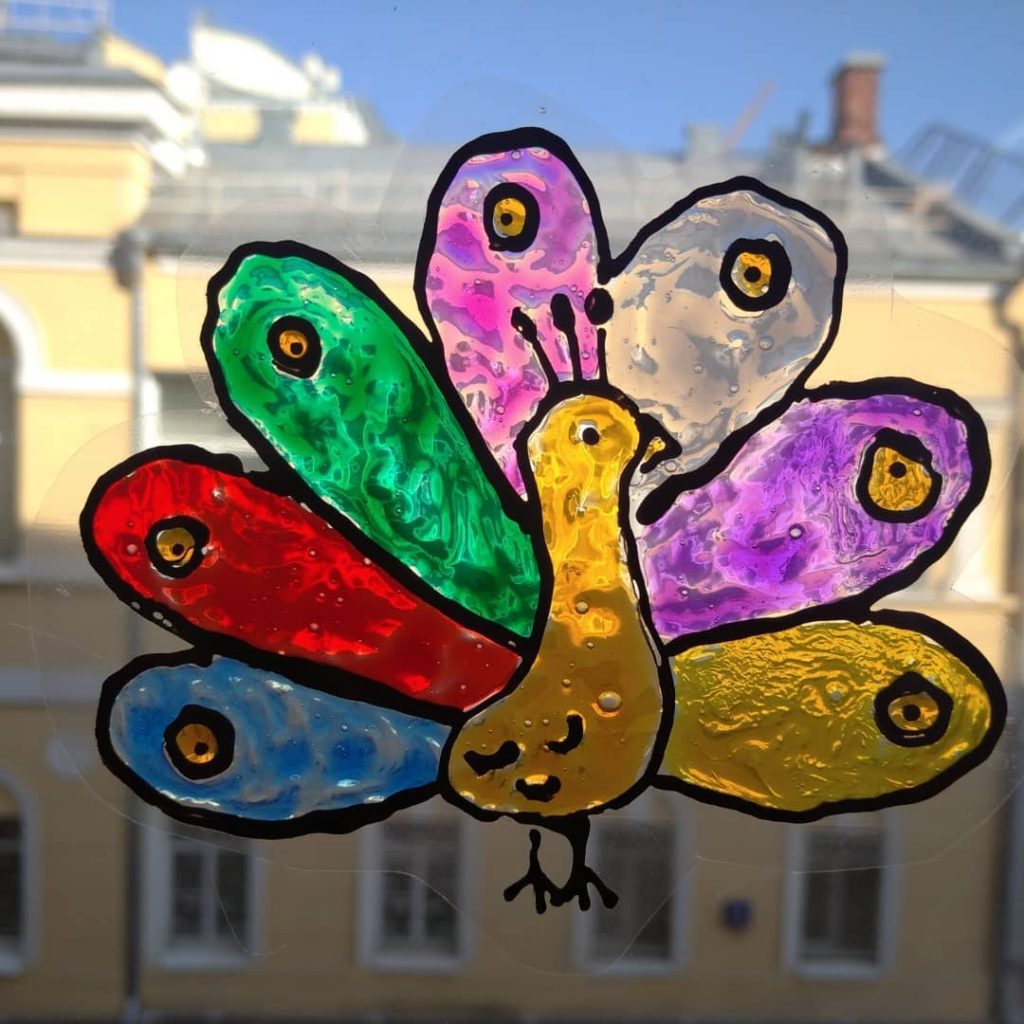
All the stained glass pictures on the window

The language

I have decided that November will be the month of animals, apparently, for no apparent reason whatsover, just because because. This week was our first lesson and we only focused on introducing and revising the vocabulary using the wordwall cards and playing a great animal sounds quiz that I found on youtube. This is my favourite because it has some less obvious animal sounds and it offers three options, with the visuals and the written words on the screen. It makes it quite challenging, even for the adults who play it the first time but it also offers some support so the kids can learn the new language from the game. There is also a feedback aka the answer, a short video with the animal making the same sound. We have played it with a few groups and it has always been fun.

The artist

Our artist of the day was Paul Klee and his Cat and Bird, but, somehow, although I have taught this lesson before and I had all the materials ready, this time round, we did not spend any time on talking about the original picture. I was planning on describing different birds and describing different cats using photographs and then on revising the shapes in the paintings which would be a nice connection between the Month of Shapes (October) and the Month of Animals (November)…But it just didn’t happen. We started a bit later (autumn camp and a general mayhem in the school) and I was really preoccupied with the logistics of the technique. However, now that all our cats are on display, I am going to use this idea in the following lesson.

Here are our watercolour cats from 2021

The art

I have used this painting in class but previously we went for simple watercolour and the cats turned out beautiful, too. This was the main aim and the main preoccupation of this lesson because we were to try and to experiment with a completely new technique. I have been on the lookout for new things yesterday and that is how I found out about the melted crayons. My main source was the post on the Artful Parent (which is one of my favourite creative directories) although I adapted it to the needs of our bigger group with a slightly different objectives.

I used the same technique for preparing the crayons, the grater worked just fine (and then all the tiny, unusuable crayons stubs went home to be recycled and melted into brand new crayons, the link to the instructions can be found here) but instead of plates or muffin cups I decided to use sheets of baking parchments. Once I had enough shavings, I simply folded each colour separately and it worked very well during the lesson itself. The kids were passing different little packets to each other, opening them, taking the colour they needed and passing them on.

Preparing the picture was super simple, it is easy to find the Klee’s painting as a colouring page and to make copies. We were sitting at a large table (aka all the small desks huddled together) and each child had a large sheet of the baking parchement and a copy of the picture on it, in my attempt to contain the mess.

We started with colouring in the smallest shapes (the diamonds in the eyes, the heart nose and the bird). Afterwards, everyone was just picking up the shavings in pinches and putting them on the picture. I also gave out paintbrushes which we used as brooms to sweep the shavings off the lines and unnecessary places. The packets with colours were travelling around the table.

As soon as someone was ready, I showed them how to cover the picture with a sheet of baking parchment (we had to use the one that was under the picture but, ideally, I would have had another one for each child, to keep the tables even cleaner) and I walked around with my iron, ironing one picture after another. The kids peeled off the baking parchment right away and put the pictures away for drying and cooling down. I think, overall, we got better results with covering the picture with the baking parchment the matte side down but there is some room for experiments there.

In the following day, I framed all the pictures in simple frames made from the coloured paper and I put them up in the window. I used all the pictures, those that we intended to be pretty and also the baking parchment prints which turned out to be interesting, too!

It needs to be mentioned that I did not intend these as stained glass, despite the fact that this is how I found them. I only wanted a new and interesting technique but the thin layer of crayons really looks beautiful on the window so this is how I decided to display them in the end.

Overall, I think that it is better to be economical with the shavings. First of all, the pictures seem to be more interesting and, what is more, too much shaving creates a thick layer that might crack while drying and it is also quite likely to stick to the parchment more. I still recycled those (as stained glass pictures and for the second ironing round) and I love how they look but, initially, some kids were a bit disappointed with the outcome.

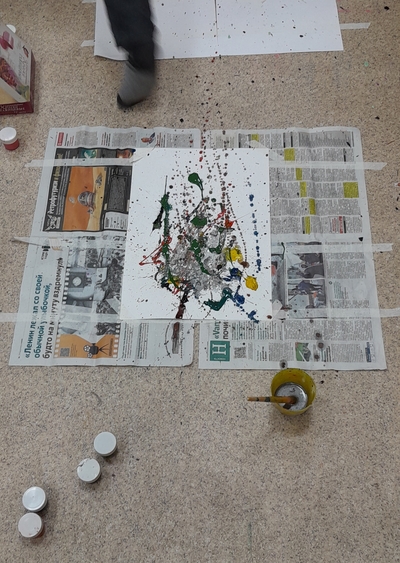
When I am using the technique again, I will definitely start with drawings, either done by the kids or photocopied, just for the framwork. Unless, of course, we decide to create some melting crayons Jackson Pollock…I would also love to try following that up with the drawings or a simple collage…

The Making of…

P.S. Here are my new cool, chunky crayons from the recycled crayons stubs and the leftover shavings…

Happy teaching!

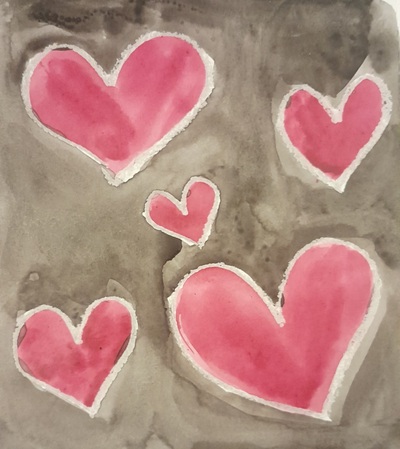
Crumbs # 69 A heart, a heart! I can see a heart! A slightly different approach to Art in English

This was our final October Art Explorers lesson. I was preparing for using Paul Klee’s The Bird and the Cat because the painting does include two hearts as well as other shapes, a perfect final lesson. However, in the middle of the preparations and my trying squeeze everything in one academic hour, I decided to go easy on all of us, myself and the kids. I changed the concept entirely and chose to focus on the technique, for the first time ever in my Art Teacher history.

Ingredients

  • A pile of cards, A5, enough for everyone to try a few techniques.
  • Pencils, crayons, watercolours, salt, tissues, hand sanitizer, a paper clip.
  • For the older learners: a heart as a symbol in brands.
  • Videos for the teacher to learn about different watercolour techniques. I have taken my ideas from these: here, here, here and here. Thank you)))

Procedures

  • First of all, I watched all the videos to learn about different techniques and to choose those that will be feasible in the classroom with my kids. The next step was creating my own hearts, a whole set, with different techqniues before the lesson time, in order to be able to show the students the final product. I kept to the same colour for the kids to be able to see the different effect and the impact on the texture and not to be distracted by the colours.
  • We started the lesson in our usual way, with the hello song, taking the roll call, singing the song about the shapes and looking for the shapes around us. With the older students we also did the heart in brands quiz.
  • Afterwards, we looked at all the techniques to try in all my samples. While we were doing it, I was also demonstrating the most important tools ie the cloth, the plastic, the salt, the paper clip (for scratching).
  • Then we just started to create. All the kids would take the cards, draw the heart and then try the new technique. We would look at the final product, talk about it a bit and move on to the following technique.

Why we like it?

  • It was a lesson like one big experiment, in which we were moving, from one stage to the other, with a lot of curiosity and excitement.
  • This time we have done the following: salt on the finished picture, salty water as the base, scratching the surface with a paperclip, drawing the patterns with wax crayons and painting over, finishing the picture with a cloth, splattered paint, the broken brush (aka printing with a split brush). I also had the plastic bag for the final touches and the alcohol prepared (aka the hand sanitizer) but we did not have time to use it in the end.
  • I have to admit, it was not the most productive lesson that I have ever taught but it was an wonderful opportunity for all of us to do something different.
  • I was very happy to see how the kids were allowing themselves to try something else, something new. At first, they were just following my instructions closely, using the same tools and the same techniques and then they were leaving all that behind and taking one more step further, with a particular technique or with a mixture of different techniques. At this point, we were all looking with curiosity at the outcomes. It was a very beautiful moment.
  • If this is an option, I would like to recommend looking at the final product on the following day (or in the following lesson). The drying time really does make an impact and the creative lesson might be followed up by gallery walk, expressing opinion and choosing the most interesting heart and technique.
  • This activity would be a perfect Valentine’s Day celebration in Art Explorers and I was almost sorry that I used it in October. I might be coming back, actually, with more techqniues!

Happy teaching!
Setting up the routine. Two months into the course

Starting the lesson

This stage of the lesson is almost exactly the same as it was in September. The only real difference is the fact that we take the roll call, we talk about how we feel and we share what we have got today, on our tables and in our bags and only later we sing the hello song to make sure that the song is really this unifying element after which a proper lesson starts.

How do you feel today?

We haven’t added any new emotions as such but our beautiful cards are on display in our classroom, in both of them, and children refer to them when they reply to the question at the strat of the lesson. But it doesn’t mean that we don’t have anything new at all. We have been working with the phrases that we have but the kids became very creative with them and these have been my favourite replies: ‘I miss my phone’, ‘I want to sleep’, ‘I miss my bed’, ‘I miss my puppy (at some point confused with ‘papi’ aka dad) and I miss my daddy’.

Songs

In the recent weeks the greatest hit was everything related to Broccoli Ice-cream. We have been doing food and ‘do you like?’ and the song quickly became a hit, especially that it has four different versions and we could beautifully extend it over a month. It has become a part of the routine itself with looking at all the foods in the beginning of the video, attempts at predicting the combinations and then singing, of course, followed by our own game played with paper flashcards or a wordwall spinner. Naturally, we have already played this game in the dinining room, in the playground and in the hallway, during the break, with our own made-up versions.

The other great songs have been all the songs from the Dance Freeze series that we started in September. They work amazingly well for our brain breaks and I am hoping that all of the verbs will stay with us, too.

The other new songs are also our two new hello songs, Every day I go to school and Hello, nice to see you, and we use one or the other, in different lessons, depending on what we feel like.

After I have found a song about what plants need to grow, I believe that there is a song for absolutely everything!

Rules and classroom language

The system is go. This is how I could describe the rules in our life at this point. We didn’t need to add any more rules, since the end of September, which, of course, doesn’t mean that there will be no new rules in the future. These rules that we have, we have been using to remind the kids how to behave and how to survive the lesson.

That is not to say that all days, every day are smooth and that everyone is a little angel. It is not the case. We have had a few situations in which I had to put the lesson on hold and spend some lesson time on a serious conversation about how we should behave and why. And how we should not behave, too. It is still only the second month of their school life in year 1 and they are still at the stage of figuring out how to be.

Rewards chart and Time

This element of our routine has not changed at all. I am keeping track of kids’ behaviour and we still put up the lesson time (and the number for the clock) on the board, too.

Story

We have had such a good run with all the stories! My storybook library is basically just round the corner so I can just just pick up our next adventure just walking to the teacher’s room or the office.

Over this last month, I have been experimenting with different stories, some of them my real favourites, and I have been also experimenting with different follow-up activities, too.

Marvin Gets Mad‘ was a nice follow-up to our lessons on body parts, emotions and Present Continous. The follow-up task was devoted to reading and Present Continous about all the sheep and what they are doing.

The Crocodile Who Didn’t Like Water‘ was a blast. This was the story that not only read and listened to but that we also managed to retell, with very simple phrases.

Barry and the Fish With Fingers’ was an opportunity to practise ‘I can’ and it was also the first time we took notes about reading, such as a set of simple sentences about the character and the story as well as our opinion about it.

Socialising

In terms of socialasing, we have done the following:

  • kids have been nominating themselves ‘Who’s next?’
  • I have been a little bit more flexible regarding the seating arrangements for some of the activities, allowing friends to sit together and to work together
  • we have done a few projects in which the kids were working individually but sharing the resources such as the cards (on the board) or the stickers, learning how to take turns, how to share, how to wait. I was really proud of the children because it all went well.
  • we have had a lot of activities in which one student was leading the game, especially our riddles
  • we have also played lots of phonics games, as a whole group, individually and in teams
  • kids are also taking turns to give out and to collect materials and resources
  • it is also our everyday feature that when I am writing the lesson plan on the board, there are always some suggestions from the room, most of the time regarding the favourite games or songs, sometimes also regarding the surprises (which, most of the time is synonymous with ‘Can we have some stickers, please?’)

Creativity

Our creative projects in October were related to Halloween as my school decided to celebrate. Apart from decorating countless pumpkin, bringing spiders and coming to school in fancy dress (a few days before the actual Halloween), we have

  • used the Halloween theme in our Serious Maths Classes, with Halloween Maths Stories, Halloween Puzzles and colouring pictures
  • we created our monsters posters to practise body parts
  • we had a great Stickers in the Park project
  • we had a drawing dictation mini-project in our ESL classes, too
  • we had a lot of fun in the miming-drama activities in the ESL classes

Teacher

As a teacher I have been working on including the electronic journal in my daily school routine, especially as regards finding the time to fill it in effectively and as regards taking notes in real time to remember what to put in later on.

I had to step down as the Science teacher because my workload was just impossible to handle. I am sorry because I liked teaching Science but the kids have a great teacher now and I have a few hours to deal with the admin tasks so hooray to that.

I am very proud of all the kids because they are making progress in English and Maths and they are better and better at being students. I hope they are ready for all the new developments. The light term has come to an end and beginning November we are going to start using the coursebooks and notebooks, getting homework and we will start dealing with slightly more serious material. We’ll see how it goes. I am keeping my fingers crossed for all of them!

I will be back with more notes at the end of November!

Happy teaching!
Crumbs #68 Stickers in the park. A great lesson out of (almost) nothing

Ingredients

  • A colouring picture ‘in the park’. Any will do but I used this particular one because it contained enough detail. Sadly, I cannot find the reference for it.
  • A set of stickers. I used animals because that is exactly what I had in my leftover box but it could be anything. We were not aiming at creating a very realistic picture, as you can see in the example.

Procedures

  • We introduced and practised the vocabulary featured in the picture. We used the wordwall for that (this one). We drilled the words, we read them, talked about the things we like and don’t like. I also decided to introduce the gestures for each of the words because I wanted to activate this part of my kids’ imagination as our following game involved miming and guessing. One of the children was sitting with their back to the screen, the group were supposed to mime something together for the student to guess. Naturally, we took turns to sit on the big chair. I was invited to particiapate, too!
  • We continued practising using the prepositions: with a song, with the YES/NO game and with out toys.
  • We sat at our tables, each with a copy of the picture and did a quick run through the picture to familiarize ourselves with all the elements (‘Can you see…?’).
  • Every child got a sheet of stickers that I had leftover from other activities, animals from different habitats that I just cut up into pieces, to match the number of children in the group.
  • The idea of the game is very simple: the leader directs the group where to put the sticker i.e. ‘Take one sticker and put it on the bench’ (in the tree, under the tree etc). Everyone listens, the teacher monitors and checks.
  • The sheets of stickers are passed on in the circle (‘New stickers, please!’) and the game continues.
  • The game is led by the teacher for the first few rounds but then the students are asked to take over and to dictate when the stickers as put.
  • The game goes on for as long as it is necessary.

Why we like it?

  • It was, eventually, a very student-centred and productive activity and we used a lot of the target language (prepositions) and in the format of the Starters YLE Speaking.
  • We had a lot of fun. It started quietly and very realistically, with animals on the grass and in the trees, but, as was to be expected, it didn’t last once someone decided to put something on the girl, on the sun, in the air etc. We laughed a lot and kids were very eager to show their pictures and to announce what they put and where.
  • Although our main aim were the prepositions, we also revised (and introduced in some cases) the names of the animals as the stickers had all the habitats and I thought it was a nice opportunity to at least try to extend our vocabulary.
  • The activity is very easy to prepare and any set of stickers can be used.
  • I was really proud of how my kids worked well as a team. Everyone played by the rules, they did not take more than one sticker, they passed on the sheets without delay, they looked at and praised their friends’ pictures.
  • I was wondering whether it can be adapted to any types of vocabulary and what I have come up with so far are the following: a picture with a few people or characters and a set of stickers to practise ‘has got’ (‘Choose something for the princess’, ‘The princess has got a cat’) or a picture with characters and practising ‘likes / doesn’t like’ (‘Choose something for the princess’, ‘The princess likes / doesn’t like apples’). I also used the similar ‘recycled stickers’ for a guessing game with older students with the places in the city. The kids had five stickers which they had to put somewhere around the city. They kept the picture secret because the speaking task was about describing the places for their partners to guess. This version could also be adapted to the picture of a house or perhaps even to the map of the world to practise the names of the countries.
  • In the picture above, you can see one of the examples, created by my student.

Happy teaching!