It is not a lesson plan in a traditional meaning of the word, that is, a set of notes, more or less formal, that a teacher writes in order to prepare the activities for the lesson. It is a list of stages of the lesson, displayed on the board, written both for the teacher and for the students.
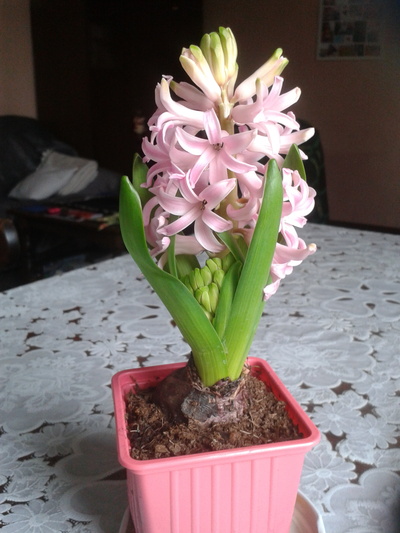
The photo that you can see above as the illustration to this post is my primary students’ take on the said plan, prepared for me one of these days, before the lesson. With a clear signal as regards the activities that they would really (really) be involved in. No homework whatsoever, no grammar, either, three games and a party…I have absolutely NO idea what this mysterious ’33’ was supposed to be…
Why do we need it?
For the teacher, it is a lesson in a nutshell, always there, always on display, a clear presentation of all the main stages of the lesson.
For the students, it is a lesson in a nutshell, always there, an overview of what to expect on the day. It serves as a classroom management tool as it helps the kids get a better idea of the lesson. This is how we keep track of the lesson proceedings as we go through it. This is how you can reward the students if you include a story or a game in it. Naturally, the game (at number 9) can happen ONLY if we go through numbers 1 through to 8 first.
The lesson plan also contains some opportunities as regards the students’ taking control of the lesson as they can be involved in erasing the stages that have been completed, after having confirmed that with the teacher, and, in some cases and to some extent, also the opportunity to choose the order of activities, when and if that is appropriate.
In case of the longer lessons, those that last two or even three academic hours, it is a great tool that helps the students manage their time, attention and focus throughout the lesson, the number of activities, the break and so on.
How to do it?
There are always ten points, regardless of how long the lesson is and #1 is almost always ‘Hello. Homework’ and #10 is almost always ‘Bye-bye. Homework’. Anything that I plan for the lesson has to fit in, in the remaining eight numbers.
This has got a lot to do with the fact that I personally like the ten sections in a lesson (and 10 is better than 12 and definitely better than 11) but it also helps the kids see the lesson as a whole, divided into the same number of sections, every single day. It also gives me an incentive to pack the lesson nicely into ten sections and, in turn, that means that they all might have a different length. It is never ‘the lesson time divided by ten’. Sometimes, half-way through the lesson we might be done only at number 2, sometimes we go through numbers 1 – 8 very quickly and what is left is only number 9 – a whole project planned for sixty minutes, for example.
As soon as we are done with a stage, we erase it off the board, moving towards number ten as the lesson progresses. Sometimes I do it, sometimes the students help. I noticed that they are paying attention, reminding me to erase a stage, checking whether we have already finished it or not yet, making sure that I have included the break or the game or the homework.
With my older kids, I try to be tricky and the names for the stages are very rarely revealing or direct. The only thing that I am always open about is the grammar introduction and practice and it normally features on the plan as: ‘Grrrr’. Everything else is as vague and random as possible. Another trick that helps the kids to manage the time and the attention. With the older students who take part in the decision making process as regards ‘What’s next?’ (or with the younger ones, when they are invited to choose), the students have to ask about the stages that interest them most and then make a decision.
Who is it for?
I use the plan for most of my classes, including the teacher training sessions for my teachers. With pres-schoolers, we use only elements of it and most of the time it is limited to annoucing ‘a surprise’ which, with time, began to translate ‘anything new’, ‘anything special’, ‘anything out of the ordinary’ and the kids were asking how many of these surprises I had, whether they were big or small and so on. I
I also try to get my youngest students ready for managing the time of the lesson by introducing stages for parts of the lesson. These of course have to be worded in a very careful way, using only the simple and familiar words and I always count the number of these stages on my fingers. This comes in handy at the end of the lesson, when the kids are already a bit more tired and less focused or, also, during the more complex craft activities. For example, at the end of the lesson, I can say: ‘We need to do ‘story’ (the thumb), ‘game’ (the index finger), ‘the homework’ (the middle finger), ‘Bye-bye song’ (the ring finger) and ‘stickers’ (the pinky). Then, we also check how many of these five we have got left. This really helps the kids to focus, even the youngest ones.
With my primary students, as soon as the kids are able to read, I start putting the plan on the board. I do it before the lesson and we read it together. Again, since they are only learning to manage the written word, I put only single words or even symbols. These may become more complex as the kids grow older.
This post is a result of a combination of factors: only a short while ago we started a new IH VYL course, I was talking to a NQT teacher and, last but not least, I have been stuck in quarantine, with a lot of time on my hands, all of a sudden. Writing calms me down and so I am writing.
If you are a novice VYL teacher, don’t forget to check out the first VYL lesson survival kit here. It might help, too! And there is this other one, about landing on Mars and having to teach there.
Now, in a rather random order…
Keep it simple
It is a good idea to stay focused and that means that ‘less is better’ or, in this case, ‘fewer is better’. There is no need for fancy activities, for some intricate craft, amazing toys, multi-item anything or a very complex game. There is no need for the coursebook, either. Everything will be new for you so there is no need to clutter your brain (or your table) and many (or all) things might be new for your students, too, depending on whether they are starting the course or whether you are taking over. In any case, simple resources will make it more maneagable for everyone.
Keep it varied
Simple does not mean monotnounous, though. The younger the children, the shorter their attention span and it is absolutely necessary to be ready to change the activities frequently, ideally when they are still enjoying them (rather than wait until the interest fizzles out and you will have to get them back on track). Luckily, there are quite a few things that can be done only with a set of flashcards, varying the activities slightly without changing the main resource. Although, of course, each lesson with pre-schoolers will need more than just one. If you are teaching colours, for example, you can do it through: flashcards, a song, a video, a wordwall game, realia (kids will be wearing colours on them and there are other colourful things in the room, such as crayons) and a story. This way you will keep things ‘the same but different’.
Keep it coherent
Make sure that you do not overwhelm the kids (and yourself!) by trying to go over too many topics in one lesson. If it is ‘colours’, it is ‘colours’ from the beginning until the end of the lesson. If it is ‘toys’, it is ‘toys’. It is only the first lesson, there will be lessons number 2, 3, 4 and 100.
Keepit interesting
This one will be a question only and a question with more than one correct answer. It has become a kind of a tradition that the first lessons in level 1 for pre-schoolers focus on the introduction of colours. The idea behind that is, I presume, the fact that colours are around us, they are a concept that the kids are already familiar with and that the words themselves are short and easy to learn. But here is a question, is it really the most interesting, child-friendly, fun, engaging, joyful topic that there is? Is it the best invitation to a new story and to a new world that learning English? Toys are colourful, too, they are toys and all the kids are more than familiar with them. Plus you can use the realia from the very first lesson. Pets are cuddly and sweet and all the kids have their favourite ones, even if sometimes less traditional ones, such as a hippo or a frog. The realia can also be found without much trouble and most pets make noises and that is another way of introducing variety in class. Both, toys and pets can be mimed and used in different ‘Guess what’ games in which the kids guess the word by looking at a small cut out of it (aka ‘through the keyhole’ or ‘the funky envelope’). The range of activities gets wider in a blink and the chances that children get interested and stay involved are much higher.
Keep it teacher-centred…
and do not feel guilty about it. Student-centred lessons are the ultimate aim and the dream but in the beginning of the course, it is the teacher and the adult who has to take the full responsibility and the full control of all the activities in the lesson. This is true for both the novice and the experienced VYL teachers as well because they all have to deal with little children who are in a new set-up, in a new situation. Be it either the first ever lesson of English, the first lesson ever in a new group with some new classmates or the first lesson with a new teacher.
Keep itorganised
Keep what organised? Everything! Absolutely everything. All the materials in the folders (or with paperclips, in boxes, files) in which they are going to be used. All of the resources in a box or in a basket, in order to be able to carry them around, if needs be. All of the things out of the kids’ reach, on the top of the board, on the top shelves, in the cupboards. All the pencils or crayons, by the colour, in separate plastic cups or boxes (but cups are cheap and easily available) and not on the table. The teacher is supposed to give them out only when they are needed.
What I found really useful in the beginning of my VYL career and something that I still do, for every lesson is a lesson plan on the wall. It is simple, big and colourful, with only the main stages and activities, in a place where I can see it and to refer to it from every corner of the classroom. You can see an example of it here.
Keepcalm
Even if you don’t feel very confident. Even if you are worried that you might not manage. Even if you are a tiny bit scared of being left alone with a bunch of kids. Even if the parents are looking at you inquisitively or if they are asking questions. Even if you have forgotten something at home or in the teacher’s room.
Smile, no matter what! Don’t lose your head! You are going to be great. Or almost great!
The off-site EFL classes, with the teachers arriving to the kindergarten and teaching their lessons there are quite common.
Advantages
The environment is by default child-friendly and safe
There are carpets, small tables, small tables or chairs boards and posters are hung on the level of the children
There are plenty of posters, toys, craft and stationery products that are child-friendly (ie crayons or safety scissors), books
Children feel comfortable in the place, they know where to find the toilet, the spare shoe, their shelves
Children already know their classmates
There will be plenty of people who already know the children from the day activities and it will be a great advantage as the EFL teachers can use them as the source of information or even ideas.
Disadvantages
Children are made to study English in a classroom that might be used for some other purposes, they might feel lost or confused when the room that they normally associate with playing will be the classroom in which they need to do some serious ‘studying’
There might be too many distractors such as toys
There might be some rules, routines and procedures in the institution that will also have to be taken into consideration, it is best to find out what these are and to try to combine them with the rules and procedures of the English lessons
Children might struggle with transitioning between the regular kindergarten activities and the English lessons, provisions must be made for that, for example special routines
Any kindergarten activities will have an impact on the flow of the English classes. There might be some specific holidays or trips that might influence the timetable or the curriculum but it is also quite likely that all the children might be tired or, on the contrary, excited on some days, due to the course of the day activities. They might also bring in their emotions and even animosities from the kindergarten.
Solutions
Where to look for ideas for the classroom
Have a look at the classroom before the lesson and figure out how you can make it fityour aims and ideas, adapt when necessary and talk to the directors or supervisors to find out as much as possible about the institution and their procedures. If you are planning to introduce some changes, first and foremost focus on explaining the rationale for them. They might not be quite clear to people who are not language teachers but when you provide a rationale, they might be willing to take your suggestions into consideration. Involve your supervisor if you have one.
Make the necessary decisions regarding the course such as the coursebooks, photocopying, homework and contacting the parents. These are not quite related to the classroom itself but a lot will be influenced here by the procedures and policies of the kindergarten and they might be different for one kindergarten to the other.
Decide where you are going to start the lesson. Ideally, it should take place in a circle, on the carpet but there are other options, too: at the door, in a circle standing. Even if it is a classroom with small desks, there will be some space in-between the board and the first rows or at the back, behind the last row.
Decide where in the classroom you are going to have the storytelling corner, the movement corner and where you are going to sit to work with the coursebooks or handouts.
Build up your routine and stick to it.
Remove the distractors if possible or as many of them as possible.
Find out which of the kindergarten resources you are allowed to use.
Decide where you are going to keep your things and resources such as crayons or markers for the lesson, handouts, flashcards for the lesson. Please use the same place and make sure you establish with the children that they are not allowed to touch anything that is on the table. It might help to keep everything in a box (as it can be easily lifted to keep it away from the children), it is easy to store and it makes cleaning easy. What is more, if you keep all your resources in one container, you gain a lot of flexibility as all your toys are there, in case you need to change your lesson plan. I have had groups with whom I had to keep all my resources in my rucksack, zipped shut in the begining of the course.
Talk to the kindergarten’s stuff and ask them to find a place for you to store your resources in-between the lesson. Otherwise you will have to carry all your resources with you all the time.
It is a good idea to talk to the kindergarten’s admin to find out whether and where you can put the students’ work on display. There might be some room in the classroom or in the hallway and it is quite likely that the administration will like the idea of assigning a noticeboard for you and the English classes work. They will also benefit from promoting the classes to the parents whom the teacher most likely is not going to meet in person.
Where to find more ideas?
Sandie Mourao and Gail Ellis ,Teaching English to Pre-primary Children, Delta Publishing
Vanessa Reilly and Sheila Ward, Very young learners, OUP
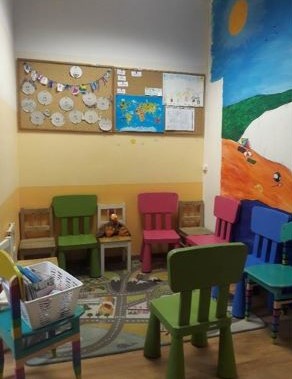
Herbert Puchta and a big group, there is a semi-circle of small chairs but the room is big enough for the kids to be able to stand up and play some movement games without actually moving too much around the room
A realistic preschool classroom, not quite EFL pre-school but real life.
And another one from PreKPages a great channel on youtube where you can find lots and lots of ideas for working with preschoolers.
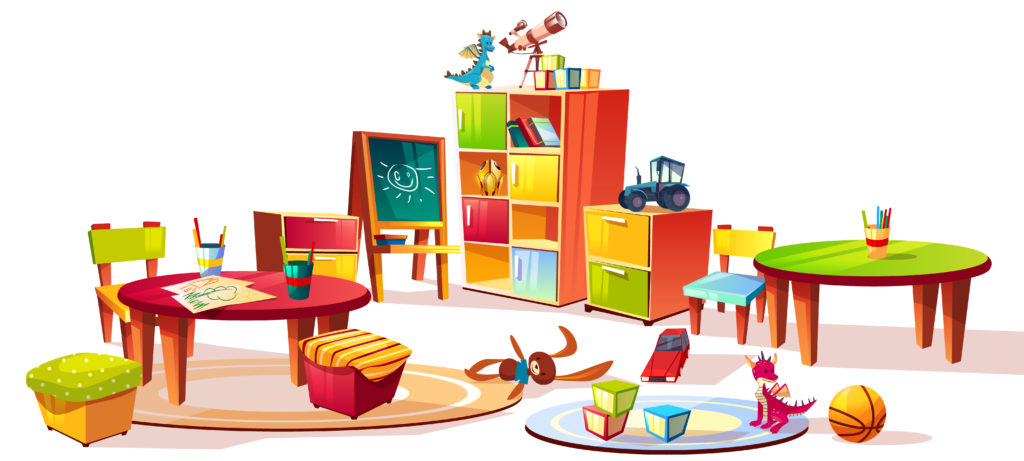
The EFL settings, a private language school, a regular classroom adapted to the needs of a group of pre-school children. There are usually big tables and chairs or the foldable desks and materials such as posters that are not necessarily child-friendly.
Advantages
The classroom is quite likely to be big and that means that the adult furniture ( frequently the foldable tables) can be moved around to create the space for the hello circle, the kids tables, the story corner etc.
Using the big chairs and tables can be an advantage, actually, as the children are sitting far apart and they are not invading each other’s space which might happen when you use a small table. Plus, sitting at the big table is a clear sign that the serious work is about to begin.
You can involve the kids in arranging the classroom, that will make them feel responsible for it and it will help the teacher, too.
The children might feel ‘honoured’ to be studying in an adult classroom as this way they will become ‘real students’, especially if they are already 5 or 6 and start dreaming of starting school.
Disadvantages
The likelihood of sharp corners and not very child-friendly items is much higher.
The teacher has to unfold the VYL kingdom before each lesson and fold it back at the end of the lesson because there might be older children or adults coming. And all of that eats up the teacher’s precious break time.
The board might be too high up and the only person who can reach it is the teacher (but it is not the worst thing in the world, you can put up things in places where the kids cannot reach them)
Solutions
Have a look at the classroom before the lesson and figure out how you can make it fit your aims and ideas. Talk to the admin of the school (and the other teacher using the room) and request permission to move the things around and to rearrange things. It is always worth checking the other rooms in the school. Perhaps one of them is more suited to the needs of the little children and perhaps swapping rooms or furniture is possible. It is always worth asking.
Make sure that the classroom is safe. Look out for the sockets, sharp edges, anything that is not stable or sticking out. There are easy ways of making the place child-proof ie moving out the furniture, swapping the classroom, getting the socket plugs etc.
Decide where you want to start the lesson. I am a huge fan oflining up outside of the classroom but it might not be always possible.
The photo that you can see as the cover photo above is our hello circle that I created in one of the corners of our very adult classroom. In a regular lesson with my pre-schoolers, we would spend here about half or even two-thirds of our lesson. A regular lesson started here with a hello circle, songs, revision and the new langauge introduction. Later on, we would move to the big tables for the more serious work with the coursebook and handouts and we would go back to the small circle for the final game, story and song. This lasted a good few years, even after we moved to the primary and we stopped here only when my students, already A2 and as ‘mature’ as 8 and 9 y.o.
Think of the routine that you are planning to have and build it with your specific classroom in mind. Decide where you are going to do the hello circle, where you are going to have your storytelling, where you are going to sit during the focused task. After you have built it, stick to your routine.
Assign a corner or the area for the movement games. Perhaps the classroom is big enough and one of the corners can be kept empty. Perhaps it is not very big and you will have to move the small stools or the carpet out of the way to make room for the movement games.
The same applies to the storytelling corner. If the classroom allows for that, it would be great to have the space dedicated only to the storytelling activities. Ideally, that would be a carpet for the kids to sit on and a chair for the teacher, to sit slightly above the students’ level. If there is no carpet, the kids can also sit on cushions or on small mats or even the foam puzzle pieces which are easily stored and can be dealt with by the children themselves. Having said that, I have also been teaching in the classrooms where the only option was for us to be either sitting straight on the floor, under the board or sitting on the big chairs in a semi-circle around the teacher.
As regards the focused task, it is normally done at the big desks / foldable tables or at a small table that the teacher puts out in the centre. The small table means that we have all the students around us but it is not going to work for groups bigger than six. Everthing becomes very crowded all of a sudden, as soon as the sixth student comes. Using two small tables mean more work and time invested in setting them up and if they are round tables the teacher spends the entire focused task looking to the left and to the right, back and forth. With larger groups, it is almost better to use the adult seats.
Think how you are going to store your resources and your materials. Sometimes scissors and crayons will have to be shared with the other teachers at the school (and hence stored in the teacher’s room), sometimes you will be able to keep them in your classroom. Think of a safe space that is not within the children’s reach ie the higher shelves of the cupboard, a locked-up cupboard etc.
Decide where you are going to keep your things and resources for the lesson such as crayons or markers, handouts, flashcards for the lesson. Please use the same place and make sure you establish with the children that they are not allowed to touch anything that is on the table. It might help to keep everything in a box (as it can be easily lifted to keep it away from the children), it is easy to store and it makes cleaning easy. What is more, if you keep all your resources in one container, you gain a lot of flexibility as all your toys are there, in case you need to change your lesson plan. I have had groups with whom I had to keep all my resources in my rucksack, zipped shut in the begining of the course.
Decide where you are going to put all the kids’ stuff such as their bags and books (which you are not going to use at all times during the lesson and for that reason it is better to keep them in a special place ie on the window-sill, on a special table etc) or even the kids’ jackets and boots. Sometimes it is possible to hang them outside, sometimes they will be hanging in the corner of the classroom. Make sure you keep your activities away from that corner
It is good to have at least one noticeboard where you can display your students’ work. It can be a noticeboard in the classroom but it can be a noticeboard in the hallway, too. I have had classrooms in which the door was the only available space and we used to put up pictures there using blutack.
Try to make the classroom child-friendly. Perhaps it is possible to decorate one of the corners of the room with the colourful kids’ posters or to decorate the windows with snowflakes or colourful leaves in winter and in autumn. Even if there is cupboard or boxes with toys, by bringing just one puppet, your class assistant, you can create great atmosphere in the room and make a huge difference. If there are more toys, it is a good idea to have a container for them, a basket or a box, in order to be able to keep them stored (and out of sight) when you don’t need them.
I have decided to write this article inspired by my trainees on the IH VYL course and to collect, in one post, everything that I have learnt about a classroom that is appropriate for the lessons with the EFL preschoolers.
This post was meant as a short, one piece (emotionally-loaded, perhaps) description of a classroom. But then, as soon as I started writing, I realised that there is a lot more to say and that I myself have worked in so many different places that were made into VYL classrooms that, abracadabra, three posts came out of it. The other two can be found here: about the regular classroom that becomes a VYL classroom and about teaching in kindergartens
Well, enjoy! And if you have any other ideas to add, there is the comments box!
Case A: Our pre-school kingdom
This is a classroom in a language school that was set aside for the lessons with pre-schoolers. The furniture has been bought for the little people and there are no big tables or chairs. There are no other classes than those with pre-schoolers.
Advantages
The classroom is used only by the pre-primary students and teachers and all the furniture and the design can be adapted to the needs of the students.
The classroom is safe.
The room can be fully decorated in a child-friendly way, even if it is not all done at once, the elements can be added to it step by step.
There is plenty of room to display the kids’ work
It is easy to store resources and they are all at hand which gives the teacher a lot of flexibility while already in class.
The students feel comfortable in class and it is much easier to build up the routine.
With some investments, there is a lot of potential for some interesting solutions such as educational carpets (yes, in English!), lines painted on the floor that help to divide the classroom into sections (or just a hop-scotch grid that is always there, l saw it once in a classroom at IH Bucharest), wall hangings that now come with some of the coursebooks and can be left on the walls and so on.
Disadvantage
I cannot think of any, sorry)
Solutions
Have a look at the classroom before the lesson and figure out how you can make it fit your aims and ideas. Do not worry if at the start of the year you do not have a clear idea of what you want your classroom should be like. There is always room to experiement, to try new ideas and to improve the classroom, based your research, ideas or the group that you currently work with.
Make sure that the classroom is safe. Look out for the sockets, sharp edges, anything that is not stable or sticking out. There are easy ways of making the place child-proof ie moving out the furniture, swapping the classroom, getting the socket plugs etc.
The routine and the classroom go together and one can influence the other. They can also change through the year.
My dream classroom actually does exist and everything that I am going to include in this section of the post is based on a real experience.
My classroom is a rectangle and it has been divided into three sections: the carpeted area with a set of small chairs in a circle, a circle of small triangular tables arranged in a circle in the middle and another carpeted area by the window.
We start the lesson outside of the classroom. I am a huge fan oflining up. Kids walk in one by one, they put their books on the table, at their seats and then take a place on one of the chairs in the hello circle.
Afterwards, we move to the carpet by the window and this is where we study, we revise and play the flashcards games and this is also where we get up to do our movement games. We used to spend more time in the circle but then, last year, my students started to suggest, more and more frequently, to go to the carpet and that is exactly what we did. Now we spend there a lot more time. One of the reasons for that might be the fact that we got a big TV that hangs on the wall by the window. In order to make sure that we don’t sit too close to the screen, I put a piece of painter’s scotch onto the carpet and this is the line behind which we always have to sit while we are watching anything on the screen. Here we also do all of our movement games.
Afterwards we move to the tables in a circle and this is where we work with the book or the handouts. This is where we write and this is where we do craft.
The lesson finishes on the carpet that is also our storytelling corner. Sometimes our story is a video and in that case we sit in front of the TV. Sometimes it is a storybook with me sitting on a small chair and the kids sitting in a semi-circle on the carpet.
We finish the lesson on the carpet, too. We sing a song, talk about the homework and choose stickers.
In the corner of the classroom, there is a bookcase and on the shelves we keep the most immediate resources such as markers, scissors in a closed box on the top shelf, glue in another box, crayons, our notebooks and two big boxes with dice, blocks, plastic toys. I don’t have to share them with anyone else, these are just used by the little kids. Outside of the classroom we have to cupboards, too and a chest of drawers for flashcards and all the other things we might need.
My resources for the lesson, for my groups are kept in three different baskets. I keep there flashcards we are using currently as well as few other sets we revise as well as our favourite games, dice, etc. The children do not touch them, mostly because they are too big and we have learnt on developing the idea that this is Anka’s basket and we do not touch it. Keeping things in a basket also makes it very easy for us to be moving around from the circle to the carpet and to the table etc. In the past, we would move between two or three different classrooms in one lesson and the basket was superuseful then, too.
I have three little tricks, too. First of all, since our table is made of small triangular tables, I have some room in the centre and this is where I put a stool. This is where I leave all the materials for the focused task for the lesson. The small tables are also very easy to be moved apart which makes it possible for me to enter the centre and sit there, having all my kids around and all the resources at hand.
There is also a small cupboard under the table and I use it to keep a selection of storybooks, coursebooks and posters which I can use in class.
And since the same cupboard has a small section underneath, a section that I can close and that is why it is used to hide all the secrets and surprises
I display the kids’ work on two noticeboards in the classroom but also on the noticeboards in the hallway.
There are no toys in the classroom. We are lucky enough to have another small room where kids can play before or after the lesson and this where we keep all the toys.
This is still one of the top 5 among the most popular posts on this blog. But it was written about a year and a half ago. It looks like the high time for part 2. Here it is.
There is only one picture…
A to Z picture: teacher writes the alphabet on the board, students work in pairs or in teams, they talk about the picture by naming the word or words beginning with each letter of the alpahbet. Younger (or lower level) kids can use only single words, older students (or higher levels) can produce relevant sentences. Thank you, Polina Smirnova, for this activity.
Dice points: kids work in pairs. They describe the elements of the picture (ie one person, animal, element of their choice or assigned by their partner (Tell me about this…). They use the structures and vocabulary that they are familiar with, depending on the level. After each round, they roll the dice to find out how many points they get. They take a note of the points and add them up at the end of the game.
I spy with my little eye: teacher demonstrates the game by describing one of the elements of the picture ‘I spy with my little eye something big and red’. It works even with the youngest children as they are not even required to name the item in the picture, they only need to point at it. When the kids are ready, they take turns to describe something to the rest of the group or to their partner. The language can be made more complex by focusing on prepositions, adding more adjectives or details. It is a great speaking and listening activity.
Yes or No? Teacher makes sentences about the picture, children listen to check if these are correct. If they are, they confirm ‘Yes’ or ‘Yes, that’s true’. If they are not, they say ‘No’ or ‘No, it is not true’ and they correct the sentence. Afterwards, they can take turns and talk about the picture for the group or their team to listen. Again, this is one of the activities that I use with my pre-schoolers and it is lovely to see how they move on from one-word utterances (correcting only the key item) to full sentences. The complexity of these sentences or their number can be adjusted to the level and age of the students.
Travelling sentences: It is a version of the Yes or No activity. The teacher displays the picture for all the students to see and gives out small cards, one per student. Each student writes a true or false sentence about the picture, the teacher can support this with providing sentence starters. When the kids are ready, the sentences start travelling, with each student passing their sentence to the student on the left or on the right. They read the sentence on the card, say if it is true or false (and correct it) and the game goes on. This stage can be done in pairs or in groups of three.
Travellingquestions: the teacher prepares a set of questions about a picture. These can be reused in many different lessons so it might be a good idea to laminate them. Students work in pairs or in groups of three. Each pair picks out one of the questions, they look at the picture, read out a question and answer it. The teacher monitors and when the time is up, the students exchange the questions by passing their question to the group on the left and they continue the game. The set of questions might include: Where are the people? What are they doing? What clothes are they wearing? How are they feeling? What’s the weather like? Can you see any animals? Do you like this picture? What’s your favourite thing about this picture? What’s your least favourite thing about this picture? Is there anything strange about this picture? If it happens, that the question is not relevant to a specific illustration, this particular question can be left out or the teacher can introduce a way for the students to get out of the situation, for example: ‘I don’t know’ or ‘I don’t know. Maybe…’
Picture boardgame: It is a version of the Travelling Questions and it was created based on the same principle: there is a set of topics, themes and items that are involved in most of the illustrations that kids can talk about. The board, such as this one here (created with toolsforeducators.com) can be reused with pretty much any visual. The students play in pairs, move their checkers on the board and describe the picture according to the suggestions from the board.
Draw the picture: this is an activity that I used to use a lot with the first years of primary in order to practise reading and, obviously, with students who like drawing. We use a set of specifically prepared cards on worwall, like this one here. We get the pencils and the paper ready and I set the first card ready (‘We are in the park’). Afterwards, we read the cards, one by one, in any order (if something does not match, I skip the card to get back to it later), the students take turns to read the sentence and we all draw a picture according to these instructions. At the end, we compare our pictures and talk about some potential differences. It is a good activity to practise simple words, prepositions, colours and verbs.
Half thepicture: Students work in pairs. Each pair receives only a half (or rather a part of the picture, depending on the particular photograph or illustration). First, they describe together what they can see and, as the second step, they try to guess and predict what can be seen in the part which they cannot see. Ideally, all the kids should be working with the same visual and then, in the feedback stage, the class share and compare their ideas before the teacher reveals the missing part of the picture. The materials can be easily created by cropping visuals but it is even easier with the electronic resources when a part of the photograph (or parts) can be easily covered and uncovered on the screen.
There are two pictures (or more)
Compare these two: students compare two pictures, they talk about the similarities and differences, very much like in the PET exam or like in the FCE exam, if there is a follow-up question, only without the time limits and without any B1 or B2+ language expectations as this activity can be done also with A2 or even A1 students.
Compare the two boardgame: there is a selection of pictures from the same topic ie school, sport, hobbies. They are numbered and displayed on the screen or on the page. Students play the boardgame and whenever it is their turn, they choose two of the pictures and compare them briefly. The pictures can be used many times in different combinations and students speak for about a minute.
Choose two to compare: students are given a set of picturse, for example 4. They are asked to choose any two to compare them and to explain why they have chosen these two pictures. The most interesting part of this activity is the follow up question which can be one or more of the following: Which one is your favourite? Which one is your least favourite? Which one is the happiest / saddest / funniest / most challenging / most unpleasant / strangest? Is there a picture that nobody has chosen to discuss? Why do you think you’ve never chosen this one?
Tell me about this picture: this game requires a set of pictures whose theme and level of complexity can be easily adjusted to the age and level of students. We normally use the wordwall which we play on the big screen. The kids play in teams and they take turns to open one of the boxes. They take a minute to talk about the picture they find there and they get the number of points for that. The teacher keeps track of that and announces the winner in the end. This game can be played with the lower level kids, like this one here, with pre-primary students on the topic of animals (here we play the group vs the teacher), with the level 1 primary school students on the topic of rooms, the level 5 primary school students on the topic of souvenirs (What is it? Who would like this present?) or even with B1 teenagers on the topic of travelling (What’s this place? What can be easy or difficult about travelling to this place?)
Two versions: this one is a bit more complex in terms of preparation as it involves some searching and researching. The idea behind this picture is to compare and contrast two interpretations of the same topic. Our photographs usually focus on the photographs and it would be the teacher’s job to find the other matching (or ‘matching’) item for example a painting, a sketch, a cartoon, a poster, an advertisement, a wordcloud and so on. The students discuss the visuals, compare them and choose the visual which they prefer and which better illustrates the idea.
I have a small problem: my brain does not like dealing with written instructions and, really, any instructions whatsoever. I cannot make myself. What that means for my life is that I use devices instead of reading the manuals, I prefer to watch cooking videos rather than reading any recipes (and, indeed, no matter how exciting the food, if the instructions for cooking are longer than four or five lines, I immediately lose interest). In my teaching life, that means never reading any teachers’ books (if I can help it and most of the time I can). If I find an activity that I like, in a resource pack, for example, and I cannot figure out how to use it only from the game itself, well, I just never use it at all.
Or I make up my own rules. That’s exactly what happened with this game.
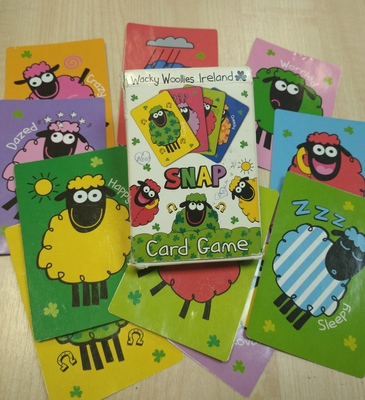
It actually makes me giggle. I have had this game for about three years (a lovely present from Chee-Way) and it was only this week that I noticed the name of the game. Apparently, it is called Snap. Oh, well.
This morning I was finally inspired enough to google how to play it and I found it easily enough, only to find out that I had never played it the right way. Oh, well.
Actually, I had some suspicious that what we were playing was inspired by another game, that I once heard about but when I bothered to find out, it turned out this morning that I couldn’t have been more wrong. Oh, well.
The Sheep Game (as we know it)
There are 12 different emotions / feelings / adjectives in the set. We started to play with those that the kids knew already and, then, we kept adding one or two with every next game. At this point, they know all of the adjectives and we play with the whole set.
There are 4 cards of each adjective but in any real game, we use only two of each. One is displayed on the floor in the middle of the circle. The other one we deal among the teams. Usually each team ends up with four cards.
The students keep their cards secret from the other teams.
We sit in a circle, students ask the questions to the team sitting on their left or on their right but the questions are always travelling in one direction.
The main question is ‘Are you happy / sad / angry?’
If the team have this one particular card, they have to answer ‘Yes, I am’ or ‘Yes, we are’ and give away the card.
If the team don’t have this particular card, they have to say ‘No, I am not’ or ‘No, we are not’ and then it is their turn to ask the team on their left / right.
The game can be played for a certain number of rounds or until one of the teams loses all their cards. Then the winner is announced and that is the team has the biggest number of the initial set left.
It is a great game to practise the key vocabulary, in a sentence and although the students play in teams, they can win the game only when they pay attention throughout the entire game, listening to all the teams and keeping track of all the cards (or words) that were mentioned and lost, too.
Variations
Blue, please – one of the first games that I normally play with my primary students, in the first weeks of the course, as soon as we feel comfortable with the basic colours or numbers, we play with flashcards that we usually hide inside of the book, to make sure that the cards remain a secret. As soon as the kids progress, we replace the simple ‘please’ with a full question ‘Can I have blue, please?‘ and we play it this way with any set of vocabulary
Do you like… – another variation of the game that we play with the beginner primary students, we normally switch into that version when we start the topic of food and drink. If the students / teams have this particular flashcard in their set, they have to answer ‘Yes,I do‘ and they have to give the card away. If not, they answer ‘No, I don’t‘ and they continue playing.
What’s the matter with your…– a version that we played with my teens while working on the health / medical vocabulary which turned this game into a mini dialogue with different yes and no answers (yes = I need to have it / them checked, no = nothing I am fine) or Excuse me, where is the check-in gate? while we were working on the travelling / airport vocabulary (yes = it is next to…, no = sorry, I don’t know).
Any other set: the vocabulary set + the structure that would be used with this set
Whole class vs groups of three? With the younger kids we normally play whole class, in small pairs because it helps them learn the rules of the game much faster and because the game is easy to set up and you need no other materials apart from the set of flashcards normally used in class. With the older students, I use words on small cards and we normally play it with the whole class only in the beginning, later on they play in groups of three.
And the winner is… Well, there are at least two options here. For a very long time we played it in such a way that the winner was the team who had the biggest number of cards left at the end. Until my kids suggested that perhaps the winner should be the team who managed to get rid of their cards first and we played it this way, too. On the one hand, it makes the game less competitive and it is not a real shame to be ‘losing’ a card but we have had a situation when a team avoided asking the right question not to help their opponents win…I suppose the game can be played as normal and it can be decided only in the end who the winner is (all the cards lost vs all the cards saved) but we haven’t really tried it in the classroom. Not yet anyway.
Leftovers. We normally deal out all the cards available but keeping a few cards away and keeping them secret adds up to the challenge. These leftovers are going to be automatically the incorrect questions and the players will have to figure out first which ones these are and secondly, which ones not to ask anymore.
This is how I daydream it: my primary kids go on to take their Starters (this is an old daydream, this year they will be taking Flyers), they are describing the pictures or telling the story. The examiner asks ‘How is this boy?’ and my kids answer ‘He is confused.’ and the examiner cannot believe her/his ears but she/he is, actually, impressed.
‘Confused’ is one of the many adjectives that my primary kids have learnt thanks to the sheep game that we’ve been playing for a few years now. We started with the normal adjectives, happy, sad, angry, sleepy but the kids noticed that I’ve been hiding some cards and they got curious. And because they were curious, they started to ask questions. Since the cards were wonderfully happy and funny, and since, together with some clarification from me, they did illustrated the concept very well (after all, they were created for children), we started using the ‘confused’ card (and with them ‘chatty’, ‘in love’, ‘crazy’).
That, in hindsight, was an excellent idea because this turned out to be a very useful words because I happen to be confused and my kids happen to be confused, too. Not to mention all the characters from all the stories. ‘Confused’ might be from the B1/B2 shelf, but, we found it very very useful, at the age of seven, in something that was the pre-A1 level.
‘OK’, ‘ill’, ‘in love’, ‘creative’
The coursebook and the curriculum
A disclaimer first: my comments in this section are based only on a very un-thorough looking through the coursebooks for pre-schoolers, only a quick glance at the contents page and the units. I acknowledge that fact that I might have missed something and that a proper research might be necessary and, for that reason, I will refrain from quoting any titles here. However, having flipped through five recently published coursebooks for pre-primary learners, I did not find much as regards adjectives, apart from colours (all), some of the weather words (depending on the title) and some random happy, sad and hungry (also depending on the title). With one honourable exception that introduces quite a few emotions as well as some other opposites, either through stories or through CLIL projects. Overall, however – not good at all.
I also had a look at the primary books and here the situation is admittedly better because all of the modern publications tend to align their content with the YLE Cambridge wordlist and that, in turn, means about 50 adjectives on the pre-A1 level, including colours and possessive adjectives.
As it happens, my school is now getting ready for the YLE mock exams and I am putting together a set of materials for our teachers and kids and that made me look at the said wordlist with a great more deal of scrutiny. Starters kids (pre-A1) are supposed to know about 50 adjectives, Movers kids (A1) – additional 50 adjectives and Flyers kids (A2) – 70 more adjectives on top of that. I am aware of the fact that these lists were not created on a whim, quite the contrary – they are a result of a large-scale research and the effort of a huge team of people. But there are all these questions there, too. Why do the pre-A1 kids need to know the adjectives such as ‘double’ or ‘correct’ and ‘right’ (as correct) and ‘its’ (also an adjective) and some other ones, although not adjectives (‘coconut’, ‘pineapple’, ‘flat’ and ‘apartment’ or ‘lime’)? Why would these be more important, useful and appropriate for primary school children than ‘hot’, ‘cold’, ‘easy’, ‘difficult’ or ‘loud’ and ‘quiet’, which are only introduced at the A1 level?
I do not have the answers but I have been introducing them (or some of them) much earlier than that. And effectively so. If you are interested why and how, please continue reading.
‘crazy’
Emotions and feelings
‘Sasha, how do feel today?‘ is one of the questions that we ask in every lesson. Why? Well, I guess, first and foremost it is for socialising. This is the question that we ask when we meet someone, just to make a conversation, at least with adults.
Since our students are children, however, there is a lot more to that. Children are growing, developing their social skills and learning about a variety of emotions available and, even more importantly, learning how to deal with these emotions and learning how to recognise these emotions in others. That is why giving them tools to do that, in their L1 and, naturally, in their L2, is absolutely crucial.
Ideally, all the Sashas in the world would walk into the classroom being happy, totally over the moon, brimming with joy and ready to conquer the world with us in the next 45 minutes. But it is not possible for every Sasha to be happy every day and, as a teacher, I want to know how they really are and during the hello circle I am, literally, all ears because if Sasha is sad or sleepy or hungry, or, sometimes, angry, I would like to know that. Not only to show empathy but also to look at the lesson and what I have prepared for today from the group’s and the individuals’ point of view. Maybe a bunch of sleepy children will not be able to deal very well with the story? Maybe it will be necessary to keep an eye on Sasha and accept that today she might not be able to focus as well as usually because she is feeling a bit under the weather. Maybe it is a good idea to start with this silly game of ours (although I did promise myself to ‘never ever’) because it might distract and cheer up this little human who walks in and announces ‘I am very, very, very angry.’
Having this range of emotions vocabulary is also very handy when it comes to behaviour management, even if in the simplest of terms.
Situation type #1: an unpleasant situation: someone draws on someone else’s paper, someone takes someone else’s toy /book / marker without asking, someone jumps the queue, no casualties, only a lot of unhappiness in the room and one person is on the verge of tears. ‘Look. Sasha is very sad now‘. Naturally, it might not be the case of ‘one size only’, one solution for all occasions but it is a good start.
Situation type #2: a 5 y.o. confrontation: both parties did have a disagreement, both parties are not very happy and, definitely, way too upset to just get over it and get involved in the lesson activities. ‘Sasha, are you angry?’ ‘Yes!’ ‘It’s ok.’ Again, some cases are more complex than that, but in many situations the very fact of calling the spade a spade and showing that it is natural to feel angry (and, by default, giving the human some time out to accept and recover) is the best solution. It applies also to all the negative emtions, as long as no comes to any harm.
To be perfectly honest, sometimes (only sometimes!) it feels like this brief and contained reaction, limited by the fact that extreme language grading is necessary, is the best solution. Anything to avoid a long lecture from the adult on ‘The negative impact and the long-term consequences of….’ that children sometimes receive from their teachers, baby-sitters, nannies, parents, grandparents…
‘ill’
Riddles
This is, by far, one of our favourite games: making riddles. The game is introduced in its simplest from, with a set of flashcards and with the students guessing the secret word which the teacher or one of the children keep close to their chest. That’s just the beginning, however, once the kids are comfortable and familiar with the format, a set of simple adjectives are added, first the colours (based on the visuals in the flashcards) and big / small. Then, depending on the topic, we introduce and play with the relevant adjectives, for example fast / slow / big / small / loud / quiet while talking about transport, big / small / friendly / dangerous while talking about animals, hot and cold while talking about food and big / small / soft / hard / light / heavy while talking about the everyday objects and so on.
The kids can either use the adjectives of their choice and affirmative sentences (It’s big, it is yellow) or they can react to teacher’s or kids’ questions (Is it big or small?).
A variation of this activity is also I spy with my little eye adopted (and limited) to the set of vocabulary that the students are familiar with, played with a set of flashcards or a poster.
Expressing opinion…
…or, rather, justifying your opinion, something that can become a part of pretty much every unit and every set of words. Not only does it create an opportunity to personalise the vocabulary by dividing it into the things we like and the things we don’t like but also to give more detail and to build a small discourse (I like it. It is beautiful) or even first complex sentences (I like it because it is beautiful).
Naturally, that will require a different set of adjectives but beautiful, ugly, easy difficult, interesting and boring to be the concepts that preschool children understand, even though the flashards and visuals will be based on some symbols.
Storytelling
Our storytelling has reached some new amazing levels since we started working extensively on adjectives, both with primary and pre-primary students. You can read more about in an earlier post on the Storytelling Campaign here and here.
‘confused’
In my classroom
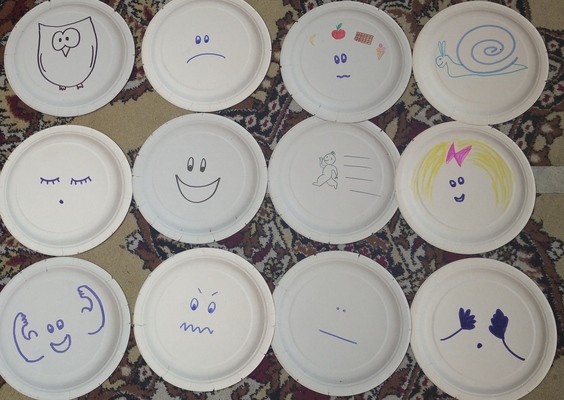
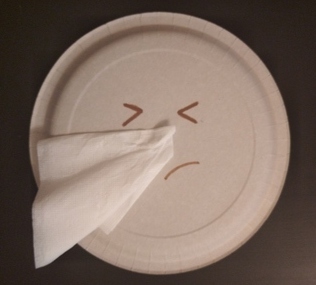
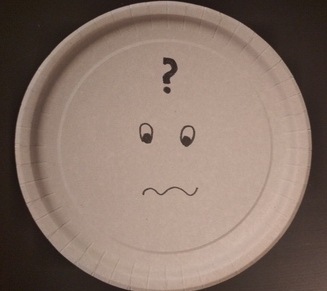
In this academic year, I am working with three pre-school groups, level 1, level 2 and level 3 and I am happy to say that even my youngest level 1 students are familiar with the set of 12 different adjectives that you can see in the first photograph plus a few more that we have learnt through songs. Level 2 group have got the basic set, quantifiers ‘very’ and ‘a little’ and a few more adjectives lined up. Level 3 group have got a nice set to describe food, transport and animals (including ‘scary‘) and they have already started working on extanding that range.
The photographs that were chosen to illustrate this post all come from the set that I have created for my pre-school group.
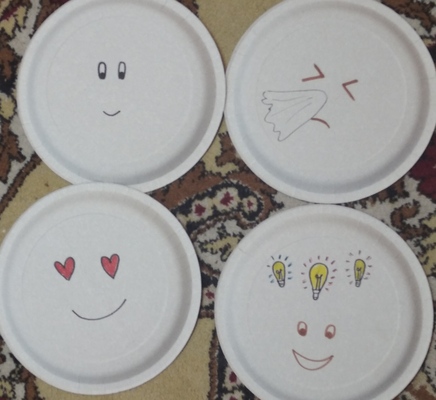
I have decided to use paper plates because they are durable, easy to stock and they have a shape of a circle aka they are a face. In the classroom, we put them in neat rows on the carpet, in the middle of the circle, to support production. My younger students like to pick up those that are relevant and hide behind them, showing how they really feel. This makes this part of the lesson a bit more kinesthetic.
I have drawn all of them myself but before making the decision on how to represent each adjective, I like to look at different emoticons to get inspired and to find something that meets two criteria a) I can draw it and b) my students will be able to associate it with a specific concept.
In some cases, the symbol was pretty easy for students to decode (for example: an owl = clever), in some others, I had to follow up with a brief clarification (for example: lightbulbs = ideas = creative). After the first lesson, I decided to upgrade the ill flashcard by adding a real tissue for the poor sneezing person.
There is another thing that I am considering at the moment. With my preschool students we start with the adjectives that help us describe how we feel and it must have been out of sheer linguistic greed that I decided to add those adjectives that describe personal characteristics rather than emotions such as ‘strong’, ‘beautiful’ or ‘clever’. Although, to be honest, we adults know very well that there are days when we feel particularly beautiful or not and the kids responded well to it. At the moment, I am considering different ways of organising all the adjectives that we already know and building up on that, in each category.
These are not all the activities that you can do with a video, these might not be the best activities for your groups. These are just some approaches that we like. Maybe you will find them useful.
Prediction
Procedure: The teacher introduces the topic of the video and gives the students a set of key words that appear in the video. The students discuss why these words might appear in the video and why they might be important. After a whole class feedback, the class watch the video to check whether they predictions were correct. As a follow-up, the students discuss the most (or the least) surprising / unusual / weird facts they have found out about.
Example: We used this video to accompany a reading on extreme adventures and survival in which making a snow cave helped the people survive. We watched a real tutorial on making a snow cave and the key words we started with were: a candle, the letter T, the stick, a saw, the flat ceiling.
Back to the board
Procedure: The teacher divides the group into pairs, one student in each pair sits facing the TV, the other one sits with their back to the screen. the teacher plays the video, students work in pairs and they retell each other what is happening on the screen. Depending on the video, the students can watch the video with the sound on or with the sound muted. After a while, the students change seats and continue watching. Finally, they talk together and answer some questions related to the video. Usually it is a mix of questions, some of which check comprehension and some which help the students see the big picture or express opinion.
Example: We did this kind of an activity while discussing sports and unusual sports. The students watched the muted video on extreme extreme ironing, in two halves, about 60 seconds each and afterwards answered the following questions: What do you think is the name of this sport? How do you think Phil Shaw came up with the idea? What can be easy and difficult about this sport? Would you like to try? Which was the strangest place in which this sport was done? In the end, we watched it together, with the sound on and we compared ideas.
Pause and talk
Procedure: This is a great activity for the videos that consist of short blocks or include a set of examples of a certain item. The teacher writes the key question on the board, usually only one, and plays the video. The students watch a short clip. The teacher pauses the video and students discuss what they have just seen by answering the question. The biggest advantage of this approach is that the teacher is in charge as regards the duration, the activity can be stopped after only three items or the video can be played until the very end. As a follow-up, the students choose their favourite / their least favourite item and justify their choices. As in all of the other activities, there is also an option of the students changing partners and sharing their ideas with someone else in the group.
Example: While discussing food, we watched the video about school lunches around the world, we watched it bit by bit (after each item) and the students had to answer the following question ‘Would you like to try it? Why?’. Actually, this particular lesson included the video because we followed up with a video on American kids trying Russian food and we paused right after the food was introduced and we try to predict if the kids are going to like it or not.
Read my lips
Procedure: It is used with the video with a very clear narrative that can be interpreted without the audio version as the students watch it muted. The teacher can start with the title of the film and ask the students to predict what they think it is about. Afterwards, the students watch the film and try to figure out what is happening, who the characters are, how they are feeling. The teacher can ask them to take notes while they are watching. Afterwards, students compare their notes in pairs or in groups of three. The teacher can also ask them about the main events or to try to connect the clip to the title of the film. Afterwards, the students watch the video again and as a group discuss their guesses. The teacher clarifies the main points, without going into too many details. The final activity is predicting what happens next.
Example: One of my top ten for this kind of an approach is a video like this excerpt from Big Fish, or actually a set of clips from the same film, for example this one here or this one here. In this one case, we did not really talk about the title of the film. After watching the film, the students were discussing what they saw but I also asked them to think about the following questions: Who was the big man? Why did he look scruffy? Why did the boy throw a stone at him? Why did the boy reach out a hand and closed the eyes? Why did they shake hands in the end?
After we finished watching and discussing, we also looked at the quote from the clip ‘You are a big man. You should be in a big city.’ and we talked about what it might mean and whether it is true.
Categorise
Procedure: The students are given a list of all the items that are shown in the video ie some extreme sports, some unusual holiday destinations, exotic animals etc. The students watch the video and they take notes about all the items, ie putting (+) and (-) next to those that they like or grading them from 1 – 5, depending on how interesting they are. After watching the video, they make their own list, organising all the items from the most to the least interesting one or dividing them into categories (like – don’t like, useful – not useful, interesting – boring) and so on. They work in pairs or small teams and compare and explain their decisions.
Example: This video was used in a lesson on technology as it presents the list of 10 Coolest Gadges. Some of the gadgets in the video have unusual names so we started with looking at these, trying to figure out what these might be. We actually divided the video into two and we discussed the first five gadgets and then, after the second half, the other five and then all ten, to round up. The students were choosing the most interesting gadgets that they might want to buy and those that they would not really even consider. In the end, we choose the most and the least popular gadget as a group.
None of the videos I use as examples were graded or created with the EFL /ESL learners so they can be considered authentic materials. I found all of them on youtube while looking for videos that would match the topic we were working on. I did not introduce any vocabulary, focusing rather on listening (or watching) for gist and general understanding, rather than on any specific details. Unless, of course, the students had any questions.
If you want to find out more about using authentic materials, have a look at some of the many resources online such as these post here: how to choose and adapt them, here from the Britsh Council, and here.
I have also found out a few posts on using video in class. If you are interested, you can find them here and here and this one here, although it has a wider scope and does not really focus on videos in the EFL/ESL classroom.
There is also this one here, The first VYL lesson survival kit, which for a very long time already has been one of the most popular and most frequently accessed pieces I have committed and published on this blog. A coincidence? I don’t think so.
I would like to think that the world is changing for the better and that the novice VYL teachers around the world are getting the help and support they need, either from their managers, from the methodology and resource books, or from the fellow teachers on the social media and blogs. But, even if they do, entering the room with a bunch of little children, whom you don’t know (yet), who do not speak English (yet) and who may not have any idea as regards why we have gathered here (yet!!!), well, this is not you typical ‘dream come true‘. And yes, with time, as you get more experience, you learn better how to prepare, what to expect and how to be, but there is no doubt that starting the course with all the other age groups is easier. No doubt whatsoever.
It is no coincidence, either, that my MA dissertation at the University of Leicester was devoted to teacher education for the first-year pre-primary teachers of English and that I decided to give it the following title ‘Left to their own devices?‘…
The time will come when I finally publish the results of my research in a real article (keep your fingers crossed!). Today, in the series of the EFL Metaphors, I would like to share a tiny little bit of it.
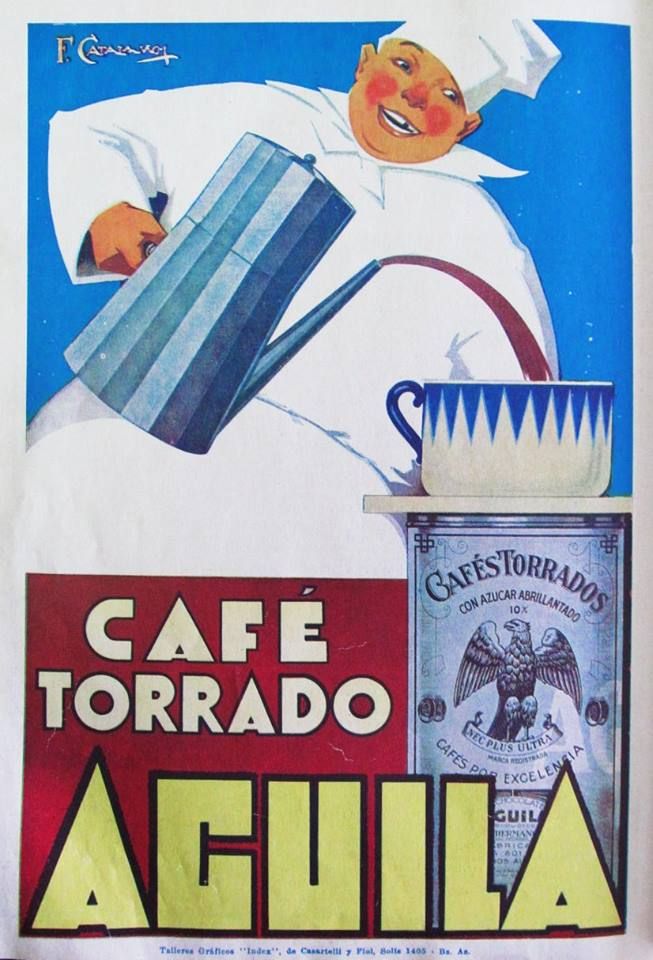
1931, Argentina
It started with…
Well, it started with an article which I talked about in the first entry in the series. The basis for my dissertation was a survey filled in by about fifty of my colleagues who had a chance to teach EFL pre-schoolers in Russia. It was a joy and a relief to find out that most of them evaluated their experience as ‘overall positive’, although, as one of them said ‘Literally, nothing was easy and everything was new’.
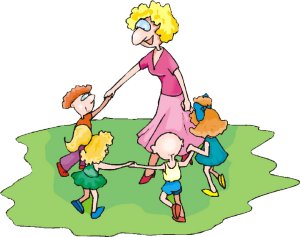
This inspired me to ask the participants of the study to try to describe their first year of teaching in one line (although, to be fair, I did not quite specify at the time that I wanted to get a metaphor). Here are some of them, accompanied by clipart library images selected by me.
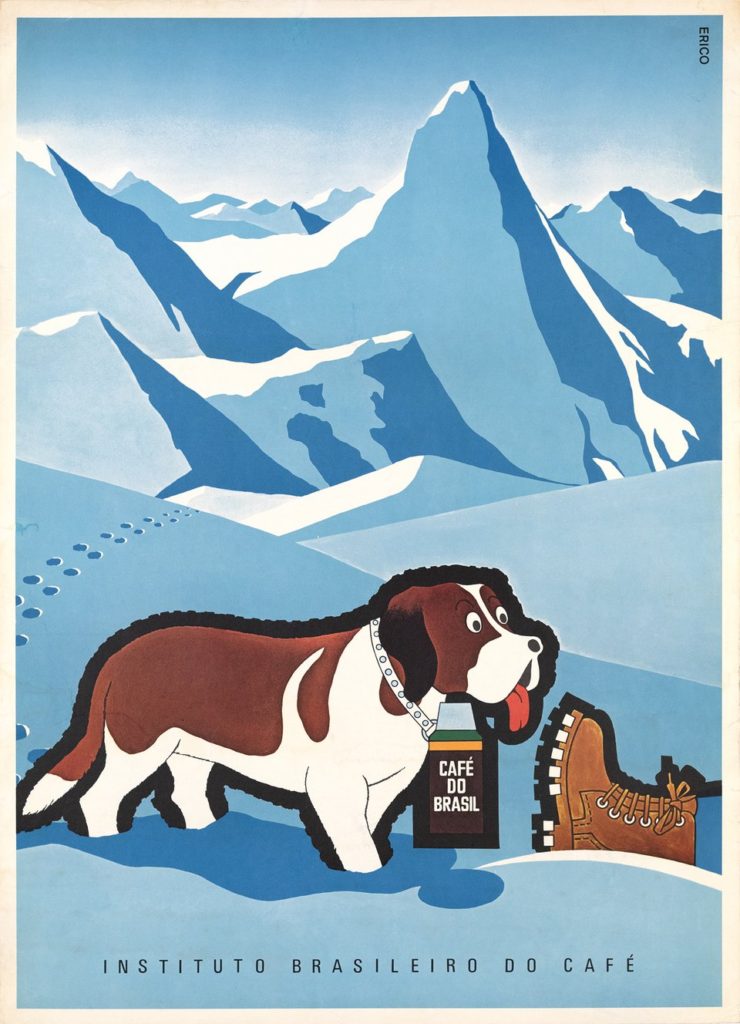
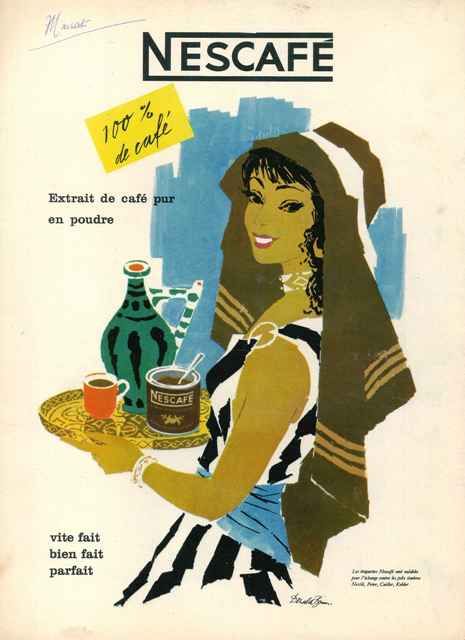
1950 Switzerland
What was your first year in the VYL world like?
‘A ring of roses, a pocket full of posies, a-tishoo, a-tishoo. We all fall down (in a good way!)’ (Keely)
‘Positively challenging in terms of experience gained and stress dealt with.’ (Rory)
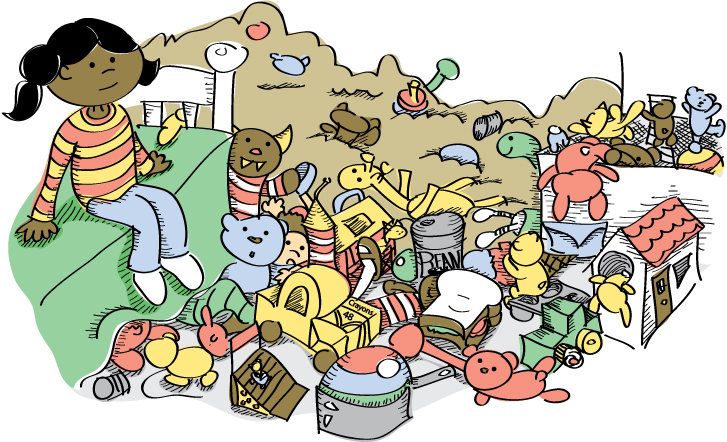
‘Pretty tough. I had to learn everything quickly and often had no time to properly reflect on my lessons. But the experience I got is valuable and helped me a lot afterwards.’ (Victoria)
‘It was like a roller-coaster. Sometimes you are enthusiatic and excited, sometimes frustrated and stressed’ (teacher 3)
‘Challenging, full of errors on my side, but at the same time joyful and full of great memories.’ (Vita)
‘Challenging but absolutely rewarding’ (Irina)
‘It was a beautiful mess’ (Cristina)
Just a few words
Apart from the fact that now, as ‘a researcher’ I am collecting these gems, I also like to use them in my teacher training sessions and workshops. They help to encourage participants to reflect on why the first lessons with the little people might be more challenging than those with any other group . They are also a great starting point in discussions between the less and the more experience VYL teachers or in discussions between the VYL teachers and the non-VYL teachers.
My dream would be to use metaphors at the beginning and at the end of a training process, in one specific area of teaching, to compare how we change our beliefs and attitudes. It is not my original idea, I got it from the same article that inspired the whole series. Maybe next time we are running the IH VYL course…
Instead of a coda
When I started to write this post, I realised that I do not have a metaphor for these first days, weeks and months as a VYL teacher. Nobody asked me then and, somehow, I forgot to ask myself when I was carrying out the research. Does it even matter what it felt like, this something that took place fifteen years ago? Probably not, but for the sake of this post and for fun, I made a promise that I would have figured it out, while writing. I did. Here we go:
‘It’s like a whitewater rafting, while you are trying hard to keep on smiling.‘
Happy Teaching!
P.S. Big, big thanks to all the teachers who agreed to take part in my MA survey! Those that I could quote in this post and all the others!
P.P.S. Please remember, even if your first lesson is not what you would like it to be, the second will be much better!
P.P.P.S. Don’t forget to check out the wonderful directory of all the useful things in the VYL world created by Sandy Millin. You can find it here.