Crumbs #39 A lazy role-play

Ingredients

  • Any role-play or a dialogue i.e. a transcript of any listening task which is a dialogue (i.e. Movers listening part 2, part 3), any written dialogue (i.e. Movers reading and writing part 3), any functional langauge introduced in a dialogue or a role-play
  • A pencil or a highlighter for each child

Procedures

  • Start with the main aim of the task is, ie listening in case of task 3 of Movers or reading in case of Movers, introduction of the functional language, etc. Go through all of the stages outlined in the teacher’s book or whichever ones you see fit in your teaching context.
  • Give out highlighters or pencils, ask the kids to open the books and look at the text again.
  • Introduce the concept of a banana (or whichever random word you want to use). Explain (and demonstrate!!!) that you will read the text slowly with some bananas in it and that if the students hear the word ‘banana’ they have to highlight or underline one word that comes immediately afterwards. Model with a few words.
  • Read the text with the bananas as the kids listen, follow and underline or highlight. The words chosen to be highlighted are the key words for each specific dialogue and their number depends on the dialogue and on the age and level of the students. With the older students and the more complex texts and language, the students can highlight two or more words that constitute a phrase or a collocation. This can be signalled with a repeated number of bananas ie banana banana for a two-piece phrase or banana banana banana for a three-piece phrase.
  • Ask the students to work in pairs and read the dialogue again and to use their own words and phrases instead of every banana.
  • Afterwards the kids can change roles and read it again or change the partners.
  • If the kids are ready, in the final (and optional) stage of the activity, they can close the book and role play and recreate the dialogue and the converation based on what they remember.

Why we like it

  • It requires no preparation, unless by preparation you mean opening the coursebook and finding the role-play or finding the teacher’s book and making copies of the transcript of any listening activity
  • It offers a great opportunity for the students to practise their speaking skills in an activity that is both controlled (as we have a framework) and free (as there are quite a few options to choose from)
  • It also offers a chance to work on the grammar accuracy and the transformation skills
  • It can be done online or offline
  • It can be done with a variety of levels. The highest level I have used it with was B1 (teens), the lowest level, so far, was A2 (primary).
  • So far, I have only tried it with dialogues but now, writing that post, I started to wonder about the potential of that activity for discourse building and creation. The original text could serve as a potential framework and support for the students to use. I am yet to experiment with that option.

Happy teaching!

Crumbs #38 A – Z Game

Ingredients

  • A piece of paper and something to write with
  • All the letters of the alphabet written in one or two columns, with some space to write, next to each letter

Procedures

  • The teacher divides the students into pairs or teams and gives out the paper with the letters of the alphabet or asks the kids to write these down.
  • Step 1: The teacher announces the topic i.e. Clothes and asks the kids write one word (or phrase) for each letter of the alphabet or, more realistically, for as many letters as they can. The teacher gives an example. Ideally, the teacher creates her/his own list in order to have a set of words to model the other stages of the activity.
  • The teacher sets the time limit (i.e. 5 minutes for the younger kids and 3 minutes for the older kids). It might be a good idea to use a song instead and after the song finishes, the activity does, too.
  • The kids work in teams and make a list of the words within the vocabulary set. After the time is up, the teacher stops the game.
  • Step 2: The kids exchange the lists and count the words or phrases which their friends have managed to write within the set time limit. The teacher writes the results for each team on the board.
  • Step 3: The teams read the words on the lists and choose: the most interesting word, the most unusual word, the funniest word, three words you also have, three words you don’t have, any word you don’t understand or remember etc. The teams work in pairs and find out why their partners put these words on the list. If possible, the kids exchange the lists with another team and repeat the procedure once or twice.

Why we like it

  • For the students it is a great opportunity to revise and recycle vocabulary. All the beginner levels aside, even when the main lesson aim is to introduce and to practise new vocabulary, chances are the kids have already learnt, heard, used or seen some of the words. After all, the vocabulary sets are repeated and extended from level to level, not to mention that most kids have more than one source of English in their lives: the state school, the language school, a private teacher, brothers, sisters, parents, videos on youtube, cartoons, stories, computer games online…This game is one of the easy ways of revising all this vocabulary to prepare for ‘something new’
  • For all the reasons mentioned above, it is an absolute necessity for the teacher to find out how much the kids already know as regards a certain area in order to do a very focused (if a very contained) needs’ analysis and to adjust the volume, the level and the intensity of the new material presentation later in the lesson
  • It is very easy and requires no preparation whatsoever.
  • It helps to improve the students’ self-confidence because it gives them an opportunity to see how much they know already.
  • It can be used with any set of vocabulary, either thematic (i.e. clothes, food, animals) or content-related (i.e. the words necessary to describe a picture, the words used in a certain text or a listening task, a video)
  • The final task can be easily adapted i.e. choose 5 words to describe yourself, choose 5 words to use in a story or in a dialogue, choose 5 and describe them for your partners to guess, use a dictionary to find the words or structures for the missing letters, compare the lists with your friends to find the words or the structures for the missing letters, use the words to describe a photograph, use the words to talk about your day today etc.

Happy teaching!

Crumbs #37 We are going to the beach! A summer lesson for pre-schoolers

Ingredients and procedures

  • Few. Depending on what you can find at home
  • The lesson plan with all the ideas can be found here

Why we like it

  • Little preparation, only a few items of realia
  • A great lesson for the summer months
  • Works well with big groups
  • Lots of movement, the whole lesson is based on gesture
  • Lots of potential for production, especially if this lesson could be developed into a series of lessons
  • A fun lesson, we really went to the beach

Here you can read a bit more about the background of this lesson: How do you know that you are an experienced teacher...

And here: Big Thanks to Ola for letting me scavenge her house in search of realia aka resources)

How do you know that you are ‘an experienced teacher’?

Based on real events.

This week’s story

I am on the move, resembling Snufkin from the Moomins now more than ever. It did so happen that this week I was asked to teach a demo lesson. While on the move.

Here are the details, just to give you a full picture

  • The lesson was supposed to last 30 minutes
  • The kids were 5 years old
  • There were eighteen kids in the group
  • I had not seen the kids before
  • I did not know the level of the group
  • Since I was on the move, I had no resources of any kind, no flashcards, no ball, no dice, no magic wand.
  • What is more, there was no flashcards at the school and I was not aware of any options related to the access to any electronic resources. I had to assume that there were none.
  • My laptop with its screen was just not good enough for such a big group.
  • Buying any new resources was absolutely out of the question
  • I could not consider any written work or craft for the same reason, no photocopying and getting enough markers and so on.
  • My performance was supposed to be evaluated. Of course.

There is a happy ending to this story…

…is probably the next thing that I should say while telling this story.

Desperation came first. And how else? I had a lesson to teach, a lesson that I wanted to teach but no tools to do it, no tools whatsoever. None. I could not use anything that I had ready and, because of my crazy timetable, I could not really set aside any time to produce the flashcards or to wander about a new city to look for resources… So, it started with desperation and anger and the foulest of mood followed. And then I just gave up.

Not on the lesson as such, although, of course that was an option, too. I could have just called and, in an attempt to be a reasonable adult and a professional, I could have called it all off (‘My apologies, that is all just plain impossible, I will have to say no.’) and forgotten about the whole business.

However, either because I do rejoice the unreasonable or because I did enjoy the idea of a challenge, I decided to go on with it. As soon as I ‘gave up‘ (on the resources, on the safety blanket of the experience so far, on the idea of a traditional lesson), I calmed down and things got interesting.

The first thing I did was to make a list of all the available resources or rather ‘resources’ aka junk, stuff, things that could be used in class and to come up with a topic, an aim and a set of activities that would match them.

The list included:

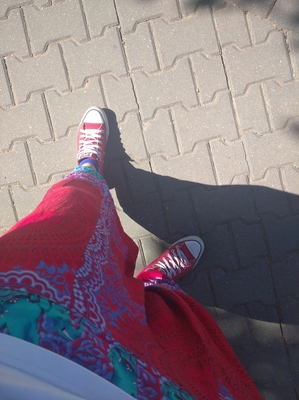
  • my magic trousers (red genie trousers with purple elephants, a sovenir from Portland, Maine)
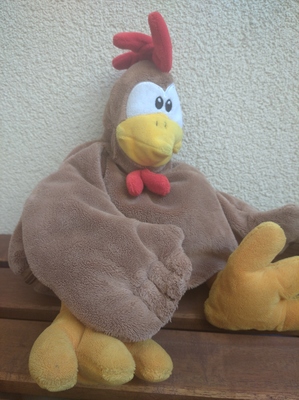
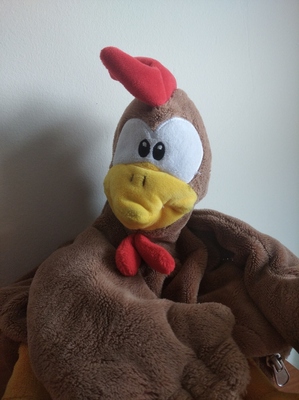
  • my toy hen, Angelina, who travels everywhere with me anyway
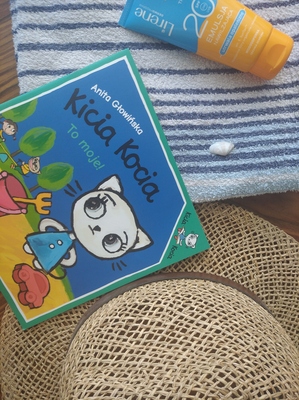
  • and a set of random objects which I have gathered around Ola’s flatt (a shell, a towel, a straw hat, a storybook, in Polish) and my rucksack with a water bottle and a few coins.
  • the Invisibles and Intangible: the experience, the charisma, the presence

The thoughts accompanying me in the taxi, in the morning were of the following kind: ‘It’s either an amazing challenge or an attempt at the professional self-destruction’. I would want to say that I was nervous or anxious because it was really difficult to predict the outcomes here, it could really go one way (aka the success) or the other (aka a complete disaster).

But I was calm. So calm, in fact, that I started to suspect myself of having given up on the entire project and of sabotaging it subconsciously by not preparing meticulously.

While in the taxi, I was on life support from my best friend and in response to my list of resources, I got a comment along the lines of ‘The magic trousers and Angelina? That is a killer combo!

I arrived at the kindergarten running…

…almost late. I washed my hands, I kicked off the trainers and there I was, on the carpet, with a bunch of kids, left to my own devices and to my random resources. It turned out that the killer combo is just that. We had a great lesson.

I decided to go for the topic of the beach and things we do there, to introduce a few verbs and chunks in the Present Continous and to be able to use them in a game of the actual going to the beach and playing on the beach, to focus on TPR and movement and to avoid any handouts or paper altogether. The language was presented through realia since the five-year-old kids are ready to make a connection between two coins and ‘I am eating ice-cream’ or between a towel and ‘I am swimming’. I carry all my songs and chants, real and made-up in my brain and I do not hesitate to use them and it was great to have Angelina and have her help me keep the lesson in shape.

We had fun, we ‘went to the beach’ and we produced the language. The lesson aims were definitely met. I would also like to say that I love the fact that now I can say that my most fun job interview (because that’s what it was) involved me lying on the carpet with a bunch of kids. We were sunbathing, after all…

If anyone wants to look at the lesson notes, you can find them here.

To be perfectly honest, I am aware that apart from the Invisible and the Intangible that were obviously there, I was lucky: the kids were old enough and I could at least hope that they would be behaving more like students in the context of the classroom. Plus, the novelty value did work to my advantage, this crazy lady, in colourful pants, coming in, talking for herself and the hen, laughing a lot, that is enough to keep the kids interested for thirty minutes. I also had the safety blanket of the impossibility of the set-up, the reasonable trainer would always be able to say ‘What did you expect? That would never work’…

Only it did.

Conclusion: How do I know that I am ‘an experienced teacher’?

I know it because, when faced with an impossible challenge, I do not panic and I am able to get over the initial and the unavoidable discomfort, I can focus on planning, without bending over backwards but rather taking stock of what is available and making do, in order to meet my aims and keep the standards where I want them.

I know it because, when the conditions are favourable, I am willing to experiment and to go for it, in order to push myself, on the one hand, and in order to push the boundaries a little bit, if only possible.

What about you?

Somewhere through this post I realised that this conclusion is a very personal and a very subjective one. What is more, the answer to this question will be changing because I myself would have answered it differently a week or two ago. I caught myself thinking that I am unbelievably curious about what my fellow teachers think. I decided to ask and this is how this post got really interesting.

It quickly turned out that there are as many approaches as many people and the answer to this question is and will be very subjective, personal and precious. It can be measured in the number of years worked but only in the eyes of our employers or according to the labour law of your country and it has got nothing or very little to do with what we think of our own skills and abilities.

Here are some of the ways in which you can get the bagde of honour. You can call yourself ‘an experienced teacher’ because…

  • ‘when the lesson plan works’, not necessarily beacuse the lessons have to go plan but because it can be taken as evidence that we understand the group and their needs and because we can prepare activities for this particular group of kids
  • you can teach a good lesson even when you do not really have enough time to plan. It is not because being experienced gives you a green light to take the preparation lightly but because when it is really necessary, you can get by with the Invisibles and the Intangibles and still do a good job. You can handle it even with zero prep whatsoever in case of a last minute cover or some class details confusion.
  • you are observed by a senior teacher and you get a great feedback
  • you are observed by a peer and you get a great feedback
  • when your students start using the new vocabulary and grammar in class, especially when it is not in the tasks directly related to this grammar point and without the teacher’s reminders to use these
  • when your students get great results in the external exams or in their regular classes or in any context that could be labelled as ‘outside of the classroom’, especially, as Maegan said, because the fun in the EFL classroom translated and transferred into progress in a more traditional approach in the school
  • ‘not sure about that’ was also one of the answers that I got. Perhaps this is something to work on, perhaps not. I will just leave it here.

While chatting about with Maegan we also bumped into the idea that this feeling of ‘I got this’ is not a long-lasting one and perhaps it should not even be. On the one hand, because, at least partially, it is based on the external factors. On the other hand, due to the fact that we live in the moment, in every single lesson and every single activitiy, focusing on that is a lot more interesting than the constant feeling of pride and confidence. I am also thinking that perhaps this is how we protect ourselves from feeling complacent. Perhaps.

If you have something to add, any comment, question, story, please, pretty please, add it in the comments section below! I will keep asking and researching)

Happy teaching!

Big thanks to my contributors: Irina, Michael, Vita, Maegan, Anastasia, Nina, Aleksandra.

Crumbs #36 Andy Warhol anyone?

This is a lesson I taught with the older YL which started in unit 1 of the National Geographic coursebook, Life that we are using with the summer courses for teens. If you are interested in the original lesson, you can find it in the coursebook, in the second edition.

My brain tends to walk its own ways so pretty quickly it became aparent that much as it is inspiring, we have our own plans (btw, I am really looking forward to teaching the rest of the unit). Since I have already put together bits and pieces that were inspired and dedicated to Andy, this lesson was a step further, to take Andy into the classroom with the older students, too.

So, Andy.

Two pretty girls in puffs posing for the camera in the studio. Blonde and brunette in stockings look confident in front of the camera, hugging each other

Colour. Two pictures aka introduction

  • Two illustrations (see below). Students work in pairs or small teams and discuss the questions below. Afterwards, they compare the ideas as a class.
  • Talk about these pictures.
  • Are they similar or different? What is similar? What is different?
  • Do you like them? Why?
  • How do they make you feel? Would you hang them in your bedroom or in your house?
  • How do the artists use the colours in both pictures? Which one do you prefer?
  • Would these pictures still be interesting in black and white? Why?

Colours. New idioms aka new language

  • Students work in small teams. They match the the idiom in the sentence with the meaning.
  • Check the answers as a class, additional clarification.
  • Students go back to work in pairs. They come up with the examples to illustrate each idiom and tell mini-stories.
  • The handout we used can be found here.

Colour. Associations aka production

  • A mini-lecture on Andy Warhol and the way he used to work (Marylin Monroe and the Cambpell Soup)
  • The whole class works on eliciting the associations with one of the colours, in our case it was grey. The teacher shows some of her associations with the colour. The students try to guess the rationale behind each of the ideas.
  • The students prepare for the main speaking task: they write the numbers 1 – 10 and they notes about at least three associations for each of the colours
  • The students work in pairs or small groups. Each of the students presents their associations for the partner to guess the colours and afterwards they explain their choices.
  • During the feedback session, the students share the most interesting or the most unexpected associations.
  • The handout we used can be found here.

Colour. Quiz

  • The students work as a team or a whole class.
  • They look at the photographs representing different cultures and countries. They analyse the colours and try to guess which countries they represent.
  • They check the answers.
  • The handout we used can be found here.

Colour. Comments

  • Any photograph can be used to accompany Andy’s Marylin. I have used the one that we had in the coursebook, one of a scene from a traditional Indian wedding. Today, if I taught this lesson again (or when I teach this lesson again), I would like to use even a wider range of colour such as a painting by Kandinsky, a a painting by Rothko, a storybook illustration, a child’s drawing etc.
  • The lesson was taught online so the craft / creation component had to be limited to a speaking task. I was tempted to use a variation of the craft activity we used with my younger students but it was simply impossible.

Crumbs # 33 Anyone up for a pirate lesson?

Anka, what about the pirates?’ was the thing I heard on Tuesday. The sentence was uttered in the middle of the lesson, in absolutely no relation to anything that happened, apart from the fact that the theme of the unit is the sailors, the mysteries of the sea, The Mary Celeste and I may have, at one point, mentioned pirates in passing. They did notice (of course), they did remember (naturally) and they waited for the best moment to use it against me. Obviously.

The funniest thing about it was the tone of voice that my kids used in that kind of situations and it is probably one of the things that I should add to the list of all the outcomes and consequences of working with a group for a prolonged period of time (you can find the post here). This tone of voice is a wonderful mix of a gentle scorn, a genuine inquiry, an honest plead and a teeny tiny layer of sarcasm. My kids are so good at it that they can squeeze it all in one word. Sometimes they just say ‘Anka‘ and it says it all…

Anyway, we did the Pirate Lesson, all the details and materials below. Enjoy!

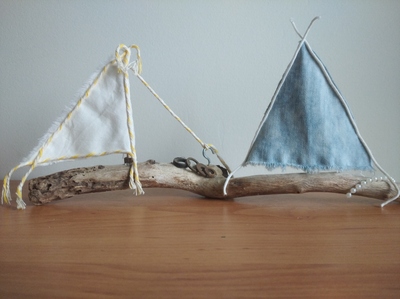
The lovely boats I found in my hotel. A potential idea for a craft activity…

Ingredients

  • Limited: we are online
  • Coursebook material: Superminds 5, CUP, Puchta and Gerngross, unit 9
  • Paper and pencils
  • One wordwall game: The captain and the cabin boy
  • Two songs:
  • A powerpoint: I have left it here, with the comments in the speakers notes)
  • Randomness around the house: a hamster, a hen soft toy, scarves, food
  • One bamboozle game: ARRR like a pirate
  • 90 minutes and a zoom classroom.
  • The level: A2 (we are finishing), the group: 7 kids, the age: 7 – 10 y.o.
A pirate’s flag. Anka’s version

Procedures

  • First of all, the kids have to remind you that there was a time when you might have mentioned that a pirate lesson might, potentially, happen at one point. After which you forgot (after all, it is May, the end of the school year) and after which they remind you and you are crazy enough to make a huge effort to make time for the planning of such a lesson). But it is worth it)
  • There were no preparations for the students, this lesson came as a bit of a surprise. I was considering to ask the parents to let the kids dress up for that but then decided not to. I thought that we would make things up as we move on. We did.
  • I prepared my own headscarf, my ‘parrot’ and, again, I was considering preparing an eye patch but since I was not at home but in the middle of the forest and the craft resources and materials were scarce, I gave up on it, too)
  • I prepared the powerpoint (which I hope you can access) but this is something that I create for every lesson anyway.
A pirate’s parrot. Anka’s version

Why we liked it

  • From the teacher’s perspective, it was a rather successful merge of a thematic lesson and the coursebook material and I am quite happy with how it went. We managed to include lots of what we were supposed to cover anyway such as the Present Perfect practice and the skills development but it turned out that it was possible to present it to the kids within a theme that was interesting.
  • The kids liked it because it was something different to a regular lesson, we did a lot of pirate things (the name, the flag, the treasure hunt and the stories), we could play a bit and we really did have fun.
  • I came dressed up, with a headscarf on and I introduced my parrot, Angelina (who in her real life is a hen and has been my class puppet for a few years now but who got to perform the role of the pirate’s parrot). True, every time I said ‘my parrot’, my kids would correct me (‘Anka, it’s a hen’) but by the end of the lesson one of my other kids introduced his real hamster (and the love of his life at this point) as the parrot and yet another one gave this role to his rucksack (which should also be written like that: Rucksack, since he featured in our stories in the past with his own adventures). One of my girls put on a scarf, too and one of the boys switched off the camera in the middle of the lesson, to come back a few minutes later, this time wearing his mum’s scarf on his head and a paper eye-patch on a string…One of my students’ younger sister joined us half-way through the lesson and asked for her own pirate name, too.
  • The kids were really active during the role-play between the captain and the cabin boy. They even did remember to play with the intonation with the ‘But what?’ question from the captain. I was moving in-between the breakout rooms and laughing, basically. One of my students could not open the wordwall games so we agreed that he could come up with his own ideas (and these were brilliant) and some other kids started to add their own questions, leaving the wordwall behind.
  • We used the Weird Echo game again, this was the second time and it went very well. You can find its description in a separate post.
  • I wish we had more time for the storytelling of how we met the sea creatures. If I had a chance to teach this lesson again, I would have planned it as a homework task or we would have continued in the following lesson. We might still do it, actually. There are still a few lessons left until the end of the academic year. If we do, you can definitely expect the follow-up post here!
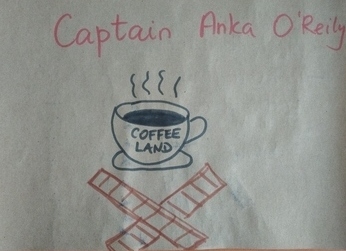
  • I personally loved my pirate name, Captain Anka O’Reily and I think the kids liked theirs, too. Whenever I made a mistake of addressing the students (or myself) using their ‘regular’ names, I was kindly reminded that that’s not how we do it. We also had a giggle because the O’Reily family was well-represented on our ship, since two of my students also celebrate their birthdays in November. The pirates on the board of our Superminds 5 ship were as follows: Captain Anka O’Reily, Captain Alejandro O’Malley, Bubbles Dasha O’Reily, Skipper Tonya O’Reilly, Hamster Jack Sparrow, Charming Timour Bailey, Skipper Eva Bailey and, for a part of the lesson, Ship-mate Ulya Jones.
  • I was really happy when I found the bamboozle game. I think it is a perfect example how a relatively simple game can be adapted and used in order to give the lesson this special flavour that we want. The students did not really learn any new words as those that popped up in the game were already familiar to them and, I suppose, you could say that we got a great opportunity to practice the long /ɑːr/ sound but that was not quite my main aim here. For a few minutes there we were loud and giggly but we were talking like pirates and it was a perfect finishing touch to this lesson.
  • The one disadvantage? Well, I am thinking of the coming-up lesson on Tuesday and the first thought that appears in my head is: ‘What, a normal lesson? BOOOORING’ so, I am afraid, I will have to come up with something…
Pirate’s shoes. Anka’s version:-)

Happy teaching!

Crumbs # 32 Online stickers with a twist

Ingredients

  • Miro board or a word document
  • Kids and their ideas

Procedures

  • We prepare the document, write the date
  • One of the students chooses the theme of the day i.e. The Chameloeon Day (not a real holiday, although it could be. There are plenty of ideas to find here.
  • The kids take turns to choose their favourite variation, as featured in the picture above: the cake chamelon, the black chameleon, the artistic chameleon, the Christmas chameleon, the cute chameleon, the police chameleon, the robot chameleon and the lamp chameleon.
  • The teacher opens the google search and keys in the requested phrase. The student who suggested the specific variation chooses their favourite picture (i.e. line one, number 2).
  • The teacher copies and pastes the chosen picture, then pdfs the whole collage as soon as it is ready. The collage is then sent out to parents via Whatsapp.
  • (!!!!!) For the purpose of protecting the kids from the inappropriate images that google might display, especially when the unusual combinations are made, I key in the requested phrase first and only then share the screen with the kids as some of the images might be too scary, explicit or simply not always appropriate for all ages.

Why we like it

  • It is fun.
  • The kids love it. They ask about the stickers (we don’t always use them in every lesson) and they remind me to send them to the parents in the end.
  • It is a great way of finishing a lesson.
  • It is a great way of building a community, especially if you keep your stickers throughout the year. With my group, we still have some of the stickers we found during the first stages of the pandemic in spring 2020 and we had a lot of fun finding them, looking through them and remembering whose they were and why.
  • It gives us a chance to practise some of the computer language in contex (go / scroll down, go / scroll up, stop, I’d like …)
  • It offers some opportunity to practise describing objects in a detailed way (it is the big one, the small, the one with the green nose etc), especially the adjectives.
  • We can create, express ourselves and express opinion on what other people choose.
  • My advertising people tell me that this is something that you do while researching and brainstorming new ideas, too, in order to ensure that yours is, indeed, a fresh solution that no one has ever thought of. So, in a way, my kids are also getting ready for the market research, too!
This is one of our pandemic 2020 stickers)

Happy teaching!

Crumbs #31: Circle IS the best shape aka Frogs Etc

@ Magdalena

Ingredients

  • Two circles cut out of cardboard (regular photocopying paper is too thin and flimsy), with the two holes for fingers also cut out before the lesson.
  • Glue to glue these together
  • Crayons, pencils or markers to draw the appropriate body parts

Procedures

  • Show the kids the finished product, introduce the frog, chat with the kids
  • Show the kids the smaller circle, show how you decorated it.
  • Give out the pencils / markers.
  • Give out the small circles, decorate it with the kids.
  • Give out the bigger circle, decorate it, if appropriate.
  • Collect the pencils.
  • Show the kids how to glue one on top of the other. For the younger kids, it might be a good idea to draw a small cross on the top of the bigger circle, to signal where the kids should put the glue.
  • Give out the glue sticks. Kids glue their circles together.
  • Glue the additional body parts, when appropriate.
  • Collect the glue sticks.
  • Play
@ Magdalena

Why we like it

  • It is super easy! These frogs here, in the picture, were produced for a child (a huge Frog Fan), rather than with a child, and that is why I went a bit crazy with the eyes but there are the simpler versions of it)
  • These two circles can become many many things: a frog, a bear, a cat, a dog, a monkey, a rabbit or a snowman, with little adaptations.
  • The task does involve a lot of pre-cutting but the rest can be done by the kids during the lesson.
  • Once the toys are ready, they can be used to play, as any other puppets with all the structures that the kids are familiar with and with those that match the topic of the lesson, at the very least, ‘Hello’, ‘My name is’, ‘I like…and you?’ and it is always great when you can maximise production.

Happy teaching!

Crumbs # 30: Circle IS the best shape in the world aka About chicks

@ Magdalena

It was a typical day in the life of a small scale Mary Poppins. I set out for a shift at the volunteering centre and, as an experienced one, I could not imagine to go unprepared, even if minimally. I thought that, at the very least, we can do some circle magic. I could not take everything but I had a big pocket and so it got filled in with three glue sticks, an envelope full of circles, a small packet of colourful feathers (that was a nice coincidence that I had it). A4 paper and a box of markers did not fit in one hoodie pocket.

When I arrived and started the shift, it became obvious very very quickly that the place is not ready for any craft activities because, apart from one small table and a few little stools and a box of coloured pencils, there was nothing. Or, rather, there was only me and my pocket.

There is some beauty in that, really, when you get to see how your brain starts to get involved in order to think of a solution. Sure, THAT was not about sending a man to the moon or putting together a new recipe, but, still. I was building a grid for our version of hop-scotch and sorting out toys, and the brain was trying to imagine what I can make out of the contents of my pocket. A little chick, that’s what.

Ingredients

  • lots of circles, cut out before the lesson out of colour paper, regular type, cardboard might be too thick. As for the size, this time it is officially: the Size of the Bottom of a Mug, colourful, for the kids to choose from, two pieces per child
  • glue
  • something to draw (markers, pencils, crayons)
  • colourful feathers (I got them in the stationery section of a regular supermarket, you can buy them in any craft activities), but they can be replaced by strips of colorful tissue paper (also those unevenly torn), three per child, if you use the feathers or as many as you want, if you use the strips of the tissue paper

Procedure

  • ideally, for the smaller children especially, it would be a good idea to put a cross on one side of each circle, so that it is absolutely clear on which side children should put the glue
  • each child chooses two circles
  • choose the circle that will be your front, draw the eyes (two small circles in the most basic version), and a beak (a small triangle)
  • take the other circle, cover the cross side with the glue
  • place one of the feathers on the top, for the little ‘fringe’, on top of the glue, so that a part of it is on the cirlce and a part of it stands out of it
  • repeat the same with the other feathers, by putting each of them on two sides, for the wings
  • take the front circle, put it face down, cover the cross side with a lot of glue
  • place it (more or less carefully), on the top of the back circle and the feathers, press
  • use the birdies to play, the kids can use them as puppets, say hello, introduce themselves, ask how they are, and use any other structures that they already know

Why we like it

  • is very, very easy, I have done it with two-year-olds (with a tiny bit of help) and with eight-year-olds
  • there is more potential for decoration (a more complex bird’s face, legs, tail etc)
  • the main focus of this lesson (or activity) can be playing with the chicks as making them will take only a few minutes
  • despite being very easy to produce, this craft has a lovely ‘wow’ moment and it lies in the fact that such simple elements put together can gives a lovely little bird.
  • below, you can also see the ‘proper Easter, made with mum and aunt’ version, with professional wings, made of felt. They look pretty and we made them only because I found this set in a shop. Here, it might be a good idea to let the chicks spend the night in the middle of the book, to make sure that they stick properly (felt is a bit thicker and it will need more encouragement, especially if you are using just the regular glue)

Here are some other circle-based craft ideas

Here are my own Frogs Etc, my snowman, and all the circle ideas.

Here is a lovely bear craft, here a ladybird craft, and here a caterpillar, too and here, a bunch of other activities, probably too complex for the EFL classroom but definitely worth looking at.

Crumbs #28 Funky envelope

Ingredients

  • a set of flashcards
  • two pieces of cardboard stapled together on three sides
  • shapes cut out on the front page (cut out before stapling)

Procedures

  • hide the flashcards inside
  • show the students only a part of the card on the top, through the cut-outs, ask the kids ‘What is it?’
  • take out the card and proceed with the rest of them
  • hide the flashcards inside
  • show the students only a part of the card on the top, through the cut-outs, ask the kids ‘What is it?’
  • take out the card and proceed with the rest of them

Why we like it

  • this is a variation of the Through the Keyhole activity that I once saw in the I Spy coursebook. However, this original version included an A4 sheet of paper with a keyhole that the teacher needed to cut out and then move the card over the flashcard. I found this tool a very interesting one but, at the same time, a bit awkward to use as the teacher needed two hands to manipulate the cards, there was a chance that the children could still see bits of the card apart from the keyhole bit and the activity involved a lot of picking up and putting down the cards. All in all, too clumsy to handle.
  • to make a funky envelope you need only simple materials (A4 cardboard or simple photocopying A4 paper although it will not be as durable, white, colourful or recycled), a pair of scissors and a stapler or glue. As soon as one envelope gets destroyed, you can easily replace it with a new one.
  • you can have one simple cut-out shape or a selection of different shapes all over the envelope.
  • all the flashcards fit in nicely inside, the teacher can manipulate them more easily. I sometimes turn the envelope over, to change the cards inside and to add to the whole ritual.
  • I normally use when the kids are already familiar with the images on the flashcards not to make the task too challenging, in lesson two or three of the unit. However, there were also cases when I used the envelope to introduce a brand new topic and to raise the level of challenge.

Happy teaching!