Crumbs # 60 Going shopping

Ingredients

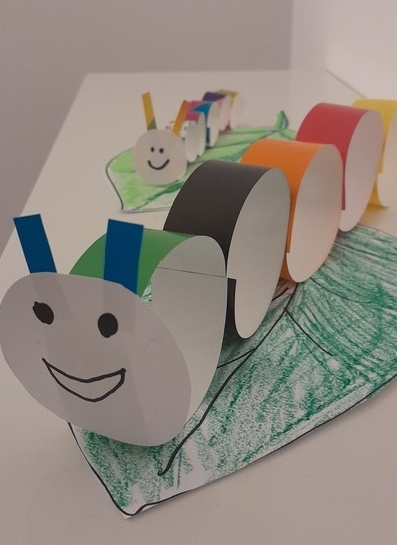
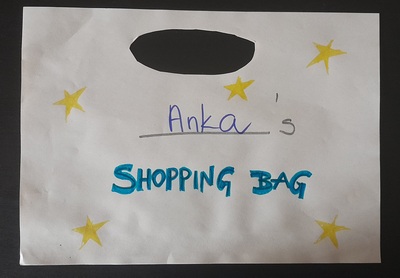
  • A lot of paper, in general, in the form of a shopping bag (see photos), cut-outs of food items to be used, one of each per child and a small cardboard rectangle per child for the credit card
  • Some furniture for the shop, possibly a poster to put up on the board
  • Markers and glue for the group, for colouring and decorating the shopping and the bag
  • The video to set the context. I used the cartoon from Playway to English which is available on youtube.

Procedures

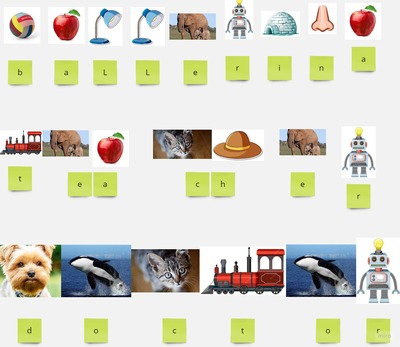
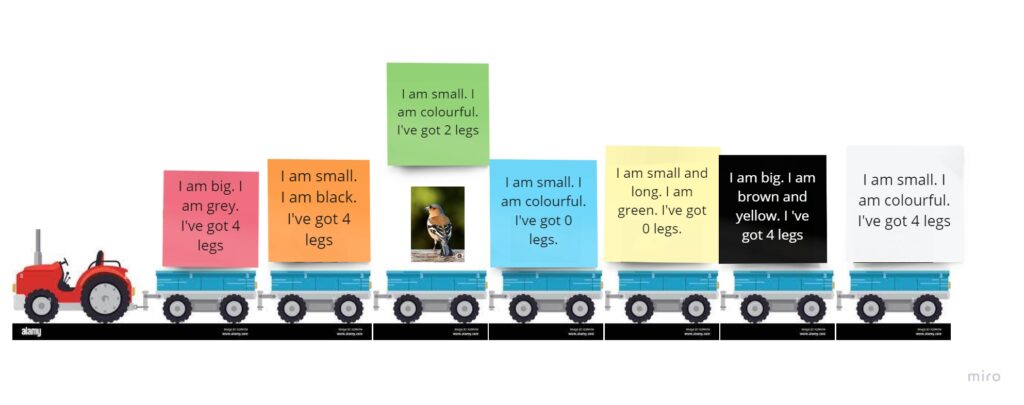
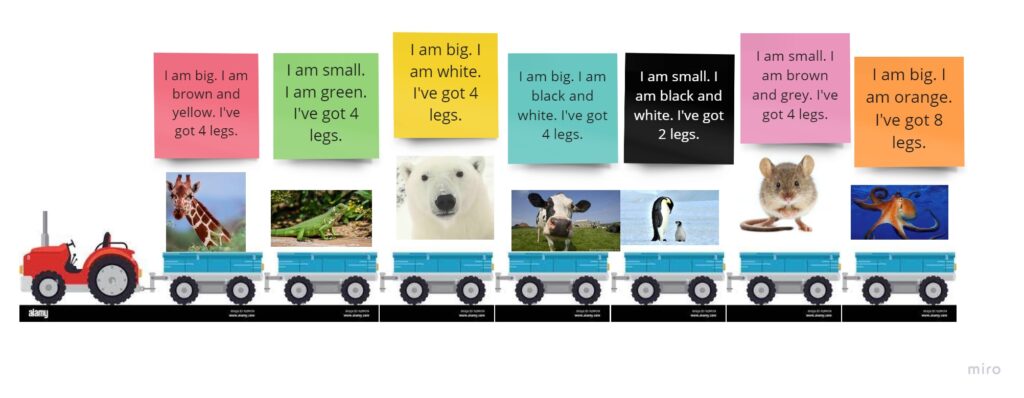
  • Introduce and practise the vocabulary. I have used it with different groups, ages and topics such as: food, fruit and vegetables, toys, big numbers, with pre-schoolers and primary.
  • During the city camp, this was the final part of the day (project), in our regular classes this was usually the last lesson of the unit.
  • We started with watching the cartoon and showing the kids our ‘shop’, which is usually just a table with a chair, in front of the board which is also also as the display for all the products available.
  • I showed the kids my shopping bag and gave out the templates for them to write their names and decorate it in any way they wanted. The kids glued the sides of their bags together.
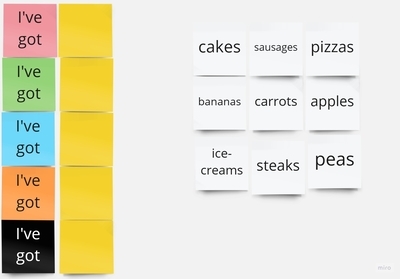
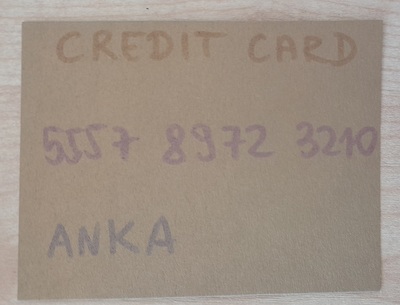
  • Afterwards, I gave out the small cardboard rectangles and we prepared our credit cards. I cut them up before the lesson and wrote ‘credit card’ on each. We looked at my credit cards and tried to make sure ours include the same information, namely the name and the number.
  • Afterwards, all the students were taking turns to come to the shop to do their shopping, to pay, They they went back to their tables to colour the cards. We repeated this stage a few times.
  • This time round, I did not include any special preparation as regards the functional language because we were only using the basic forms that we use everyday (Hello, How can I help you, I want / Please, can I have…, That will be, Thank you).

Why we like it

  • This was a lovely, communicative lesson. All my students produced a lot of langauge, both as regards the key vocabulary and the functional language. The kids were involved, they kept coming to the shop until they bought absolutely everything.
  • The best thing about this activity set up in this way is that despite very moderate resources (only paper, only black and white copies), they kids were fully engage. They took it seriously, they stood in line, they were taking time to make a real decision what to buy. They were also very serious about the payment. I did not want to include any real counting and prices but we did have the moment of the payment being completed, every time the teacher said ‘beep’. And all of it was real despite the fact that our credit cards were made of cardboard and that our terminal was simply my computer mouse. It didn’t matter. The magic did happen with some paper and the careful set up. One of my students commented ‘This is the first time I have gone shopping’. She did not talk about ‘playing shopping’, or ‘pretend play’, she used the verb ‘go shopping’ and she was really serious about it. Looking back, I actually do think that although I had done this activity before, only now, it was especially successful and I believe it was due to the introduction of the credit cards.
  • There is a lot of potential for extending the activity, with more complex structures if possible and with elements of maths if we add prices, for older kids. With some groups, I also managed to make it more SS-centred because I was involved only in the first round, for everyone to do their shopping once. In later stages, that is the kids were taking turns. Student A was the shop assistant and student B was the customer. Afterwards, student B would sit down and student A would become the customer, with student C taking over as the shop assistant.
  • A lesson of this type can also be used in a variety of lessons: with different topics (clothes, toys, food, furniture), to introduce the idea of money, to teach the kids about the value of coins and notes, although, actually, at this point, the majority of transactions are done via credit cards.

Happy teaching!

Crumbs #59 Hello Elephant!

Ingredients

  • One piece of A4 paper per child. It can be the regular photocopying paper or a sheet of the drawing paper, of regular texture, from a drawing album that kids use at school.
  • Markers or pencils, scissors and glue.
  • My elephant was inspired by the design I found at Creative Family Fun website, which I adapted to the needs to my group.

Procedures

  • Show the kids the finished product. I do not always do it but in case of this craft it seemed important to help the kids see the final product and to visualise how they are going to proceed during the entire activity.
  • Check that everyone has all the materials by going through the list, picking the items up and showing them to the camera, asking ‘Have you got…?’
  • Fold the A4 paper into halves, crosswise. Open the paper and draw the line in / along the fold. Cut into two.
  • Put one of these halves aside. It will be used later for the trunk and the ears.
  • Take the other piece of paper, hold it lengthways (with the longer edge on the top), draw a line along one of the shorter edges
  • Closer to the top edge draw two eyes. It might be a good time to decide if the elephant is a boy or a girl and add eyelashes and / or a bow on the forehead.
  • Open the glue and apply some glue along the line that has just been drawn along one of the shorter edges. Roll and glue into a tube. Put it on the side.
  • Take the other piece of paper. Draw a circle. Cut it out. It is ok if it is not a perfect circle.
  • Fold the circle into half and draw the line in / along the fold. Cut into two semi-circles.
  • Draw the line along the diameter of the circle, on both semi-circles.
  • Apply the glue on the line, on one of the semi-circle and attach it to the side of the head of the elephant. Press. It might be a good idea to show the kids how to press it here – with the fingers inside the tube and the fingers outside of it.
  • Repeat with the other one.
  • Prepare the strip of paper that will be used as the trunk. It will be glued under the eyes and it might be a good idea to check its length and perhaps cut off a bit.
  • Roll one of the ends of the strip around a marker or a pencil. It will twist it a little bit and it will make it look a little bit more like a trunk. Apply the glue under the eyes of the elephant, attach the top of the trunk and press.

Why we like it

  • This is a relatively easy craft that can be completed by children online, although I would not choose this particular activity as the first craft of the year. However, it is appropriate for five-year-old children, half-way through the academic year or the children who have taken part in some craft activities before.
  • It is a simplified version of the original craft and it requires less preparation on the part of the teacher. It was ‘designed’ and tested with regular A4 photocopying or drawing paper, without any real templates or special resources such as the cardboard tubes and goggly eyes.
  • If the students are younger, the teacher might choose to cut up the paper before the lesson (one big rectangle for the body, one small rectangle for the trunk and a circle for the ears).
  • It is an online-friendly activity.
  • The finished product can be easily used as a puppet (if it is put on the two or three fingers of a hand). One of my students also turned it into a bracelet, only because she chose to use a bigger square and, in the end, it was big enough to be worn on the wrist. As such, it can be used in simple role-plays.
  • It definitely has the WOW element and kids get very excited to be able to make a real toy out of a piece of paper.
  • It can be used to accompany a story, for example ‘Elmer’ or ‘Dear Zoo’ as one of the animals.
  • Our elephants were very simple and white but they can be made colourful, very much in the theme of the elephant party we know from Elmer in which all the grey elephants ‘get dressed’ for the occasion. The teacher can use the colourful paper or the kids can decorate their squares before glueing them together into a tube. If there are some leftover stickers available, these can be used to decorate the elephants in the end.
  • We used the elephant as a part of our unit Animals in Art and English classes and apart from making the elephant we also looked and talked about different elephants created by Salvador Dali, Pablo Picasso and Henri Rousseau, among others.
  • We also had a lot of fun playing with the semi-circles. We used them as our mouse’s ears, cat’s ears, sunglasses, monkey’s ears and wings. ‘I am a butterfly’ as a lot of fun!

Happy teaching!

Craft #58 Baby shark craft

Ingredients

  • One A4 piece of cardboard paper, ideally in colour but if that is not available, the while cardboard will do, too.
  • Markers, scissors, glue
  • Something to use as a template for a circle i.e. a small plate for the bigger circle and a small glass for the smaller circles
  • A link to inspire you. Mine came from supersimple.com, after some adaptations for our online classes.
  • A link to the song which this craft usually accompanies. This is my favourite rendition of the song.

Procedures

  • The teacher starts by demonstrating the finished product to facilitate the whole process. I do not use this kind of an approach but it might come in really handy with this particular craft activity.
  • The teacher and the class go over the all the resources necessary for the lesson. The teacher calls them out and shows them to the camera. The kids do the same.
  • The teacher demonstrates how to draw a big circle on the piece of cardboard. If the kids are ready, they can draw a circle themselves. If not, the teacher shows them how to draw around a plate. It is a good idea to use the paper economically, in order to ensure that there will be enough paper left for the small circles. The kids do the same and show their circles to the camera.
  • The teacher cuts out the circle. The kids follow suit.
  • We fold the circle into half and we draw the eyes and a smile at the front.
  • The teacher demonstrates how to draw two small circles (or how to circle the smaller object twice). Afterwards, these are cut out, too. They are folded into halves and cut into halves, too.
  • Two of these half-circles are used as fins. They are glued to the side of the shark. The teacher demonstrates that, step by step.
  • The third half-circle is to become the frontal dorsal fin. It is glued to the top of the shark, at the back.
  • The remining half a circle is cut into two pieces (in any way) and these are are the tail (or the caudal fin, what a pretty name!). Their ends are glued together to form something resembling the letter V and they are glued inside the folded circle.

Why we like it

  • It is a perfect craft to accompany the song or to be included as a part of the life aquatic-themed unit.
  • It is easy enough to make, even online. It works well in the offline classroom, too and the teacher can adapt it to the younger students by preparing the circles before the lesson or even by folding them beforehand.
  • Even if the circles are drawn by the kids themselves and they do not turn out perfect, the sharks will look good.
  • The sharks are 3D and are a lot of fun.
  • They can be used as a puppet and they can be used in role-plays.
  • The kids can decide if they make a baby shark or a mummy or daddy shark and they can decorate the sharks accordingly.

Happy teaching!

Crumbs #57 Early reading: Secret words

Ingredients

  • The most important thing is a set of words to represent each letter / sound of the alphabet. Some teachers like to use the set from a song to make it possible to use and reuse the same set of words and to help the students memorise and practise them in an easy way, in class and outside of class. One of these more popular songs is this one from Kids TV 123, Phonics Song 2. I use the song, too, although I created a different set of words for myself and for our teachers with b is boy, g is for girl etc. What is more, in our exercises we use a wider range, too, as an opportunity to revise all the words that the kids already know. Sometimes b is for boy and sometimes b is for banana, ball, blue or black.
  • The other thing that is necessary is a place to display the words. It can be a whiteboard, a noticeboard, a powerpoint or, as in the case of my online classes, a miro board. All the photos presented here are the screenshots from my miro board from the past two weeks.
  • Depending on the type of display, a different set of resources will be necessary. In the classroom, I simply draw and write on the whiteboard. As regards miro, I duplicate pictures and post-it notes. It would be possible to do the same using a set of specific flashcards and letter cards. In this case, the words could even be displayed on the carpet or on the table.

Procedures

  • The teacher chooses the word(s) for the lesson and prepares the visuals to represent them.
  • The pictures are drawn on the board or arranged on the miro board.
  • In class, the students, aided by the teacher, sound out all the pictures (‘What’s this?’ ‘Apple’ ‘Ok. Apple starts with …aaa or ooo’ ‘A’).
  • The teacher writes the letters as the kids call them out.
  • When all the letters of the words are on the board, the students try to read them as one word, supported by the teacher.

Why we like it

  • This game is introduced as a part of every lesson, as a starter or as a final game and normally two or three words are used.
  • We start playing the game only when the kids are familiar with all the letters / sounds of the alphabet and alongside the traditional phonics and sight words work, not instead of it. It is a way of encouraging kids to read the familiar words that might not and do not fall into all the patterns of the phonics system and which are not going to be as frequently used as the sight words.
  • In a way, it is a decoding activity that is made fun and achievable with the use of the familiar visuals and it has worked well as a transition from sounds to letters through an intermediary of the carefully chosen images, before we are ready to decode words using only letters.
  • Kids enjoy this activity and they quickly improve their skills. In our lesson yesterday, my student Sasha started to call out the sounds in the sequence of the pictures so fast that I could not catch up with typing the letters. Recently, we made even more progress. She just looked at a series of pictures and called out the hidden word out loud, not even bothering to wait for me. I guess that means that we are ready for the next step.
  • The next step and the development of the activity will be decoding secret words with a mix of letters and visuals before we finally move to reading only letters.
  • The choice of words used is up to the teacher. It makes sense to start with the easy, short words, the students’ names, the familiar cvc words or the frequently used words such as sight words or the functional words (‘Hello’, ‘Bye’, ‘Thank you’ etc). The decisions made here are in no connection with the phonics or the sight words that we currently work on. Most frequently, these represent some of the target vocabulary or the words that are interesting for the student (hence all the Frozen characters here).

Happy teaching!

Crumbs #56: VYL Miming Upgraded

Ingredients

  • Any set of new vocabulary, at the stage when it is introduced or when it is practised.
  • A set of flashcards, electronic or paper, to support the clarification and building the connection between the word, its visual representation, its meaning and the gestures and phrases chosen to represent it
  • The teachers and their face, hands and voice

Procedures

  • The teacher introduces the vocabulary, as usual, with a set of flashcards or realia
  • What follows is a set of practice activities appropriate for the students’ level, age and interests
  • The teachers add miming but apart from gestures accompanying the key words, there are also simple phrases for each of those i.e. ‘a doctor’ represented by a flashcard, a gesture (for example, putting on the stetoscope) and a phrase (‘Open your mouth and say ‘aaaa’).
  • Students look, listen and say the words.
  • In the later stages, students also mime and produce the language for the teacher or the other students to guess.

Why we like it

  • First of all, this particular trick (I would not dare to use the term ‘an activity’ here) was simply a coincidence. We were practising the vocabulary in the unit of professions and, as part of the revision stage of the lesson, I was miming jobs for my student to guess, just like we had done many times before, with other sets of vocabulary. It was then that I realised that there are certain limitations and that miming some of the jobs might be confusing for the students. ‘A ballerina’, ‘a singer’, ‘a photographer’ were easy enough but I got stuck with ‘a firefighter’, ‘a doctor’ and ‘a teacher’. Until I realised that to my miming and gestures, I can add a word or two.
  • The main aim here is still the same – the gestures, the TPR, the miming are supposed to help the children understand the target vocabulary better and remember it better, for example, while miming the word ‘firefighter’ the teacher can pretend to be directing the hose and the stream of water at the invisible fire but, to make it more obvious and visual and rich, the teacher can also say a simple phrase, for example ‘Look! A fire!’, to illustrate the word and to create associations with it. All in all, the combination of different learning channels is beneficial for the language learning.
  • This added linguistic element to our TPR means an extended exposure to the target language and an opportunity for more listening practice.
  • The set of phrases used with the specific vocabulary should be kept the same in the beginning, not to overcomplicate and to overburden the children, but, naturally, there is a lot of potential here for a wider range of the structures later on.
  • Initially, it is the teacher who is going to be producing the language here, however, with time, the students can also be encouraged to take over. We have only been doing it for about two weeks at this point but I have already noticed that my students started to pick on the language and start using it. And that means a lot more potential for maximising language production.
  • So far we have been using this approach in two different activities: Guess my word (miming, as a revision of the target language in the beginning of the lesson) and Abracadabra (setting a word for the other students / teacher to mime, with a wider range of vocabulary).

Happy teaching!

Crumbs #55 Early readers and the sentence building blocks.

‘Pigs might fly’ from Poznan

Ingredients

  • Since I am teaching online at the moment, my main resources are digital. To create this material and this activity, I used my Miro Board although the same could be done using a regular powerpoint. In the classroom, the activity could be recreated with a set of flashcards and wordcards, on the board or on the floor.
  • Three sets of cards are necessary: the key phrase, the numbers, the objects.
Step 1

Procedures

  • We start with revising the key structures and the vocabulary. We read together all the cards.
  • We read the first sentence (I’ve got’) and add one of the food items. Once it is added, the card changes the colour to match the first one. The same activity is repeated with all the cards.
  • We read the sentences again but this time the students choose the number, the teacher add the number and changes the colour to match the colour of the sentence. The same procedure is repeated with all the cards.
  • We read all the sentences together.
  • We play in pairs and we call out the colour of the sentence for the partner to read out loud. The teacher is monitoring and helping.
Step 2

Why we like it

  • This kind of an activity is introduced in the middle of the unit when the students are more familiar with the key structure (I’ve got) and the vocabulary (food and numbers 1 – 20) and its main aims the literacy development.
  • I have only used it with 1-1 online students but there is some potential for adapting this activity for a group of even for pairs (with a multiple set of cards or colour-coded handouts).
  • The activity helps the kids deal with the written form of the vocabulary and structures and to read the words in sentences. In a way, they are also involved in writing because they put the blocks together and make decisions about the numbers, too.
  • The colours help to make the activity more fun and to help them deal with a text that for them will be long and potentially scary. The activity uses only one structure at a time which will be also an early reader-friendly approach.
  • The activity can be made more or less challenging by adding food illustrations to help the kids read, extending the number of sentences or extending the sentences ie I’ve got 4 cakes and 3 apples, etc. When the students are ready, the teacher can also introduce a variety of structures in one set i.e. I’ve got, I like, I can etc.
  • The activity is easy to prepare, it can be recycled and it can be used with a variety of structures.

Step 3

Happy teaching!

Crumbs #54 Caterpillars everywhere

Ingredients

  • A4 paper, one sheet (for the leaf) and some coloured paper, I have tried both cardboard and regular craft paper and they both worked very well. The smaller caterpillar in the photo was done with the cut-up cover page of the drawing album and it works well, too. Some of my students were using ultra-thin craft paper and it worked, too so I presume cut up colourful pages of glossy magazines could be recycled this way, too.
  • Glue, scissors, markers and crayons.
  • This lesson was a part of the series of lessons devoted to spring so among all the other materials that can be used there are: The Very Hungry Caterpillar, the book or the video, the story or the video from Playway to English 3 about 6 Hungry Caterpillars, a video about the life cycle of a butterfly, the garden craft and the butterfly craft. It can also be a part of the Art lessons on the topic of weather and seasons. More about it – soon!

Procedures

  • Check that we all have all our resources, one by one showing them to the camera and, more often than not, finding the missing bits.
  • Show the kids the final product. This is not something that I do in every lesson, sometimes this element is left out for the surprise element. This time, however, I wanted the kids to understand exactly what we are doing and why.
  • Draw the leaf on the A4 paper, colour it green and cut it out. Demonstrate each step to the camera and wait for the kids to complete it before moving on to the next one. During this particular lesson I have also came up with a little chant that we started to sing while colouring and cutting (‘It’s a big, big leaf for a very hungry caterpillar’)
  • Ask the kids to prepare the strips of the coloured paper, of any colour they want. The paper can be cut sideways (probably the easier option as it involves less cutting) or lengthways (in this case each strip needs to be cut in half). I didn’t tell the kids how wide the strips should be. We have been doing craft online for a few months now and my kids are now able to make such decisions themselves. I assumed that everyone will choose the width themeselves (as wide as they can handle).
  • We glue the strips into a ring by putting the glue on one end and shaping it into a circle. We glue all the rings first.
  • Glue all the rings together by applying the glue and attaching the rings and pressing them with two fingers.
  • Cut out one circle for the face, draw the eyes and the smile, glue the circle onto the caterpillar. If possible, the little antennas can be added, too.
  • Sit the cateripillar on the leaf, introduce the caterpillars, say hello, use them in a dialogue etc. We sang the song about the garden that we had been practising for a week then.
Here are the caterpillars made by my kids. Courtesy of FunArtKids

Why we love it

  • It is very easy to make.
  • It is beautiful and sweet. Whenver I choose and prepare activities for my groups, I always wonder if my kids will simply approve of it, if they just like it. When I showed them the caterpillar, simple as it is, I got this very special ‘Ahh!’ and big smiles.
  • It can be done in the offline classroom but it is also possible in the online classroom.
  • It gives the kids some opportunities to make decisions about the creative content, the size of the leaf, the colours for the caterpillar etc.
  • It can be easily combined with any spring lesson or with any story lesson.
  • The level of challenge can be adjusted. In the classroom the teacher can prepare the strips of paper or the parents can be asked to pre-cut them if the lesson is taught online. We used five strips / rings but the caterpillar can be made longer or shorter.
  • There is some potential for the literacy skills development – kids could write the key words on the outside or on the inside of all the strips before glueing them together.

Happy teaching!

Crumbs # 50 Vyacheslav or about getting ready to tell a story

Ingredients

  • a group of A2 or A2+ kids preparing for the Cambridge Flyers or the Cambridge KET exam
  • a set of the storytelling pictures from the exam writing materials
  • a piece of paper and a pen

Procedure

  • The teacher displays the visuals on the screen and tells the kids that they will be used to tell a story.
  • The teacher asks the kids to look at the visuals and decide what their character is going to be called. Everyone writes the name down on their piece of paper.
  • The teacher tells the kids to write down ten numbers, 1 – 10, and, when everyone is ready, to write ten things that they can see in all the pictures. These can be only nouns or a selection of nouns, verbs, adjectives etc.
  • The teacher asks the kids to decide what kind of a story they are going to tell: a happy story, a sad story or a scary story. Everyone decides and draws a relevant smiley at the bottom of their list.
  • The teacher divides the kids into pairs and sends them into breakout rooms to tell their stories. They have to use the name, all ten words and they have to make sure that their story has the mood they have chosen for it.
  • Back in the common room, the kids give the group a summary of their story (‘It is a story about a boy who…’)

Why we like it

  • The main aim for me in this particular lesson was to show the kids that even such uninspiring illustrations as the ones we used (and sadly, they were really boring this time) can be a start of a fun storytelling activity and that the final product’s quality depends only on the writers that is us.
  • We are preparing for a progress test and a mock test and I am hoping that an activity of that kind will get the students ready for the independent work during the test itself. Looking at the visuals and making the list helped the students think of the words that they see and it helped to assure that they will be closer to getting to the required wordcount (35 words). If they have ten on their list already 30% of the way there. It also gave them the time necessary to really look at the pictures and to start thinking of what might be happening.
  • From the word ‘Go’ the stories became personalised because the character got a name and became six different boys instantly, Fred, Bob, Tom and Vyacheslav among them. (‘Anka, but why Vyacheslav?‘ ‘I am not sure. I looked at him and I just thought he looks like a Vyacheslav‘).
  • Deciding how the story will end in the beginning also helped to shape it. It was the first time we did it and for that reason I only offered three options: a happy story, a sad story and a scary story but that list can be easily extended. We shared how we were planning to tell the story before we went into the breakout rooms and among our six stories there were three happy stories, one sad story, one scary story (mine) and one ‘ill story’ because one of my students decided that his character is going to catch a cold in the end. Anyway, from the very beginning the kids knew where they were taking their Fred and their Bob. They also knew that their partner’s story will be a bit different so, hopefully, they were more interested in listening to it. There was some variety in the group so I could put them up in a pair whose angle was different.
  • It can be easily done in the classroom but it works amazingly well in the online classes and this is how it came to be. I wanted to avoid sharing the visuals and wasting time on opening them.
  • It is easy and it can be a speaking activity in its own right or it can work as a story-writing preparation task as it was in our case. Consequently, a set of three pictures can be used (Flyers and KET writing tasks) or a set of five pictures (Flyers speaking tasks).
  • As a potential follow-up, the kids can write the story for homework.
  • Next time (and there will defnitely be another round of this activity), I am going to add a more communicative element that will give them a proper listening task and that will give them an opportunity to interact with their partner’s story such as retelling the story they have heard in the breakout rooms, creating a title for their partner’s story or continuing it (‘The next day…’). I know that choosing the best story is sometimes suggested with this kind of an activity but, to be honest, I am not a fan. Not everything needs to be a competition.

Crumbs #46. Case studies aka My new favourite thing

Preface

It’s been almost ten months since I took on more adult classes. I still teach my kids but the balance of adult EFL to YL EFL has definitely been tilted towards the adult classes. While I take a lot of pleasure in teaching 18+, I am hoping that this is only a temporary fixture because I miss my classroom and my carpet. At the same time, YL or not YL, I still get ideas and I want to share them. So, here we are – the first post in the Category: Adults.

Case studies in the EFL. A bite of theory

‘Case studies, a form of task based learning (TBL), allow teachers to implement the communicative approach: the central focus is on completing a task, and students use language as a tool to communicate their ideas instead of doing language exercises to practise a grammar point or lexical item’. This definition comes from Christine Roell’s 2019 article (see references) and it is a piece I’d recommend to anyone who is looking for some theoretical input and ideas on creating and using case studies in the EFL.

There are many arguments for including case studies but for me, personally, the priority has to be given to the fact that they create an opportunity for the development of a variety of skills, the language itself but also critical thinking, organising information and team work (Daly, 2002). Among the disadvantages that Roell mentions, the most important one would probably be the time and the effort that needs to be invested in finding, researching and preparing a case study for the class use.

According to Roell, a case study lesson follows the following six stages: introduction of the situation (relevant information, background, the necessary vocabulary), analysis of the additional information, discussion in small teams, presentation of ideas, teacher-led feedback session and reflection, both on the case study itself and the procedures in the lesson. In the article you can also find some valuable notes regarding the creation and implementation of a case study in the lesson.

Case studies in my classes aka the notes from a beginner case study creator’s diary

  • An indispensable connection to reality as all the case studies that I write and use have been taken from the real life, either from the news or from my personal experience. On the one hand that means that the case study is realistic, based on the facts and numbers. On the other hand, that automatically introduces ‘the answer’, which is not only a reward for the students but also allows for another layer of the feedback session: not only the students’ ideas, reflections and solutions but also the opportunity to analyse their ideas against the real life developments. These ‘real’ case studies were definitely a lot more popular among my students than the made-up case studies from the few coursebooks that I have used recently.
  • A more obvious focus on the target language use which I try to create, in order to give the students a chance to practise specific structures or vocabulary. Naturally, he students have a lot of freedom, however, the case studies are introduced in the freer practice part of the lesson and they come with the Structures To Use section.
  • The bare minimum as regards the data to analyse. This, partially at least, has been due to the implications of the lesson format (online, limited lesson time, corporate clients who very rarely have time to do the homework etc). I have been choosing only the case studies that do not require any extensive reading and that can still be effective and generative even with a small number of facts and figures.
  • The element of surprise as the actual details, ie names and brands are kept secret until the very end of the activity, in order to make sure that the students focus on the situation and the processes, rather than on specific names. It is also to ensure that they are motivated to discuss and debate, rather than just look up the events online.
  • The adaptability as an added bonus. So far, as demonstrated below, it has been possible to smuggle particular case studies into different lessons, by changing the angle and the target language to use. This means that the time invested in researching and designing the case study really pays off for the teacher.
  • A wider audience. It has been suggested by Daly (2002) that the most important target customer for the EFL case studies are the advanced Business English students but this has not been my experience. If adapted and staged properly, they can be used with the low B1 students and I have used them successfully with the Business English students, with the general English students with the corporate background and in general English ‘regular’ classes, too. The reason for that is that the students had a lot of background knowledge and could relate to the situation not only as the CEO of a company but also as the film audience members or the pizza restaurant customers.

5 case studies from my classes

Most of the ideas below come from my adult EFL classes in the last two months.

Case study: Kanye West and Addidas

Source: the news and especially the two posts, here and here.

Lessons: We have used it in lessons to discuss risk and risk management, brand image and reputation and general values. The main grammar structure here was the first conditional as the students discussed from the point at which no decision has been made yet.

Case study: Domino’s Pizza

Source: Domino’s Pizza Turnaround available on youtube created with the owners and Domino’s employees and the analysis of a great, albeit risky, marketing campaign in 2009.

Lessons: We have used it in lessons to discuss marketing and advertising (EAP) as well as in the BE and general English students in lessons on: risk, brand image and reputation. As regards grammar, our main focus were modal verbs for deduction, giving advice, conditionals.

Case study: Starbucks and racism

Source: the news such as the Guardian and here

Lessons: This was the main case study we used in the lessons on brand image and reputation and, as regards the language, our main focus was the language of advice.

Case study: The Shawshank Redemption

Source: the wikipedia and the related articles such as this one

Lessons: This is a really fascinating case because, after over thirty years after its release, it is still one of the popular films ever despite the fact that, initially, it was considered to be a flop. We used it in the lesson devoted to risk management and the focus was the first conditional (‘Imagine you are the CEO of the studio. What will you do?’) and the second conditional, with the contemporary twist (‘What would they do today, in 2022?’).

Case study: Famous people

Source: The news, unsourced, google images for the photographs of some famous representatives for the following professions: a chef, a sports coach, a ballerina, a politician, a writer, a CEO. The only trick here is to choose the names that the students in your country are less likely to be familiar with and the photographs that show them in their private life. The real names and professions of all the people involved are kept secret until the very end of the activity.

Lessons: This is one of my favourite activities that I have managed to adapt to the needs of my older YL students. It got inspired by an activity that I saw in one of the Rewards Resource Pack, only the original activity did not include the element of reality. For that reason, I have decided to use my own ‘characters’. With the teens and juniors, the main language focus is the modal verbs for deduction and the vocabulary necessary to describe the character and the personality. With the adults, we extend it towards a discussion on stereotypes and the ways of overcoming them. Here is an example of the set that I have used with my adult students in Poland.

References

Peter Daly, Methodology for using case studies in the Business English classroom, The Internet TESL Journal, III / 11, 2002, available online

Lynne Hand, Using case studies in the ESL classroom, LeoNetwork, available online.

Christine Roell, Using a case study in the EFL Classroom, English Teaching Forum, 2019, available online

Happy teaching!

Crumbs #43 Tractors and trains. Riddles for VYL

Ingredients

  • A Miro board or a powerpoint in the editing mode.
  • A beautiful train with carriages or a tractor with trailers, with one animal on each trailer.
  • A set of colourful cards, with a set of riddles following the same framework and the set of structures in each riddle.

Procedures

  • Students take turns to choose the colour of the card.
  • Teacher reads the description of the animal. Kids listen and guess the animal. Teacher uncovers the picture to check the answers.

Why we like it

  • First and foremost, this kind of an activity helps to develop listening skills in very young beginner students and focus as they need the information from all the sentences in order to guess the name of the animal.
  • At the same time, since all the riddles use the same framwork and the same structures, this game is an opportunity to practise all the key structures. The set of these will depend on what the students are familiar with and can be simplified or extended.
  • We use this kind of a game to prepare the students to produce the language, too and after playing the game for a few lessons in this very format, with the teacher reading and the kids guessing, we move on to the following stage with the students producing a set of sentences to describe an animal.
  • Last but not least, with time and with the development of the literacy skills, this kind of an activity can also help develop reading skills.
  • The game is pretty and colourful, made with colourful cards, beautiful visuals from google. The students are usually curious to find out which animals are hidding on the trailers. The format of the presentation can be adapted, too. In the past we played with huge present box (partially inspired by Rod Campbell’s Dear Zoo) and with houses in which the animals were hiding and the miraculously appearing thanks to the funcion of ‘bring to the front’ or ‘move to the back’ on Miro or any powerpoint.
  • It can be used with animals or with any other topic with the appropriate adaptation of the phrases ie toys (It is big. It is red, with the assumption that we refer to the visuals that the students are familiar with) or transport (It is big, it is fast, it is quiet) etc.
  • If you are interested in riddles, please have a look at this post, too, where I write more about riddles for the older and more advanced students.

Happy teaching!