Behaviour management in the VYL classroom. When the world begins to fall apart…

London

I would like to dedicate this post to my trainees on the IH VYL course because it was during the coversations with them, during the session and after the session, during the tutorials and the informal chats on Whatsapp that this article took shape.

The set-up

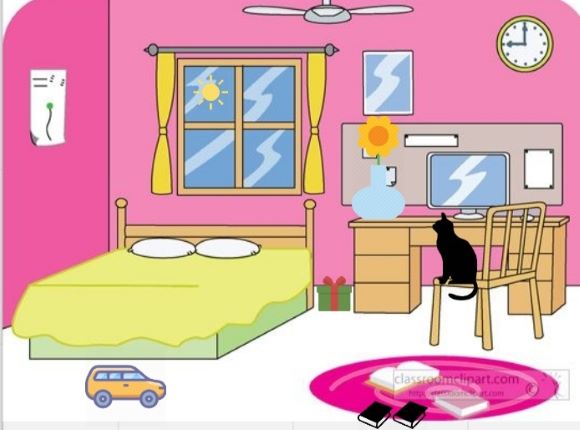
Imagine: you plan your class, you get the materials ready, you enter your little kingdom and then things happen. They are the things you do not approve of, things you don’t like, things that should not be happening, things that get in the way of learning English. Or, in other words, as Harold Macmillan said ‘Events, my boy, events’, my favourite line of this week or even this whole month (courtesy to Edward).

The number of things that can happen is somewhere around… a few hundred and, naturally, it is simply impossible to put them all into a manual for teacher, with all ‘what to do’s and what not to do’s’. There are too many of these and there are too many variables that will be playing a part and adding the local colouring. Here, it is not the case of ‘one fits all’. Oups.

One thing is certain, the problem is not just going to go away, it is not going sort itself out. Whatever ‘unwanted behaviour’ is taking your lesson apart, it needs to be dealt with.

Here are a few roads to take.

Spinetto, Italy

The worst solution ever? Doing nothing.

Simply because it not a solution at all. The problem (whatever it is) is not going to simply go away, disappear or un-happen. Pretending that it hasn’t happened and moving on, in an attempt to save the activity, the game or the entire lesson, can only lead to even more serious consequences.

The unwanted behaviour needs to be acknowledged and stopped because it can escalate and compromise the well-being and safety of all the people present. So, do something! Perhaps one of these things that you can find below.

Moscow

Signal

The simplest way of doing it will be calling the student’s name but using a voice that is appropriate to signal the unwanted behaviour. The tone of the voice on its own should convey the message that something undesirable is taking place and that it needs to stop. This, of course, does not mean raising the voice or shouting but if the teacher uses the same ‘happy’ voice for praising and for disciplining (or ‘disciplining’), the message will be much more confusing for the kids. Instead of ‘Oups, I’d better stop‘, the child will think ‘Oh, look, my teacher is saying my name in such a nice way. She must really like me‘.

In the same vein, long speeches, in L1 or L2, will be counter-productive in such a situation. It is much better to keep it short, for example ‘No!’ or ‘Stop, please!’, used together with the child’s name and a gesture. And, as soon as the unwanted behaviour finishes, also acknoledge it, perhaps with a smile and a ‘Thank you’.

Very often and with a majority of things that can happen in the VYL classroom, this approach should do, if applied consistently. After all, kids know that we don’t run, we do not push the others, we do not take their toys and so on. In most cases, such a gentle reminder, a speed limiter of sorts, will do the job.

Saint Petersburg

Pause

Sometimes, these kinds of signals are not enough, however and it might be necessary to pause the lesson and deal with the problem in the open, either because more than one student is involved and / or because everyone can learn from it. This might be a situation when more than one child has done something to upset another (ie draw on their work, take their toy, say something) or when there is more than one child involved in any unwanted activity (hiding under the table, pretending to be a very angry dinosaur, hitting the class puppet, drumming with the markers on the table). All these situations do affect everyone present, not only the two students actively involved, and they need to be dealt with in the open.

‘Stop’ is still going to be necessary but it is going to work only as the first step. If there are any resources that contribute to the mayhem, they need to be taken away, for example these markers used to drum on the table. Then, a conversation.

It is very difficult to recommend something that will work in all the situations and all the contexts. Ideally, this part would be done in the children’s L1, but not all the teachers out there speak their little students’ language and not all the schools out there approve of the teachers using the L1 in the classroom.

Now, in Russia, I have the advantage of being able to understand the L1 of my students and what normally happens is we have these conversations in two languages: I speak English and my kids react in Russian, but it was not always the case. Like many of my colleagues in the VYL classrooms around the world, I had to do my magic only in English.

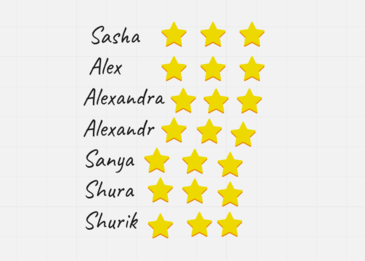
To be perfectly honest, it is not easy to grade the language to the level of pre-A1 and, at the same time, to convey the message in a delicate and sensitive way, but it is not impossible. You can use simple sentences and draw the children’s attention to the fact that their behaviour may make other students unhappy (‘Look, Sasha is sad now’) or that their behaviour is not appropriate (‘Is it a good idea?’). There are some advantages here, as it is almost guaranteed that these conversations will be short and concise and this is how I have dealt with all the issues in my classroom in the past couple of years. Although, to be perfectly honest, sometimes I am sorry that I cannot just sit down and have a real conversation in my students’ L1.

Moscow

Be clever

There are many tricks that the teacher can use in order to manage the behaviour of the group and of the individual students, without interupting the lesson too much but dealing with the problem effectively. Here are some of mine

  • Almost magically remove or stop the catalyst or the distractor, for example, put the hand at the back of the stool to block it and to stop the child from rocking, put the marker on the top of the board or on the top shelf
  • Use the command ‘Freeze’ to physically pause all the class proceedings and in a game-like way stop the unwanted behaviour. Although, of course, the teacher needs to introduce the game first. Once the kids got involved in something else, the disaster has been averted and the teacher is again in charge, the lesson goes on, according to plan. It might be the best solution for all the difficult situations when the world really does begin to fall apart and a quick fix is necessary. Instead of a conversation with the kids, a thorough analysis of the situation and looking for answers and the steps that need to be taken in the future.
  • Create a diversion and draw the kids’ attention to something else – a song (the easiest one to implement), a video, a favourite puppet. Again, as soon as the kids have calmed down, proceed with the lesson. And then take a moment to reflect on what led to the difficult situation.
  • Become the class clown and joke your way out of it. A funny face will do, a silly, clumsy gesture and a well-faked horror at the crayons that spilled out of the box. Then, like in most of the situations above – proceed, reflect and change.
  • Depending on the situation, it might be a good idea to whisper some encouraging message into the student’s ear. It can be in English, it can be in the child’s L1, it might a real whisper or a 5-year-old whisper (a good attempt that everyone present hears anyway). It will help to redirect the emotions, break the spell of sadness or anger, and it will help them to focus on something else and it works really well with the situations in which a child is upset or sad or just withdrawn, for whatever the reason there might be. It might be also a good idea to play a quick round of Broken Telephone with everyone, to involve the whole group in the same activity but it will work only if the kids already know the game.
Vyborg

Praise

There are situations when the best way of dealing with the unwanted behaviour is a complete diversion when instead of addressing the offender (apart from the basic signal and calling to attention), the teacher can choose highlighting the fact that the other children behave well.

Not only will it work well for the behaviour that is aimed at drawing the teacher’s attention (since the teacher is withdrawing this attention) but it will also acknowledge and applaud the behaviour of the class which is something that we often forget to do, taking those ‘angels’ for granted. Although, truth be told, they deserve our recognition.

Praising the students and reinforcing their behaviour will be also a clear message and, short-term, it will create a situation when the ‘offenders’ get a chance to reflect on their actions and to calm down and by the time everyone else has already been praised, they will also be closer to the desired behaviour and the teacher will be able to high-five them, too.

Baikal

Ignore (only not really)

Some disasters are better to be ignored entirely.

Of course, by ‘ignore’ I do not mean here the official Cambridge Dictionary definition of the verb because that is going to get us nowhere good (see above). What I have in mind is a VYL teacher’s (a pre-school teacher’s, a parent’s, a carer’s) definition of ‘ignore’ which, more or less, goes like that: acknowledge that a situation has occurred and, instead of drawing more attention to it, let it sizzle out, while, of course, keeping an eye on the child, paying even more attention than usual, only not openly this time.

Sometimes this will work better than any whole-class conversations or ‘lectures’, especially when we are dealing with a tantrum directed at getting the teacher’s attention hoping for an outcome that will be more favourable (ie we will not sing the song I don’t like, I will get the best sticker, I will be the first one to join the circle) or when two students have had a disagreement (and there are no obvious roles of the offender and the victim or when it is impossible to tell who is who) or when there is obvious resistance from the student and taking the matter further is dragging it into a dead-end street, like in the story here.

It has to be said out loud, it will not always be easy to label a classroom situation as ‘Ignore (only not really)’ because, of course, tens and tens of factors will have to be taken into consideration. Nonetheless, I believe, it is good to remember that this option also exists.

Rybinsk

Ask yourself it is a one-off or a regular feature

Or about working with the events long-term.

It is perfectly natural that all, even the most angelic and most well-behaved children, have a worse day, a crazy day, a tired day or a not-such-a-good day. This is the day when their behaviour might surprise their teacher (or, let’s be honest, completely ruin their teacher’s plans for the lesson). But these are the one-off events and it is not even necessary to analyse them in detail.

If, however, such unwanted behaviour happens regularly and repeatedly, it will be necessary to look into it. Is there a pattern? Is there anything specific that triggers that behaviour, an activity, a person, a stage of the lesson? Analysing all these details will help to choose the right solutions to the problem.

Perhaps it is the time to change the routine? Perhaps some games or activities have to be put on hold for the time being? Perhaps the group needs more settlers? Perhaps they need more stirrers? Perhaps it is time to reconsider the seating arrangement? Perhaps it is the time to talk to the parents?

Find out more

It might happen, too, that the self-reflection of the classroom adventures is not enough and that the teacher will have to reach out to the parents because this background information might help to understand what is happening in the classroom and why and, in turn, lead to finding a solution.

New York

Post-post reflections

Classroom and behaviour management is the theme and the focus of session 3 of the IH VYL course on which I have been a tutor for four years now and that is always the session that, according to our trainees, ‘could last twice as long’, because there are so many issues, so many problems, so many tricky situations that the debate could go on forever…

Unfortunately, that is simply impossible. Fortunately, as another trainee commented, to some extent, we deal with the classroom and behaviour management in every session, while discussing craft, songs, stories and literacy so at the end of the course, our trainees are better prepared to manage a group of the little people. Here is one hoping that this post will be helpful, too!

It is my deeply-held belief that by gaining understanding of all the pre-school brain and heart and by trying to see the world from their perspective, we get better prepared to teach and to bring up very young learners and to deal with the classroom and behaviour management issues that might arise.

For that reason I started a series of posts on the blog, in which I describe the real situations from the classroom and how I dealt with them. The series is called ‘Child development stories’ and you can find it here. While a manual with all the potential situations and all the right answers is never going to happen, we can definitely learn from observing our students and from analysing what happened and get better at managing the pre-primary kingdom, on the good days and on the worse ones.

Happy teaching!

My favourite songs aka Where to start if you have never sung before

This post is dedicated to all the teachers who soon are going to be entering the VYL or YL classrooms for the first time ever and are now wondering how to prepare for that.

Why?

Songs are definitely the resource that a teacher should use while teaching primary or pre-primary. A while ago I have tried to collect all the reasons to sing a song in one post (the full list here) but if you have never sung before in the classroom, here are the five most important reasons

  • songs will help you create a framework for the lesson, something to begin with, something to finish with, some nice punctuation marks in the lesson
  • they will be the easiest way of changing the pace of the lesson. Even if the kids don’t participate fully from the very beginning by singing, the song itself will work as a stirrer (or a settler, if you choose a very calm and peaceful one)
  • they will create an opportunity for the children to participate, at least with movement and gestures and, depending on the song, even with a few words or structures
  • songs are something that we all do together so they will help you ‘unite’ the group after the tasks on which the kids work individually and they will help to create a community
  • you can share them with the parents, to listen at home, this way taking English out of the classroom

Some do’s and don’t’s

Staging a song lesson for pre-primary or primary should, in fact, be a separate post, because there is a great variety of techniques and activties that can be used. For now, I can recommend having a look at this post here as well as the five tips.

  • Listen to the song before the lesson and get ready. Plan how you are going to introduce it. Simply pressing the PLAY button and saying ‘Let’s sing’ is not going to do the job with songs in the EFL / ESL classroom.
  • Play the video. It will really help the kids understand what the song is about.
  • Sometimes they are already in the song and in the video, sometimes not and we have to come up with a set to use with each song. It is something worth investing your time in because the gestures will help the kids understand and remember the lyrics. What’s even more important, especially in the first lesson with a new song – gestures will give the children a real opportunity to participate.
  • Sing yourself, do all the gestures yourself. And with a smile, too! Even if you are the only one and even if the students don’t join you straight away. It is perfectly natural, they need time to get used to the music, the lyrics, the gestures, the rhythm. Plus, you are the leader! If you don’t get involved, why would your students?
  • Share the song with the parents and use it again. A song is never just for one lesson.

My favourite hello songs

Hello. Super Simple Songs – a real hit and a good start, with 6 emotions, including ‘not so good’, to show the kids that it is ok to feel not happy, sometimes.

Hello Song. Fun Kids English – another good one, with monsters, there are actually two parts of it, each with 4 emotions. It is good to have a new version when the kids get bored with the first one.

Hello Song For Kids, The Singing Walrus – I love it because it includes not only the hello questions but also some Present Simple sentences and questions about the everyday school routine (‘Everyday I go to school) and each of them is repeated twice, in the classroom it can be T and then kids. Lots of potential.

Hello Song for Kids, EFL Kids Videos – very simple but very energetic, lots of repetition but also a nice variation of verses sung loudly and quietly. We loved it.

Hello Hello! Can you clap your hands. Super Simple Songs – another simple one with a few movements, perfect if you want to get up and move a bit

My favourite goodbye songs

Goodbye to you! EFL Kids Videos – using the same melody and the same pattern as the hello song from EFL Kids Videos, helps to save the time and works both as ‘something old’ and ‘something new’

Bye Bye Goodbye Super Simple Songs – a kind of a follow-up to the Hello Hello Can you clap your hands, the music is different but the song uses some of the verbs.

Goodbye Song for Kids, The Singing Walrus – this one is a bit more complex, but again, as their hello song, it uses full sentences. Lots of potential.

See you later, aligator, Super Simple Songs – a very short one, includes gestures for alligator and butterfuly and if you want, it can go on forever.

My favourite movement songs

Head, shoulders, knees and toes, Super Simple Songs – everything you may need in your first lessons, just getting up and moving a bit, even if the topic of body parts is scheduled for some other day

Move. Dance Song For Kids. Super Simple Songs – my latest discovery, lots of movement (verbs), a great melody. It can be used partially ie the first three parts of as a whole. It can be also extended if kids have their own ideas.

Jump, Run and Shout. The Singing Walrus – another energetic, rock song with movement. Just like Move, we like to sing it in the beginning of the lesson. It helps to get rid of lots of energy.

The Jellyfish Song. Super Simple Songs – a simple but effective song, very little langauge here, you are going to be pretending that you are jellyfish. Somehow, the kids get a chance to move but also to calm down.

Shake Your Sillies Out. Brain Breaks For Kids. – this is one is for older kids, lots of great ideas here and quite tiring, when used from the beginning until the end, but my kids loved the idea of ‘shaking the sillies out’ or ‘clapping our crazies out’ (very necessary on some days) so we only used the movements, not the song.

My favourite randomness

Open Shut Them, Super Simple Songs – one of my favourite songs ever because it teaches adjectives and opposites (somehow neglected by many of the coursebooks and programmes) and you can easily include gestures. Plus there are four parts of it which means that a new one can be added as soon as necessary. Open Shut Them can almost become a part of the classroom routine for the whole year and later on, the teacher can even extend it by creating own versions.

Hickory Dickory Dock, Super Simple Songs – some counting, some animals and an unexpected ending.

What’s your favourite colour? Super Simple Songs – first of all, it can be inroduced from the beginning of the course (colours), it can be used as a game (to point at different colours in the room as the come up in the song) and, last but not least, it contains a great Q&A set (‘What’s your favourite…?’ ‘I like…’) and it can be turned into a real conversation and easily extended into other topics, as they come up i.e. toys, numbers, pets, letters.

Happy teaching!

Rewards charts and young learners

This is not going to be a post on the advantages and disadvantages of using a rewards’ chart in the EFL classroom. If you are interested in one or the other, please, scroll down to the bibliography with some pieces to read.

Instead, I am going to tell you a story about a period of six years of using a rewards chart with my kids, successfully and where it has got me. Or where it got us. Consider it a case study.

The group

There are eight of us, in the group, one of me, two boys and five girls and at this point (January 2021), we are in our sixth level together. On the one hand, it is a bit scary, that so much time has passed and so quickly, too, on the other hand – six levels together, pretty much with the same children, from the first words, literally, to Movers.

The first rewards chart

Once upon a time, when my kids were still very very young, in our first year together, the day came when I realised that I needed a rewards chart, badly, with a set of rules and a system.

To be honest, it was a bit of a heartbreak and it did feel like a total defeat. Until then, I had never (as in: NEVER) had to resort to it with children so young. Not once in my entire teaching career (of 10+ years). Rewards charts were for the primary and teens, not for the babies. Sigh.

I was thinking and pondering and wondering, approaching it with a lot of trepidation (in Polish we say: to come up to something like a dog to a hedgehog) and really, stubbornly, putting off the D-day. But, the group was a big one, with ten kids, some of whom were six, some of whom were barely three and they were just rowdy (even for my standards) and ‘my traditional methods’ (or whatever they were back then) were just not working. As in: at all.

Reluctantly and very un-enthusiastically, I took a deep breath and introduced changes: a set of rules and a rewards chart.

The class rules: How to.

  • Think of your group, the kids sitting in your classroom. What are they struggling with? What is the unwanted behaviour right here, right now? Choose the most important three behaviours that you would like to eliminate. There is no point in constructing a set of ten commandments as there will be too many to revise, to remember and to focus on.
  • Formulate the rules and try not to use negatives. ‘Sit nicely’ sounds much better and is more positive than ‘Don’t run’.
  • Yes, there might be situations when a clearly formulated ‘Don’t‘ is the only solution. In the group that I am describing here, we did have some issues that the kids decided to resolve with fighting so for some time, this was our rule number 1.
  • In general, it would be better to refrain from using imperatives altogether and go for full sentences, for example, instead of ‘Sit nicely’ we were using ‘I sit nicely’, together with ‘I don’t run’, ‘I listen to the teacher’, ‘I don’t fight’. These are great language models and, over time, they become a part of everything that the kids can say, even early on, in the first year of primary or pre-primary. Investing in the rules is also investing in the language.
  • Think how you will introduce the rules. I prepared A4 flashcards, with the rule written down (for me to remember and to be consistent and for the kids, to expose them to the written word, although, of course, back then they were not able to read these), with an appropriate picture (thank you, clip art) and with an accompanying gesture for each of them.
  • The first time I introduced them slowly, using the gestures, drawing the kids attention to the pictures and repeating the rules a few times. They did get the idea pretty quickly. After all, they learnt how to behave and how not to behave. After all, they are familiar with the concept of rules. They are rules in the kindergarten, in the art classes, at the swimming pool. Naturally, there will be some in their English class, too.
  • How was I sure that they did understand? Because, of course, one brave volunteer quickly translated them into Russian and all the kids started to discuss the rules. I went over the rules a few times and I encouraged the kids to repeat the gestures.
  • Put the posters up, in a place where everyone can see them. In my case, the best place for that was the door, on the classroom side:-)
  • Revise the rules in the beginning of every lesson. I would go over the rules, ‘reading’ them out loud, while pointing at the sentences and later, once more, I would ICQ everyone, this time with gestures. ‘Do we sit nicely?‘ ‘Do we fight?‘ and so on.
  • Keep an eye on your students and when a rule becomes redundant (because, hey, it worked and your students’ behaviour has improved), change it or replace it with something that is necessary and relevant at the moment.
  • In our case, in the first year, after a while we could replace ‘I don’t fight‘ with a very general but also very broad ‘I am a good friend‘ which we used to signal that we basically behave well because a good friend will not fight, will not take someone else’s pencils or books, will not say unkind things about other children and will not always try to go first and so on.
  • It is also good to have a rule that models and acknowledges the behaviour that is even better than good, something exceptional that we all should strive for. In our case, it was the rule number 4 ‘I am fantastic‘ which I chose because it sounds similar to its Russian equivalent and it is a positive word.
  • Make sure that you refer to the rules throughout the lesson, to remind the students about them when you notice some examples of the unwanted behaviour. I do it using a question form, while using the gesture or pointing at the posters, for example ‘Are you a good friend?‘, ‘Are you fantastic?‘, ‘Are you sitting nicely?

The rewards’ chart. How to. A case study.

  • I decided not to use the board as it was too far away from our little circle and I did not want to get up and walk away from the kids a few times during the lesson as it would be too disruptive. Instead, I got a clipboard and prepared a table with their names, written in different colours and accompanied by little icons, ten different ones, so that the kids, who were pre-literate at the time, could recognise their names easily. I put the table into a plastic sleeve, sealed it and pronto. Laminating it would do the job, too. I used a whiteboard marker and so I could easily clean it and re-use it in the following lesson. I was also able to carry it around the classroom.
  • A few times during the lesson, I would take out the chart and check out, with all the kids, asking everyone the same question ‘Are you fantastic?’ (or any other question relevant to our rules, but this one was the most common one) and, if they answered ‘yes’, I would add one more star to the chart, next to their names.
  • Naturally, if the student did seriously ‘misbehave’ (inverted commas here because it really does happen rarely), first would come a warning and then, possibly, if that didn’t work – a tiny little bit of a star might get erased. Which happened on a few occasions and usually the warning itself was enough.
  • In the beginning, I did do it after every single stage and almost after every single activity. It did take time but it was worth it. With time, I was able to cut down on the frequency and the number of stars, extending the length of the stage that could earn them a star.
  • Eventually, we got to the point when each child would get only one star at the beginning of the lesson. It was their job to make sure that it stays whole until the end of the lesson.
  • There was also a point, in year two, when we started to invest more time into our stars because at the same time, we started to talk about other people, and the stars gave us a perfect opportunity to do just that, ‘My star is…’, ‘My star has got…’ and, of course, it was then even more important to keep all the stars intact.
  • It is also very important to remember that the kids should be given an opportunity to get better and to be acknowledged when their behaviour improves. It should not be a problem since the teacher is in charge of when the new stars are awarded.
  • Also, whenever we ask the question ‘Are you fantastic?’, I always start from the well-behaved students, mainly in order to give the ‘not-so-fantasic’ ones a chance to calm down and to think about life so that, when it is their turn, they could be ready to be fantastic, too.
  • ‘Are you fantastic?’ is a very powerful question in itself, too. On the one hand, it serves as a reminder of our aim and our rule (‘We are fantastic’), on the other hand, it is another chance for the students to confirm that they are fantastic AND to make a conscious decision and to make a promise that yes, they will be, from now on, even if there have been a few issues with it.
  • Eventually, by the time we got to our level 3, the rewards chart became almost completely unnecessary. We had the rules on the wall (a new classroom) and I still kept the rewards chart grid at the ready but I would only take it out and use it, when someone needed a reminder that we are, in fact, fantastic. Which, in year 3, happened perhaps once a month.
A slightly different rewards chart or What the kids care about

Today aka the Outcomes

Today, in our 6th year together, we have long forgotten about the rewards’ chart and the rules. My students are now seven, eight and nine and, after all this time, it is no longer necessary to keep such a strict routine and such an elaborate system. The last time we did come close to anything resembling a rewards chart was a collage (an example of which you can see in the photo above), which we made on our Miro board, at the end of each lesson. Everyone could choose an image, google or icons, that they wanted to add. This, in a way, was some kind of a reward for everyone.

Looking back, I think it was a good decision, to introduce the chart and the rules all these years ago and even a better decision to ‘waste’ time on drawing all these stars and asking all these questions. And, dear teacher, if you worry that it takes six years to reap what you sow, don’t. The effort made and the time spent did start to pay off already after a few weeks.

I cannot guarantee that we are going to stay in that bliss forever (fingers crossed that I don’t jinx it with this post) but so far, so good.

My kids have never been very quiet (apparently it’s because I am loud, I am told) but they do behave. Today, after all these years, we all know what is OK and what is not. Most of the time, that is.

They have become more talkative and for that reason a new ‘poster’ appeared on the noticeboard. ‘When I speak, people listen. When people speak, I listen’. It works. Especially that we did specify that by ‘people’ I mean both, teachers and students present in the classroom.

On some days, I have to bring Pasha, our invisible student, one some days I call them using their first name, in full, and their patronymic, sometimes I have to use my serious face but that’s it. I want to believe that it all started with a simple rewards chart a long, long time ago…

Happy teaching!

Something else to read

  1. Rewards charts: how to use them to change the child behaviour at raisingchildren.net.au
  2. Are rewards charts actually bad for our kids? at healthymummy.com
  3. Why you shouldn’t reward kids all the time? at sleepingshouldbeeasy.com
  4. Rewards for kids: Maybe all they want is time? at kiddycharts.com
  5. 20 classroom rewards to get students motivated at englishteaching101.com

A to Z of homework for Very Young Learners***

What a wonderful book this is, The Worst Alphabet Book Ever, by Raj Haldar and Chris Carpenter. In a way, it has inspired this post here, on all things related to homework for pre-primary EFL students.

Mine is a very messy alphabet, with some letters in, some letters missing, all of them in a very un-alphabetical order…

The Worst Alphabet Book Ever

S is for ‘Should we even think of setting homework for preschoolers?’

Some of the arguments against:

  • Kids are too young
  • It is too much pressure, too early. They will grow up, start school and then they will have to really learn what it means to be a student.
  • Kids forget to do the homework.
  • Parents forget to do the homework.
  • Parents may not speak English well enough to help with the homework task.
  • Parents work and are essentially too busy to deal with the homework tasks.

Some of the arguments for:

  • We are teaching the kids English but we are also teaching them how to be a student. Doing the homework and taking responsibility is a part of that process.
  • It has to be the homework task that is appropriate for the students’ age (2 – 6 years old) and level of English (pre-A1) so also something that non-English speaking parents will be able to do and something that will not take a lot of time
  • Certain procedures for setting the homework and checking the homework should apply to ensure that the tasks are not a hassle for the parents or the children
  • Homework is a wonderful way of creating a link between different lessons

So the short answer to the question in the heading would be ‘Yes, we definitely should’.

The Worst Alphabet Book Ever

E is for the extended exposure and R is for results

This is one more argument in favour of the VYL homework, so important in fact that it is going to have its own paragraph here.

Usually, pre-primary students who learn English as a foreign language have a very limited exposure to the language as they come to class twice a week for 45 minutes or, in some cases, for only 45 minutes once a week. That is not a lot but it is enough to get good results if the time in class is spent well. Or, if there is an opportunity to extend this English exposure time by homework tasks.

In practice, in might mean only the additional five or ten minutes or fifteen minutes per week but it will be the important link that will provide some additional practice between the lessons, which will be very beneficial for the children and it will help to recycle and keep up the language from Tuesday to Thursday and, even more importantly, from Thursday to Tuesday.

As it happens, a few years ago, me and my colleague-teacher, Anya (hello Anya!), we had a chance to be a part of a very informal and very small scale classroom research or an accidental experiment. We both worked with the same levels onsite (at one of our IH schools in Moscow) and, at the same time, offsite (at one of the kindergartens). All the kids were amazing, very bright and a pleasure to teach. They had the same teachers and they were following the same programme and yet, we realised that the onsite students were making more progress. We tried to analyse the situation and the only difference between the groups that we could put a finger on was the fact that our offsite groups were not getting any homework, according to the arrangements with the client.

Then, there were my other groups, a few years ago, that all of a sudden started to make lots of progress and, surprisingly enough, we did not have to devote so much time to drilling and practising the new vocabulary, right after it was introduced.

Normally, the first two lessons with the new material were filled with a lot basic games whose aim was to provide the exposure and the controlled practice before we would move onto more complex vocabulary games and introducing structures. Until, that is, I noticed that all this drilling was not necessary and, in most cases, already in the second lesson the children were using the new vocabulary with a lot of confidence. What it did look like in class, of course, were my students’ faces quickly losing interest in ‘just’ repeating the words with voices and emotions and, even, random comments (or, shall we say, feedback) muttered, here and there, ‘Да, мы уже все это знаем...’ (‘We already know all that...’)

I would never complain about that, we could move on and do the more interesting and challenging things but it took me a while that it was connected to the additional practice opportunities that the parents were providing at home. Just because they wanted to.

The Worst Alphabet Book Ever

P is for the parents

It is not a secret that in case of all the young learners or non-adult groups, the parents are the third party involved in the process and, one way or another, they will have to be included because, really, they are our clients, not the students themsevels. This is particularly true in case of the pre-school groups, mainly because children are very young and if we want to make the learning process effective, with homework or without it, we will be dealing with parents, too. Even more so, we need parents to make it all work.

Parents always want the best for their children but many of them are also taking their first steps in the EFL world, this time through their children. They might have had different previous learning experience (their own or of their kids’), they might have different expectations and aims that might not always coincide with ours, with our previous teaching experience or with our school’s policy. That means that we cannot take things for granted and that we should always talk to the parents, to explain what we do and why we do it. That applies to the homework tasks, too.

Some parents might really not be able to spend time with their children, some might choose to spend the time they have in other ways, not working on the English homework and we should accept and respect that. However, there are also parents for whom the English homework will not be so much of a burden but rather an opportunity to do something together in English. We can help them by showing them what can be done at home and the actual homework task is the first step here.

The Worst Alphabet Book Ever

N is for nuts and bolts

Here are some things to take into consideration

  • The homework should be short. Our students are still two or three or five and will not be able to remain seated for a long period of time, in class or at home.
  • It should be easy to complete, too. The students are still two or three or five and tasks that are very complex cognitively will not be appropriate for them.
  • However, the fact that the task looks like a simple colouring page (see below) does not mean that it is just colouring because the actual physical task will be connected with the language produced that is presented and practised in class with the teacher, practised at home with the parents and then practised again, with the teacher, during the homework check in the following lesson.
  • Ideally, the homework task should be consistent, in form and in content, with the focused task completed in class. This way, we do not only provide additional practice of the vocabulary and structures that we currently work on but we also ensure that the students will know how to complete the task because the instructions are the same, for the focused task and for the homework task. Of course, that is not always possible but it is a good aim to set for yourself while lesson planning.
  • For that reason, the longer I work, the more convinced I become that in an ideal set-up, I would rather work with a coursebook only, without any activity book whatsoever, in order to give myself the flexibility to match and to better combine the programme, the focused task and the homework task. This is, of course, only my very subjective view and I am aware of the fact that it would not be everyone’s choice.
  • The task should be set in class, with the students. After all, these are the ones who are learning to be responsible for the task. For the teacher and the students this is, yet another opportunity for practice. The teacher can bring another copy of the handout or the book and do the task together with the students.
  • The homework task should be explained to the parents, too, because, they will have to remember to take the task out and to complete it before the following lesson. There are different ways of doing it. The teacher can explain the task after the lesson, alone or with the help of the students, the administration of the school can be asked for help, too. Some teachers like to leave the notes about the homework on the door of the classroom and, nowadays, we all have the whatsapp groups which we can use to communicate with the parents, too.
  • The homework checking is a part of the routine and another opportunity to practise the language and to talk to students, one on one, as they walk into the classroom (more about the line-up routines here). In the past, I used to reward my students with stickers for the homework but I stopped doing that when I realised that not everyone does or brings their homework and that is precisely because mum or dad or granny forgot…Now, I only acknowledge the hard work with smileys, suns, flowers, ‘Fantastic!’ and ‘Excellent’ and I keep a spare handout, my homework or any visual in order to be able to have a little chat also with those students who are without a homework task on the day.
The Worst Alphabet Book Ever

B is for the basic homework tasks

Here are some of the staple food tasks that work well as homework tasks. All of these were created using the miro board. These are not actual handouts but only sample tasks in each type.

a) colouring: task: students colour the objects and produce simple sentences ie ‘The apple is green’ or ‘It’s a green apple). This kind of a task is especially appropriate after the new vocabulary has been introduced and colours can and should be revised throughout the course.

*****

b) drill: task: students look at the the sequence of words, name them, using a single word or a sentence and make a decision what should be the final word. This is also a task appropriate in the beginning of the unit. Here, some students might choose to colour the picture but that is not obligatory.

*****

c) odd one out: task: students name all the objects in the sequence and decide which one does not match the others. We usually use very simple langauge here for example: Goodbye, cat.

*****

d) matching: task: students look for the same objects in both columns and connect them with a line. This is also a task more appropriate for the beginning of the unit and for younger students, too. The older students can complete it, too, but in their case it would be a good idea to encourage the kids to produce a full sentence.

*****

e) finish the sentece: task: students try to build simple sentences by naming the elements of it represented by visuals or symbols and by choosing one of the elements.

*****

f) categorise: task: depending on the language, students can categorise the objects into those that they like or don’t like, big or small, animals that can fly or swim or even words beginning with the same sound if you have started working on developing literacy skills. They can either colour or circle different categories with different colours, at the same time producing the target language.

*****

g) count: task: students look at the picture and count all the apples, bananas, kiwis and nuts, they write the number.

*****

h) maze: task: students trace different lines in order to produce the required sentence, for example ‘I’ve got a doll’ and similar. Again, thanks to the fact that all elements of the sentence are represented visually, an activity like that is going to support maximising production, here full sentences.

*****

i) collage: task: in class, students make sentences about mum, dad, grandma (my mummy likes apples) glueing simple pictures in the appropriate part of the handout. All the leftover pictures are given out as homework. Students glue them onto the handout and produce similar sentences but now about brother / sister, grandpa or friends.

A is for the alternatives

Normally, the homework task is set as a handout (or in the activity book) but the pandemic and the lockdown of 2020 has changed everyone’s way of looking at homework and, fortunately or unfortunately, it has closed some doors but it has opened some others. During the lockdown, not all the studnets had access to a printer so sending out homework for the parents to print and complete was not always possible. What is more, not all the students even had coursebooks and so these could not always be used as the basis for homework tasks.

W is for Wordwall

This website has been a real revelation and a milestone in tasks for age groups of students but especially for my pre-primary studnets. Wordwall is available for everyone and free in its basic version. Anyone can register and gain access to all the tasks and games that have been created by the community and made public. These games can be used in class and shared with the parents to play on any device available at home. Another advantage is that each of the tasks or games is available in a few different formats (or ‘templates) which means that the parents (or the teachers) can still practise the same set of vocabulary or structures but in a slightly different game.

If you are willing to invest a small sum of money, you can choose your own plan and start creating your own activities to match the programme or the curriculum of your group or school, too.

Here are some examples of the games that I have created for my pre-primary students

a) Let’s count, created for the students who were in the beginning of level 1

b) Categorising, created for level 2 students (farm animals which can fly, swim, run, jump)

c) Tell me about this picture, created for my level 3 students to practise opposite adjectives.

All of these we played in class, first and then the same or a similar task was shared with the parents.

L is for homemade listening tasks

These are lightly more complex but a real lockdown revelation for my primary and pre-primary classes. You can read more about them here.

Happy teaching!

P.S. All the samples of activities were created using the images on Miro and all the in-text photos come from the same wonderful book, P is for Pterodactyl, The Worst Alphabet Book Ever by Raj Haldar and Chris Carpenter and illustrations by Maria Tina Beddia from Sourcebook Jabberwocky, which by the way can be (and will be) used with my teens. More on that later:-)

*** This post was based on the talk I gave at the 2020 IH YL Conference.

P.S. A request!

It is very simple.

I would like to know a tiny little bit more about my readers. There are so many of you, popping in here, again and again, and the numbers of visitors and visits are going up and make my heart sweel with joy. But I realised I don’t know anything about my readers and I would love to know, a tiny little bit more.

Hence the survey.

A Brand New Class. Volume 2: Primary

September is upon us. It is a joyful month, what with all the new books, freshly sharpened pencils, markers that have not lost 50% of the caps yet, storybooks and flashcards that are still as God intended (in order!) and all the new adventures because ‘The kids are back!!!!’. At the same time, my favourite tune of the month is …Green Day and when they sing ‘Wake me up when September ends…’ Every single year. And this year more than ever.

Until we have all survived yet another autumn rollercoaster, spiced-up by the pandemic-related uncertainty, here is a tiny little something: activities for the first lesson of the course, today something for teenagers: 5 ‘sandwich fillers’ and 5 activities in their own right.

All of them are and have been my favourite start-of-the-course activities but they can be adapted to different topics and used throughout the year.

Most of them require only the basic resources and little preparation.

Some, although admittedly not all, will also work in our online classrooms.

None of them are how-did-you-spend-your-summer-themed because I never do it in my first lessons (and definitely won’t do this year since a) we did spend the summer together studying English and b) other than that we were stuck at home or at the dacha, growing cucumbers and carrots and feeding birds…) but they can be made so, if needs be.

You can find them HERE.

And if you also teach teenagers, you might find these useful, too!

Happy New Academic Year!

Happy teaching!

A Brand New Class. Volume 1: Teenagers

September is upon us. It is a joyful month, what with all the new books, freshly sharpened pencils, markers that have not lost 50% of the caps yet, storybooks and flashcards that are still as God intended (in order!) and all the new adventures because ‘The kids are back!!!!‘. At the same time, my favourite tune of the month is …Green Day and when they sing ‘Wake me up when September ends…‘ Every single year. And this year more than ever.

Until we have all survived yet another autumn rollercoaster, spiced-up by the pandemic-related uncertainty, here is a tiny little something: activities for the first lesson of the course, today something for teenagers: 5 ‘sandwich fillers’ and 5 activities in their own right.

All of them are and have been my favourite start-of-the-course activities but they can be adapted to different topics and used throughout the year.

Most of them require only the basic resources and little preparation.

Some, although admittedly not all, will also work in our online classrooms.

None of them are how-did-you-spend-your-summer-themed because I never do it in my first lessons (and definitely won’t do this year since a) we did spend the summer together studying English and b) other than that we were stuck at home or at the dacha, growing cucumbers and carrots and feeding birds…) but they can be made so, if needs be.

You can find them: HERE!!!!

Ideas for the first lesson with primary can be found here

I hope you have fun using them. Looking forward to your feedback, too!

Happy New Academic Year!

Happy teaching!

P.S. Activities for Pre-primary coming soon!

All you need is…a picture!

A post by a lazy teacher who likes to ditch the tasks and the responsibility onto her students, even those little ones.

A post by a greedy teacher who always wants more and whose main aim of every lesson is: language production. And then more language production.

A post by a teacher who first shared these ideas at the Cambridge Back to School webinars in August 2020.

A post by a teacher, about materials management or 00000 different ways to use the same picture.

A post with activities that were inspired by some of the YLE Cambridge exams but approached in an open-minded way…Ready, steady, go!

P.S. Don’t forget to check out of the second part this post.

There is only one picture…

created using an image from classroomclipart.com and Miro

Before you even look: tell the students that it is a picture of a bedroom, have them predict what they might see…Then we look at the real one and check.

Tell me about this room: the students describe the room, using the language that they are familiar with, ‘there is’, ‘I can see’, perhaps only the nouns, perhaps nouns and colours and prepositions.

Riddles: the kids make up simple riddles for their partners to guess. ‘It is black and it is on the chair’.

Stickers dictation: this one is more appropriate for the lower levels and was inspired by the sticker activity in the Superminds coursebooks by CUP. It is also a perfect opportunity to use up all the leftover stickers that no one ever asks for. Students work in pairs and they upgrade the illustrations in their coursebooks (as in: any illustrations) with the stickers. Student A is telling student B where to put the five stickers in one of the coursebooks and then they swap roles.

Teacher = Cheater: the kids open their books and look at the picture. The teacher tells them about her non-existent picture which is, surprisingly, very different from the picture in the coursebook.

Students = Cheaters: the kids describe their made-up rooms, also, very different from the bedroom that they are looking at.

In my real room: particularly appropriate for the online classes since the children will be already sitting in their rooms and can easily compare the illustration with the reality but can be done in the offline lessons, too.

Because: students describe the picture but instead of just focusing on what exactly they can see they try to find the rationale for what they can see. ‘The books are on the floor because….’

The story behind the picture: even such an uninspiring picture in which nothing is happening (really) can be a starting point to writing a story or telling a story. The only thing that you need is a set of questions to get them started, for example: Who lives in this room, a boy or a girl? How old is he/she? What is his / her name? What does he / she like? He / she is not in his/her room. Where is he/she? What is he/she doing? What did he/she do before? What is he / she going to do next?

Dice games: the teacher has to assign the structures to each of the numbers on the dice and these can be easily adapted to the level of the students. The standard set might include: 1 = I can see, 2 = There is, 3 = There are, 4 = It’s on / under / in, 5 = It’s green / red, 6 = It’s big/ small / beautiful. You can also include: I like, I don’t like, …is doing what, is happy/ sad/angry, there aren’t any and so on, depending on the picture. Kids work in pairs, roll the dice and describe the picture using the assigned structures.

Noughts and crosses: It takes three lines to turn any picture into a noughts and crosses game. Students play the game in pairs but before they put their mark in one of the boxes, they have to describe what they can see there in one, two or even three sentences. To keep the kids interests up, a marking scheme can be introduced, a twin grid, with points which is of course kept secret until the end of the round (in Miro – under the noughts and crosses grid, on paper – on the corner that is folded under). This way we always have a winner, the person who collects more points for the boxes that they have described. Sometimes we have two winners, too, the logical one and the mathematical one.

Memory games: first, the students get to look at the picture for a minute or two. The teacher asks them to remember the details, all the colours, actions, number of children and so on. Afterwards, the students are divided into teams. The teacher can use either a set of pre-prepared sentences some of which are true and some of which are false. The teams pick out one of the cards, read the sentence and check how much they remember. This version is more T-centred but it has the advantage of additional reading practice. In another version, the students get to look at the picture again and make up a sentence about it, for the other team to guess. They can also write their own set of sentences which will be later used to test the other team.

There are two pictures…

I can make it different: the starting point is a picture and it can be copied and upgraded in any way the teacher sees fit, using all the beautiful tools that the Miro board has to offer (google image search and icons). It will take some time but it means that it can be adapted to the level, skills and interests of a particular group and then saved and recycled forever. Just like these two pictures here…

Predict the Differences: the children can only see one of the pictures and they try to figure out all the ways in which the two pictures can differ. It might be especially effective if they are already familiar with the task format and know that they have to be looking out for different patterns, activities, objects that the people are holding, throwing, the comparisons between two objects, the location on the right or left side of the picture and so on.

Predict the Differences Quiz: the idea is the same but we add the competitive element and another skill as the teams or pairs of students are asked to write ten potential differences between the picture they can see and the other one. The team that manages to better at predicting wins.

Find the difference: we can ask the students to work in pairs but to find all the differences without showing their picture to the partner. This is not going to be a strict Movers or Flyers preparation task but we are going to raise the level of challenge and they students will really have to listen carefully in order to establish how these two pictures are different.

One big and ten small pictures: it is not necessary to kill another tree to ensure that each child has two pictures right in front of their eye. One, enlarged copy of Picture A can be displayed on the board (or on the screen) and compared with the picture B in students’ coursebooks.

Accidental friends: illustrations that were created not as a ‘find the difference’ task but can easily serve the purpose. Examples? Any of the Movers and Starters reading and writing story tasks or any of the Movers or Flyers speaking story tasks…The theme is already there and looking for differences can be a nice warm-up to storytelling or story-writing activities…

Very, very different: the illustrations that can be used in this kind of a task do not even have to be specifically created with that purpose in mind. Any (and I mean it: any) two pictures depicting ‘a bedroom’ can be used to find the differences. The crazily pink exhibit A here and practically any page of the IKEA catalogue…And pronto!

YLE listening task recycled: these can be used as a listening task, to prepare for the format and to develop listening skills but they can be later used again as a colouring dictation activity. Students work in pairs, one is in charge of the coloured pencils and speaking (‘Colour the bird yellow’), the other one – in charge of the colouring page and listening. Half-way through the activity they swap roles.

This is already more productive but the best is yet to come. Since it is a freer practice activity and students make their own decisions regarding the choice of the colours, it is quite likely that all the pictures will be different. And then…Yes, we can compare them, in groups of four.

Actually, even a leftover listening copies can be used in the same way (Saving the planet, remember?). After all, regardless of which exam it is, the students only have to colour five elements of the picture and the rest of them can be used in a speaking task like that.

Colouring printables: can be used in exactly the same way. Not all the pages will do, for example a large drawing of a cat does not really offer too much as an object to be described and I try not to use colouring pictures which are too big as some students like to be precise and colouring those might take too much of the precious time of the lesson. Other than that, just open google and type in: a child’s bedroom colouring page…Ready! And if there are any words that the students don’t know yet, we can always learn them. Even if they are not on the YLE word list and just because ‘a dragonfly’ might be a cool word to know😊

Which one is different?

Which one is different? Why?

Vocabulary practice: we only need four pictures out of is one is different. It might be a set of four objects, three of which are blue and one of which is red and the students do not even need to know the name of all of the objects. They can still complete the task by using the structure ‘It’s blue’ or even ‘blue’. We can create such by using icons or google images on the Miro board or by arranging and re-arranging the flashcards that accompany our books.

Grammar practice: the focus here can be chosen depending on the topic of the lesson and it can be limited to only ‘it has got…legs’ with animal flashcards, ‘it’s big’ with school objects, ‘I like’ with food, prepositions, Present Continuous and what not.

Kids take over: the students can make up their own chains, either with the coursebooks flashcards or the mini-flashcards (always a good idea to have two or three sets of those for each topic, they can be reused throughout the course).

Chant it! This is the only variation here that I have not had a chance to use in the classroom but if you look at it from the right angle, all of a sudden, there is a lot of potential here: each chain has four pictures and each of them can become a separate verse. The kids can clap for the similar concepts and stomp for the odd one out…

It’s a good idea but it’s not my idea: the kids talk about the pictures and describe the odd one out but they have to go on until they guess the teacher’s original idea (probably better to write it down somewhere in order to be able to prove that we have not been cheating this time😊. If the appropriate topic has been chosen (such as, for instance, animals), this activity can go on for almost forever and the students will produce a terrifying amount of language. Once they learn to think outside of the box, this same activity can be used with all the seemingly less ‘appealing’ topics, too.

How many can you think of: a similar idea but realised slightly differently as students work with the exam materials but try to think of as many reasons to odd one of the pictures out…

Well, 27 activities…Not bad, not bad at all. I might be adding to this list in the future.

I hope you have found something useful here! And if you have used it in class, please let me know!

Happy teaching!

P.S. A request!

It is very simple.

I would like to know a tiny little bit more about my readers. There are so many of you, popping in here, again and again, and the numbers of visitors and visits are going up and make my heart sweel with joy. But I realised I don’t know anything about my readers and I would love to know, a tiny little bit more.

Hence the survey.

The first VYL lesson survival kit

My first VYL teaching experience…

…was in Spain. There were eleven kids in the group, we met for two real hours but only once a week. Some of the students were five and some were six and already in school which, of course, made everything a bit easier.

Our classroom was not quite what you would call a VYL teacher’s dream come true. We had huge, wardrobe-size tables that no one, save for Hulk, possibly, would have been able to move and they were so big that when my students sat down, they were barely visible. There were only eleven little heads bobbing above these huge tops…

In terms of the space, we had a tiny strip of the floor in the aisle and another one between the first row and the podium with the teacher’s desk stood because, of course, there had to be a podium. I did not speak my students’ first language and they were beginners in English.

If that had not been enough, just before the first lesson, I was informed that one of my students was allergic to most foods, and the allergy was so strong that we were not allowed to bring anything edible into the classroom, not to put his life at risk. I was also told that, should I notice anything suspicious, any potential symptoms of an allergic reaction, I should immediately leave the classroom with my underage students (one of them unwell) and run about 200 meters along the hallway to fetch the person who was qualified and equipped with the injection that would save his life.

As a result, naturally, I spent the entire academic year stressing out to the maximum of my brain’s capacity. Because something might happen to him, he might try to tell me and I might not understand. And perhaps I don’t run fast enough to get to the office room on time…Or I have to leave all the kids in the classroom and it will be a huge traumatic experience for them…I was dying before, during and after the lesson and perhaps because of that I managed not to focus too much on the potential methodological failings of my first year with the little ones. We had fun, we learnt a lot and my kids were amazing. And, probably, because of that experience, I am what I am today. Alvaro, Jesus, Luz, Uliana, Itziar, Amalia, Oihana, Beatrice, Andre, Eva, Maria. The amazing students.

If you are about to start teaching English to preschoolers…

Let’s start from a happy ending because there will be one: you will start teaching a new group of preschool beginners, they will fall in love with you and with learning English. You will get the access to a source of pure, undiluted life energy twice a week. You will adore teaching the future to speak a foreign language. The parents will be grateful, the kids will start shouting their first words as soon as they enter the school. The songs you teach will stay with them forever and they will sing them while in the car on the way home. And, many many years later, while they are taking their FCE or CAE exam in a few years’ time, they are going to look back and smile thinking of their first English teacher. See? A happy ending.

Before you get there, though, and it is still a long, long way from now, you just have to survive the first 45 minutes of the first lesson.

Surprise!

That is potentially the biggest problem that during that first lesson anything can happen, literally anything. Some kids will have already started kindergarten so they are used to staying on their own, with ‘a stranger’. Some children have started ballet classes or swimming lessons so they know that mum is not always around and, instead, there is another adult and that they will be ‘learning’. Some kids have had a conversation with their parents that prepared them for this new experience and now they know what to expect. Some children may have even learnt a few words, some red, blue, green, pink and onetwthreefourfivesixseveneightnineten, usually like that, as one word. Some are ready.

However, it will be only some of them and this year, due to the pandemic, possibly fewer than in a regular year since for quite a few of them the academic year and the socialising would have been interrupted. The thing is that you really need to meet them in person and then start discovering them all by yourself.

What can go wrong?

Well, let me think and reminisce a little:

  • tears as soon as you enter the room (for the first two weeks straight, actually)
  • running in the hallway screaming (in their L1) ‘I don’t want to learn any English’.
  • lying on the carpet for 40 out of 45 minutes of the lesson time, looking at you but absolutely refusing to interact in any way whatsoever
  • covering their ears when you speak English
  • responding to you in Turkish (the L2), not in Russian (the L1) and not in English (the foreign language, that was a fun one!)
  • leaving the room to bring the nanny in
  • hiding under the table. Standing by the door during the entire lesson
  • speaking very very quietly
  • asking to see mum every ten minutes
  • asking why you don’t speak Russian
  • hugging the bear and not letting go

Just to name a few things.

Ten things that you can do

One. Do not panic.

Being experienced does give you some heads-up, true, but it is a bit nerve-wracking anyway, no matter how many years you have on your resume. It is quite likely that the first lesson will be an awkward one. It’s ok.

Two. The parents are on your side.

It might not always be possible but it would be great to meet the parents and let them know what you are going to do during the first lesson. Ask the parents to stay at the school, close to the classroom. You will be on your own during the lesson but it is good to know that, should it come to the worst, you can just open the door and call Masha’s dad or Tima’s mum to help you deal with the tears or the unwanted behaviour. Keep the doors of the classroom closed and collect the kids in the hallway. Line the kids up and find out what their names are. Say hello and count everyone. Open the door to the classroom and take the kids in, one by one. The parents will help you here, they will wait with their children and keep an eye of them while you are organising the students in the room.

After the lesson, take the kids out and explain the homework to the parents, too.

Three. Get ready.

Prepare a lesson plan, trying to predict what can go wrong, with the classroom management, instructions or materials and to prepare a plan B. I have found it very useful to put up a poster on the wall with a simplified version of your lesson plan, big font and colour-coded, something that you will be able to glance at without turning your back or taking the eyes off your group.

Get all your resources ready and in order. You will have your plate full as it is so you don’t need to wonder where the pencils are or try to reorganize all your papers when the kids are already in the classroom.

Four. Priorities.

One of the most important things during the first lesson and during the first ten or even twenty lessons, is working on the classroom routine. Your students have no previous learning experience of that kind. They don’t know what is expected of them because they literally, have never done that before. Go step by step, especially between the stages or when you are moving between the parts of the room. In a few weeks’ time, yes, you will be able to say ‘Everyone, let’s make a circle’ but for the time being, do get up, stand where the circle is supposed to be and call Petya. Wait for him. Then call Misha, wait for him to come. Then Marusya, wait for her to join the circle…Don’t worry that you are wasting the precious lesson time. No, you are not. You are establishing the routine and investing in the future.

Five. Your basic teaching tools.

Don’t forget that you have the most important teaching tools on you – your face, your hands and your voice. Use them to help you, to show the kids what to do, to praise them or to discipline them. They don’t speak the language, yet. Your face and your voice and gestures must match the message you want to convey, your soft voice and a smile for praising, your other voice and a serious face when you want to tell them that something should not be happening.

Six. Model.

Demonstrate. Model. Show. Always. Verbal instructions and ICQs (instruction checking questions) matter, too but your students will not know any of the words you are using and modelling will be essential. No matter what your activities are, give the instructions and do it first yourself, possibly a few times. If you are going to use a handout, prepare two spare copies for yourself – one to complete before the lesson and to use as the finished product to show the kids what the aim is and another one to be completing with the kids during the lesson.

Seven. Peer observations

Ideally, there would be enough time for you to arrange a live peer observation session with somes more experienced colleagues. Watching real kids during a real lesson can be especially beneficial, and even more so if you can have a look at the lesson plan and to talk to the teacher after the lesson. Arranging peer observations of the online lessons should be even easier to manage. In the school where I work, we also record lessons for teacher training purposes and we keep them on the database. This way, the newly qualified teachers can access them easily and watch them from home.

If none of these is available, there is still youtube and lots and lots of videos of teachers who want to share their activities and favourite tools. Every little does actually help. A lot!

Eight. Do the reading.

There might not always be enough time for the extensive reading and research before the first lesson but you have to start somewhere. Have a look at these two posts, on the methodology videos and the literature devoted to teaching English to very young learners.

Nine. Smile.

No matter what, keep it up. Smile.

Ten. Bring the ferret.

Last but not least, to quote a great mainstream Hollywood manual into the work with the very young learners ‘The kindergarten is like the ocean. You don’t want to turn your back to it’. Kind of.

But, actually, go on and re-watch the Kindergarten Cop with your teacher’s eyes. Especially the ferret bit…

Have a good one! And remember – the second lesson will be better than the first and the third one – better than the second one. I promise!

Happy teaching!

P.S. Here you can read about how I plan my lessons with pre-schoolers and here about our entering the room routine.

There is one more, newer post, with more focus on the teacher during the first VYL lesson.

Your 10 basic flashcards games

One hundred.

It is the number of things in which you can manipulate the set of flashcards during the lesson and call it ‘a game’. That means that to teach, to introduce and to practise, to have fun and to change activities fast not to lose kids attention you really only need a set of flashcards and a table or a carpet. No more.

That means that you can mix and match, engage the kids and keep them involved for hours on end. Almost.

But before I take on the challenge of typing all those 100 up, here are the staple ten. The basics of the basic, the everyday. Five to practise receptive skills and five to focus productive skills.

Imagine that you have drilled all your words already (this will be another post, too!)

1. Finger up! (group)

Put all the flashcards face up on the table. Ask the kids to show you the indicative finger and put the hand up. This will be your punctuation mark here. Say ‘Finger up’ and all the kids and the teacher put their hands up, with the indicative finger out. Say ‘Touch the banana’ and encourage all the kids to lower their hands and put the finger on the banana flashcard. Then again say ‘Finger up’ and repeat with other words.

It is a great game especially for the beginning of a new unit or the beginning of the course as the kids will be basically following what you are doing and doing the same thing at the same time.

Variations: You can include different verbs i.e. pat the bananas, scratch the bananas, knock, stroke, etc.

Production: After a while, regardless of the variation, you let them lead the game and they are…producing!!!!

2. Yes and No (group)

Put all the flashcards face up on the table or on the carpet. Use your favourite punctuation mark. Point at one of the cards (banana) and ask ‘It’s a banana.’ ‘Yes?’, when kids start answering, by nodding or using their L1, provide the English word ‘Yes!’ and encourage them to repeat. Don’t forget to nod your head here. Point at another card (grapes) and ask ‘It’s a banana’ Yes?’ when the kids start answering, provide the English word ‘No!’ and encourage them to repeat. Don’t forget to shake your head. Repeat with the other words. The first time you play, it might be a good idea to use only singly words, to make sure that the rules of the game are perfectly clear but you can quickly start using full sentences, in singular and in plural, to model the language. There is no need to make things overtly simple.

Variation: Depending on the topic, it is a good idea to use the structures, too, for example with fruit: I like bananas (and picking up the banana flashcard), clothes: I am wearing jeans (picking up a t-shirt), I’ve got a kite (toys flashcards or pets) etc. This way they are not only going to learn to recognise the key words but they will be practising listening for detail with more challenge and getting a lot of exposure of the target language.

Production: After a while, regardless of the variation, you let them lead the game and they are…producing!!!!

3. Apple, please (group)

Give out all the flashcards, one per child. Use your punctuation mark and say ‘Apple, please’. Reach out your hand, towards the child who is holding the apple (if you can see who it is😊). After you have received it, say ‘Thank you’ and ask for another fruit. After a few rounds, add ‘Here you are’, too.

Variation: If you have a big group, you can ask for two words at the same time. Using a full question form is a good idea, too ‘Can I have an apple, please?’ All the flashcards on the carpet or on the table, and with calling the kid’s name to ensure that everyone gets a chance to play and that they don’t fight over cards.

Production: After a while, regardless of the variation, you let them lead the game and they are…producing!!!!

4. The duo (individual students)

Sit in a circle, put two cards on the carpet ie a banana and an apple, in a place where everyone can access them. Say ‘Masha, it’s a banana’. Masha picks up the banana flashcard and puts it away. Add another flashcard so that there are always two ie an apple and a pear. Say ‘Katia, it’s a pear’, Katia picks up the pear card and puts it away. The teacher adds another card etc.

Variation: You can change and vary the structures, even with the same set of flashcards i.e. with fruit: it’s a pear, I like pears, I don’t like pears, pears are green and so on. You can also ask the students to leave the flashcards that corresponds with the sentence and take away the incorrect one.

Production: After the kids have learnt how to play the game, nominate two students, they make simple sentences for each other. Then, another pair etc.

5. Get up! (pairs or trios)

Give out the flashcards to students, one per person. Go around the circle and call out all the words, one by one, slowly. Use your regular punctuation mark for starting an activity* and play the game. Call out two of the words (‘banana’ and ‘apple’) and motion the kids to stand up in the circle. Praise them and ask them to sit down. Call out two other words, wait for the kids, praise and ask them to sit down. Repeat with any combination you see fit. Then start calling out three words or even four. Kids listen and get up.

Variations: If it is a revision activity and they know the vocabulary, they can be holding two or even three cards.

If they already know a structure, instead of using single words, the teacher can use them in a structure, either very simple and generic ‘I can see a banana and an apple’) or something more connected to the set of vocabulary that you are practising ie I like bananas and apples.

Instead of getting up, the kids can also raise a hand, stamp their feet or clap their hands.

Production: After a while, regardless of the variation, you let them lead the game and they are…producing!!!!

6. Open your eyes (the group)

Put all the cards on the table or on the carpet, encourage the kids to call out all the words. Say ‘Close your eyes’ and make sure that they all cover their eyes, turn over one of the cards. Say ‘Open your eyes’ and call out all the words, in the end point at the card that has been turned over. After they guess, make sure everyone says the word out loud. Repeat.

Production: Let the kids take turns to lead the game.

7. Mime it! (whole class)

Very easy if you start preparing kids for it while introducing the vocabulary and helping them associate each word with a gesture.

Pick up one of the flashcards, say ‘3…2…1!’ and show the word for the kids to guess. Encourage them to produce a full sentence i.e. ‘It is a cat’. Let the kids lead the game as soon as possible!

Variations: If you have introduced some of the simple adjective you can start miming sentences. Pick up two flashcards (differentiated either by colour or size, to make it all go smoothly), say ‘3…2…1’ and mime the adjective and then the noun. Kids produce the sentence ‘It is a funny cat’ etc and it is quite likely that most of the sentences will be a bit ridiculous (but memorable).

8. Merry-go-round (group)

Start with one travelling flashcard. Have the kids sit or stand in a circle. Give the student on your left one of the flashcards, encourage and motion for them to pass the card to the student on their left. Let the card travel, then say stop and ask the student who is holding it to say the word out loud. Repeat a few times for them to get used to the idea.

Start the game all over but keep adding cards so that there are a few of them travelling. Say stop and have the kids call out the word they are holding at the moment.

Variations: There is a lot of potential for producing full sentences as soon as the kids get the idea and the key structure used will be related to the vocabulary, i.e. ‘I like’ with fruit, ‘I am wearing’ with clothes, ‘I can’ with verbs, ‘I’ve got’ with pets or toys, ‘I go to school by’ with transport etc.

This is also a great opportunity to teach the kids the word ‘nothing’.

9. Disappearing words (whole class)

Put five flashcards in a row, on the floor or up on the board, go from the beginning and call out all the words. Ask the kids to close their eyes and turn over the last card in a row. Call out all the words from the first one, in the same order and when you get to the last one, pause and wait for the students to say / shout / whisper the last word. Check quickly if they were right, show the cards to the kids, put it up covered again.

Ask the kids to close their eyes and turn over the last but one card. Ask the kids to open their eyes and call out all the words starting from the first one. When you get to the last but one, pause and wait for the kids to say the word, then the same with the fifth one. Proceed until all the words are covered up.

Variation: To help the kids remember, you can use a different gesture for each card, it can be either something related to the meaning of the word ie by miming the words or something that will help them remember ie knocking at the card, snapping, touching, clicking fingers, stroking it.

If you teach a big group, you can divide the class into two teams, one team will be holding the cards, one each, the other team will be guessing the words.

It might be also a good idea to use a full sentence ie I like to eat bananas, apples, peaches, plums and grapes, instead of single words.

10. Secret word! (whole class, pairs)

Revise the flashcards that you are going to be playing with so that the kids have a chance to become familiar with the images, the set of words and the colours. Then hold the flashcards to your chest. Ask ‘What’s the secret word?’ and model ‘Is it a kite?’ ‘No’. ‘Is it a doll?’ ‘No’ etc.

Variations: When they are playing the first time, they are quite likely to give you only separate words but it is worth encouraging them to produce full questions. You can either use ‘Is it…?’ or ‘Have you got…?’

Production: After a while, the students are given a chance to lead the game, first a student vs the rest of the group, later on in pairs, too.

*) ‘Punctuation marks’ are all the signals that the teacher uses to announce a start of a new activity. It can be clapping of the hands, it can be counting down from 5 to 1, it can be a bell, it can be snapping your fingers, it can be a chat ‘1, 2, 3! Eyes on me!’