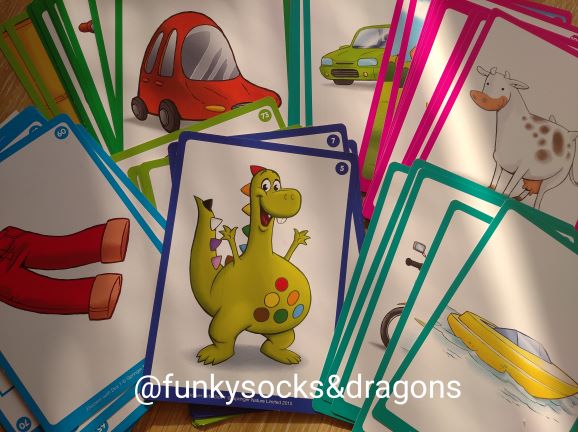
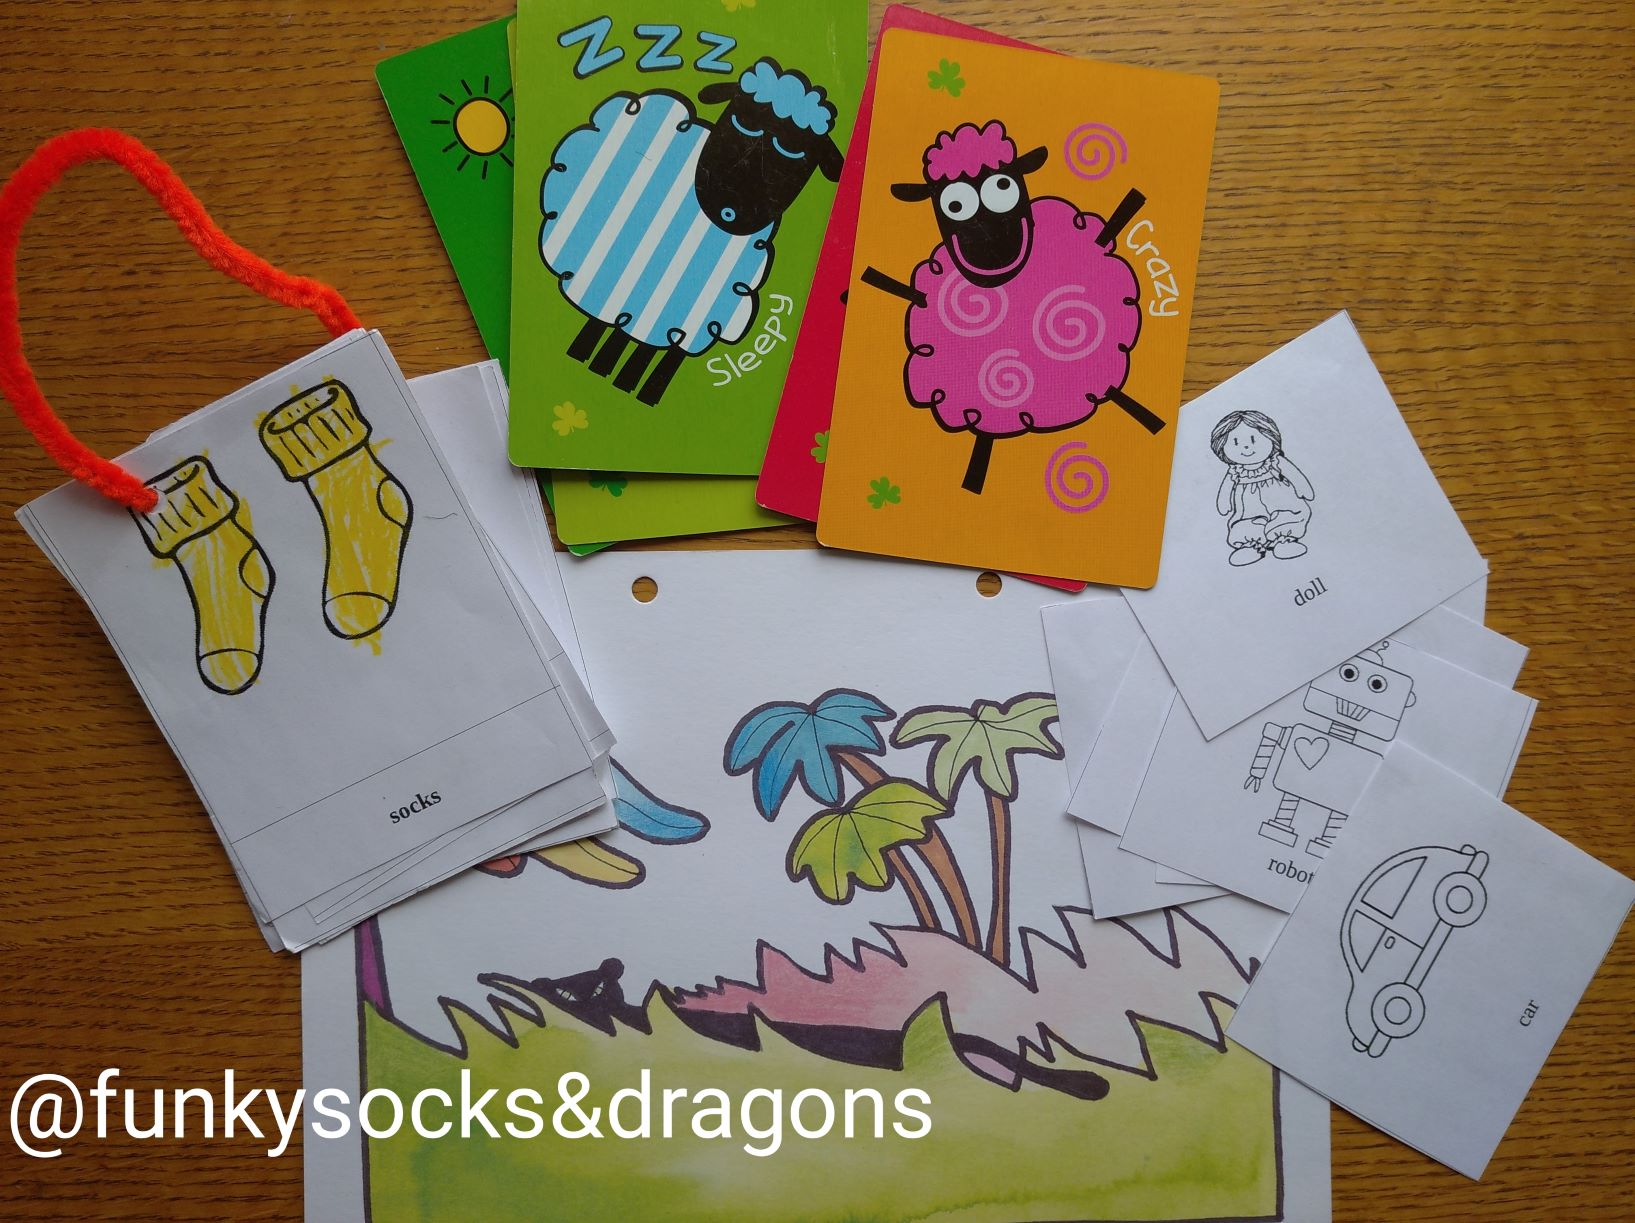
More than drilling, more than flashcards. Teaching vocabulary to young learners.

It’s been six months now (and four courses) since we introduced the individual consultations to our YL and VYL course and a lot of good has come out of it already for the course, for the trainees and my blog. This post today will be dedicated to one of the course participants, Valentina, who came to the meeting with one question only, namely: ‘I am bored with teaching vocabulary through flashcards and drilling’. This was when I realised that we never really talked about the variety in that area. Hence this post.
Back to the basics

…or our gurus. For anyone who is not familiar, I would recommend getting hold of Carol Read’s chapter on teaching vocabulary and grammar and all the basic concepts as well as her post in the series of the ABC of Teaching Children in which she highligts the need for the crystal clear meaning, the context as well as opportunites for memorising and for practice.

Carol also offers a lot of ideas for the classroom (as promised) and if you are looking for more, please have a look at the bilbliography where I have left some more interesting links, for inspiration and from two different areas, the teachers of EFL/ESL and just children learning new words. Many of them are quite recent publications so have a look! There is lots and lots to read.

For that reason, also, this post here will focus not on practice activities but on ways of introducing vocabulary to primary and pre-school students, more than just flashcards.

Electronic flashcards

‘Electronic flashcards’ is an umbrella term for a great variety of resources that can be used in the YL classroom. I will try to include here at least the few basic ones

  • Wordwall (wordwall.net), with all its growing number of templates and options. You need to join the community but the membership is free and it gives you access to everything that any member ever created and made public. You can, for example, get access to the whole library that I have created (Azapart). The ability to create resources is only available to the members with subscription but it is cheap and definitely worth it. My favourite resources here to introduce vocabulary include stencil flashcards, cropped images, simple word cards and flashcards or flashcards with the audio.
  • Simple video flashcards of which there are plenty available on youtube, such as offered by Maple Leaf Learning. There are also such products as EFL Kids Videos that present not only vocabulary but also vocabulary + structures.
  • Videos that not only present the new vocabulary but that also offer an option of a game, for example places in the city from Smile and Learn where you get a presentation and a guessing game, ‘What is it?’ games from Fun Kids English or drawing – guessing games from Games4ESL.

Sounds

This might be a more obvious resource when it comes to some topics, such as animals, pets, farm or jungle but it is definitely a lot more potential here. Sounds can be also used to introduce the vocabulary of transportation, places in the city, instruments, Present Continuous or everyday activities and objects, a day in sounds or even weather.

It needs to be mentioned that these materials were not created as educational materials with a specific aim to match the content of one coursebook or another and they are not used to replace the official published materials. They only help to introduce the topic and the idea in an interesting way, with at least some of the items that we are required to cover according to the curriculum.

Gestures

I am a huge fun of using gestures in the classroom. The gesture is king after all! For a good few years now, whenever we introduce new vocabulary we add gestures to it, to help clarify the meaning but also to give the children one more channel that might help them remember and recall the meaning of these new words. This kind of miming can be upgraded to include a lot more speaking (see: a post here) and the children can be involved and invited to come up with their own gestures for certain phrases and express themselves in that way, too! It is not only for the youngest of the youngest. Once we introduced, even my 8 – 10 A2 year-olds loved working with this form of expression.

Realia

Like in the case of sounds, realia would be something that naturally springs to mind when we talk about teaching school objects, food or classroom vocabulary and, perhaps, if you have any access to any friendly children who are willing to share their collection, perhaps also to teach toys, transport or even animals. The other topics seem to be impossible. Or do they?

I think my realia creativity had a chance to skyrocket during the pandemic while we were all stuck at home and with a very limited access to all those beautiful things that we would normally use. A blessing in disguise?

My solution is relatively un-revolutionary and is based on using symbols, items that we agree stand for our chosen concepts. Here are some examples:

  • rooms in the house: a spoon = the kitchen, a pair of socks = the bedroom, a remote = the living room, a key = the hall, a toothbrush = the bathroom
  • weather: gloves = it is snowing, sunglasses = it is sunny, a cap = it is warm, a kite = it is windy, an umbrella = it is raining, a scarf = it is cold
  • school subjects: a tshirt = PE, a mouse = IT, paints = Art, counting sticks = Maths, dictionary = English, a book = Russian, a magnet (from abroad) = Geography, a paper crown or a photo of a king = History etc
  • party aka characters: a star = a sheriff, a crown = a prince / a princess, a red nose = a clown, a witch’s hat = a witch, a flower = a gardener, a plastic stetoscope = a doctor etc
  • seasons: just lots of things, clothes and accessories which we use in winter, spring, autumn and summer
  • family: accessories that different memebers of the family might have, a car = a brother, a doll – a sister, a newspaper = daddy, wool = grandma etc.
  • body: accessories and objects which we use with different body parts: glasses: a nose and ears and eyes, socks = feet and toes, a spoon = a hand and fingers. The confusion might be even beneficial here because we will be repeating the words a number of times.
  • free time and verbs: different objects and accessories that we use, for example: a pen = to write, a ball = to play, a spoon = to eat etc.

Song

In a majority (almost certain here) of our coursebooks songs are introduced as a means of practising and revising vocabulary and grammar but this does not have to always be the case, not when we are in charge.

Since I discovered the existance of the amazing Pete the Cat who is rocking in his school shoes, I have not taught the places in the school (and Present Continuous) in a different way. The song is beautiful, fun and very catchy and the video illustrates the idea of both the vocabulary and the tense in such an obvious way that I am not even looking for any alternatives. We start with the song, we enjoy the music, the video and Pete and only later, we move on to flashcards, drilling and all the other practice activities.

Here are some more examples of songs that can be used in the same way

E pronto? E pronto!

Story

Whatever we do with songs, it can be done with a story. A video, a storybook or storycards can be the starting point in a vocabulary lesson. Here are my favourite storybooks to teach vocabulary:

  • ‘Elmer’ by David McKee to teach jungle animals
  • ‘Marvin Gets Angry’ by Joseph Theobald to teach emotions
  • ‘Cat’s Colours’ by Airlie Anderson to each colours
  • ‘A Very Hungry Caterpillar’ by Eric Carle to teach food
  • ‘Zob’ by Julia Donaldson to teach helth problems

To name just a few. Introducing them will give you a ready made context and it will be a pleasure for the kids to get back to the story over a series of lessons and to be more and more involved in reading and retelling the story. That is a brand new level of the sense of achievement and of the meaningful lessons.

Posters

Admittedly, in the past, a few years ago or in the previous editions of the coursebooks, posters were a more frequent quest. They are not as common today although different schools produce their own posters and so do publishing houses, although not necessarily in connection with a particular title. For that reason, I will extend the definition of poster to ‘any large size visual with a variety of elements’ in order to be able to include any silly pictures, clip art creations to be found on google (really!) or the picture wordlists as these absolute beauties available on the CUP website for Starters, Movers and Flyers exam preparation (but not exclusive to these).

I am a huge fan of using visuals in the classroom and I am proud to say that I have come up with a plethora of ideas for language practice. You can find them in two posts: All you need is…a picture. They can be displayed on screens or interactive whiteboards or even printed and laminated.

As regards vocabulary introduction, however, here are some ideas:

  • labelling the items in the picture together with the kids
  • covering some parts of the pictures with the post-it notes, to elicit from kids (It is a city. What can we see here?) and then to uncover the picture step by step while introducing the equivalents of the words the kids provide, in English
  • covering some parts of the picture with the post-it notes, to uncover them step by step while clarifying the meaning of the words and including elements of drilling
  • covering some parts of the picture with the post-it notes, to play ‘What’s missing?’ (although this slowly moves towards controlled practice / drilling)
  • pointing at two objects in the picture and calling out a name for the kids to recognise. Here, the teacher can use hands (Left! Right!) or, if it is too confusing, two markers of different colours (Blue! Red!), a fun exercise for the auditory practice and word recognition.

Coda

All of the activities mentioned above can be used during the practice stage and they are not to replace flashcards and drilling but to supplement or replace them and to introduce a bit of variety and a breath of fresh air, for the students and for the kids.

The choice will depend on the age and level of the students and, naturally, on the specific set of vocabulary.

Bibliography

Carol Read (2007), 500 Activities for the Primary Classroom, Macmillan

Carol Read (2011), ABC of Teaching Children, V is for Vocabulary here.

How to teach vocabulary: 5 fun and easy ideas (2020) from Begin Learning.

17 ways for kids to learn new vocabulary (2020) from Imagination Soup.

Kids and vocabulary (2011?) from British Council, Teaching English.

How to teach vocabulary. Twinkl’s super seven-step guide (2023) from Twinkl.

6 Science-based tips for teaching your kids vocabulary…the fun way (2022) from Maya Smart.

5 fun ideas to make vocabulary jump out of the page for young learners (2021) from CUP.

30 meaningful vocabulary activities for every grade (2023) from We Are Teachers.
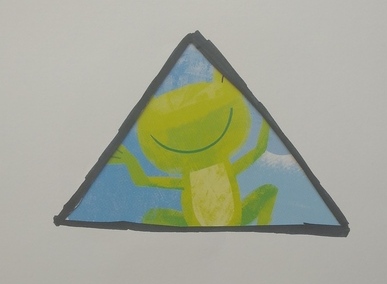
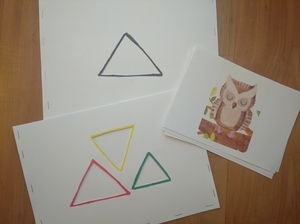
Crumbs #28 Funky envelope

Ingredients

  • a set of flashcards
  • two pieces of cardboard stapled together on three sides
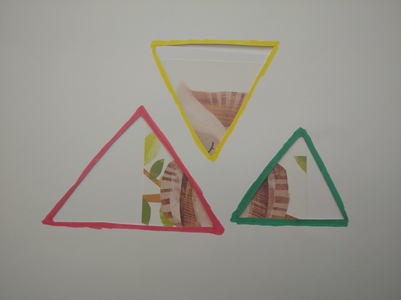
  • shapes cut out on the front page (cut out before stapling)

Procedures

  • hide the flashcards inside
  • show the students only a part of the card on the top, through the cut-outs, ask the kids ‘What is it?’
  • take out the card and proceed with the rest of them
  • hide the flashcards inside
  • show the students only a part of the card on the top, through the cut-outs, ask the kids ‘What is it?’
  • take out the card and proceed with the rest of them

Why we like it

  • this is a variation of the Through the Keyhole activity that I once saw in the I Spy coursebook. However, this original version included an A4 sheet of paper with a keyhole that the teacher needed to cut out and then move the card over the flashcard. I found this tool a very interesting one but, at the same time, a bit awkward to use as the teacher needed two hands to manipulate the cards, there was a chance that the children could still see bits of the card apart from the keyhole bit and the activity involved a lot of picking up and putting down the cards. All in all, too clumsy to handle.
  • to make a funky envelope you need only simple materials (A4 cardboard or simple photocopying A4 paper although it will not be as durable, white, colourful or recycled), a pair of scissors and a stapler or glue. As soon as one envelope gets destroyed, you can easily replace it with a new one.
  • you can have one simple cut-out shape or a selection of different shapes all over the envelope.
  • all the flashcards fit in nicely inside, the teacher can manipulate them more easily. I sometimes turn the envelope over, to change the cards inside and to add to the whole ritual.
  • I normally use when the kids are already familiar with the images on the flashcards not to make the task too challenging, in lesson two or three of the unit. However, there were also cases when I used the envelope to introduce a brand new topic and to raise the level of challenge.

Happy teaching!

Much Ado About Nothing: realistic flashcards vs illustrations and the EFL world.

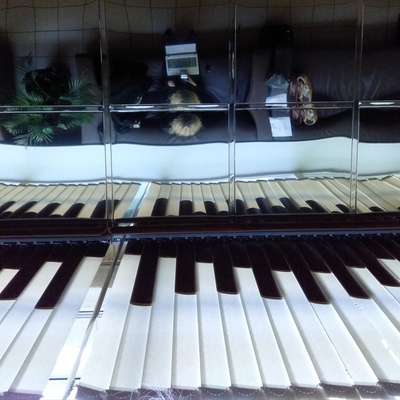
Realistic vs non-realistic? Am I am really inside of a huge glass piano?

Preface

A while ago I got into a discussion on why the realistic flashcards aka photographs are much better for YL than the cartoon flashcards.

Oh wait, not quite this way. First (and foremost), as I am typing up this post, I am glancing left and right, for support. To the right, towards the shelf with my storybooks and all the ‘unrealistic’ illustrations and all the imaginary characters and to the left, where the materials for the next Lesson at the Museum are lying (this week: Natalia Goncharova, more of that – soon!). At this point, I still cannot formulate it very well but my guts (and a few years in the classroom and around kids) are telling me that realistic and photographic IS NOT the only way. I object.

Second of all, this discussion, it just was not a discussion at all. I must admit, I am a bit naive when it comes to the social media and I would like to believe that teacher meet there to exchange ideas, to learn from each other, not to preach, making it look like theirs is the only way to do things and recommending that I should do my homework and read first before I voice an opinion (as if the empirical evidence did not matter at all).

Enough of this bitterness, though. Here I am after all, doing my own reading and research, with mixed feelings, if I am to be perfectly honest. A little bit anxious (because what if the research proves that I was wrong, eh? What then? (I am laughing here) and a little bit excited (because what if the research proves that I was right? (still laughing).

This introduction was planned and written before the actual reading did happen but you, dear reader, looking at the title (courtesy of Mr W. Shakespeare of Stratford-upon-Avon), you can guess now where it is all going (based on the research that I have managed to do so far) so if you have very little time on your hands, I will make it easier for you, here is a summary of the whole post:

When it comes to choosing between the visuals with a high degree of iconicity (aka the resemblance between the picture and the object) such as photographs and the visuals with a low degree of iconicity such as cartoons, storybooks illustrations, there isn’t only one answer, one way out, one approach. It is not a case of black and white, good and bad, left or right. It is a beautiful case of ‘well, it all depends’. Done.

Now, if you have more time, follow me. There is more to come.

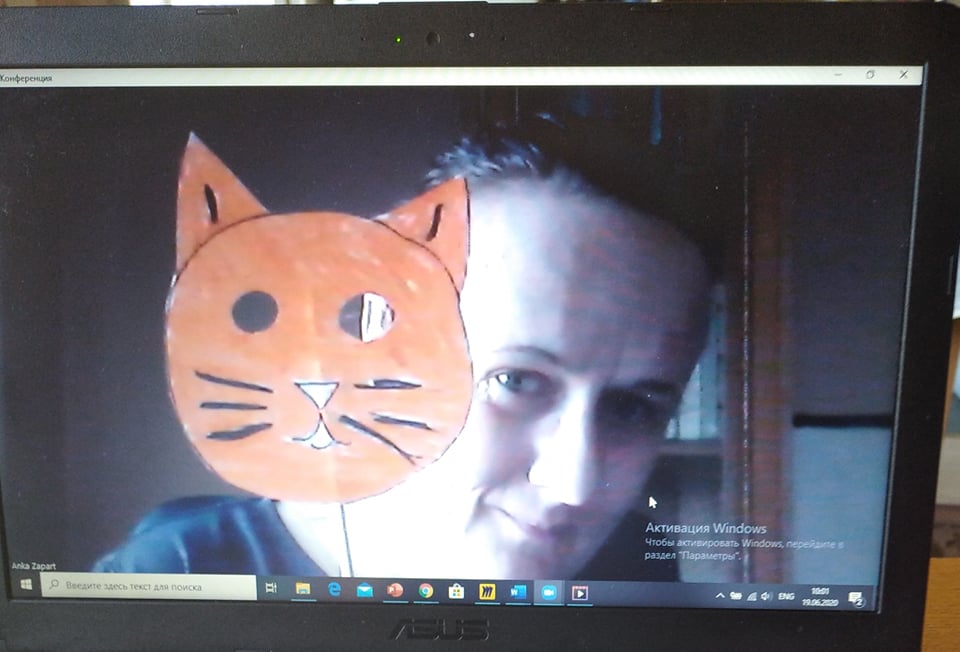
Realistic vs imaginary: My teacher is a cat.

Act I: Why choose the real photos

The first (and the most important question) to ask here is: How old is the child? A picture is a symbol, a representation of the real object and children will require a certain level of cognitive skills development (such as symbolic development, analogical reasoning, reasoning about fantasy and reality) in order to be able to process that image and to relate it to something that they know from real life.

For example, newborns, who have not become symbols users, when presented with a photographic image and a real object, would always choose the real object over the visuals but, at the same time, if the real object was not present, they would interact with its image in exactly the same way as they would with the real object. These examples come for a truly fascinating article by Gabrielle A. Strouse, Angela Nyhout and Patricia A. Ganea which you can find here.

As shown in other studies they mention, too, it seems that although these young children can transfer the concepts both from cartoons and photographs or realistic drawings to the real world, the more realistic the image the easier the transfer. And for that reason, we find plenty of recommendations for such books to be used with the younger pre-schoolers. This attitude seems to be especially popular according to the Montessori method (although to be honest, I am not very familiar with it, I know it only from reading, not from the classroom, so forgive me for any inaccuracies or faux-pas that I might commit here).

Another interesting argument, and this time applying to not only the youngest children, is how the information presented in the picturebooks might have an impact on children learning about the world. As Strouse (et al) claim, it seems that ‘Fantastical context used in stories may cue children that information presented in books is not transferable to real-world contexts’, especially when the children do not really have any opportunities to connect the book world with the real world because, for example they live in the city and have never been on a farm, or are not supported by adults in their journey through books. The authors claim that it might impact the learning of physics and biology or moral learning. All these arguments would support the use of photographs and realistic cartoons.

Apart from that, there is the obvious argument, applicable both to children, teenagers and adults, alike – we like photographs. According to the professionals such as graphic designers (because this is where this reasearch has taken me, too), photography is used when we strive for accuracy, professionalism and when promoting the object is the real aim. The latter two might not really be relevant to the world of EFL and ESL but the first of them, accuracy is going to be our key word. When presenting vocabulary to children we want them to understand clearly what we mean and a photograph of an elephant will illustrate it better than a drawing of an elephant. We might not only see the tiny little details such as the shade and the texture of the skin but, quite likely, the elephant will be photographed in a natural environment so we will be also able to notice how big it is and what kind of a habitat it lives in. The elephant will most likely be doing something, walking, running, eating or sleeping and this will help us understand a bit more about it. Not to mention that it will also help us produce more language (the secret aim for anything that the English teachers do).

It seems to be especially important in the English lessons while teaching the concepts that students are not familiar with and which they do not encounter in their real life such as the jungle animals (while teaching in Russia), snow (while teaching in Brazil) or Polish pierogi (while teaching outside of Poland). The photographs will help the children understand these concepts better than drawing, although, it has be said that no photographs of snowy landscapes will help you get the real idea of what winter is like unless you have rolled in snow yourself and unless you have actually tried to catch the snowflakes on your tongue. As regards preschoolers, there arises one more question, too – Should we even introduce the concepts, ideas and vocabulary that they are not familiar with in their L1 and in their lives? My personal (and very subjective) answer would be: ‘no’, not in the EFL context, with a limited language exposure and the limited lesson time available. With a very few exceptions, of some cool animals. Perhaps.

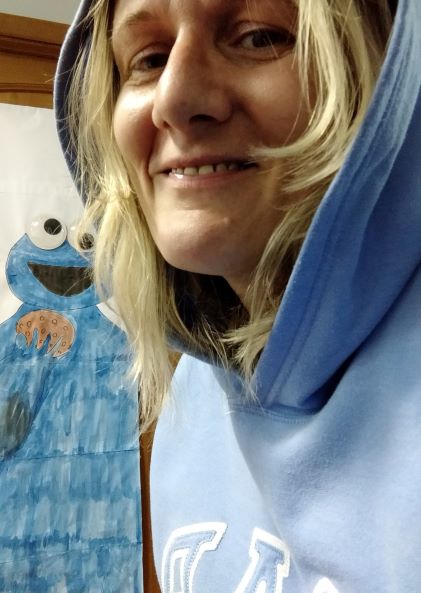
Realistic vs illustrations: Two Cookie Monsters

Act II: Why choose illustrations

First and foremost, as children are growing, they develop their cognitive skills and they become better at recognising symbols, using symbols and, last but definitely not least, at creating symbols (here you will find my earlier post devoted to symbolic representation and the EFL with your starter kit). Using illustrations, cartoons and drawing is necessary!

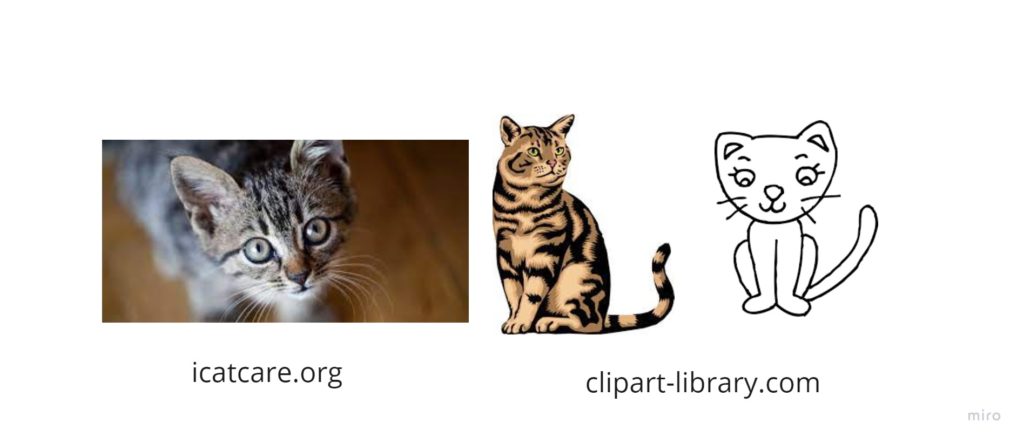
Children are progressively better able not only to distinguish between these and label them as more realistic and a less realistic representations of an animal…

…they might also appreciate the cat on the far right as it is most likely to resemble the cats that they draw in their pictures. And as they are learning to hold a pencil and to produce marks, scribbles, lines and circles, it will be quite a long time before their drawings look like the cat in the middle or anywhere near the cat on the far left. As Bernadette Duffy (see bibliography) says ‘If we intervene with a view that the purpose of art (or, in this case anything that children create (own comments) is to produce an image that is as realistic as possible and therefore think of children as failed artists we may do great harm by imposing inappropriate expectations that do not match children’s developmental stage‘.

Then there are the visual arts and these are full of ‘hurdles’ for a rational mind. Picasso’s faces are far (far far) from realistic. Chagal makes his characters float in the air, as if they were kites (sometimes accompanied by goats). Warhol stubbornly chooses the ‘wrong’ colours and Malevich replaces the whole world with one (amazing) square. And then there is Miro, Bosch, Rothko and many, many, many more. It is, of course, possible to give up on teaching art to such young children, but, before you do, please read why it is a good idea and how it benefits them. For that very reason, all the major galleries and museums include programmes for kids.

As for the graphic designers, among the advantages of the illustrations is the fact that they can be used whenever it is necessary to show the unique features and to stand out, since all the photos of the cat might look the same and the drawings will differ as they will depend more on the artist style, abilities and techniques, when a simple design is needed (for example an icon) and to depict the imaginary.

The last argument seems especially fitting in the world of the early years. Or in the classroom. Children love stories and these feature real children, talking animals and a whole array of imaginary characters such as mermaids, fairies, dragons, dwarves, fish with fingers and children who are going on a bear hunt (something that you should not really be doing in real life, not when you are five and, actually, although this is yet a very personal opinion, never ever ever). This imaginary world is a part of being a child and children do grow out of it, eventually and naturally. Although, still, some of us, even at 40, we like to revisit this world, accompanying Harry Potter to Hogwarts, Frodo to Mordor and Zima Blue in his search of the meaning of life.

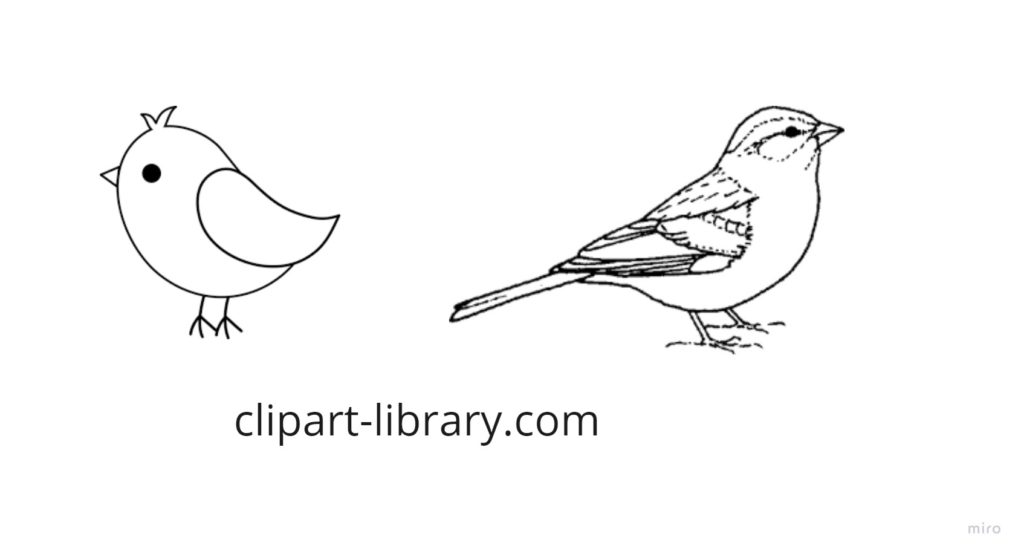
Another thing is that, as a material designer for preschoolers (and I am that, too, as all teachers are), I sometimes tend to choose illustrations over photographs specifically because they are simple and easier to colour for my 3- and 4-year-olds and because I want to convey the general meaning of the word ‘bird’, rather than anything specific, for instance ‘a sparrow’

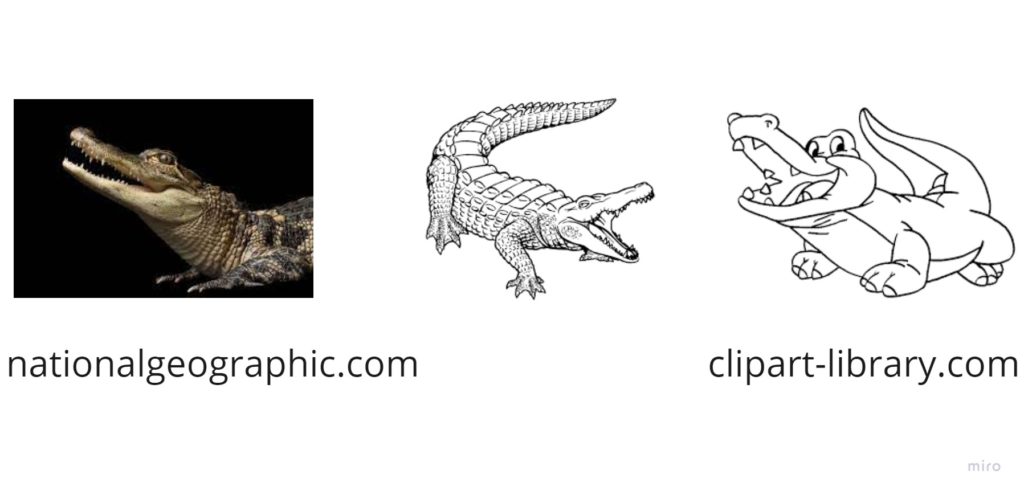
Another reason for choosing the illustrations over more realistic drawings or photographs is that some animals look too realistic and scary. I am one who does not really like touching the spider flashcard (cartoon, but too real and disgustic) and some of my students feel the same way. So, in case of a crocodile, for instance, I might opt for the one on the far right.

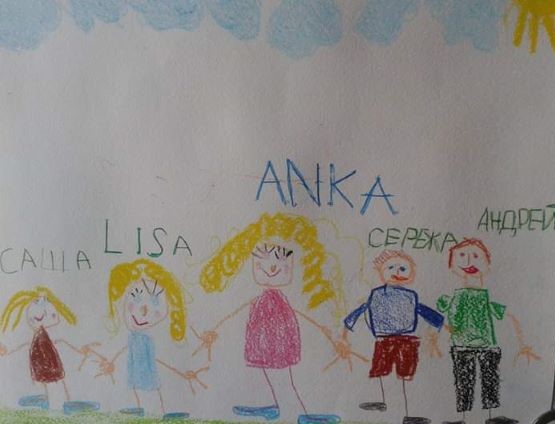
Realistic vs imaginary: a class portrait and a teacher of seven fingers (but with amazing eyelashes:-)

Act III: Why do we have to choose? Variety is the answer!

That’s it. A ridiculously short Act III. Nothing more to add. We can and we should use both. Also because the realistic is not always true, either. Have a look at the photo that introduces this post once more: Am I or am I NOT sitting inside of a huge glass piano?

I hope you have enjoyed reading this article as much as I have enjoyed researching for it and that this is definitely not the end.

And a request to you, dear read. All of the sources that I have used directly have been referenced throughout the post. Below you will see some other treasures that you might find interesting. If you have anything else to add to this list – please, let me know in the comments sections.

Two requests, actually – if you have any stories related to children’s reactions to the photographs and visuals used in class, more or less realistic, please share these, too!

Happy teaching!

Bonus: One of my favourite film adaptations
Много шума из ничего (1993) – IMDb

Bibliography and further reading

All the sources that I have quoted have been referenced throughout the post.

Here are some more things that you might want to read

Why children need real images – how we montessori

Drawings – stages, meaning, Definition, Description, Common problems (healthofchildren.com)

An introduction to the visual arts in early childhood education – THE EDUCATION HUB

Teaching Preschool Art Lessons — KinderArt

Around the world: Art allows all children the freedom to explore (pearsoninternationalschools.com)

Why Real Photos? What about Cartoons? (stageslearning.com)

Picture This! Why Books with Real Photos Help Kids Discover the Big, Wide World (kindercare.com)
Pictures and Images in Flashcards – Are They Even Useful? (universeofmemory.com)

The Truth about Flashcards for Toddlers Who Don’t Yet Talk – teachmetotalk.com

The Pictorial World of the Child (nih.gov) (a review of a wonderful book that I am getting as soon as I can come up with a reason to treat myself)

How to Introduce Toddlers and Babies to Books • ZERO TO THREE

Which Works Better: Illustrations or Photographs? – Ecommerce Platforms (ecommerce-platforms.com)

5 Reasons To Choose An Illustration | Holywell Press

Bernadette Duffy, Supporting Creativity and Imagination in the Early Years, Open University Press, Maidenhead

I want my flashcards please!

Kids in the online classroom: how to survive the transition.

Dear teacher!

The world sucks at the moment, oh yes, it does. Let’s just face it.

If, like me, you have always considered yourself a dinosaur teacher, who adores paper, flashcards, realia, toys, little cards, magic wands, running around, crayons, craft and storytelling and if, like me, you have done your best to stay away from technology in your classroom (well, apart from youtube, perhaps), you are not in the best of moods now.

However, here is some good news. First and foremost, you are a teacher and, I bet you, you are a great teacher. A resourceful teacher, a creative teacher, a dedicated teacher. A teacher who works hard to develop and get better and better and better. A teacher who is greeted with smiles and cheers by the students.

Dear teacher, you are going to be just fine and you are going to rock your lessons even in the virtual world. This is just the beginning of this journey and as we proceed, from week to week and from lesson to lesson, we are going to be getting better and everything that is not perfect (yet) should be considered hiccups and hiccups only. Not the end of the world.

I am not a great expert at teaching online. Not yet. Never wanted to be, either. But I will turn this horrible year into an opportunity to take the bull by the horns and to raise and shine.

Then, eventually, I will be back in my real classroom because this is where I belong. The sooner the better. In the meantime, however, I am just going to share with you some of the things that can be done in our online young learners lessons. Today: flashcards.

Scenario A: you have your own flashcards (from the bookshop, handmade, printed and/or printed and coloured-in from one of the websites).

Yes, yes, we are going to be developing technologically and we will be doing anyway but does it mean that we have to give up on the real flashcards? No, absolutely not. You can still use them while online.

Guessing game: it will have to be you versus the student or the whole class. When you are leading the game, hold the flashcards, as usual, and describe or mime the word. When it is the students’ turn, chose the flashcard without looking and bring it closer to the camera for the students to describe for you. For a more dramatic effect you can also close your eyes😊

Guessing game B: revise all the cards, repeat the more challenging words, too. Put the cards in a box or on the table, without looking at it. Encourage the kids to guess what it is, try guessing yourself, too. After a few seconds, say ‘Let’s check’ and uncover the card. Congratulate the students who guessed it.

Slow reveal: You can still use the funky envelope but your camera is your best friend here. What’s hidden – stays hidden but what slowly emerges from the left of right or top or bottom…is a lot of fun.

Left and right: works in the classroom, works online. Get a flashcard in your left hand, get another one in your right hand. When the hand is up, the students have to say the word.

Topsy-turvy: works in the classroom, works online. Put two flashcards back to back, turn them over in your hands a few times. When the students see the card, they say the word.

I can’t read: get a set of flashcards and a set of word cards (even easier to home-make these). Show the kids the flashcard and put a word card on it. Ask the kids to read the words and tell you if these match. To make it even more challenging and more fun you can create double-sided word cards (a regular word and a scrambled-up word). Put up the flashcard, add the scrambled-up word, ask the kids to read it, write it unscrambled in their notebooks and check immediately.

Scenario B: Your students can print their own flashcards at home

That is the optimal solution because then you can basically play any of the games that you have used so far in the classroom.

My bus is green: everyone colours their own cards and the variety can be used in different games a) to compare the buses  b) to play a guessing game (My secret bus is green)   c) to play a memory game after a few lessons, with the teacher taking notes secretly and then creating a worksheet or just making sentences ‘This bus is green’ ‘It is Max’s bus’

My favourite colours: ask the kids to choose one, two or three favourite colours, foods or words. First teacher, then students in turns, show one of their cards and say ‘I like pizza’. The other students who have chosen the same card, respond ‘Me, too’. Then, the students take turns to make their own sentences. It can also be played with three least favourite words.

Scenario C: The kids don’t have a printer at home

Draw your own: In a typical unit we usually get 8 – 10 words. Setting it all as homework will be a lot of drawing but after the first lesson, the kids can choose three favourite words to draw and during the homework check they will say what they have prepared and describe the words. During the second lesson, they can be asked to create three more words and then three more. This way you will not only guarantee a fun and varied homework and homework check but after the three lessons, each child will have a set of beautiful, personalized cards to play with in class and at home (which at this point in the game is the same place😊

Wordcards: same procedure but much easier to prepare but still, all the games can be played nonetheless. If your students are pre-primary and cannot write yet, you can make letter cards, instead of wordcards and in all the games you can focus on the first letter/sound.

Scenario D: The teacher wants to go high-tech

That solution is actually quite tempting and there are a few ways of going about that.

  • Use a pdf version of cards available from British Council https://learnenglishkids.britishcouncil.org/flashcards or www.esl-kids
  • Make your own pdf with images from clip art
  • Make your own animated powerpoint, words appearing and disappearing
  • Use quizlet.com. Whatever you create for your classes you can later share with kids and have them practise lots and lots at home
  • Use the videos available on youtube to introduce and practice vocabulary, for example English Singsing, Fun Kids English, WOW English TV, Dream English Kids, Maple Leaf Learning
  • Use Starters/Movers/Flyers Picture Wordlists. These are beautiful and can be downloaded for free.
  • Use the whiteboard and all its options on zoom.us (this will be a separate post, when I either master that option or ask my Teach Tech Guru to write a post).

PS Do take it easy and don’t try to become an online expert overnight. Start with whatever is less complicated, for you and for your students and then raise the level of challenge when everyone is ready for it.

Remember that variety is our favourite word anyway so mix and match! And have fun!

P.S. Everything is going to be alright. Eventually. Tudo vai dar certo. Wszystko będzie dobrze. Все будет хорошо.

Your 10 basic flashcards games

One hundred.

It is the number of things in which you can manipulate the set of flashcards during the lesson and call it ‘a game’. That means that to teach, to introduce and to practise, to have fun and to change activities fast not to lose kids attention you really only need a set of flashcards and a table or a carpet. No more.

That means that you can mix and match, engage the kids and keep them involved for hours on end. Almost.

But before I take on the challenge of typing all those 100 up, here are the staple ten. The basics of the basic, the everyday. Five to practise receptive skills and five to focus productive skills.

Imagine that you have drilled all your words already (this will be another post, too!)

1. Finger up! (group)

Put all the flashcards face up on the table. Ask the kids to show you the indicative finger and put the hand up. This will be your punctuation mark here. Say ‘Finger up’ and all the kids and the teacher put their hands up, with the indicative finger out. Say ‘Touch the banana’ and encourage all the kids to lower their hands and put the finger on the banana flashcard. Then again say ‘Finger up’ and repeat with other words.

It is a great game especially for the beginning of a new unit or the beginning of the course as the kids will be basically following what you are doing and doing the same thing at the same time.

Variations: You can include different verbs i.e. pat the bananas, scratch the bananas, knock, stroke, etc.

Production: After a while, regardless of the variation, you let them lead the game and they are…producing!!!!

2. Yes and No (group)

Put all the flashcards face up on the table or on the carpet. Use your favourite punctuation mark. Point at one of the cards (banana) and ask ‘It’s a banana.’ ‘Yes?’, when kids start answering, by nodding or using their L1, provide the English word ‘Yes!’ and encourage them to repeat. Don’t forget to nod your head here. Point at another card (grapes) and ask ‘It’s a banana’ Yes?’ when the kids start answering, provide the English word ‘No!’ and encourage them to repeat. Don’t forget to shake your head. Repeat with the other words. The first time you play, it might be a good idea to use only singly words, to make sure that the rules of the game are perfectly clear but you can quickly start using full sentences, in singular and in plural, to model the language. There is no need to make things overtly simple.

Variation: Depending on the topic, it is a good idea to use the structures, too, for example with fruit: I like bananas (and picking up the banana flashcard), clothes: I am wearing jeans (picking up a t-shirt), I’ve got a kite (toys flashcards or pets) etc. This way they are not only going to learn to recognise the key words but they will be practising listening for detail with more challenge and getting a lot of exposure of the target language.

Production: After a while, regardless of the variation, you let them lead the game and they are…producing!!!!

3. Apple, please (group)

Give out all the flashcards, one per child. Use your punctuation mark and say ‘Apple, please’. Reach out your hand, towards the child who is holding the apple (if you can see who it is😊). After you have received it, say ‘Thank you’ and ask for another fruit. After a few rounds, add ‘Here you are’, too.

Variation: If you have a big group, you can ask for two words at the same time. Using a full question form is a good idea, too ‘Can I have an apple, please?’ All the flashcards on the carpet or on the table, and with calling the kid’s name to ensure that everyone gets a chance to play and that they don’t fight over cards.

Production: After a while, regardless of the variation, you let them lead the game and they are…producing!!!!

4. The duo (individual students)

Sit in a circle, put two cards on the carpet ie a banana and an apple, in a place where everyone can access them. Say ‘Masha, it’s a banana’. Masha picks up the banana flashcard and puts it away. Add another flashcard so that there are always two ie an apple and a pear. Say ‘Katia, it’s a pear’, Katia picks up the pear card and puts it away. The teacher adds another card etc.

Variation: You can change and vary the structures, even with the same set of flashcards i.e. with fruit: it’s a pear, I like pears, I don’t like pears, pears are green and so on. You can also ask the students to leave the flashcards that corresponds with the sentence and take away the incorrect one.

Production: After the kids have learnt how to play the game, nominate two students, they make simple sentences for each other. Then, another pair etc.

5. Get up! (pairs or trios)

Give out the flashcards to students, one per person. Go around the circle and call out all the words, one by one, slowly. Use your regular punctuation mark for starting an activity* and play the game. Call out two of the words (‘banana’ and ‘apple’) and motion the kids to stand up in the circle. Praise them and ask them to sit down. Call out two other words, wait for the kids, praise and ask them to sit down. Repeat with any combination you see fit. Then start calling out three words or even four. Kids listen and get up.

Variations: If it is a revision activity and they know the vocabulary, they can be holding two or even three cards.

If they already know a structure, instead of using single words, the teacher can use them in a structure, either very simple and generic ‘I can see a banana and an apple’) or something more connected to the set of vocabulary that you are practising ie I like bananas and apples.

Instead of getting up, the kids can also raise a hand, stamp their feet or clap their hands.

Production: After a while, regardless of the variation, you let them lead the game and they are…producing!!!!

6. Open your eyes (the group)

Put all the cards on the table or on the carpet, encourage the kids to call out all the words. Say ‘Close your eyes’ and make sure that they all cover their eyes, turn over one of the cards. Say ‘Open your eyes’ and call out all the words, in the end point at the card that has been turned over. After they guess, make sure everyone says the word out loud. Repeat.

Production: Let the kids take turns to lead the game.

7. Mime it! (whole class)

Very easy if you start preparing kids for it while introducing the vocabulary and helping them associate each word with a gesture.

Pick up one of the flashcards, say ‘3…2…1!’ and show the word for the kids to guess. Encourage them to produce a full sentence i.e. ‘It is a cat’. Let the kids lead the game as soon as possible!

Variations: If you have introduced some of the simple adjective you can start miming sentences. Pick up two flashcards (differentiated either by colour or size, to make it all go smoothly), say ‘3…2…1’ and mime the adjective and then the noun. Kids produce the sentence ‘It is a funny cat’ etc and it is quite likely that most of the sentences will be a bit ridiculous (but memorable).

8. Merry-go-round (group)

Start with one travelling flashcard. Have the kids sit or stand in a circle. Give the student on your left one of the flashcards, encourage and motion for them to pass the card to the student on their left. Let the card travel, then say stop and ask the student who is holding it to say the word out loud. Repeat a few times for them to get used to the idea.

Start the game all over but keep adding cards so that there are a few of them travelling. Say stop and have the kids call out the word they are holding at the moment.

Variations: There is a lot of potential for producing full sentences as soon as the kids get the idea and the key structure used will be related to the vocabulary, i.e. ‘I like’ with fruit, ‘I am wearing’ with clothes, ‘I can’ with verbs, ‘I’ve got’ with pets or toys, ‘I go to school by’ with transport etc.

This is also a great opportunity to teach the kids the word ‘nothing’.

9. Disappearing words (whole class)

Put five flashcards in a row, on the floor or up on the board, go from the beginning and call out all the words. Ask the kids to close their eyes and turn over the last card in a row. Call out all the words from the first one, in the same order and when you get to the last one, pause and wait for the students to say / shout / whisper the last word. Check quickly if they were right, show the cards to the kids, put it up covered again.

Ask the kids to close their eyes and turn over the last but one card. Ask the kids to open their eyes and call out all the words starting from the first one. When you get to the last but one, pause and wait for the kids to say the word, then the same with the fifth one. Proceed until all the words are covered up.

Variation: To help the kids remember, you can use a different gesture for each card, it can be either something related to the meaning of the word ie by miming the words or something that will help them remember ie knocking at the card, snapping, touching, clicking fingers, stroking it.

If you teach a big group, you can divide the class into two teams, one team will be holding the cards, one each, the other team will be guessing the words.

It might be also a good idea to use a full sentence ie I like to eat bananas, apples, peaches, plums and grapes, instead of single words.

10. Secret word! (whole class, pairs)

Revise the flashcards that you are going to be playing with so that the kids have a chance to become familiar with the images, the set of words and the colours. Then hold the flashcards to your chest. Ask ‘What’s the secret word?’ and model ‘Is it a kite?’ ‘No’. ‘Is it a doll?’ ‘No’ etc.

Variations: When they are playing the first time, they are quite likely to give you only separate words but it is worth encouraging them to produce full questions. You can either use ‘Is it…?’ or ‘Have you got…?’

Production: After a while, the students are given a chance to lead the game, first a student vs the rest of the group, later on in pairs, too.

*) ‘Punctuation marks’ are all the signals that the teacher uses to announce a start of a new activity. It can be clapping of the hands, it can be counting down from 5 to 1, it can be a bell, it can be snapping your fingers, it can be a chat ‘1, 2, 3! Eyes on me!’