www.seanparks.net, also reproduced by allisonfors.com and aulap.org
Can you see what I see? Are you thinking what I am thinking?
This adventure started like many others, really, with google and one of those straightforwardly mindless searches and a hope that the engine can actually pleasantly surprise you once more. this time it was ‘silly pictures for kids, clip art’ or something similar.
When I came up, I tried to take in all the absurdities all at once but at the same time, my teaching brain was firing at me with the many ideas of how I could use it in class. If I had been an ancient Greek philospher, most likely, I would be running around shouting ‘Eureka’ but since I am only a humble teacher, the only reaction was a rather excited mumble ‘THIS is going to be SO good!’
Now, this Crumbs post is going to be slightly different. We are still in the middle of winter holidays so there hasn’t been a chance to properly trial and test it with mu kids. but I am going to share it anyway, now, and the real classroom experience is going to be added in a week.
Here are the activities I am planning for next week
Preschoolers: Yes and No.
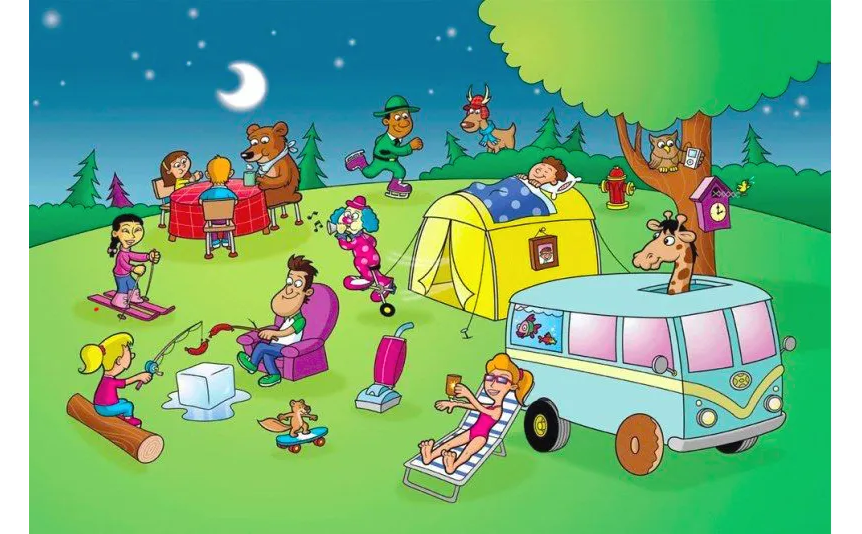
With my second year preschoolers, we are going to use the winter scene as this one is most relevant due to the what’s happening in the world outside of our windows and because the vocabulary and structures that we are already familiar and this picture has a chance of being most productive.
Yes and No is a game that my kids are familiar with. The teacher makes a sentence about the picture, which can be true or false and the kids have to react to it and correct it, using either a full sentence or only a phrase, depending on their abilities.
For example:
T: I can see a girl. She is sliding on a doughnut.
SS or S 1: Yes / Yes, it’s true.
T: I can see a girl. She is wearing one yellow hat.
SS or S: No. She is wearing 5 hats.
https://www.pinterest.ru/pin/96686723224800785/
Primary: Can you see something really silly?
Step 1: Prediction
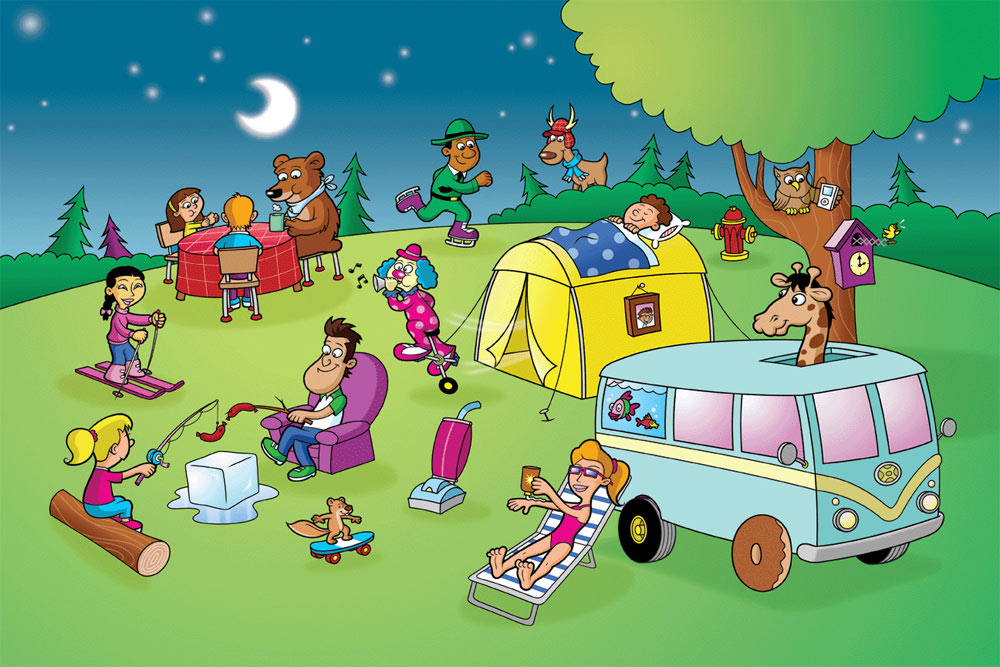
T tells the kids that they are going to see a picture of a campsite. T asks the whole class to guess what might be in the picture. To make it even more dramatic, T can ask the kids to close their eyes, imagine that they are in the forest and say what is happening. T may preteach some of the campsite-related words that kids might not be familiar with yet.
Step 2: Silly campsite
T tells the students that the campsite that they are going to see is a little silly. Kids work in pairs. T gives out a copy of the picture per pair. Kids circle and describe all the silly things they can see.
Step 3: What’s the silliest thing in the picture?
To round up, each student chooses one thing in the picture that they think is the silliest one.
www.seanparks.net, also reproduced by allisonfors.com and aulap.org
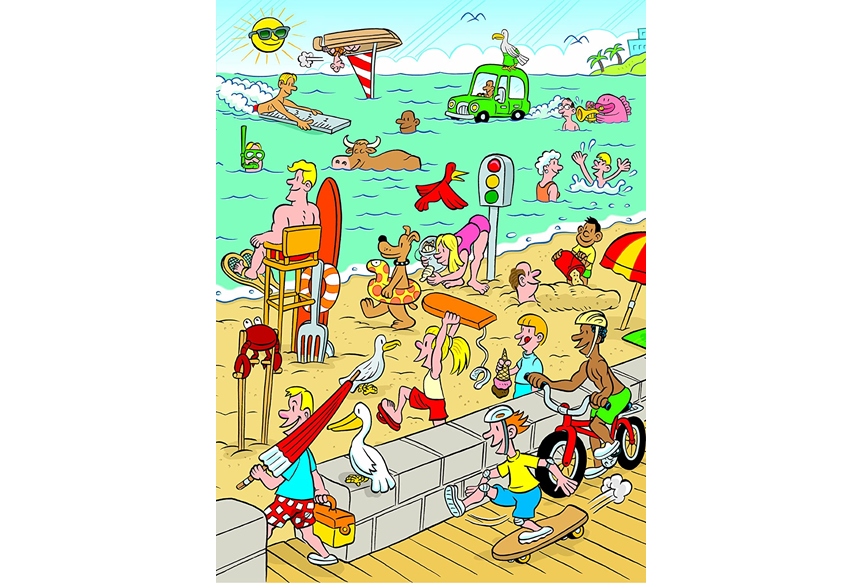
Primary: Silly pictures reading practice
This one was inspired by an activity I found on aulapt.org and, automatically, I wanted to have my own with sentences about the scene.
Primary: Tell me about this boy…Because
All these silly picture scenes are going to be the main character in our free speaking activities that has become a regular feature in our lessons recently.
One of the easiest activities to apply here is ‘Tell me about this boy‘. In the beginning, the teacher is leading the activity, chosing the people, animals or objects to describe and the students, in turns, decide what information they want to share. Now we have reached the stage when the kids are comfortable enough with working in pairs and taking turns in choosing the parts of the illustration for their partners and describing what was selected for them.
Now, with this new resources and all the absurdity, I would like to go in the direction of looking for rationale for their actions. We will try to play ‘Because‘. It might not always be easy but since the students are in charge of their discourse (well, ok, their mini-discourse), they can focus on how the people are feeling, what they like or don’t like or what they did before that might have had an impact on their non-standard behaviour now. Especially that we have just started talking about the past, using was/were and the affirmative forms of the regular and irregular verbs so that might be just a perfect opportunity to practise these.
Stage 1: Extended modelling
T: Tell me about this animal.
S1: It is a bull. It is swimming.
T: Because he likes water.
T: Tell me about this man.
S2: He is sitting. He’s got a big fork.
T: Because he is very hungry.
Stage 2: Because
Since this is a new kind of an activity and it might quite challenging to find the rationale for all the actions, we will play it together, to ensure a good brainstorming session. Kids will be choosing what they want to talk about and the whole class will try to say what everyone is doing and why.
In the worst case scenario, we might resort to our ‘Because because’ answer which they sometimes use or we might just go for a simple ‘Because it’s fun’.
This ia brand new adventure for us. I will be back in a few weeks to let you know whether it was a story of success or yet another epic fail story to post on this blog, too.
If you are interested in our free speaking practice circle, have a look at this post and if you would like to know more about what EFL teachers can learn from speech therapists – here is another post to check out!
If you are looking for more ideas on using pictures in speaking activities, here are two posts from the series of ‘All you need is…a picture’ and, its Volume 2 (because activities are accumulating:-)
PS A word of confession: it was very difficult to resource these illustrations. They have been posted, reposted and shared a million times, sometimes losing the artist on the way. I did my best!
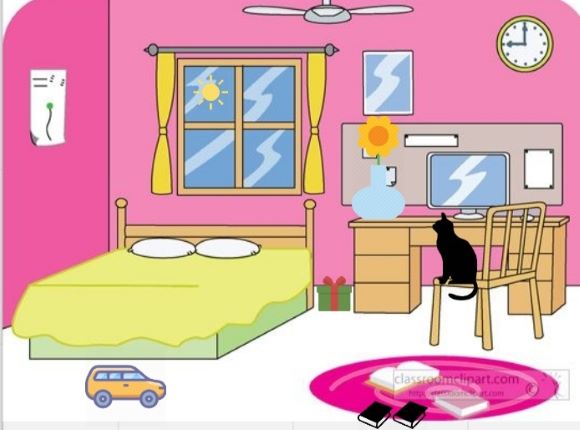
created using an image from classroomclipart.com and Miro
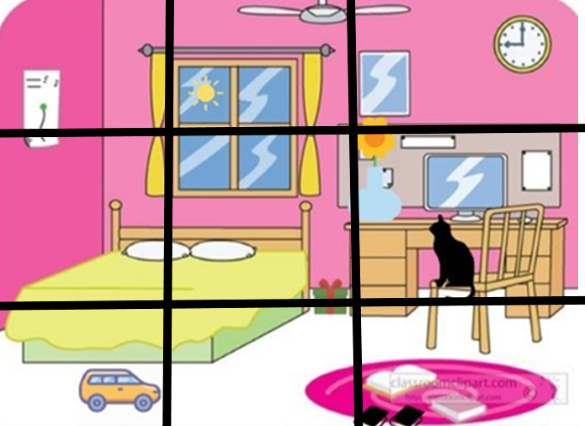
Before you even look: tell the students that it is a picture of a bedroom, have them predict what they might see…Then we look at the real one and check.
Tell me about this room: the students describe the room, using the language that they are familiar with, ‘there is’, ‘I can see’, perhaps only the nouns, perhaps nouns and colours and prepositions.
Riddles: the kids make up simple riddles for their partners to guess. ‘It is black and it is on the chair’.
Stickers dictation: this one is more appropriate for the lower levels and was inspired by the sticker activity in the Superminds coursebooks by CUP. It is also a perfect opportunity to use up all the leftover stickers that no one ever asks for. Students work in pairs and they upgrade the illustrations in their coursebooks (as in: any illustrations) with the stickers. Student A is telling student B where to put the five stickers in one of the coursebooks and then they swap roles.
Teacher = Cheater: the kids open their books and look at the picture. The teacher tells them about her non-existent picture which is, surprisingly, very different from the picture in the coursebook.
Students = Cheaters: the kids describe their made-up rooms, also, very different from the bedroom that they are looking at.
In my real room: particularly appropriate for the online classes since the children will be already sitting in their rooms and can easily compare the illustration with the reality but can be done in the offline lessons, too.
Because: students describe the picture but instead of just focusing on what exactly they can see they try to find the rationale for what they can see. ‘The books are on the floor because….’
The story behind the picture: even such an uninspiring picture in which nothing is happening (really) can be a starting point to writing a story or telling a story. The only thing that you need is a set of questions to get them started, for example: Who lives in this room, a boy or a girl? How old is he/she? What is his / her name? What does he / she like? He / she is not in his/her room. Where is he/she? What is he/she doing? What did he/she do before? What is he / she going to do next?
Dice games: the teacher has to assign the structures to each of the numbers on the dice and these can be easily adapted to the level of the students. The standard set might include: 1 = I can see, 2 = There is, 3 = There are, 4 = It’s on / under / in, 5 = It’s green / red, 6 = It’s big/ small / beautiful. You can also include: I like, I don’t like, …is doing what, is happy/ sad/angry, there aren’t any and so on, depending on the picture. Kids work in pairs, roll the dice and describe the picture using the assigned structures.
Noughts and crosses: It takes three lines to turn any picture into a noughts and crosses game. Students play the game in pairs but before they put their mark in one of the boxes, they have to describe what they can see there in one, two or even three sentences. To keep the kids interests up, a marking scheme can be introduced, a twin grid, with points which is of course kept secret until the end of the round (in Miro – under the noughts and crosses grid, on paper – on the corner that is folded under). This way we always have a winner, the person who collects more points for the boxes that they have described. Sometimes we have two winners, too, the logical one and the mathematical one.
Memory games: first, the students get to look at the picture for a minute or two. The teacher asks them to remember the details, all the colours, actions, number of children and so on. Afterwards, the students are divided into teams. The teacher can use either a set of pre-prepared sentences some of which are true and some of which are false. The teams pick out one of the cards, read the sentence and check how much they remember. This version is more T-centred but it has the advantage of additional reading practice. In another version, the students get to look at the picture again and make up a sentence about it, for the other team to guess. They can also write their own set of sentences which will be later used to test the other team.
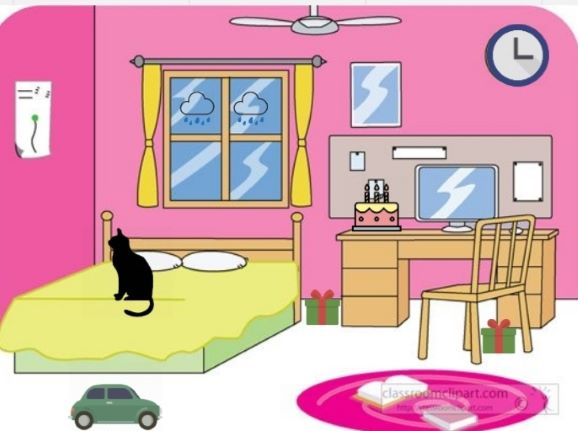
There are two pictures…
I can make it different: the starting point is a picture and it can be copied and upgraded in any way the teacher sees fit, using all the beautiful tools that the Miro board has to offer (google image search and icons). It will take some time but it means that it can be adapted to the level, skills and interests of a particular group and then saved and recycled forever. Just like these two pictures here…
Predict the Differences: the children can only see one of the pictures and they try to figure out all the ways in which the two pictures can differ. It might be especially effective if they are already familiar with the task format and know that they have to be looking out for different patterns, activities, objects that the people are holding, throwing, the comparisons between two objects, the location on the right or left side of the picture and so on.
Predict the Differences Quiz: the idea is the same but we add the competitive element and another skill as the teams or pairs of students are asked to write ten potential differences between the picture they can see and the other one. The team that manages to better at predicting wins.
Find the difference: we can ask the students to work in pairs but to find all the differences without showing their picture to the partner. This is not going to be a strict Movers or Flyers preparation task but we are going to raise the level of challenge and they students will really have to listen carefully in order to establish how these two pictures are different.
One big and ten small pictures: it is not necessary to kill another tree to ensure that each child has two pictures right in front of their eye. One, enlarged copy of Picture A can be displayed on the board (or on the screen) and compared with the picture B in students’ coursebooks.
Accidental friends: illustrations that were created not as a ‘find the difference’ task but can easily serve the purpose. Examples? Any of the Movers and Starters reading and writing story tasks or any of the Movers or Flyers speaking story tasks…The theme is already there and looking for differences can be a nice warm-up to storytelling or story-writing activities…
Very, very different: the illustrations that can be used in this kind of a task do not even have to be specifically created with that purpose in mind. Any (and I mean it: any) two pictures depicting ‘a bedroom’ can be used to find the differences. The crazily pink exhibit A here and practically any page of the IKEA catalogue…And pronto!
YLE listening task recycled: these can be used as a listening task, to prepare for the format and to develop listening skills but they can be later used again as a colouring dictation activity. Students work in pairs, one is in charge of the coloured pencils and speaking (‘Colour the bird yellow’), the other one – in charge of the colouring page and listening. Half-way through the activity they swap roles.
This is already more productive but the best is yet to come. Since it is a freer practice activity and students make their own decisions regarding the choice of the colours, it is quite likely that all the pictures will be different. And then…Yes, we can compare them, in groups of four.
Actually, even a leftover listening copies can be used in the same way (Saving the planet, remember?). After all, regardless of which exam it is, the students only have to colour five elements of the picture and the rest of them can be used in a speaking task like that.
Colouring printables: can be used in exactly the same way. Not all the pages will do, for example a large drawing of a cat does not really offer too much as an object to be described and I try not to use colouring pictures which are too big as some students like to be precise and colouring those might take too much of the precious time of the lesson. Other than that, just open google and type in: a child’s bedroom colouring page…Ready! And if there are any words that the students don’t know yet, we can always learn them. Even if they are not on the YLE word list and just because ‘a dragonfly’ might be a cool word to know😊
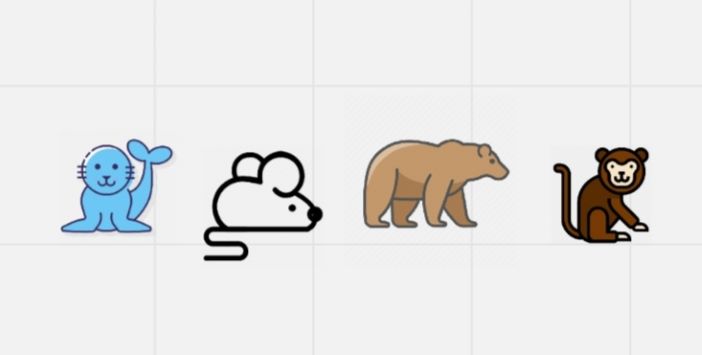
Which one is different?
Which one is different? Why?
Vocabulary practice: we only need four pictures out of is one is different. It might be a set of four objects, three of which are blue and one of which is red and the students do not even need to know the name of all of the objects. They can still complete the task by using the structure ‘It’s blue’ or even ‘blue’. We can create such by using icons or google images on the Miro board or by arranging and re-arranging the flashcards that accompany our books.
Grammar practice: the focus here can be chosen depending on the topic of the lesson and it can be limited to only ‘it has got…legs’ with animal flashcards, ‘it’s big’ with school objects, ‘I like’ with food, prepositions, Present Continuous and what not.
Kids take over: the students can make up their own chains, either with the coursebooks flashcards or the mini-flashcards (always a good idea to have two or three sets of those for each topic, they can be reused throughout the course).
Chant it! This is the only variation here that I have not had a chance to use in the classroom but if you look at it from the right angle, all of a sudden, there is a lot of potential here: each chain has four pictures and each of them can become a separate verse. The kids can clap for the similar concepts and stomp for the odd one out…
It’s a good idea but it’s not my idea: the kids talk about the pictures and describe the odd one out but they have to go on until they guess the teacher’s original idea (probably better to write it down somewhere in order to be able to prove that we have not been cheating this time😊. If the appropriate topic has been chosen (such as, for instance, animals), this activity can go on for almost forever and the students will produce a terrifying amount of language. Once they learn to think outside of the box, this same activity can be used with all the seemingly less ‘appealing’ topics, too.
How many can you think of: a similar idea but realised slightly differently as students work with the exam materials but try to think of as many reasons to odd one of the pictures out…
Well, 27 activities…Not bad, not bad at all. I might be adding to this list in the future.
I hope you have found something useful here! And if you have used it in class, please let me know!