We Want More! (vol.1)

Creative use of the language or…LEGO!

Because that’s what language is: LEGO blocks.

It does come nicely packed and organised in our coursebooks, with a set of instructions on how to assemble it to make our own city, farm, car or whatever it is that we have been dreaming of. So we show the kids how to play it (and the name, LEGO, comes from Danish phrase ‘leg godt’ or ‘play well’)

However, if you are a true Lego fan, you know that keeping this Death Star on your shelf forever and ever is not what it is about. The feat has been achieved, it is there but after a while it starts to collect dust and it just get boring. It is not the end of the story; it is when the real fun starts! You take it off, you disassemble it to the very last, minute block and then… you start putting together your own, innovative spaceships.

With languages, the same rules apply and our students should be taught that, even those young ones or those very young ones, too.

How? Easy. Keep on reading…

It can start with a favourite song, one that everyone has already mastered, one that everyone knows very well and one that is somewhere on the brink of becoming yesterday news, not yet but soon.

The only thing that you need to do is to sing it but change a word and wait for the students to correct you. It will not only help you check if they were really listening but it can become a great new game – ‘correct the teacher’. It will generate the language from the students but, most importantly, it will show them that a song or a chant are not a chain of random sounds but a collection of bits and pieces that can be manipulated and replaced with other bits and pieces. This is also the first step to inviting the students to create their own versions of the song (more on that in another post).

Another way of encouraging the students to be creative about the language is to come up with the new, alternative names for the familiar objects, for example colours of crayons and pencils. Of course, for that they have to have some vocabulary in order to be able to participate but asking for ‘apple pencil’, ‘chocolate pencil’, ‘pumpkin pencil’ instead of the red, brown or orange one can be a fun game which will create an opportunity to climb onto the higher level of the Bloom’s pyramid, from knowledge to comprehension or perhaps even application as we are going to encourage the kids to create new associations with the familiar colour. Not to mention that, as language teachers, we are going to provide them with an opportunity to revise the language in a fun way and make it memorable.

The same game can be played with any chunks of language that the kids are using to create the impossible combinations i.e. put on (put on your jacket, shoes, hat or put on your apple), verbs and body part verbs (clap your hands or clap your…nose), classroom instructions and nouns (open your book, bag or open your…pen).

Making purposeful mistakes is a great incentive for the students to take over and to produce the language. Most frequently, it will be a typical teacher support technique. When the students cannot recall the word they need in a lesson, the teacher can ‘make a mistake’ and point at the picture of a dragon and say ‘I can see a tiger’, in the hope that it will help to bring back the forgotten word from one of the students. However, it can also lead to generating more language when it is applied to the content familiar to the student, for example, a story which is being retold in the following lesson. Even if the students are quite young and pre-A, they can participate by echoing after the teacher but supplying the correct word, for example the teacher can say ‘Ben is a cat’, kids can ‘correct’ the sentence by saying ‘Ben is a boy’. If the students are very familiar with the story (for example because it is the third or fourth lesson in which the same story appears), they can be even encouraged to produce more complex sentences, i.e. ‘Ben is a boy’, in an attempt to correct the teacher’s incorrect sentence of ‘Lucy is a giraffe’ and so on.

Another way of reinforcing this idea and fostering creative use of the language is using visual representation of the chunks that constitute a sentence or a phrase. A good example that will help to demonstrate the idea is the structure ‘I like’ that is depicted with the use of hearts, for example a red heart might stand for ‘I like’ whereas a crossed heart will mean ‘I don’t like’. When these are used with the flashcards depicting some food items, students will be able put them together and recreate the sentence and generate a lot of language by manipulating one of the elements, the heart or the food flashcards, at the same time learning that while the combination ‘I like’ + ‘pizza’ is a correct one, the other set ‘pizza’+’I like’ will not be accepted. The same technique can be used to create other structure and the only challenge for the teacher here will be coming up with symbols for ‘I’ve got’, ‘I can’ or ‘I’m wearing’

Playdough in the classroom. 5 ideas.

Little people get bored quickly and when they do, they start for looking alternative ways of getting occupied. The thing is, teachers get bored, too and this is when they start looking for alternative ways of getting entertained. Today, five ideas with plasticine. Very much adaptable.

Idea number 1: Fruit salad.

Pick up a paper of plastic plate (paper plates are better because it is easier to label them with kids’ names. If you are using plastic plates, it is necessary to use permanent markers) and show the kids.

Pick up a piece of yellow plasticine, knead it and roll it. Shape it up as a banana. Show it to kids, ask ‘What’s this?’, elicit the answer. Ask all the kids to repeat ‘It’s a banana’. Put it on the plate.

Wait for the kids to ask ‘Yellow, please’, take a piece for yourself, repeat the whole procedure from the very beginning. Knead and roll together, shape it as a banana.

Continue with other fruit. You can include as many as you have time for.

If the kids are young, it might be easier to make 2D fruit, rather than 3D. In that case, put the banana on the plate and press it.

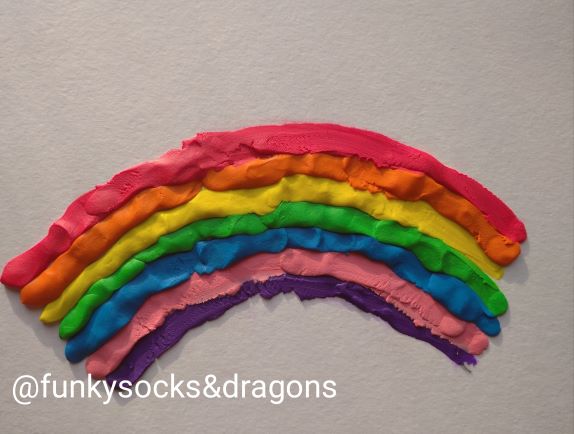
Idea number 2: Rainbow

Get the plasticine ready. Since you are going to use the specific seven colours and only these, you can get all the pieces ready, one of each colour per student. It will make the lesson go more smoothly.

It might be a good idea to prepare a handout for each student, a very simple one – a piece of cardboard with the smallest arch, in pencil. The rainbow is quite easy but, still, some students might struggle. Once the first one is ready, all the other ones will be built on it and it will be easy.

Show the first colour, ask the kids to name it. Pick up a piece, show how to roll it with the palm of your hand and when it is ready, pick it up to show everyone and then put it on the arch on the handout and press so that it sticks. Pick it up to show all the students.

Give out the pieces of paper and pieces of the first colour. Take one for yourself, too. Roll the first piece together and repeat all the steps together.

Continue with all the colours until the rainbows are ready. Don’t forget to sing the rainbow song when you finish.

Idea number 3: I have a pet!

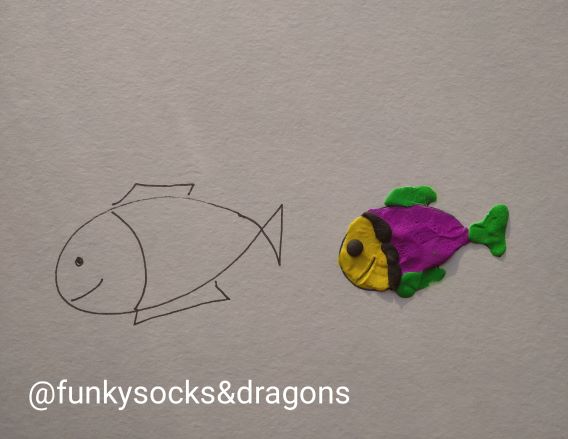
This activity is an example of ‘colouring with plasticine’. I used it in a lesson on pets but of course it can be almost any topic.

Prepare a set of pictures to colour (black and white clip art😊) and make sure you choose them carefully. They have to be small enough (or else children will need a long time to complete the task) but at the same time not too detailed (or they will be extremely challenging to do). Make a few copies of each so that the children have a choice. You can also let the students decide before the lesson and prepare a copy of their chosen pet.

Pick up a piece of plasticine and practise the key verbs for the lesson (knead, press, smear). Ideally, the kids would also practise on a piece of paper before they start colouring their pet.

Pick up your pet. Choose a piece of plasticine, knead a bit, press to paper and smear it, covering the chosen area. Show the kids. Pick up another piece and go on with colouring your picture.

The kids choose their pet and ask you for the colours they need. This is the main communicative aim (Can I have blue, please? Here you are. Thank you).

Kids show their finished pet and introduce them to the group (This is my pet. It is a cat. His/her name is Misha).

This particular activity was a part of the pets unit and in this particular lesson, we watch Peppa episode so we finished with me giving out medals for the best cat, the best fish, the best lion etc. The kids glued them to their posters.

Idea number 4: I can write!

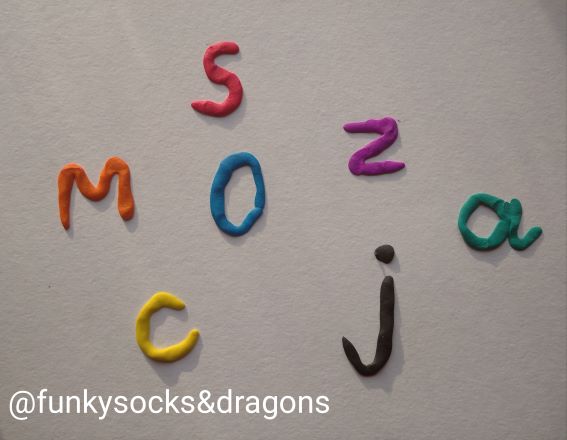
When students are beginning to learn about the letters and beginning to write, it is a good idea to let them experiment with many different alternative ways of writing and different materials. Plasticine is one of them and even the younger students can participate and enjoy ‘writing’ with it.

Decide which letter you are going to write. Write a big one on the board and practise writing the letter in the air and on the table. It might be a good idea to start with the easier letters such as c, o, b, i.

Get the kids’ attention, pick up a piece of plasticine and say ‘Let’s roll’ (sometimes we joke that we are making spaghetti) and show the kids how to do it with the palm of your hand. When the piece is ready, form the letter on the paper and press. Show the kids the final product.

Let the kids choose the colour they want to work with. Repeat the stages (Let’s roll, Let’s make a letter, Press).

The advantage of this activity is that you can make one, three or ten letters during the same letter, depending on how fast the children are able to work.

Idea number 5: How many?

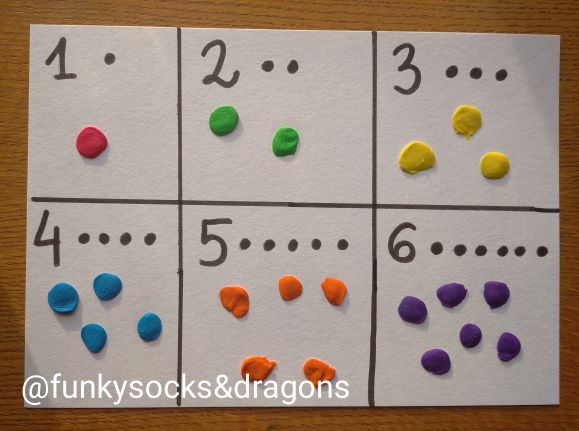
Prepare the handout (a piece of cardboard, divided into sections, each section with a number, 1 – 5 or 1 – 10, depending on the topic and the level).

Show one copy to your students and read all the numbers out loud.

Choose one of the numbers, choose one of the colours. Tear off small pieces of plasticine and attach them, one by one to the handout, in the section with the number, counting out loud.

Give out the handouts, one per child, ask them to find the number and point at it. Give out the pieces of the colour you have used. Monitor and count out loud with everyone as kids are tearing off small pieces and attaching them to the handout in the appropriate section. Collect all the remaining plasticine.

If possible, ask one of the students to choose the number and the colour. Make sure everyone has a piece of plasticine, get the kids ready. Start to tear off and count out loudly and attach the pieces of plasticine to the handout.

Continue with all the numbers.

And all the useful tips…

  • Make sure that you are using plasticine of a good quality.  It doesn’t have to be the most expensive thing available on the market but also not the cheapest one as this tends to flake and stick to hands and tables and that’s very frustrating for the little ones.
  • I am not a fan of using all the fancy colours like golden, silver and all the fluorescent greens and yellows. The kids are drawn to them but there is something in the colouring affects that quality of the clay. But it is up to you.
  • Make sure you get the plasticine ready before you give it out. Even some of the older kids might struggle with kneading it and softening it before it is pliable enough to play with. Sometimes you might have to kneed it yourself before the lesson but most of the time it is enough to leave it for a moment in the sun or near the radiator.
  • Give out small (A5) pieces of cardboard to roll the plasticine on but the younger kids can roll it directly on the table. This way they won’t have to deal with holding the piece of cardboard and the table is big and stable. All the leftovers that get stuck to the table can be picked up with bigger pieces of plasticine.
  • It might be easier to work on cardboard, rather then on regular paper. It is more durable and easier to ‘draw’ on. It holds plasticine better, too.
  • Get a packet of wet tissues and keep it in the classroom. Making a train and going to the bathroom to wash the hands at the end of the lesson is always a good idea but some kids might not like the feeling and will be impatient to clean their hands as soon as possible. Wet tissues will come in very handy here!
  • As with all the craft activities – do it at home first, before you take it to the classroom.

P.S. A box of playdough costs about a dollar…

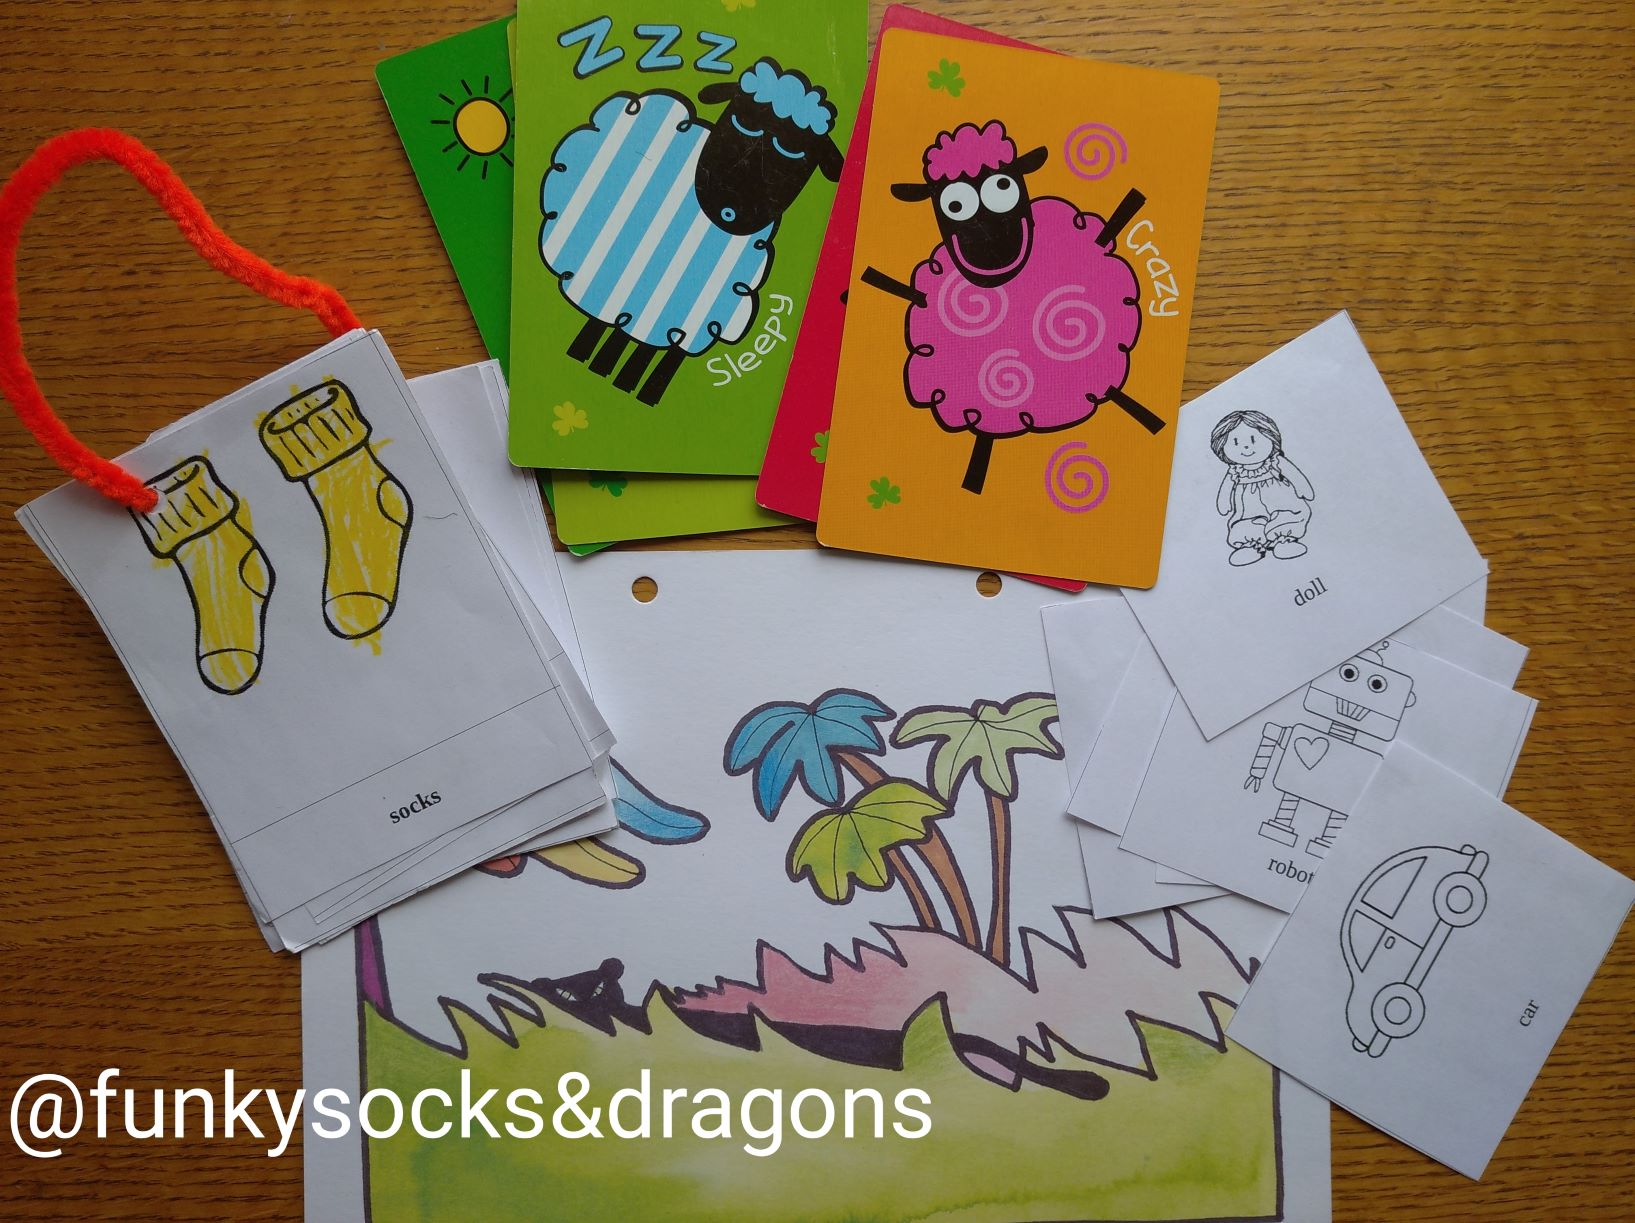
Your 10 basic flashcards games

One hundred.

It is the number of things in which you can manipulate the set of flashcards during the lesson and call it ‘a game’. That means that to teach, to introduce and to practise, to have fun and to change activities fast not to lose kids attention you really only need a set of flashcards and a table or a carpet. No more.

That means that you can mix and match, engage the kids and keep them involved for hours on end. Almost.

But before I take on the challenge of typing all those 100 up, here are the staple ten. The basics of the basic, the everyday. Five to practise receptive skills and five to focus productive skills.

Imagine that you have drilled all your words already (this will be another post, too!)

1. Finger up! (group)

Put all the flashcards face up on the table. Ask the kids to show you the indicative finger and put the hand up. This will be your punctuation mark here. Say ‘Finger up’ and all the kids and the teacher put their hands up, with the indicative finger out. Say ‘Touch the banana’ and encourage all the kids to lower their hands and put the finger on the banana flashcard. Then again say ‘Finger up’ and repeat with other words.

It is a great game especially for the beginning of a new unit or the beginning of the course as the kids will be basically following what you are doing and doing the same thing at the same time.

Variations: You can include different verbs i.e. pat the bananas, scratch the bananas, knock, stroke, etc.

Production: After a while, regardless of the variation, you let them lead the game and they are…producing!!!!

2. Yes and No (group)

Put all the flashcards face up on the table or on the carpet. Use your favourite punctuation mark. Point at one of the cards (banana) and ask ‘It’s a banana.’ ‘Yes?’, when kids start answering, by nodding or using their L1, provide the English word ‘Yes!’ and encourage them to repeat. Don’t forget to nod your head here. Point at another card (grapes) and ask ‘It’s a banana’ Yes?’ when the kids start answering, provide the English word ‘No!’ and encourage them to repeat. Don’t forget to shake your head. Repeat with the other words. The first time you play, it might be a good idea to use only singly words, to make sure that the rules of the game are perfectly clear but you can quickly start using full sentences, in singular and in plural, to model the language. There is no need to make things overtly simple.

Variation: Depending on the topic, it is a good idea to use the structures, too, for example with fruit: I like bananas (and picking up the banana flashcard), clothes: I am wearing jeans (picking up a t-shirt), I’ve got a kite (toys flashcards or pets) etc. This way they are not only going to learn to recognise the key words but they will be practising listening for detail with more challenge and getting a lot of exposure of the target language.

Production: After a while, regardless of the variation, you let them lead the game and they are…producing!!!!

3. Apple, please (group)

Give out all the flashcards, one per child. Use your punctuation mark and say ‘Apple, please’. Reach out your hand, towards the child who is holding the apple (if you can see who it is😊). After you have received it, say ‘Thank you’ and ask for another fruit. After a few rounds, add ‘Here you are’, too.

Variation: If you have a big group, you can ask for two words at the same time. Using a full question form is a good idea, too ‘Can I have an apple, please?’ All the flashcards on the carpet or on the table, and with calling the kid’s name to ensure that everyone gets a chance to play and that they don’t fight over cards.

Production: After a while, regardless of the variation, you let them lead the game and they are…producing!!!!

4. The duo (individual students)

Sit in a circle, put two cards on the carpet ie a banana and an apple, in a place where everyone can access them. Say ‘Masha, it’s a banana’. Masha picks up the banana flashcard and puts it away. Add another flashcard so that there are always two ie an apple and a pear. Say ‘Katia, it’s a pear’, Katia picks up the pear card and puts it away. The teacher adds another card etc.

Variation: You can change and vary the structures, even with the same set of flashcards i.e. with fruit: it’s a pear, I like pears, I don’t like pears, pears are green and so on. You can also ask the students to leave the flashcards that corresponds with the sentence and take away the incorrect one.

Production: After the kids have learnt how to play the game, nominate two students, they make simple sentences for each other. Then, another pair etc.

5. Get up! (pairs or trios)

Give out the flashcards to students, one per person. Go around the circle and call out all the words, one by one, slowly. Use your regular punctuation mark for starting an activity* and play the game. Call out two of the words (‘banana’ and ‘apple’) and motion the kids to stand up in the circle. Praise them and ask them to sit down. Call out two other words, wait for the kids, praise and ask them to sit down. Repeat with any combination you see fit. Then start calling out three words or even four. Kids listen and get up.

Variations: If it is a revision activity and they know the vocabulary, they can be holding two or even three cards.

If they already know a structure, instead of using single words, the teacher can use them in a structure, either very simple and generic ‘I can see a banana and an apple’) or something more connected to the set of vocabulary that you are practising ie I like bananas and apples.

Instead of getting up, the kids can also raise a hand, stamp their feet or clap their hands.

Production: After a while, regardless of the variation, you let them lead the game and they are…producing!!!!

6. Open your eyes (the group)

Put all the cards on the table or on the carpet, encourage the kids to call out all the words. Say ‘Close your eyes’ and make sure that they all cover their eyes, turn over one of the cards. Say ‘Open your eyes’ and call out all the words, in the end point at the card that has been turned over. After they guess, make sure everyone says the word out loud. Repeat.

Production: Let the kids take turns to lead the game.

7. Mime it! (whole class)

Very easy if you start preparing kids for it while introducing the vocabulary and helping them associate each word with a gesture.

Pick up one of the flashcards, say ‘3…2…1!’ and show the word for the kids to guess. Encourage them to produce a full sentence i.e. ‘It is a cat’. Let the kids lead the game as soon as possible!

Variations: If you have introduced some of the simple adjective you can start miming sentences. Pick up two flashcards (differentiated either by colour or size, to make it all go smoothly), say ‘3…2…1’ and mime the adjective and then the noun. Kids produce the sentence ‘It is a funny cat’ etc and it is quite likely that most of the sentences will be a bit ridiculous (but memorable).

8. Merry-go-round (group)

Start with one travelling flashcard. Have the kids sit or stand in a circle. Give the student on your left one of the flashcards, encourage and motion for them to pass the card to the student on their left. Let the card travel, then say stop and ask the student who is holding it to say the word out loud. Repeat a few times for them to get used to the idea.

Start the game all over but keep adding cards so that there are a few of them travelling. Say stop and have the kids call out the word they are holding at the moment.

Variations: There is a lot of potential for producing full sentences as soon as the kids get the idea and the key structure used will be related to the vocabulary, i.e. ‘I like’ with fruit, ‘I am wearing’ with clothes, ‘I can’ with verbs, ‘I’ve got’ with pets or toys, ‘I go to school by’ with transport etc.

This is also a great opportunity to teach the kids the word ‘nothing’.

9. Disappearing words (whole class)

Put five flashcards in a row, on the floor or up on the board, go from the beginning and call out all the words. Ask the kids to close their eyes and turn over the last card in a row. Call out all the words from the first one, in the same order and when you get to the last one, pause and wait for the students to say / shout / whisper the last word. Check quickly if they were right, show the cards to the kids, put it up covered again.

Ask the kids to close their eyes and turn over the last but one card. Ask the kids to open their eyes and call out all the words starting from the first one. When you get to the last but one, pause and wait for the kids to say the word, then the same with the fifth one. Proceed until all the words are covered up.

Variation: To help the kids remember, you can use a different gesture for each card, it can be either something related to the meaning of the word ie by miming the words or something that will help them remember ie knocking at the card, snapping, touching, clicking fingers, stroking it.

If you teach a big group, you can divide the class into two teams, one team will be holding the cards, one each, the other team will be guessing the words.

It might be also a good idea to use a full sentence ie I like to eat bananas, apples, peaches, plums and grapes, instead of single words.

10. Secret word! (whole class, pairs)

Revise the flashcards that you are going to be playing with so that the kids have a chance to become familiar with the images, the set of words and the colours. Then hold the flashcards to your chest. Ask ‘What’s the secret word?’ and model ‘Is it a kite?’ ‘No’. ‘Is it a doll?’ ‘No’ etc.

Variations: When they are playing the first time, they are quite likely to give you only separate words but it is worth encouraging them to produce full questions. You can either use ‘Is it…?’ or ‘Have you got…?’

Production: After a while, the students are given a chance to lead the game, first a student vs the rest of the group, later on in pairs, too.

*) ‘Punctuation marks’ are all the signals that the teacher uses to announce a start of a new activity. It can be clapping of the hands, it can be counting down from 5 to 1, it can be a bell, it can be snapping your fingers, it can be a chat ‘1, 2, 3! Eyes on me!’