Crumbs #35: Interaction patterns: a messy choir

Ingredients

  • Any drilling activity, any Q&A game, practice or drill, any Finish the sentence activity
  • Online or offline
  • Resources as usual: wordwall games, flashcards, posters, puppets, miro

Procedures

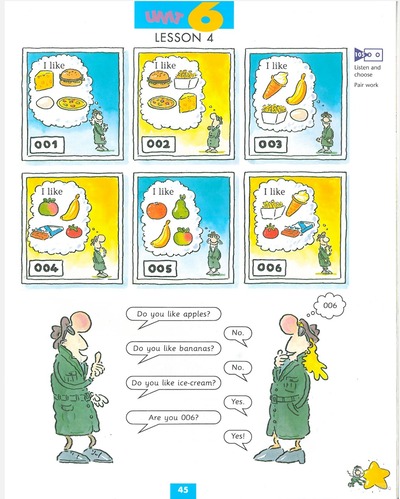
  • I will describe the procedures for one of the games that we played in the messy choir manner with the use of the wordwall flashcards. It was done with a group of level 3 pre-schoolers and we used it to supplement Playway 3 (Puchta, Gerngross, CUP) materials.
  • The kids were sitting on the carpet looking at the screen. The teacher showed the cards and asked ‘Are you scared of lions?’ and the kids would answer ‘I’m scared’ or ‘I’m not scared’. They would behave precisely like a messy choir – kind of doing the same thing but totally (and purposefully) out of sync. The main aim here is not harmony or timing but production.
  • The teacher was participating, too, to model and to encourage production.
  • Later on, in the following lessons, the individual students were asked to lead the game and ask the questions. Everyone was answering.
  • The key element here is the slow (but not too slow) pace, without rushing through, giving the kids the ample time to make a decision, to be ready to speak and to be heard.
  • The teacher sometimes had to pause and ask the individual students ‘And you, Sasha?’, but it was more necessary during the introductory stages of the whole approach, to signal to the kids that, despite that being a whole class activity, the teacher is listening and paying attention and curious what everyone has to say.

Why we like it

  • It is especially useful with the pre-school or primary classes, especially those bigger ones. It can be a nice alternative to choral drilling (which can become boring if used constantly) and to 1-1 exchanges (which have to be limited in larger groups as they will be taking a lot of the lesson time and they might have negative implications for classroom management as kids get bored waiting for their turn and they start looking for something to do)
  • It does take some time for the kids and for the teacher to get used to. The kids take time to realised that despite the fact that they speak all at once everyone will be heard and acknowledge and that it is not necessary to shout or speak loudly or that, indeed, they are allowed to take their time to answer. The teacher needs time to slow it down, too, to wait for everyone to produce the language, to call out those who might not have answered or wait for those who are taking their time. Like with anything, the task requires staging and scaffolding and time.
  • The shy students still get ‘the protection’ of the group. They are not in the spotlight but at the same time they are not left to their own devices.
  • It resembles a natural conversation.
  • It might lead to extended production ie in the activity described above some kids will only say ‘I’m scared’ or ‘I am not scared’, some others (and when ready) might want to expand that and provide a rationale ie ‘I like snakes. They are beautiful’.
  • I think the main benefit of this approach is that it contributes to the general atmosphere that I want to have in my classroom and that is: we talk when we have something to say, not only when the teacher asks a question.

Happy teaching!

Crumbs # 33 Anyone up for a pirate lesson?

Anka, what about the pirates?’ was the thing I heard on Tuesday. The sentence was uttered in the middle of the lesson, in absolutely no relation to anything that happened, apart from the fact that the theme of the unit is the sailors, the mysteries of the sea, The Mary Celeste and I may have, at one point, mentioned pirates in passing. They did notice (of course), they did remember (naturally) and they waited for the best moment to use it against me. Obviously.

The funniest thing about it was the tone of voice that my kids used in that kind of situations and it is probably one of the things that I should add to the list of all the outcomes and consequences of working with a group for a prolonged period of time (you can find the post here). This tone of voice is a wonderful mix of a gentle scorn, a genuine inquiry, an honest plead and a teeny tiny layer of sarcasm. My kids are so good at it that they can squeeze it all in one word. Sometimes they just say ‘Anka‘ and it says it all…

Anyway, we did the Pirate Lesson, all the details and materials below. Enjoy!

The lovely boats I found in my hotel. A potential idea for a craft activity…

Ingredients

  • Limited: we are online
  • Coursebook material: Superminds 5, CUP, Puchta and Gerngross, unit 9
  • Paper and pencils
  • One wordwall game: The captain and the cabin boy
  • Two songs:
  • A powerpoint: I have left it here, with the comments in the speakers notes)
  • Randomness around the house: a hamster, a hen soft toy, scarves, food
  • One bamboozle game: ARRR like a pirate
  • 90 minutes and a zoom classroom.
  • The level: A2 (we are finishing), the group: 7 kids, the age: 7 – 10 y.o.
A pirate’s flag. Anka’s version

Procedures

  • First of all, the kids have to remind you that there was a time when you might have mentioned that a pirate lesson might, potentially, happen at one point. After which you forgot (after all, it is May, the end of the school year) and after which they remind you and you are crazy enough to make a huge effort to make time for the planning of such a lesson). But it is worth it)
  • There were no preparations for the students, this lesson came as a bit of a surprise. I was considering to ask the parents to let the kids dress up for that but then decided not to. I thought that we would make things up as we move on. We did.
  • I prepared my own headscarf, my ‘parrot’ and, again, I was considering preparing an eye patch but since I was not at home but in the middle of the forest and the craft resources and materials were scarce, I gave up on it, too)
  • I prepared the powerpoint (which I hope you can access) but this is something that I create for every lesson anyway.
A pirate’s parrot. Anka’s version

Why we liked it

  • From the teacher’s perspective, it was a rather successful merge of a thematic lesson and the coursebook material and I am quite happy with how it went. We managed to include lots of what we were supposed to cover anyway such as the Present Perfect practice and the skills development but it turned out that it was possible to present it to the kids within a theme that was interesting.
  • The kids liked it because it was something different to a regular lesson, we did a lot of pirate things (the name, the flag, the treasure hunt and the stories), we could play a bit and we really did have fun.
  • I came dressed up, with a headscarf on and I introduced my parrot, Angelina (who in her real life is a hen and has been my class puppet for a few years now but who got to perform the role of the pirate’s parrot). True, every time I said ‘my parrot’, my kids would correct me (‘Anka, it’s a hen’) but by the end of the lesson one of my other kids introduced his real hamster (and the love of his life at this point) as the parrot and yet another one gave this role to his rucksack (which should also be written like that: Rucksack, since he featured in our stories in the past with his own adventures). One of my girls put on a scarf, too and one of the boys switched off the camera in the middle of the lesson, to come back a few minutes later, this time wearing his mum’s scarf on his head and a paper eye-patch on a string…One of my students’ younger sister joined us half-way through the lesson and asked for her own pirate name, too.
  • The kids were really active during the role-play between the captain and the cabin boy. They even did remember to play with the intonation with the ‘But what?’ question from the captain. I was moving in-between the breakout rooms and laughing, basically. One of my students could not open the wordwall games so we agreed that he could come up with his own ideas (and these were brilliant) and some other kids started to add their own questions, leaving the wordwall behind.
  • We used the Weird Echo game again, this was the second time and it went very well. You can find its description in a separate post.
  • I wish we had more time for the storytelling of how we met the sea creatures. If I had a chance to teach this lesson again, I would have planned it as a homework task or we would have continued in the following lesson. We might still do it, actually. There are still a few lessons left until the end of the academic year. If we do, you can definitely expect the follow-up post here!
  • I personally loved my pirate name, Captain Anka O’Reily and I think the kids liked theirs, too. Whenever I made a mistake of addressing the students (or myself) using their ‘regular’ names, I was kindly reminded that that’s not how we do it. We also had a giggle because the O’Reily family was well-represented on our ship, since two of my students also celebrate their birthdays in November. The pirates on the board of our Superminds 5 ship were as follows: Captain Anka O’Reily, Captain Alejandro O’Malley, Bubbles Dasha O’Reily, Skipper Tonya O’Reilly, Hamster Jack Sparrow, Charming Timour Bailey, Skipper Eva Bailey and, for a part of the lesson, Ship-mate Ulya Jones.
  • I was really happy when I found the bamboozle game. I think it is a perfect example how a relatively simple game can be adapted and used in order to give the lesson this special flavour that we want. The students did not really learn any new words as those that popped up in the game were already familiar to them and, I suppose, you could say that we got a great opportunity to practice the long /ɑːr/ sound but that was not quite my main aim here. For a few minutes there we were loud and giggly but we were talking like pirates and it was a perfect finishing touch to this lesson.
  • The one disadvantage? Well, I am thinking of the coming-up lesson on Tuesday and the first thought that appears in my head is: ‘What, a normal lesson? BOOOORING’ so, I am afraid, I will have to come up with something…
Pirate’s shoes. Anka’s version:-)

Happy teaching!

Crumbs #28 Funky envelope

Ingredients

  • a set of flashcards
  • two pieces of cardboard stapled together on three sides
  • shapes cut out on the front page (cut out before stapling)

Procedures

  • hide the flashcards inside
  • show the students only a part of the card on the top, through the cut-outs, ask the kids ‘What is it?’
  • take out the card and proceed with the rest of them
  • hide the flashcards inside
  • show the students only a part of the card on the top, through the cut-outs, ask the kids ‘What is it?’
  • take out the card and proceed with the rest of them

Why we like it

  • this is a variation of the Through the Keyhole activity that I once saw in the I Spy coursebook. However, this original version included an A4 sheet of paper with a keyhole that the teacher needed to cut out and then move the card over the flashcard. I found this tool a very interesting one but, at the same time, a bit awkward to use as the teacher needed two hands to manipulate the cards, there was a chance that the children could still see bits of the card apart from the keyhole bit and the activity involved a lot of picking up and putting down the cards. All in all, too clumsy to handle.
  • to make a funky envelope you need only simple materials (A4 cardboard or simple photocopying A4 paper although it will not be as durable, white, colourful or recycled), a pair of scissors and a stapler or glue. As soon as one envelope gets destroyed, you can easily replace it with a new one.
  • you can have one simple cut-out shape or a selection of different shapes all over the envelope.
  • all the flashcards fit in nicely inside, the teacher can manipulate them more easily. I sometimes turn the envelope over, to change the cards inside and to add to the whole ritual.
  • I normally use when the kids are already familiar with the images on the flashcards not to make the task too challenging, in lesson two or three of the unit. However, there were also cases when I used the envelope to introduce a brand new topic and to raise the level of challenge.

Happy teaching!

Crumbs #27: A project I can be proud of

Ingredients

  • A3 paper
  • a yellow square aka the city centre for each pair
  • pencils, rulers, crayons, markers
  • a very detailed plan and careful staging (see below)
  • post-it notes (two different colours)
  • the materials to set the context based on the material from Superminds 5 by Herbert Puchta and Gunter Gerngross from CUP

Procedures

  • The introduction to the project was based on the material in the coursebook.
  • Afterwards we made a list of places in the city (I was taking notes on the board). Then, the kids were chatting in pairs, creating questions for each other: Which one is more important in a city, X or Y? Why? This was a fun activity, the kids were coming up with sometimes impossible pairs and providing justification for their choices.
  • I divided the kids into pairs and explained that we were going to design a good city. Each pair got a set of questions about their city and they were to discuss these with their partner. The handout was cut up into three pieces and they were given out, bit by bit (or rather, that was the plan. In the end, I only gave out the first part, the other phrases and questions were simply written on the board for everyone to see). I was only monitoring and asking follow-up questions. We did not have a whole class feedback.
  • I gave out the A3 sheets and the yellow square. I explained that it is the city centre and I asked the students to decide where it is in their town and to glue it on. I did it on my model. I drew the map legend box and I drew two items on my plan. Afterwards, I gave out materials and the students started to work.
  • The negotiation language and the steps (stage 2 of the handout) was displayed on the board. I planned it differently but, in the end, I decided not to give this part of the handout out. There was no room for it on the tables anyway.
  • The kids were working on the project for about 10 – 15 minutes, until the end of the lesson.
  • At the beginning of the following lesson, the kids sat down with the same partner and each pair got a set of post-it notes, pink to write what they like about the city and green to write about the things that the city should have. We circulated the projects, kids worked in pairs, looked at the plans, talked and made their notes on the post-it notes, discussed what they liked about each city. They also made suggestions and all their ideas were written down on the post-it notes which they attached to the plans. Each pair had a chance to talk about all of the other posters.
  • In the end, the posters returned to their owners and the designers had a few minutes to look through the comments.
  • In the very last stage, each pair of designers was asked to provide feedback on the feedback they received. They did that by answering the following questions: Which are the favourite places in your city? What should your city have? Do you agree? Why? This was the only part of the project that was done in front of the whole group.
  • In the end, the posters were displayed on the walls.

Why we like it

  • I personally really liked this project because it was a diversion from a traditional approach to a project in which the students work in pairs or teams to produce something and then present it to the rest of the class and in which a creative stage is followed by a productive stage. I have decided to give up on this format almost entirely and, instead, to minimise the creative stage and to maximise the production without limiting it to the post-project phase.
  • Throughout the entire project, the kids produced lots and lots of language, they were making suggestions, expressing views and commenting on the other students’ suggestions. There were at least three layers of material created by the students, in one format or another.
  • In hindsight, I do believe that there were even more opportunities for the further extension of the project by comparing the real cities the kids know and whether they would be a good place to live, by making suggestions how the city they live in can be made better or by ‘visiting’ one of the other cities and writing letters or postcards from their visit…
  • I was glad that I decided to keep the creative part of the project, even if in a limited format. They students really did enjoy designing their cities, drawing and colouring, even though in my eyes (a boring teacher here) they should be the first to go as not very generative.
  • It looks like my kids also enjoyed the project. They were asking after the lesson whether I would put the posters up (I did!) and, a few days later, whether we are going to have any more project lessons (we will!)

Happy teaching!

Teaching English through Art: Andy Warhol

Dear reader! I hope you are here because you have been in search of ideas for a lesson on Art and English for primary school children. If so, you are in the right place! I would like to share with you a lesson that I taught a few months ago as a part of my Art Explorers programme. I would like to start with some blowing my own trumpet in an attempt to inspire you and to think ‘I want one of those!

It was a great lesson because…

  • our group of Art Explorers was a mixed-age, a mixed-level and a mixed-ability group, with some pre-A, some A1 and some A2 children and we were all united in art. Everyone was involved, everyone was producing as much as they could and everyone had fun.
  • the kids who took part were the members of five different groups at the school and it was the first time they had a chance to interact with each other, in English.
  • the children had a chance to revise and practise English, to find out about Andy Warhol, to talk about feelings, emotions and associations and to exercise their creativity in the craft task.
  • it worked very well as an introduction to our Art Explorers programme
  • it was relatively low-key as regards the preparation and craft materials as we used the simplest things available: a powerpoint, a handout, a few sets of vocabulary flashcards, a few sets of watercolours, paintbrushes and cups.
  • it lasted 60 minutes but it could easily be adapted to 45 or 90 minutes, depending on the needs of the group and the age of the students.

The lesson, stage by stage

Stage 1: Introduction

We said hello, introduced ourselves and we had a small ‘get to know each other’. Each pair of students got a pile of flashcards (food, toys, sports, colours, animals etc). The students were supposed to pick out one card and to ask each: Do you like…. There was a model question and answers on the board, together with ‘because’ which the older students were already familiar with in order to encourage more developed answers.

Stage 2: Colours and emotions

We revised the emotions and a set of the basic adjectives was displayed on the board as a point of reference. Afterwards, we revised the colours and I introduced the idea of associations. The key word here (‘associations’) is actually quite similar to its counterpart in the kids’ L1 but I decided to use even a simpler structure ‘Green is a happy colour because…’

The kids were put into pairs, for another speaking activity and they were comparing their own associations related to each of the colours. At this point we did not use the flashcards. Instead, eaach pair got a set of markers and they were asked to discuss all the colours in the set. Afterwards we compared our ideas.

Stage 3: The artist of the day

We moved to the TV room to meet the artist of the day. At this point I was using the powerpoint which you can find in the attachments.

First of all we looked at the photo of Andy and the kids said as much as they could, about his appearance and character. Only later did I introduce him properly, albeit briefly – as artist, from the US, a very creative person.

I showed the kids a few paintings and asked what they thought of them. They were using the simplest structures of ‘I like’ and ‘I don’t like’ and, in the case of the older and more advanced students, to provide a rationale for their views.

The Campbell soup was especially interesting. First of all, because we compared it to the local brand of ready made food that the kids could relate to and it was a huge surprise that such a usual item can become an artifact. Second of all, this particular painting was how we transitioned into the theme of the day: how the same item, represented in different colours can create different associations.

Stage: The colours and the emotions

We looked at the photograph of Marilyn Monroe and one of the most famous paintings by Andy Warhol and at the similar painting of Mickey Mouse. We worked as a group and we talked about the different emotions related to different versions of Marilyn and Mickey Mouse and how they made us feel. I wanted to keep it open class in order to give the students a chance to hear as many different versions and ideas as possible to show them that the same painting can generate a great variety of emotions.

Stage: Let’s create

I told the kids that we are going to try to express our emotions and that we are going to be like Andy Warhol. I added that to Andy, Marilyn and Mickey were important symbols because he was American and that we would use some other symbols. At this point, the kids were already shouting out the name ‘Chebourashka’:-)

We went back to the other classroom. Everyone got a handout (see below) and a pencil or a marker. First, we all decided what feelings and emotions we wanted to represent and we labelled all the sections of the handout.

Afterwards, I gave out the painting materials and we sat down to work. The kids were given time to paint and I was painting my own and monitoring and chatting to the kids and asking the follow-up questions.

Stage: Tell me about your Chebourashka

The kids worked in pairs and told their partner about their pictures and the emotions they represented and, whenver possible, provided rationale for that. In that particular lesson, we only had enough time to talk to one partner but, in theory, there is a lot more potential and it is more than recommended for the kids to swap pairs and to talk to as many peers as possible.

Stage: Goodbye

We finished the lesson with cleaning up, with a round of stickers and with a song.

@funkysocksanddragons

Materials

Crumbs #24: The sheep! A game

Instead of an introduction

I have a small problem: my brain does not like dealing with written instructions and, really, any instructions whatsoever. I cannot make myself. What that means for my life is that I use devices instead of reading the manuals, I prefer to watch cooking videos rather than reading any recipes (and, indeed, no matter how exciting the food, if the instructions for cooking are longer than four or five lines, I immediately lose interest). In my teaching life, that means never reading any teachers’ books (if I can help it and most of the time I can). If I find an activity that I like, in a resource pack, for example, and I cannot figure out how to use it only from the game itself, well, I just never use it at all.

Or I make up my own rules. That’s exactly what happened with this game.

It actually makes me giggle. I have had this game for about three years (a lovely present from Chee-Way) and it was only this week that I noticed the name of the game. Apparently, it is called Snap. Oh, well.

This morning I was finally inspired enough to google how to play it and I found it easily enough, only to find out that I had never played it the right way. Oh, well.

Actually, I had some suspicious that what we were playing was inspired by another game, that I once heard about but when I bothered to find out, it turned out this morning that I couldn’t have been more wrong. Oh, well.

The Sheep Game (as we know it)

  • There are 12 different emotions / feelings / adjectives in the set. We started to play with those that the kids knew already and, then, we kept adding one or two with every next game. At this point, they know all of the adjectives and we play with the whole set.
  • There are 4 cards of each adjective but in any real game, we use only two of each. One is displayed on the floor in the middle of the circle. The other one we deal among the teams. Usually each team ends up with four cards.
  • The students keep their cards secret from the other teams.
  • We sit in a circle, students ask the questions to the team sitting on their left or on their right but the questions are always travelling in one direction.
  • The main question is ‘Are you happy / sad / angry?’
  • If the team have this one particular card, they have to answer ‘Yes, I am’ or ‘Yes, we are’ and give away the card.
  • If the team don’t have this particular card, they have to say ‘No, I am not’ or ‘No, we are not’ and then it is their turn to ask the team on their left / right.
  • The game can be played for a certain number of rounds or until one of the teams loses all their cards. Then the winner is announced and that is the team has the biggest number of the initial set left.
  • It is a great game to practise the key vocabulary, in a sentence and although the students play in teams, they can win the game only when they pay attention throughout the entire game, listening to all the teams and keeping track of all the cards (or words) that were mentioned and lost, too.

Variations

  • Blue, please – one of the first games that I normally play with my primary students, in the first weeks of the course, as soon as we feel comfortable with the basic colours or numbers, we play with flashcards that we usually hide inside of the book, to make sure that the cards remain a secret. As soon as the kids progress, we replace the simple ‘please’ with a full question ‘Can I have blue, please?‘ and we play it this way with any set of vocabulary
  • Do you like… – another variation of the game that we play with the beginner primary students, we normally switch into that version when we start the topic of food and drink. If the students / teams have this particular flashcard in their set, they have to answer ‘Yes, I do‘ and they have to give the card away. If not, they answer ‘No, I don’t‘ and they continue playing.
  • What’s the matter with your…– a version that we played with my teens while working on the health / medical vocabulary which turned this game into a mini dialogue with different yes and no answers (yes = I need to have it / them checked, no = nothing I am fine) or Excuse me, where is the check-in gate? while we were working on the travelling / airport vocabulary (yes = it is next to…, no = sorry, I don’t know).
  • Any other set: the vocabulary set + the structure that would be used with this set
  • Whole class vs groups of three? With the younger kids we normally play whole class, in small pairs because it helps them learn the rules of the game much faster and because the game is easy to set up and you need no other materials apart from the set of flashcards normally used in class. With the older students, I use words on small cards and we normally play it with the whole class only in the beginning, later on they play in groups of three.
  • And the winner is… Well, there are at least two options here. For a very long time we played it in such a way that the winner was the team who had the biggest number of cards left at the end. Until my kids suggested that perhaps the winner should be the team who managed to get rid of their cards first and we played it this way, too. On the one hand, it makes the game less competitive and it is not a real shame to be ‘losing’ a card but we have had a situation when a team avoided asking the right question not to help their opponents win…I suppose the game can be played as normal and it can be decided only in the end who the winner is (all the cards lost vs all the cards saved) but we haven’t really tried it in the classroom. Not yet anyway.
  • Leftovers. We normally deal out all the cards available but keeping a few cards away and keeping them secret adds up to the challenge. These leftovers are going to be automatically the incorrect questions and the players will have to figure out first which ones these are and secondly, which ones not to ask anymore.

Happy teaching!

Wordwall: Top 10 Favourite Activities

Well, well, well, this is officially my post #100 on the blog and I am in the mood for celebrating. That might take the form of sharing some random numbers (8,280 visits and 5,563 visitors over a year and a half (and mind you, I have NO IDEA WHATSOEVER if it is ‘impressive’, ‘not so good at all’ or just ‘why even bring it up?!’) and pondering over the fact that these have been my 5 most popular posts:

a) Colourful semantics in EFL?

b) The Invisible Student and why you might want to have one

c) The first VYL lesson Survival Kit

d) A to Z of homework for very young learners

e) All you need is a picture

Which means that there is some interest in teaching pre-schoolers, using visuals in class and that Pasha, the invisible student, has become a bit more real, overall.

Apart from that, however, I would also like to take this opportunity to share with you my top 10 wordwall activities that I use with my primary and pre-primary students.

Disclaimer: Wordwall is amazing, no doubt about that, but it is still only a resource, a material. Its main aim is to provide opportunities for the students to produce the language. For that reason, in all of the games (for the lack of a better word) described below there will be always a differentiation between the material (the actual tool created with wordwall formats) and the activity (how we use it in class).

Here we go (in no particular order):

  • Are you scared of?

Materials: Random cards, for example ‘Are you scared of…?

Activity: Kids take turns to ask everyone the key question using the cue on the card. All the students in the group answer. The same pattern can be used with any question ie Do you like…? Can you…? Have you got…?

Works well with: primary (they can attempt working in pairs and taking turns to ask a question to their partner only) and pre-primary, individual and groups

  • Tell me about

Materials: Open the box, for example Tell me about this picture (seasons #2)

Activity: Kids play in teams, ask for the box to be open, produce a sentence (or sentences about the picture), win the number of points. The game about seasons is a very simple one, for preschoolers, the one such as this one here, about animals, can generate a lot more language, also with preschoolers and, of course, a lot more with primary.

Works well with: primary and pre-primary (with pre-primary we play T vs the whole class), groups and individial (we play T vs the student).

  • What’s this? Stencils

Materials: Flashcards, double-sided, for example Secret animals. What’s this?

Activity: Kids play in teams, team A asks the question ‘What’s this?’, team B tries to answer. Afterwards the teacher flips the card to check. Depending on the vocabulary kids then say whether they like it or not or try to describe, too.

Works well with: pre-primary, individual and groups, it might be a bit under-challenging for the primary students

  • Which one is correct? Spelling

Materials: Flashcards, double-sided, with visuals and correct and incorrect spelling of the word Places in the city or a quiz with a similar idea, for example this one Superminds 5, Read and choose

Activities: Kids read both versions and choose the correct one. With the flashcards the teacher is flipping the cards back and forth, I use it mostly with my 1-1s. With groups the quiz version works better and it can turn into a proper quiz, with the kids writing the answers down.

Works well with: primary, individual and groups

  • Advanced riddles aka Turn your back

Materials: Random cards, for example Transport Revision.

Activities: Kids work in pairs, one student in each pair has to sit with their back to the TV/ interactive whiteboard, the other is looking at the board. T keeps dealing the cards. The student looking at the screen has to describe the word for their partner to guess. After a certain number of rounds they change. The cards usually have the words on them, too, so it works well with mixed ability groups.

Works well with: primary and teens. I have only tried it with groups.

  • Song support

Materials: Match, for example Pete the Cat, Rocking in my school shoes or As quiet as a mouse

Activity: We use the cards or the matching activity to sing the song, slowly, with pauses, to practise and to revise before the actual video / track. The set such as the one for the ‘As quiet as a mouse’ can be used to start creating own versions of the song as kids have only the animals and they can (if they are ready) to come up with their own adjectives.

Works well with: primary and pre-primary, individual and groups.

  • Story / video comprehension check

Materials: Match to accompany Peppa Pig ‘Fruit Day’ or a quiz to accompany Peppa Pig ‘George is ill’

Activities: We normally learn the vocabulary, get ready for watching the video and then watch it. The games described here are used to check comprehension. The quiz is read by the teacher and the kids answer ‘Yes’ and ‘No’ and correct the incorrect sentences (unless I use the same story with primary who can read it themselves). The matching activity is always accompanied by a structure. It can be a simple ‘Apples are for George’ or a more comples ‘George would like apples’.

Works well with: primary and pre-primary, individual or groups.

  • Memory Game

Materials: Match, for example I am going to the supermarket. I am going to buy bread or any other matching activity consisting of two components.

Activities: The game itself is usually set for homework. We check it together, whole class. Afterwards the kids are divided into pairs and they test each other, for example Student A says: I am going to the supermarket’, student B has to recreate the second half of the sentence. To help the kids a bit, I put up some key words (ie places and main verbs) on the board. The kids change after a few rounds.

Works well with: primary, individual or groups

  • Just questions

Materials: Flashcards or random cards, with full questions or prompts.

Activities: Kids work in pairs and the kids interview each other, reading the questions or prompts of the computer / TV / interactive whiteboard. Afterwards they swap.

Works well with: primary and teens, individual and groups

  • Yes / No

Materials: Radom cards or flashcards for example ‘She’s / He’s wearing’

Activities: Kids look at the cards and listen to the teacher describing the pictures. If the sentence is correct, they say ‘Yes’, if there is a mistake, they reply with ‘No!’ and correct the mistake. Later on, there is a lot of potential for the kids to take turns to lead the game. The older students can work in pairs, too, while looking at the screen / the interactive whiteboard / the TV.

Works well with: primary and pre-primary, individual and groups.

If you are looking for inspiration or ready activity, you can find my profile (Azapart) there. I share all of my activities so there is plenty to choose from, especially if you work with Playway to English and Superminds.

Here you will also find Part 2 of this post and even more ideas for using Wordwall games in your YL classes.

Happy teaching!

P.S. A request!

It is very simple.

I would like to know a tiny little bit more about my readers. There are so many of you, popping in here, again and again, and the numbers of visitors and visits are going up and make my heart sweel with joy. But I realised I don’t know anything about my readers and I would love to know, a tiny little bit more.

Hence the survey.

Breathe! From the series: One-word advice from a trainer.

I am a trainer and an assistant director of studies. I spend a relatively large part of my professional life sitting in the back of classrooms, observing. I love it.

Not that anyone asked (hahaha, here is one clumsy blogger, at your service. After all, one should start with ‘Many of you have been asking me…’ or ‘I’ve received many questions about…’ I DID NOT) but if I were to give one piece of advice to all the YL and VYL teachers (or maybe not only to them), it would be this: BREATHE.

If I were given a chance to use more words, I would say:

‘Breathe! Pause! Calm down! We care about the efficient use of the lesson time but nobody is in a hurry, nobody is rushing to catch a train. There is time. You will be doing a great service to yourself and to your kids. I promise. Inhale. Exhale. Repeat!’

What do I mean? Here are five ideas.

Instructions

Going slow is absolutely crucial while giving instructions.

Not always but frequently enough our primary and pre-primary students will be doing something in class for the first time in their lives, without any metaphors whatsoever. It is quite likely that we, the teachers are the first ones to introduce a boardgame to them, a role-play, a game with a dice, a pair-work activity, a mingle, the game of pelmanism or a project. Our students might behave like they have never done it before because, very often, they really haven’t. Or they haven’t done it in a foreign language to practise vocabulary or grammar. It really IS their first time! Our classroom IS full of Gagarins, Columbuses or Cabrals (or whoever is your favourite First-Timer Metaphor).

That is why the instructions we give have to be not only graded and accompanied by gestures and (ideally) by modelling but also paced. With the teacher taking baby steps, pausing (and breathing) for all the students to catch up. Before anyone is allowed to take the next step forward.

Taking this one breath in-between the sentences will really make a huge difference. Let’s breathe then!

A listening task, as in: any listening task

Listening tasks for young learners are another example how pausing can make the world go round and in the right way, too. This tiny (and, really, the most insignificant) movement of the teacher’s finger pressing PAUSE on the CD player / the telephone / the computer can be the factor that decides about the activity becoming a success or a failure. Something that amazes me every single time I see it in action.

PAUSE and the kids have a chance to hear what they are supposed to hear, circle what they are supposed to circle and get ready for the next bit. PAUSE and the teacher has a real chance to monitor while in-task. PAUSE and if there have been any glitches, now is the time to fix things and to save the rest of the activity.

DON’T and they miss the first example because they are still not quite sure what they are doing. Then they miss the second example because the breaks between the pieces of the recording are too short and there are no numbers or beeps to help their focus. DON’T and, inevitably, they miss the third one, too, because they missed the previous two and everything becomes just a mesh of sounds. DON’T and you have no chance to monitor or to give feedback, Although, really, it is NOT a mini-test that the kids should pass. It is only an opportunity to develop their listening comprehension skills. It is ok to help, to support and to guide. Unless it is a real test.

So maybe it is a good idea, to pause and to breathe?

Questions and answers

Here is a question: Do you know how long is the average ‘wait time’ aka the time that elapses between the moment a teacher asks a question and the moment a student is expected to answer it?

Well, fasten your seatbelts because it is quite likely that what I am about to tell you will be a bit of a shock.

Apparently, we, teachers wait as long as long as 1.5 seconds at maximum and most of the time even less than that. One second and a half. Which means that we don’t really wait at all. Either student A knows that answer that we want to get and they provide it or they don’t (more likely) and we move on to student B or C until we find what we want or we just answer the question ourselves.

Extending that wait time can have a huge impact on students’ learning, engagement and, possibly, also on their confidence because they will be given a chance and time to rise and shine. And don’t worry. By extending here I mean ‘waiting three (3) seconds‘, not the whole eternity. 3 seconds aka one inhale – exhale set. Breathe!

Just look at the picture first

This particular issue is going to make an entry here for one and very specific reason: our coursebooks and all the materials for YL are full of great visual material which, sadly, is not given all the attention it deserves.

The first question that I often I ask my trainees during the post-observation feedback session while discussing visuals, photographs, cartoons and drawings is: Why not spend more time on talking about the picture? There are so many things that you can do with a picture! (If you are not sure what these are, have a look at the earlier posts, here and here).

Once we establish that these do indeed have a lot of potential that needs to be tapped into, the question arises of how to do it. And this is how we get back to breathing.

Whenever students are shown a new picture, one that they have never seen before, they need to be given time to take it in, with its narration and all the details. It is more important for the younger learners, since their cognitive skills are still developing but it can be beneficial for the learners of all age groups and levels. If you are in doubt, just have a look at how visuals are dealt with during the speaking part of different Cambridge exams, from Movers, through PET to CAE, although with the higher levels it is hidden under the lengthy instructions from the interlocutor during which the candidates are allowed to look at the photographs they are to describe.

Step 1: instructions, Step 2: one deep breath while the kids are getting ready. Thinking time is precious and it extends on all the activities, picture-related or not.

Classroom management

Last but not least, the main destroyer of the peaceful flow of a VYL and YL lesson makes an appearance, too – the unwanted behaviour, in all its shapes and sizes.

The option of ‘doing nothing’ is out of the question, it is the teacher’s job to react but perhaps it is worth considering whether the immediate reaction is the best solution. After all, there might be some situations in which everyone would benefit from the teacher taking a deep breath and using this second or two to calm down, to consider the options and to see the situation from the little people’s point of view? Maybe the situation was not that serious? Maybe it was just a silly joke? Maybe just an unfortunate mistake? Maybe the reaction does not need to involve the headmaster, the parents and the armoured infantry? At least in some cases. This tiny little pause might help establish that. The thinking time for the teacher. And then – back to action!

Happy teaching!

My favourite songs aka Where to start if you have never sung before

This post is dedicated to all the teachers who soon are going to be entering the VYL or YL classrooms for the first time ever and are now wondering how to prepare for that.

Why?

Songs are definitely the resource that a teacher should use while teaching primary or pre-primary. A while ago I have tried to collect all the reasons to sing a song in one post (the full list here) but if you have never sung before in the classroom, here are the five most important reasons

  • songs will help you create a framework for the lesson, something to begin with, something to finish with, some nice punctuation marks in the lesson
  • they will be the easiest way of changing the pace of the lesson. Even if the kids don’t participate fully from the very beginning by singing, the song itself will work as a stirrer (or a settler, if you choose a very calm and peaceful one)
  • they will create an opportunity for the children to participate, at least with movement and gestures and, depending on the song, even with a few words or structures
  • songs are something that we all do together so they will help you ‘unite’ the group after the tasks on which the kids work individually and they will help to create a community
  • you can share them with the parents, to listen at home, this way taking English out of the classroom

Some do’s and don’t’s

Staging a song lesson for pre-primary or primary should, in fact, be a separate post, because there is a great variety of techniques and activties that can be used. For now, I can recommend having a look at this post here as well as the five tips.

  • Listen to the song before the lesson and get ready. Plan how you are going to introduce it. Simply pressing the PLAY button and saying ‘Let’s sing’ is not going to do the job with songs in the EFL / ESL classroom.
  • Play the video. It will really help the kids understand what the song is about.
  • Sometimes they are already in the song and in the video, sometimes not and we have to come up with a set to use with each song. It is something worth investing your time in because the gestures will help the kids understand and remember the lyrics. What’s even more important, especially in the first lesson with a new song – gestures will give the children a real opportunity to participate.
  • Sing yourself, do all the gestures yourself. And with a smile, too! Even if you are the only one and even if the students don’t join you straight away. It is perfectly natural, they need time to get used to the music, the lyrics, the gestures, the rhythm. Plus, you are the leader! If you don’t get involved, why would your students?
  • Share the song with the parents and use it again. A song is never just for one lesson.

My favourite hello songs

Hello. Super Simple Songs – a real hit and a good start, with 6 emotions, including ‘not so good’, to show the kids that it is ok to feel not happy, sometimes.

Hello Song. Fun Kids English – another good one, with monsters, there are actually two parts of it, each with 4 emotions. It is good to have a new version when the kids get bored with the first one.

Hello Song For Kids, The Singing Walrus – I love it because it includes not only the hello questions but also some Present Simple sentences and questions about the everyday school routine (‘Everyday I go to school) and each of them is repeated twice, in the classroom it can be T and then kids. Lots of potential.

Hello Song for Kids, EFL Kids Videos – very simple but very energetic, lots of repetition but also a nice variation of verses sung loudly and quietly. We loved it.

Hello Hello! Can you clap your hands. Super Simple Songs – another simple one with a few movements, perfect if you want to get up and move a bit

My favourite goodbye songs

Goodbye to you! EFL Kids Videos – using the same melody and the same pattern as the hello song from EFL Kids Videos, helps to save the time and works both as ‘something old’ and ‘something new’

Bye Bye Goodbye Super Simple Songs – a kind of a follow-up to the Hello Hello Can you clap your hands, the music is different but the song uses some of the verbs.

Goodbye Song for Kids, The Singing Walrus – this one is a bit more complex, but again, as their hello song, it uses full sentences. Lots of potential.

See you later, aligator, Super Simple Songs – a very short one, includes gestures for alligator and butterfuly and if you want, it can go on forever.

My favourite movement songs

Head, shoulders, knees and toes, Super Simple Songs – everything you may need in your first lessons, just getting up and moving a bit, even if the topic of body parts is scheduled for some other day

Move. Dance Song For Kids. Super Simple Songs – my latest discovery, lots of movement (verbs), a great melody. It can be used partially ie the first three parts of as a whole. It can be also extended if kids have their own ideas.

Jump, Run and Shout. The Singing Walrus – another energetic, rock song with movement. Just like Move, we like to sing it in the beginning of the lesson. It helps to get rid of lots of energy.

The Jellyfish Song. Super Simple Songs – a simple but effective song, very little langauge here, you are going to be pretending that you are jellyfish. Somehow, the kids get a chance to move but also to calm down.

Shake Your Sillies Out. Brain Breaks For Kids. – this is one is for older kids, lots of great ideas here and quite tiring, when used from the beginning until the end, but my kids loved the idea of ‘shaking the sillies out’ or ‘clapping our crazies out’ (very necessary on some days) so we only used the movements, not the song.

My favourite randomness

Open Shut Them, Super Simple Songs – one of my favourite songs ever because it teaches adjectives and opposites (somehow neglected by many of the coursebooks and programmes) and you can easily include gestures. Plus there are four parts of it which means that a new one can be added as soon as necessary. Open Shut Them can almost become a part of the classroom routine for the whole year and later on, the teacher can even extend it by creating own versions.

Hickory Dickory Dock, Super Simple Songs – some counting, some animals and an unexpected ending.

What’s your favourite colour? Super Simple Songs – first of all, it can be inroduced from the beginning of the course (colours), it can be used as a game (to point at different colours in the room as the come up in the song) and, last but not least, it contains a great Q&A set (‘What’s your favourite…?’ ‘I like…’) and it can be turned into a real conversation and easily extended into other topics, as they come up i.e. toys, numbers, pets, letters.

Happy teaching!

Crumbs # 17: New beginnings. Things to do before the lesson.

They are growing up. My students are no longer the little babies they were when we said our first ‘Hello!’. Six years is a long time, after all. And because they are changing, the lesson is changing, too. I like to think that, in a way, we are growing together.

An example? For five years and five months my students would wait for me outside of the classroom, in a neat line and we would check the homework and have a little chat, 1-1, with them slowly entering the classroom (more about it here). Well, not anymore. Two months ago we stopped. For good.

Because it turned out that, all of a sudden, the kids like to be in the classroom before the lesson. The choose their seats, take out their books, draw on the board or show each what they do in Maths classes at school. They also like to hide to surprise me (if I happen to leave to get some water or flashcards), walk around to inspect what I prepared for the day or just sit down and read they books.

And because over those six years we have managed to establish what’s OK and what’s not OK in terms of behaviour and because they have grown up and become more mature, I just let them do it and take over the classroom during the break. Plus, let’s be honest, they seem to be enjoying it a lot and I just don’t have the heart to forbid them and to continue to impose lining up.

Instead, I had an idea: how about a before-the-lesson activity for the early comers? It turned to be a very good idea indeed!

Ingredients

  • A whiteboard and a set of markers.
  • An activity that can be prepared on the board before the lesson for the students to work on potentially unsupervised (although in real life it differs, depending on whether I can be in the classroom during the break or not)
  • A set of easy instructions written on the board and an example
  • A longer break before the lesson – not obligatory but highly recommended
  • It might be necessary for the teacher to hint that there is something on the board that needs dealing with, at least when this part of the routine is introduced. It is quite likely that the kids would just not approach the board if there are any notes on it.
  • Ghost letters, focus: pronunciation. Students underline the silent letters in the words written on the board
  • Letter snake, focus: reading / writing. Students divide the chain (or a snake of letters) into words. Each snake can be made as challenging as necessary ie only the words themselves, the words with letters-distractors, the words in a sentence.
  • Letter stories, focus: reading/ writing. Students divide the very long chain (or a snake of letters) into words and sentences. I used a different colour for each line of the story and neat breaks between the lines, too, not to overwhelm the kids. Forgot to take a photo:-(
  • To rhyme or not to rhyme, focus: phonemic awareness. Students put the rhyming words into pairs. Again, colour-coding is supposed to be make is a bit more achievable and visually appealing.
  • Messed-up, focus: vocabulary revision. Students put the halves of words together.
  • Angrams (and Secret Messages): These are just silly anagrams which are a nice task, more necessary for the Starters students but fun for everyone. It can be a set of random words, connected by the topic (or not) or sentences, especially if there is an especially important message that the teacher needs to pass on to the students. The message below appeared on the board before the second lesson with the mock Movers test, in an attempt to praise the kids and to motivate them. It worked!

Why we like it

  • Those who come early can wait for the lesson doing something in English.
  • They provide additional practice and revision in different areas and skills: reading, writing, vocabulary, pronunciation
  • Different kids come early on different days so they get to work in different pairs and teams which seems to strengthen the sense of community in the group
  • It seems to have become ‘fashionable’ to arrive early for class (not that it has even been a problem) but it is obvious that they have already developed the habit of walking in and checking what’s on the board
  • The teacher is applying all her creative powers to come up with more and more pre-lesson activities

Happy teaching!