Why you DON’T want to mix age groups and levels. Adventures of a teacher

Sigh.

This was my first reaction to the context I had a chance to teach in last week. To be honest, I am still sighing because an experience like that does not wear off too easily. Yes, it was not a positive experience.

Now, even being just dead inside and very very angry (not a contradiction) at the time it was taking place, I was still a devoted teacher and, even more importantly from the point of view of this post, I was a trainer, reflecting and assessing. So here we are. For you, what not to do and why.

What happened

Last week I had a chance to teach an extremely mixed ability group. I am an experienced teacher and an experienced trainer and, over the years, I have had an opportunity to work in a variety of contexts with different students and mixed ability groups in all shapes and forms and types of a mixture. Last Wednesday I reached a new level.

There were nine kids in the classroom. Three of them – real beginners who should be learning colours and their first hellos. Seven of them – pre-literate students who would require an alternative set of materials. Two kids – of a higher than ‘just pre-A1’ who should be in a more advanced group. One child, aged 5 (according to the information from the admin) and aged 4 (according to what he told me) – a pre-schooler who should not be spending in the classroom more than 30 minutes. Three kids, aged 10 – who should be in a completely different group where they are given a task on a higher cognitive level of challenge than just a picture to colour. And yet, there we were, myself and all nine kids (all of them called Sasha, traditionally), in the same classroom, for 4 academic hours of a lesson.

We all survived. Here are some notes from this memorable day.

The youngest Sasha…

  • The youngest Sasha was completely out of place. He did not understand what we were doing and the only reason why he even stayed in the classroom was that his older sister was present and involved. He was trying to join in, though, and the result of it was a little boy babbling in some kind of a newspeak, that was neither pidgin, nor Sasha’s L1 and not any langauge known to mankind. Albeit, to be honest, it to someone who did not know English, it might have sounded like English, from afar. My heart was literally aching at his efforts.
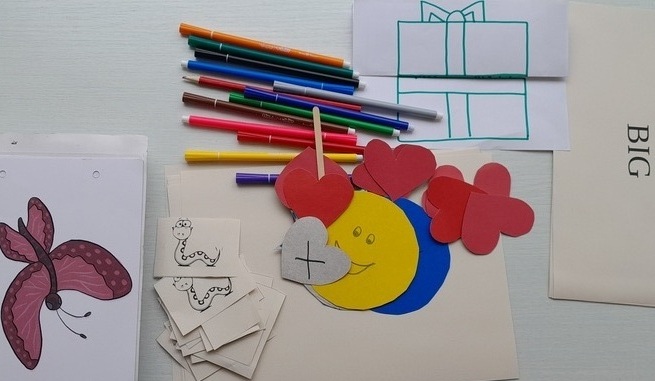
  • The youngest Sasha had no idea of the way you interact in the classroom. On countless of occasions, he would get up, come to the board, pick up markers to draw on the board (since the classroom was not baby-proof, I did not expect a pre-schooler), to try to nick a few post-it notes. He did not understand why he did not get a set of mini-cards (and some kids did, the leaders of all the small teams) and when he got a small heart for the other activity, he did not want to give it back. Because why would he? At one point, I felt like being on the playground and ‘fighting’ over toys.
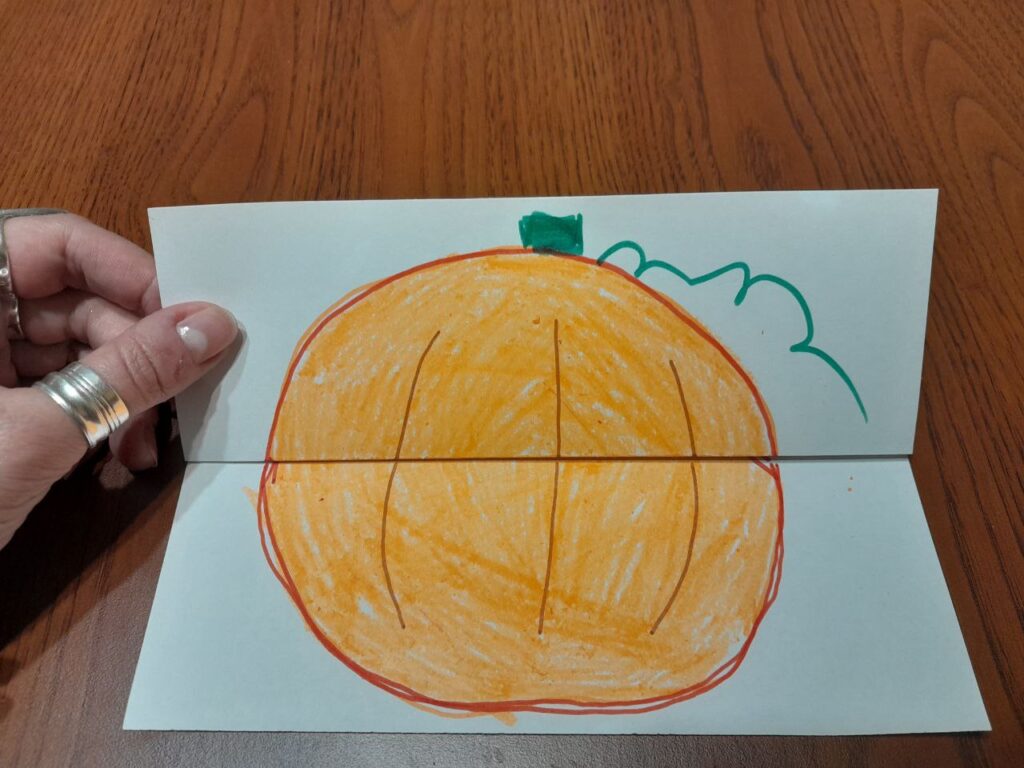
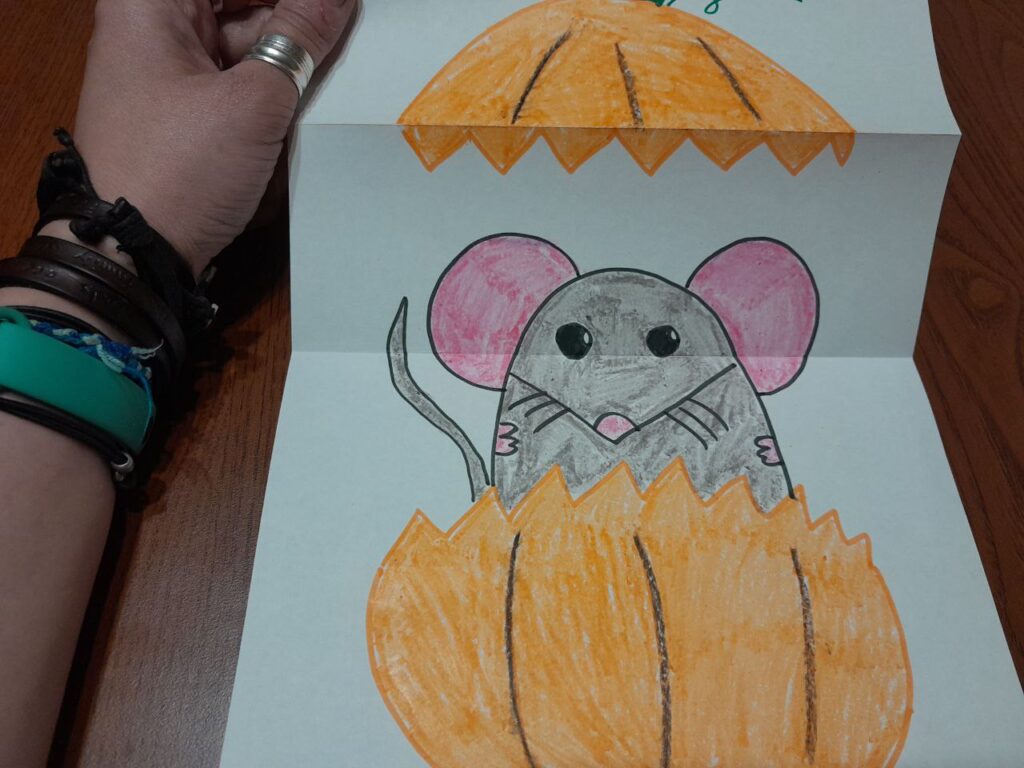
  • It was beyond the little Sasha’s understanding why we would even dictate the colours for each other to use in a colouring dictation. ‘But I want to colour it blue and green!’, he said, already on the verge of tears and, later on, naturally, he was thoroughly confused that his picture was different from the teacher’s, his sister’s, all the other kids’ and he kept asking if he did a good job and if he completed the task well.

The Sashas in the middle…

  • Generally, these Sashas were under control. After all, they are the kids who have spent the longest period of time in the classroom and they are the kids who have had a chance to experience and to benefit from the routine of the previous two weeks. High five to the teacher who made an effort to build this routine. It was worth it. These are also the children who constitue the biggest group and the activities were generally designed for them and graded to their linguistic, cognitive and social skills. They did participate, they did produce, they did work well in pairs and, unknowingly, they were the kids that the teacher was looking at and sighing with relief. ‘Not all is lost’, thought the teacher. ‘I have not run in vain’, thought the teacher, quoting her favourite quote from the Bible, albeit a very un-religious one.
  • But, still, the atmosphere of the lesson, chaotic and messy, unravelling and tense (my bad, I know that) also took its toll even on them. My amazing twins were on the edge and, at one point, a heated debate broke out because one of them wanted to play a simple gussing game (as intented and as they were instructed to) whereas the other wanted some hints and suggestions (because that is how we played in the previous weeks). ‘Why aren’t you miming? Why aren’t you telling me if it is big or small and if you like it?’, he was asking. They ended up getting upset with each other and breaking up for a minute. The other pair, Sasha girls were sleepy and tired and on the verge of tears and even though they did play, they also spent a moment discussing whether they should just divide the cards into two piles or take them from the same pile and how much time is necessary to make a decision which word you want to use to talk about (Answer: not too much, the sooner, the better).
  • The day is quite long and the kids like to ask how much time is left. We have established a routine that when they want to know, they should ask (‘What time is it?’) and the teacher checks the watch and writes how many minutes are left until the nearest break. I don’t quite like it but they are quite young, they cannot tell the time using the clock and, still, they need something to understand and to manage the lesson time. We have drilled the question, it is always on the board and, although it is slightly annoying to hear the same question over and over again, it gives me an idea of how involved the group are. The more frequent the questions, the more ‘trouble’ we are in. Unsurprisingly, in that particular lesson, this question was popping up again and again and again.

The oldest Sashas…

  • The oldest Sashas finished the task way too quickly for teacher’s liking and we all had to wrap up a bit faster, although, indeed, they got convinced into taking part in some kind of an extension and it did buy the rest of us some time.
  • The oldest Sashas, because there were more than one, spent the lesson being on the brink of getting involved in some alternative, mostly illicit activities. In the end, they did not, with an experienced teacher present, but, oh Lord, there was so much potential for it. If there had been only one older Sasha, they would have been more easily contained. With two or three, at times, they could bounce their exciting ideas off each other, fueling the behaviour that were not quite welcome.
  • It was almost a miracle that the older Sashas enjoy colouring and that they got midly interested in completing the task. They were most engaged than I would have expected from children of their age. I can safely say that, yes, I did get away with it.
  • In an ideal world, these Sashas would be getting a much closer monitoring from the teacher to ensure that they are using the same material but producing a lot more langauge than the average student. Unfortunately, with the kind of mix that I actually had to deal with, it was not possible. Apart from the storybird activity that involved a 1-1 interaction with the teacher, closely supervised. Overall, the teacher was not happy at all.
  • I have also noticed that one of my older Sashas has got a very strong inclination for bullying. Nothing happened but I do not like the vibe and the way he behaves around the younger children (aka all the other children in the group). He is naturally a leader without any skill to be one and he has absolutely no one to look up to and to be inspired by. He would benefit more from being in a group of older children in order to develop his social skills and to learn from the other kids.

If I could think of a metaphor for that day…

A sweater that is fraying uncontrollably, at three different ends.

Washing the windows in a flat ont the top floor, in a blocks of flats. Standing on the chair and reaching out to this little piece in the corner, thinking that this may all end up in a very, very bad place.

A flooded kitchen, with you trying to make decisions quickly and to save something, to wipe the floor and not to let the flood spread to the neighbours below you.

A three-course dinner for ten, prepared by one relatively skilled chef, on one hob, with a pot and a pan.

A herd of cows that your grandma asked you to bring back from the pasture, walking them on the main village road, with all the tractors and all the combine harvester coming back from the fields and using the same road AND all the neighbours and villagers standing by the fences of their houses, watching the god-damn show because a city teenager trying to manage a task she had no preparation or knowledge of. Speaking from experience, in case you are wondering.

Any of the experiences that you spend hating every second of and yet you go on and you survive. Exhausted. And then you just sigh and vent in a post on your blog.

Coda

There is not much to say here apart from this one thing: all these kids should not be learning English together. There are too many factors that come into the picture that make it an almost impossible task for the teacher. It is true that English language groups are rarely homogenous and it is especially true in case of young learners groups and, especially especially, in case of primary school students. Teachers are simply obliged to deal with that issue on daily basis. Managing a group of kids who are on the same level of English but who are of different ages – it is possible. Managing a group of kids who are of the same age but have different levels of English – it is manageable. However, this kind of a mix, different age groups, different levels of English, different levels of literacy skills, cognitive skills and social skills development with such a number of kids is simply not a good idea. If you have a choice, please, DO NOT DO IT.

Happy teaching!

5 times when a piece of paper made a difference (in the EFL classroom)

The EFL classroom, just like the Mary Poppins’ bag, is full of the little pieces that to other people might be just random junk but to the teachers of young learners, they are the true gems and the amazing, life-saving fireworks. This post today includes only 5 of them, something old, something blue, something borrowed, something blue or, in the EFL words, something for production, something for games, something for classroom management…Because sharing is caring.

One: paper hearts

You need: a set of small colourful cardboard cards, which stand for ‘I like’ (the colour side) and ‘I don’t like’ (the side with a small cross).

You will need these to encourage the kids to start expressing opinions. The hearts are used as a symbolic representation of the structure when it is introduced, they are used in all the handouts, even with the youngest kids, but they really start working when the students can physically hold them and use them to react to express opinions by showing the appropriate side of the heart, depending on their opinion. First come the gestures and the symbols, then the language itself and then the hearts become unnecessary because the kids are ready to just talk about the things they like and those that they don’t. It works amazingly well with small groups and it works even better with the bigger groups because all the kids can talk at the same time and the teacher gets the immediate group feedback with all the hearts up into the air.

Two: Little random word cards

You need: a set of regular small cards with the key vocabulary from the unit. They can be handwritten or printed. For the younger kids these are replaced with a set of mini-flashcards, with the images and the text or only the images.

You can: use them in a variety of games to practise vocabulary such as: riddles (make a definition to guess the word), questions (ask a question with the word for your partner to answer), similar or different (taking two words at a time to look for similarities between them), categories (with students grouping the words in any way they want), random stories (telling stories with the words taken out of the pile in a random order) or testing each other (to check the meaning or spelling of certain words) or pelmanism if there are two sets of words per group or pair. Anything for more vocabulary practice and use.

Three: Faces

You need: a set of cardboard circles with emoticons for them. The disposable paper plates work amazingly well here, too.

You can use them during the hello circle to help the kids answer the question ‘How are you today?’ as they are allowed to manipulate the cards while talking to the teacher. We also use them all the time while telling stories to help illustrate all the emotions involved and while working with any visuals that accompany listening or reading activities in the coursebook. The emotion flashcards can also come in handy with different behaviour issues. Knowing the words such as ‘angry’, ‘sad’ or ‘ill’ can really come in handy in many class situations.

Four: Stars

You need: a set of cardboard stars, cut out of regular or, if you are really fancy, out of some colourful cardboard paper, and some blutack or magnets. In a super upgraded version these cardboard stars can have a piece of magnetic sheet glued to them (aka this is how we recycle the merch magnets given out at out local pizza place, cut them up and glue them to things we want to use on the board).

Why? These have become my go-to, clutching-at-straws solution to motivate my kids to speak more English in class at the point when my sweet primary kids grew up and became more talkative and they were more likely to choose their first language to chat away. The stars, given out demonstratively with an excited ‘Oh, what beautiful English!’ worked in two ways. On the one hand, they made them focused on using the target language, on the other hand, somehow, magically almost, it got them to use the target langaguage from the higher shelf. Once they got into the habit of communicating mostly in English, we could stop using the stars in every lesson.

Five: Names Cards

You need: a set of small cardboard rectangles, with each of the students’ names on them, one per card, possibly laminated, to make them year-long-lasting.

You can: use them for any pairwork or group forming activity without getting personal. The cards can be kept in a box or a bag and drawn out by the teacher to organise the kids in a fun way. Even more so, the students can be involved in the draft. This way the grouping and pairing will be the most impersonal, the most random and the most genuine ever. It might also make it easier for the students to accept the outcome, even if they end up working with the classmates whom they might not like very much. After all, it will be due to luck, good or bad, not due to some very arbitrary decision of the teacher.

Happy teaching!

Crumbs #55 Early readers and the sentence building blocks.

‘Pigs might fly’ from Poznan

Ingredients

  • Since I am teaching online at the moment, my main resources are digital. To create this material and this activity, I used my Miro Board although the same could be done using a regular powerpoint. In the classroom, the activity could be recreated with a set of flashcards and wordcards, on the board or on the floor.
  • Three sets of cards are necessary: the key phrase, the numbers, the objects.
Step 1

Procedures

  • We start with revising the key structures and the vocabulary. We read together all the cards.
  • We read the first sentence (I’ve got’) and add one of the food items. Once it is added, the card changes the colour to match the first one. The same activity is repeated with all the cards.
  • We read the sentences again but this time the students choose the number, the teacher add the number and changes the colour to match the colour of the sentence. The same procedure is repeated with all the cards.
  • We read all the sentences together.
  • We play in pairs and we call out the colour of the sentence for the partner to read out loud. The teacher is monitoring and helping.
Step 2

Why we like it

  • This kind of an activity is introduced in the middle of the unit when the students are more familiar with the key structure (I’ve got) and the vocabulary (food and numbers 1 – 20) and its main aims the literacy development.
  • I have only used it with 1-1 online students but there is some potential for adapting this activity for a group of even for pairs (with a multiple set of cards or colour-coded handouts).
  • The activity helps the kids deal with the written form of the vocabulary and structures and to read the words in sentences. In a way, they are also involved in writing because they put the blocks together and make decisions about the numbers, too.
  • The colours help to make the activity more fun and to help them deal with a text that for them will be long and potentially scary. The activity uses only one structure at a time which will be also an early reader-friendly approach.
  • The activity can be made more or less challenging by adding food illustrations to help the kids read, extending the number of sentences or extending the sentences ie I’ve got 4 cakes and 3 apples, etc. When the students are ready, the teacher can also introduce a variety of structures in one set i.e. I’ve got, I like, I can etc.
  • The activity is easy to prepare, it can be recycled and it can be used with a variety of structures.

Step 3

Happy teaching!

I am a lazy teacher and why you should be, too!

Two weeks ago I was invited to present at the monthly meeting of the Teacher – Mentor Learning Community which was founded by Anna Kashcheeva who, over the years, has been my fellow teacher, ADOS, trainer, my trainee and my trainer and supervisor. Oh, what a lovely list))

I prepared a session on laziness, one of my professional passions. The session went well, the audience were amazing and I got a lot of positive feedback. We were not recording but the presentation was followed up by a post on the community’s blog and you can find it here. Once you get there, don’t forget to have a look at all the other posts and materials.

Happy teaching!

DIY peer observations aka Where to find videos to observe YL teachers in action

This is part II of the series, devoted to lessons with Young Learners aka Kids aka younger primary classes aka children aged 7 – 9 years old.

First part of the series, DIY observations with pre-schoolers, can be found here.

A few tips from the trainer

  • Choose the focus for the observation: classroom management, behaviour, staging, storytellings, songs, chants, literacy, working with big groups, students’ production, spontaneous production, interaction patterns, routine, variety, gestures, classroom management, timing and many many more.
  • Think of yourself as an observer, look for the strong points and the areas to improve. There is always something!
  • Be a kind observer! Remember that no matter what you are watching, the teacher WAS on tenterhooks because the lesson was filmed and that the whole filming adventure might have affected the teacher’s and the kids’ behaviour.
  • But don’t forget about your standards. I would not want to imply that all of these are great lessons that would get Above Standard if the lesson was assessed. They are not. In some cases, I have highlighted some of the strong points that got me especially interested. Everything else is up to you.
  • More than anything else, please remember that whatever was filmed, it is only a part of a lesson and we have no chance of finding out what happened before and after.
  • Think about your particular context (your institution, your group, your classroom, your country and your culture), would this activity and this approach work? Why? Why not? Can it be adapted?
  • If possible, watch the video again, after some time has passed or after you have had a chance to use some of the activities or approaches in practice. Are your impressions the same?
  • If possible, watch it with some other teachers, too! It is fun to find out what others think about it and sometimes we learn more from people that we disagree with!
  • I have tried to include a variety of contexts and countries of origin and I am hoping to be adding to this list when I find some more videos.

The videos

  1. A lesson from a Polish primary school in Gosciejow, year I, 24 minutes, about 20 kids. It looks like a typical lesson for year 1 beginners. It includes hello, revision, some movement, new vocabulary presentation and practice, and a focused task. The teacher provided a lot of exposure and controlled practice of the target language in this lesson.
  2. A lesson from a Polish school in Dabrowka, year II (recorded in September at the start of the academic year), 34 minutes. It looks like a typical lesson with that group, with their own routine. About 20 kids. It seems to be an open lesson, there are some parents in the classroom. There is some evidence of the class routine (hello, table time, movement, storytelling).
  3. A lesson from a Polish school in Tarnowo, year III (presumably), 34 minutes, about 20 kids. It is a revision lesson, with some favourite activities that the kids are already familiar with which can be used with different sets of vocabulary.
  4. A year 1 lesson from Almaty, Kazakhstan, 15 kids, 27 minutes. The lesson includes the following stages: Hello song, new vocabulary introduction and practice, reading and writing, , a video story, coursebook work, evaluation, feedback and the theatre based on the story, the final song. The video finishes with the commentary from the teacher, very interesting but in Russian only. According to the teacher, the main aim was to reinforce the new vocabulary, skills development and teaching values (work and play).
  5. A year 1 lesson from Nanjing, China, 36 minutes, over 20 kids. It is great to see how the teacher is using the gestures to praise, to instruct, to model, to teach vocabulary and grammar. He is also trying to introduce the vocabulary and immediately do something with it, although I am not quite sure if it is the kids’ very first lesson. The teacher is using some Chinese, alongside gestures and the presentation to clarify the concepts and ideas and the class rules. The lesson includes the following stages: hello, rules, warm up, alphabet, song, new vocabulary and structure, practice, goodbye. The video includes some subtitles to help clarify what is going on in class.
  6. A year 1 lesson from Kaluga, Russia, 38 minutes, about 10 students. The stages of the lesson: hello, introducing the lesson topic, pronunciation practice, hello role play (pairwork!),r revision, song, new vocabulary presentation and practice (vocabulary and vocabulary used with structures), a video, practice, song, literacy, literacy craft, writing, stickers and goodbye. It is great to see that the teacher always prepares the kids for the activity (ie the kids revise and drill the numbers before the song). I also found it interesting to see how much L1 is used by the teacher and what the purpose of it is, for example a short poem / riddle to help the kids remember the words in English. The teacher also explained a lot in Russian, presumably to help the kids feel more comfortable with the activities ie the pronunciation practice.
  7. A year 2 from Moscow, Russia, 41 minutes, 5 students. It is some kind of an open lesson. The stages of the lesson in the video: the lesson plan, tongue twisters, reading (cartoon), vocabulary revision, movement, literacy, riddles, homework. It is good to see that the teacher encourages using the vocabulary and structures and that they try different interaction patterns (whole class, individual, whole class vs one student).
  8. A year 1 lesson from Vietnam, only 20 minutes, about 20 kids in the room. It is a shortened version of the lesson (colour and fruit), but we can still observe the main stages: hello, hello song, new vocabulary introduction, practice and literacy, song, new vocabulary part 2, practice games, song. The group is quite big but the kids are using boards + chalk and they put up for the teacher to see their answers. It is also good to see that the teacher is using the new words individually and in sentences and that the abstract topic such as colours has been combined with something more real as fruit.

Happy teaching!

Yayoi Kusama and Pumpkins. Art and English in Primary

Yes, the Halloween was approaching and my English+Art lesson was on the day. Yes, I was just googling random things hoping that if I find something interesting, I will have a Halloween-ish lesson and if I don’t find anything, well, we will go in a different direction. At this point we have done colours, we have done leaves and, ideally, I was hoping to find some cool artist, some pumpkins and some technique that we have not tried before yet. Last year, around that time, we went to Ilya Mashkov as we tried to recreate his still-life with the magnificent cucurbita pepo but it was last year (aka we have done it already) and it was offline (aka it was more manageable)…I needed something different.

Surprisingly, googling ‘pumpkin in art’ can get you when you want to be)

The artist of the day.

Enter Yayoi Kusama. Until last Monday, I had never heard of her. Since last Monday, I have been a great fan. Her art is exploding with colour and with energy and she makes me feel like being a part of the Wonderland, Alice in the real world, easily available, at hand. And she loves dots and dots are circles aka the best shape ever that can be easily used in class (here is an earlier post about that).

We met Yayoi and found out about her favourite things and we looked at some of her paintings in our gallery as is now our habit. We also talked about the paintings we like and don’t like.

Yayoi Kusama and her favourite things
Our gallery in Miro

The language

In this particular lesson I wanted to focus on practising expressing opinion using ‘I like’ and ‘I don’t like’ and that is exactly what we did. We looked at Yayoi Kusama’s pumpkins and said what we think of them (P.S. We like them!), we looked at a range of creative pumpkin (google) said what we think of them and we enjoyed the variety in which pumpkins can appear (photos, art, real pumpkins (yes, these were present) and, finally, the Surprise Pumpkin that I have brought. See below)

The craft

The final product here was a compilation or an adaptation of two ideas from the amazing Art for Kids Hub and their pumpkin folding surprise and the most amazing mouse.

  • We looked at all the pumpkins, Kusama’s, the realia, the creative pumpkins
  • I presented the ready made product making sure that the Surprise Pumpkin is a proper surprise (‘Look, this is a pumpkin. But it is also a surprise. Are you ready? 3…2…1….’)
  • We went over the necessary materials with everyone (‘Have you got the paper? Have you got the pencils/markers/crayons?’)
  • I was making one more copy together with the kids. I am drawing on the regular paper, holding it in my hands, on a thick pad. Going step by step, slowly, pausing and waiting for the kids to complete every single step. This is absolutely crucial.
  • We folded the paper, stopping after every stage, showing the page to the camera. There are four essential stages: 1) show the A4 paper 2) fold the paper in half, widthwise 3) press at the crease / fold 4) fold the top flap outwards (show the kids how the edge of the paper touches the crease / fold in the middle 5) press at the crease / fold
  • Draw the pumpkin on the folded paper, that is at the 1/4 flap folded outwards and the 1/2 half at the bottom simultaneously, draw the stem and the leaf as well as three lines for the ribs. Don’t forget to pause at every stop, wait for the kids to complete every step and show you the result.
  • Open the paper and place it flat on the table. Draw the edge of the top half (‘Let’s draw a zigzac’)
  • Draw the edge of the bottom half (‘Let’s draw a zigzac here, too’)
  • Draw the mouse step by step: the oval for the body, two lines for the nose, the ears, the eyes, the whiskers, the tail and the hands.
  • Leave the colouring for after the lesson.
  • Play a bit with the surprise pumpkins that everyone prepared. My students simply recreated the ‘presentation’ that I gave at the beginning of the lesson, of their own accord, just like that.

Some final notes

  • Most of my students deal very well with the folding bit. Only one of us struggled a little bit and we needed mum’s help at the very beginning. It might be a good idea to let the parents know ahead of time and ask them to be at the ready, just in case.
  • As regards the materials, absolutely anything goes: coloured pencils are great, crayons are great, markers work, too. I am at my personal happiest drawing with markers and colouring with crayons or with crayons and markers, for the extra shine and glow.
  • Kids are amazing and they really can recreate the drawings or, rather, they can create their own versions of it. The only thing that is really necessary is the proper staging, going step by step, modelling and pausing, to give everyone time to complete the drawing.
  • It does not matter how big or how small the mouse is. It will all be hidden in the folds of the paper.
  • There are many variations of the craft. You can find some of them online. Below you can see what we have created ad hoc, just because we did everything that we needed and I could extend the lesson a bit. The pumpkin with a cat and the apple with a caterpillar were the result. These are only a few of the options!

Happy teaching!

Crumbs #38 A – Z Game

Ingredients

  • A piece of paper and something to write with
  • All the letters of the alphabet written in one or two columns, with some space to write, next to each letter

Procedures

  • The teacher divides the students into pairs or teams and gives out the paper with the letters of the alphabet or asks the kids to write these down.
  • Step 1: The teacher announces the topic i.e. Clothes and asks the kids write one word (or phrase) for each letter of the alphabet or, more realistically, for as many letters as they can. The teacher gives an example. Ideally, the teacher creates her/his own list in order to have a set of words to model the other stages of the activity.
  • The teacher sets the time limit (i.e. 5 minutes for the younger kids and 3 minutes for the older kids). It might be a good idea to use a song instead and after the song finishes, the activity does, too.
  • The kids work in teams and make a list of the words within the vocabulary set. After the time is up, the teacher stops the game.
  • Step 2: The kids exchange the lists and count the words or phrases which their friends have managed to write within the set time limit. The teacher writes the results for each team on the board.
  • Step 3: The teams read the words on the lists and choose: the most interesting word, the most unusual word, the funniest word, three words you also have, three words you don’t have, any word you don’t understand or remember etc. The teams work in pairs and find out why their partners put these words on the list. If possible, the kids exchange the lists with another team and repeat the procedure once or twice.

Why we like it

  • For the students it is a great opportunity to revise and recycle vocabulary. All the beginner levels aside, even when the main lesson aim is to introduce and to practise new vocabulary, chances are the kids have already learnt, heard, used or seen some of the words. After all, the vocabulary sets are repeated and extended from level to level, not to mention that most kids have more than one source of English in their lives: the state school, the language school, a private teacher, brothers, sisters, parents, videos on youtube, cartoons, stories, computer games online…This game is one of the easy ways of revising all this vocabulary to prepare for ‘something new’
  • For all the reasons mentioned above, it is an absolute necessity for the teacher to find out how much the kids already know as regards a certain area in order to do a very focused (if a very contained) needs’ analysis and to adjust the volume, the level and the intensity of the new material presentation later in the lesson
  • It is very easy and requires no preparation whatsoever.
  • It helps to improve the students’ self-confidence because it gives them an opportunity to see how much they know already.
  • It can be used with any set of vocabulary, either thematic (i.e. clothes, food, animals) or content-related (i.e. the words necessary to describe a picture, the words used in a certain text or a listening task, a video)
  • The final task can be easily adapted i.e. choose 5 words to describe yourself, choose 5 words to use in a story or in a dialogue, choose 5 and describe them for your partners to guess, use a dictionary to find the words or structures for the missing letters, compare the lists with your friends to find the words or the structures for the missing letters, use the words to describe a photograph, use the words to talk about your day today etc.

Happy teaching!

How to choose a storybook?

Seven. This is how many storybooks I own at this point in my life. To be honest, seven is a huge downgrade from these three shelves that I used to have a few months ago: one full shelf at the office, one full shelf at home and one, half-full shelf in the school…

I sigh and I try not to think about the absence of these shelves and, instead, I am thinking of my books circulating in the world, stuck all over the other, guest shelves, my storybooks out of reach but bringing joy to someone, somewhere. On a really good day, I can almost see myself as a fairy who sprinkles not golddust but beautiful pieces of literature.

The thing is, one cannot stay too far away from storybooks. Whether you want it or not, they start piling up, slowly, cautiously but still. Starting from scratch but I already have seven new books. Although ‘new’ should be taken with a pinch of salt here. I do recycle a lot, when possibly, and pick the gems to my collection in all the friendly charity shops. And some of them in my favourite book shop.

How do I choose the storybooks?

Oh, look, my unit 1 vocabulary! I buy the books to teach the lexis

In a perfect world there would be a library in which I would have a storybook for every unit (or for every set of vocabulary) that I am planning to teach. From colours, numbers, pets, transport, shapes to Christmas, Halloween and insects. This is probably never going to happen due to that inability to stick to a shelf for longer (see: Introduction) but it is good to daydream at least.

But I am trying!

When I choose storybooks, I like to look through the illustrations to see to what extent I will be able to use them with a specific topic. Sometimes I read the text, too, but I have also learnt to completely disregard it. The story can always be retold or adapted, graded to the needs of the people in the classroom and the lexis that they are working on at the moment.

That is why I bought Nick Sharratt and Sally Syme’s Something Beginning With Blue (yes, to teach colours!) and Debbie Harter’s Walking Through the Jungle, which has an amazing set of animals, habitats and verbs and which I will be also able to use alongside Walking in the Jungle by Super Simple Songs.

Grrrr! I buy the books to introduce and practise the structure

Because there is more than words, there is also the structure and sometimes I choose the books with the grammar that I will be able to introduce or to practise using a particular story. Oftentimes, the illustrations play the main role here (because, again, the story can be retold and adapted) although the story itself can help, too!

This is how Copy Cat by Mark Birchall landed in the bag and on the shelf. The adventures of the two friends, a cat and a dog, have a lot of verbs which means that I will be able to use it to practise Present Continuous or the Past Simple. I was also thinking of some functional language because the cat and the dog already talk a lot but they can talk even more in the future.

Say it again! I buy the books with repetitive language

Having read those two paragraphs, you might think that I buy the books not to read them but to look at the illustrations. It is not quite true. I use the text, too, but bearing in mind that my students are EFL kids, beginners, with somewhat limited exposure to the target language, I have to be selective as regards the text. At the same time, there are many amazing storybooks which can be used with a beginner child learner and that is because the language is repetitive and, even if it is above the child’s level and even if it has to be introduced, it is a good time investement because it appears throughout the entire story. Some good examples of that could be ‘I wrote to the zoo to send me a pet’ in Dear Zoo (another favourite) or ‘What do you see?’ in Brown Bear, Brown Bear, What do you see?.

The story mentioned above, ‘Walking Through the Jungle’ took a similar approach. The entire story is told through the following exchange: ‘Walking through the jungle, what do you see?’ ‘I think I see a lion chasing after me‘.

I know this story! I buy the books with traditional stories

It is great to see that traditional stories are making a comeback into the EFL VYL world. They are not the easiest material to work with, especially with the younger students, because the language is usually complex albeit beautiful, but they have one great advantage – the chances are that kids will be already familiar with them, the characters and the plot, because they are quite likely to have heard them before. At the very least, these are the stories that we can start with while taking the first steps in the traditional stories for pre-schoolers or primary.

That is why I picked up Alexei Tolstoy’s and Niamh Sharkey’s The Gigantic Turnip at the bookshop. I am hoping we are going to have a lot of fun with it, especially that the illustrations are beautiful and there is some repetition in the way the story is told.

Hello again! I buy the books I used to have

The list of the storybooks that are important and close to my heart is long, very long, indeed. The list includes Elmer, Barry, the Caterpillar, Gruffalo and many others, all of the books that I love, that I have been using in class for ages and that I could just take out of my bag and have a lesson with, without any real preparation. The trialled and tested. The best friends forever. The personal top ten, twenty, thirty.

However, when I start recreating the shelf, I do not start from this list, although, perhaps that would be a good idea. Making a fresh start brings with it an opportunity to find new treasures and that is what I like to do, I am on the look-out, I keep my eyes open and when I bump into a title that I know and love, I just get it.

Only when I get to the point of ‘Oh, how I miss Elmer!’, do I go online and just order all of these staples.

This time, my oldie but good is an Oliver Jeffers’ book, Lost and Found which I love for his illustrations and stories.

Guilty pleasures. I buy the books beacause they are just beautiful.

To be perfectly honest, I have to be double reasonable when it comes to this particular category because it is very easy to lose control and to end up with piles and piles of beautiful artifacts that I cannot really use in class. Self-restraint, moderation and temperance are not my favourite words but I have to make an effort, from time to time.

Once in a blue moon, however, comes the day when I am allowed to forage the shelves and the boxes and pick out publications which are (mainly) appealing visually. They are those that are to be used in my art lessons to develop taste, visual intelligence and symbolic representation in children.

This time, the two books that I picked for that very reason were Lauren Child’s Beware of the Storybook Wolves (for the trademark produced-by-a-child-like illustrations) and Kazuno Kohara’s Jack Frost (for the monochrome in black and in blue which will be a starting point for a lesson on the importance of colour). Or Lost and Found

Most importantly…

It does not really matter why you buy the books as long as you buy them!

The stories that I could tell you of the books that were no one’s favourite and on no one’s wishlist but they came with other treasures or there was a really good price on them or they simply got donated and thus they made it to the shelf…True, they had to wait for their turn, for the inspiration to come, for this special lesson. Every dog has its day. Every storybook has its audience and its lesson.

Go, get the books! Bring them to the classroom!

Happy teaching!

P.S. The only problem now is that it is the middle of July and I already have a head full of new ideas and still – a good few weeks of waiting before I can put them into practice…

Crumbs #28 Funky envelope

Ingredients

  • a set of flashcards
  • two pieces of cardboard stapled together on three sides
  • shapes cut out on the front page (cut out before stapling)

Procedures

  • hide the flashcards inside
  • show the students only a part of the card on the top, through the cut-outs, ask the kids ‘What is it?’
  • take out the card and proceed with the rest of them
  • hide the flashcards inside
  • show the students only a part of the card on the top, through the cut-outs, ask the kids ‘What is it?’
  • take out the card and proceed with the rest of them

Why we like it

  • this is a variation of the Through the Keyhole activity that I once saw in the I Spy coursebook. However, this original version included an A4 sheet of paper with a keyhole that the teacher needed to cut out and then move the card over the flashcard. I found this tool a very interesting one but, at the same time, a bit awkward to use as the teacher needed two hands to manipulate the cards, there was a chance that the children could still see bits of the card apart from the keyhole bit and the activity involved a lot of picking up and putting down the cards. All in all, too clumsy to handle.
  • to make a funky envelope you need only simple materials (A4 cardboard or simple photocopying A4 paper although it will not be as durable, white, colourful or recycled), a pair of scissors and a stapler or glue. As soon as one envelope gets destroyed, you can easily replace it with a new one.
  • you can have one simple cut-out shape or a selection of different shapes all over the envelope.
  • all the flashcards fit in nicely inside, the teacher can manipulate them more easily. I sometimes turn the envelope over, to change the cards inside and to add to the whole ritual.
  • I normally use when the kids are already familiar with the images on the flashcards not to make the task too challenging, in lesson two or three of the unit. However, there were also cases when I used the envelope to introduce a brand new topic and to raise the level of challenge.

Happy teaching!

Crumbs #27: A project I can be proud of

Ingredients

  • A3 paper
  • a yellow square aka the city centre for each pair
  • pencils, rulers, crayons, markers
  • a very detailed plan and careful staging (see below)
  • post-it notes (two different colours)
  • the materials to set the context based on the material from Superminds 5 by Herbert Puchta and Gunter Gerngross from CUP

Procedures

  • The introduction to the project was based on the material in the coursebook.
  • Afterwards we made a list of places in the city (I was taking notes on the board). Then, the kids were chatting in pairs, creating questions for each other: Which one is more important in a city, X or Y? Why? This was a fun activity, the kids were coming up with sometimes impossible pairs and providing justification for their choices.
  • I divided the kids into pairs and explained that we were going to design a good city. Each pair got a set of questions about their city and they were to discuss these with their partner. The handout was cut up into three pieces and they were given out, bit by bit (or rather, that was the plan. In the end, I only gave out the first part, the other phrases and questions were simply written on the board for everyone to see). I was only monitoring and asking follow-up questions. We did not have a whole class feedback.
  • I gave out the A3 sheets and the yellow square. I explained that it is the city centre and I asked the students to decide where it is in their town and to glue it on. I did it on my model. I drew the map legend box and I drew two items on my plan. Afterwards, I gave out materials and the students started to work.
  • The negotiation language and the steps (stage 2 of the handout) was displayed on the board. I planned it differently but, in the end, I decided not to give this part of the handout out. There was no room for it on the tables anyway.
  • The kids were working on the project for about 10 – 15 minutes, until the end of the lesson.
  • At the beginning of the following lesson, the kids sat down with the same partner and each pair got a set of post-it notes, pink to write what they like about the city and green to write about the things that the city should have. We circulated the projects, kids worked in pairs, looked at the plans, talked and made their notes on the post-it notes, discussed what they liked about each city. They also made suggestions and all their ideas were written down on the post-it notes which they attached to the plans. Each pair had a chance to talk about all of the other posters.
  • In the end, the posters returned to their owners and the designers had a few minutes to look through the comments.
  • In the very last stage, each pair of designers was asked to provide feedback on the feedback they received. They did that by answering the following questions: Which are the favourite places in your city? What should your city have? Do you agree? Why? This was the only part of the project that was done in front of the whole group.
  • In the end, the posters were displayed on the walls.

Why we like it

  • I personally really liked this project because it was a diversion from a traditional approach to a project in which the students work in pairs or teams to produce something and then present it to the rest of the class and in which a creative stage is followed by a productive stage. I have decided to give up on this format almost entirely and, instead, to minimise the creative stage and to maximise the production without limiting it to the post-project phase.
  • Throughout the entire project, the kids produced lots and lots of language, they were making suggestions, expressing views and commenting on the other students’ suggestions. There were at least three layers of material created by the students, in one format or another.
  • In hindsight, I do believe that there were even more opportunities for the further extension of the project by comparing the real cities the kids know and whether they would be a good place to live, by making suggestions how the city they live in can be made better or by ‘visiting’ one of the other cities and writing letters or postcards from their visit…
  • I was glad that I decided to keep the creative part of the project, even if in a limited format. They students really did enjoy designing their cities, drawing and colouring, even though in my eyes (a boring teacher here) they should be the first to go as not very generative.
  • It looks like my kids also enjoyed the project. They were asking after the lesson whether I would put the posters up (I did!) and, a few days later, whether we are going to have any more project lessons (we will!)

Happy teaching!