Ingredients
- Paper kitchen towels, cut up into rectangles. It might be a good idea to test and trial, always, but especially here, not all the kitchen towels have the appropriate density. They cannot be too thin or too thick, for the kids to be able to draw with markers and for the water to wet them fast and efficiently enough.
- Markers. I am using the thick ones but their tip is not to thick. Roller pens might be too thin.
- Some water. In order to be able to use it in the classroom, we used a big plastic box. Ours is not very deep and it does not have to be. At home kids can use the washbasin, the sink or even the soup plate.
Procedures
- This was one of the three experiments I planned for our Science lesson devoted to water.
- Apart from everything else that we did on the day (which you can read about in an earlier post here), this part of the experiment was called the Surprise Experiment. We started with looking at the materials which I demonstrated and we watched a short but very informative video from the Messy Little Monster that I found on youtube.
- While in our lab (aka the dining room), I showed the kids the box filled with water and, together, we looked at the pictures I prepared and tried to guess what we might see once they land in the water. These included: Hello – kids! (the visible part – the part that appeared while in the water), a simple sun – a smiling, yellow sun, my name is – miss Anka, you are – fantastic.
- Then we were dropping cards into the water one by one and checking the full picture.
- Afterwards we went back into the classroom and started to create our own pictures. I showed the kids two cards and drew one picture with everyone looking, as a model. It was absolutely important that they understand that page 1 is only a part of the picture and that page 2 is going to be more detailed. While we were working on the pictures, we developed a few useful techniques: checking the design against the light, drawing with the picture on the window pane, tracing the lines twice or three times (on page 1) to ensure that they seep through onto the page 2, to facilitate making sure that the pictures match. I was also showing the kids’ ideas to the room as soon as I spotted something interesting, for example the use of the words, the use of the colours or the elements.
- We established in the beginning that in class we are only going to watch a few examples and create our own, to take home and to surprise the parents.
- After the lesson, I sent a message to the parents in the messenger to tell them about the surprise coming from school and how they can use it, where they can pour water etc.
Why we like it
- Apart from the fact that this activity was a great puzzle piece in the lesson and on the Blue / Water day, I loved the fact how it worked.
- The activity itself is very simple and requires only the minimal resources.
- All the kids, our preschoolers and primary students, could create it, with varying degrees of detail and complexity. It worked very well with a mixed ability group. Although, of course, I can be further adapted with the teacher starting the activity i.e. drawing circles on both pages or other shapes to which the kids could only add the detail on page 2.
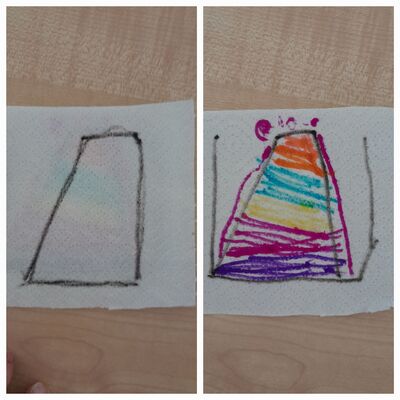
- It gave everyone an opportunity to design something and I was really impressed that they got the idea of how this simple toy works and what is required to make it. To be honest, I was truly impressed with the kids took to it and how creative they became in the process. The first designs were very simple, a circle that turns into a smiley and so on but, as the time went on, their creativity was simply snowballing and more and more amazing ideas started to pop up, also because everyone was observing everyone else and sharing ideas. The mountain that turns into a volcano (in the photo), a girl that turns into a princess, cards to say hello to mum, dad, grandma, the house that gets all its details…It was amazing and I am just sorry I did not take more photos. And I did not take more photos because I was busy cutting up more and more pieces of the paper towels. I planned to give everyone three bits for three mini-projects but I underestimated my kids, their creativity and the speed with which they started to draw.
- I was also very happy with my being clever and announcing that all the kids’ experiments will be carried out at home only. Doing it in class could become very messy, especially with the big groups because the pictures need to be taken out of the water as the colours start to run, they get the water dirty. Taking the pictures out means that there are wet balls of paper around…I decided that the kids would enjoy it a lot more at home, especially that they could also take pleasure in showing off what they have learnt at school.
- The langauge production was a bit limited but, to be fair, for us, it was spread throughout the day. We talked about the pictures while they were being designed and there was a lot of focus on instruction and the functional langauge. There was also some opportunity for the language of prediction / guessing and I would definitely like to explore it more in the future.
- This experiment can be a part of a lesson on the colour blue, on the topic of water or perhaps also in a lesson on conditional and the langauge of prediction with the older kids. It can be also a very simple craft activity with all age groups.
Happy teaching!