Breathe! From the series: One-word advice from a trainer.

I am a trainer and an assistant director of studies. I spend a relatively large part of my professional life sitting in the back of classrooms, observing. I love it.

Not that anyone asked (hahaha, here is one clumsy blogger, at your service. After all, one should start with ‘Many of you have been asking me…’ or ‘I’ve received many questions about…’ I DID NOT) but if I were to give one piece of advice to all the YL and VYL teachers (or maybe not only to them), it would be this: BREATHE.

If I were given a chance to use more words, I would say:

‘Breathe! Pause! Calm down! We care about the efficient use of the lesson time but nobody is in a hurry, nobody is rushing to catch a train. There is time. You will be doing a great service to yourself and to your kids. I promise. Inhale. Exhale. Repeat!’

What do I mean? Here are five ideas.

Instructions

Going slow is absolutely crucial while giving instructions.

Not always but frequently enough our primary and pre-primary students will be doing something in class for the first time in their lives, without any metaphors whatsoever. It is quite likely that we, the teachers are the first ones to introduce a boardgame to them, a role-play, a game with a dice, a pair-work activity, a mingle, the game of pelmanism or a project. Our students might behave like they have never done it before because, very often, they really haven’t. Or they haven’t done it in a foreign language to practise vocabulary or grammar. It really IS their first time! Our classroom IS full of Gagarins, Columbuses or Cabrals (or whoever is your favourite First-Timer Metaphor).

That is why the instructions we give have to be not only graded and accompanied by gestures and (ideally) by modelling but also paced. With the teacher taking baby steps, pausing (and breathing) for all the students to catch up. Before anyone is allowed to take the next step forward.

Taking this one breath in-between the sentences will really make a huge difference. Let’s breathe then!

A listening task, as in: any listening task

Listening tasks for young learners are another example how pausing can make the world go round and in the right way, too. This tiny (and, really, the most insignificant) movement of the teacher’s finger pressing PAUSE on the CD player / the telephone / the computer can be the factor that decides about the activity becoming a success or a failure. Something that amazes me every single time I see it in action.

PAUSE and the kids have a chance to hear what they are supposed to hear, circle what they are supposed to circle and get ready for the next bit. PAUSE and the teacher has a real chance to monitor while in-task. PAUSE and if there have been any glitches, now is the time to fix things and to save the rest of the activity.

DON’T and they miss the first example because they are still not quite sure what they are doing. Then they miss the second example because the breaks between the pieces of the recording are too short and there are no numbers or beeps to help their focus. DON’T and, inevitably, they miss the third one, too, because they missed the previous two and everything becomes just a mesh of sounds. DON’T and you have no chance to monitor or to give feedback, Although, really, it is NOT a mini-test that the kids should pass. It is only an opportunity to develop their listening comprehension skills. It is ok to help, to support and to guide. Unless it is a real test.

So maybe it is a good idea, to pause and to breathe?

Questions and answers

Here is a question: Do you know how long is the average ‘wait time’ aka the time that elapses between the moment a teacher asks a question and the moment a student is expected to answer it?

Well, fasten your seatbelts because it is quite likely that what I am about to tell you will be a bit of a shock.

Apparently, we, teachers wait as long as long as 1.5 seconds at maximum and most of the time even less than that. One second and a half. Which means that we don’t really wait at all. Either student A knows that answer that we want to get and they provide it or they don’t (more likely) and we move on to student B or C until we find what we want or we just answer the question ourselves.

Extending that wait time can have a huge impact on students’ learning, engagement and, possibly, also on their confidence because they will be given a chance and time to rise and shine. And don’t worry. By extending here I mean ‘waiting three (3) seconds‘, not the whole eternity. 3 seconds aka one inhale – exhale set. Breathe!

Just look at the picture first

This particular issue is going to make an entry here for one and very specific reason: our coursebooks and all the materials for YL are full of great visual material which, sadly, is not given all the attention it deserves.

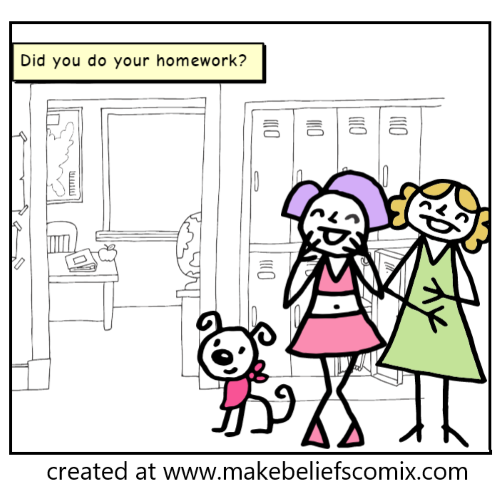
The first question that I often I ask my trainees during the post-observation feedback session while discussing visuals, photographs, cartoons and drawings is: Why not spend more time on talking about the picture? There are so many things that you can do with a picture! (If you are not sure what these are, have a look at the earlier posts, here and here).

Once we establish that these do indeed have a lot of potential that needs to be tapped into, the question arises of how to do it. And this is how we get back to breathing.

Whenever students are shown a new picture, one that they have never seen before, they need to be given time to take it in, with its narration and all the details. It is more important for the younger learners, since their cognitive skills are still developing but it can be beneficial for the learners of all age groups and levels. If you are in doubt, just have a look at how visuals are dealt with during the speaking part of different Cambridge exams, from Movers, through PET to CAE, although with the higher levels it is hidden under the lengthy instructions from the interlocutor during which the candidates are allowed to look at the photographs they are to describe.

Step 1: instructions, Step 2: one deep breath while the kids are getting ready. Thinking time is precious and it extends on all the activities, picture-related or not.

Classroom management

Last but not least, the main destroyer of the peaceful flow of a VYL and YL lesson makes an appearance, too – the unwanted behaviour, in all its shapes and sizes.

The option of ‘doing nothing’ is out of the question, it is the teacher’s job to react but perhaps it is worth considering whether the immediate reaction is the best solution. After all, there might be some situations in which everyone would benefit from the teacher taking a deep breath and using this second or two to calm down, to consider the options and to see the situation from the little people’s point of view? Maybe the situation was not that serious? Maybe it was just a silly joke? Maybe just an unfortunate mistake? Maybe the reaction does not need to involve the headmaster, the parents and the armoured infantry? At least in some cases. This tiny little pause might help establish that. The thinking time for the teacher. And then – back to action!

Happy teaching!

I am a teacher. Reflections from the rocking chair by the fire.

All photos dedicated to the city. Happy Birthday, Moscow!

Everyone gets to answer the question, at one point in one’s life, at least once. ‘What do you want to be when you grow up?’ On my personal wishlist, over the years, there were the following: a ballerina, a doctor, a woman (the first one), a plumber (that is the latest, my plan for the retirement years) and…a teacher. No idea if that means ‘no ambition whatsoever’ or ‘achievable aims’ but nevermind that. I am a teacher. Yay to these dreams that come true, tick!

I have been planning to write this post for a while but I’ve been struggling and what I ended up with was either a lot of sentimental waffle or some lofty speeches worthy of an educational Thomas Moore. No, thank you. Instead, I am going to hide behind a few stories, hoping that they will collectively illustrate why one might want to become a teacher.

There is a boy in this story, a local troublemaker, who actively spent his school time making his teachers’ life ‘interesting‘ for three years straight. There is always one of these in every class and someone has to be their teacher. The teacher and everyone else survived.

The same boy, fifteen years on (15!), meets the teacher’s brother at some kind of a social do in the hometown. ‘I was a nightmare at school‘, says the boy, already an adult, ‘Say hello to your sister and pass on my apologies‘.

There is another student, a girl this time, that the same brother meets at another do in the hometown. This student, years on, also asks the brother to pass her regards. ‘I don’t remember many teachers from the school.’, she says, ‘I do remember her. She was cool.’

There is an adult student, Olga, who gets in touch via Instagram and it turns out that she is also a teacher now and that seems to be inspired to become a teacher of English in the teacher’s classroom, about ten years earlier. And it nothing short of touching…

There is the first student ever, her own cousin, Magda, and the lessons which were based on pure enthusiasm and on intuition because the teacher was more of an ugly duckling and not yet a real professional. Now, imagine this teacher’s emotions when, a few years later, she was sitting in the hallways of the university, waiting for Magda to pass her final exams and to be awarded an MA in English and Translation.

There is a teenager, only a year ago, at the summer camp. This teenager fills in an anonymous feedback form and in her commentaries on the English lessons writes ‘I’m not scared anymore‘. To be honest, that reduces the teacher to tears because, really, although the lessons were good, she thinks ‘I have not done anything special‘, and yet, that seems to have made a difference.

There is the little girl, Sasha. After one of the lessons, this little girl comes up to her teacher, looks at her with a very serious face and says: ‘Anka, thank you very much for preparing such interesting activities for us‘.

It’s been a good few years already but the teacher still hasn’t recovered from the happy shock that this conversation was. The little people hardly ever do that. They will go for it, they will take part and leave the classroom happy. Sometimes, they might bring you a dead ladybird or donate the only balloon they have. Sometimes they may actually confess ‘Я Вас люблю‘.

Very often, though, as soon as they leave the group or change the school, they simply forget. Just forget. I like to think that they make room for new memories and new information. Out of sight, out of heart, without any metaphors. And no honourable mentions on the social media. But that’s ok, that’s simply how it is and it doesn’t matter. The teacher knows anyway that maybe she will not be remembered, but she did make a tiny little bit of a difference.

But there is more than just the blast from the past, more than just memories. There are the kids in the classroom, here and now. It is a good feeling to be looking at their progress test results. It feels great when they come back in September and proudly show the certificates they got from Cambridge.

It is even more beautiful when during the most regular lesson, you realise that the shiest and the quietest teenager in the world now leads the debate and presents winning arguments, with the confidence that could move the mountains. Or, that the student who entered the classroom five years ago to learn her first words, now is telling everyone about something that happened at school that morning, a hilarious story from the cafeteria, with the narration and the dialogue, with only a few grammar hiccups which are still to be expected since it is only A1 and she is only 9.

So, for a moment like one of these, the teacher is still a teacher.

And, now, as a reward, since you have lasted until the end of this post, here are all the articles that might come in handy in September.

Classroom management

Activities for the first lessons

Happy teaching!

Crumbs #15: Our new favourite vocabulary game aka General Kutuzov

As soon as I said it out loud, it turned out that in my classroom is a crowded place. Apart from the teacher (that would be me), my students (older and younger), there is a whole bunch of characters who simply are there.

There is Pasha (the invisible student), there is Angelina (our class puppet), there is Mr Milk (the little-known-superhero), there is the Flying Cow…And there is also general Kutuzov. To whom this game is dedicated.

The thing is, general Kutuzov is a personal hero of mine. Every time I find myself in the middle of a big project, with one million areas to oversee and to manage, while on the verge of going crazy (because I multi-task well only in the classroom and in the kitchen), I think of general Mikhail Illarionovich Kutuzov, one man managing troops, camps, provisions, civilians, and all that in the face of the approaching enemy (aka Napoleon). This thought calms me down.

But not only that.

We sometimes play games with my kids (duh!) and sometimes they get very competitive (duh!) and sometimes, instead of ‘just playing’, some of them take time to think, to ponder, to come up with some very clever strategies in order to win…Which, on one occasion, resulted in me saying ‘Oh, look, here is general Kutuzov, planning something’ and ‘General, Kutuzov, please, can you make a decision? Today?’

They giggled. They are eight but they got the reference. And general Kutuzov stayed with us. So now, when they want to comment on someone taking their time to think or someone coming up with a strategy, they call him or her ‘general Kutuzov’ which, to be honest, I am rather proud of.

And that’s what I called that game:-)

www.wikipedia.com

How to play?

  • The main aim of the game is to get from the START to FINISH, choosing your own route on the board.
  • Players move across the board and as they do, they have to explain the word in each box. They answer the question ‘What’s…?’ or ‘Tell me about ….’
  • It’s always good to put the key structures on the board, to support the production. In the animals game, with my A1 students, we used ‘It has got…(body parts)‘, ‘It can…(verbs)’, ‘It likes to eat(food)‘ and ‘It lives in… (habitats)’.
  • Students play in pairs or groups of three per board.
  • Players move one box at a time, to the left, to the right, up, down or diagonally up or down.
  • Each box has a number of points assigned and the students collect the points throughout the game.
  • I give the kids small cards, folded, on which they are to write their points and to keep them secret until the end of the game.
  • In the end, each player adds the points and we announce who the winners are, in each pair and in the class.

Why we love it

  • The game generates a lot of language and it keeps the students motivated and involved.
  • It is a competitive game but you can win it not because of good or bad luck but because you plan your movements well.
  • It is suitable for mixed ability groups as the students choose their route themselves and can, if necessary, avoid using the words they don’t know.
  • We played it in our offline lessons but it can be also used online, with the kids annotating on the screen. It would work best with individual students, small groups or big groups playing in teams.
  • It depends only on the players (or their teacher) how long the game is going to last. Naturally, the kids will try to get from start to finish and as soon as one player does it, the game is stopped and the points counted. At the same time, the teacher can set the timer at ‘ten moves per player’ or, simply, stop it at any given point in the game (with the same number of moves per player, of course), announce the end and count the points.
  • It takes a few minutes to prepare and it can be used with any kind of vocabulary, a thematic set (lower levels) or any random set of vocabulary taken from a story or a listening task.
  • The first time we play it, the game is teacher-led and we play with teams of students, on the board but once they get the idea, they can play in pairs.
  • No dice is necessary. Kids can either use checkers or colourful markers to draw their route across the board.
  • I have played it with primary school students (A1) and with my B1 teens, too.
  • The game can easily be made more or less challenging by keeping only two types of boxes (1 and 5 points, for example) or by adding more of those (1, 3, 5 and 10 points) and the number of points can reflect the level of difficulty of the word or phrase.
  • Players can move in any way they choose, one box at a time, but to make it more challenging, the teacher can exclude moving diagonally or any other of the movements.
  • The same can be applied to the rule of using the same box twice. It can be allowed or not.
  • I have thrown my kids at the deep end but I think that if I were to introduce the game again, in a new group, I would probably create a board of boxes worth only 1 point to highlight the importance of strategic thinking here. The kids figured it out themselves, though: the longer the route, the more points (the kids’ aim) and the more language produced (the teacher’s secret objective:-)
  • The board can be colour-coded. It will make it more attractive visually and it will help the kids understand where to move next, for example: a green box = 1 point, a blue box – 3 points and a yellow box = 10 points. Having said that, the black and white simple chart with points works equally well.
  • You can get my animals boards here: the colour-coded board and the points board.

Happy teaching!

P.S. The inspiration for the game might have been a listening activity in one of the old coursebooks by OUP called ‘I Spy’ which had a listening activity in each unit called ‘the maze’. Maybe or maybe not))

New kids on the block. Teens joining a group mid-year.

Tuscan Flying Beauties

A post inspired by a reader. Thank you @kids.in.english.

Where the inspiration came from

It was ten years ago. I was standing at the board, looking at my students working on a task,all of them, working hard, involved, a teacher’s dream, and yet…To my right – the bunch that had been in my group for the past two or three years, to my left – the three new students who had just joined us and in the middle – a beautiful wall, invisible but sturdy and getting thicker by the minute. They were not aggressive verbally or otherwise, they did not do anything mean, there was no bullying. They simply decided that they do not like each other. The ‘old’ kids – because they did not want any invaders, they ‘new’ kids – because they did not feel welcome.

I did not like it at all. I was looking at them (yes, a little bit annoyed because we had everything figured out) thinking ‘Not on my shift, people. Na-ah’. Today I would like to share some of the tricks that I applied and have been applying since then in the new-teen-in-the-group scenario.

Ideas for building and re-building a group

  • Change the seating arrangements during the first month or the first six – eight lessons with the new students. The main aim here is to enable everyone in the group to work with everyone else. It has to be initiated (or ‘forced’ if you prefer) by the teacher because the students will be acting as a group and might not have enough courage to break ranks in order to befriend the new students or to venture out and try to join the cool kids. It is a good idea to explain to students why this is done (‘we need to get to know each other’) and give them a specific time limit so that they know when they will be able to go back to sitting with whom they want. Even if, initially, the students do not like the hassle and the uncertainty that it introduces, they have a deadline and they know when things go ‘back to normal’. The burden is easier to bear.
  • Frequently group and regroup the students for activities and use a tool that will be completely arbitrary. These can be for example re-usable cards with the students’ names that are kept in a box or in a bag. Before the activity, the teacher (or even better – one of the students) simply picks out cards randomly and this is how pairs and teams are formed. This way, it is simply fair, impersonal and, every single time, there is a high probability that student A might end up working with their best friend. If they are lucky. Again, the burden is easier to bear. Both of these tactics will also help the teacher establish how the students work in different set-ups. It will be more important in case of the new students
  • It is a good always but especially during those ‘first’ days or weeks to include activities which promote team-work and cooperation, such as smaller or larger scale projects, ideally in every lesson. The students will be already mixed, the new with the old and it is quite likely that they will want to share the responsibility for the task and they will want to complete it. This will be their excuse, the teacher asked them and they are just completing the task, without losing the face since working with the new partner is not their own choice.
  • While cooperation works well, competitive games are even more effective. If the students have their favourite games, they obviously like to play and win. Since they will be put in mixed groups, the ‘old’ and the ‘new’ students together, they will be put in a situation in which they might have to cooperate with ‘a new friend’ to compete against ‘an old friend’. Of course, these two elements, the competitive and the cooperative, should complement each other and balance each other. Some of my favourite games include ‘the game of five’ and ‘stop!’
  • When we start working with a new group, some getting to know each other activities are in order. Here, however, the situation is a bit tricky. If there are three or four new students in the group, then we can easily use some of those. When only one student joins the existing group, it might not work that well. The majority of the group already know each other very well so they will not be motivated in taking part in it. What’s more, it will be rather obvious why it is added to the lesson and the new student might be accidentally put in the spotlight. Not to mention that if a few students join the group, separately, it would mean including these activities in a few lessons in a row and the students might be even less motivated to take part in them.
  • Instead, an activity in which the students can express themselves and share personal information is a much better solution. It can be, for example, ‘Who is X?‘, a task in which students would have to match the names of all the students in the group to a set of sentences (in any structure that is the topic of the lesson). If it is the Present Simple then the sentences describe daily routines ( X never does homework, X always wakes up early on Saturday), if it is the future then the sentences describe future predictions (X will live abroad, X will become famous, X will travel to Spain) etc. During the feedback, students will be mingling and confirming and justifying the sentences about themselves. The task that I really like to use for that is the United Buddy Bears art project but this one is a bit more difficult to add to any lesson in any level at any point when the new student joins the group. But not impossible))

If you have been in a similar situation and you have some great tips and tricks up your sleeve, please share them with the rest of us in the comments box! Thank you!

Happy teaching!

Crumbs #7: Line up, everybody!

Today about a little and very un-revolutionary change in the routine that has, nonetheless, made a huge difference to my VYL and YL classes.

Instructions

  • Make sure the door to your classroom is closed and that the children wait for the lesson outside.
  • When it is the time to start, come out and line them up, perhaps with the parents’ help in the beginning, until they get used to the new routine
  • Wait for them to be ready, say hello to everyone and count together how many students are present
  • Say hello to the first student, ask how they are, let them into the classroom, wait until they book the books and bags away, choose their seat and sit down.
  • Let the second student in.
  • If setting homework is a part of your routine and programme, this is when you can check the homework, asking each student a few questions about it.
  • If there is no homework, this time can be devoted to a short individual conversation with each student. It can be a short revision of the vocabulary, talking about a picture or, if the students are already in one of the primary levels – some reading practice with flashcards or a few questions about any material covered in class. We often use it for practice with ‘Tell me about…’ with the use of a picture.
  • When the students get used to the first part (entering the room), you can add the second element and make sure that the students already sitting in the classroom are occupied, too. They can either play a simple guessing game if this game has been practised in class and if they have been given a set of flashcards. They can also play some games on the phone or the tablet, for example to practise reading with phonics. Again, they have to first to try it under your close supervision, to get used to taking turns etc.

Why we love it

  • It helps to introduce the order from the very start of the lesson since the kids are not waiting in the classroom and the teacher’s arrival is not an interruption of something that they are doing.
  • It is obvious who is responsible for the students during that time, the teacher’s take-over is clearly marked. It might not be as obvious if the kids enter the room during the break or before the teacher, especially if the teacher wants or has to spend the break time outside of the classroom, for whatever the reason.
  • The parents are of a great help in the beginning of the course, they can help explain what the kids are supposed to do, they can help with the name etc.
  • This part of the lesson is a fantastic opportunity for the 1-1 conversation with each child. Regardless of whether the teacher uses this time to check the homework or to ask and answer questions or to read, they are giving each child all their attention (almost all, the eyes at the back of the teacher’s head are watching the kids already in the room, of course:-) and they can check the progress and language use.
  • For the parents, this is a wonderful opportunity to find out how their children are interacting in English, without the parents’ supervision and this is how they can, indirectly find out about their child’s progress, before every single lesson if they wish to do so.
  • For the parents, this is also a chance to find out how the homework handouts or materials are used, what questions the teacher asks and how much language can be generated out of a page that, to the untrained eye, looks like a simple colouring page. If they want to and they have have the time, they can later use this knowledge to practise English at home.
  • In the beginning, when the children are just getting used to the new routine or if they are really young, this part of the lesson can be kept short, later it can be made longer. Similarly, in the begining, the T leads the activity but, later on, the kids can ask each other at least some of the questions, too.
  • I have been using this technique for about six years now. My first ever group for which this has been created (because there were ten of them and we hardly ever got to talk 1-1 in class), now in the third year of primary, still line up to chat with me on entering the room. I have been using it with my pre-primary students, too, groups and individuals, too. The parents always wait in the hallway, at the back of the line and they always wait to hear how their children talk to me. If they leave the school, it is only after their kids have walked into the classroom. They always wait and not because they don’t trust us/me but because they are curious and want to know how it goes.

Happy teaching!

A Brand New Class. Volume 1: Teenagers

September is upon us. It is a joyful month, what with all the new books, freshly sharpened pencils, markers that have not lost 50% of the caps yet, storybooks and flashcards that are still as God intended (in order!) and all the new adventures because ‘The kids are back!!!!‘. At the same time, my favourite tune of the month is …Green Day and when they sing ‘Wake me up when September ends…‘ Every single year. And this year more than ever.

Until we have all survived yet another autumn rollercoaster, spiced-up by the pandemic-related uncertainty, here is a tiny little something: activities for the first lesson of the course, today something for teenagers: 5 ‘sandwich fillers’ and 5 activities in their own right.

All of them are and have been my favourite start-of-the-course activities but they can be adapted to different topics and used throughout the year.

Most of them require only the basic resources and little preparation.

Some, although admittedly not all, will also work in our online classrooms.

None of them are how-did-you-spend-your-summer-themed because I never do it in my first lessons (and definitely won’t do this year since a) we did spend the summer together studying English and b) other than that we were stuck at home or at the dacha, growing cucumbers and carrots and feeding birds…) but they can be made so, if needs be.

You can find them: HERE!!!!

Ideas for the first lesson with primary can be found here

I hope you have fun using them. Looking forward to your feedback, too!

Happy New Academic Year!

Happy teaching!

P.S. Activities for Pre-primary coming soon!

Crumbs #5 End-of-course Goodbye-Letter

This is one of my favourite end-of-course activities for all young learners.

Instructions

You need a piece of A4 paper per student. You can use regular white or colourful photocopying paper.

Write the names of the students on the sheets, one per student, and put them up in the hallway, ideally at a distance from each other. Have a card with your name, too but keep it in the classroom. It will be used for demonstration.

Show your card and tell the students that everyone has a card like that in the hallway. Explain that they are going to walk around and write something for everyone.

If necessary, pre-teach or revise some language, for instance ‘You are…’ and adjectives or ‘Thank you for…’.

Clarify the rules: a) we don’t come up to the card with our name, b) we write something for everyone, c) we can leave anonymous notes or we can write our names, d) we only write nice things, e) if we have nothing nice to write, we only leave a smiley

Give our markers, line up and go out. Monitor and keep an eye on the clock. This part of the task takes about 15 minutes with a group of twelve.

Ask the students to go back into the classroom and quickly collect the letters. Give them out in the final lesson.

Why we love it

  • It is a great opportunity for the students to read and to write something that they really care about and it is a great souvenir from the course, handmade and personalised.
  • The students have a lot of freedom and can write as much as they want or only leave a smiley in case they really have nothing to say.
  • This activity can be adapted to the level and age of the students. It can be done in the classroom, with the papers being passed from student to student, until they make a full circle and return to the owner and the youngest kids can only draw some simple shapes for example a smiley, a heart, a sun, a star and their name.
  • The first time I did this activity, I planned for the kids to re-write the letters before handing them out to the addressee but they stopped me (‘But Anka, this is much cooler and more beautiful!!!!”) and they were right!
  • I keep my card on the board but I don’t actively encourage the students to write something for me, too. Somehow they always do anyway))

Happy teaching!

The W.O.R.L.D. or What is an ideal craft activity for the EFL classroom?

A post for those who have been contemplating using craft activities in their pre-primary lessons, especially for those who have not started yet or those who have tried but have not really been quite successful with it.

First of all, let’s get started from the facts.

Fact number 1: kids love craft and no wonder they do – you get to creat; you produce something real and you can take it home. Even if your creation has a limited durability and appeal and after some time (a day in the playroom and a week on the fridge door) it gets destroyed and lands in the bin or it gets folded carefully and is stored in the ‘Ania/kindergarten’ box.

Fact number 2: teachers are a little bit more cautious with expressing their love for the craft activities. Some of them do, of course, but there are still quite a few who don’t really appreciate all the hurdles you are required to jump over in order to get to the finish line called ‘A great craft EFL lesson’. Because it can get messy, because it requires more preparation than other acitivities and because it needs to be planned properly to ensure that you don’t spend the lesson colouring and cutting and NOT using the target langauge.

Perhaps that is also the reason why even the most recent coursebooks for primary and pre-primary (which shall not be named here) do not really seem to promote craft activities as much as they should in my humble and very subjective opinion. Alas.

Why craft?

There are many great blog posts and articles on the advantages of using craft, I am not going to be attempting to reinvent the wheel here. Here are those that I have found useful. Have a look yourself.

  1. Kids and Arts and Crafts https://www.teachingenglish.org.uk/article/kids-arts-crafts
  2. Arts and Crafts with Young Learners https://www.teachingenglish.org.uk/article/arts-crafts-young-learners
  3. Using Arts and Crafts to teaching languages to young children https://www.teatimemonkeys.com/using-arts-and-crafts-to-teach-languages-to-young-children/
  4. Adding Language to Crafts https://www.englishclub.com/efl/tefl-articles/adding-language-to-crafts/
  5. R. Bastianoni, The Linguistic Benefits of Using Crafts in TEYL http://www.teyl.org/article16.html

Planning a lesson with a craft activity

If you are looking for a manual how to set up a craft activity and what to think about while planning it, then you should definitely start from reading the introduction to the craft chapter in Carol Read’s 500 Activities for the Primary Classroom where she outlines the principles of the MAD FOX (which, by the way can be used as a framework for all of the VYL and YL activities). Strongly recommended!

Where to find a craft activity?

Well, this is the best news ever: nowadays, finding out about available craft activities is really a piece of cake. There are plenty of websites, blogs, Instagram accounts written by and for:

  • The teachers of English as a foreign language
  • The parents of young children
  • The teachers of kindergarten

There are also multiple groups on facebook, vkontatke (or whatever is your local equivalent), pintrest and just the good old google or Yandex search enginge.

How to choose a craft activity for the EFL lesson?

Well, this is where the W.O.R.L.D. might come in handy. This is an acronym that I made up for myself and for one of the workshops that I was giving a few years ago. Also, because I really wanted to have an acronym:-)

Here it is!

W is for ‘WHY?

Probably the most important question a teacher can ask while planning a lesson with a craft activity: why am I even doing it? It is great to include craft only for the sake of ‘the variety in the classroom’, but I strongly believe that a craft activity must have a follow-up, that it cannot be an end in itself. After all, we are language teachers and not art teachers.

An ideal craft activity is only the preparation for the proper language exercise, it is our way of getting the kids interested in what we are doing and using the finished product to encourage them to engage in a language activity. If this element is missing, there should be a really good reason for including it in your lesson. Is there?

O is for ‘On their own

No matter how amazing an activity looks in the photograph or the video, no matter how beautiful and colourful it is, no matter how strong its ‘wow’ effect might be, there is no point of bringing it into the EFL classroom if your students cannot complete it on their own.

Perhaps, the assembling process is too long and too complex and the materials too small and too flimsy and your students will not be able to complete it all by themselves. If it is a 1-1 lesson, sure, you can help but let’s take ‘the worst case’ scenario, a lesson with a group of 8 students, each of whom gets stuck at precisely the same moment in the activity and the teacher having to help every single one of the 8 students at 17:25:04…No. Not worth it.

R is for ‘Recycle

It will not always be possible but in order to justify the time and work invested in preparing and carrying out a craft activity, it should be possible to recycle ‘the product’ in one of the following ways:

  • The same product is used throughout the course to recycle the particular vocabulary set, story or functional language phrases
  • The same product is used throughout the course with different vocabulary sets, for example the boardgame the children made is used to practise vegetables, then fruit, then transport
  • The same type of product can be made again, with different vocabulary or structures, for example mini-flashcards booklets, flapbooks, window decorations. If the format of the activity is used later on in the year, setting it up and executing it will be much easier because both the teacher and the students will be familiar with it.

L for ‘Language

First and foremost, we are the teachers of English and our main aim and priority should be the development of the linguistic skills in our students, regardless of how old there are. In the same vein, the main advantage of a craft activity is how it contributes to generating language.

Level A: the exposure. This is of course, always there, teachers speak, students listen. No matter what they do, they are also develop their listening skills and the ability to focus. So, technically, any craft activity will score high in that area as the teacher gives instructions and students follow them. What’s more, it is instantly obvious – the kids are leaving the room with a card, a puppet or a mask hence they have understoon the instructions. Good but not good enough.

Level B: the functional language. All craft activities have their stages, the students are encouraged to ask for the coloured pencils, glue, scissors, react to the teacher’s praise, sometimes praise their friends’ work and this is how some functional language comes into the picture and students are given an opportunity to practise it in context. Better but not good enough still.

Level C: the production. In an ideal craft activity, the making of is only the first step towards the follow-up stage in which the finished product will encourage them and will give them a chance to speak English.

D is for ‘Duration

Realistically speaking, how much time of the lesson time is the activity going to take, from the moment it is presented to the moment the last scraps of paper end up in the bin and the crayons, scissors and glue back in the box where they live? 5 mintes? 10 minutes? 15? 20? More than 20?

I am not going to try to discourage anyone from those longer craft activities because they need to be seen in perspective, together with all the other pieces of the puzzle, but it needs to be remembered that the longer the activity lasts, the higher the chances that kids will lose interest, that they will find alternative things to do, start chatting in their L1, get bored and tired and that, basically, it will be increasingly difficult to manage them and to get something out of the activity.

The potential time contraints apply to teachers’ too, actually. How much time and effort does the teacher want to spend on preparing the activity? Will they inolve the whole family into pre-cutting and pre-folding the night before? Will it be really worth it?

What is the ratio between the before-the-lesson preparation time, the activity-in-class time and the follow-up production stage time?

For that reason

  • Cutting out a bunch of grapes that takes twenty minutes to complete: no
  • Making a complex puppet that takes half of your lesson so that you could use to say ‘hello, my name is Mitya’: no
  • A set of tiny little bits that have to be carefully glued onto the piece of paper: no
  • A picture to colour: no (not when it is just that ‘a picture to colour’)
  • Goggly eyes: no
  • Food craft without consulting parents first: no
  • Draw your…: no
  • Glittter: no (but that’s just me) and any ultra fancy materials that teachers would have to purchase themselves in specialised shops: also no

Anything else you would like to add? Anything that you don’t agree with? Please, let me know!

And don’t forget to pop in here to read about one ideal (and tried and tested) craft activity for the EFL preschoolers.

DIY Rulez! Listening homework tasks.

DIY is the answer, in most cases. Especially in the VYL world.

All those missing, lost or non-existent flashcards, magic wands, puppets, handouts, balls, hats, masks, storybooks that we just nevermind-gonna-make-my-own-then (it really should be a verb).

DIY was the answer, an obvious answer and, yet, an answer that, on this particular occasion, took quite ages to land on the table and to become obvious.

The equation? A group of very young learners, studying online, helpful parents (but no printers at home so no customized handouts), a coursebook (but with tasks that I could make work only in the classroom), no ready-made material (and two steps away from regretting the decision to use the book altogether).

The first fifteen minutes went by peacefully, filled with sighing and staring blankly at the page in the coursebook. The next fifteen minutes were similar, only the sighs became more desperate and angrier.

Not happy at all. Until…Nevermind, gonna make my own then.

This time: Listening homework tasks! It’s been only a month but I am absolutely loving it!

How to?

  • Minimal requirements, your phone recording app will do.
  • Usually two takes are enough to record (although, suspiciously enough, as soon as I start, there is always a police car or a fire engine whee-yoo-ing just outside my window)
  • After a first few exercises, I started to type up ‘the script’ and it made everything much smoother.

Why?

  • An opportunity to take English out of the classroom and a recording that the kids can listen to as many times as they want to
  • Extended exposure to English, especially in the area of the functional language that the teacher can create, shape and enlarge as the course progresses
  • A great support for the parents, to help them work at home with the child and to structure it properly
  • Any picture, any illustration or any photograph in the coursebook (or online) can be used as the basis for it.
  • Widens the range of homework activities (see the ideas below)
  • Amazingly, it is also a great tool to practise scaffolding for teachers because you have to dissect an activity and verbalize all the procedures in simple English and only then you start think of all the micro-stages and you can hear what your students might hear.

Some of the activities we have done so far

  • Identifying pictures (pre-primary): It is a simple riddles game, based on an illustration with the key vocabulary. Most coursebooks for pre-primary include a page which introduces all the new words. In the example that I am sharing with you, I also managed to incorporate a verse from song ‘Are you hungry?’ by Super Simple Songs.
  • https://www.youtube.com/watch?v=onlENphATDQ

  • Dictation (pre-primary) It is better to use a black and white picture, perhaps from the workbook
  • Any illustration can be used for this kind of an activity. A chapter usually starts with an illustration of all the key woIt’s a teddy. Brown (children circle the bear brown)
  • Identifying differences (primary). Additional listening and speaking practice in the format inspired by the YLE. You can use set of pictures from Movers or Flyers, a set of illustrations for Movers or Flyers story or your own set prepared using the miro board (my example uses a picture from classroomclipart.com and the miro icons). Students listen and describe how their picture is different. The same activity can be prepared using only one picture. In that case, the students are listen to the sentences about the picture and correct the mistakes, for example: In my picture, the white cat is sitting on the chair.https://www.youtube.com/watch?v=wTBhq4TkE_M

  • Find a mistake (primary). The audio is a follow-up to the story / text done in class, record a summary of the story with some mistakes (and with pauses between sentences). Children listen and correct the mistakes. This is also an opportunity to expose them to a lot of past tense.The following task was prepared to follow-up a cartoon lesson from Superminds 1 by Cambridge University Press. https://www.youtube.com/watch?v=DbwiidV_i7Y

  • Ask your mum! (pre-primary) Here, the audio is only used to set up a conversation between the child and the mum. A set of pictures (for example a picture dictionary at the back of the book) can be used as the worksheet for the kids to mark the answers they get from the parents, for example: ask ‘Mummy, do you like carrot?’ (and circle / cross the fruit that mum likes and doesn’t like, these symbols have been used in class before, the kids are familiar with them). https://www.youtube.com/watch?v=onlENphATDQ

Happy teaching!

How to see a city. From the series: Teaching English through Art

source: www.izi.travel

A while ago, I was teaching my first teens group in Moscow, an amazing bunch of students that I had a privilege to take from A2 to FCE and that I referred to as ‘my monsters’, though never to their face. And this is how this project came to be.

It could be called an attempt at a CLIL lesson. It could be said that the not-yet-dead-historian in me was behind that project but the truth is that, at the time, I was simply bored out of my wits the coursebook we were ploughing through and I wanted something else.

And, inspired by Kenneth McHoan, a character from the Crow Road by Ian Banks and one of his lines (‘He is my son. I’ll fill his head with anything I like’), I decided to teach Art.

The lesson that I am sharing today is the first in the series of ten lessons ‘How to see…’ that I taught as part of our general English course. The group that I trialled it with were B2 young teens but, since then I had a chance to teach it both to adults and pre-teens, C1 and end of A2 levels.

Why we liked it:

  • I had lots of fun, accompanied in the classroom by my favourite artists.
  • I did enjoy the change, in the curriculum and the pace, and it did feel great to be teaching a subject, in English, not just the language.
  • The students did enjoy it, too, being given a chance to have an opinion and to express it, freely and the fact that one painting could generate so many different views. 
  • Last but not least: although it did not happen overnight, I did realise that when my students were given a chance to talk about Art, all of a sudden, they were using the vocabulary from a higher shelf and really working hard on communicating what they thought in a beautiful way.

Lesson 1: How to see a city

Language focus

Aim: to introduce the language and the approach the students will need to be able to deal with the task. Normally introduced in the lesson beforehand, to allow sufficient time for practice and to make sure the students feel relatively confident using in the Art lesson itself.

  • language to express opinion / to agree / to disagree
  1. expressing opinion: I think, In my opinion. The way I see it.
  2. agreeing: I think so. I agree. Exactly. That’s true.
  3. disagreeing: I don’t think so, I don’t agree. I am not sure.
  • Three sheep: the name I gave to a trick I learnt from Rafael, to teach your students how to construct their discourse, how to express and justify opinions, even for the lower level
  1. Sheep 1: the opinion itself (I think)
  2. Sheep 2: reasons etc (because, so, and, but)
  3. Sheep 3: an example from the real life

Setting the context

Aim: to help set the context for the Art lesson

  • T shows the students a few photographs from New York
  • Questions to discuss
  1. What can you see in these photographs? Do you know the city?
  2. What is New York famous for?
  3. Have you ever been there? Have you seen any films set in New York? Have you read any books set in New York?
  4. Is New York similar to or different from Moscow? Is it similar to or different from any other cities you know?
source: wikiart.org

Interacting with the artwork: stage A

Aim: to provide an opportunity for the students to interact with the painting in a freer way, to provide opportunities for speaking

  • T divides the students into two groups and assigns a painting, group A to work on Frida Kalho’s painting, group B to work on Georgia O’Keefee’s painting
  • Each group can be divided into pairs, depending on the group dynamics
  • The students are discussing their painting, answering the following questions:
  1. What can you see in the painting?
  2. Is it a happy / sad / angry / depressing / scary painting? Why?
  3. In your opinion, how did the artist feel about New York? Did they like the city they lived in? What makes you think that?
  4. Could this image be used in tourist brochures to promote the city? Would it make a good postcard or a souvenir?
  5. How does the painting make you feel? Would you like to have it on the wall in your room? Where could it hang, in an office, in a hospital, in a shop or in a museum?
source: museothyessen.org

Interacting with the artwork: stage B

Aim: to provide an opportunity for the students to interact with both paintings

  • T mixes the students so that students from group A can work with students from group B, in groups or new pairs
  • Students show each other their painting and report their personal and their group’s opinions
  • T gives out new questions for the students to discuss
  • Which of these two paintings do you like more? Why?
  • Both of these paintings show New York in a very different way. Why do you think these artists had such a different view of the same city?

Open class feedback

Aim: to report back to class, to compare views

  • T leads the open class discussion, all the groups present their views, focusing on the two different ways to portray the same city. The teacher reveals that both paintings were painted at approximate the same time (1933 and 1925)
  • Error correction

The mini-lecture

Aim: to present the background information to provide the background for both paintings

  • T gives a short lecture, adapting it to the level and the age of the students, highlighting the main points
  • Both painters were not New Yorkers by birth, they came to the city with their husbands, one from exotic Mexico, the other from a small town in the prairies in Wisconsin.
  • Frieda felt alienated in the city, she didn’t like it, she missed home, she stayed only to accompany her husband
  • Georgia lived with her husband, in Manhattan, on the 30th floor, in Hotel Shelton and painted and sketched what she saw from her window.
  • Perhaps these are the factors that influenced both artists.
  • Questions from students
  • Error correction

The follow-up

Aim: to give the students an opportunity to look at their own city and reflect on how their feelings might influence the way they see the city

Part A

  • T divides the students into new teams / groups of 3
  • Students discuss the following questions about Moscow / own city:
  1. Do you like Moscow? Is it a good city? Would you like to live here in the future?
  2. What are the main tourists’ attractions?
  3. What are your favourite places in the city?
  4. If you could change something in the city, what would it be?
  • Open class feedback

     Part B

  • T gives out different paintings / photographs of Moscow / own city
  • Students discuss the following questions
  1. Look at these three different ways of showing your city in a painting/photograph. Which one is the best? Why? Which one is your least favourite?
  2. If you painted a picture of the city or if you were to take a photo to represent it, what would you include?
  • Open class feedback
  • Error correction

The follow-up: homework

Aim: to present an alternative way of looking at a city: through its inhabitants

Option A: Based on the photographs by Stan Raucher who photographs people on the metro in different cities

  • T selects the photographs / a photograph, appropriate for the age/ level of the students, hands out
  • SS at home prepare to talk about the photograph
  1. Who are the people in the photograph?
  2. What are they doing?
  3. What are they wearing?
  4. How are they feeling?
  5. Where are they going?
  6. Which city are they from? Why do you think so?

Option B: Based on the stories from Humans of New York, a project that interviews the people in the streets of New York and retells their storiesT selects the story/stories, appropriates for the age/level of the students, grades the language, if necessary, hands out to students

SS at home read the story and prepare to talk about their character:

  1. What is the name of the person?
  2. Where is he/she from originally?
  3. What does he/she do?
  4. What do we know about this person?
  5. What makes this person special?
  6. Would you like to meet this person?

In the following lesson, students report back, in pairs/teams and they choose the most interesting story / person / photograph.

Resources:

Frida Kalho, My dress Hangs there, 1933

Image and the basic information about the painting:

https://www.fridakahlo.org/my-dress-hangs-there.jsp

For more information on Frida Kalho see:

https://en.wikipedia.org/wiki/Frida_Kahlo

https://www.wikiart.org/en/frida-kahlo/my-dress-hangs-there-1933

https://worldhistoryproject.org/1933/3/frida-kahlo-paints-my-dress-hangs-there

Georgia O’Keefee, New York Street with Moon, 1925

Image and the basic information about the painting

https://www.museothyssen.org/en/collection/artists/okeeffe-georgia/new-york-street-moon

https://www.wikiart.org/en/georgia-o-keeffe/new-york-with-moon

For more information on Georgia O’Keefee see:

https://en.wikipedia.org/wiki/Georgia_O%27Keeffe

https://www.artsy.net/artwork/georgia-okeeffe-new-york-street-with-moon

Yuri Pimenov, New Moscow, 1937

Image and the basic information about the painting

https://izi.travel/en/3185-yuriy-pimenov-new-moscow-1937-the-state-tretyakov-gallery/en

https://en.opisanie-kartin.com/description-of-the-painting-by-yuri-pimenov-new-moscow/

For more information about Pimenov https://soviet-art.ru/soviet-artist-yuri-pimenov/

Stan Raucher

https://www.dailymail.co.uk/news/article-3615702/Photographer-Stan-Raucher-captures-everyday-lives-ordinary-people-metro-systems-world.html

Stan Raucher’s photography https://stanraucher.com/metro

Humans of New York

https://www.humansofnewyork.com/