Teaching English Through Art: Malevich

The language

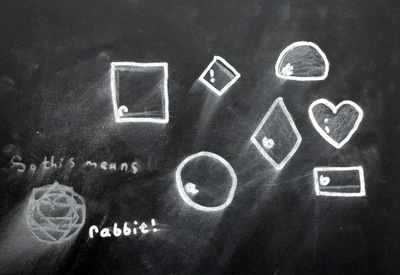
Malevich was the hero of the first October lesson but somehow, it landed in the wrong order on the blog. This whole month we are learning about shapes and you can read about some of the ideas for these here. Thanks to Super Simple Songs we have two cool songs about shapes, this one and this one, and they can easily be turned into a game as we go on singing and looking for shapes around the classroom, on the walls, in the alphabet and on our clothes. I don’t.

Some animals admiring the black square

The artist

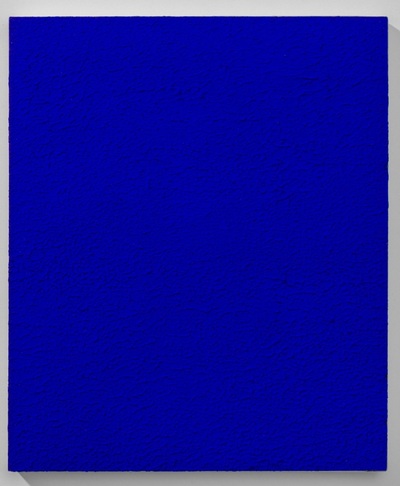
There could be only one painter to be invited to this particular lesson, of course, Kasimir Malevich and the Black Square. We started with introducing him and we looked a few of his paintings. I rarely include a lot o detail from the artist’s biography but here it might be quite interesting to see how his creativity went from ‘just realistic paintings’, through many intermediary stages, casting off realism and colours, to the Square.

Because at the time, we also had the mixed age groups and levels group, we could discuss symbol in general and what symbols exist in our everyday life for example the symbols that are logos of different brands or the symbols that we have in the streets or in the public transportation. This is how we arrived at the square that could be a symbol, too. We also looked at some of the parodies of Malevich.

Black on black by one of my students

The art

  • The preparations for this lesson were quite limited: markers, glue and scissors and a lot of coloured paper. I had white and coloured paper for the background and some bigger and smaller black squares for the main protagonist.
  • I showed the students my example and the kids were asked to pick a square and the colour of the background. Then, they went on to glue, to cut and to create.
  • I was monitoring and discussing the choices. I also helped them translate the titles for their creations.
  • As can be seen, not everyone was very concerned about the perfection of their squares. It is my fault because I gave them relatively big squares and rectangles for them to make their own decisions regarding size. Some of the kids decided to glue them as they were. It is ok. i don’t think Malevich would have minded.
  • I loved the creative process and I was so proud of them for having created all these lovely pieces. The Camera by Nikita is just briliant and it was actually a 2D creation. The Labirynths by Kostia are out of this world and, although I don’t understand them, there is some link to some computer game. Apparently. One of my students, Sasha, kept walking around the room and trying out the square against different background and, surprise, surprise, she ended up choosing the black one, taking Malevich one step further. With the older students we also had a great discussion in which we shared why we like the square so much. ‘It is like the silence in a picture’, was one of the lines in that conversation.
  • I can’t wait to teach this lesson again)

Happy teaching!

Teaching English through Art: Vincent van Gogh and Starry Night

Halloween Starry Night by me

The language

October is for us a month of shapes and every week gets a different shape hero. Because of that at the start of the lesson we revise shapes, sing songs, look for shapes around us and talk about shapes as symbols and our associations with this particular shape which last week was a star.

The only trick is to prepare a great variety of activities to make sure that everyone stays interested but, beginning October, at my school we introduced a new element to the format of our Art Explorers classes. Our group used to meet twice a week and we had quite a few students, younger and older, from pre-school to grade 4. It was not the best solution as there was a huge gap as regards the lingustic skills and abilities, motor skills and abilities and creative skills and abilities. Luckily, we were able to divide the group into two, the older and the younger and this way adapt the course and the activities. The lesson I am describing here was taught with the older group. The younger kids practised the same vocabulary but their focused task was different, the one that I did before with the same lesson (see below).

Vincent van Gogh meets Kasimir Malevich

The artist

In a way, I was waiting for this lesson. Starry Night by van Gogh is this one painting that immediately puts me in a good mood (although I cannot help but think about the paradox of how such a troubled soul managed to create such a peaceful image) and it is probably one of the most easily recognised paintings and kids respond to it immediately. I have already used it in the magic wand lesson, with the younger kids and I was looking forward to taking it to another level with a more advanced group.

As usual, we introduced the artist, together with his country and his favourite things. We also looked at different interpretations or parodies of the painting which can be easily found online. They all feature the amazing background of the starry night and…anything: Batman, Snoopy, birds, cats, ghosts, Santa, Mona Lisa and a city of your choice. This is what became the inspriation for the art part of the lesson.

The art

  • It was relatively easy. The main ingredient to prepare was the starry night background that we printed in colour, one per child. I was considering preparing it ourselves, from scratch and it would have been amazing but our lessons are too short and there was no chance that I could do it over two different classes. For that reason, I decided to print.
  • I also brought a lot of coloured paper and just some regular white paper. The main idea was to draw the shapes, figures, objects for your picture, to cut them out and to glue them back on the starry night background.
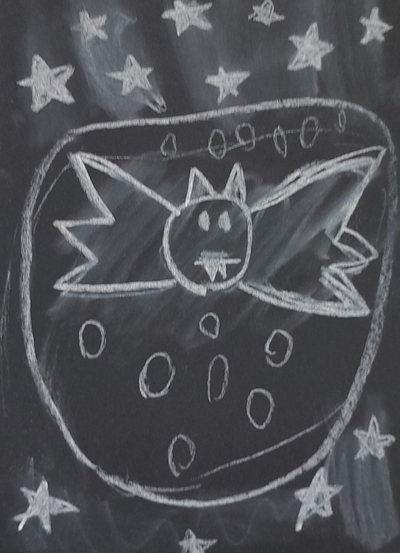
  • The images that you can see in this post were created by my students and as you can see, they represent different directions that the kids decided to take. There is another Halloween van Gogh, inspired probably by my example, a Starry Night Malevich that got carried over from the previous lesson devoted to a square (and Malevich, see the post here) and we had a starry night that became the setting for a meeting…
  • The best thing about this kind of an approach is that any student can produce something according to their abilities, either something very intricate, beautifully drawn and cut out or, on the contrary, something very simple if they don’t feel confident about their drawing skills. I have also decided that next time I am teaching this lesson, I will be also bringing newspapers and magazines for the students to be able to make the collage even more fun and feasible. This will be also beneficial for the students who are not very confident about their drawing skills.

  • With my younger group, preschoolers and year 1 of primary, I decided to do something that I have done before and something that was a huge success. Instead of creating a picture, we created out own magic wand with the use of two stars (printed, cut out, decorated, glued together), a chopsticks (although a wooden stirrer will do, too) and some ribbons. The regular glue stick will do the job well, you just need to apply a lot of glue on both stars. Don’t worry if they look a bit damp and unappealing, they dry well and if they are given a chance to spend a night among the pages of a big book, they will also be flat and just perfect.
  • Oh, and one more thing, with my regular English classes, we create wands whenever we need a tool to practise Present Continuous (‘Abracadabra, 123, you are…) or just whenever we learn something that can be mimed, for example pets or toys.
  • As you can see the last few pictures come from this year’s Autumn Camp which we taught in two groups. I decided to go for a proper collage whereas my colleague, miss Victoria, decided to upgrade it and use mixed media methods: a picture painted by the children themselves and then decorated with stickers. I simply love the idea and how it turned out. With preschoolers, btw.
Stars, van Gogh and magic wands

Happy teaching!

Crumbs #63 Musical Challenge meets Andy Warhol

Ingredients

  • A set of markers and a simple handout (eight circles and numbers)
  • A video with different music samples. I have used this one here, devoted to the unusual instruments.

Procedures

  • In our case (City Camp), the whole day was devoted to music and in the first half of the day we: learnt the names of the instruments, played different games with the vocabulary such as miming, guessing the name of the instrument by the sound and we made our own shakers. I came up with the idea for the musical challenge to follow-up on all of that.
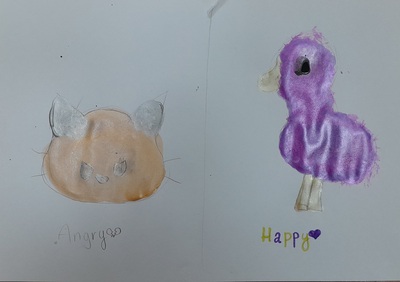
  • First of all, we revised all the colours and we talked about the associations between colours and emotions. We used those that the kids were familiar with (happy, sad, angry, tired, sleepy, hungry, crazy, scared, energetic).
  • I showed the kids the handout, with the eight empty circles and numbers and asked ‘How is number 1?’ and the other numbers. It was clear that they had no colours and no emotions.
  • I told the kids that we would listen to music. ‘Is it a happy music?’ ‘A sad music?’ ‘Are you scared?’. I asked them to close their eyes and played the first part of the video. It is important to mention that I used my laptop here and the kids were not able to see the screen and the instrument. I did not want them to get distracted by the image and I was hoping that we would be able to focus only on the sound and the associations.
  • When the music stopped we talked about out emotions and the best colour for them. Afterwards we coloured the first face.
  • Later on, we proceeded with all the other pieces of music in the same way.
  • In the end we watched the video again, this time properly but we also paused and talked about the emotions and the colours, comparing our pictures.

Why we like it

  • This activity is a variation of the Musical Challenge that I often use with my older students. Initially, I was considering using it in its original format but later decided against it as some of the kids in the group were too young and I was worried that I would not be able to explain in English that they can draw anything they want, that they should be quick and avoid adding too much detail and that we would not really be able to talk about the results properly as the children do not really have enough langauge for that. Instead, I mixed the Musical Challenge with the Andy Warhol lesson.
  • I loved the way the activity worked. As an English teacher, I should probably start with the fact that it gave us an opportunity to produce a lot of langauge because kids started to make some comments even during the listening part and continued later, while making decisions about the colours and while presenting their smiley to the teacher and the group.
  • The same video and handout can be used with older and more advanced students because the music samples / emotions can be used in an extension acticivity i.e. group the samples/ emotions, choose your favourite, create your own instrument and play some music, choose one sample / emotion and tell a story etc.
  • It was also amazing that everyone could produce as much as they were capable of. Since it is a city camp group, we have some mix of abilities but since it is an open-ended task, kids can produce a little bit, the bare miminum (‘It is sad. It is green and yellow’) or a lot more, fully justifying their choices.
  • As an Art teacher (and yes, I dare call myself that), it was absolutely amazing to see how well kids responeded to an opportunity to look at the world from a slightly different perspective, making the connections between the colour, the music and the emotions and representing it on paper. During the entire activity, it was easy to see how the kids actually did take time to think about their impressions and how to express them best through langauge and through colour. Sometimes, they would make an immediate decision, while listening and then rethink it and change it. And the conviction with which they did it was a wonder to behold.
  • As a teacher of children, I loved this activity because it gave us all an opportunity to express our own personal views and opinions and to learn that everyone, the kids and the adults may have a completely different opinion and that there are no right or wrong answers. So at the same time, it was also a lesson on learning how to respect other people.
  • A busy/lazy teacher loves this kind of an activity because it takes about 5 minutes to prepare and to set up.
  • For us the activity was the final project but it can also be used, in a shortened version, as an introduction or a lead-in activity to any lesson related to music.

Happy teaching!

Teaching English Through Art. Jeff Koons and his rabbit

The language

  • The activities mentioned here were a part of the final lesson of the month and in the unit on animals. We practised the names of animals and we tried to make very simple riddles about animals (‘It is big. It is green. It can swim’). In this particular lesson, for the first time ever, I invited the children to make their own riddles and, with the help of the teacher, they managed.
  • I also introduced the forest version of ‘Walking in the jungle’, which very conveniently, includes a rabbit.
  • We used the finished product for practising the target langauge (Rabbit, can you jump? Yes, I can). We created a few questions (and I say ‘we’ because I only needed to start and the kids took over), answered them and then followed that with singing the song that we learnt in this unit (Little bird, can you clap, from Super Simple Songs) which turned into our own conversation and / or a version of a song (‘Anka, Anka, can you dance?’) which is now one of our favourite parts of the lesson. Kids took a lot of pleasure in answering the questions about themselves.

The artist

  • Jeff Koons was chosen to be the artist of the day only because he was what came up as a result of the google search along the lines of ‘modern artists who drew animals’. His most famous animal is, of course, the balloon dog but I really could not think of a way of turning it into a fun craft activity in the online environment, without asking parents to purchase some unique resources. Plus, we made a puppy craft only a few weeks earlier and I wanted something else. Luckily, Jeff Koons created more than just one dog and a balloon rabbit was one of his creations.
  • We introduced the artist (name, country, favourite things) and we looked at his animals and tried to guess what they are.

The art

  • We started with checking all the materials: an A4 piece of paper (either the drawing album paper or just regular photocopying paper), scissors, glue and marker. I also sent the photo of the finished product to the parents so that they could help, if necessary.
  • As usual, I was modelling every step, then waiting for the kids to complete the action before moving on to the following stage.
  • First we drew two lines along the long side of the piece of paper and we cut along them.
  • Then I put the two strips together into a letter L (although in class I used the references from Russian and we made a capital letter G) and glued the ends together. Then came the time for the most challenging step, making the harmonica (or the spring (the reference that came from the student who had a slinky and called it a spring). I used the phrase ‘on the top, on the top’ while demonstrating how I was folding the paper. We glued the ends, too.
  • On the remaning piece of paper we drew a circle and drew the face of the rabbit on it. Afterwards we drew ‘two letters A’ for the ears and cut them out. We glued them together and then we glued them on the top of the spring.
  • Next, we drew ‘4 zeros’ for the paws and we also cut them out and glued them on the pieces of spring, two at the base and two somewhere in the middle. The glue here can be applied on the top or at the bottom of the piece and glued on, it does not really matter.
  • The rabbit was adapted from the original version from DIYArtPins to make it feasible in an online class but, still, it is the most complex and the most challenging craft that we have done in our online class. I had experiemented with it before the lesson, making my own copy, checking whether the quality of paper will or will not have an impact on the final product, visualising the stages and instructions. I was ready but I still got cold feel once we started to make it. However, my amazing kids who have been creative for two years and who have been creative online for one year managed. The youngest artist was supported by her mum and she managed, too. I would not recommend this activity for beginner online artists of beginner offline artists, either.
  • Without doubt, the rabbit is just cool. It is a real toy, made of paper and when you press it, it springs back or, we could and we did say, ‘the rabbit can jump’.

Happy teaching!

Teaching English Through Art: Upgrading Picasso

The artist

This is not Pablo Picasso’s first appearance in our lesson because last week, in our unit on animals, we looked at elephants by different artists and among them was also the most amazing and the most beautiful elephant by Pablo Picasso (see below). Even then I knew that it would not be the last we see of it.

I was planning to introduce Pablo Picasso in our traditional way, with the country and his favourite things (faces, shapes and line drawings) and I have prepared our gallery for it, but, as it sometimes happens, there was no time for that in the lesson. We are going to catch up on that next time, in our final lesson in this academic year.

In this lesson, we only looked at different one line animals created by Picasso and we tried to guess which ones they are using this set of visuals on wordwall.

The language

This lesson was a part of our Animals unit and the langauge that we have been working on and this was one more chance for us to use and to practise the following langauge: names of animals, categorising animals (big and small, I like and I don’t like) and, most importantly, talking about what animals and what we can do, using I can and I can’t and a series of verbs. We have based it on the song from Super Simple Songs, Little Bird, and we have been working on extending the list of verbs beyond the song.

We have already been playing with the spinner, asking the question: ‘Can you jump?’ and doing the actions to prove that, yes, we can but not as much language came out of it, even though it has been one of our favourite activities recently. This Monday, however, we started to adapt the song and sing it for all the kids, one by one (‘Sasha, Sasha, can you clap?’) and, finally, the langauge came out it. The girls were either singing or singing-reciting their answers, in full sentences. Hooray! Hooray! Hooray!

The art

In the last few lessons, we have done a lot of work with paper, scissors and glue, creating various toys. It was fun and lots of it but, at the same time, I was getting ready to introduce a new technique in our lessons. That is how the idea of upgrading Picasso came about.

I have looked through all the amazing line drawings that Picasso created and I was experimenting with the animals that we could all draw in class, online. Unfortunately, that meant that I had to give up on the chameleon (although that would have been the animal to upgrade with colours!) but I will leave it for another occasion. The flamingo and the horse were the other ones that I was considering but decided against, in the end, because they would be a bit too complicated for the younger students.

Eventually, I have chosen the elephant, the fish and the owl because they are simple and they represent three different actions and animals from the song which was also used during the craft activity. The verses of the song helped us to punctuate the activity as we sang it at the end of every stage of the craft, that is, after we completed the fish, after the completed the elephant and after we completed the elephant.

Before the lesson I experimented with the technique and checked with the parents that all the resources were available at home. In class, we went through all the resources, showing them to the camera, as usual: an A4 piece of paper, a pencil, paintbrushes, watercolours and two pots with water, one with the regular water and one with the water with salt.

First we drew the fish, step by step. I was drawaing one element, the kids followed and I waited for them to finish. This was not our first drawing dictation so the kids are now very good at following, showing the piece of paper to the camera after each step. Normally, I hold the piece of paper on a clipboard and I show it to the camera. This time, however, I decided to hold the camera over the paper because of the watercolours and I did it consistently throughout the activity. We drew three animals, one by one and put the pencils away.

The idea for upgrading Picasso I got from this great video on youtube. First, we prepared the based and covered the drawing of the owl with the water mixed with salt. The we put it away and started to apply the paints, first one colour, then the other. It is necessary to take some paint with the paintbrush and delicately touch the paper. The colour should spill and seep into the paper beautiful, opening like a flower. It has to be done slowly and carefully in order to be able to observe how that happens. After the first colour is applied in such a way, we repeat with the other or with the others, depending on what the kids choose.

In the end of the stage, I announced ‘I am ready. My owl is blue, red and pink’ and elicited the same from the kids. Afterwards, we sang the verse for the owl. This gave the kids a little bit more time to complete their birds.

Later on, we moved on the the other two animals and repeated the steps. I told the parents to leave the animals somewhere to let them dry completely.

My students were really involved and they had a lot of fun. One of them even used the animals to play a game with her dad and grandma (‘What animal is it? Can you guess?’). They drew their own Picasso animals themselves and they upgraded them beautifully. I was a very proud teacher that day!

And the most amazing of one line drawings and the most amazing of elephants that actually made me fall in love with Picasso…

Happy teaching!

Teaching English Through Art: Water! (and the Jellyfish craft!)

The artist

This is an unusual situation for me and for my course designer experience. This time the artist is not one person but a whole bunch and they are only connected by the theme of their paintings and this is water.

In class, I introduced a whole set of all the water words, in photograhps and in paintings, such as Turner, Hokusai, Monet and Levitan. We mimed all the words, we drank the water because when the picture of the bottle came up, we all realised that we were thirsty and we mimed all the words. We also started to talk a little bit about all the pictures i.e. I like it / I don’t like it. It is big and quiet, stormy, beautiful etc. There is definitely more to come here.

The language

There were two language aims in this lesson and, because there two, I am planning on the kids to be able to use them with ease after a series of lessons only.

The more important set were the ocean animals. I am planning to study ocean animals and then take it towards verbs movement and ‘I can’, ‘I can’t’ and ‘it can’, ‘it can’t’. We practised the names of the ocean animals and played different vocabulary games, such as One, Two or Many. We also sang ‘Baby Shark’, how else? We also categorised the animals into big and small on the Miro board.

The other set, for now on the back burner, are all the words related to water, which I described above.

The craft

It had to be a jellyfish, as the first of many life aquatic craft activities and the reason for that was the generally low level of challenge. Plus I have done this kind of craft before because it is easy and a great opportunity for the practise of colours and it can be done even with the youngest of students. Frequently, this has been the first craft in many of my year 1 pre-school classes. This is what it looks like.

This is a lovely jellyfish but I was worried whether it would be appealing enough for my already craft-advanced kids. I needed something to spice things up although without any fireworks because my lessons are online at the moment and I could not ask my online parents to buy something extremely fancy. I have to admit that I spent the whole morning last Monday, teaching my C1 English and my financial English classes, fully devoted to the lesson in progress minus the 10% of the brain that was trying to come up with ways of making the jellyfish more exciting. Effectively, because I remembered the tinfoil in my drawer. Bingo.

This part of the lesson started with us going over the list of all the materials ready for the activity (white paper, glue, scissors, tinfoil, markers) by showing them to the camera.

First step was to draw a big circle on the A4 paper. I modelled, of course, but the kids were supposed to do it themselves, without any stencil. It can be done this way because even if the circle is not quite perfect, the jellyfish is going to be a success. Afterwards, we cut the circle. Afterwards we fold the circle in half and we draw a line on the fold. In the end, we cut the circle in half, along the line.

The next step was to draw the jellyfish face on one of the halves. We drew the eyes and the smile and then the kids decorated their in any way they wanted. Some jellyfish ended up being princesses. I made sure we put them away, on the side, to make sure that we don’t glue anything on it until it’s time.

Next, we took the roll of the tinfoil and we tore off a sheet. Afterwards I demonstrated how to tear it into strips. It can be done with scissors but I tried before the lesson and it didn’t work very well, actually. Tearing strips off is more fun and, more or less naturally, kids choose how thin or how thick the strips are.

We take the additional half-circle and put the glue all over the half and then arrange the strips along the edge. In the end, we put more glue on the back of the jellyfish princess’s face and we put one on top of the other. Stick and press.

The jellyfish can be hung in the window or anywhere in the sun to let it reflect the sunrays or in the doorway to let it float in the air. If you can permanent markers, the tentacles can be decorated (inspired by Our Beautifully Messy House). My friend Michael also had a nice idea for an adaptation (being in need of a jellyfish carft but with not tinfoil in sight). He prepared a very simple template of a jellyfish (imagine not a half-circle but a half-oval) that the kids can cut out and simply cut the bottom part into strips this way practising their scissors skills.

Finally, and traditionally, we talked a bit as our jellyfish and we sang the final song.

Happy teaching!

Damien Hirst and butterflies! Teaching English through Art

The artist

It was interesting this time. The spring came and I really wanted to a related theme. It is true that at the time the snow was still lying around or still falling but I just wanted bees, butterflies and flowers. And caterpillars, of course. Only later did I start to look for an artist who could help us with it. Believe or not, dear reader, I found one! Just to prove that with this Art and English, if only you try hard enough, you can connect any two dots, even the most random ones.

I have heard about Damien Hirst before. He is, after all, one of the leading British artists and his name pops up here and there. But only now was I able to see his art in all its beauty, the dots that I had seen in so many places without realising what they were and the butterflies!

As usual, we introduced the artist, the photogragraph, the country and his two favourite things and we looked at his butterflies. And our Miro board was just perfect for it. We looked at the circles first (‘Can you see the circle?’, ‘Can you see the butterflies?’) and then we zoomed in (‘Can you see the circle?’, ‘Can you see the butterflies?’) as the circle disappeared and a multitude of butterflies emerged. Almost like magic).

Afterwards, I showed them my mini-graph and moved it around to illustrate how Damien turned butterflies into a circle and how we are going to turn circles into butterflies.

The language

This whole unit and the lesson revolved around spring, gardens and all the garden creatures, insects and not only. We have practised our vocabulary, we were describing gardens (‘I can see’), we practised numbers 1 – 20 and we sang a song about gardens, too.

We watched and tried to retell the cartoon about Six Hungry Caterpillars from Playway to English and a series of lessons we made a garden (see the photo below) and our own caterpillars which you can find out about in this post here. We also looked at different gardens in art and we talked about those that we like and don’t like.

The craft

My main inspiration for our butterflies was the video from World of Art and Craft because it is supereasy and very effective. However, because our classes take part online everything has to be made achieveable for the kids to do on their own and on the other side of the screen. For that reason I gave up on the stapler and experimented first with paper and glue. It worked.

As usual we went through the list of all the resources (‘Have you got the glue?’ ‘I’ve got the glue’ with showing it to the camera) to make sure that all the parents prepared what I asked for in a message before the lesson.

We started with choosing the two colours of the coloured paper, drawing the circles (‘not very small, not very big’) and cutting them out. I was a little worried about that bit but the thing is that even if the circles are not very regular and even the butterflies will be pretty. I was using the craft paper (one sided, the white inside), the kids were using some double-sided coloured paper, thinner and thicker, everything worked.

Afterwards we drew a line across each circle (to make sure that we don’t spread the glue all over the circle) and put some glue on the line. We closed folded the circles in half, and pressed in the middle. Afterwards, we fluffed up the sides a little bit. After both parts were ready, we put some glue in the middled and pressed the two halves together.

In the end we cut out a thin strip of paper, folded it in half and glued it as the butterfly’s antennas.

And then the second version of the butterfly appeared. I could not reuse the 3-D butterfly because while making the caterpillar, we had some problems with the glue and the paper which was just too thick and so another butterfly had to appear.

This one started with us going over the resources and choosing two colours of the coloured paper. We drew a circle on each, again, not too small, not too big and we cut them out. Afterwards, we drew the line across each circle, on the B side, and we folded each circle into half. The next step was to cut off a slice of the folded circle (‘Look, it is like cutting off a slice of cake’), to create the edge to shape the wings. Afterwards we drew the body of the butterfly on a piece of A4 paper, and we glued the wings on. We made only one butterfly in class but, of course, depending on the skills of the children, there is definitely a potential for more.

In the photo, you can see the intended butterfly and what happened in the classroom because students started to play with the materials and experiment how you can turn them into a butterfly.

Footnotes

It is only now that I have found out about the many surprises that Damien Hirst has up his sleeve. It turns out that his mandalas are made out of dry butterfly wings from real butterflies and that he himself is the biggest importer of butterflies in the UK. And I have to admit, I feel a little bit less enthusiastic about it all.

Happy teaching!

Ed Emberly and Monsters. Teaching English through Art

I suppose that, on some level, the idea of including the storybook illustrations and their creators into my English through Art curriculum has always been there and it was just waiting for its turn. The first lesson devoted to that happened somewhere in December 2020 with my juniors and you can read about it here. Including it in the series of lessons with my primary kids was just a matter of time. Ed Emberly (and his bestiary of monsters)* is the first one to have a lesson dedicated to. The first of many, I hope!

The artist

The idea to base the whole lesson on Ed Emberly and his art came from the Big Green Monster storybook which has been my go-to resource in all the body parts / monsters lessons for a very long time now. The kids absolutely love the fact that they can control the monster, make it appear or disappear and this way deal with the fear. I used to have students who would sneak into the storybook room before the lesson and ‘read’ the book on their own or run a reading sessions for their friends who also wandered in, both in English and in Russian.

But then, as I started to look through everything that Ed Emberly produced, it turned out that monsters really were his favourite thing and that he wrote a few books on how to create your own illustrations using finger paints and markers. ‘I want one of those!’ was the brain’s initial reaction.

First of all, we introduced Ed as our artist of the day (name, face, country and his favourite thing) and we talked a bit about the monsters which he drew, including the Big Green. The gallery walk was a very brief one this time but that is because Ed was present throughout the lesson, with the story and the craft. It was probably the most consistent and artist-focused lesson of all of those that I have ever taught on this course.

The language

This part was very simple and very straightforward – as much of the body parts practice as possible. It was the first lesson with this topic and we did a variety of exercises related

  • Introduction, repeating, a bit of drilling (I do less and less of that, as a teacher and I have begun to wonder why. The post will be coming soon).
  • Pointing and moving of the said body parts which could perhaps go under the TPR label
  • Introducing the song ‘My teddy bear’ by Super Simple Songs
  • And a selection of the wordwall games such as matching the human body parts and the animal body parts, pelmanism (only in zoom we write the numbers first on all the cards) and describing monsters using ‘my monster has got…’ and similar structures, also with the use of a set of wordwall cards. This last one is the most generative activity and I have high hopes for her in terms of the amount of the language produced in the long run. Usually it takes a few lessons for the kids to get used to it and to become comfortable and this time round was not an exception. With my current group, the Ed Emberly lesson was chronologically the first one and it was only in the Degas lesson, two weeks later that the kids were ready to produce lots of language.
  • Last but not least, we watched and participated in the storytelling and it was, of course, Ed Emberly’s ‘Go Away Big Green Monster’, this time in the video format, although, ideally, we would have used a storybook only I did not have it at home at the time.

The craft

Originally, Ed Emberly monsters (and other creatures) were done with a combination of two techniques – finger paint prints and drawing with markers. For anyone willing to use this approach, his books are full of ready made ideas. However, finger paints are a tricky resource to use in the classroom, especially if you want to finger print and draw, and I just did not want to bother with the logistics of it in the online world, especially that our group is now located in three different countries. Solutions had to be found.

It does help, I suppose, that I am a lazy teacher and I have noticed that with all the obstacles of the online Art class I am blossomig and I end up with the ideas that I like. This was the case here and that’s what we did:

  • The first step – produce own monsters in order to test and trial and to understand how much time is required and how many monsters can be created during the ten minutes that we hae assigned for the craft activity.
  • Write to the parents, to inform them what resources will be necessary: a sheet of A4 paper, a marker, glue, old newspaper and magazine pages OR coloured paper.
  • Show the kids the finished product and describe all the monsters (colour and body parts). I did it holding the picture in front of the camera but it was not as effective as I would have wanted it it to be. Next time, I will keep the paper on the desk and I will move the camera above it, in order to make sure that the kids see only one monster at a time and that it is clear and big enough.
  • The monsters are super easy to make and the one thing that is necessary is a piece of paper (the more recklessly torn off, the better). It is then glued onto the paper and the body parts are drawn. Then the kids describe their own monster, ideally using full sentences but, since it is the first lesson with the new vocabulary, I accepted simple ‘three eyes’, ‘one nose’, ‘two legs’. The number of the monsters produced in class will depend on the age and the skills of the kids.
  • My students are already quite ‘advanced’ when it comes to craft and after they figured out how to make the monsters, they were on producing more and more of them, focused more on the craft than on the speaking (ouch!). For that reason, when I teach this lesson again, I will want to scaffold even more carefully and introduce the following tricks a) ‘dictate’ the colour for the monster, b) promote production by guessing how many legs their monsters will have, hoping that even if I don’t guess, they will want to correct me and c) introduce a punctuation mark between the monsters ie a proper introduction (My name is Polly. I am a happy monster)
  • I personally adore the fact that the monsters are made from newspapers and that they have the most irregular shapes, the more reckless, the better. However, I noticed that some of my parents were reluctant to the idea of letting the kids work with old newspapers and magazings, preferring the regular and pretty craft paper. I have also noticed that some of my students did not quite like the idea of the torn paper and while I was happily tearing the resources for my monsters, they simply picked up their scissors and started to cut out square, circles and triangles. In the offline classroom, I simply wouldn’t have given out scissors, trying to encourage them to work with a new resource. In the online classroom I could not control it but the monsters turned out pretty anyway.

*) I cannot NOT share this amazing article with the funny and weird collective nouns. Enjoy!

Happy teaching!
Edgar Degas and Ballerinas. Teaching English through Art in Primary.

Sonia’s ballerina

The artist of the day

Edgar Degas is a perfect example of a love – hate relationship with Art. I adore his ballerinas, the beauty caught in a frame, the purposeful randomness of different set-up that make it often look like the candid camera photos, caught in the act, almost random, immortalised forever. But, at the same time, Edgar is the artist that I would never want to meet in person or talk to because of his beliefs and views.

But, it so happened that we are still doing body parts with my kids and I have only girls in the group and I really wanted to make ballerinas and so, reluctantly though it was, I chose Degas to be the artist of the day.

As usual, we introduced him by name, by country and by his favourite thing (ballerinas!!!). We looked at the paintings and talking about the colours and the actions and then, we made our own ballerinas.

Our gallery with Degas

The language

  • We are still practising expressing opinion using ‘I like’ and ‘I don’t like’, we include it in every lesson and at this point we are (almost) at the point when the kids talk spontaneously about the different things we are looking at
  • We are still practising describing monsters using the sentences such as ‘my monster has got two eyes’ as well as ‘my monster is green and yellow’, ‘my monster is happy’ and ‘I like it / I don’t like it’. Apart from the regular revision and drilling, we used the monsters from one of the wordwall sets, such as this one here. I was simply over the moon to see that at this point (and it was our lesson #3 with this topic), the kids were just producing a sequence of two or three sentences. It needs to be mentioned that we still sing the song about the teddy bear and it helps us to produce, too as the key structure ‘my teddy bear has got one nose’ can be easily transformed into a sentence about the monsters or ballerinas and that definitely helped, too.
Teacher’s ballerina

The craft

  • The final version of the craft is a combination of two ballerinas that I have found online, one of them from Kidspot, the other from Creative Child. Since my students are still very young and our lessons are online, I needed something that we would all be able to do without my direct assitance
  • As usual, I sent the information to parents with the list of all the necessary items: two sheets of white paper, safety scissors, glue and markers or crayons.
  • In class, we checked that everyone had all the materials (‘Have you got the paper? Show me, please’ etc).
  • I showed the students what we are going to need: a rectangle (for the body), a circle (for the head) and a square (for the skirt).
  • We prepared our shapes together: I showed the students how to cut off the rectangle (the shorter side of an A4 piece of paper, approximately 4 cm wide) and I waited for them to cut off theirs. I cut out a circle for the head and I cut of a square, too. We put the scissors away.
  • I did not give the students (or the parents) any details regarding the dimensions of all the shapes because, in a way, it does not really matter and we could manage with the wider or thinner rectangles or the smaller squares or circles. Whatever was too big, got trimmed later on. However, I knew that my girls would be able to handle that. With some of my other students or with much younger children, I would consider asking parents to cut out the shapes for us, before the lesson.
  • We proceeded to making the ballerina and here are the exact instructions. As usual, I was making my own doll and demonstrating, waiting for all the girls to catch up on with us.
  • Step 1: take the rectangle, fold it into half, lengthways (‘It’s a book’, said one of my kids, and a book it was, although it had a slightly weird size) and we spread some glue inside of it, to glue both sides together, in order to make it thicker.
  • Step 2: draw the lines at the bottom and the top of of the rectangle, to make the cutting a bit easier and to ensure that the kids don’t cut it into halves.
  • Step 3: cut along the line at the bottom of the rectangle, say ‘My ballerina has got two legs’
  • Step 4: cut along the line at the top of the rectangle, fold them to the sides, say ‘My ballerina has got two arms’
  • Step 5: glue the circle on, draw the eyes, the nose, the hair, we were drawing and talking about it ‘My ballerina has got…’
  • Step 6: fold the square into a triangle and cut the patterns, in a way in which we make paper snowflakes. Decorate the skirt with markers.
  • Step 7: cut off the top of the square/triangle in order to be able to put the skirt on. Put it on the doll and glue it at the top (and at the back) in order to make sure that it does not fall off.
  • Step 8: add all the other details: draw the hands, shoes, top of the dress etc.
  • Initially, I had the idea of practising some Present Continous with our ballerinas but in this particular lesson we only managed to start using it and the kids were not ready. Instead, we introduced them and sang the goodbye song together.
Marta’s ballerina

Some final notes

  • As I have mentioned before, the ballerina does not require any careful or detailed actions and even a messy cutting or measuring do not get in the way of finishing the task, if the kids are old enough. The most challenging part was the skirt as it involves preparing the snowflake and cutting off the tip in order to put the skirt on but once the kids were shown the final product (a circle with a slit), they were able to find their own solutions. Some of the skirts were not circles, some of them were not the most regular squares, some of them had not the prettiest slits but they could all be put on and, when, decorated, they all just look beautiful.
  • With the younger students, I would ask the parents to prepare the shapes and to cut the slit for the skirt, too.
  • I have also seen ballerinas that are even easier to make as the snowflake skirt could just be replaced with tissue paper or strips of paper glued on, or, if you have them, cupcake paper liners folded in half. This would also make this craft easier to make.
  • I loved the fact that when I first introduced my ballerina, the kids were slightly taken aback (and, fair enough, it is not the most graceful thing in the world, my ballerina) but as we proceeded through the craft, they grew fonder and fonder of their creations. They came up with many ideas of personalising them and of adding more detail ie a separate piece of paper for the hair. Not to mention that their dolls are simply amazing.
  • Another beautiful that happend during this lesson was the fact that the girls remembered the acrobats that we did in a Chagal and Circus lesson in December 2021. An eternity ago and yet, they did remember!

Vicky’s ballerina

Happy teaching!
Yayoi Kusama and Pumpkins. Art and English in Primary

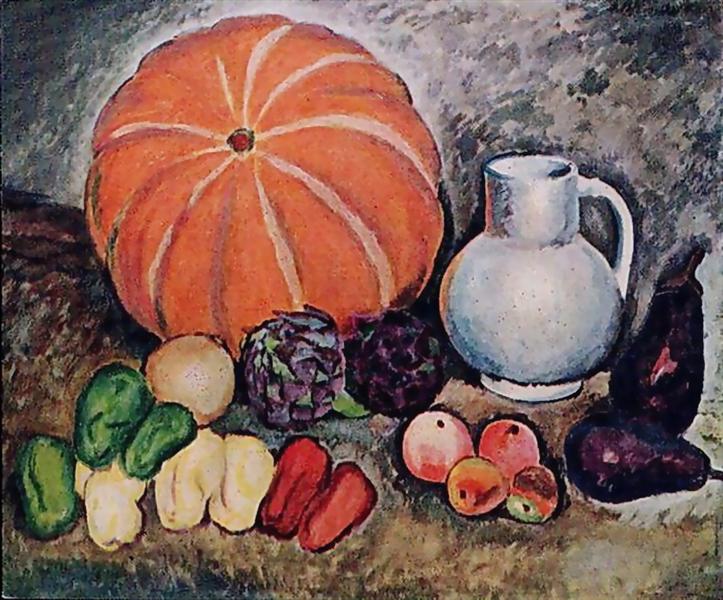
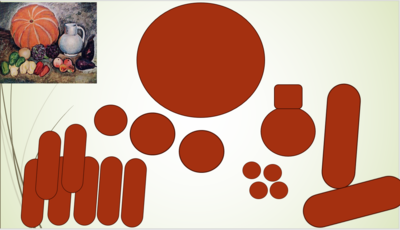
Yes, the Halloween was approaching and my English+Art lesson was on the day. Yes, I was just googling random things hoping that if I find something interesting, I will have a Halloween-ish lesson and if I don’t find anything, well, we will go in a different direction. At this point we have done colours, we have done leaves and, ideally, I was hoping to find some cool artist, some pumpkins and some technique that we have not tried before yet. Last year, around that time, we went to Ilya Mashkov as we tried to recreate his still-life with the magnificent cucurbita pepo but it was last year (aka we have done it already) and it was offline (aka it was more manageable)…I needed something different.

Surprisingly, googling ‘pumpkin in art’ can get you when you want to be)

The artist of the day.

Enter Yayoi Kusama. Until last Monday, I had never heard of her. Since last Monday, I have been a great fan. Her art is exploding with colour and with energy and she makes me feel like being a part of the Wonderland, Alice in the real world, easily available, at hand. And she loves dots and dots are circles aka the best shape ever that can be easily used in class (here is an earlier post about that).

We met Yayoi and found out about her favourite things and we looked at some of her paintings in our gallery as is now our habit. We also talked about the paintings we like and don’t like.

Yayoi Kusama and her favourite things
Our gallery in Miro

The language

In this particular lesson I wanted to focus on practising expressing opinion using ‘I like’ and ‘I don’t like’ and that is exactly what we did. We looked at Yayoi Kusama’s pumpkins and said what we think of them (P.S. We like them!), we looked at a range of creative pumpkins and said what we think of them and we enjoyed the variety in which pumpkins can appear (photos, art, real pumpkins (yes, these were present) and, finally, the Surprise Pumpkin that I have brought. See below)

The craft

The final product here was a compilation or an adaptation of two ideas from the amazing Art for Kids Hub and their pumpkin folding surprise and the most amazing mouse.

  • We looked at all the pumpkins, Kusama’s, the realia, the creative pumpkins
  • I presented the ready made product making sure that the Surprise Pumpkin is a proper surprise (‘Look, this is a pumpkin. But it is also a surprise. Are you ready? 3…2…1….’)
  • We went over the necessary materials with everyone (‘Have you got the paper? Have you got the pencils/markers/crayons?’)
  • I was making one more copy together with the kids. I am drawing on the regular paper, holding it in my hands, on a thick pad. Going step by step, slowly, pausing and waiting for the kids to complete every single step. This is absolutely crucial.
  • We folded the paper, stopping after every stage, showing the page to the camera. There are four essential stages: 1) show the A4 paper 2) fold the paper in half, widthwise 3) press at the crease / fold 4) fold the top flap outwards (show the kids how the edge of the paper touches the crease / fold in the middle 5) press at the crease / fold
  • Draw the pumpkin on the folded paper, that is at the 1/4 flap folded outwards and the 1/2 half at the bottom simultaneously, draw the stem and the leaf as well as three lines for the ribs. Don’t forget to pause at every stop, wait for the kids to complete every step and show you the result.
  • Open the paper and place it flat on the table. Draw the edge of the top half (‘Let’s draw a zigzac’)
  • Draw the edge of the bottom half (‘Let’s draw a zigzac here, too’)
  • Draw the mouse step by step: the oval for the body, two lines for the nose, the ears, the eyes, the whiskers, the tail and the hands.
  • Leave the colouring for after the lesson.
  • Play a bit with the surprise pumpkins that everyone prepared. My students simply recreated the ‘presentation’ that I gave at the beginning of the lesson, of their own accord, just like that.

Some final notes

  • Most of my students deal very well with the folding bit. Only one of us struggled a little bit and we needed mum’s help at the very beginning. It might be a good idea to let the parents know ahead of time and ask them to be at the ready, just in case.
  • As regards the materials, absolutely anything goes: coloured pencils are great, crayons are great, markers work, too. I am at my personal happiest drawing with markers and colouring with crayons or with crayons and markers, for the extra shine and glow.
  • Kids are amazing and they really can recreate the drawings or, rather, they can create their own versions of it. The only thing that is really necessary is the proper staging, going step by step, modelling and pausing, to give everyone time to complete the drawing.
  • It does not matter how big or how small the mouse is. It will all be hidden in the folds of the paper.
  • There are many variations of the craft. You can find some of them online. Below you can see what we have created ad hoc, just because we did everything that we needed and I could extend the lesson a bit. The pumpkin with a cat and the apple with a caterpillar were the result. These are only a few of the options!
Happy teaching!