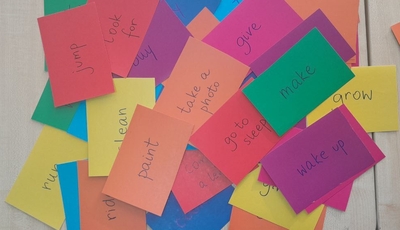
the idea this time was taken from Global English 4, with the unit 5 whole focused on storytelling. There is an activity there with a framework to write a story: you roll the dice and choose one of the options for the time of the story, the setting, the characters and the dilemma. This grid gave me the idea for our lesson and it helped me shape the preparation stage to our writing. It can easily be replaced with a much easier vocabulary set, adapted to the level of the students. And a few die.
We started the lesson in our usual way, with hellos, our hello song and an exercise to practise past tense, our main grammar thing this month.
We revised the main parts of a story that we would use mentioned above and the dialogue and why we have it in the story (to help us express emotions in a story better)
I showed the kids the template written on the board and I read the story I wrote before the lesson using the dice and the framework from the book
We put together a few stories, using the same framework, and a variety of set-ups: everyone rolling and contributing one element at a time, everyone contributing an element each, in turns (i.e. 9 different days, 9 different locations etc), each child contributing their own element, without the support of the book etc.
Afterwards, we started to work on our own stories. I kept the coursebooks open for the kids to have some sources of support and ideas but even before I managed to finish giving the instructions, some of my kids were asking ‘Can we use our ideas, please?’
Everyone had a handout (see above) and we were going step by step, with me modelling and creating my second story on the board and making sure that everyone was on the ball as we went along.
In the end, we added the title and signed the story.
When the stories were ready, we had a reading session and all of them were read out loud. With one of my groups, I had to suggest three options: a) the story is read by the child, b) the story is read by the teacher, c) the story is read by the teacher only (for the sake of my shiest student). I introduced all the stories and we had a round of applause at the end, for everyone.
We haven’t done it yet but I want to type up and print all of the stories for the following issue of our school journal so next week I am going to ask each student to write a short description of the illustration they want the A.I. to create for their story.
Why we like it
The dice story was a perfect introduction to the lesson and an ideal idea-generator. I decided to use the coursebook as it is, in order to expose the students to the real un-graded language.
It was an easy thing to write (it was short) but it had enough for funny and entertaining stories which my kids’ work proved.
By adding two lines of dialogue to the framework in the coursebook, it became even easier and more fun to write and to read.
Initially, I planned it as a one-lesson event but seeing how much they benefited from extended practice and preparation, I extended it into two 45-minute classes.
All of the kids got really into writing their stories. One of my students literally dragged me into the classroom, from the break, as, in his opinion, I wasn’t walking fast enough and he wanted to start work as soon as possible.
All of the stories that were written are great and I am really proud of my students, but there are four or five that are really way above the average, with the funny dialogue and an unexpected ending, a really good piece of work!
I am planning to use the dice framework to prepare a similar but simpler sets for the everyday use, for us to tell little stories in the beginning of every lesson while we are still practising the past tense. I am hoping that now the kids will be able to tell these stories in pairs.
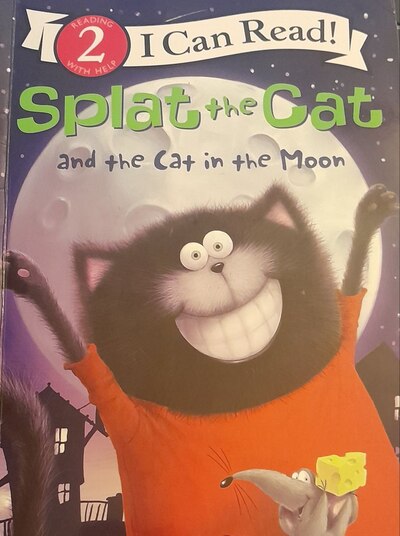
This time we used the story by Rob Scotton published by Harper Collings Publishers in the series Reading With Help. It is one of the stories in the series my kids know already because it has been translated into Russian. I had a copy at home and I really wanted to use it as part of our going back to roots (aka to the procedures from year 1) when we were reading a book every week as part of developing my students’ literacy.
Underneath you can see how we used this particular story, however, these are not the only activities that this book lends itself to. This is how we needed it and how we used it.
The ideas
Concepts: this was, probably, the main aim of this book in our lessons. We have done a series of lessons devoted to development of soft skills in our communication lessons. Splat and Plonk differ in their opinions on what the moon looks like and they sort out this disagreement in a slightly agressive way, teasing and pushing and almost hurting each other. This was a perfect story to bring to class at the end of the whole series.
Another concept that I did not include or even forsee from the very beginning was the different ways that we see the world. Plonk looks at the moon to see the craters, as a great space fan, whereas Splat looks at the moon to see the cat’s face in she shades and spots on the moon surface. Neither is wrong, they only have a different outlook on the world. Plonk represents a realist (or, as we called him, the scientist) and Splat has a more creative way of perceiving the world (for us he was the artist).
Functional language: this was the main aim of the lesson, linguistically, not focused on any specific function or a situation, only a few useful phrases such as ‘These are definitely craters’, ‘I’ll show you’, ‘Are you ok?
Grammar: no obvious structure for us to focus on, since nothing stands out, however, we used it as an additional practice of the past tense. Some of the verbs my students already know (saw, didn’t see, looked) and some were completely new (nudged, hit, aimed).
Vocabulary: no obvious set of vocabulary items but we had to introdudce/ check such as: a notepad, telescope, craters etc,
The lesson
Here is the overview of the main stages of the lesson
the cover page
the vocabulary, I have chosen the words and phrases to introduce and to check, we read them and looked for more examples of use
‘your phrase’: I have prepared a few phrases aka quotes from the story on separate cards to give out to students (one per each) to help them focus on listening. We read them out loud and the students were supposed to listen and to raise a hand when they heard their line in the story
comprehension task: Did Plank and Splat communicated effectively? Who was right? Who was wrong?
reading: I read the story from my copy while changing the visuals on the powerpoint. I created these using A.I. to match the key moments in the story and to boost comprehension
discussing the comprehension questions above.
personalisation: How do you look at the moon, as an artist or as a scientist?
the following lesson: a few chosen words from the story written on the board, the students retell the story (or elements of it)
there are few videos of the read aloud on youtube so these can be used in class, too. I am going to use one of them to share with my kids and I hope that, perhaps, they will read it and watch it again at home.
Reflection and more ideas
I absolutely loved the story. We listened and read, we had a little laugh at the end we had a reall nice discussion about communication and the ways of looking at the world. It even went further because one of my students suggested that the moon can also be a pancake and we agreed that this is how a chef would look at it. I also liked all of the ideas they expressed in their notes and they were definitely not anonimous. Most children liked Splat (but not everyone), most appreciated Plank’s realism (but not everyone, ‘Miss Anka, he is a bore!’) and most children liked Seymour’s trick (but not everyone, ‘Miss Anka, he cheated’).
Absolutely everyone loved the last task in which they had to come up with an idea what to put in front of the telescope lens to play a trick on both cats and this is the only sentence that we read out loud, just to compare ideas.
This lesson and this story is actually going to transform into a lot more because first of all, I got hooded on the visuals created by the A.I. and I want to included it in our Art Explorers and I love the idea of the world seen by different people, the scientists and the artists and this is where we are going to go next week.
The way that only the freezing winter sunsets can be
Storytelling and storybooks in the primary classroom
Welcome to one more of my obsessions: the story in the classroom, be it a story from the coursebook, a video, a storybook or even a thing that I invent myself, just to sell my ‘product‘. A story is not only the type of an activity that we introduce because of its many benefits or because we want to prepare our students for the YL Cambridge exams but also because the story can be a way and the means of developing the young children’s language skills, reading and writing, speaking and listening but also their grammar and vocabulary.
I have been using stories for ages and I am not exaggerating when I say that this is one of my favourite teaching tools and different storybooks characters, Marvin, Barry, Pete the Cat or Splat the Cat or Peppa, are like my best mates.
‘What’s new?‘, one could ask.
In this academic year (four months so far), I have been involved in teaching the British National Curriculum, KS 3 to my two wonderful groups who are an amazing but mixed bunch, especially when it comes to their actual English skills. One of my main aims is developing my students reading and writing skills, preferably fast (yes, yes, I know, nothing happens fast) while working with a very mixed ability group, ranging from complete beginners to A1+ children. Stories have been one of the many ways of doing and I decided to share a few examples of what we have done, hoping that they can serve as a source of inspiration, for all kinds of classes, EFL or ESL.
The general idea
The way these five stories were used in the primary classroom follow the same pattern
pre-book: looking at the cover of the book, reading the title, introducing the main character, asking some questions about it, trying to predict the story, introducing and practising the key vocabulary.
while-book: reading / watching the story, sometimes with pauses to check understanding, sometimes to involve the kids through gestures, sometimes through the phrases, if they are used repeatedly.
post-book: a variety of activities related to the content of the story or to the grammar or vocabulary of the week in which the story was introduced.
And this is when the post starts to make more sense, I hope, because I am going to share here five different stories and five story-related, follow-up activities that I used in the last few months.
Hen’s pens and Let’s practise vocabulary!
Hen’s pens is a story, one in the series published by Usborne, a lovely resource with the Ted in a red bed, Fat Cat on a mat and Big Pig on a dig. I usually use them a bit later, with slightly more advanced students, in shared reading sessions (and there probably should be a post about that) but this time, I wanted to introduce a longer story, a video story and a rhyming story, specifically to have kids practise noticing rhymes.
In the follow-up of the story, we completed a very simple reading task, in which we put the words into pairs by colour-coding them and then using the chart to practise reading. You will have also notice a colouring page in the handout. This was an additional task for the kids, only for those who like colouring.
Pete the Cat and Let’s speak!
Pete the Cat is very famous in the EFL circles and the story about rocking in the school shoes is an absolute hit. This is my personal way of teaching Present Continuous ever since I have seen the video for the first time and this year, not quite for the first time, I used it also to introduce the school vocabulary, verbs and places.
In our lesson, apart from watching, singing, miming and even re-enacting Pete’s day at school, we also followed up with a speaking activity in which the kids had to create their own sentences in the Present Continuous. They had the main verb forms, mostly taken from the story, accompanied by visuals to support speaking (in most cases, the kids were unable to read yet) and their task was to finish the sentence by drawing something. ‘I am eating…a pizza, an apple, a cookie, a banana’, according to their preferences. Later on we compared our sentences, creating our own day at school. The handout served as preparation for speaking.
Again, those children who were interested, were given a second handout to colour.
Marvin Gets Mad and Let’s practise grammar!
Marvin is, no doubt, one of my favourite characters and he’s been present in my classroom for about fifteen years now (wow!). ‘Marvin Gets Mad’ by Joseph Theobald is a great story for feelings and for learning about controlling emotions but this time round I decided to use it to reinforce the grammar behind the Present Continuous.
In the follow-up task, which was quite a stretch from the plot of the original story but it was exactly what we needed to practise the Present Continuous and to reinforce the idea of the suffix -ing. The kids had to add the suffix to all the sentences and then read them and match them to the pictures of a particular sheep.
Zog and Let’s take some notes!
Zog by Julia Donaldson was a good lesson, too. We focused on revising the body parts but we also did a lot as regards the language practice, as regards the structures we already learnt (‘I can…fly, catch a princess, breathe fire) and a few structures that were used repeatedly in the story (‘What’s the matter?’ ‘I can help you’ ‘Thank you’). While we were going through the story, the children helped me produce all the key language.
After we were done with the story itself, we ‘took notes’ about the story. All the kids got their copy of the handout and we went on through it: tracing the lines, reading the lines and completing them with our ideas. As usual, some of the lines are actually very restricted (‘Zog is a dragon’), some are more open-ended (‘He can…fly, breathe fire, catch a princess, help’), the others – even more. (‘He is…green, big, small, happy, sad, scared’). The final two lines are for tracing and for circling, depending on whether you liked the story or not. This time I included a small picture of Zog for everyone and some kids took time to colour it after they were done with writing.
Ling and her proud memory and Let’s draw!
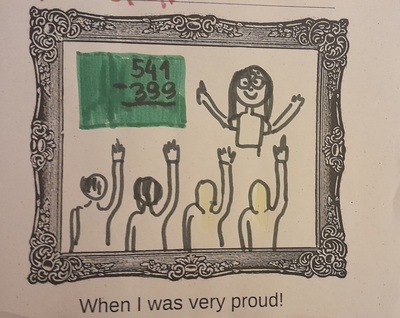
Ling is a girl from one of the stories in our coursebook, Global English 3, in a series on memories (a sad memory, a happy memory and a proud memory) and I actually loved teaching all three. The story was quite challenging for my kids in terms of the language and I just wanted a general understanding of the main facts. After we talked about the picture and listened to the story, I did a short Yes / No activity regarding the content. This was followed by a note-taking activity, similar to the one we did with Zog, but it was substantially shorter and more limited in terms of creativity. However, this was only because the real star of the lesson was the drawing activity.
The word ‘proud’ was a new concept to us and I really wanted to make it personal, mostly because it has a huge potential and it is a good word to have at your disposal in the classroom. With the help of my T.A. we explained what it means, we gave examples and suggested some ideas for the kids, based on our shared experiences such as preparing for the Christmas show, doing difficult exercises in class and so on. I showed my students my example (below) and I let them draw.
Admittedly, the lesson (or this project) did not involve a huge lot of language production but it was a beautiful moment, nonetheless. And a very necessary one, too! Some children knew straight away what they were proud of, some others needed to take time to come up with an idea. And they did! Even those who started their search with a desperate ‘I don’t know!’.
My example is below and showing it to my class was another special moment and, guess what, they got the idea straight away! Because when we are doing something very, very difficult in Maths and my students keep raising their hands and everyone wants to give the answer, I am very proud (based on real events:-).
Coda
These are just a few ideas of what can be done in class when a story is involved. One of many ideas!
One of the YLE Cambridge visuals, Movers speaking (4 pictures), Flyers writing (3 pictures) or Flyers speaking (5 pictures). In our case, this time it was Paul and his Granmother from Flyers from the sample tests booklet (volume 2 p. 96), tampered with lightly (see below)
A handout created to accompany the visuals, you can download it from here
Procedures
Prepare the visuals by covering up the numbers on the pictures and making a copy for each student, cutting these up. Make a copy of the writing handout for each student.
Introduce the story: without revealing too much, for examply by telling the kids that they are going to meet a boy and read a story about his day.
Give out the visuals, cut up, ask the kids to find out the start of the story (aka picture number 1), talk about this picture with the class. The questions to use might include: Who is it? How old is he / she? What is she / he doing?
Tell the kids that this is Paul and his gran (we had different interpretations here but we need grandma for the handout) and their day. Ask the kids to reorder the pictures, check and glue them in the correct order in the notebooks. They number the pictures.
Create the story: kids look at all the pictures, in order to be able to construct the whole story and the plot. This can be easily turned into a speaking activity: the teacher makes sentences such as: I can see a boy. Kids answer with: Picture 1, 2, 3, 4 and 5, etc. Later on, the students take over by making their own sentences. This can be done as a whole class or in pairs. This is also the time to introduce or to check that all the kids have all the key vocabulary. The kids are not telling the story yet, they are only getting ready, thinking about the characters, their actions and feelings.
Write the story: the teacher gives out the handwriting handout, the kids glue it in their notebooks, too. The class go together, picture by picture, they read the sentences and think of their own ways of finishing the sentences. They write the words or they ask the teacher to write the words on the board for them to copy. The teacher monitors and makes sure that everyone is going on at the same pace.
Read the story: the groups that I did it with were not very big, only 5 or 6 students, so we could all read our stories out loud and applaud. With the bigger groups, it might be a good idea to put the kids into pairs or smaller groups to read to each other and to applaud. Nonetheless, I still wanted to include this element, purely for the reading practice.
Why we like it
I am quite happy with that activity since all the materials worked well in the classroom.
The kids enjoyed it. Many of the ideas were the same, especially the feelings but there was also some potential for variety in kids’ answers. I accepted everything, for example ‘Parents are angry’ (picture 5) or ‘Paul is scared’ (picture 4). As we always say: ‘All ideas are good ideas’. In that sense it worked very well as ‘the first story we wrote’. I was very proud of them and they were proud of themselves, too.
My students are only 6 and 7 and all of them are in year 1 of primary. Their literacy levels vary and this kind of an activity gave them an opportunity to practise a variety of skills, especially their literacy skills, with more focus on reading and writing. There was enough room for creativity and enough support at the same time. Initially, I was considering including the tracing element but then I decided that it would be too much for one lesson, with five pictures and five short texts to write.
There is a lot of potential for adaptation: the number of pictures can be adapted, if you choose to use the Movers speaking resources or the Flyers writing resources. The number of sentences for each picture can also be adapted, extended or cut short. If there is time and if the kids are ready, they can add their own, sixth part and even to draw their own picture.
I made sure that everyone had the same order of the pictures for the entire story as my kids are quite young and this was the first time we worked with this kind of a materials. Because of that and because of their literacy levels, they are not yet able to work independently on such a task and I decided to keep it more T-centred and T-led this time. However, for more advanced groups (as regards literacy and independent work), there is a lot more potential. They could tell the story in their own way. If needs be, the writing handout, can also be cut up and rearranged, to match the pictures and their order.
One thing that I did not do was to allow creativity as regards the title of the story. We did not focus much on it, I only introduce the brief: Paul and his grandma, but there is so much potential here, especially that the kids are also supposed to learn about a structure of the story and that it includes a title. No harm done, we will be repeating this activity and next time we will write our own titles, too!
Before you go, make sure you have a look at all the other storytelling ideas, here and here.
This is my number 1 storybook illustration ever. Marvin Wanted More by Joseph Theobald
This post came about as a result of conversations with some of my trainees and colleagues, most recently with Vera, and it inspired me to reflect on not necessarily on my favourite storybooks as this list would be much, much longer but on the list that I would start a storybook library from and the titles that I would buy first.
Making this list was not entirely pleasant because as soon as I got to number 10, I started to revise it as I was being flooded by the titles and the characters that also wanted to make it. It is quite likely that this list will be modified in the future.
Here we go then. The Very Personal List Of My Favourite Storybooks To Be Used In the EFL Classroom with some very short rationale and some interesting links.
Very Hungry Caterpillarby Eric Carle: It is a true classic and it is quite likely that your students, no matter how young, have already read it in their L1. It has a great character that we can relate to (I know I can) and it can be used to teach food, emotions (‘I am hungry’, ‘I am not feeling very well’), the life cycle of butterfly and, potentially, the seasons and weather, too. It can be combined with a treasure hunt in the garden and in the park and with a craft lesson.
Dear Zoo by Rod Campbell: This is a storybook that I know it by heart and I did use it in class a few times with only a box and a set of flashcards. It is a great resource to teach and to practise all the animal vocabulary but it is a great starting point to teaching adjectives, too. I used it to introduce the idea of a riddle which we later extended to make our own. It has been
Marvin Gets Angry by Joseph Theobald: I have a special place in my heart for Marvin and his antics. This book can help you to teach the basic emotions (happy, sad, agry, tired) and it is great in the first lessons, while establishing class routines and teaching kids how to behave but it also helps to accept that we all get angry sometimes and we need to find ways of dealing with. Other than stamping on the flowers, frightening the hens and biting the cow’s tail. It works for body parts, too.
Brown Bear by Bill Martin Jr and Eric Carl: It is a wonderful book for the first lessons with year 1 students because it has a repetitive text and it works very well with colours. It can be also used to teach ‘What can you see?’ ‘I can see / I see’ which is a good first functional phrase that will be used throughout the course.
Barry And the Scary Hairy Monster by Sue Hendra: It is not the first book of the series, but it is the first one I used and I fell in love with. It has a great plot with a fantastic surprise at the end and I normally use it in the beginning of the year 1 course, to practise emotions, colours and some simple questions such as ‘Where are you?’, ‘Who are you?’. It is great for involving kids through miming and counting. It also normalises the fact that we are all afraid and it helps the kids to deal with the fear.
Three Billy Goats Gruff (traditional): This is my favourite traditional story to be used in the EFL classes although the reasons for that are rather random. I started using it with my students only because I found it lying around and came up with ways of dealing with it. We use it to talk about emotions and food because all the goats offer some random food items to the troll trying to bail themselves out. At least they do in my rendition.
Where Is My Baby? by Julie Ashworth: Here is another book that I am very attached to emotionally. We have a history, you could say. Naturally, I know this one by heart, too. It has some repetitive language, it can be easily turned into a role-play with the whole class and it is a perfect resource for teaching and practising body parts and adjectives. I love the ending, too because it helps to teach the idea of tolerance. It can be combined with a craft lesson.
Zog by Julia Donaldson: I love Zog because it works well in the EFL classroom to teach body parts, health problems (‘What’s the matter?’) and ‘I can’, ‘I can’t’. Apart from that, it also has a great story that includes an underdog hero, a princess that does not care about castles and honours and who wants to do something real and a prince that learns that it is not necessary to fight with dragons, all the great ideas that can help teach kids develop and believe in themselves.
Don’t Eat the Teacher by Nick Ward: This books made it to my top ten because it includes aquatic animals and a shark as the main character and a lot of school vocabulary. It has got a funny plot and can be used to teach imperatives and the rules of classroom behaviour. It is one more book that I like to use in the beginning of the year. It can be used in the unit on animals or, specifically, on life aquatic and it can be combined with the Baby Shark song and craft, too.
Rhinos Don’t Eat Pancakes by Anna Kemp: This storybook might be a bit too challening for the youngest of students, in terms of concepts or vocabulary, but it is still an amazing resource. It has some potential to be used in lessons on colours, emotions, house vocabulary, animals, verbs and adjectives. It is a fantastic resource to start a conversation on the power of imagination and the relationship between the kids and the parents. I am also planning it to use it in my Art and English classes. This is also the storybook that I used with all the ages of students: from pre-school to my advanced teachers.
Those that almost made the list: Elmer by David McKee, Marvin Wanted More by Joseph Theobald, Pete the Cat by Eric Litwin, James Dean and Kimberly Dean, Hugless Douglass by David Melling, Dinosaurs in the supermarket by Timothy Knapman and Sarah Warburton, Perfectly Norman by Tom Percival, The Colour Monster by Anna Llenas, The Day the Crayons Quit by Drew Daywalk and Oliver Jeffers, Lost and Found by Oliver Jeffers and many many more…
a group of A2 or A2+ kids preparing for the Cambridge Flyers or the Cambridge KET exam
a set of the storytelling pictures from the exam writing materials
a piece of paper and a pen
Procedure
The teacher displays the visuals on the screen and tells the kids that they will be used to tell a story.
The teacher asks the kids to look at the visuals and decide what their character is going to be called. Everyone writes the name down on their piece of paper.
The teacher tells the kids to write down ten numbers, 1 – 10, and, when everyone is ready, to write ten things that they can see in all the pictures. These can be only nouns or a selection of nouns, verbs, adjectives etc.
The teacher asks the kids to decide what kind of a story they are going to tell: a happy story, a sad story or a scary story. Everyone decides and draws a relevant smiley at the bottom of their list.
The teacher divides the kids into pairs and sends them into breakout rooms to tell their stories. They have to use the name, all ten words and they have to make sure that their story has the mood they have chosen for it.
Back in the common room, the kids give the group a summary of their story (‘It is a story about a boy who…’)
Why we like it
The main aim for me in this particular lesson was to show the kids that even such uninspiring illustrations as the ones we used (and sadly, they were really boring this time) can be a start of a fun storytelling activity and that the final product’s quality depends only on the writers that is us.
We are preparing for a progress test and a mock test and I am hoping that an activity of that kind will get the students ready for the independent work during the test itself. Looking at the visuals and making the list helped the students think of the words that they see and it helped to assure that they will be closer to getting to the required wordcount (35 words). If they have ten on their list already 30% of the way there. It also gave them the time necessary to really look at the pictures and to start thinking of what might be happening.
From the word ‘Go’ the stories became personalised because the character got a name and became six different boys instantly, Fred, Bob, Tom and Vyacheslav among them. (‘Anka, but why Vyacheslav?‘ ‘I am not sure. I looked at him and I just thought he looks like a Vyacheslav‘).
Deciding how the story will end in the beginning also helped to shape it. It was the first time we did it and for that reason I only offered three options: a happy story, a sad story and a scary story but that list can be easily extended. We shared how we were planning to tell the story before we went into the breakout rooms and among our six stories there were three happy stories, one sad story, one scary story (mine) and one ‘ill story’ because one of my students decided that his character is going to catch a cold in the end. Anyway, from the very beginning the kids knew where they were taking their Fred and their Bob. They also knew that their partner’s story will be a bit different so, hopefully, they were more interested in listening to it. There was some variety in the group so I could put them up in a pair whose angle was different.
It can be easily done in the classroom but it works amazingly well in the online classes and this is how it came to be. I wanted to avoid sharing the visuals and wasting time on opening them.
It is easy and it can be a speaking activity in its own right or it can work as a story-writing preparation task as it was in our case. Consequently, a set of three pictures can be used (Flyers and KET writing tasks) or a set of five pictures (Flyers speaking tasks).
As a potential follow-up, the kids can write the story for homework.
Next time (and there will defnitely be another round of this activity), I am going to add a more communicative element that will give them a proper listening task and that will give them an opportunity to interact with their partner’s story such as retelling the story they have heard in the breakout rooms, creating a title for their partner’s story or continuing it (‘The next day…’). I know that choosing the best story is sometimes suggested with this kind of an activity but, to be honest, I am not a fan. Not everything needs to be a competition.
This is how I daydream it: my primary kids go on to take their Starters (this is an old daydream, this year they will be taking Flyers), they are describing the pictures or telling the story. The examiner asks ‘How is this boy?’ and my kids answer ‘He is confused.’ and the examiner cannot believe her/his ears but she/he is, actually, impressed.
‘Confused’ is one of the many adjectives that my primary kids have learnt thanks to the sheep game that we’ve been playing for a few years now. We started with the normal adjectives, happy, sad, angry, sleepy but the kids noticed that I’ve been hiding some cards and they got curious. And because they were curious, they started to ask questions. Since the cards were wonderfully happy and funny, and since, together with some clarification from me, they did illustrated the concept very well (after all, they were created for children), we started using the ‘confused’ card (and with them ‘chatty’, ‘in love’, ‘crazy’).
That, in hindsight, was an excellent idea because this turned out to be a very useful words because I happen to be confused and my kids happen to be confused, too. Not to mention all the characters from all the stories. ‘Confused’ might be from the B1/B2 shelf, but, we found it very very useful, at the age of seven, in something that was the pre-A1 level.
‘OK’, ‘ill’, ‘in love’, ‘creative’
The coursebook and the curriculum
A disclaimer first: my comments in this section are based only on a very un-thorough looking through the coursebooks for pre-schoolers, only a quick glance at the contents page and the units. I acknowledge that fact that I might have missed something and that a proper research might be necessary and, for that reason, I will refrain from quoting any titles here. However, having flipped through five recently published coursebooks for pre-primary learners, I did not find much as regards adjectives, apart from colours (all), some of the weather words (depending on the title) and some random happy, sad and hungry (also depending on the title). With one honourable exception that introduces quite a few emotions as well as some other opposites, either through stories or through CLIL projects. Overall, however – not good at all.
I also had a look at the primary books and here the situation is admittedly better because all of the modern publications tend to align their content with the YLE Cambridge wordlist and that, in turn, means about 50 adjectives on the pre-A1 level, including colours and possessive adjectives.
As it happens, my school is now getting ready for the YLE mock exams and I am putting together a set of materials for our teachers and kids and that made me look at the said wordlist with a great more deal of scrutiny. Starters kids (pre-A1) are supposed to know about 50 adjectives, Movers kids (A1) – additional 50 adjectives and Flyers kids (A2) – 70 more adjectives on top of that. I am aware of the fact that these lists were not created on a whim, quite the contrary – they are a result of a large-scale research and the effort of a huge team of people. But there are all these questions there, too. Why do the pre-A1 kids need to know the adjectives such as ‘double’ or ‘correct’ and ‘right’ (as correct) and ‘its’ (also an adjective) and some other ones, although not adjectives (‘coconut’, ‘pineapple’, ‘flat’ and ‘apartment’ or ‘lime’)? Why would these be more important, useful and appropriate for primary school children than ‘hot’, ‘cold’, ‘easy’, ‘difficult’ or ‘loud’ and ‘quiet’, which are only introduced at the A1 level?
I do not have the answers but I have been introducing them (or some of them) much earlier than that. And effectively so. If you are interested why and how, please continue reading.
‘crazy’
Emotions and feelings
‘Sasha, how do feel today?‘ is one of the questions that we ask in every lesson. Why? Well, I guess, first and foremost it is for socialising. This is the question that we ask when we meet someone, just to make a conversation, at least with adults.
Since our students are children, however, there is a lot more to that. Children are growing, developing their social skills and learning about a variety of emotions available and, even more importantly, learning how to deal with these emotions and learning how to recognise these emotions in others. That is why giving them tools to do that, in their L1 and, naturally, in their L2, is absolutely crucial.
Ideally, all the Sashas in the world would walk into the classroom being happy, totally over the moon, brimming with joy and ready to conquer the world with us in the next 45 minutes. But it is not possible for every Sasha to be happy every day and, as a teacher, I want to know how they really are and during the hello circle I am, literally, all ears because if Sasha is sad or sleepy or hungry, or, sometimes, angry, I would like to know that. Not only to show empathy but also to look at the lesson and what I have prepared for today from the group’s and the individuals’ point of view. Maybe a bunch of sleepy children will not be able to deal very well with the story? Maybe it will be necessary to keep an eye on Sasha and accept that today she might not be able to focus as well as usually because she is feeling a bit under the weather. Maybe it is a good idea to start with this silly game of ours (although I did promise myself to ‘never ever’) because it might distract and cheer up this little human who walks in and announces ‘I am very, very, very angry.’
Having this range of emotions vocabulary is also very handy when it comes to behaviour management, even if in the simplest of terms.
Situation type #1: an unpleasant situation: someone draws on someone else’s paper, someone takes someone else’s toy /book / marker without asking, someone jumps the queue, no casualties, only a lot of unhappiness in the room and one person is on the verge of tears. ‘Look. Sasha is very sad now‘. Naturally, it might not be the case of ‘one size only’, one solution for all occasions but it is a good start.
Situation type #2: a 5 y.o. confrontation: both parties did have a disagreement, both parties are not very happy and, definitely, way too upset to just get over it and get involved in the lesson activities. ‘Sasha, are you angry?’ ‘Yes!’ ‘It’s ok.’ Again, some cases are more complex than that, but in many situations the very fact of calling the spade a spade and showing that it is natural to feel angry (and, by default, giving the human some time out to accept and recover) is the best solution. It applies also to all the negative emtions, as long as no comes to any harm.
To be perfectly honest, sometimes (only sometimes!) it feels like this brief and contained reaction, limited by the fact that extreme language grading is necessary, is the best solution. Anything to avoid a long lecture from the adult on ‘The negative impact and the long-term consequences of….’ that children sometimes receive from their teachers, baby-sitters, nannies, parents, grandparents…
‘ill’
Riddles
This is, by far, one of our favourite games: making riddles. The game is introduced in its simplest from, with a set of flashcards and with the students guessing the secret word which the teacher or one of the children keep close to their chest. That’s just the beginning, however, once the kids are comfortable and familiar with the format, a set of simple adjectives are added, first the colours (based on the visuals in the flashcards) and big / small. Then, depending on the topic, we introduce and play with the relevant adjectives, for example fast / slow / big / small / loud / quiet while talking about transport, big / small / friendly / dangerous while talking about animals, hot and cold while talking about food and big / small / soft / hard / light / heavy while talking about the everyday objects and so on.
The kids can either use the adjectives of their choice and affirmative sentences (It’s big, it is yellow) or they can react to teacher’s or kids’ questions (Is it big or small?).
A variation of this activity is also I spy with my little eye adopted (and limited) to the set of vocabulary that the students are familiar with, played with a set of flashcards or a poster.
Expressing opinion…
…or, rather, justifying your opinion, something that can become a part of pretty much every unit and every set of words. Not only does it create an opportunity to personalise the vocabulary by dividing it into the things we like and the things we don’t like but also to give more detail and to build a small discourse (I like it. It is beautiful) or even first complex sentences (I like it because it is beautiful).
Naturally, that will require a different set of adjectives but beautiful, ugly, easy difficult, interesting and boring to be the concepts that preschool children understand, even though the flashards and visuals will be based on some symbols.
Storytelling
Our storytelling has reached some new amazing levels since we started working extensively on adjectives, both with primary and pre-primary students. You can read more about in an earlier post on the Storytelling Campaign here and here.
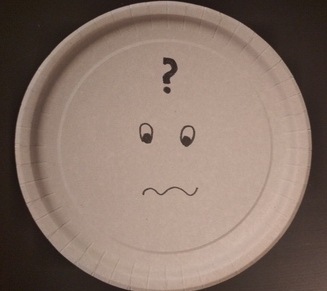
‘confused’
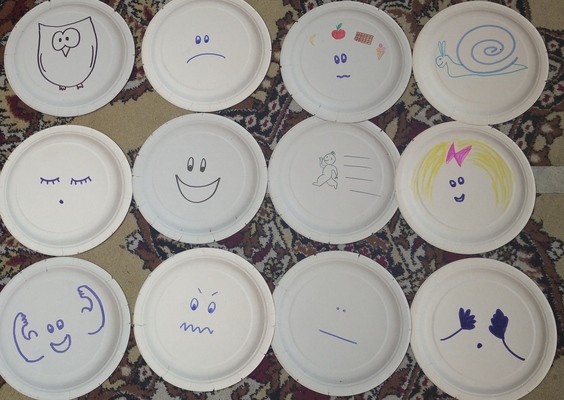
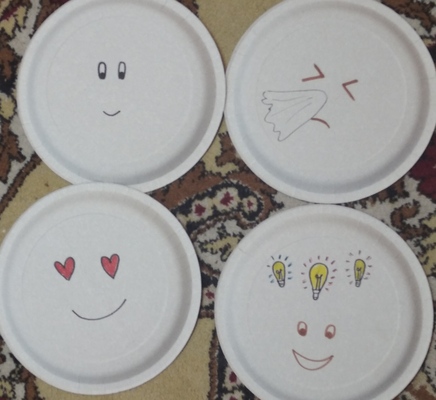
In my classroom
In this academic year, I am working with three pre-school groups, level 1, level 2 and level 3 and I am happy to say that even my youngest level 1 students are familiar with the set of 12 different adjectives that you can see in the first photograph plus a few more that we have learnt through songs. Level 2 group have got the basic set, quantifiers ‘very’ and ‘a little’ and a few more adjectives lined up. Level 3 group have got a nice set to describe food, transport and animals (including ‘scary‘) and they have already started working on extanding that range.
The photographs that were chosen to illustrate this post all come from the set that I have created for my pre-school group.
I have decided to use paper plates because they are durable, easy to stock and they have a shape of a circle aka they are a face. In the classroom, we put them in neat rows on the carpet, in the middle of the circle, to support production. My younger students like to pick up those that are relevant and hide behind them, showing how they really feel. This makes this part of the lesson a bit more kinesthetic.
I have drawn all of them myself but before making the decision on how to represent each adjective, I like to look at different emoticons to get inspired and to find something that meets two criteria a) I can draw it and b) my students will be able to associate it with a specific concept.
In some cases, the symbol was pretty easy for students to decode (for example: an owl = clever), in some others, I had to follow up with a brief clarification (for example: lightbulbs = ideas = creative). After the first lesson, I decided to upgrade the ill flashcard by adding a real tissue for the poor sneezing person.
There is another thing that I am considering at the moment. With my preschool students we start with the adjectives that help us describe how we feel and it must have been out of sheer linguistic greed that I decided to add those adjectives that describe personal characteristics rather than emotions such as ‘strong’, ‘beautiful’ or ‘clever’. Although, to be honest, we adults know very well that there are days when we feel particularly beautiful or not and the kids responded well to it. At the moment, I am considering different ways of organising all the adjectives that we already know and building up on that, in each category.
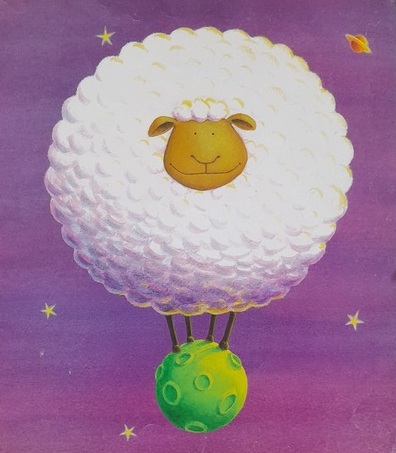
This post is a lesson I taught with a group of 4-year-olds in their first year of studying English, based on the materials from Playway to English 1, 2nd edition by Herbert Puchta and Gunter Gerngross from Cambridge University Press.
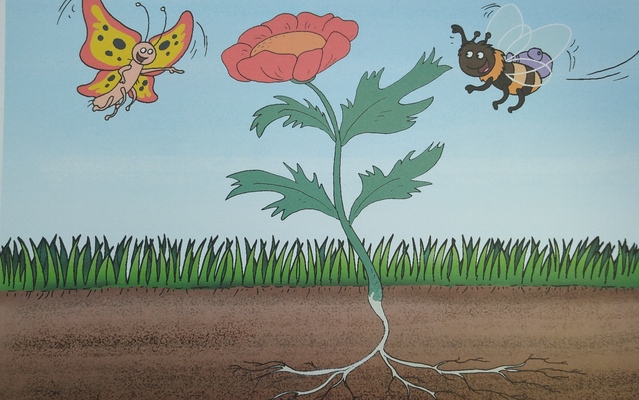
It was taken from unit 6 (The Weather) and it is called ‘The Little Seed’.
Story cards ‘The Little Seed’ Playway to English, 2nd ed by H.Puchta and G.Gerngross, CUP
Pre-Story
Vocabulary revisionand practice with flashcards, the weather dice, the song, the weather sounds etc. Kids sit in a circle, on little stools.
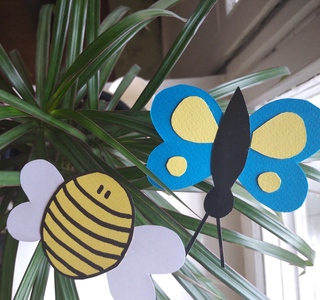
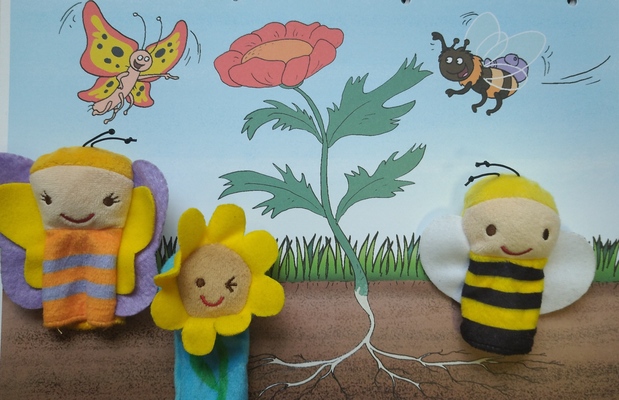
New vocabulary introduction: a bee, a butterfly, a flower, a seed. We used finger puppets because these three feature in my garden finger puppet set (together with a ladybird and a caterpillar) which I once got as a present (thank you, Cheng <3). I put them on my fingers and we practised saying ‘Hello, bee!’ ‘Hello, butterfly!’ The kids got really excited so we did spend some time, playing with them, trying them on and saying ‘Hello, bee!’ ‘Hello, butterfly!’ These activities were done on the carpet, with kids sitting in a circle. I forgot to bring real seeds so this time, we skipped this stage but I am planning to include them in the follow-up lesson (see below). Of course, the same can be done with regular flashcards or handmade toy butterfly and bee.
While-Story
Just look: I hold the cards and show them to the students, one by one, in silence. Kids just look. Sometimes, I draw the kids’ attention to some of the elements, by pointing at them. Sometimes, I point and say the words or encourage the kids to name things they can see but, really, that is not the priority here. I just want them to take the story in, to build it up in their heads, before we add the language layer to it.
Listen: I play the audio and we listen to the story and look at the pictures. Again, I sometimes point to the key elements in each card. I also use the gestures to reinforce the ideas and concepts and to add another learning channel to the visual and the auditory. In this story we are using the following: hands together, under your cheek with the head slightly tilted (The little seed is sleeping), face up, as if enjoying the sun, with a smile and a happy sigh (It is sunny), hands moving up and down, with the fingers spread and wiggling (It is raining), hands going up and arms stretching high up for (The little seed is growing, growing, growing), pointing with one finger at the picture (Look, it’s a beautiful flower). Some of these gestures have been used so far (the weather), some are new. I don’t pre-teach them, the kids join in when they are ready.
Listen and say: We retell the story together, using the cards. I lead but this time I pause frequently and elicit the words and structures that the students know or, alternatively, I produce the phrase and encourage the kids to repeat.
What do you think? This is the stage for the students to personalise and to express opinion. Usually this is done through a very simple question of ‘Do you like the story?’ or ‘What’s your favourite…?’ In this particular story, we asked ‘Do you like the story?’ ‘Is it a happy story or a sad story?’ ‘Is it a beautiful flower?’
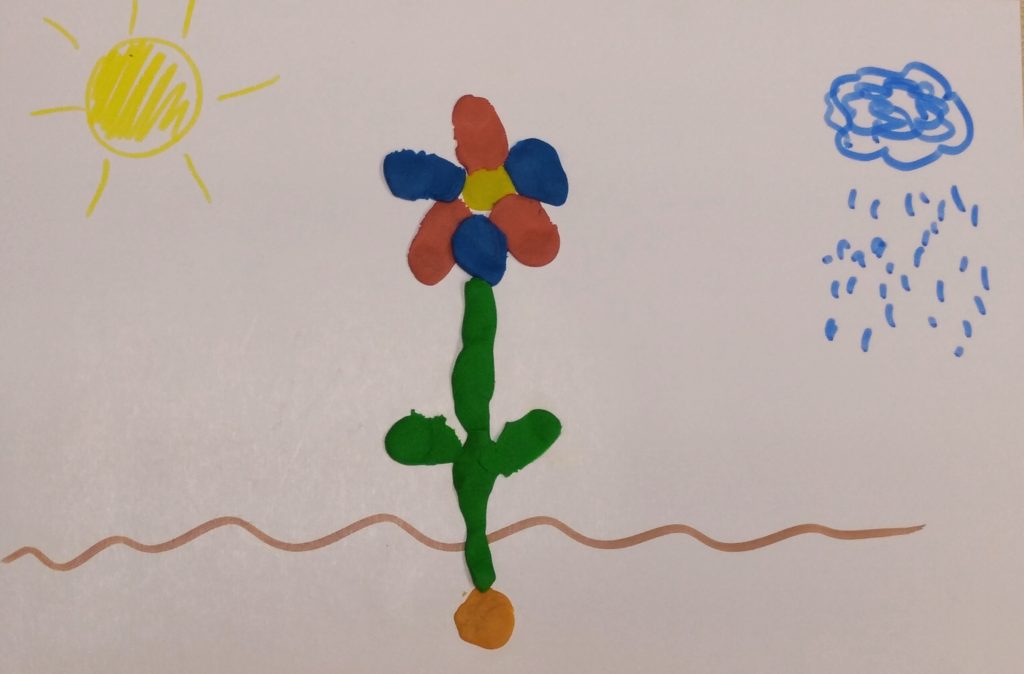
The finished product
Post-Story
Look at my picture: I show the kids the final product and we try to retell the story once again, in its simplified version, this time focusing on the structures that the kids can reproduce: The little seed is sleeping. It is raining. It is sunny. The little seed is growing and growing. Look, it’s a beautiful flower.
Craft: I give out the cards and we create the pictures with kids, while retelling the story. I create another picture, step by step, to model the activity for the kids. This stage took about 10 minutes. I was considering adding the butterfly and the bee but decided that it would take too much time and that is why they do not feature in the picture.
‘The little seed is sleeping’, I give out a small blob of white plasticine, I stick it ‘underground’, ‘Stick and press’
‘It is sunny’, I give out yellow markers. We draw the sun in one corner. We repeat the key phrase as we draw. The kids who have finished drawing can also use the gestures for ‘It is sunny’. I collect the markers.
‘It is raining’, I give out blue markers. We draw the cloud and rain in the other corner. We repeat the key phrase as we draw. We use the gesture for ‘It is raining’. I collect the markers.
‘The little seed is growing, growing and growing’. I give out a piece of green plasticine. We kneed it and roll it to create a string. ‘Let’s roll and make one piece of spaghetti’. We stick it to the picture, as the stem of the flower. ‘Stick and press’.
I give out two pieces of green plasticine, we make two blobs and attach them as leaves. ‘One leaf, two leaves’. ‘Stick and press’.
‘Look, it’s a beautiful flower!’ I give out two big pieces of blue and red plasticine. ‘We need three red pieces’ ‘Let’s make the flower’ ‘Stick and press’. ‘We need three blue pieces’ ‘Let’s make the flower’ ‘Stick and press’
3. Let’s tell the story: We show the pictures and go through the story again. The kids are now better able to tell and show the story.
4. Homework: Kids listen to the audio at home with parents, while looking at the pictures in their books. They complete the task in the book by sticking stickers in the gaps.
5. Follow-up: In the following lesson, we are going to retell the story again. I am also planning to start our own classroom garden with some flowers and beans, water them and watch how they grow.
This lesson plan is, of course, one of the many many ways of using this material and teaching this lesson. Enjoy!
From a seed to a flower here – a lovely video that I used when I was teaching Maths and Science to pre-schoolers in one of the lessons devoted to plants but it can be used as a follow-up activity in the story lesson.
How plants grow – an interactive gamethat demonstrates how much water and warmth a plant needs to grow. On the one hand, it is kind of cool and very informative, on the other, however, I could not apply the water and warm fast enough and ended up killing the plant. It made me sad (yeah, really) so, eventually, I decided not to use it in class, either.