31 words for December (yes, we are extending since we are learning almost until the end of the month and not until the 24th)
a noticeboard
a simple December calendar to cross things out
Procedures
As a part of our hello circle, we check the calendar and count the days since the last lesson. We have classes only twice a week so it is 2 (on Thursday) or 5 (on Tuesday) and we pick as many cards from the bag.
We read the words, the teacher writes the date on each card and the word (we are working on our literacy skills, too).
The teacher puts up all the words up on the board.
One of the students crosses out the days on the calendar.
Then we play with all the words we have so far.
Things that can be done: read all the words, mime the words for the kids to guess, play ‘What’s missing?’, read the words (if special word cards are prepared) and play riddles (It’s an object / person. It’s big / small / medium. It’s red and green. etc).
Why we like it
It is a great way to learn new vocabulary and to revise all of the words that we already know. It is not getting in the way of our regular vocabulary and topic. It is done on the side.
All the words are on display and we can see how we move through the unit and the month.
We are also learning about the calendar and the month.
We are preparing for the New Year’s Celebrations and by the time we get there – we will know all of the words.
It is a nice addition with new games, miming and, eventually, songs that are Christmas-themed.
This particular activity is very seasonal but even though we have just started, I can already see its benefits and the big picture and I really want to use the concept for some other topics. My first idea is the next seaon peak – spring and Easter. I am thinking.
There has not been a school year in which I would not actually go to school, not since 2007, anyway but, somehow, every year is different, in its own way. This year I went back to teaching a lot of students individually, online, and then back to groups of preschoolers offline.
The classroom and the resources
Long story short: Nothing happens overnight, nothing happens in a blink.
Naturally, I hope for all of us teachers out there, that we enter the classroom in a kindergarten, in a language school, in the student’s home or in a language studio and everything is just as we imagined and the classroom is just perfect, teacher and student-friendly and we have all of the resources and organised beautifully.
In case it is not (and, most likely, it will not be so, in about 99% of cases), it will take some time to get it into shape.
During our sessions on the course I keep telling teachers that it is the most precious thing, to have this ideal pre-school classroom at the back of your head because it will help shape the real environment in which we find ourselves with our students.
This year, it has taken me about two months, to turn the classroom into a place that we all enjoy being in and which works out logistically, with our routine and with our numbers.
It is not a very big place and we have to share it with some other classes, groups and adults, but we have enough room for the small chairs and the hello circle, one big table for our writing and craft and a bit TV and room in front of it for dancing and singing. We have two small cupboards for our resources and lots and lots of walls for our posters and materials.
I have already figured out the layout of the resources and I have organised the flashcards, too. I am not using a basket this year but I have a box for all of the resources for each group where I keep all of the resources for the unit. It makes preparing for each group a bit easier without putting them all away every single day. And, at the same time, I can put them all away not to get in the way when someone else is using the classroom.
The teacher
There is only one thing here (a word from an old hand): dear teacher, be good to yourself. We want the best for our students, we work hard, we teach, we prepare, we reflect and do a better job next time. No two groups are alike and but, with a little bit of time and patience, we can get good results. Kids Can! Teachers Can!
The kids
My students are, of course, amazing. Some of them have been with the school for some time, studying with some other teachers in the past, some of them are new to the school and to learning English. The approach is just being open-minded and working, step by step, towards the routine that I would like to have.
The older group have got used to it pretty quickly and it was relatively easy to just work effectively, with an established routine.
The younger group is still work in progress because we get new students joining in. As a result, wee have been at the stage of ‘building the routine’ since September, simply because every time I think ‘oh, I think that’s that’, there is a new student and, in a way, we go back to square one.Everyone needs a fair chance and the time necessary to figure things out, to get to know the other children and to learn the ropes. It does help a lot that the ‘old’ students (aka those who have been in the group since the start of the year) are our beautiful role-models and we are catching up again.
The activities (and the pairwork)
Our hello circle is quite a long one and in every lesson we talk about all of the following:
Homework check
My name is…and I want…(kids introduce themselves and ask for something, I draw it on our mini-whiteboard)
What’s the weather like today? (asking and answering questions and then putting the relevant pictures up on the board)
Hello song
Clothes: Who’s wearing jeans?
Christmas Words Advent Calendar (only in December)
Literacy practice (only the older group)
A revision game (based on what we have covered so far, different, depending on the group)
The older group have started doing pairwork and it has worked amazingly well.
They have been in one group for two years already and they know each other very well
They have had a chance to lead certain activities
I have used the seating from the hello circle (small chairs in a circle, we only moved them a bit for the kids to face each other)
We have used an activity they already know well (a set of flashcards and a question – answer: Are you scared of…? – I’m scared / I’m not scared /I’m brave / I like..). We have done this activity a few times with the teacher leading and with a student leading for the whole group.
If you are interested in setting up pairwork with a beginner group, have a look at the earlier post here.
The other activities that have been a hit this year:
If you follow me and read these posts regularly, you already know that every English through Art lesson has three elements and that the most challenging and the most fun part is always combining these three in one short lesson and finding the connection between the English curriculum and the Art.
If you are a thorough reader, you may have also found out that sometimes, when you really (really) want to do something, you may turn the blind eye or the deaf ear to this beautiful equlibrium and just do it. And Georgia’s lesson is a perfect example of that kind of an approach. Why? Because I just wanted an Art lesson.
It doesn’t always have to be that way and if you go back, to my first lesson with leaves (here), you will see that it is a perfect lesson for the beginner learner because what you really need is the colours and it can be beautifully used with just that kind of linguistic input and practice. If your students are in year 1 of pre-primary English.
For my year 3 kids, we used it as an opportunity to bring autumn to class and to close the unit. We worked as usual, revised all of the vocabulary and just had a nice end-of-unit lesson. And then we did Art.
The artist
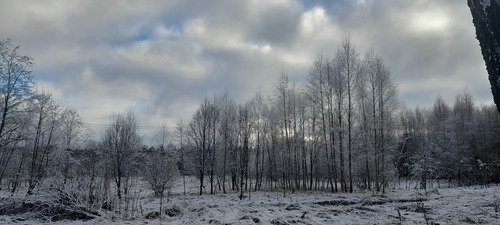
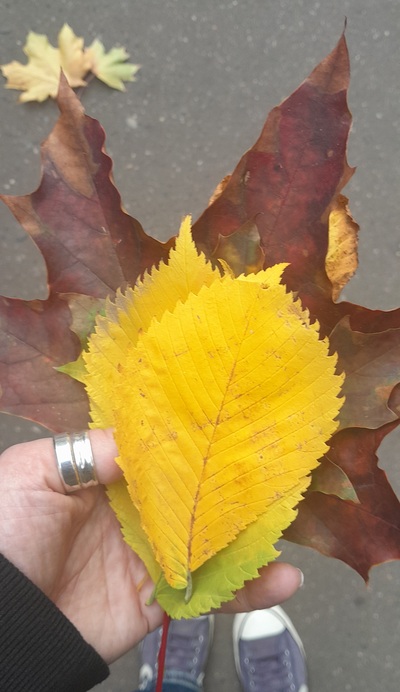
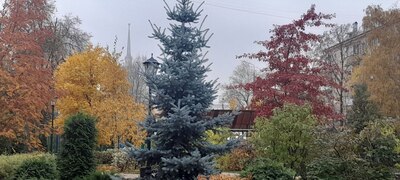
As you can see in the photographic evidence above, I went to school collecting leaves on the way. I wanted us to have something real to look at and to compare them with the painting. I put the leaves on the big table, before the lesson, and I was not really surprised that as soon as the kids entered, they started to touch them, to look at them and to smell them, just because and despite the fact that they definitely do not belong to the category of a luxurious product, there are literally piles and piles of them absolutely everywhere you look.
But I liked their reaction because it just proved what I knew anyway, that the topic and the task will appeal to them. We looked at some of the leaves, called out their colours and checked if they had only one specific colours or a mix of many.
Then I showed the copy of Georgia O’Keeffe’s leaves on the screen and introduced her briefly and we had a quick voting regarding which leaves kids like more, the real ones or the painting (answer: real or real and painting).
The art
Previously, in my Georgia lesson, we used the old favourite – crayons and watercolours, a perfect combination for that piece and a perfect combination for the first Art lessons. The only problem was that, after the relocation, at the moment, I have absolutely no idea where my collection of kids aprons is and I really didn’t want to just use paints in class without any protection…all these beautiful t-shirts and sweaters that my kids are wearing…
After having spent a whole day with a face of Oscar the Grouch (I call it ‘angry brainstorming’), I finally found a solution! We were to draw the layout of the leaf with the crayon and we were to use the watercolours but to print, with cotton pads! One set of watercolours in the middle of the table, minimal amount of water (and potential spatter) and cotton pads that can be just disposed of. A box of wet tissued to clean the hands. I tried and tested the technique and yet, the cotton pads are perfect for printing and the only problem I encountered (the watercolours get dry pretty quickly and you need to have some supply of water) was solved when I found, in my own bathroom, a tiny bottle sprayer (that never got used for it was meant to be, helping me travel with a tiny amount of tonic or micellar water). Finding it literally made my day.
It was absolutely crucial that we do everything step by step, not only because of this particular activity but because this was our first lesson and I was expecting that the kids might not be ready for a structured approach to art. And I was not disappointed.
As soon as I showed them my picture (‘Look, we have the real leaves, we have the painting and now we are going to make our own…’), I got literally flooded with questions. Imagine, only 4 kids on the day, all of us around the big table, everyone can see everything and then within 1 minute, about a hundred questions like that: Are we going to do it? But can I get the paints? Where are the cotton buds? Will you help me? I don’t know how to draw the leaves? But can I do it the way I want or do we have to draw everything you drew? Can you help me? Where are the paints?
It is at the moments like these that you find out the power and the necessity of the verbs: ‘Stop’, ‘Wait’ and ‘Look’.
Here are the steps:
show the finished picture, call out the colours, draw the kids attention that each leaf has its own set of colours, lots of them, just like the real leaves and just like Georgia’s
demonstrate the whole process, from start to finish (the resources were ready in the middle of the table but for this stage, I put them away and I was bringing them one by one): step 1: draw the leaf / leaves with a crayon, the wax will help the paint within the lines and it will not seep or get distroyed in contact with water, step 2: put one box of watercolours in the middle of the table, on some scrap paper and spray it with water, step 3: fold a cotton pad, dip it in the paint and stamp, stamp, stamp on the leaf / leaf, step 4: put the used cotton pad into our mini-bin (aka a small bag or box, in the middle of the table), step 5: proceed with another colour
give out the paper, an A4 sheet of watercolour paper (or cardboard) and crayons, draw the leaves. With my youngest student we did the piglet follower (хрюшка – повтарюшка) aka I draw a line, you draw a line, I draw a squiggle, you draw a squiggle. Put the crayons away. Wait for everyone.
give out the cotton pads, 5 each, sprinkle the paints and start working. Stress that ‘we are working together’ (a gesture here:-)
at the end, call out all of the colours everyone has. We can use ‘I’ve got’ so that’s exactly how we did it.
About the lesson
First of all, I was really happy that I decided to introduce Art to my new group. Good decision! They loved it and, after a month of hard work, we really needed ‘something different’.
All of the students completed the task and I loved watching how they were approaching it. My youngest student needed help with the drawing but he did it and his leaves were beautiful. One of my older students, at the very beginning, announced that ‘my leaf is going to be unusual’ and that it was. It reminded me of some tropical flowers, of unusual shapes. The other students made their own artistic decisions and even included ‘The Titanic’. It must have been a very small ship or a very big leaf but they looked amazing.
I am really happy with the adaptation of the teachnique. It was monitorable, with a very little potential for a disaster, easy to execute, easy to clean and generating amazing pictures, too.
This year is different and now, or for now, hopefully, I am not teaching Art. And it was only before I came up with this lesson, with Kandinsky, that I realised how much I miss it and, that, really, at heart, I am the Art teacher. As if to confirm, shortly after that, I got a message from one of my students from last year and it went ‘miss Anka, you’ve been my favourite Art teacher and I miss our classes’.
So this is how I get back – to writing here (after a few months’ break) and to Art in class. I don’t have any full time Art in English classes but I have lots of English classes and I will be trying to bring Art into them. Starting with Vasilyi Kandinsky.
The language
We are at the begining of our journey into English with my student and, so far, what we have at our disposal is some functional language, emotions and colours and that is basically what the lessons have been about. We practice a lot, we find colours around the room, we sing songs, we do some online colouring (in the mode of ‘you say, I click’) and we talk about it. But I really (really) wanted to include something practial and something creative. And this is when I remembered about the video from the 2nd edition of Playway to English (CUP, Puchta, Gerngross) and the storyline there: Max, the creature tries to make a picture but due to some mishaps he almost destroys it and gets very upset. Until he finds out that modern Art is basically non-figurative and that he created a masterpiece. I looked at his picture and I thought: Kandinsky!
The artist
With my student being 6, and with us studying online and still getting adjusted to the format of the lesson, I wanted to keep this part of the lesson short, just to include the bare minimum: introducing him by the name (there was a photo, too) and looking at ‘Composition number 8’ to call out some colours and patterns that we were going to use.
This stage can be extended, of course, it is a great piece for introducing and practising shapes, too and if your students are older, you can also include the music connections (apparently, this one got inspired by Debussy’s music, and there is another lesson that I taught based on that, here). We just went on to create.
Before the lesson, I asked the student’s mum to prepare a piece of paper, a pencil and crayons for us and when the time came, we went through the list to check that everything was there (‘Have you got…?, with me showing my bit to the camera, and waiting for the student to show hers).
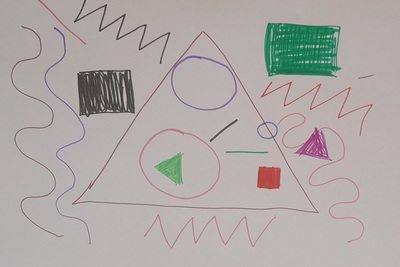
For this particular lesson, I chose seven different patterns that we would draw: a circle, a square, a triangle, a rectangle, a line, a zigzac and a wave. I drew them on my presentation and we looked for them in the painting. Then I told my student that we are going to draw three of each, with different colours and we started.
Each element was executed in the following manner:
the teacher calls out the pattern and demonstrates drawing to the camere on the demo sheet
the teacher chooses three markers / crayons, shows them to the camera and then draws on the actual piece of paper, i.e. a yellow circle, a green circle, a red circle, in the most random manner (seemingly, because, of course, all this time we are working on the composition:-)
the teacher asks ‘What about your colours? Show me three colours (pause) and draw three circles’
the student completes the task
the teacher describes her picture (I’ve got a yellow circile, a green circle, a red circle)
the student tries to describe hers in the same way
and we move on to the following item on the list.
It might seem that there is a lot of commentating here, on the part of the teacher but it is done on purpose. The aim of this task is to create something that the student will want to talk about and to model the language that we are hoping to produce. Without it, it would be just a lesson of drawing (which is amazing) but since it’s a language lesson, we (I passionately, obsessively and lovingly) strive for more language production. Always.
I prepared seven items to draw (times 3) but I was ready for the option of not including all of them if the student got tired or lost interest, especially that it was our first Art task in an online lesson and I was not quite sure how it might go. And Kandinsky, or any non-figurative painting, was perfect for that. On the other hand, if we had time, we could still add other elements such as stars, hearts, semi-circles, or shading. As it turned out – seven was just a perfect number for us and for that lesson.
I am really very happy with how it went. We managed to include all seven items, we went step by step and we produced a lot of language. She was quite involved in the process so there was no talking while drawing but, after each item was added, she showed the picture to the camera and told me all about it.
I loved the lesson (see: I miss Art in class!) and so did my student which I could see myself in class and which got confirmed after the lesson, in our chat with mum. I can’t show you her work but, as it often happens, it was much, much better than mine. You will just have to take my word for it this time.
So, if you are wondering, what kind of art to include in the beginning of the course for primary or pre-primary kids who speak very, very little English, Kandinsky is your man!
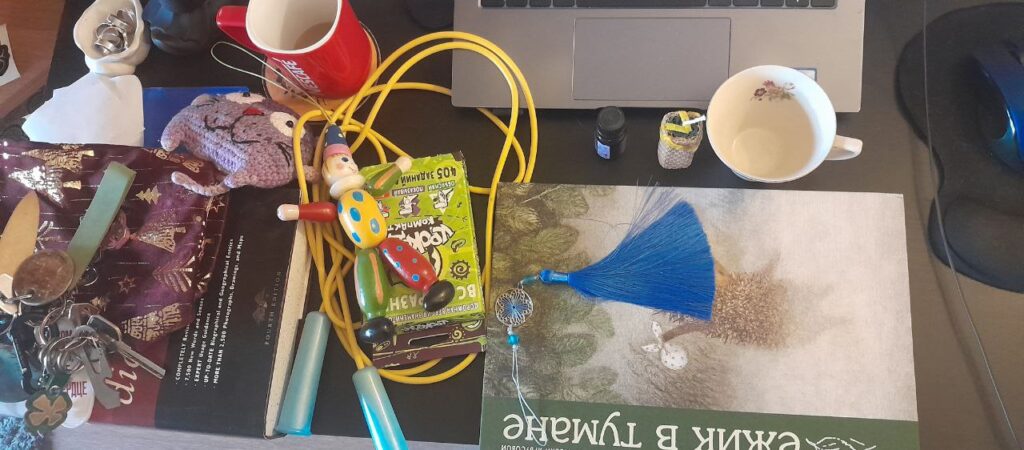
What a teacher’s table looks like after an online lesson in primary…(realia, toys and adjectives)
Instead of a preface
I am writing this post as a response to many of the enquiries that I get from the trainees of the teacher training courses that I have been running for a decade now. Of course, this question rose to popularity with the year 2020, the pandemic and the fact that we have all embraced the online world since.
I have not always been a huge fan of the online education but, like many of my colleagues, I was forced to at least try exisiting in the online classroom over the period of the lockdown in the spring – summer 2020. And, because of how the world has turned to be, since the pandemic I have been spending about one third of my teaching life one: teaching all my young learners online during the pandemic, teaching online and hybrid in the crazy 2020 – 2021 academic year, teaching adults and my teenagers online permanently and teaching pre-schoolers, the regular EFL/ ESL and teaching English through Art, too.
As a result, today, when my teacher trainees ask me about teaching children online, I say: Yes, sure, it is just one of the classrooms that I work in.
This particular post is intended to be a set of ideas and suggestions for teachers who have never worked online and who want to start. These are not all the answers, only how I would get started, with a brand new group of kids. Maybe someone will find it useful)
Before the first lesson
The most important part of the course, before it even starts, would be talking to the parents. What I would like to find out would be:
as much as possible about the children as humans: how old they are and what their interests are, how they spend their time and what they like to do
as much as possible about the children as learners: whether or not they have learnt English before or interacting with English in any capacity and whether they have had a chance to learn anything online
as much as possible about the parents’ expectations regarding learning the language
Depending on the answers to the above questions, the conversation with the parents would have take into consideration to make the lesson successful and effective:
the working space for the child. It might be obvious for the parents that the child needs a special place to sit down, i.e. a table and a chair (not the bed or the carpet in the playroom), but a chair that can be moved aside if the movement stage of the lesson comes up. This should be a place that is quiet, away from the TV or the busy living room or the kitchen where the rest of the family hangs out.
the set of resources that might be necessary. It can be a list of standard resources that you will be using in every lesson, a notebook, a set of markers or crayons and handouts, all depending on the age of the child, as well as some specific resources needed for the particular lessons.
the presence of an adult who will be helping the little student during the lesson and what kind of a support is going to be necessary. With younger children (pre-schoolers), it might be necessary for an adult to be around all the time, although it might be necessary to highlight that the children need to be developing their independence
the length of the lesson that will depend on the child’s age and the previous online learning experience. Even if the optimal length is estimated at 45 minutes, it would be recommended to start with a shorter lesson. If the kids have not studied online before, they will not have enough attention span to participate and to focus to make this lesson effective. It is better to start with 20 or 25 minutes and extend it to one academic hour over a few weeks. And, of course, explain it to the parents.
the potential resources, the most important being the potential for printing resources at home. If the parents can do that – you will be able to use a little bit more, if not – in that case the lesson will be based only on the electronic resources.
The platform
There are a lot of platforms available and, in the end, everyone chooses something that works for them. It has to be the tool that you know very well and the tool that works in the classroom. I personally like to have a platfrom that lets me share the screen and see the students faces at the same time, that is not very tricky with the sound sharing but I don’t really care about the whiteboard option or the drawing on the screen option for the kids. Just a choice and I know that some teachers use these a lot. For the older primary students studying in groups, I like to have the breakout room option for some of the activities (although, again, that is for the groups only and that is not something to do in the very beginning of the course but something to aspire to).
The resources
Please remember that I am myself a dinosaur and I have always been a lazy teacher or a minimalist teacher (save for the special occasions when I splash out). The same applies to the resources in the online lesson. During the early stages of the pandemic, there has been this panic to find and to incorporate as many platforms, games, resources in the lesson as possible. Basically, every week was THIS NEW THING that you had to learn about and to use with your students. That was overwhelming, to say the least, because the most important thing in the lesson is the teacher and the methodology and the tools, no matter how fancy, cannot replace a good structure and a plan.
For that reason, what you see below, is a very basic list, the things that I am using at the moment but that is not everything out there. That said, I am always on the lookout for the new solutions and new things to inspire me, so feel free to use these ideas and keep your eyes open for more!
the coursebook, if applicable, the paper copy for the kids
the self-made handouts that I send to students if the parents can print them
the mini-flashcards that we prepare with the students, if the parents can print them. Usually, there are four per A4 paper, the parents cut them before the lesson, the kids can colour them, I have my own set and we use them for riddles, for testing each other (T: show the card, S: say the word, then swap the roles), substitution drill with the new structures, What’s my secret word? (guessing which card from the set the T / the S is holding) etc.
online games – for the lesson and for the homework or revision.
bamboozle games, although for the younger or new students, I start with one team games (‘we are collecting the points for us’) or with severly adapted power-ups list
some of the Games to learn English. This is a good example of why it is good to continue checking and searching. I have known this resource for ages but I haven’t used it for a year or so but I visited it last week and so much has changed. There are some new games, focused on a specific structure and the past tense or the prepositions. It definitely feels like a new best friend.
traditional (and not so boring) powerpoints which is my homemade online board replacement. I used to use the professional online board but, admittedly, it became simply overwhelming. I use the powerpoints in the same way, T: moves/uncovers the item, S: say things and I like it more because I can organise them by the team, copy them for each student etc.
the realia that you have and that the kids have at home. Luckily, with the online world, we are truly blessed, practically everything that we teach in primary and pre-primary kids have at home, toys, clothes, colours, sport equipment and even the pets or the family member. They should be used in the lesson to make the langauge real. It might be a good idea to inform the parents before the lesson what will be used in class, just to make them aware that the kids might be walking around and bringing things and that it is for a reason.
the craft resources such as plasticine, coloured paper, glue, scissors, crayons or markers or whatever else you want to use. Craft online is a bit more challenging but not impossible. It might be a good idea to leave it for later in the course when you and the students know each other a bit more and when they understand how the lesson works. Again, the parents need to be notified ahead of time, to prepare the materials or even to check and to confirm that they are available. Of course, if a kid is at home, the coloured paper or the glue are lying around at home but it is always better to confirm ahead of the lesson time.
The lesson
Again, this is the lesson format that works for me and it does not really differ much from what we do in the offline classroom with my students.
Regardless of how long the whole lesson is, I divided into three sections: Revision, New Material / presentation, Practice. They are more or less even, without being to strict with the time slots.
A song to get us started, a proper Hello song or just a song that we like.
Revision: saying hello, talking how we feel, what we are wearing etc, depending on the age/ level of the child, actually revising the vocabulary, playing some familar and favourite games.
New material presentation: in the middle of the lesson, when the kids are already warmed-up but still with enough energy and focus for something new, this is when I introduce the new vocabulary or the new material and when we do some controlled practice, too.
Practice: more productive games, more freedom for the kids.
Goodbye: a new song, a video, a story, to finish on a high note.
Coda
If you are just starting in the online world, good luck to you! Remember that in many ways, this is a just a new lesson with student or a new group, doing a new thing and in our early years world, it is very rarely that things work from the word go. It is the routine, the repetition and the familiarity that make things look like we want them. Quite frequently, a new activity done for the first time is just like a preview. If something does it work, reflect on why it didn’t and then try to change some things around and do it again.
Make sure you keep in touch with your students’ parents. Feedback is always necessary but it is crucial during the early stages of the new class because apart from building the routine with the student, you are also building the trust with the parents. And it is a process.
February is our Fun Cartoon February but language-wise I decided to focus on Present Continuous to work on verbs and to get us ready for storytelling later on in the year. This is also a great TPR-friendly structure that comes in very handy and gives us a chance to move a little bit when we meet at around 4 pm, already a bit tired after a whole long day at school. We have a set of basic activities for that, tried and tested, that include making sentences based on stencils, Pete the Cat and his ‘Rocking in my school shoes’ (video and song) and a miming-guessing game (the calss asking:’Sasha, what are you doing?’, Sasha demonstrating and the kids guessing).
The artist
The day has come! Jean-Michel Basquiat is here! It has taken some time for him to arrive (mea culpa!) but it is finally happening. I was racking my brain in order to find a match for February and my own alliteration challenge because I really (really) wanted to deal with Basquiat (and with Roy Lichtenstein and Keith Harring) as soon as possible.
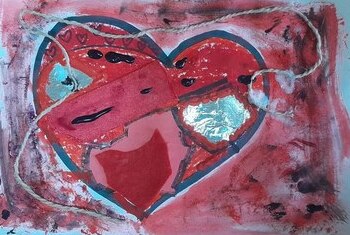
I introduced him to my students in the usual way (name, photo, country, favourite thing) and we looked at a few of his creations, including one of the self-portraits, cats and his ‘Robot man’. Funnily enough, my kids found some of his pictures a bit scary. That is why we didn’t spend a lot of time on that and we moved on to his technique because that was, really, my main aim for this lesson.
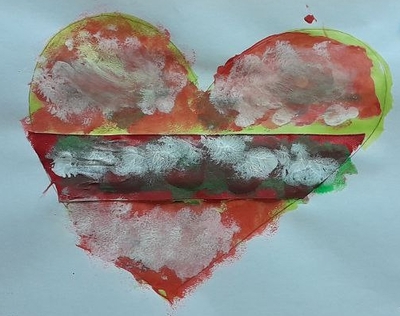
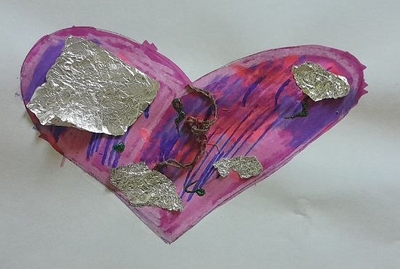
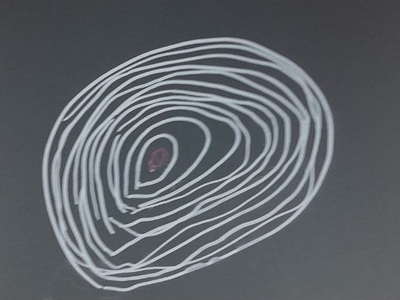
Before the lesson I prepared my own model of the heart because it made it a lot more easier to explain what ‘layering’ is all about. We looked all of the materials I prepared on the table and we tried to count how many I used in my picture and what they were.
My own piece
The art
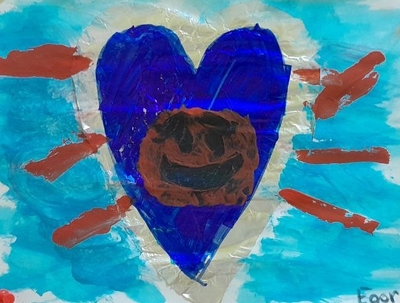
Apart from the number of layers that my picture helped with, we also made a list of stages that we need to go through and I wrote them on the board: 1. the draft with a pencil, 2. the outline with a marker, 3. and more: all of the other materials, as many as you want and 4. the final one: glitter. The only thing that was obligatory for everyone was the topic, a heart as we had our lesson in the week of St. Valentine’s Day that our school was getting ready for.
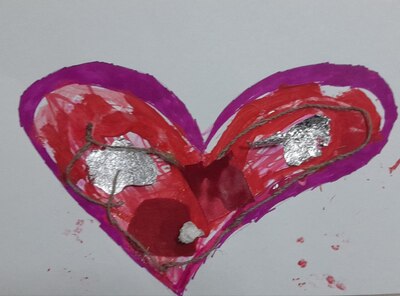
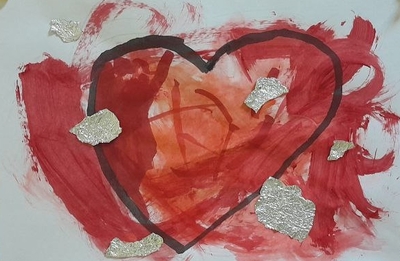
This was a great process art lesson, an amazing process art lesson, in fact. I experienced it myself, while creating my own heart. Apart from just having fun, working with all of the materials and resources and experimenting with them brought me a lot of pleasure. Certainly, I was hoping that my students will also be able to experience that. Guess what? They did!
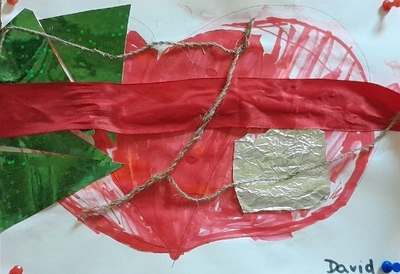
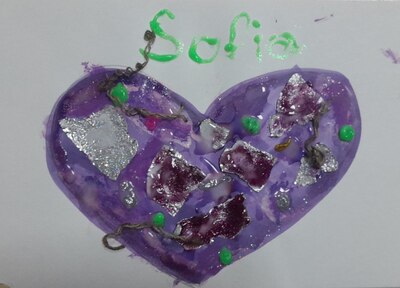
Different children chose their own approach to the resources and the number of different materials and layers to work with. I didn’t want to interfere with that, even though some of them chose only or two resources. I tried to suggest other solutions but I respected their final decisions. This was an interesting balance to those of my students who went over the top and used absolutely every single material that I had prepared. Or more, just because they found some random bits of coloured paper in the glue box.
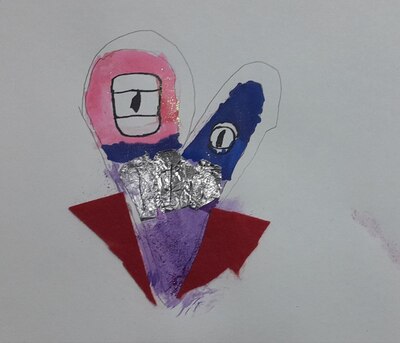
Two resources onlyOnly markers)
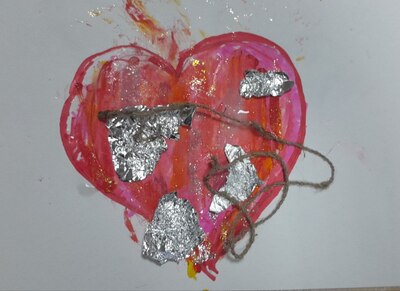
My favourite thing was probably the fact that the kids went into the task with a completely open mind, willing to experiment, to try new resources and the new combinations of resources and to learn from each other, as well. We discovered that tinfoil can be torn and cut, it can be coloured and glued or glued and painted over. I shared with the kids that you can paint with acrylic paints and a wet tissue and I looked at how they liked working with our almost professional acrylic paints and that a piece of string actually makes a difference. I myself added a few more bits to my picture just observing what my students were doing.
One of my students came to our class for the first time ever and it was lovely to see how unexpectedly creative he is and how beautifully he applied the technique to create his heart.
Have a look at the beautiful pieces in our gallery…
I decided to put all of these together in one post and share them here in case someone is looking for some try and tested activities. Some of them were done as part of our Art Explorers afternoon club, some were done in class, some were even completed during the long break and we made them just because some students (mine and not mine) wandered into the classroom with ‘Miss Anka, can you give us something to do? You have many interesting things here.’
Meaning? They can be turned into a real, productive lesson, with additional vocabulary and activities and song or they can be the add-on to some regular classes that simply take place in December. It is up to you, dear teacher.
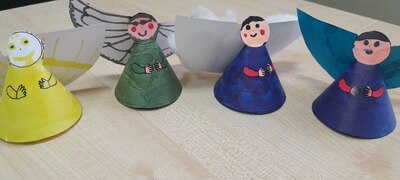
Little angels
My, oh my, this craft activity is about ten years old. I have not invented it myself, I saw it somewhere online or in a book ages ago and I loved it so much that I decided to make my own template. Imperfect as it is, it works and the final result is still pretty. You can find the template here and some basic instructions are included there, too.
You can use some cardboard (if it is thin enough for your printer) but the majority of the angels we made were printed on the regular photocopying paper and they are all pretty and amazing. There are four main elements to be drawn and coloured: the face, the clothes, the wings and the thing that the angel is holding (and these can be also the four main elements that the kids are talking about in the end: I am happy, I am wearing, I’ve got, My wings are..) before the angels are cut up. Cutting is actually the one tricky element and for my youngest students I draw the coloured lines where they should cut. For the youngest of them or those who need help, I was helping with cutting the tricky bits.
In the end, the angels can also be decorated with the glitter glue markers or with the cotton which can be glued on the wings. The finished angels can be hung on the tree or they can stand on the shelf.
Christmas cards
I really wanted us to make the cards that can be given out to teachers, friends or parents and that is how this craft made an appearance. It had to!
There are many many templates for a card and many of them for the specific simple triangle Christmas tree silhouette, like this one here, but I got really inspired by my own friend, Jill, who made those with her son. However, instead of using scotch to form the triangle (I know my scotch likes to stick and destroy the surface), I cut out simple silhouettes in cardboard cards (destined to be destroyed or recycled).
I showed the kids the finished cards, we prepared the working space (the silouettes over the cards) and started to work on our trees. We used a variety of materials: regular markers, acrylic markers and crayons and pencils. Then we took off the silouettes and finished the cards with the glitter glue markers.
The finished cards that you can see were created by a mixed ability group, some were 5 years old and some were almost 9, some were made by everyone in-between!
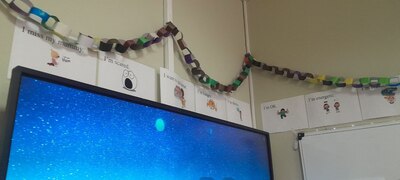
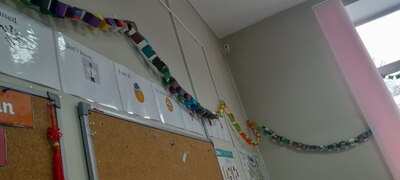
Christmas garland
It has been a few years now, since I use the garland making as the whole class team building activity. What you need is a lot of glue sticks and lots and lots of strips of paper but because of the task and the volume, here, literally: ANYTHING WILL DO: coloured paper, photocopying paper, ready to be recycled photocopying paper, old newspapers and glossy magazines, all of it, as long as it is cut up into strips.
Modelling is easy, just showing the kids how to make hoops and how to connect them. Then the kids should be divided into groups, if they want to, or allowed to work on their own. This is good, because everyone can work in their own way and at their own pace and what matters is that, in the end, all of the pieces will be connected together to decorate the classroom.
It is a lovely bonding task with the aim (to decorate the classroom) that unites the whole group. I normally do it within a group but in the past I also did it as a cool end-of-the-lesson activity during an open lesson, with the parents helping out and one year, we also did it as a whole school competition, with a time limit for each class. Later, of course, we had meters and meters of garlands to decorate the whole school. Highly recommended!
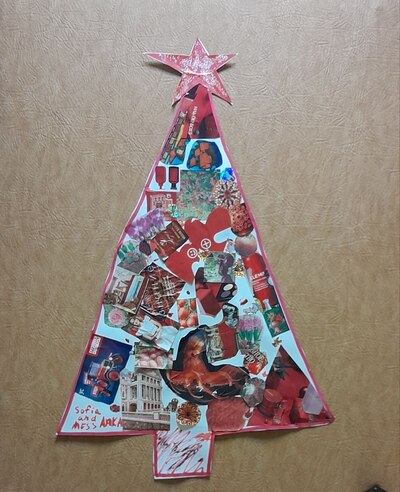
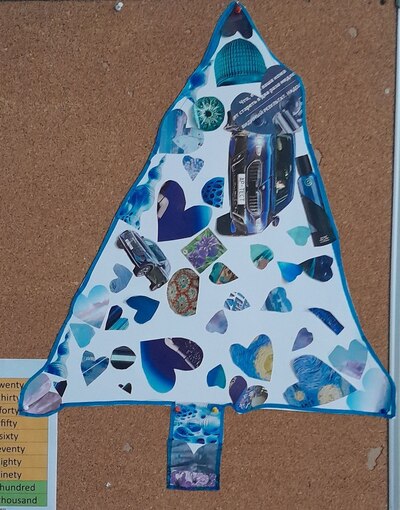
Christmas tree
It was last year that I found out about the love that Andy Warhol had for Christmas and it was last year that I fell in love with the Christmas tree that he created. We followed suit and made our own last year and you can read about it here.
This year, I decided we would do it again but this time as a team effort. The task is not a small one and it takes time to decide on the theme, the colour and then look for and cut out and assemble the pieces (especially if you really want to stay within your theme), even if your tree is not very big. For that reason and to help build social skills in the group, we went for pairs. Truth be told, I also wanted to have a few trees to decorate the room…
Here are our beautiful trees, the one in red and the other one in blue. We will be making more with the younger group on Monday.
Christmas Marker Printing
This is to prove that marker printing can be adapted to any season and holiday! This year it happened only because the kids asked to do it during the break. We did.
You will need: permanent markers, regular markers, tinfoil, scotch, paper and sprinkler to do it and the more detailed instructions can be found here, in the November post on printing. Here only a few photos (that I will add on Monday).
Christmas in style
Here is another lesson we had in December, devoted to style and Christmas symbols, easy and fun! I do recommend.
This post here is my response to the challenge set by my teacher-friend Michael. Challenge accepted. Let’s go, 5 steps.
Lesson aim
The first-est step. Always.
The session devoted to lesson planning on our YL course is called ‘What do you want teacher?’ and that is for a reason. Making a decision why we enter the room and what we want to achieve by the end of the lesson is key. Is the vocabulary the focus or is it a grammar point? Or any of the skills? What is the context? Do you want to focus on the language or the most important thing on the day is the work we put in developing social skills or building the routine? It might be something suggested by the book or chosen by the school curriculum but not always. And even it is, there is always room for adjustments and adaptation. At the end of the day, there is the teacher and there are the students in the classroom that matters most. The programme and the coursebooks are to be adapted.
After the aim is selected, there are more follow-up decisions to make, namely the selection of the focused task (aka the main productive activity) of the lesson?
That’s it, done. The main thing is done and it probably took about 5 minutes. The next step will be looking for things that will help make it happen.
Books basics
The coursebook and whatever it contains is already partially included in the previous step. Most of the time, this is what we use, for convenience and just because we can. The coursebook is not the enemy of course and there is a lot of useful material. Though, not all of it.
I presume the main activity has already been chosen and the next decision is regarding all the other exercises, activities, audio and visuals that are there (and in the workbook and teacher resource packs) that either match or don’t our aim and our focused task, or, in other words, our A or the lesson and our Z.
The most important thing to remember and the thing that is on constant repeat during our sessions and in my conversations with teachers is: the book is not there for us to follow to the letter and to cover and to include all the exercises.
Things you can repeat
In every lesson for YL there are certain elements that we can and that we should repeat because they help us construct the framework and the routine. They include either the elements of the routine: the hello song, the how do you feel today, the rules revision, the homework check, the goodbye as well the elements that are short-temporarily fixed: the songs we are singing in September, the games we are playing in the unit of toys, the story we are reading in the chapter on the jungle animals. All of these will feature in the lesson over a month. It is good to included them in the plan, keeping them on the side, in order to be able to use them.
The missing bits
Having got that far in the lesson planning, it might be the time to figure out how much time we have already taken out of the lesson time and how much time we already have left. Then, look at all the activities there are in the coursebook, all ready and waiting to be used, and, only if necessary, to replace them with some other activities, from another sources or self-designed.
Most of the time, the coursebook will do the job just fine.
Something for the balance (bits)
What I like to do at the very end, when the lesson is already ready, to have a quick look at everything, to check it for the contents and for the balance and variety
the ratio of interaction patterns
the ratio of different activities: songs, stories, creative and hard work
the ratio of new and familiar
the ratio of settlers and stirrers
And, when something is off, I fix it. Done!
Instead of a coda
Here are a few words of wisdom from a grandma teacher and trainer / mentor / observer:
we want good lessons to be our everyday but that does not mean that every single lesson needs to be an Oscar-worthy (or a Nobel prize-worthy) unit at the cost of the teacher’s sleep, peace of mind, family life or salary. Yes, I sometimes invest a little bit more into my teaching, in terms of planning, resources and time but, after all these years of experience, I also have lessons that are ‘just regular, no fireworks’.
we sometimes plan lessons and as soon as we get to school, out of the blue, we come up with something entirely different and it is the best lesson ever. Yes, that happens, but (here comes a very subjective line), it is the result of all the brainstorming and thinking that has already taken place. Otherwise, it wouldn’t have happened.
designing your own activites does not have to take ages and it does even require a teacher to be super creative. I personally find it much easier to prepare something for my lesson from scratch, rather than spend hours of looking through materials and resources to match the needs of my group and then, on having found it, still waste time on adapting it to what we (my kids, my course and our lesson) really need (here you can find some of the posts on material design).
our coursebooks have a lot of different resources and pictures among them which can be used in a million different ways with very little effort. A picture is an actitivity and you can read about it here, here and here.
in general, being a lazy teacher has a lot of benefits. You can read about it here.
here you can find another post about the everyday lesson planning
This lesson was a part of our autumn camp, with each day dedicated to a colour. For that reason, in the language part of the day, we worked with the things that are red. We revised and learnt new and we talked about things that we like and we don’t like. We did some literacy work, too.
The artist
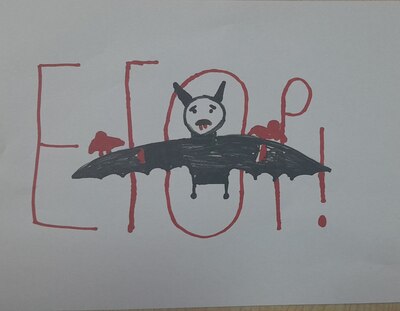
I actually have no idea why it has taken so long for me to invite Banksy into our lessons but it was definitely worth the wait because this lesson turned out to be great.
I introduced the artist and showed the kids a few of his works. We also talked about the graffiti that can be art and the graffiti that is just vandalism (as brought up by the kids). Then we looked at the Girl with the Balloon and we talked about its different interpretations, sad or happy, and variations, with the balloon in red and in black.
I decided to present this work from the point of view of the red balloon and how the artist used it for the contrast and to draw our attention to the most important element. We also looked at the same effect that can be achieved in photography. For all of those stages I used a powerpoint. You can access it here.
The art
The task was very simple: white paper, black marker and a drawing of your choice, with one element of it in red. I suggested using a collage for the red but, in the end, most of my students went for the red marker.
I am really in awe with the results. The simplicity of the task and the basic resources gave the kids an opportunity to focus on the theme and the content (because, let’s be honest, sometimes, the resource and the method can be a bit disruptive) and they all chose their own way of dealing with it.
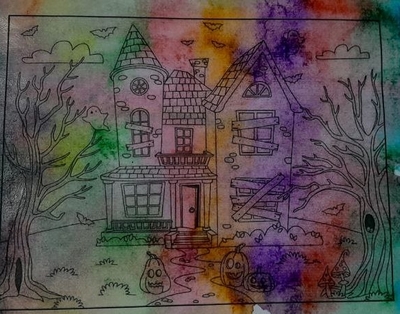
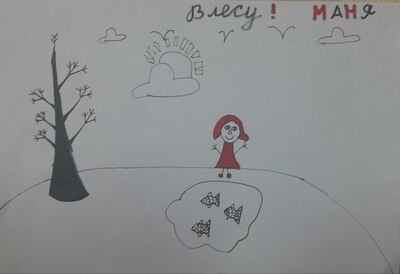
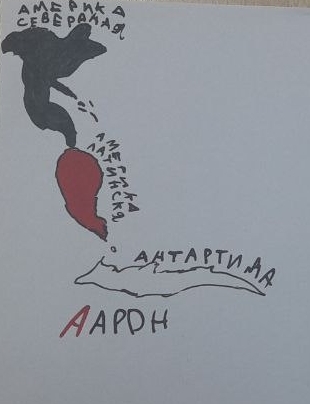
Among all the pictures created on the day, we have one copy of Banksy (with the author’s decision to make it a sad picture), we have a name logo (Halloween-style), a scene from the forest (in two copies because my student finished earlier and wanted to do the same picture on black paper), a map and a cartoon, on red paper.
It was lovely to see how involved my students were and how their creativity was taking flight, with every next step of the process as our lesson proceeded, how they moved from black on white to white on black or from black on white to black on red.
If you are looking for an easy lesson, with minimal resources and lots of opportunities, here is one for you!
J.M.W. Turner is, hands down, one of my favourite painters and, definitely, one of the first ones that I fell in love with and it has taken way too long for me to introduce him to my students. But, finally, this day came. We are now in our summer camp ‘Travelling around the world’ session and we planned an England Day, there could be no other painter to bring to class. ‘It had to be you’, Turner, sir.
The language
On the day, we had to lessons which we could devote to England. The first one was a vocabulary lesson in which we learnt about the different things we can see and do in England, food, sports, symbols and sights. We also talked about the things we like and don’t like. We filled in another page in our ‘passport’ (every day we do one) we watched a short video about the top attractions in London to compare it with our city.
The artist
Introducing J.M.W. Turner was easy as we could compare him with Claude Monet and it went along the lines of ‘Claude Monet had a garden and there he went to paint and Turner lived in Margate, by the sea, so he went to the beach to paint the sea’. That is, of course, a huge simplification but it worked for my 6-8-year-old audience.
We looked at a few of paintings and talked about the colours and the sea (‘Is it day or night?’, ‘Is the sea calm / quiet or angry?’, ‘What colours can you see?’).
The art
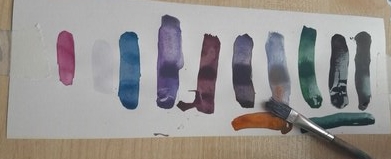
This was the first lesson in which we had two separate creative exercises.
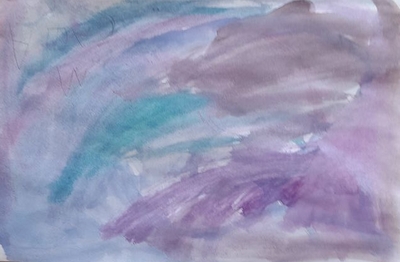
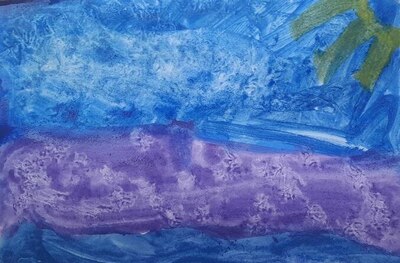
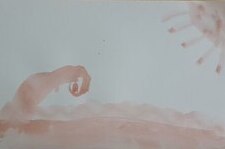
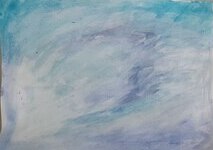
The first one focused on mixing the colours as I wanted the children to experiment with the paints we had in order to achieve a wide variety of blues which, later, would be used to paint the main picture. Everyone got a narrow strip of watercolour paper attached to the table, a box of watercolours, water, and a paintbrush. And the task: mix the colours in any way they want in ten different ways. I asked them to try out the paints on the paper.
Before we started, I showed them what I did for homework, namely about 20 different shades in my sketchbook. While I was monitoring and watching the kids, I realised that it was a great idea and that this could be a separate lesson. I just need to stage it in a slightly different way.
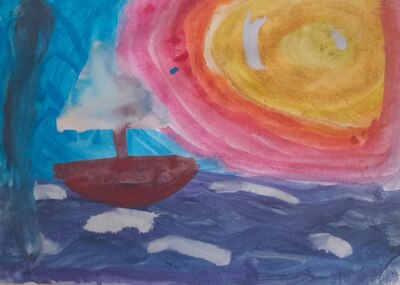
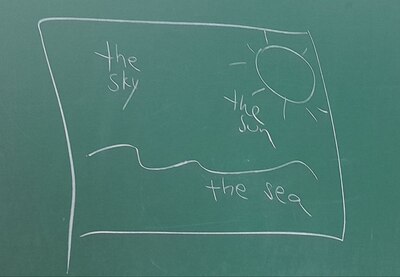
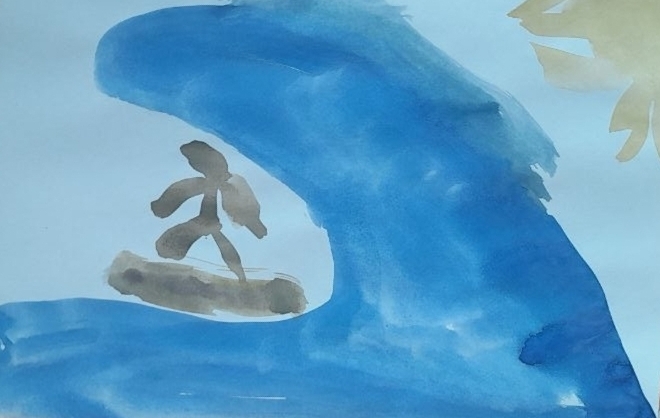
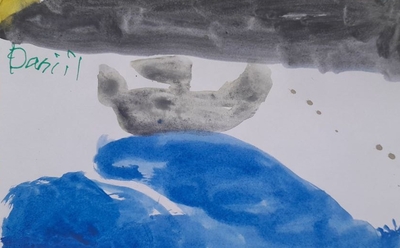
Turner in three short words
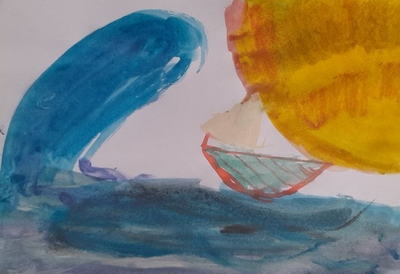
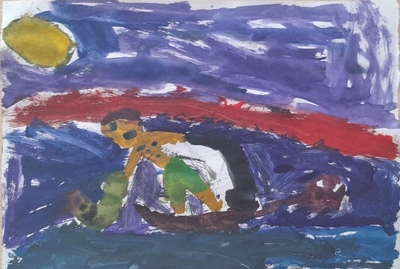
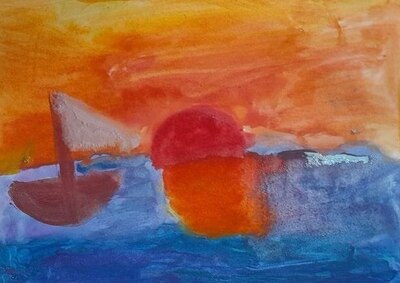
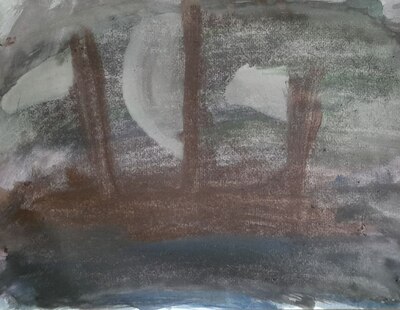
When everyone completed the task, ten different shades of blue, we got down to a real Turner. I drew a simple plan of what a Turner painting is (with all the love there is in the world): the sun, the sea, the sky and I asked the children to decide if it is a day or night, if the sea is quiet or angry, what colours they want to use and whether there is going to be a boat or not at all…
And we got down to work.
In methodology you call it ‘teacher monitoring the work of the students‘ and I do a lot of that but the truth is that I adore watching my kids work, take time to think, handle the materials, make decisions and focus on the beauty that they are creating. I cannot post the photos which feature my students, we take them only for the parents, but they are all so involved, so in the process, so concentrated, each in their own way.
What I noticed:
the 10 shades of blue was a great idea and it helped them see how many options there are and I could that they were using it later. One of our youngest ones also applied the same technique in the following day, with another teacher. He really learnt something!
everyone interpreted the topic in their own invidividual way
one of our oldest students was a beginner painter and looking at the way he held and moved the brush, I could tell that there hadn’t been much of painting in his life until our lesson. For him, this kind of an easy task was a good introduction into the world of Art and by the end of the lesson he seemed a bit more relaxed and confident.
the simple Turner was introduced to help the kids see the pattern in his paintings and to include all three elements.
it was an achievable task for the youngest (5 y.o.) and the oldest of my students (9 y.o.)