‘It’s tricky! It’s tricky!’ Back to school classroom management

About some ridiculous expectations

Well, it is not my first rodeo and, actually, it might be actually a good point in life to count properly how many rodeos aka Septembers there have been so far (I really don’t know) but, it turned out that I had been a bit naive about what to expect in the classroom on the 3rd of September. Or, in other words, my students managed to suprise me once more! Hooray to that. I suppose)

I knew that my students would come back having forgotten a lot and that we would not be able to pick it up where we left off, not after three months of no-school life. However, naively, I was hoping that they will remember something and that our September life will not involve starting off a brand new blank page. I was wrong!

The funny thing about it is that a few minutes into a lesson that was not necessarily bad but also not my dream come true, I kind of split my attention. There was a part of my brain that was solely responsible for the lesson taking place and the other one stepped back and started to look at the events the way a trainer would, connecting the dots and making mental notes about ‘the things to improve’. That was an interesting experience, I have to say.

This post today will have a format different to every other post in this series. I will try to analyse the things that did not go to plan and the solutions I already decided to put in place.

Things that I liked on the first real day

  • We talked about the things we did on holiday and it was great
  • We kept our Months Improvisation Song and now we are singing about ‘September’, I did my verse and the kids did theirs.
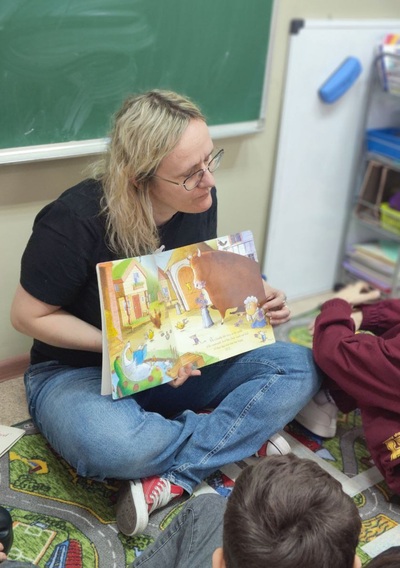
  • We did an introductory reading task and I was really happy with how it went. The kids really wanted to read (already a reason to celebrate) and to find the mistakes in the song.
  • We played our numbers spinner Maths game (‘I want…’) and it was very productive.
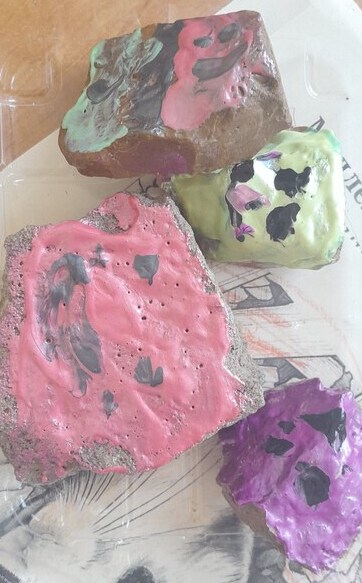
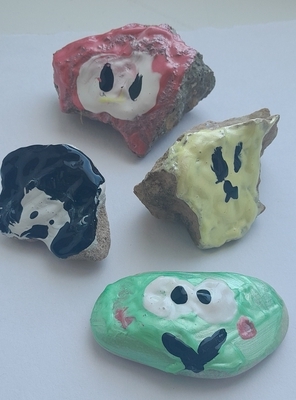
  • We made a mural about our favourite things that we will put up on the wall, Our Solar System. We sat together on the floor around a sheet of paper and we went on creating.
  • Even in the first lesson we had a good variety of interaction patterns: whole class, individual work, activities led by kids, collaboration on the project.
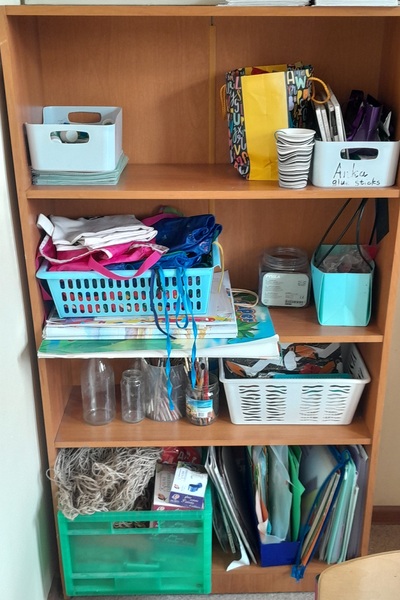
  • We have a special board where we keep the plan for the lesson.

Things that I didn’t like on the first real day

  • In one line, the kids were over-stimulated and out of control.
  • It was the first lesson in our new classroom, out of the previous set-up, associated with good habits and routines and there were too many new elements.
  • I allowed the kids to sit the way they wanted, with the friends they wanted to be around.
  • I decided to include the rules revision during the second lesson (for a reason) but I had to pay for that
  • I decided to include one of our favourite Maths games, to balance ‘the new’ with ‘the familiar’ but, I have to admit, there were better solutions, something else than a game would work better.
  • We used some of the favourite songs but I also included a new song, ‘Back to school’ but, in hindsight, I think it was not really necessary. It could have been left for a bit later.

What has changed since the first day aka Solutions

  • Nobody is sitting where they want anymore. This was my plan and I announced it in the first lesson that during the month of September we are going to have a different seating arrangement every single day. I prepared some September vocabulary cards and glued them onto the desks and a set of cards with the same words. Everyone coming into the room picks up one card and then looks for their place to sit. I want to experiment with different seating arrangements (especially that I am still working on the arrangements of the desks, too) and I want to check which combination works the best. There are some dangers involved, some tricky combinations to be avoided at all cost, but I am willing to take that risk, in order to learn. It was only yesterday that I saw a meme or a video on the social media in which teachers were saying that they let everyone to sit the way they want on day 1 specifically in order to find out who shouldn’t sit with whom. Plus we are also going to learn some cool September words)
  • Our rules have not been printed, laminated and displayed on the wall above the board. We have been reading and revising them at the start of every lesson. There are only few, my basic set: I sit nicely, I listen to the teacher, I speak quietly, I raise my friend, we are friends and Russian is beautiful but I speak English here. If we need, we will add to the list.
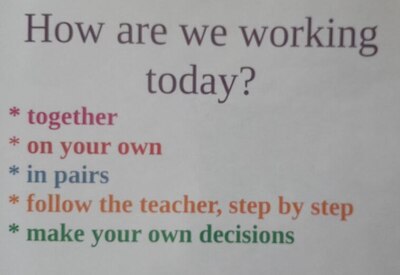
  • I have also decided to add another poster ‘How are we working today?‘ to help kids understand the different interaction patterns and modes of work. You can see all of them in the poster underneath and these are the terms that I am using to describe what the lesson is going to be about. They also help a lot with giving instructions to particular tasks. The most important differentiation at the moment is the one between ‘follow the teacher step by step’ and ‘you can make your own decisions’.
  • I reinstated the tool that we already abandoned, namely, the final stage of the lesson with the official announcements of the grades for the lesson, for work and for behaviour. We did not quite abandon them because I still needed my notes to add comments to the electronic journal for all my students but making formal announcements of praise and of not-so-good feedback was not necessary at the end of the previous academic year. This is back and it helps to summarise the lesson, to highlight once more the superstar behaviour and to explain why some grades are not very good.
  • We have a new call – response and last we used ;Autum leaves’ (teacher) – ‘falling down’ (students). They have already customised it and some of them respond ‘falling up’, just because it is funny. I need one more of those.
  • We sang a lot of our favourite songs during the other two days and I am planning to keep that trend for another week, without repeating, until we go through everything in our Songbook.
  • With one of my groups, I have put the games on hold for now, we are not ready yet. With the other one, the games are at the end of the lesson plan, in the ‘if time’ section. We need to get back into the school mode, back into the focus, before we start doing something more entertaining.

What’s next?

Not much, just the everyday and helping my adorable monster get back to the proper working mode. We will sing our songs, we will definitely do a story next week. We are still working without our books, rationing resources. We already have the beautiful notebooks, though, so there is a place to keep all the notes. Step by step!

The sun, the sea, the sky. J.M.W. Turner with kids

J.M.W. Turner is, hands down, one of my favourite painters and, definitely, one of the first ones that I fell in love with and it has taken way too long for me to introduce him to my students. But, finally, this day came. We are now in our summer camp ‘Travelling around the world’ session and we planned an England Day, there could be no other painter to bring to class. ‘It had to be you’, Turner, sir.

The language

On the day, we had to lessons which we could devote to England. The first one was a vocabulary lesson in which we learnt about the different things we can see and do in England, food, sports, symbols and sights. We also talked about the things we like and don’t like. We filled in another page in our ‘passport’ (every day we do one) we watched a short video about the top attractions in London to compare it with our city.

The artist

Introducing J.M.W. Turner was easy as we could compare him with Claude Monet and it went along the lines of ‘Claude Monet had a garden and there he went to paint and Turner lived in Margate, by the sea, so he went to the beach to paint the sea’. That is, of course, a huge simplification but it worked for my 6-8-year-old audience.

We looked at a few of paintings and talked about the colours and the sea (‘Is it day or night?’, ‘Is the sea calm / quiet or angry?’, ‘What colours can you see?’).

The art

This was the first lesson in which we had two separate creative exercises.

The first one focused on mixing the colours as I wanted the children to experiment with the paints we had in order to achieve a wide variety of blues which, later, would be used to paint the main picture. Everyone got a narrow strip of watercolour paper attached to the table, a box of watercolours, water, and a paintbrush. And the task: mix the colours in any way they want in ten different ways. I asked them to try out the paints on the paper.

Before we started, I showed them what I did for homework, namely about 20 different shades in my sketchbook. While I was monitoring and watching the kids, I realised that it was a great idea and that this could be a separate lesson. I just need to stage it in a slightly different way.

Turner in three short words

When everyone completed the task, ten different shades of blue, we got down to a real Turner. I drew a simple plan of what a Turner painting is (with all the love there is in the world): the sun, the sea, the sky and I asked the children to decide if it is a day or night, if the sea is quiet or angry, what colours they want to use and whether there is going to be a boat or not at all…

And we got down to work.

In methodology you call it ‘teacher monitoring the work of the students‘ and I do a lot of that but the truth is that I adore watching my kids work, take time to think, handle the materials, make decisions and focus on the beauty that they are creating. I cannot post the photos which feature my students, we take them only for the parents, but they are all so involved, so in the process, so concentrated, each in their own way.

What I noticed:

  • the 10 shades of blue was a great idea and it helped them see how many options there are and I could that they were using it later. One of our youngest ones also applied the same technique in the following day, with another teacher. He really learnt something!
  • everyone interpreted the topic in their own invidividual way
  • one of our oldest students was a beginner painter and looking at the way he held and moved the brush, I could tell that there hadn’t been much of painting in his life until our lesson. For him, this kind of an easy task was a good introduction into the world of Art and by the end of the lesson he seemed a bit more relaxed and confident.
  • the simple Turner was introduced to help the kids see the pattern in his paintings and to include all three elements.
  • it was an achievable task for the youngest (5 y.o.) and the oldest of my students (9 y.o.)

We don’t need no…enthusiastic teachers. The dangers of enthusiasm

Do I hear gasps of horror in the audience? Good. That is how I reacted when I said these words out loud, in a conversation with a teacher friend, retelling her some of the ‘recent events’…

Bear with me, dear reader and let’s see if you still gasp at the end of this post. Or maybe I will get you to at least look at the world through my eyes and give me a tiny little nod of agreement…

The ideal teacher?

Enthusiastic‘ is this one term that frequently appears on the list of words to describe an ideal teacher. Qin Zhang goes as far as saying that it is ‘generally recognised as one of the most essential and desirable qualities and characteristics of effective teachers‘ as one almost synonymous with energy or passion. What’s more, it is often presented as key to students’ motivation and engagement and, if you look long enough, you can even find advice how to be enthusiastic about what you teach (and in case you need it – use your voice and gestures, never admit that you don’t like your subject or topic or that it is not important). Enthusiasm then – a key factor in teaching.

Or is it?

Reading all these articles made me want to jump up and shout ‘Objection, Your Honour!’

My definition of a teacher, and especially a YL teacher, is slightly different and, surprise surprise, enthusiasm does not feature there as one of the necessary qualities. I put this list together based on years of mentoring and training of teachers who were either novices in general or novice teachers in the early years ESL/ EFL world. I based it on my own experience, the things that worked and the things that didn’t. I read about it, too, of course.

On my list, I have resilience and stamina and a variety of skills, I have resourcefulness and patience, I have creativity, energy and calmness and all three elements mentioned by my gurus such as Sandie Mourao (2018): the level of language, the knowledge of child development and of the appropriate methodology. A YL teacher is also someone who can teacher up or teacher down. But ‘enthusiastic’, well, somehow I didn’t think of including it. Truth be told, only recently did I begin to understand why.

Case studies

To illustrate that, I will use three case studies, from my professional life as a teacher, a trainer, an educational manager in all the contexts, countries and schools where I have worked and, at the same time, in none of them. The stories may have happened but in the way you think, not in the place you can guess and not with the people you know. No identification with actual persons or places is intended or should be inferred.

Case study 1: A senior teacher is asked to prepare a programme for the summer camp session. This senior teacher does not really have a lot of experience in the area and with this age group and, somehow, they do not bother to ask for advice, recommendations or support from more experienced colleagues. They just put it together, as best as they can because they really, really want to and they believe that something’s gotta give.

The programme has more holes than a slab of some Swiss cheese. There are no real ideas, no lesson plans, no support for the teacher or any attention or knowledge of any methodological principles. The only thing that there is – the enthusiasm and the Wow Factor . The camp lags from one day to the other, the teachers are confused and lost and just doing their best. But, because they are dedicated and passionate, they pull it through.

Execution mode: atrocious and unecessarily exhausting.

Aims: met as in: the world did not fall apart.

Case study 2: A teacher orgnises an excursion for her students, to the cafe, to celebrate. It is not a big group of students, there are four adults accompanying the kids, the paperwork is ready. However, the teacher doe not bother to check and to plan the route, there and back, because they are in the city city, not far from the school and the place is reacheable on foot. On the way there and on the way back, the group wanders around, they have to stop a few time to check the google maps, everything takes forever and on the way back, they take yet another shortcut and, to add insult to injury, they are caught in a blizzard.

Execution mode: messy and unnecessarily exhausting.

Aims: met (meaning: the world did not fall apart and there were a lot of lovely photographs)

Case study 3: An adult student stays after a lesson to talk about a relative who would like to work as a teacher. The contacts are exchanged and the potential applicant is advised to get in touch with the recruitment department of the school. She does and only later doe it become obvious that the enthusiastic would-be teacher has not graduated from the university yet, her studies are not even remotely related to education, she has never every taught in any capacity and does not even have any official confirmation of her language level. For all these reasons, naturally, the school does not hire her. However, she is advised to take a language test and consider starting the basic teaching qualification course. The potential applicant does not reply to these in any way and, her relative, the adult student who comes to the following lesson iss obviously disappointed and she tries to plead, with her teacher. ‘But she is so eager to start teaching. She really, really wants to be a teacher of English. It would be a dream come true...’

Execution mode: a great range of mixed feelings.

Aims: not met. I hope this person found her path.

Put the enthusiasm on the back burner!

It is easy to image that all of the directors, all of the managers, all of the parents and all of the trainers would love to see their teachers full of energy, stars in their eyes, joy in their gait, impatient to start doing their favourite thing, teaching! To impart knowledge, to help the kids learn, to help their students grow! That’s absolutely important and I hope that all my teachers, readers, colleagues have a chance to experience it on daily basis, this passion for what you do. I, personally, cannot imagine a life in which you to work without a tiny spark of happiness, just to do something in exchange for the salary. There are lots and lots of things that I do, solely out of pure enthusiasm and there are lots and lots of things that my colleagues and teacher friends do, on daily basis, that are not reimbursed financially.

But.

Enthusiasm cannot be the only resource available to a teacher. If it is and if it is there to cover up and to make up for all the other adjectives (such as organised, supportive, qualified, skilled, realistic, methodologically sane, planned, reasonable and professional), then I would like to make an objection and a strong one, too!

If we were talking about a different profession, nobody would even consider hiring a person to do the job of a doctor, a driver or a hair-dresser if the only thing they had to show for themselves was their enthusiasm or serving a disgusting cake on a pretty plate and claiming a Michelin star or two. It would not be a good idea to organise a festival without checking all of the bits, pieces and options and going for it just because we really, really want to have it.

No because it does not work like that in other areas and we should not have to deal with that in teaching, either.

Personally, I find it very, very tiring, as a teacher, as a trainer and as an educational manager. Mostly, because, in most cases, it translates into mess, confusion, teaching and learning below standard and last minute preparations and fixing problems as we (happily) go along. Perhaps, on my part, it is some kind of professional OCD but I like things to be in order.

This is not a post against enthusiasm and pession. Let’s not take it off the list, let’s just put it on the back burner, please.

References

Instructor’s Corner #3: Teaching with Enthusiasm: Engaging Students, Sparking Curiosity, and Jumpstarting Motivation | National Communication Association (natcom.org)

An enthusiastic teacher of English – How I see it now (wordpress.com)

Being an Enthusiastic Teacher – Swansea Academy of Learning and Teaching

What makes teachers enthusiastic: The interplay of positive affect, self-efficacy and job satisfaction – ScienceDirect

Sandie Mourao (2018), Research into the teaching of English as a foreign language in early childhood education and care, In: S.Garton, F.Copeland, The Routledge Handbook of Teaching English to Young Learners, Routledge, p. 429.

Crumbs #81 Making sandwiches aka a different type of Food Art

Ingredients

  • anything that you want to use to make sandwiches, we used: toast bread, blueberries, cucumbers, carrots, cherry tomatoes, cheese slices
  • a few pictures to get the inspiration from, for yourself and for your students. There are lots of websites with creative sandwiches for kids but I wanted something simple that we could all make and that is why I just looked for illustrations on google. If you are looking for something more intricate, you can have a look here and here.
  • two plates for each child and a small plastic knife
  • we made the sandwiches in our lunch room

Procedures

  • We started with the picture that I created during our previous lesson, my own vegetable print and I asked the kids to guess which vegetables I used in another lesson on the same day (here) and we connected them to the flashcards of vegetables we had on the board. Before the lesson I also put up more flashcards, of all the other items to be used in our sandwiches, and we spend some time working on those, drilling and playing a game.
  • Important: before the lesson, I sent the list of ingredients to my administrators to ask them to buy everything we needed and to inquire with the parents if everything was ok and to check against the allergies that our students might have.
  • I told the kids that we would be making sandwiches and I showed them a few different patterns but I also stressed that everyone would be making their own monsters.
  • We relocated to the lunchroom, washed hands and sat down. The vegetables had already been washed and cut up: cucumbers into julienne and slices, carrots into julienne and slices, cheese into slices. Cherry tomatoes and berries were only washed and dried.
  • I was making my own sandwich, modelling what can be done and my T.A. was bringing plates with more and more veggies. I did my best to encourage the kids to ask for certain vegetables and we did it))
  • At the end, we went through all of the veggies to check that everyone used everything. (“Have you got any carrots?’)
  • Then, we went on to eat!

Why we like it

  • It was the most ideal follow-up of our lesson 1 (vocabulary) and lesson 2 (making print art with vegetables) and, finally, we could eat in class.
  • It was a great way of practising our target vocabulary, practical, hands-on, productive because we really, really used the language.
  • Apart from what I planned for this lesson, namely using the functional language in the context (‘Bread, please’), we also started to sing a new version of the Broccoli Ice-cream, using the combination of the things on the table and then tasting to check what we really think. And, guess what, it turns out that carrot cheese, blueberries cheese and blueberry carrot are all yummy!
  • The kids worked very well together, they reacted well to changing the set-up and the type of an activity. Nobody got overwhelmed or overexcited, they were patient and waited for their turn and they used the langauge. I was really proud of them.
  • Last but not least, we made sandwiches (some kids more than 1) and we ate A LOT of vegetables. I was worried for a while that dry bread might not be the most popular item but I did not want to include any spreads of any kind and it turned out not to be necessary. Actually, during the previous stages of the lesson, I asked whether the kids liked all of the items we had ready and I was lucky – everyone liked everything! But, even if not, they were not required to use or to eat all of the ingredients.
  • As for the creative element, I was laughing a lot during this lesson because my students and their monsters were just amazing and very creative. I showed just a model but I didn’t want them to follow directly in my footsteps. We all looked at our plates and everyone, clearly, had their own idea of what the monster should look like.

Kind of green. Summer still-life #2

Last week, we had an opportunity to still-life twice, with the same group. Make sure you check out the other post, too. You can find it here.

The language

This was one more lesson we did this summer as part of our summer camp, with each day dedicated to a different colour and we had a whole lesson which we could devote to language practice. This lesson went according to the same plan: a song, things that I green and things that we like. We also included more practice and games and we wrote a poem about the colour green, modelled on the poems I found in the Little Learning Corner.

The artist

Initially, I was planning to base this lesson on Ilya Mashkov and his pumpkin painting because it worked very well in the past (post here) and the kids responded well to it. However, having decided to do just that, on the day of the lesson, while going to school, I realised we needed something more. Firstly, because I have a new group, with mixed ages and levels and all made of kids who did not attend my Art lessons throughout the year. Secondly (and more importantly), the colour and the shades and the logistics of it, were a new concept and I wanted to set an appropriate time slot for that. Instead of looking at some other paintings we got down to business:

Shapes: we looked at all the green fruit and vegetables that I brought and described them using simple shapes. In order to help the younger kids, I also drew them quickly on the board, too, to demonstrate that it is not necessarily very complicated.

Colours: for this part of the lesson, we all sat on the carpet, around a piece of paper and a box of watercolours. We tried different colours in the box (there were 2 shades of green) and then we experimented with mixing shades, creating new ones and trying them out on paper. We checked how adding water works, mixing greens with white, black and grey and then we just used a few combinations that kids suggested.

Outlines: I personally love drawing with crayons and colouring with watercolours, because the crayons do a great job of holding the paint within the lines and really like the contrast of the most random colours used to sketch. Black is not the only option and I wanted to share that with kids. I demonstrated that but I also told the kids that they can also use pencils or nothing.

The art

Before the lesson, I prepared the working stations and the kids were taking their after they got up from the carpet. On the way, they also picked up their aprons.

I gave out all the materials: crayons, water, watercolour, paintbrushes, palettes for mixing and tissues and we got down to work. The kids were working at their pace and I was just so happy that I had my TA who could help monitor a relatively big and varied group.

My eldest students were working very well on their own and they really didn’t need any real support and direction. The youngest students took a while to get started and were definitely in need to the first step accompanied by the teacher. For two of the children, we even had to start the sketch and let them continue.

It is interesting to see how many different ways of looking at the composition of the still-life the kids took. I tried to suggest starting from the biggest and the most obvious ones (the broccoli and the zucchini) but I did not insist and, as you can see, some of them went as far as just drawing a set of fruit and vegetables, reminding me of a page of a XIX century herbarium.

Regardless of their age, they really enjoyed working with the colour and the experimenting with different combinations of paints. They were working and, again and again, they would call us out, me and my TA, to come up to their desks to look at the new variations of green. ‘I’m a real artist!’ our youngest in the group said proudly when we were about to start working.

Some of them also went as far as working on the texture to match the texture of different fruit and vegetables but, again, I did not insist on that. That’s a separate lesson, something to look into in the future.

Three of the children completed the ‘obligatory’ fruit+veg painting and went on to create their own paintings, one for mum, one to experiment with different painting techniques and one, ‘the glory of the colour’, just because a 5 y.o. found an especially bright box of colours and she decided to express herself with them. Two of the creations were never photographed because they were so precious that my student just snatched them, still slightly wet, to leave them in the changing room, not to forget to take them home.

Next time to-do list:

  • Make sure that all the kids have a spare piece of paper to try out all the new shades before applying them on the actual painting.
  • Write the lesson plan on the board. I didn’t this time and it is a pity, it would have helped to keep everyone more or lesson on the ball.
  • Prepare some kind of a version of a template or a sketch ready for the youngest children, in order to help them jump over the huge challenge of the drawing stage and in order to be able to focus on the colour and the shades. Technically, this could also be a separate lesson, too, with a template for everyone, to focus on the colour or on the texture.

The gallery

Crumbs #80 A clever drawing dictation

‘Students draw…’ is one of the YL-related lines that is my personal pet peeve…You can see it in coursebooks, teachers’ books, in lesson plans and on the social media. The idea is that a bunch of seven-year-olds (or younger) will have their teacher give out the pencils and they will hear their teacher say ‘draw (insert your word)’ and they will just sit down, get an idea and complete the job in five minutes without any issues and (AND) afterwards they will be ready to talk about their pictures, to present their work or do whatever goes under the productive part of the project.

What a joke! It looks good on paper and in theory and in a real classroom it is going to translate into a neverending, unproductive, very often full of blood, sweat and tears task because the little people simply do not have the drawing skills, the time management, the imagination and the self-control necessary to complete the task that the adults imagine them to do and, more often than not, they will really want to do it well because they care, they love a project and they love drawing and those zoo animals, monsters and princesses that they were told to create. Or, quite possibly, they don’t like drawing, they are into other creative areas and they will devote precisely a total of sixty seconds to that task having then announced ‘I have finished’ and already on the lookout for other things to do. While their more involved peers are still busy and far from finishing, leaving the teacher with a room full of self-induced mixed ability group.

Is there a solution to that? Yes, there is. There must be. This ‘students draw’ has been on my mind for a very long time and there are some ways of handling it, the first of them – taking the coursebook and the ideas with a pinch of salt. Or two. The second of them, working on the staging and the clever way of keeping the activity in shape and everyone on the ball.

This is one of my solutions. It has worked very well with both groups and I am already thinking how to adapt it to other topics. As soon as I do come up with something and as soon as I trial and test, I will be adding to this post. For now, only one topic: the dinosaur.

Ingredients

  • Paper and pencils or markers for the children
  • A set of cards that help to shape up the drawing process, like the one that I used in a lesson in which we created our dinosaurs.

Procedures

  • It is noteworthy that the lesson in which we actually draw the dinosaur was only one of the series of lessons taught over a period of three weeks and was proceeded by a few lessons in which we introduced and practised new vocabulary, did a mini-research and described the appearance of different dinosaurs. After our dinosaurs were ready, we added a fact file, did lots of quizes on dinosaurs and, eventually, had a role-play aka an interview about a dinosaur. The drawing lesson was just a part of a long chain of activities.
  • The teacher asks the kids to open their notebooks and get the markers or pencils ready or give out the paper for the drawing, depending on the set-up in your context.
  • The teacher tells the students that they are going to create a dinosaur, their own dinosaur and that they will listen to the teacher and make decisions. It might be a good idea to show the children the cut-up cards and to tell them that each card is a decision about a dinosaur.
  • The teacher is supposed to draw their own dinsoaur, either on a piece of paper or on the board.
  • The activity starts with everyone drawing a circle or an oval for the dinosaur’s body in the middle of the page.
  • The teacher picks up the first card (i.e. ‘draw a long neck’ OR ‘draw a short neck’), the teacher reads it out loud and makes their own decision, announces it out loud and draws the neck for the dinosaur. The teacher then checks with all the students, in turns, what choice they have made, making sure they say out loud what they have decided to do. The kids draw, the teacher monitors.
  • The activity goes on, with the teacher doing one more round and then the students taking over and reading and dictating for the class and the teacher.
  • In the end, the student come up with the name for their dinosaur with the suffix -saurus (although it is, of course, not the only suffix used to created dinosaurs names).
  • The lesson finishes with all the students introducing their dinosaurs briefly and only in the following lessons do the students proceed with working on their dinosaurs (facts, role-playes etc).

Why we like it?

  • I loved how this format worked in the classroom. It was well staged and it helped me manage the children and their creativity, without losing control and without anybody finishing ahead of time or going on for too long. It was also a perfect combination of teacher-centred and of individual creative choices for every student.
  • I had quite a few cards to use but I was prepared to use all or not all of them, depending on how focused or interested my students would have been. In the two lessons / groups I did it with, we managed to go through all the cards (aka decisions).
  • The kids were prepared for the task, vocabulary-wise and we also could use it to practise it further, through reading, confirming, checking etc. The words were out there, in the air, throughout the entire lesson.
  • The kids absolutely loved their dinosaurs. Some of them even managed to finish their first dinoasaur, and draw another one.
  • It worked very well also as the preparation for the more productive part of the project, our interviews – role-plays in the following lessons.
  • Kids also enjoyed the fact of being responsible for making the decisions, step by step, while creating their dinosaurs.
  • I will definitely be applying this particular approach to our projects in the future.

Erik Bulatov. A word that is also a picture

A whale!

Even today, after a few days have passed since the day of the lesson, and with other lessons that have happened in-between, I am still simply, well, euphoric, about the lesson I taught and about the art we created. Cloud number 9.

I saw Bulatov in an exhibition more than ten years ago and, my oh my, what an inspiration he was. Really, I cannot think of anyone who had an impact comparable to him. And he stayed with me. For days on end did I draw letters and tried to make them work together. I even turned one of the pictures into a pillow case, in black and white.

A few weeks ago, I got to see his exhibition again and, once more, it was a blast, in every possible way and, naturally, I made an instant decision that we would do it in class, sooner or later.

A pizza!

The artist and the concept

It was with a real pleasure that I got to tell my students that our Artist of the Day is a contemporary artist who is almost 91 years old and who still lives in our city. They got really excited about it.

However, before we looked at Bulatov’s works, I wanted a proper lead-in. It seemed crucial to me that my students start to use the words as images, to have them look beyond the letters and to see the bigger picture. In order to do that I decided to use two tools or two tricks and I am so happy that what I came up with worked wonders.

The first, really easy exercise was to look at the colour words and to read them as words and as colours. There are plenty of resources that talk about the Stroop effect and pleny of resources to use: the online game, the article, the quiz video. I used a super simple visual, like this one here. The kids loved the challenge and I was having fun with them, quietly celebrating the fact that reading (all of a sudden) is an easy-peasy task for my almost-year-2 students.

For the following stage, I used my own illustrations of some of the Portuguese words which you can see the photographs. My students don’t speak Portuguese and I wanted to have them try to guess what they might mean just looking at the visuals. And they did so well here! Preparing those visuals took some time but I loved this kind of a homework and it made for a lovely evening for me. I chose ‘o sapo’, ‘a casa’, ‘o amor’ and ‘os olhos’ (without articles) simply because I had an idea for the illustration and I knew that my students will know these words in English. Obviously, any other words can be used and any other language that is appropriate in the context. I have already decided that when I teach this lesson again, I will use a wider range of words and a wider range of langauges.

At this point it was already obvious for the kids that words are more than ‘just words’ and we were ready to look at what Erik Bulatov created. I chose only five of the paintings. We looked at them and we briefly analysed why these particular words were presented in such a way. The main idea for this lesson was the sentence that I repeated a few times during the lesson and the one that is also the topic of that post: a word is also a picture.

Amor!

The language

The language input was minimal in this lesson as we only talked about the different words that the kids could use. As an example, I suggested using their names, animals, food, emotions and professions (the theme of our summer camp). The kids had time to think about it (as we were getting ready for the creative part, bringing water, getting on the aprons, giving out paints and brushes) and when they were ready, I wrote all the words they suggested on the board.

I was considering showing them a few examples of the English words that were also turned into images such as a few variations of ‘love’, ‘a cat’ and ‘a dog’ but I decided not to put them up, just to see what the students can come up themselves.

It is worth mentioning, however, that, depending the language input can be extended and there is a lot of potential for combining this lesson with a lesson on animals, colours, seasons or fruit and vegetables. I will definitely be going back to it and I am already excited about it. I want to be perfectly honest here, though. I focused on the artistic part because we are at the summer camp at the moment and there are separate English and Art lessons and, hooray, we have more time for English and for Art. Our Art lesson, however, was done entirely in English.

Sapo, casa, olhos!

The art

We used very basic materials: pencils and watercolours. We didn’t even have any real watercolour paper, because we ran out and we had to use the regular photocopying sheets. Not the best choice, but it didn’t stop us from creating.

I gave out the paper and pencils and we started to design our words. It is a good idea to keep a few spare pages of scrap paper for the kids to practice because it might be a bit complicated to get to the ‘acceptable’ level of quality of the letters or the picture, even with a good general idea, this does not happen naturally. I experienced that myself with my ‘casa’ picture and I was just so happy that I kept the drafts because I could show the kids that only practice makes perfect. Next time we are going to create Bulatov, I am also going to include different versions of his paintings that I saw at the exhibitions, either sketches (if they are at all available) or the same painting with various approches to the composition, size of letters or colours that I know exist. They will be a wonderful lesson into the creative process. Actually, here is another great idea for a lesson for me and for us, from the sketch to the masterpiece…Soon, I promise, soon!

A rabbit!

After the sketches were ready and the kids were happy with them, we started to paint. That’s it. The only thing to follow will be only my admiration, love, excitement, awe and multiple rounds of applause and high-fives. My kids did great.

Here is what went well / very well / amazingly well:

  • We went smoothly from the main idea, to Bulatov’s paintings and to our own creations
  • The kids did great, many of them knew straight away what idea they want to depict and they just went for it. They worked very well, they were focused and motivated. Many finished their first original idea and went on creating.
  • Designing the ideal visual was not easy for all the kids and not all of them got there from the first time. Keeping the additional sheets of paper was a good idea, showing my failed attempts was a good idea, too, and it did help some of the kids. I was really proud of those who got upset at the begininng but decided to go on and created real masterpieces.
  • It was interesting to work with this particular group of kids because they were a new bunch, a mix of my students and some new children who joined us only for those two weeks. All of them, however, apart from one, were new to the artistic activity, unlike everyone who took part in our regular Art Explorers activities that I normally write about here. And it was such a joy to teach them and to take them into the world of creativity.
  • We used the simplest resources, the pencil and the watercolours, but I have already started to wonder what else we could use. Perhaps gouache, perhaps acrylic paints or maybe a mix of techniques, paints and a collage, with the newspaper cut-outs…So many things to think about!

The only thing left now is to invite you to admire what my amazing artists have created!

Love!

The unsung heroes of the YL/ VYL classroom. Volume 2

I was there first, dear Balenciaga!

This is the second post in the series and the link between them is the painter’s scotch that already futured in the first post but that is still one of my top 5 things in my bag. And here are some more…

The alphabet

We started the academic year with ‘Aa is for apple’ in our handwriting booklets and we spent the first three months on meticulous handwriting exercises. When we got to Zz and we were more or less familiar with the whole set of letters, I would write all of them on the top of the board for the kids to copy. I know that there are a lot of posters available on the market (and my school prints their own, too), but I just didn’t like them as they did not match my set of requirements: big letters, handwriting, font matching what we have been using and some visual representation, too, to help make them a little bit less abstract. With the visuals that we already know instead of some randomness such as ‘N – nest’, ‘Q – quilt’, ‘S – sparrow’, ‘Y – yak’ or even ‘X – xylopohone’ that are either very rare, well beyond the A1 level, not child-friendly or just vile (yes, I am talking about the xylophone that has the randomest pronunciaction of ‘x’ ever).

I made my own. I made two, one for 1A and one for 1B. The only thing necessary was an A1 piece of cardboard, a marker and a set of stickers.

It has spent the second half of the year on the walls of our classrooms and we used it as a reference point in all our writing exercises. The kids used it on their own and I used it, too, to direct them towards the correct letter. ‘Dd is for dog! Look!’. All in all, it helped us made huge progress with our literacy skills. No more than that but so much!

The chalk markers

When I found the Treasure of the Year, I was looking for something else entirely. I was getting ready for the Art classes, White on Black, googling for black drawing paper and white pencils. I found them and the lesson was great (you can read about it here) but what I also found the Solution of the Year and the Teacher’s Love of the Year: the chalk markers.

The thing is for the previous six months I had been forced to use the traditional blackboard and the traditional chalk and I hated every single moment of it, after all my educational like in the Polish state schools, fourteens years as a student and five as a teacher; hatred from the very bottom of my heart, because of the dry hands, because of the chalk dust on your clothes and because of the cloth. And then I found the chalk markers that I had not even known existed!

They are beyond amazing. They last a few weeks, they are just markers and they are quite thin so it is a dream to be writing with them and you can be very accurate and produce intricate letters and drawings. And they erase easily!

The trolley

I spent about three weeks of the academic year being miserable. I had two groups and two classrooms and the whole day was about moving from one to the other, together with everything that I needed in my teaching life: markers, toys, flashcards, cards, stamps, schoolbag, thermos, notebook, my magic wand, glue, craft paper, pencils…Most of the time wasting on it the entire length of the break. Every single time, every single day. The classrooms are door to door but, still, it meant making a few rounds, a few times a day. It’s not that I did not have a place to keep my things in either of these classrooms, I did, but it was still impossible to have two separate sets of cards, two separate sets of puppets, two separate sets of markers for the whole class.

The misery lasted almost a month until I had enough and I looked for solutions. I used to use boxes and baskets in the past, with my preschoolers but these would not work in these new circumstances. This is how I got my trolley, four metal shelves of happiness on wheels. Each shelf has its own theme and I keep there, going from the top: markers, flashcards and storybooks and puppets, cards, packets small scrap paper cards and handmade cards.

It is super easy to move from one classroom to the other or to roll it around the classroom while handing out boxes with markers. It is light so my students can help with it and they love doing it. They actually love to pretend play being flight attendants and giving out things. It made my life much easier.

One more thing! That trolley is getting me one step closer to becoming a Real Babushka!

The cupboards

One thing that I definitely had a chance to find out about myself is that I am thoroughly obsessed with order. It might have something to do with some form of OCD because mess and disorder makes me very unhappy. In the past, I must have lived in some kind of an ignorance but that’s because I was not obliged to share the classroom with another teacher on permanent basis. Until September 2023.

This was when I realised that I am deeply unhappy with the disorder on the table, on the cupbards, on the window sills and on the shelves. This was when I understood that I like my classroom near to empty, without all of these toys, games, books and (omg) candy that children have a full and unrestricted access to, which, of course, has a detrimental impact on the general classroom management. Alas, when you have to share, you just share and try to live to tell the story.

The cupboards made it possible and because there are two that I have got, I can be easy-going with how I organise the shelves and what I put things. In one word, I have room for everything. One full cupboard is filled with books, workbooks and notebooks and the other is my beloved Art cupboard, with all my resources, treasures, aprons and jars. They are all located at the back of the classroom and sometimes, when I teach, I like to glance at one or the other and smile. Peace and quiet, law and order in my resources.

The markers

There are many stationary items in the primary classroom, pencils, pens, crayons, coloured pencils but ‘Nothing compares to you’ is what I would sing to my boxes of markers. I think, perhaps, it might be because of the hours spent in the young learners’ and very young learners’ classroom or, in other words, because of the hours spent with people who are learning to hold a writing tool and people who are learning to use it to write their first words.

On behalf of my students, I prefer them to everything else, because, first of all, they are much easier to handle for an inexperienced hand, much easier to hold, requiring less muscle power to hold and to produce a line, very often much thicker and much lighter than anything else. Not to mention that because of the colours and the excitement of using them, they make the difficult and tiresome task of writing a tiny little bit more appealing and motivating.

We use them throughout the year to colour and, also, in the beginning of the year to write. I cannot really say exactly when we stop and switch to pencils and pens as it varies, from year to year but that is our general procedure.

Materials May: stone painting!

The language

This was the last episode in our series of Materials in May. The language input was a revision and limited to colours, emotions and animals which was also consistent with the vocabulary that featured in the photos I found online to inspire my students. Which, of course, means that the vocabulary can be adapted, adjusted and selected to match the topic that you are planning to focus on or the topic that the stone painting is supposed to accompany.

The artist

Since our main character was stone, I decided to choose a group Artist of the Day and look at the artistic creations across the centuries made specifically of stone (or, rather, different variations of it) such as the Sphinx of Giza, the Easter Islands monuments, Nike, the Greek goddess and Moscow lions, among others. The great thing about it was that many of these, the kids were already familiar with and they could relate to them on a slightly different level, for example, because they had a lot to share, although most of the time this was done in Russian, rather than in the target langauge.

The art

The art part was very simple and straightforward. We started with looking at a great variety of stone paintings that can be found online, with different smileys, fish, dogs, cats, elephants and what not. The kids were told that they would be able to paint whatever their want.

We proceeded to choosing the stones and handing out pieces of paper and pencils as we were to design our drawings. We traced our stones on the paper and spent some time trying to figure out the best picture or pattern for our stones. I tried to encourage them to be inspired by the shape, especially that we had stones of two different sources.

A word here on the stones themselves. They came from two main sources. Some of them were the ‘pretty’ craft stones, round and polished and I bought them in a craft store. The others were more organic, collected by me in the neighbourhood. These are irregular, ragged, rough but also more inspiring. I washed all of them with soap and hot water. In the end, they were left in a bowl with hot water, in order to sanitise them as much as possible.

When our designs were ready, we put on the aprons and started painting. Our paints were on a big table in the middle of the classroom so that all the kids could share all the resources. We used two types of the acrylic paints, I had some basic colours (but in lovely, rich shades) and some pearl colours (in other shades, as it happened). A part of the fun on the day was mixing of both in order to get the best of both. I am not sure if it can be seen in the photographs but it really worked out very well.

As for the design, as I said before, the kids had a free hand and they chose whatever they wanted. We had some smileys, we had some ‘favourite things’ such as the horses, the geese and Picachu, we also had some ‘magic stones’, which were only coloured and decorated. Because the acrylic paint dries relatively quickly, some of my students managed to decorate both sides of the stones.

I had the black markers ready for the follow-up decorating as it is also an option, especially useful for all the tiny elements of the drawing or the tracing, but it turned out not be necessary in the end. As with all the materials lessons in May, I announced that we would be leaving our creations to dry overnight but, guess what, that also didn’t happen. Almost everyone insisted on taking their stones home asap. I barely had time to take any photos. I suppose that means that the lesson was a success.

Upside down and inside out. How to dismantle a traditional EFL curriculum and how to spend a year disregarding the CEFR

(Or an English teacher reflects on the academic year that has just finished.)

This is the third of the posts in the series of the Reflective Teacher that I promised myself to celebrate the end of the school year. Here you can find me reminiscing on the life of an Art teacher. Here you will find the unexpected memoirs of a Maths teacher and here (because they also secretly belong in the series) – a whole set of notes of a teacher trying to introduce law and order in Year 1.

But, first and foremost, I am a teacher of English, working hard to give the students in my classroom the tools, the imagination and the courage to speak a language. And from that point of view, this year has been a very interesting experience for an English teacher, too.

Something old

Well, there is a lot of that!

I have been teaching English to primary for many, many years now. I know how to do it and I love doing it, really. Vocabulary, grammar, communication skills, functional language, reading, writing, a is for apple (a a apple), learning how to be a student, learning how to be a member of a community, routine, pairwork, all of that, all at once. It makes your head spin, a little bit, of coure, but then, all of a sudden, it all starts coming together and it feels great.

Introducing all the letters of the alphabet, staring our handwriting booklet, phonics stage 1, stage 2, stage 3, the first song, the first test, the first spontaneous production case, the first storybook. I have jumped through all these hoops with many generations of my students and successfully so and this year we have done it together once more.

The only thing that was different was the fact that I had a lot more time in a week and we could set aside a lot more time for practice. And that, apart from English and the ESL classes, my kids were getting a lot more exposure and practice from the History lessons, from Maths, Science, PE, Art and the break times, too. Every little helps!

Something new

Do you still remember the title of this post? If not, please scroll up to refresh. Why? Because this is the image that I have in my head when I think of English in this academic year, here goes:

a beautifully constructed framework of the CEFR, with all the levels and their detailed descriptions, skills, grammar and vocabulary, in a sequence, neat and tidy, like a set of puzzles forming one beautiful picture, now scattered on the floor, all over the place and it is not even possible to understand what it was that they showed in the first place…

That is exactly what happened this year and that is all due to the context in which I was teaching, namely my bilingual primary school, with a group of students who were in their year 1 of education but according to the curriculum and age, in their year 3 of the BNC. And who, naturally, were a very mixed bunch as regards their L2 language skills. A very mixed bunch indeed.

Because of that we made a decision to adapt the programme and the plan and divide the children into level-appropriate ESL groups so that they all could learn and take their English to another level and, alongside that, we would teach the English and develop the skills according to the BNC. All in all, it has worked well. The kids were tested throughout the year, both as regards the reading and writing skills (milestone tests) and speaking (Cambridge YLE) and they all made progress. Hooray.

However, all of that meant that I had to forget about what the basics, the CEFR. First of all, because, from the very beginning I had pre-A1, A1, A2 and A2+ and everyone in-between sitting in my classroom. Outcomes: forget about using one single set of materials.

Second of all, we were to follow the curriculum of the year 3 of the BNC and even if we made amendments (as we did), this was nothing in any way related to the CEFR, as regards the structures or the vocabulary and we had to at least make an attempt at combining the English curriculum with our ESL curriculum. Outcomes: adapt, adjust and do your job, feeling just a little bit anxious, with the safety blanket gone.

Last but not least, I had my bunch in the classroom and in the school, for many hours a day and it was my task to make the most of it and to give them a chance and the tools to communicate in English as much as possible and that means (or it might mean) not going nicely from one level of CEFR to the other. I have already written about it earlier, in my storytelling campaign posts here, and this year I definitely had a chance to research it more and to gain even more experience.

Some of the things that meant for us:

  • introducing lots and lots of verbs, the everyday verbs (to talk about what we do in the classroom), the story verbs (in order to read and to tell stories), the hobby verbs (to talk about what we like to do)
  • introducing lots and lots of adjectives, to describe emotions and feelings (to talk about ourselves and to talk about the emotions in stories), to describe objects (all the Maths, History, Science lessons because of the comparatives and superlatives used in all of the subjects)
  • introducing structures when we needed them: Present Continuous (to describe what we are doing in the classroom, to manage the kids, to tell stories and to describe pictures), comparatives and superlatives (the BNC)
  • introducing some elements of the word formation (some negative prefixes, gerund, er for jobs) because of the requirements of the BNC
  • introducing the elements of the three basic tenses (the Present Simple, the Past Simple and will) to give the kids a chance to express themselves, to talk about the weekend on Monday and to talk about the things to do on holiday
  • learn a huge pile of words from way beyond our A2 level and not in some topical sets but because we either needed them in our phonics practice and it was ok to learn them because they were all 7-year-old-friendly words (with such treasures as: feather, together, trophy, sloth, gate, cube, arrow, pillow among them) or because we needed them for our English, History or Science lessons.
  • introduce a pile of useful phrases, way beyond our A2 level, through stories, just because we needed them in the everyday. ‘It’s impossible!’, ‘Let’s try!’, ‘You’re too loud!’, ‘Just a little bit more!’, ‘I’ve got an idea!’…

Something borrowed, something blue!

Two things that it led to is that we have actually learnt and we have made huge progress over the year, despite this being the first year of learning English for some of my kids and it meant learning some complicated vocabulary and grammar at the age of seven. The other thing it meant for me only was staying somewhat shell-shocked and puzzled at the fact that I have turned the CEFR upside down and inside out and I lived to tell the story…

I am not sure if, with this post, I really want to promote getting rid of the CEFR. Quite the contrary, I appreciate it being a part of our life, as a teacher and an assessor or an examiner. But it is not the only thing that matters and, sometimes, experimenting and playing with it or just blatantly going around it, that is the best idea EVER! Especially that the CEFR itself is one thing and the way the structures or vocabulary items are included and organised in our coursebooks, that is a completely diferent thing.

It’s been years now since I started to introduce lots of verbs, lots of adjectives and the Present Continuous in my VYL classes. This year was the first one in which I brought some elements of the Past Simple and the future will to my young beginners, just so we could talk about the everyday in a meaningful and natural way. And I am very happy with the results. Hooray to that!