A square peg in a round hole. New kids joining the group mid-year.

Back in the classroom

January, January. Here we are, are still dragging the residue of the Xmas – New Year laziness in our blood cells but the time is now to enter the classrooms briskly (also, because the school hallways is the only place where you can do ‘briskly’, the pavements outside are either icy or covered with snow or slush), with the new energy and to start the second half of the game.

Sometimes, let’s be honest, this YAY attitude is a show you put on (see the laziness residue) but if it doesn’t start with the teacher, then there is no or very little hope that it will be student-generated. After all, they don’t only have you, their after-school English classes, they also have the regular school, with the huge piles of homework and, this year’s special – they are back to the regular, offline classrooms, after three months of the screen’n’pjs education. This is the older students.

The younger ones, well, they have been attending regular classes, without any breaks, in most cases, but these, they come after not having seen you for two weeks. Will they be a little bit displaced and confused? Yes, they will. Will they have forgotten some of the class rules and routines? Most likely, yes. Will this first lesson after the winter holidays be to some extent like the first lesson of the course? It might be.

What to do with it? Not much, really. Just being kind to yourself and to your students and acknowledging the fact that it will take some time to warm up the neurons and to have them work at the top of their capacity. And a lot of revision, as regards vocabulary, structures, rules and routines. It is not that difficult to put together a great and meaningful ‘revision’ lesson and all the students will appreciated and enjoy doing something that is familiar (but not boring) and achievable (but still challenging enough). Before we get back to climbing yet another of our EFL Everests.

But that’s not really what I wanted to write about today

Imagine, dear reader, that to all the hoops that are already in place (a long break, sleepy students, tired students, all over the place students), you get one more: you find out that a brand new student will be joining your group. Or coming to do a trial lesson. Or just joining you for a catch-up lessons since he/she missed a few classes with their regular teacher.

I am not sure how common an occurence that would be in state schools, kindergartens or classes given by private tutors, or, even, whether it does happen in other private language schools. It does in mine and it is an interesting experience. Here are few thoughts from the last two weeks.

The teacher

It is a challenge, admittedly, because in a way we work the double amount, on the one hand dealing with the group, re-instating the kingdom from before, on the other hand, taking the new student on a brand new adventure and that might mean some temporary dissonace that will have to be managed.

It might also happen that the new student’s mum will want to take part in the lesson or that the new child will refuse to enter the classroom without her. How you react here will, of course, depend on the school’s policy.

It might be a good idea to invite the parents in or to have them sit in the hallway but with the door open so that everyone (the parent and the child) feel comfortable and it is equally important for the teacher to explain what is going to happen in the lesson and how the parents can help. What usually happens is, the child stays around mum in the very beginning and then, slowly, wanders towards the teacher and the group and, eventually, takes part in all the activities. This period of time might be different for different children and it is crucial that they are not rushed here, by the teacher or by the parents, and that they make the decision when to join all by themselves.

The best advice that I might give teachers (and that I give myself when I enter the room on a day like this) is to stay calm and to smile a lot, because things will get better soon. Of course, in 2020 – 21 even smiling might not such a straightforward solution, but even with the mask on, it is good to remember that it takes a few muscles to smile and that the smile spreads all over your face. Plus, it might be a good idea, to stand at a safe distance and to take off the mask just for a second, while meeting the child for the first time to let them see your face.

The activities

This is an interesting case, especially with the very young learners. As mentioned before, some revision is absolutely necessary in any lesson and especially in the first lesson after a long break. However, that might mean that the new students will be constantly at a disadvantage, because for example, they won’t know all the songs that everyone else already loves or to take part in all the games because in order to do so, they would have to be familiar with all the vocabulary and, of course, they are not.

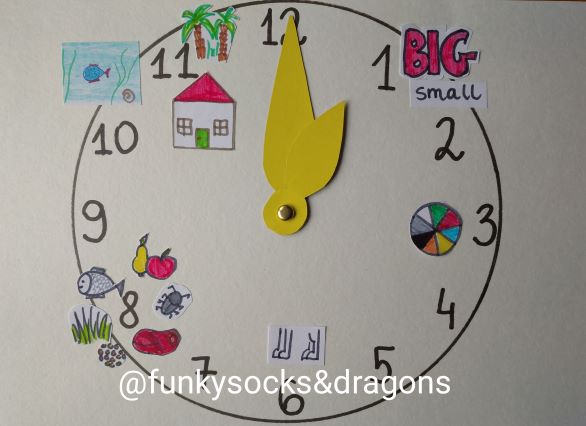
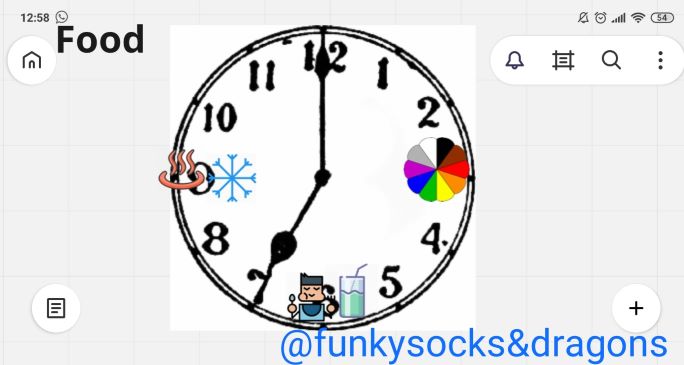
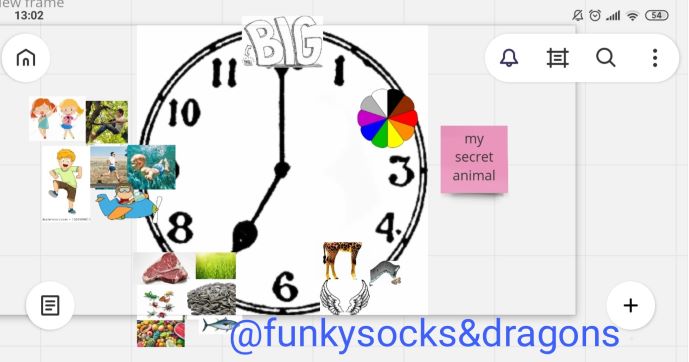
For that reason, it would be good to start each activity with a quick revision of the vocabulary and drilling, to inlcude the games that will have a double focus, something apart from the language itself, for example langauge and CLIL (names of the animals and whether they are big or small or numbers and counting real objects) or language and cognitive skills (names of toys and looking for differences between two pictures or odd one out) because the new students will be able to participate partially at least, relying on their ‘previous knowledge’ not on the langauge only in order to complete the tasks.

What’s more, despite the overall focus on the revised, I would still recommend introducing some new material, in order to ensure that there is something which is new to absolutely everyone, the ‘old’ students and the new and that we all learn it, together, as a group. It doesn’t have to be a brand new topic, only a couple of new items to extend their vocabulary range in the topic of toys, a new song or a new story.

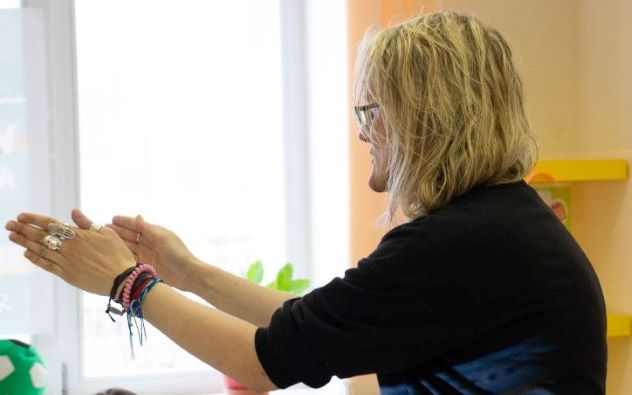
Using gestures is always a good idea, but it can be especially beneficial in the begining of the course, the new topic or when there is a new student in the group. They might not be able to produce all the words straightaway but they should be able to show them, if they know how.

As for songs and videos, in general, although there are plenty of advantages of using a mixture of both audio and video or even moving to using audio only, once the kids know the song very well, the videos will help to support the new kids for whom all is new. At the very minimum, they will be able to follow and understand the plot of the song.

The new child

Well, in a way, this is the most important person in the room as this is, definitely, the most confused, the most singled-out and the most vulnerable person in the room. The adults definitely know what is going on, what we are doing and why we are here. The other non-adults, albeit a bit out-of-sync perhaps, also seem to recognise the set-up and the procedures and they also know each other.

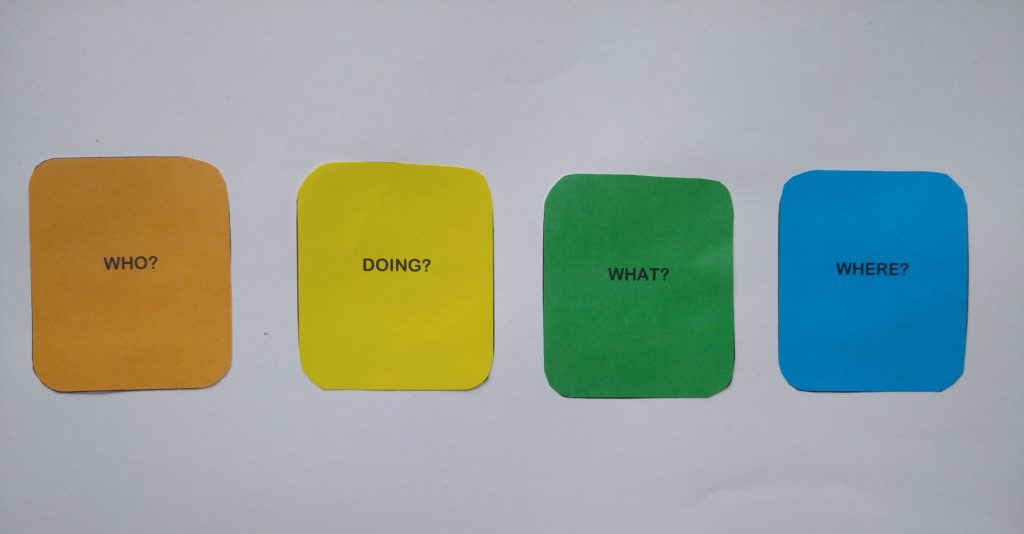
The reactions to this amount of ‘new and unfamiliar’ might vary, from a complete disregard for it (‘There are other kids, they do something, I want to do it, too! What, they use some strange words all the time? Nevermind! ‘), through one million questions in an attempt to take the situation in (‘Why?‘ ‘Who?‘ ‘What?‘ ‘Why?‘ ‘Why?‘ ‘Why?‘) to a complete refusal to take part (‘I can’t, I won’t‘)

As I said before, it is rare that the children are completely uninterested and not ready to be involved. Usually, it wears off during the first fifteen minutes so it is only up to the teacher and the parents to wait it out, patiently, while providing all the support necessary.

Apart from tthe smiles and the praise, all the new activities should be modelled and demonstrated with the other students. This way, the newcomers will have a chance to see the game in action before it is their turn to take part.

The group

This is, by far, the most interesting component of the whole set. No matter how unfocused they are, and how much they have forgotten, these are the students who have been with you for a few months and, almost automatically, they will become your teaching assistants.

You will be able to demonstrate the activities as well as the behaviour that you want to reinforce or, sometimes, too, discourage. What is more, they will naturally want to be involved and, even without you asking, they will give the new student the best introduction to all the lesson procedures, in the L1 and in a way that is best understood by a child.

It is actually a real joy to see them do that, with all the 3 or 4-year-old kindness and empathy:

‘Don’t worry, we all take turns. First me, then Anya, then Masha, then you. Don’t be sad.’

She doesn’t speak Russian. We speak English here.’

She will show us how to do it

And then we will read the story‘.

There is another reason why having a new or a guest student might be interesting. This is a truly unique (albeit unsolicited) opportunity for the teacher to see how much progress the group have made. Assessing preschoors is not as easy and straightforward as assessing other age groups, and comparing them against a beginner who is just starting to learn is fascinating. Even if seemingly, they are all still beginners, still pre-A CEFR and still in year 1, it is possible to see how much progress the children have made over a period of a few months. And it applies to all the areas, vocabulary, behaviour, social skills.

And two stories from the classroom, instead of a coda

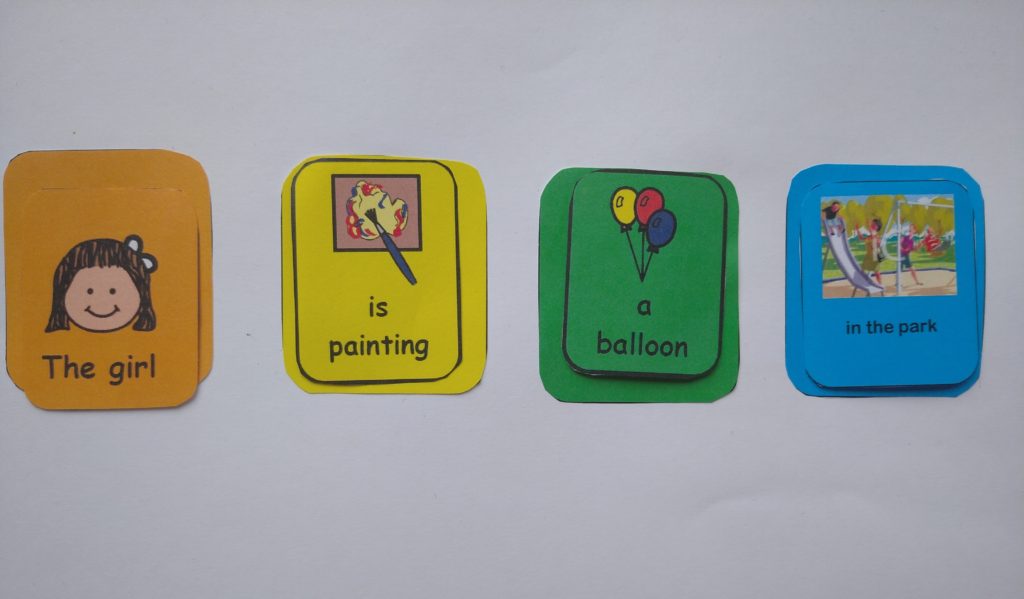
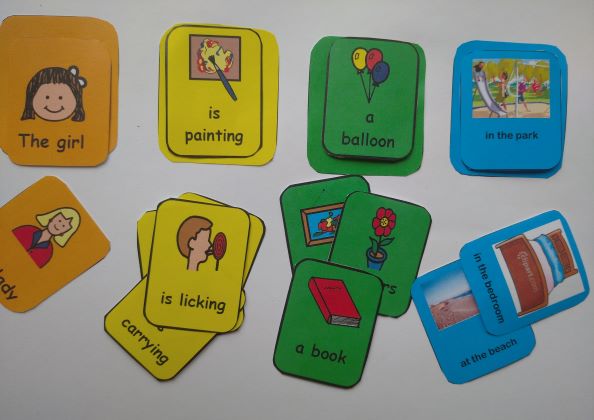
The first one, from my preschool group a few years back. Over the course of the year, we got bored and started to come up with more creative names for things that we were using. No more of ‘orange juice’ or ‘cherry juice’, we were drinking ‘clock juice’ and ‘balloon juice’ and we were all using chocolate marker, cucumber marker, strawberry marker and sky marker, instead of all the traditional colours. It was all great and a lot of fun, until a new student joined. We just had to explain what was going on.

The second one, from my teens group. This time, it was not a new but a catch-up student. Who brought her phone and who did not switch it to mute. Whose telephone rang in the middle of the lesson, naturally. Who just picked it up and started a conversation.

We sorter it out later, of course, but before we did, I because a part of a beautiful classroom tableaux. I, in the middle, and a few of heads of my students, first turning towards the new girl and then right at me, with the same question in their eyes, ‘WHAT is she doing?!?!?!’

It made me giggle, inside. ‘Hm, look, it seems we have a code of conduct here.’, I thought. ‘And someone feels strongly about it.’ Good to know, eh?

As for the square pegs and round holes…Well, even if they that in the beginning, during the first lesson or the first two lessons, they never stay that way. The square pegs become a bit rounder and the round holes get a bit square-y. And that is the way to go!

Happy teaching!

We want more. We ALWAYS want more! Maximising language production

Here is my favourite character who would be a perfect amabassador for ‘We want more‘, my professional obsession (you might have noticed:-) and some of my favourite solutions for the classroom.

Trick number 1: The language

Regardless of what coursebook is used or what curriculum is followed, there are certain language items that can be included even in the pre-primary programme that will enable children to communicate and produce more language.

Some of these language items include:

  • descriptive adjectives, such as big – small, long – short, happy – sad, beautiful – ugly, serious – funny, old – new, etc. Introducing them in opposites will make it easier for the students to understand and to remember
  • simple linkers, introduced gradually, starting with ‘and’ (‘blue and green’, ‘cats and dogs’, ‘I like bananas and apples’), then moving on to ‘because’ ( starting with ‘I am happy because it is sunny’) and perhaps even ‘but’ (‘I like dancing but I don’t like dancing with a bear’, like in the song from Super Simple Songs).
  • introduce Present Continuous, because it will be easy to play with it in all the miming games and it will come in very handy while describing pictures and telling stories.
  • talking about other people. Personalisation is very important while learning language, not only with the little ones, but it is also a good idea to start introducing other people and the language we need to talk about them such as ‘she/he is / has got / can / likes’

Trick number 2: The freedom of speech

This freedom of speech has got very little with the civil rights. It is all about the degree of freedom that the students are given or, in other words, about the scaffolding and the support that are slowly removed in order not to limit the students and to enable them to choose what they want to talk about.

One way of doing it is shifting from closed yes/no questions towards more open-ended questions. ‘What do you like to eat?’ is more likely to generate more language that only ‘Do you like bananas?’ which will lead to one-word answers or maybe even only gestures. ‘Tell me about‘ will be a lot more generative.

Using this approach while working with illustrations, pictures or any kind of visuals will give students the opportunity to choose for themselves what to talk about. And it is quite likely that they will pick the topics (elements or aspects of the picture) that they are either more interested in, have more knowledge of or are better prepared to discuss. In any case, more language is likely to be generated.

Examples or real activities? Here you are:

Pairs is a speaking activity that uses a simple material of a set of pictures. The students put them in pairs, in any way they want. They also have to justify their choice. In case of the younger learners, this principle can be the colour (‘Panda and zebra. They are black and white’) but kids can also choose any other reason for that, like ‘Zebra and horse, they have 4 legs’ or ‘Bear and deer. They live in the forest’.

This activity can be also used with the older students who are given a list of words and have to put them in pairs, according the knowledge and the language they have.

Below you can see the end of the game with my pre-primary student. It started off slowly, with simple sentences about the colours that the animals have in common but as the activity progressed, the categories changed, too and we have here an example of animals that have a long tail (a lizard and a monkey), animals that live in the forest (a bear, a fox and a deer) or animals that like meat (a tiger and a lion).

This is the final product of our Pairs activity, using the visuals on Miro

Tell me about is another activity that uses a visual, for example a set of pictures with animals or a picture scene. Students choose an element for their peers to describe, for example Tell me about this boy’ and it is easy to imagine the variety of responses that these can generate. Students can choose to talk they boy’s clothes, feelings or actions.

Trick number 3: The appropriate activities and materials

Our students do what we want them to do. It is assumed so, precisely because we are teachers and they are students. The roles have been assigned once and for all. The question to ask yourself, though, is Would they really want to do it, if they had a choice? Is there anything in the task itself that would encourage them to? Or not.

Certainly, it does not meant that all those less-exciting-but-crucial activities will be renounced forever, because even though they are not always fun from the point of view of our students, they might still be necessary and useful, but it is an interesting aspect to start taking into consideration while lesson planning.

Here a few activities that use that principle

Yes or no? This is an activity that also uses visuals as the basis. In the first stages of the activity, the teacher describes the picture using very simple structure ‘I can see’ when some of the sentences are true and some are false. Students listen to the sentences and correct the sentences. In case of the pre-primary students, this is likely to be one-word production but with time, they are learning to respond in full sentences. Later on, when the students are familiar with the format of the activity, they are invited to take a leading role in the activity, also producing true or false sentences about the picture for the teacher and their peers to correct.

Kids love the game because they can correct the teacher’s mistake and they are allowed to create their own un-true sentences about the pictures and to try to trick the teacher. I have used it both with primary and pre-primary students. The younger kids, naturally, needed more time to adjust and to start producing full sentences, in the beginning they would only provide the key information, for example the colour or the number of objects but, eventually, they were comfortable enough with producing full sentences. At approximately the same time, they were ready to lead the game, too. The older, primary students could make this transition within a lesson.

This is how we were telling our own version of ‘Pete the Cat. I’m rocking in my school shoes’ using the visuals on Miro

Storytelling for pre-primary is based on picture description. Here, the easily available materials might involve the stories from the coursebooks for pre-primary, retelling together any other story used in class or even any of the materials in the YLE Starters materials. In this case storytelling is scaled down to simple picture description, in the appropriate sequence.

Storytelling for primary can also use the visuals but it can be more challenging with the use of storydice or a storytelling treasure hunt (see here)

The lion and the kitten is a simple boardgame that has been very helpful in encouraging the students to produce the language. It was created and used with the online 1-1 pre-primary students. The game does not use a dice. Instead the students can choose the box where they want to go next and in each round, they have to talk about one of the pictures hidden under the yellow, orange and blue diamonds. In the beginning the sentences are very simple and focus on simple vocabulary (‘It’s mommy‘), later on these can be exchanged for a more detailed description (‘Mommy is happy‘ or ‘Mommy is dancing‘) and even further extended with the use of ‘because’ (‘Mommy is dancing because she is happy’) or in any other way that is within the children’s linguistic ability.

This game gives children a lot of freedom and almost a guaranteed victory. The cards can be changed easily, especially in the online format, and even if not, new sentences can be made every time the game is played. With a group of children, a dice would probably have to be used.

This is the board for our boardgame, also created using the visuals available on Miro.

Are you in the park? is a simple guessing game turned into a role-play. Each student has a city plan (since this was the language that we were working at the time) and three stickers which they glue somewhere ‘in the city’. They keep their picture secret and they try to guess where their partner is at the time.

Student A: Are you at the bank / park / market?

Student B: Yes, I am / No, I am not.

After a while, they can ask for help.

Student A: Please help me.

Student B: I can see…I can hear…I can smell….

Student A: You are…

Initially, the stickers were introduce only to prevent the kids from ‘cheating’ but they absolutely loved having random leftover stickers all over the place. In the first lesson we play, it was pirates, in the second one, it was farm. They laughed a lot about having little pigs and chicks all over their cities. The other incentive was the opportunity to imagine and to describe the places from the angle of what they saw, heard and smelled in different places in the city. The kids had the full control over the game and they were making the decision themselves when to move to the second stage.

For some more tricks, please see my other posts: the discourse clock, pairwork for preschoolers or using ambiguity to get the students to talk.

Happy teaching!

Crumbs #7: Line up, everybody!

Today about a little and very un-revolutionary change in the routine that has, nonetheless, made a huge difference to my VYL and YL classes.

Instructions

  • Make sure the door to your classroom is closed and that the children wait for the lesson outside.
  • When it is the time to start, come out and line them up, perhaps with the parents’ help in the beginning, until they get used to the new routine
  • Wait for them to be ready, say hello to everyone and count together how many students are present
  • Say hello to the first student, ask how they are, let them into the classroom, wait until they book the books and bags away, choose their seat and sit down.
  • Let the second student in.
  • If setting homework is a part of your routine and programme, this is when you can check the homework, asking each student a few questions about it.
  • If there is no homework, this time can be devoted to a short individual conversation with each student. It can be a short revision of the vocabulary, talking about a picture or, if the students are already in one of the primary levels – some reading practice with flashcards or a few questions about any material covered in class. We often use it for practice with ‘Tell me about…’ with the use of a picture.
  • When the students get used to the first part (entering the room), you can add the second element and make sure that the students already sitting in the classroom are occupied, too. They can either play a simple guessing game if this game has been practised in class and if they have been given a set of flashcards. They can also play some games on the phone or the tablet, for example to practise reading with phonics. Again, they have to first to try it under your close supervision, to get used to taking turns etc.

Why we love it

  • It helps to introduce the order from the very start of the lesson since the kids are not waiting in the classroom and the teacher’s arrival is not an interruption of something that they are doing.
  • It is obvious who is responsible for the students during that time, the teacher’s take-over is clearly marked. It might not be as obvious if the kids enter the room during the break or before the teacher, especially if the teacher wants or has to spend the break time outside of the classroom, for whatever the reason.
  • The parents are of a great help in the beginning of the course, they can help explain what the kids are supposed to do, they can help with the name etc.
  • This part of the lesson is a fantastic opportunity for the 1-1 conversation with each child. Regardless of whether the teacher uses this time to check the homework or to ask and answer questions or to read, they are giving each child all their attention (almost all, the eyes at the back of the teacher’s head are watching the kids already in the room, of course:-) and they can check the progress and language use.
  • For the parents, this is a wonderful opportunity to find out how their children are interacting in English, without the parents’ supervision and this is how they can, indirectly find out about their child’s progress, before every single lesson if they wish to do so.
  • For the parents, this is also a chance to find out how the homework handouts or materials are used, what questions the teacher asks and how much language can be generated out of a page that, to the untrained eye, looks like a simple colouring page. If they want to and they have have the time, they can later use this knowledge to practise English at home.
  • In the beginning, when the children are just getting used to the new routine or if they are really young, this part of the lesson can be kept short, later it can be made longer. Similarly, in the begining, the T leads the activity but, later on, the kids can ask each other at least some of the questions, too.
  • I have been using this technique for about six years now. My first ever group for which this has been created (because there were ten of them and we hardly ever got to talk 1-1 in class), now in the third year of primary, still line up to chat with me on entering the room. I have been using it with my pre-primary students, too, groups and individuals, too. The parents always wait in the hallway, at the back of the line and they always wait to hear how their children talk to me. If they leave the school, it is only after their kids have walked into the classroom. They always wait and not because they don’t trust us/me but because they are curious and want to know how it goes.

Happy teaching!

A piece of cake. The everyday lesson planning: Pre-schoolers

photo courtesy of Юлец

Welcome to my classroom. I will take you through the lesson planning for one of my preschool groups. They have just started to learn English, they are four and they come to us only once a week.

This was our lesson number 5 and I taught it last week, just one of the lessons, without any fireworks or magic, just what we do. The only thing that was different was me taking notes and photos every step of the way. The planning took about twenty minutes (plus photocopying and preparing the classroom).

This IS how I plan and it was only a few months ago, while talking to a friend and a colleague (insert virtual hugs to Vita), I realised that if I had to pick up a metaphor for my approach to lesson planning, I would go for a cake: I figure out what I want (the visualisation of the amazing piece of baked goods, just a second before you cut it up to serve) and then I come up with all the ingredients to buy, all the equipment to prepare and all the steps to take to get there. Just like while making a cake.

Welcome to my lesson, step by step. Get ready for a lot of I’s!

Step 1: Getting started

An A4 piece of paper is where I always start. A single piece of paper and a few colourful markers. I use the same approach to planning for all my lessons, regardless of how old the students are or what their level, but for pre-schoolers it is especially important.

Leafing through the pages is not necessary and, let’s be honest, not recommended or even impossible when simultaneously you are managing a group of four- or five-year-olds. The lesson plan is always on the wall. It is relatively simple and thanks to the big font, the structure and the colour-coding, I can read it, even from the other end of the classroom. Sometimes, I take it around with me and pin it in the other corner of the room, all that depending on the activity. If for example we are doing something completely new, for the students or for me, my notes for this particular activity are a lot more detailed.

Step 2: The framework

This is the typical framework that I use for all my pre-primary groups and individual students. The lesson is divided into the three main slots, regardless of how long the lesson is. As a result, the length of each third varies and it can last 20 minutes in one real hour class, 15 minutes in one academic hour class or even 10 or 5 minutes in the shorter online classes that lasted 30 or 15 minutes respectively. As with any lesson planning, assigning time slots should be only approximate because a) anything can happen b) we adapt our and the coursebook authors’ ideas to what actually happens in a particular lesson. To be honest, if I were to give up one lesson plan / lesson ingredient / craftsmanship element, timing would be the first one to go.

I start from the scratch in every lesson although I have been playing with the idea of improving the approach – printing the template, half-filled in with all these elements that are constant, then laminating it and using whiteboard markers to plan to minimise the time expenditure and the workload but I have never got round to it. Not yet, anyway.

Step 3: The aim

I start with the lesson aim. I mean, we all do, in a more or less conscious way. Only about a year ago, though, I started to force myself to verbally formulate the aim of each lesson and to write it down. The results of that little, non-time-consuming teaching habit have been nothing short of amazing.

I know most of the coursebooks that I am / we are teaching with very well, I have gone through most of them once at least and I have my favourite activities and solutions and so on and, of course, at the bottom of my brain, I know why I do this or that. But, having to actually think about a particular group and a particular lesson, on a particular day and having to say it out loud has made a bit difference and has made me more aware of what I do and why.

But there is more to it, too. There have been a few occasions over this year when I really wanted to include something to supplement the coursebook, a game, a song you find or an idea you wake up, include it at all cost, just because the idea seemed very appealing. On those few occasions, the lesson aim got skipped or left for the very end of the lesson planning, as if by accident.

Only it was not by accident. Because when I got to the point when I was ‘just’ supposed to summarise it in the lesson plan, I simply could not. It did not come together because the lesson, at this point, was just a collection of activities, without any real focus or an obvious outcome. All these lesson plans were redone and the activities reconsidered.

For that reason, now I always put the lesson aim at the top of the page, as my frame, my spotlight, my runway. A clear lesson aim also helps to reflect on what happened in class afterwards.

In this particular lesson, I wanted my students to start talking about emotions. They had already been exposed to the three key words (happy, sad, angry) and their symbolic representations but without actually producing much. In this particular lesson, I wanted to try to take it a bit further, to the production stage, ideally in the form of a full sentence ‘I’m happy / I’m sad / I’m angry’.

To be honest, ideally, this is what should have been written on the page ‘I’m happy/ I’m sad / I’m angry’ but it got compressed to only three words, mainly because I have taught the lesson a few times already and it would be a full sentence by default. Just to prove that the lesson plan was for the lesson itself and not for ‘publication’.

Stage 4: I will always love you

This is the easy thing. The first and the last block, in brown, are the admin bits, with the students entering and leaving the classroom.

We line up in front of the classroom, count how many people are present, we say hello officially and we check the homework (more on that kind of a hello routine soon to come!) and we sing our goodbye song and choose stickers, get homework and choose the stickers before everyone goes home. These never change, although sometimes I only send the homework through the WhatsApp group or explain it directly to the parents. This was a standard lesson, though.

The other element that always appears at that point are all the songs and chants to be sung in class. These depend on the topic of the lesson and later on, the students can sometimes decide which one we are going to sing. This group here is at the very beginning of their English adventure so for the sake of establishing the routine and because we only know a few songs, we sing all of them in every lesson.

Songs work here as some kind of punctuation marks and during the lesson, we basically sail from one song to the other. It helps to ensure the balance between settlers and stirrers or songs offer at least a tiny little bit of a change of a pace and an opportunity to move but they also help to ensure that there are periods of the lesson when we all do something together so it helps to keep the balance of different interaction patterns (whole class vs individual work, pair work or taking turns).

Step 5: The centrepiece

At this point, I am adding the main activity, our focused task during which we are set to make the lollipop puppets with our three emotions (plus colours and some functional language). I have done this activity in that format a few times and for that reason there are no detailed instructions, the staging is already in the blood.

Another thing that appears at the time is the storybook. At this point in the course, we use storybooks only as supplementary material to revise and to reinforce the target language from the lesson and this is how Pete the Cat helped us. We revised the colours and emotions only using a different resource.

Step 6: The familiar

The next step is adding the other elements of our routine. These are not as constant as the hello or goodbye routine but not as changeable as the focused task or the target language practice.

Since it is the beginning of the course, there is not much to pick out from or to revise and since we are still working on building our routines and I try not to add too many new elements, not to overwhelm the kids.

Our revision activity has been the same for all this time: we count up to ten on fingers, we count the people present, boys and girls and teachers and we count other things, in this lesson dinosaurs, in this lesson in a book and our plastic toys.

Our music and movement has been pretty much the same from the beginning of the course and it is only now that the kids are properly enjoying the activities. This applies to the songs and the magic bag game, in which we use plastic fruit. They don’t know the fruit names so at this point we only focus on their colours (‘It’s green’).

As for our How are you today part, the plan was to do it in the traditional way but with the introduction of the finished product. I thought that this might help the kids become aware of what this toy is and how to use it (pick one and place it in front of our face, while saying ‘I’m happy’). By the time we’d get to making our own lollipops, they would already be familiar with them. It would also help with giving the instructions.

Step 7: The key elements

The things to add now, will be the details of working with the target language and with the revised language, in order to ensure that they best contribute to the completion of the focused task.

What I did plan, however, was the colours practice with a variety of activities: not quite in the order in which we did them. The main and the new one here was ‘open/close’ also known as ‘what’s missing’, a memory game and the most challenging activity here (as it involves cognitive skills and language production, focus). Everything else was either a preparation for that or a supplementary game, which can but may not be used, in the end. I like to make a list like that to prepare myself for their different moods, participation and involvement levels, etc. Having a list of potential games which we can play, without any major changes to the materials set or the seating arrangement I found it to be quite useful.

The fish game here acted as my potential plan Z, only if we have time. In the end, I used it later in the lesson, instead of the magic bag activity since they were both quite similar (students taking turn to perform an individual task with a motor skills development focus and colour revision.

In this lesson, the connection between the focused task and the target language practice is not as strong but that is because it is only the lesson 5 in level 1. Thinking about it now, after the lesson, I think that, ideally, I should have included some additional activity to combine numbers and colours, for example in the form of colourful happy, sad and angry faces, that we could categorise by emotion, count etc. So see, there is always a way to improve things)))

Ready!

The lesson plan is ready. Perhaps now, looking at it, in its full, finished glory, it is easier to see why I do not include any timings. The framework itself outlines the time slots for each stage of the lesson, alongside their aims, although they are not articulated clearly and they are the following:

Column A: the introduction to the lesson, hello and revision, the aim: settling in, duration: about 20 minutes.

Column B: working on the target language, the aim: presentation, practice and production, in varying ratios, depending on whether it is the beginning of the ‘unit’ or the end of it, duration: about 20 minutes.

Column C: production, the aim: production, with the hope of more freer practice and spontaneous production, although, of course not during the first few lessons of the level 1 course.

Looking back

The lesson went well and, apart from the few things mentioned already, I did not really have to change anything else. Not that it would be a very bad thing to do. Regardless of what has been planned, the thing that matters most is a group of the little people who are sitting in the classroom, how many of them there are, how advanced they are, how they are feeling on the day. Flexibility, first and foremost. And then – the reflection bit. Because we can always make things better.

If you are new to teaching pre-schoolers, have a look at my post about the first VYL lesson survival kit.

Happy teaching!

Colourful Semantics in EFL?

Have you got something that you could file under ‘professional interests‘ (or, more to the point in some cases, ‘professional obsessions’)? Mine is language production.

That is why I am always on the lookout for new ideas on how to trick my students into producing more and more. And more. Some of these ideas can be found on this blog, in the posts on the discourse clock, pairwork for pre-schoolers, using songs or cognitive skills-based activities to develop speaking. Today – a new post in the series.

It was probably one of those free-falling searches on Instagram, with no rhyme and reason, that got me to Saffira Mattfield’s (@onlinespeechie) Instagram post on Colourful Semantics. A very special moment, like when you stumble upon a proper toolbox with the screwdrivers and bolts and saws and monkey wrenches…Or, when in the supermarket, you wander into the baking aisle and, all of a sudden, all the professional decorations and ingredients right within your arm’s reach…This amazing and a very powerful feeling of: ‘I could do so much with it!’

Colourful Semantics

The approach was created in the 90s by a UK-based speech therapist Alison Bryan in order to help children develop their speaking skills especially as regards the use of full sentences, storytelling and so on.

The main idea behind colourful semantics is the colour-coding of parts of speech and the parts of the sentence and developing the habit of including all the necessary ‘ingredients’ in the simpler or more complex sentences. This is done with the use of the cards, like those in the photograph below. Subject (who?) is orange, verb (what doing) – yellow, object (what?) – green and, location (where?) – blue.

Colourful Semantics cards from @onlinespeechie Saffira Mattfield

Children start with building simple sentences by using only two cards, for example ‘The girl’ (an orange card) and ‘is painting’ (a yellow card) and putting them next to each other on the template. Later on they move to constructing sentences made of three elements, for example ‘The girl’ (an orange card), ‘is painting’ (a yellow card) and ‘a balloon’ (a green card) or even four, by adding the blue card with the location, for example ‘in the park’. They not only learn to remember to include all the elements but they can also manipulate them physically. The sentence itself becomes less abstract since it all its key elements are represented visually.

If you are interested in all the details, please have a look at the bibliography.

Colourful Semantics in EFL? Yes, please!

Colourful semantics perfectly resonates with everything that I have been doing in my lessons. Grammar structures and the format of the sentence are an abstract concept, beyond the grasp of pre-schoolers especially those who live in their own country, surrounded mostly by their mother tongue and not exposed to a sufficient amount of the target language. By using some kind of a visual representation of the parts of speech or the parts of the sentence, we make it more accessible to them and we enable production.

This visual representation can be realised through:

  • using gestures such as ‘pointing at yourself and sliding the hand along your body to draw attention to your clothes’ for ‘I am wearing’
  • using symbols such as ‘a heart’ for ‘I like’ and ‘a crossed heart’ for ‘I don’t like’
  • using flashcards such as ‘big’ and ‘cat’ to elicit a chunk ‘a big cat’

And…colours!

While making the sentences, students will be required to use all the required colours, ‘to tick all the boxes’, this way building a full sentence or a phrase. Of course, they might require more support from the teacher who will have to ensure that they did not skip any of the elements, but, the hope is that with time, including all the elements will become a habit.

Colourful semantics in the EFL classroom: how to get started

Step one: very easy

Get in touch with Saffira (@onlinespeechie) in order to get your own set of the ready-made cards. It is a perfect way of familiarising yourself with the colourful semantics in practice and to understand how it can be adapted to our EFL context. Although, of course, these cards can be used in the EFL classroom as they are, depending on the level of your students.

Step two: adapting the idea to your groups’ needs

The materials presented below were used with a group of the second level of four- and five-year-olds. Since they were still learning online, they were not using any real cards but only the visuals created with the Miro board. The unit was built around the topic of the house and included some furniture vocabulary, the prepositional phrases ‘the cat is on the sofa’ and some of the Present Continuous based on a story as well as a song.

The boards were used to practise these phrases were used later in the unit, when the student had become familiar with all the basic components. The main structure ‘The mice are having fun’ was introduced through a song. The first time the cards were used, the teacher was a very active participant, taking turns with all the kids to make sentences. In the following lessons, the teacher only modelled the activity and was responsible for moving the pictures around in accordance with the sentences the kids were producing.

The first set was designed to support the production of the sentences with the preposition ‘on’ which were later practised in a freer practise activity (‘My room’) whereas the second one focused on Present Continuous which was later reinforced in a storybook activity.

For the time being, a decision was made not to adapt the original colour-coding system and instead, a set of colours was assigned freely to each structure, to help the children associate them with each particular components of different structures, rather than with the whole system.

Reflection time

I have just started experimenting with this approach in my classes but the first steps in the world of Colourful Semantics have been more than exciting. This is definitely not the end of that adventure. Right now I am working on a set of cards that I could share with the parents of my students so that they could be printed, cut up and used at home.

Want to find out more? Start here:

Bryan, A. (1997) Colourful Semantics: thematic role therapy. In Chiat, S., Law, J. and Marshall, J. (Eds) Language Disorders in Children and Adults: Psycholinguistic approaches to therapy. London

Bolderson et al in (2011) Colourful Semantics: A Clinical Investigation. Child Language Teaching and Therapy October 2011 vol. 27 no. 3 344-353

Saffira Mattfiled @onlinespeechie

Colourful Semantics from London Speech Therapy

The Unthinkable or About choosing to stay online with VYLs.

To online or not to online, that is the question?

No, not really. That, for sure was never a question!

Not for me, that is. I am a dinosaur teacher and I had always been against teaching pre-schoolers online. Or, actually, teaching online in general. If, before the 15th of March 2020, you had asked me what I thought about it, my answer would have been as short as it would have been decisive. No.

No. No. No.

I love my beautiful classroom, all the puppets, the flashcards…My rucksack that makes me look and feel like a proper Mary Poppins, the box with all the precious junk. How we sit in a circle to read a story and how we make stuff or play with a Magic Bag…

But, then, hey-ho, the pandemic happened and I and we just moved online. Just like that. Just to prove that the EFL teachers are the most amazing species. Just to see whether one can, in fact, develop professionally, at a head-spinning pace, learning about new approaches, techqniues, platforms, games, tools, tricks, websites, solutions…and about their effective use in the online EFL lesson.

Yes, indeed, one can. In March many of us (including myself) had very little or no idea about the online classes but look at us now. Superheroes!

But guess what? The Universe had other surprises in store for us (I mean, of course, it is 2020, the year of surprises), like this idea, here…

‘Can we just stay online?’

I don’t know about you but I have spent the last 100+ days dreaming and daydreaming of going back offline. But while I was doing this, the other stakeholders had their own ideas and this is how we (the parents, the admin and the Mary Poppins here) found ourselves discussing the options and, actually, willingly, considering choosing to stay online with the youngest children, regardless of the situation in the city.

Well, that was a bit unexpected, to put it mildly. However, once I got past the stage of the initial shock, I was able to look at it all in a more objective way (as in: not blinded by my own old age and stubbornness:-) and actually see some of the benefits, for all of us.

So here goes, in no particular order

Pre-primary online is better because…

  • We can do it! A good quality online classes for pre-schoolers are not a marketing spin. Impossible is nothing! We learn, we are engaged, we have fun, we produce, we develop, we bond. We are loving it and we are looking forward to the next one. You only need to want to make it work and just like with the regular classes, everyone needs time to get used to each other, the routine and the rules of the game.

  • It’s virus-free. Covid 19 aside, little children get ill more frequently. That’s just the way it is. It does happen that they might not be entirely healthy when they come to their afternoon English lesson or that, being ill, they miss a lesson here and a lesson there and they do not make as much progress as they could have. The online classroom is a perfect solution here: we can all participate, even if we sneeze and cough and the school and the teacher do not lose money over the classes that would have to be cancelled.

  • It lowers the affective filter. There were a few students in my groups this year who definitely benefitted from moving online. In the classroom, they were amazing and a pleasure to teach. They participated but at the same time struggled, now and again, with being separated from mum. They simply flourished in the online classroom. I can see how much more confident and at ease they are, sitting in their own chairs, in their bedrooms, with cats, toys and, most importantly, with Mum at an arm’s reach. What’s not to like here?

  • It is less stressful for the teacher. It is a little know fact that VYL teachers, in the course of their career, develop a set of eyes around their heads and can produce a pair of additional arms, on request. They are ready for everything that is happening, for everything that is to happen and for everything that might potentially happen, too. Why? Because acting in loco parentis is a huge responsibility. And a lot of stress, even for those experienced teachers. The online classroom comes with an army of the best teaching assistants there are: mums, dads, grandmas, sisters, brothers and nannies. The kids are safe, every single one of them.

  • Parents like being in the classroom. So far, the classroom has been this galaxy far-away which the parents had no or very little access to. Of course, teachers talk to parents, they explain the homework, they give feedback. They share songs and send out the invitations to the open lesson, twice a year. Now, however, the whole course is one big open lesson and the parents are a part of it. More even, they are having fun. Not because they want to interrupt or tell the teacher off, not to take over and not because they do not trust the teacher and would rather keep an eye on things. It’s because they can finally see how their children operate in the world of the foreign language, how they become more independent and how they are learning new things and making progress.

  • Parents can get properly involved now. The parents are there, they learn our songs, they play our games and they see exactly what we practise and how. If there is time and willingness, they can easily extend the English lesson time, take it ‘out of the classroom’, this way contributing to their children’s progress. During the lesson time, they can be involved in too, helping the teacher model the activity but also helping their child understand that, yes, you can sometimes speak to your mum in English, too.

  • Flexibility and frequency. 45 minutes in the real classroom is just enough for the little people. 45 minutes in front of the computer screen might be a challenge, especially if they audience is only 3 or 4 years old. For that reason, we decided to experiment and chop the lesson time into smaller bites. Now we meet for thirty or even fifteen minutes at a time but more often. The students are involved throughout and stay focused, the financial expenses or profits are the same, and such lessons are very easy to plan. The most important thing, however, for me as a teacher, are the benefits for the learning process. When you are 5, you learn quickly but you also forget quickly, so by increasing the frequency of the lessons, we create better conditions for learning and can expect better results. It is already happening!

  • The lesson time = the speaking time. The ‘time constraints’ mentioned above as well as the online format had an impact on the lesson structure and routines. The students have the coursebooks but it is used only at home, for revision and for homework. When we meet in our online classroom, it is to learn new things, to listen, to sing and to speak and speak and speak. And I really like that way.

Much to my amazement, I am a happy online teacher but that doesn’t mean that I have stopped dreaming about the offline world or that any decisions have been made. It’s too early, anyway, so I am still on the fence, just ‘sitting, waiting, wishing’, like in a song.

What about you? Has this been your experience, too? Have you noticed any other benefits of the pre-primary EFL online classes? I would love to hear from you.

Happy teaching (online or off:-)

Pairwork for pre-schoolers: Where the angels don’t fear to tread*

Ha! It was working!

Again, I made it happen. They were sitting in pairs, facing each other, making riddles, answering, all by themselves. I was sitting in the corner, just keeping an eye.

First reaction? To run out of the classroom, shout it from the rooftops or, since they were just in the hallway, tell my students’ parents. But then, just then, I hesitated because, in my mind’s eye, I saw their reaction. What if I really did rush out, with a victorious ‘Your kids can play in pairs!!!!’

What would they do? They’d just look at me with an eyebrow raised. They do know that their 4 and 5-year-old sons and daughters can play in pairs. They did see it, a million times, in playgroups, in the playgrounds, in kindergartens, at home…what’s the big news here?

Indeed. If you look at the types of play and the age slots when kids normally are capable of engaging, then yes, for a long time, children are only taking part in unoccupied play (0 – 2), solitary play (2-3), onlooker play (2.5 – 3.5) and parallel play (2.5 – 3.5) but even the children aged about 3- 4 do engage in associative play and, a bit later, from the age of 4, in cooperative play. And that means, that for most of the EFL students (with some exceptions as there are school which admit 2 and 3-year-olds), there is nothing, from the point of view of child development, that should prevent children from interacting with each other and working together towards a common goal, without the adult, or rather, with the adult being involved only marginally.

Consequently, they should be able to take part in a pairwork activity in an English class because why not?

Naturally, some provisions related to the age of the participants will have to be made and the whole definition of what a pair-work activity is, adapted. And things such as the inability to read and write, the level of English, the duration of the activity, the ability to stay on the task…but these are the things that we work on anyway so…

I think I became obsessed with pairwork in pre-primary about five years ago. The group I was teaching was big, nine or even ten students at a time. They were absolutely amazing, some of them I still teach today, but there were ten of them and I felt really unhappy. They did not produce as much as they could have as we had to focus on whole class activities. Until, one day, I had enough of that, and out of this desperation, I started taking my first steps towards pairwork. From that group on, nothing was the same, pairwork was there on the table, for this and for all the other groups. There is no way back.

This year, with my new level 1 group and with a conference approaching, I decided to run an experiment, a small case study, just to put the pairwork with pre-schoolers on a timeline, out of curiosity and for the other teachers, too.

The group

There were seven kids in that group, two boys and five girls. The youngest of my students was around three, the two oldest ones – five years old.

The course

The group studied once a week, for sixty minutes. We had a pacing schedule and we did use the coursebook. In many ways, this was a typical level 1 group. We did things in the way that I normally did them with a level one group, the only real difference was that I kept my eyes open and I kept the journal of the whole experiment. Throughout the whole project, I did plan to go through it in the most organic of ways, without speeding the process, observing the kids and moving on to the next stage when they were ready.

Stage one: weeks 1 – 12: the start of the course

During these first twelve weeks of the course, we did absolutely everything that we do when we start with a new group, including:

  • The first vocabulary sets: colours, numbers, school things, toys
  • The first functional language phrases: hello, goodbye, blue, please, thank you, who’s next, are you ready, it’s big, it’s small etc.
  • Establishing and working on the routine
  • The first everything: the first lesson with the coursebook, the first story, the first craft, the first video, the first holiday
  • Developing social skills, building the class community

Stage two: a new game: week 13

Since the kids already knew the toys vocabulary and we had played some simple flashcards games, I decided to introduce a more complex game and the basis for the whole project: the guessing game ‘Is it?

In week 13, we played the game for the first time, ever, with the kids sitting in a circle, with the teacher leading the game. I did have to play it up a little bit, in the beginning, pretending to be student A and student B but they got the idea of the game very quickly. I did accept the one-word production but some of the older children started to ask full questions from the very beginning.

Stage three: students take over: week 14 – 18

At the time I was not sure when this particular stage would happen, I wanted to wait for the kids to be ready and I was getting ready to wait. But, surprise surprise, they were ready, already in the following lesson.

I did play a few rounds, with me in the lead and then, invited a few of them to lead the game. They did need my help with holding the cards and keeping the game going but that’s really it. It was all natural and they were more taken aback by the fact that, out of all eight of them, not everyone did have a go.

Stage four: team vs team: the stage that did not happen

When I was staging the whole process, I did plan the stage in which the kids divided into teams would be playing the game, with one set of cards.

The idea was that would be slightly more independent, at the same time not being exposed and supporting each other in the game and the teacher could still supervise them effectively.

However, when we were sitting down to play the game, one of the pairs, grabbed the cards that were lying on the side, took them and, without any further ado, started to play the game, with the child sitting nearest, using full sentences.

This is when I realized that we were ready for the next stage so we proceeded.

Stage five: pairs: lesson 19 – 24 and onwards

It just happened and it was a success, despite the fact that between the whole Christmas break took place between lesson 18 and 19 and the fact that a student came back after a longer trip. As soon as the kids saw the materials, they knew what was to come (I knew because they were commentating in Russian) and to reinforce the whole idea, I prepared another set of seats, in another part of the classroom.

Stage six: the follow-up: interrupted by the pandemic

Here, again, I can only tell you about everything that I was planning to do, and everything that I could not do because we are chased out of the classroom by the coronavirus.

The first step was to be switching the vocabulary, to push the boundaries of the familiar and the unknown a bit, and play the same guessing game with school objects and colours.

The second step was to switch the game and, hopefully, swish through a few stages and use a game to play in pairs, Abracadabra, Pelmanism or One or many.

Reflection

All in all, it was very easy and pretty straightforward despite the fact that the kids were quite young and despite the fact that we only did meet once a week. I would imagine that, if we had classes more regularly, for example twice a week, even less time would have been required and we would have met our aims even faster.

If you haven’t tried pairwork with pre-primary, then use the first opportunity and go for it!

The contributing factors

  • Seating arrangements: very important, especially for the first few times with pair-work. It does make it a bit more complicated for the teacher, to put together mini-stations with two stools facing each other or, even better, two stools at a small table, in a reasonable distance from the other mini-stations but it really does contribute to the whole project. Kids can only see their partner; they have a small working space in front of them and the other pairs are automatically excluded. Out of sight, out of mind.
  • Material arrangement: very important. Colourful flashcards are great and beautiful to look at but they proved to be too big to manipulate for some of the little hands. It was too much of a challenge to shuffle them, one of twice they did spill onto the carpet and if the kids really wanted to keep them a secret, they did press them tight to their chests and the flashcards got folded and creased. This is how the black and white mini-flashcards appeared. Even if they got torn, lost, destroyed, it was super easy to replace them. To make sure that they were not see-through and they don’t fly out of the little hands, the colourful envelopes appeared. The students very quickly learnt to associate these envelopes with this particular game
  • Material coherence: This is in order to ensure that they students will be using the full structures and that they will be using the grammatically correct language. Naturally, it will depend on the activity and the vocabulary set. In our case, we started using pairwork with toys but I decided to eliminate ‘puzzles’, ‘crayons’ ‘blocks’ from this particular game. I did not want my students to overgeneralize and use ‘Is it?’ with a noun in plural and, at this point in the game, they had not learnt the plural form ‘Are they?’ and I did not want to overcomplicate things.
  • Voices to show interest: especially in the beginning, while modelling, when the teachers themselves are their own student B and student A. A little bit of theatre goes a loooong way here.
  • Decision making: or in other words, teaching kids to be independent. In a regular lesson, there are plenty of opportunities for the students to make decisions about the lesson – choosing the colour of the stool to sit on, choosing which song to sing, which game to play, the order in which they join the circle, or who is the next one to lead the game. This way, step by step, the little people learn that the teacher is always the hub and not the only hub in this little community and it all comes in handy later on, during the pairwork tasks.
  • Leading the game: as soon as the kids become familiar with the activity, they can be given the opportunity to ‘be the teacher’ and lead the game. This way they will be producing more language but, from the point of view of pair-work, they will be also better prepared to take a bit more responsibility for the game.
  • S-S interaction: as with leading the previous point, the students should be given many opportunities to interact with other students, without the teacher. Obviously, with the little ones, these exchanges will be limited to saying hello and goodbye to each other, not only to the teacher, to students asking each other ‘How are you?’, to students giving out pencils, asking for them and saying thank you etc.
  • Pairing-up aka Clever teacher: Ideally, of course, everyone should be able to work with each other and be on good terms with everyone in the group and building these relations is one of the general aims of the course. However, getting to that place is a process and work in progress and it will take time. For that reason, it might be a good idea, to consider pairing children up in a way that will be contributing to pairwork, with the hope that the benefits for the community spirit will be secondary here. There might be two factors to take into consideration, on the one hand pairing up the children that work well together, on the other pairing up the younger with the older, creating perfect conditions for this pairwork ZPD, with one student the expert, the other the novice.
  • Functional language: We started with the key language necessary for this particular game (Is it…? Yes, it is. No, it isn’t) and only later, when the time came, we added ‘I give up!’ which turned up to be necessary. When we were about to start the proper pairwork, I added chants to give it a proper framework, ‘Are you ready? 3…2…1…Let’s play!’ to start the activity and ‘Let’s finish. 10.9.8.7.6.5.4.3.2.1. Well done!’

If you are interested in the topic of language production in pre-schooler, make sure you check out the posts on Colourful Semantics, discourse clock, using songs and activities based on developing cognitive skills.

References

Discourse at the age of 5?

From the series: We want more!

Of course! You can hear kids blabbing in the hallway. To their mums, dads, nannies, friends, school’s security guards, all these never-ending stories of kindergarten adventures, scraps with siblings, birthday parties, visits from gran, new toys, rain in the playground, teeth lost, dead grasshoppers found…

They do it in Russian, of course, but that just proves that they are capable of discourse and that we, teachers, cannot really use the excuse of their age to justify all the one- word exchanges in the classroom.

Of course, they are already fluent users of Russian so they will be able to produce lots more, naturally but this post is not about catching up with the L1 but about what is feasible for the pre-primary students, pre-A1 level with the total of 90 or 120 minutes of exposure to the English language. More than just single word utterances.

I present to you… (drum roll): A discourse clock.

The tool itself is neither very complex or especially revolutionary. It is a just a neater and a more VYL-friendly toy which was created to support the kids in producing the language.

How to?

  • We play a game of riddles
  • Teacher demonstrates: moving the hands around the clock and producing sentences about a secret animal, from 12 o’clock to 12 o’clock. Kids guess the animal.
  • Kids take turns to make sentences about their secret animal for the group to guess.

Why we like it?

  • Moving the hands around makes this taks a little bit more kinaesthetic and it helps to structure the whole discourse by sequencing it and by highlighting all the topics to mention. The clock hands never stop half-way through. They have to make a full circle and they can only make a full circle when the language is produced.
  • The icons offer the visual support for the students and they represent all the language that they should know. But, apart from working as ‘visual reminders’, they can also be used by kids to ask for teacher’s help, by pointing at the word they need to use, without having to resort to their L1.
  • It is ridiculously easy to adapt to different topics and levels of challenge. The most basic animal clock can only include ‘big/small’ and ‘colours’ and more areas can be added to it as the kids progress through the unit or the course.
  • It works in the classroom and online.
  • Eventually, the clock becomes unnecessary and the kids are ready to produce longer stretches of discourse without it.

If you are interested in the topic of language production in pre-schooler, make sure you check out the posts on pairwork in pre-school, using songs, activities based on developing cognitive skills and Colourful Semantics in EFL.

Happy teaching!

VYL speaking activities and the cognitive skills development

Where to look for inspiration for pre-primary activities? Coursebooks will be probably the first point of reference for many of us, but not the only one. There are kids and their interests, too and this is how pets, favourite toys or books make an appearance in our lessons, Frozen and Co. There is the internet and what other people have created, used and share and we are really truly blessed to be teaching in the XXI century, with Instagram, Facebook and youtube. CLIL and ‘real subjects’ are another great source of inspiration even if our students learn English as a foreign language. Sometimes it also happens that we find some randomness and we really really really want to bring it to class and we design the whole lesson around a story, a glitter gun or our new puppet.

In this post I would like to focus on activities whose beginning and the main driving force was the development of the cognitive skills or, in other words, everything contributing to the development of the thinking skills: memory, focus, logic, connections, information processing, patterns etc.

Why?

  • Because our students are 3 or 4 or 5 and 6 and they are developing these skills anyway. Using that and applying activities and concepts they are familiar with in their ‘L1 life’ to benefit of our English lessons is something that we do. This is how songs, chants, stories, crafts and puppets took over our classes.
  • Because the kids will be drawn to them and motivated by this cognitive challenge. And this is how we are going to ‘trick’ them into producing the language.
  • Because it would be simple be a waste not to use them.

How to do it? Keep on reading.

Categorising

This is something that can easily be done very early in the game, with the level 1 students and even with the younger pre-primary. ‘It’s big’ and ‘it’s small’ is probably one of the easiest concepts to start with. ‘You can eat it’ and ‘you can’t eat it’ is another. This is what I always start with because it is easy to demonstrate and even the youngest students giggle when you demonstrate ‘eating’ a pencil or a schoolbag.

Later on, the time comes for more complex categories, either based on personal preferences (I like it / I don’t like it) or the knowledge of the world (it’s hot / it’s cold, it can swim / it can fly / it can run or you eat it / you drink it).

Another, very simple way of applying this principle is categorizing objects by colour. These can be any objects that the students are familiar with, for example toys. The activity presented here was created for a 3-year-old student and used during the first week of the course. It went very well, the student was responding to the teacher pointing at different objects and responding to simple questions ‘Is it blue?’ with ‘Yes’ and ‘No’ but by the end of the lesson he started to produce his first chunks such as ‘a yellow car’, ‘a yellow robot’.

Odd one out

The inspiration for this and the following activity came from the Cambridge Young Learners Exams. The language level of these activities is, of course, way above the abilities of a typical year 1 or year 2 pre-primary student. However, cognitively, these are the tasks that preschoolers adore – looking for differences, similarities and connections and they will certainly be able to say ‘It’s blue, it’s blue, it’s blue. It’s red’

Most of the original exam materials can be used in class but with all the magic of the miro board preparing a task adapted to the needs and the level of the particular group will literally take two minutes.

Find the difference

Again, this is a task that children are familiar with. However, the original exams tasks as well as the tasks intended for language practice might contain the language that is above the students’ level or might be too complex visually and too detailed, hence inappropriate. However, this problem can be solved quite easily by selecting two random illustrations of the topic of the unit ie the farm, as it has been done in the presented activity used in lesson with a 5 year old year 1 student (courtesy of pintrest.com and clipartart.com) and we produced sentences such as ‘I can see an orange cat’ and ‘I can see a grey cat’

I spy with my little eye

It is a great game that does not require any preparation or special materials because that involves only looking around, listening and speaking. However, in its original form, it might be a little bit challenging for the EFL kids whose dictionary is very basic. For that reason, we play this game in a different way, based on a poster or a set of flashcards depicting only familiar vocabulary.

The most basic version ‘I spy with my little eye…something big’ can be easily extended into ‘I spy with my little eye…something big and pink’ or even ‘I spy with my little eye…something big and pink. It’s in the water. I like it’. The kids will be listening and speaking and required to process more complex information in order to complete the task.

Shapes

For some reason, shapes, for some mysterious reason, are not one of the key topics in pre-primary coursebooks, despite their importance and general appeal. Luckily, it is easy to fill that gap and supplement.

You need to start with introducing the key vocabulary, at least the four basic shapes, but after this obstacle is dealt with, they can be used and referred to frequently. Creating familiar objects from shapes, counting them, calling out the colours is a fun activity and can be included in every unit, regardless of the topic. And we can look for shapes around us, in the classroom or in any picture we are dealing with.

Sequence 1

This is a great activity that is especially useful in the first lessons with the new vocabulary as it really helps with drilling the single words or words in sentences. In the beginning the sequences can be very simple and straightforward, for example ‘robot, teddy, robot, teddy’ (or ‘It’s a robot, it’s a teddy’) but not necessarily. There are a lot of opportunities here and the students themselves can be involved in creating these.

Sequence 2

Sequencing is not about figuring out and reciting what should go next but also which elements are missing in the set. In this lesson we were revising the foot items and there were four things in the set, something we eat, something we drink, something yummy and something good. We were counting and adding the missing elements. Later on, new sets were introduced and children were asked to say what is missing (something we drink) but they could choose their favourite drink ie milk, water, juice and so on.

P.S.

The basic overview of what cognitive skills are: here https://helpfulprofessor.com/cognitive-skills/

If you are interested in how the concepts change based on the level of cognitive skills of the human being, check out the 5 Levels series on youtube (https://www.youtube.com/watch?v=QcUey-DVYjk)

PPS

If you are interested in the topic of language production in pre-schooler, make sure you check out the posts on pairwork in pre-school, discourse clock, using songs and Colourful Semantics in EFL.

10 ways in which you can use gesture in your pre-primary classroom.

The Gesture is King!

How can you tell a VYL teacher?

It could be the Mary Poppins’ bag full of markers, stickers, a storybook and random treasures that they carry. It could be because you can catch them hum ‘Baby Shark’ or ‘Broccoli Ice-Cream’ while they think no one’s listening. It could be also that it is difficult to catch them in pretty tights and dresses because many an outfit was destroyed by clumsy little hands. By accident but irreversibly, too.

Look at the hands, too, a lot more expressive than those of an average teacher, hands that constantly gesture and motion, a habit that is difficult to drop even outside the classroom.

It is true that Total Physical Response stopped being the new black a few decades ago and nowadays referring to learning styles is looked down on or even mocked. Nonetheless, the gesture is one of the vital components of the pre-primary classroom, simply because it works and it helps the teacher and the students to communicate more effectively, especially if the students are 5-year-old beginners.

One: participation

Throughout their pre-primary adventure with English, the students will always be pre-A level but as the course progresses, their vocabulary range will grow. But in the first few weeks of the course those kids really are a clean slate. Thanks to gestures, however, they can participate and be involved in class activities.

They can for example wave ‘Hello’ and ‘Goodbye’ to the teacher or other children, silently, they can participate in ‘Head, shoulders, knees and toes’, touching or pointing at the correct body parts because they will be mimicking the teacher’s gestures and not because they know exactly which part of the body is the head and which ones are toes.

That is why including gestures will be important in the beginning of year although they can be used to the same effect at the start of each unit. Students, still not familiar with the new vocabulary, will react to it by miming ‘cat’, ‘dog’, ‘princess’, ‘sheriff’, ‘book’ etc. Before they are ready to produce the words orally.

Two: clarification

Little students cannot use a dictionary or translation into L1 because sometimes the teacher does not speak it. In that case, the teacher has limited resources to clarify the meaning of the new words. The visuals and the realia will help, of course, but adding gestures is definitely going to reinforce the meaning. Two hands together with palms touching and moving apart (a book), fingers of one hand scratching the air (a cat), the arm touching the nose and waving (an elephant and its trunk), a hand cupped around the nose (a clown), two hands touching above the head (a house) and so on…

Three: memorising

Almost automatically, adding these gestures will help to ensure that the kids will remember the words better. There is evidence that suggest that sign language and gestures in general active additional neurons and the information can be stored and retrieved more effectively.

Four: support for production

Once the gestures have been introduced and become a part of the classroom reality, they can be used by the teacher to support the language production by the students. While they are trying to answer a question or to make a sentence and if they experience any difficulty retrieving the word or the structure, instead of whispering the word or giving the L1 equivalent, the teacher can hint at the word by producing the familiar gesture, assisting the student but not actually saying the word.

Five: asking for clarification or support

Similarly, their use can also be extended to asking for clarification or support by the students themselves. Chances are that after the children have become familiar with the gestures used in class on daily basis, they will be using them actively, too.

This was one of the surprising discoveries I made during a classroom research for my MA degree. When a communication breakdown occurred, my five-year olds did resort to familiar gestures to ask for a word they wanted to use but forgot. They still remembered that the word ‘long’ was accompanied by two hands flying apart or that the word ‘sandwich’ was demonstrated by pressing two hands together, one on top of the other, even though the words themselves had not stuck in memory. The produced the gestures asking for my assistance and then, provided with the word, went on with the sentence.

Six: imagination, creativity and symbolic representation

The development of symbolic representation in pre-primary children is an important stage of their growth as human beings (Bruce 2004, p. 170) and introducing and using gestures is one of the ways in which a teacher of English can also contribute to it.

It is fascinating to observe how, at first, very young learners only imitate the teacher and reproduce the gestures exactly, as they are introduced and how, later, they move on to creating their own ways of representing certain words or phrases. And how the teacher can actually learn from the students here because their 5-year-old ways of miming a clock, a flower, a pumpkin or a melted ice-cream are much better and much more interesting!

Seven: instructions

This is, probably the most straightforward way, used from the very first minute of the course. The students, entering the classroom don’t know any English and can’t react to all the teacher’s instructions if they are not accompanied by some gestures: one or both hands being lowered for ‘sit down’, hands palms up being raised for ‘stand up’, waving the hand towards the chest for ‘come here’.

Eight: classroom management

Naturally, gestures can be used to praise the students or to show disapproval for any unwanted behaviour. Both thumbs up or a high five (or a double high five for really special occasions) show the teacher’s approval, both palms crossed at wrists might signal ‘stop’, the index finger put across the lips will work as ‘silence please’.

The gestures may vary, from class to class or even from culture to culture. What matters is that the teacher is consistent with the gestures they use with a specific group. Examples? For my youngest students the small waving hand (something similar to the way the Queen would wave hello) became a sign of warning, although I seriously doubt that anyone else would ever read it this way. For my group, however, it was closely related to our rewards chart, kids’ names on it and stars or smileys drawn next to them. Sometimes, during the lesson, I would indeed wave my hand slightly, to remind them that if they don’t stop misbehaving, I might erase one of their stars. And it worked, for us.

Nine: emotions

Knowing how your students are feeling is very important in general, but especially with the pre-primary children as their reactions and participation will be closely connected to whether they are happy, sad, angry or scared. The teacher should be able to read those emotions but children will also be taught to recognise and to express them, in English.

The first lessons will start from the the basic adjectives accompanied by gestures (a big smile and arms up in the air for ‘I’m happy’, a sad face and fingers drawing the tears rolling down the cheeks for ‘I’m sad’, a frown and stomping for ‘I’m angry’, eyes covered with both hands for ‘I’m scared’) but then more and more of them can be added. These emotions can help the teacher, too, for example to signal that they are happy with students’ achievements or sad when they are misbehaving…

Ten: bonding and creating a community in the classroom

Last but not least, everything that we do together in class, helps the children to bond and to create a community in the classroom, with its own rules and ‘traditions’. Not only songs or stories can be used that way but also all the miming games. They are easy, everyone can participate and they are a great stirrer, too.

After the teacher’s modelling and after everyone becomes familiar with the game, the kids, one at a time, are allowed to lead the game and to suggest what you all could mime. And this is when the real fun begins.

It doesn’t have to be very complicated, only the emotion adjectives and fruit, pets, school objects, anything you are studying at the moment. Have you ever tried to mime a cat? Probably yes. Have you ever tried to mime a happy cat, a sad cat, a sleepy cat? Yes? Then you should definitely try to mime an angry pencil then!

I wonder if I have managed to convince you, dear reader, that the gesture is the absolute king of the VYL world…

Happy teaching!

T.Bruce (2004), Using symblos,in: T. Bruce, Developing Learning in Early Childhood, London: Paul Chapman Publishing, pp 170 – 195