All the experimenting fun aka CLIL in the classroom

The summer is not over yet and there will definitely be more experiments but I wanted to collect in one post all of the experiments that we did this summer during our summer camp. Our students were all between 5 and 9 years old and they were a mix bunch not only as regards the age but also in terms of the language, from beginners to a strong B1. Everyone participated, the language was graded but, of course, the older / more advanced could be more involved cognitively and linguistically.

However, these have a lot of potential, not only because they are very engaging and have a strong WOW effect but also they can be adapted to different contexts and levels. I will include their connection in the curriculum for us, at the summer camp and some potential links to a more traditional EFL curriculum.
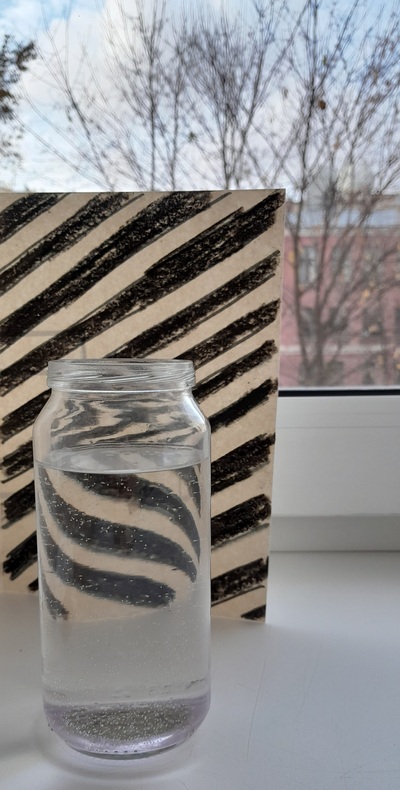
‘Refraction’

Last year’s fun

First the experiments that have already been described here, in separate posts:

Refraction, the original post is here. Our connection: black and white things. Potential connection: I can see, optical illusions.

Design 101, you can find the original post here. Our connection: things that are blue and water. Potential connection: colours, emotions, toys, pets.

Skittles, the activity has already been described here. Our connection: colours, prism, sugar in our food, hot and cold water. Potential connection: colours.

Volcanoes, the post is here. Our connection: things that are red and fire. Potential connection: colours, natural world.
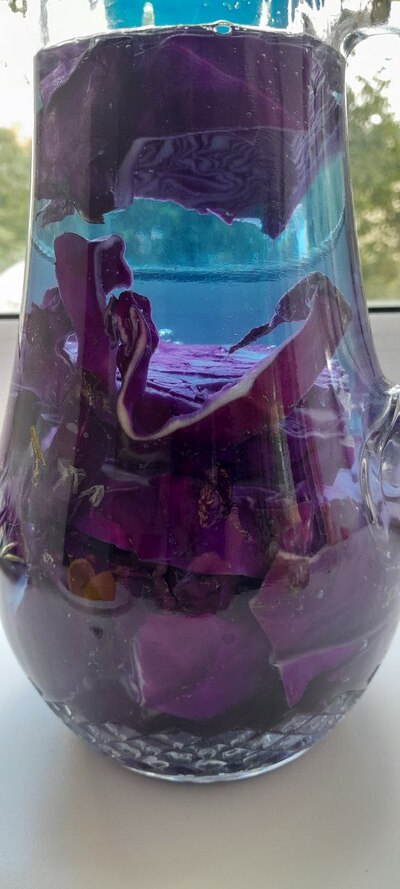
The cabbage ‘juice’

This summer’s fun

Some of those experiments I ran myself, some of them were run by my colleagues, as a part of the programme which I designed and which we taught together at our school.

A floating orange, a perfect experiment for the Orange lesson and a great element of the lesson on objects that float or sink. We watch an episode of Blippi (or this one here) and do exactly the same, collect bits and pieces around the school, predict and then test if they sink or float. The orange, with and without the skin, was the cherry on the cake, so to speak. If you need any inspiration, here is the video to help. Our connection: things that are orange. Potential connection: materials, things around us, passive vice.

What colour is the colour black? This was an absolutely fascinating experiment that I found and ran following the example of The Dad Lab. The only thing you need is a range of black markers, from different sets and different brands, a few jars or glasses with cold water and strips of kitchen towels. The results are almost immediate and it is very obvious to see the great variety that can be combined to create the black ink for the markers, not only the browns, greys and blues but also greens and even yellows and reds, depending on the manufacturer. Our connection: things that are black and white. Potential connection: colours, I can see,

What colour is the colour white? This was the other half of the lesson described above and we also looked at how the colour white is created. We produced our Newton’s disc to see how different colours can mix to become white. There is this video here, in which you can see how a proper spinner is made although we used a simpler version, on a pencil. Our connection: things that are black and white. Potential connection: colours.

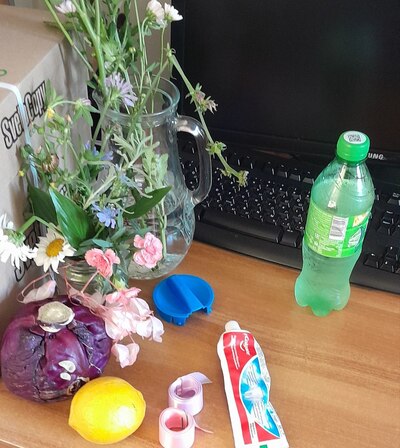
Cabbage juice or the ph indicator. This was probably one of the coolest experiments ever. On the one hand, we had a real staging and a real topic (ph indicator of different substances in our life) and a real Chemistry lesson. On the other hand, this was an experiment that most resembled proper magic. There are quite a few things that are necessary, all the substances (see the video here that I used as inspiration), a few jars or bottles and, of course, the cabbage jar. Many videos and manuals suggest using a blender but I didn’t have one so I just chopped the cabbage and threw it into a jug of warm water. This was also an interesting bit as the water started to change the colour within the first minute. Even though my students were quite young and with not a very high level of English, we talked about acids and alkaloids and tried to predict how the cabbage juice will behave. Our connection: things that are purple and pink. Potential connection: food and drink, introduction to Chemistry, future with ‘will’ for prediction.

Travelling colours, another very simple craft and very good for the young kids and beginners who have only little langauge but can learn a lot about mixing the primary and secondary colours. Our connection: experiments with water. Potential connection: colours, primary and secondary. The video that I watched to learn about this experiment is here. At first, I used regular paints to colour the water but the dye is not strong enough and although the water wets the strips of paper towel, it does not carry the dye. We repeated the experiment with proper food dyes and that was a lot more successful.
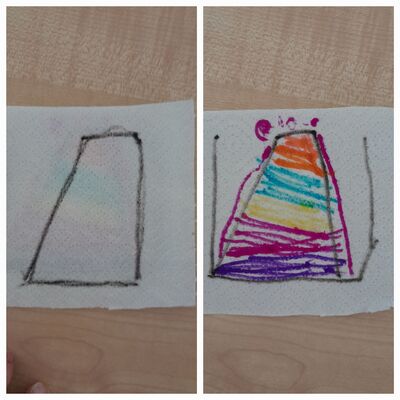
One of the paper towel magic pictures

Why we liked it?

I have to admit, I had so much fun with these lessons! We had a whole day at the camp and we didn’t need to rush anyway. There was time for English vocabulary and grammar, another lesson for the creative activity and then, after the lunch break, one more slot, just for CLIL and Science. It actually helped a lot to put it at the end of the day. The Science lessons were more hands-on and I had a longer break which I could devote to preparations. That came in very handy indeed.

All that meant that preparations were required and, admittedly, not all of the resources necessary are the things that you would just find lying at the school, but, they are definitely materials that can be easily found around the house. That, of course, meant, going to school with a bag packed with the most random selection of things but, hey, it was definitely worth it.

The summer is not over yet and there are still a few lessons to come and a few more experiments. I will be adding to this list but I am already ready to say it out loud: Science is cool!

Who are you, dear reader?

It is very simple.

I would like to know a tiny little bit more about my readers. There are so many of you, popping in here, again and again, and the numbers of visitors and visits are going up and make my heart sweel with joy. But I realised I don’t know anything about my readers and I would love to know, a tiny little bit more.

Hence the survey.

It is completely anonymous, I am not collecting any data and there are no obligatory questions. I would just like to know who you are, how you have found my blog and why you are reading my posts. Apart from satisfying my curiosity, it will also help me understand which articles and themes are the most interesting or popular for my audience. 

You can find it here.

Thank you so much! 

Teaching emotions or Four stories to use in class with primary and pre-primary students

This was a week of our winter (or dare I say spring?) camp classes or, in other words, a week of alternative timetable and alternative activities at the school. It lasted four days and combined two programmes, the emotions activities organised and prepared by our school psychologist and run by the national language programme teachers AND the English language programme prepared and run by me and my colleagues.

I decided to put it together here, as an example of how a curriculum can be composed without relying on the coursebook. Our programme lasted 4 days within the same week but it equals 4 mini-modules, of two lessons each and, theoretically at least, this could amount to a month’s worth of classes and each of these could be further extended to give children an opportunity for more practice.

It needs to stressed that, because of the context of my school, none of the kids are real beginners at the moment and they have seen and used all of the structures and vocabulary before. None of them had to be properly introduced from scratch, for all of us it was a revision and that it why were could squeeze it in two lessons only.

Just as an idea, just for inspiration.

The house for the frog

Step 1: I’m happy, I’m sad.

Vocabulary: all the emotions (the number will depend on the age and the progress of students), the phrase ‘I am happy’. We also revised the extended characters (fairy tale characters and our favourite animals) and used them to make phrases such as ‘The princess is happy’, something that we would need for all the storytelling. The main vocabulary focus for us was the ‘rooms in the house’. We introduced and practised the new vocabulary and I prepared the Magic Bag with items from different rooms in the house.

Songs: there are many songs that include emotions that can be used here, for example Hello song, Open Shut Them 2 or Feelings and Emotions Song.

Story: There are many stories that could be used here, some of them with a bit easier content but I decided to use one of my personal favourites, Rhinos Don’t Eat Pancakes by Anna Kemp which is also available on youtube. I adapted the story, simplifying it a bit and while I was doing it, I asked the kids to help me with describing the main characters’ emotions.

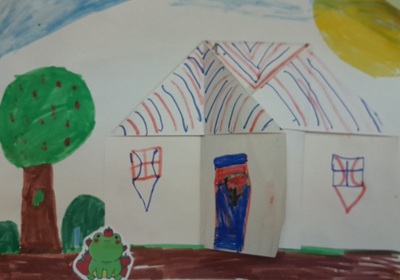
Follow-up: We had two lessons and two main craft activities. The first one was a house which I described a bit earlier here, the other one was creating a crazy animal from different body parts.

Evaluation: The kids really liked the story, Daisy and her purple rhino are always a hit. The house went great, too, as some kids chose to draw the entire kitchen and some just went for a basic symbol for each room in the house. I also had a whole bunch of frog stickers so the houses ended up with having at least one reptile inhabitant.

Step 2: I’m angry.

Vocabulary: The emotions and characters were a part of every lesson in these series, with teh list of characters growing longer. Apart from that, there is also a lot of potential for body parts to prepare the kids to describe all the wild things.

Songs: There are lots of body parts songs, including Head and Shoulders, but one of my favourite ones is ‘This is Me!

Story: I chose ‘Where the wild things are’ by Maurice Sendak also because apart from the book in our library, it is also available in the form of a youtube video.

Follow-up: For this day, I planned the music and emotions activity that I described earlier on this blog for the first lesson. In the second half of the day, after the storytelling session, the kids made their own crowns to become the Kings and Queens of the Wild Things and they played the game that I found here on the Famly Blog in which the kids would take turns to dictate the group what to do.

Evaluation: Making a crown is super easy as it only requires an A4 piece of paper cut into halves, lengthways which the kids decorate, cut out the spikes (optional) and glue together and it is amazing how much fun it can bring. Every time I made crowns in class, they were very popular among boys and among girls, too. I was especially happy that the crown would later become an accessory in our game (which, by the way, is a great bonding and team building activity as the kids can make the group perform a complex dance or just a simple gesture such as bending a finger).

Don’t you just love a circle. At the farm.

Step 3: I’m fantastic, I can do it!

Vocabulary: The vocabulary input here was imposed by the story that I really wanted to use in class and this is how farm animals made an appearance in our lesson. We focused on introducing the names and practising. We did the sound quiz together and we played a simple guessing game in pairs, with a set of mini-flashcards for each pair or team. The younger and lower level students played focusing only on guessing the name of the animal and the more advanced were making simple sentences or questions to find out what their partner is talking about.

Songs: I was planning on using Old MacDonald’s but I changed my mind during the lesson and replaced it with the Eddie song that goes with the story.

Story: I have been using this story in class for about 15 years now and out of everything that you can find in Playway to English series, Eddie, the king of the garden is my absolute favourite. It is quite simple, very easy to understand but with a very powerful message.

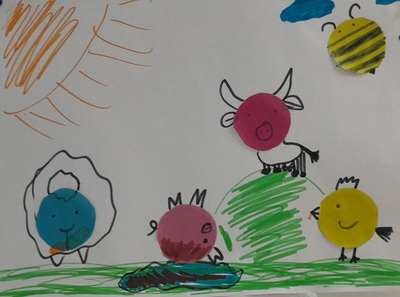
Follow-up: In this ‘module’ we had time for only craft and I decided to revisit one of my favourite craft activities, Don’t you just love a circle, this time farm-themed.

Evaluation: The activities went well but this day at camp helped me realise that every lesson should include a craft activity, something hands-on, something that we will make and take home. I was planning to include it, initially, but then decided to abandon the idea, in order to make room for riddles and the quiz. It went well but not as well as the other days when two creative (or two paper activities) were included.

Our book about being proud

Step 4: I’m proud.

Vocabulary: I wanted to based this lesson on different activities that kids can do and those that can fill them with pride. The list was adjusted to what I expected my students to know and included the following: Reasons to be proud.

Songs: In my plans I had ‘Little bird’ that we have known for some time as well as the related game ‘Can you? Show me!‘ but, in the end, we did not have time for that. It would have been a great extension and an opportunity for practice, though.

Story: Our story lesson was based on Pip, the would be guide dog and its adventures which we followed with a video from a real school for puppies.

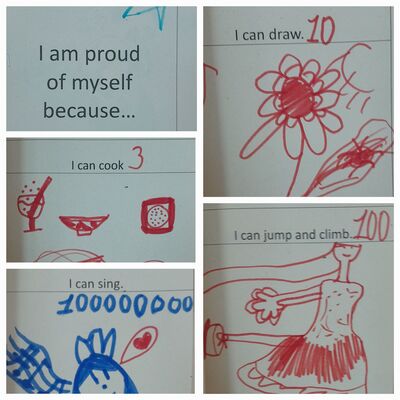
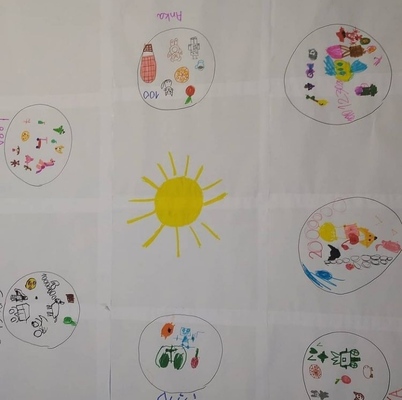
Follow-up: In the first lesson we made a book about being proud, with each page dedicated to a different skill. We went page by page in the following manner: read the sentence a few times, give ourselves a mark, in connection with how strong we are in the area and draw a symbol to represent the activity. In the end we stapled the pages together into a book. I loved watching my kids while they were assessing their own skills. We used the traditional scale we know from school but it was OK to extend it and that is how some kids awarded themselves with 7+ or even 100 for some skills. It was a beautiful moment.

In the second activity, we prepared diplomas that were handed in at the end of the session because everyone is fantastic and deserves five stars.

Evaluation: This was, by far, my favourite lesson of the series. One reason for it was the fact that I managed to find both videos and to balance a cartoon with a documentary on the same subject. The second reason was the fact that the lessons gave us an opportunity to talk about what we can do, to evaluate our skills and to be proud. I did underestimate the kids’ ability to draw for their friends and the ‘decorate your friend’s diploma’ did not go that well. They turned out to be too young and I should have predicted that, skip that element and focus on preparing the diplomas and handing them out on the last day of the camp. My colleague did the same activities with another group and it was a success. I did overdo it a bit. Lesson learnt.

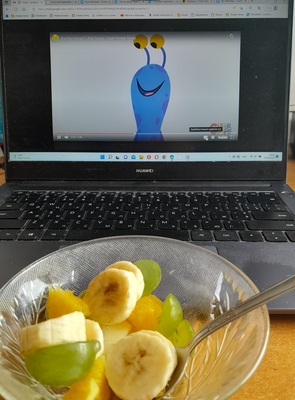
Crumbs #40 A fruit salad

Ingredients

  • Fruit, washed and cut up into manageable chunks. The most basic set includes: apples, bananas, pears, seedless grapes, seedless oranges.
  • A plastic plate for each child, a plastic cup for each child, a plastic spoon and a plastic knife.
  • A set of tissues and a set of wet tissues.
  • Optional: a set of fruit flashcards and the video of the Super Simple Song ‘Are you hungry?’

Procedures

  • Start with presenting the idea of the activity to the parents and agreeing on the list of fruit to be used. It is absolutely crucial that the parents are aware of the procedures and the ingredients and that they approve. In my offline classes, I normally send a message to find out whether the parents approve and then I send a list of specific fruit that I would like to use. I look for seedless oranges and grapes. The list of fruit does not have to be very long. It is going to be a great lesson anyway, even if only the basic fruit are used. Although, of course, the salad will look very appealing if we include more colours and adding some citrus such as orange will be beneficial as regards the flavour, even a little bit of the lemon or orange juice will bring out the flavours of all the fruit and it will blend them nicely. But it is not obligatory. In my online classes, the parents prepare the fruit that the kids really like and it might happen that our sets will vary.
  • Wash the fruit and pre-cut them into pieces and chunks or ask the parents to do the same at home.
  • Plan where (in the school or in the classroom) you are going to set up your salad production station. Ideally, it would be done in a separate room, where everything can be prepared before the lesson and where the students can relocate half-way through the lesson. In the online classroom, the kids can relocate to the kitchen or cut things up on the table in front of the computer. In the classroom or in the kitchen, prepare the working top first: wash the tables, cover them with a plastic tablecloth.
  • Set aside the time for hand-washing. Line the kids up and go to the bathroom, wash the hands, dry the hands and go to the classroom.
  • Give out the tools while pre-teaching the names and while introducing the basic health and safety rules i.e. a plate – it stays on the table, a cup – it is in front of the cup, a knife – be careful. It is a good idea to stage the giving out of tools ie: first the plates and the cups, then the first fruit and the knives, then clean up the plates and give out the teaspoons etc.
  • Take out the first fruit, call out its name. Demonstrate how to cut it up, for example using the following set of instructions: 1) take a piece of apple, ‘Apple, please’ 2) put it on your plate 3) cut it up carefully 4) put the apple into the cup
  • Repeat with the other fruit. Throw away the plates. Give out the spoons.
  • Stir the fruit in the cup carefully.
  • Start eating.
  • Game 1: What’s this?: it is a fun game that involves eating and guessing which fruit we have fished out. Teacher can demonstrate how to play it: take some fruit from the cup, eat it without looking or even with the eyes closed and try to guess what it is. If modelled properly, with the teacher asking question ‘What is it?’ and trying to guess ‘It’s an apple’ etc, the kids will follow and will be playing in the same way.
  • Game 2: Singing and eating: Play the song and pause at every fruit and ask the kids the same question ‘Are you hungry?‘ ‘Oh, look (name the fruit in the salad). Yum, yum, yum’. The only thing to remember here is to make sure that kids finish eating before we play the song again and to continue singing.
  • Clean up, throw away the rubbish, clean the hands with the wet tissues.

Why we like it

  • It is a great and relatively simple way of making the language real and meaningful. We learn about fruit and we do something with the real fruit. With many other topics creating this connection between the classroom and the real world is a bit more complicated, fruit (and food in general) is easy. After a few basic precautions are taken, such as the allergy check, the parents permission, clean hands and a safe working environment.
  • It gives kids a great sense of achievement despite the fact that in the eyes of an adult that might look simplistic. One of my groups called it ‘a cooking lesson‘ and after the first salad, they kept asking for more of those.
  • It is an opportunity to develop social skills (we are taking turns and waiting for everyone to finish), focus (we are cutting fruit slowly and carefully), fine motor skills (we are working with a knife, we are manipulating small pieces of fruit).
  • It is an opportunity to eat in class and that is always fun but it is also something that we do together, as a group and, as such, it can be repeated regularly, although not necessarily with the salad every single time. It can turn into some ‘teatime‘ aka a lesson when we just have a little snack together. That name and the idea is also something that came from one of the groups.
  • It is not an activity for the first lessons with a group
  • If done properly, the lesson can lead to a lot of production. The ‘What’s this game’ was something that just happened in class, just because I really could not recognise one of the piece of fruit in my cup. I fished it out to taste it and I was simply blabbling to myself. The kids were watching and quickly followed suit. Together we turned into a real game and, since then, I played it with all my groups. The other game, based on a song, was something that we played in class for a few lessons, with our set of plastic fruit and it worked very well. The kids liked giving out fruit and pretending to munch on them. Moving onto the real fruit and the salad was a natural next step.

Happy teaching!

Crumbs # 33 Anyone up for a pirate lesson?

Anka, what about the pirates?’ was the thing I heard on Tuesday. The sentence was uttered in the middle of the lesson, in absolutely no relation to anything that happened, apart from the fact that the theme of the unit is the sailors, the mysteries of the sea, The Mary Celeste and I may have, at one point, mentioned pirates in passing. They did notice (of course), they did remember (naturally) and they waited for the best moment to use it against me. Obviously.

The funniest thing about it was the tone of voice that my kids used in that kind of situations and it is probably one of the things that I should add to the list of all the outcomes and consequences of working with a group for a prolonged period of time (you can find the post here). This tone of voice is a wonderful mix of a gentle scorn, a genuine inquiry, an honest plead and a teeny tiny layer of sarcasm. My kids are so good at it that they can squeeze it all in one word. Sometimes they just say ‘Anka‘ and it says it all…

Anyway, we did the Pirate Lesson, all the details and materials below. Enjoy!

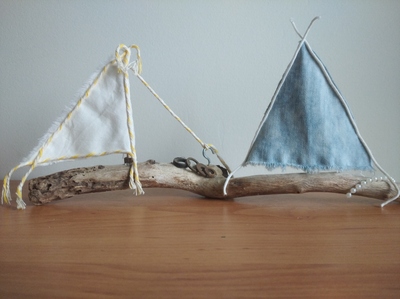
The lovely boats I found in my hotel. A potential idea for a craft activity…

Ingredients

  • Limited: we are online
  • Coursebook material: Superminds 5, CUP, Puchta and Gerngross, unit 9
  • Paper and pencils
  • One wordwall game: The captain and the cabin boy
  • Two songs:
  • A powerpoint: I have left it here, with the comments in the speakers notes)
  • Randomness around the house: a hamster, a hen soft toy, scarves, food
  • One bamboozle game: ARRR like a pirate
  • 90 minutes and a zoom classroom.
  • The level: A2 (we are finishing), the group: 7 kids, the age: 7 – 10 y.o.
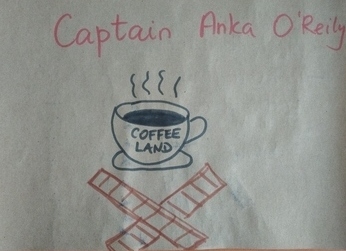
A pirate’s flag. Anka’s version

Procedures

  • First of all, the kids have to remind you that there was a time when you might have mentioned that a pirate lesson might, potentially, happen at one point. After which you forgot (after all, it is May, the end of the school year) and after which they remind you and you are crazy enough to make a huge effort to make time for the planning of such a lesson). But it is worth it)
  • There were no preparations for the students, this lesson came as a bit of a surprise. I was considering to ask the parents to let the kids dress up for that but then decided not to. I thought that we would make things up as we move on. We did.
  • I prepared my own headscarf, my ‘parrot’ and, again, I was considering preparing an eye patch but since I was not at home but in the middle of the forest and the craft resources and materials were scarce, I gave up on it, too)
  • I prepared the powerpoint (which I hope you can access) but this is something that I create for every lesson anyway.
A pirate’s parrot. Anka’s version

Why we liked it

  • From the teacher’s perspective, it was a rather successful merge of a thematic lesson and the coursebook material and I am quite happy with how it went. We managed to include lots of what we were supposed to cover anyway such as the Present Perfect practice and the skills development but it turned out that it was possible to present it to the kids within a theme that was interesting.
  • The kids liked it because it was something different to a regular lesson, we did a lot of pirate things (the name, the flag, the treasure hunt and the stories), we could play a bit and we really did have fun.
  • I came dressed up, with a headscarf on and I introduced my parrot, Angelina (who in her real life is a hen and has been my class puppet for a few years now but who got to perform the role of the pirate’s parrot). True, every time I said ‘my parrot’, my kids would correct me (‘Anka, it’s a hen’) but by the end of the lesson one of my other kids introduced his real hamster (and the love of his life at this point) as the parrot and yet another one gave this role to his rucksack (which should also be written like that: Rucksack, since he featured in our stories in the past with his own adventures). One of my girls put on a scarf, too and one of the boys switched off the camera in the middle of the lesson, to come back a few minutes later, this time wearing his mum’s scarf on his head and a paper eye-patch on a string…One of my students’ younger sister joined us half-way through the lesson and asked for her own pirate name, too.
  • The kids were really active during the role-play between the captain and the cabin boy. They even did remember to play with the intonation with the ‘But what?’ question from the captain. I was moving in-between the breakout rooms and laughing, basically. One of my students could not open the wordwall games so we agreed that he could come up with his own ideas (and these were brilliant) and some other kids started to add their own questions, leaving the wordwall behind.
  • We used the Weird Echo game again, this was the second time and it went very well. You can find its description in a separate post.
  • I wish we had more time for the storytelling of how we met the sea creatures. If I had a chance to teach this lesson again, I would have planned it as a homework task or we would have continued in the following lesson. We might still do it, actually. There are still a few lessons left until the end of the academic year. If we do, you can definitely expect the follow-up post here!
  • I personally loved my pirate name, Captain Anka O’Reily and I think the kids liked theirs, too. Whenever I made a mistake of addressing the students (or myself) using their ‘regular’ names, I was kindly reminded that that’s not how we do it. We also had a giggle because the O’Reily family was well-represented on our ship, since two of my students also celebrate their birthdays in November. The pirates on the board of our Superminds 5 ship were as follows: Captain Anka O’Reily, Captain Alejandro O’Malley, Bubbles Dasha O’Reily, Skipper Tonya O’Reilly, Hamster Jack Sparrow, Charming Timour Bailey, Skipper Eva Bailey and, for a part of the lesson, Ship-mate Ulya Jones.
  • I was really happy when I found the bamboozle game. I think it is a perfect example how a relatively simple game can be adapted and used in order to give the lesson this special flavour that we want. The students did not really learn any new words as those that popped up in the game were already familiar to them and, I suppose, you could say that we got a great opportunity to practice the long /ɑːr/ sound but that was not quite my main aim here. For a few minutes there we were loud and giggly but we were talking like pirates and it was a perfect finishing touch to this lesson.
  • The one disadvantage? Well, I am thinking of the coming-up lesson on Tuesday and the first thought that appears in my head is: ‘What, a normal lesson? BOOOORING’ so, I am afraid, I will have to come up with something…
Pirate’s shoes. Anka’s version:-)

Happy teaching!

I am a teacher. Reflections from the rocking chair by the fire.

All photos dedicated to the city. Happy Birthday, Moscow!

Everyone gets to answer the question, at one point in one’s life, at least once. ‘What do you want to be when you grow up?’ On my personal wishlist, over the years, there were the following: a ballerina, a doctor, a woman (the first one), a plumber (that is the latest, my plan for the retirement years) and…a teacher. No idea if that means ‘no ambition whatsoever’ or ‘achievable aims’ but nevermind that. I am a teacher. Yay to these dreams that come true, tick!

I have been planning to write this post for a while but I’ve been struggling and what I ended up with was either a lot of sentimental waffle or some lofty speeches worthy of an educational Thomas Moore. No, thank you. Instead, I am going to hide behind a few stories, hoping that they will collectively illustrate why one might want to become a teacher.

There is a boy in this story, a local troublemaker, who actively spent his school time making his teachers’ life ‘interesting‘ for three years straight. There is always one of these in every class and someone has to be their teacher. The teacher and everyone else survived.

The same boy, fifteen years on (15!), meets the teacher’s brother at some kind of a social do in the hometown. ‘I was a nightmare at school‘, says the boy, already an adult, ‘Say hello to your sister and pass on my apologies‘.

There is another student, a girl this time, that the same brother meets at another do in the hometown. This student, years on, also asks the brother to pass her regards. ‘I don’t remember many teachers from the school.’, she says, ‘I do remember her. She was cool.’

There is an adult student, Olga, who gets in touch via Instagram and it turns out that she is also a teacher now and that seems to be inspired to become a teacher of English in the teacher’s classroom, about ten years earlier. And it nothing short of touching…

There is the first student ever, her own cousin, Magda, and the lessons which were based on pure enthusiasm and on intuition because the teacher was more of an ugly duckling and not yet a real professional. Now, imagine this teacher’s emotions when, a few years later, she was sitting in the hallways of the university, waiting for Magda to pass her final exams and to be awarded an MA in English and Translation.

There is a teenager, only a year ago, at the summer camp. This teenager fills in an anonymous feedback form and in her commentaries on the English lessons writes ‘I’m not scared anymore‘. To be honest, that reduces the teacher to tears because, really, although the lessons were good, she thinks ‘I have not done anything special‘, and yet, that seems to have made a difference.

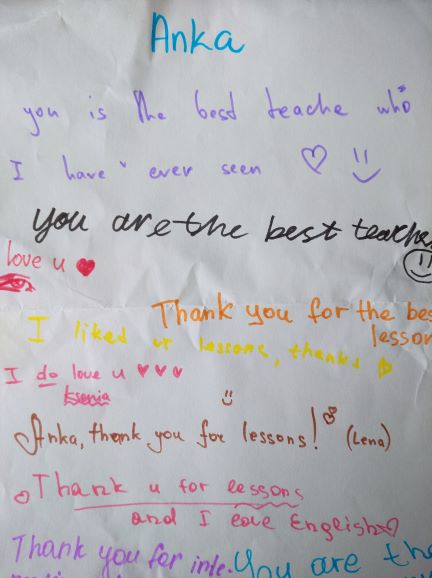
There is the little girl, Sasha. After one of the lessons, this little girl comes up to her teacher, looks at her with a very serious face and says: ‘Anka, thank you very much for preparing such interesting activities for us‘.

It’s been a good few years already but the teacher still hasn’t recovered from the happy shock that this conversation was. The little people hardly ever do that. They will go for it, they will take part and leave the classroom happy. Sometimes, they might bring you a dead ladybird or donate the only balloon they have. Sometimes they may actually confess ‘Я Вас люблю‘.

Very often, though, as soon as they leave the group or change the school, they simply forget. Just forget. I like to think that they make room for new memories and new information. Out of sight, out of heart, without any metaphors. And no honourable mentions on the social media. But that’s ok, that’s simply how it is and it doesn’t matter. The teacher knows anyway that maybe she will not be remembered, but she did make a tiny little bit of a difference.

But there is more than just the blast from the past, more than just memories. There are the kids in the classroom, here and now. It is a good feeling to be looking at their progress test results. It feels great when they come back in September and proudly show the certificates they got from Cambridge.

It is even more beautiful when during the most regular lesson, you realise that the shiest and the quietest teenager in the world now leads the debate and presents winning arguments, with the confidence that could move the mountains. Or, that the student who entered the classroom five years ago to learn her first words, now is telling everyone about something that happened at school that morning, a hilarious story from the cafeteria, with the narration and the dialogue, with only a few grammar hiccups which are still to be expected since it is only A1 and she is only 9.

So, for a moment like one of these, the teacher is still a teacher.

And, now, as a reward, since you have lasted until the end of this post, here are all the articles that might come in handy in September.

Classroom management

Activities for the first lessons

Happy teaching!

Summertime, party time! End-of-course activities with young learners.

Today is the 8th of May and, at least in Russia, we have about three weeks left until the final lesson with our young learners before they say their good-byes and rush to enjoy the summer. I don’t know about your students but mine have already started counting down the days.

As for us, the teachers, it is the high time to start thinking about the ways of finishing the course. I know, I know, we can just write the final tests, prepare the reports and diplomas, give them out and wave ‘good-bye’, to go for the minimum because it has been a long year and we are tired but I would like to encourage you to go one step further because this is how you build a community and how you create beautiful memories.

Here are my eight favourite activities for the final lessons of the course.

Main aims? To acknowledge the hard work throughout the course, to reflect, to praise, to celebrate the end of the year and the beginning of the summer.

Good-bye letters

This is an activity that I have always done at the end of my summer camp sessions and I wrote a post about it a while ago and you can find all the details here.

Storybird.com

This is the only tool that involves a website and, apart from the first stage of the pandemic and in a limited version, is a tool that has to be paid for. I would not recommend purchasing the subscription only for the purpose of the graduation party but the website periodically offers a free trial so the end of the year might be a perfect opportunity to have a look and see how it works and then, perhaps fall in love with it and decide to use it more extensively in your lesson just like I did last year.

Storybird is a website where aspiring illustrators’ works can be assembled in a book, the text added and the whole thing can be downloaded and printed or accessed in the pdf version. The stories can be published on the website or kept in a private library. Naturally, as the user, you also get access to everything that has been published and these stories can be used in class.

We have written a few stories with my primary groups already. Usually it means that before the lesson I prepare the illustrations by choosing the artist and selecting the images that might be appealing to my students (plus a few extra so that everyone has a chance to pick something they like). In class, we look at all of these and I ask the students to choose one image for themselves. Later on, the class is divided into two, the group works on a task in the book or the exercise book and students take turns to dictate what they want to say. I type up.

The end-of-the year contributions might include the following:

  • What are you going to do in the summer?
  • About you
  • Tell me about this picture

When everyone has finished, we delete the unnecessary pages, we save the story and read it together, with each child presenting their page. After the lesson I proofread it, save it and pdf it to send it to all the parents. They can print it or just keep it in the electronic from.

Anyway, it is a great souvenir and there is a chance that kids will read the whole book and a few times, too.

The Oscars or The Best Toilet Paper Dress Designer

This is the activity that we prepared first with my friend Stephanie at the end of the summer camp in the UK. We had an amazing group of teens that we used to teach in a team and we wanted some great ceremony at the end of the session. This is how we came up with the Oscars. It takes some work but it is definitely worth it. I used it with some of my teens’ groups later on as well as with my trainees on the IH CYLT course.

The idea was inspired by the Oscars ceremony and all the different categories in which the winners are announced, the Oscar figures (papers ones) and diplomas are awarded and a round of applause is given. There is also an option of including a thank you speech, you know the drill.

The only difference is that in the group absolutely every student (or trainee) has to end up with an award and so the teacher (or the trainer) makes up new (and amazing) categories to highlight everyone’s achievements and contributions throughout the year (or the course). They can include some real achievements like the best test results, the funniest story, the most creative role-play or the most interesting project but they can also draw on the students’ personalities and their roles in the group.

During the final lesson can announce the category and have the group guess the potential winner before they are officially announced. When we organised the ceremony the first time, at the camp, all these years ago, we also included a bag with trinkets – a set of most random items that we gave out as awards such as a pencil, a rubber, a plastic glove, etc. The kids would accept the award and then fish out their ‘amazing’ prize. It was a lot of fun.

Self-evaluation

I found the idea for this activity in Carol Read and her ‘500 Activities…‘ and, so far, I have only used it only once with my teenagers. Only once it this was a great lesson and I will definitely will be going back to it this year.

The idea is that the feedback and the evaluation of progress is put in the hands of the students, the teacher is only the faciliator here.

The end-of-course self-evaluation could be staged in the following way

  • speaking: discussion in groups or pairs, monitored by the teachers, the students are encouraged to talk about their favourite and least favourite lessons during the year, favourite and least favourite activities, most difficult and easiest topics and tasks.
  • writing A: students are given the report form to fill in for themselves, writing about their achievements and potential areas to improve
  • writing B: the teacher adds his/her comments to the report, when applicable.

All these should be done in the last-but-one lesson so that the reports are ready to be handed out in the final lesson of the course.

When I did it with my teens a while ago, I was a little bit apprehensive, not quite sure how my students will take the task but, as it turned out, they were heart-breakingly honest and serious about it and I really did not need to add anything to their self-evaluation. It was all to the point, very much I would have wanted to write myself. But before we started, they did ask ‘Are the parents going to see it?’ so perhaps this is an issue that should be taken into consideration and, perhaps, the end-of-year evaluation should be done two-ways, the internal students’ self-evaluation and the official report for the parents and carers. A question without the answer yet.

Medals

Medals are an obvious symbol that even the youngest students understand.

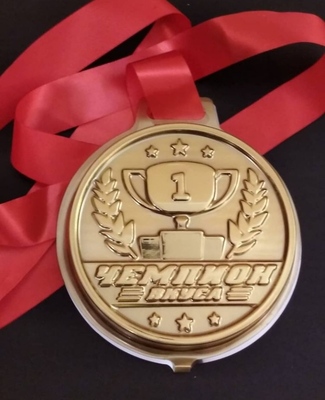
The teacher can purchase chocolate medals (like the one in the photograph which my educational parents bought for the end-of-year celebrations) which will be exciting, for sure, but feeding kids chocolate is not absolutely necessary. Handmade paper medals work equally well. They can be made by the teacher and given out at the end of the final lesson but it is even better if the students are involved in creating them.

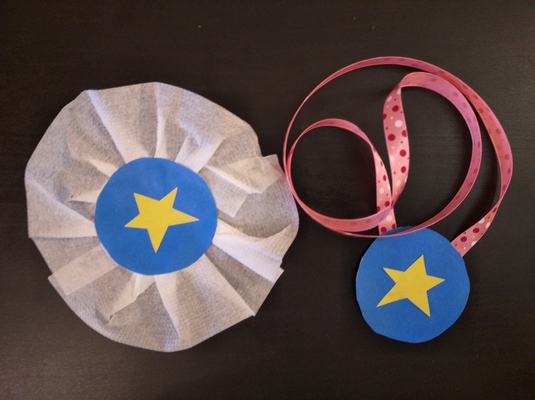
Here you can find some of the websites with the ideas and templates from notimeforflashcards.com, artfulparent.com, redtedart.com. You can also get inpired by the one I put together while experimenting with the format for this year’s end-of-course with my youngest group.

Our Solar System 7

This is an activity that, initially, came to be as a part of our pre-primary space and Yuri Gagarin-themed lessons but there is a lot more potential here. Thanks, Rory, for pointing it out! Here you can find the post on how to do it.

A tea-party

Well, there is never any tea, the name comes from one of my students чайпите which translates as ‘tea-drinking’ and which, in real life, involves having a cup of tea and eating something with it, sweet or savoury. In our classroom life, it is the term for when we sit down and eat together, essentially.

The first question to always ask is to find out what the parents think about it and to present what food items you have in mind. In the last few years, even pre-pandemic, I have limited the food to separately packed juice, biscuits, mandarins and the occasional child-friendly chocolates. It is not about the exquisite food or drink but an opportunity to share food together.

The parents can be asked to buy the food and split the costs or it can be funded by the school.

Such a lesson is a wonderful opportunity to build a community and to practise the language that we do not normally have a chance to use related to lining up, going to the bathroom to wash hands, sitting down, serving food, asking for food, etc. After we have eaten, there can be a small dancing party, with a song or two and dancing. With my older students, juniors and teens, we always have a pizza in the last class. Now, it is almost a tradition.

Now, there are a few disclaimers and points on the obligatory check-list. First of all, the full list of items that will be served has to be run by and agreed with the parents. The children might be suffering from allergies, the parents might have the food items that are a no-go in their families and, in the times of covid or in any other year, some parents might not be happy with ‘strangers’ feeding their children anything. This has to be respected.

Open lessons for parents

This is something that I have been doing with my younger students since I started to work at BKC IH Moscow because this is the tradition of the school.

It is something that can be quite stressful for the teacher (yes, even for an experienced teacher who has well-behaved groups) but the benefits definitely outweigh the challenges and the potential difficulties. The parents have a chance to see the kids in action, in their ‘natural English environment’, with the teacher and, at the end of the year, they can see how much the kids have learnt and how they interact in a foreign language.

There are different approaches to organising open lesson but I have to admit that, personally, I am not a fan of any kind of performances. One reason for that is definitely the fact that, as a child, I was forced to sing, dance and recite at school and I hated it, from the bottom of my heart. The other reason, the more important one, though, is that I believe that an opportunity to participate and to observe a typical lesson, ‘just a lesson’, as some might say, is a lot more beneficial and representative of what we do, how we play, how we interact. Not to mention that this is the routine that the children are most familiar with.

Before the lesson, we prepare the invitation for the parents which can be themed according to the final units of the coursebook, for example jungle animals in Playway 1, holidays in Superminds 1 and 2. This way the craft activity can be also a revision lesson.

In real life…

…we never just do one of these things and in case of my classes, we mix and match, depending on the day, on the group and on the mood on the day.

Happy teaching!

A Brand New Class. Volume 1: Teenagers

September is upon us. It is a joyful month, what with all the new books, freshly sharpened pencils, markers that have not lost 50% of the caps yet, storybooks and flashcards that are still as God intended (in order!) and all the new adventures because ‘The kids are back!!!!‘. At the same time, my favourite tune of the month is …Green Day and when they sing ‘Wake me up when September ends…‘ Every single year. And this year more than ever.

Until we have all survived yet another autumn rollercoaster, spiced-up by the pandemic-related uncertainty, here is a tiny little something: activities for the first lesson of the course, today something for teenagers: 5 ‘sandwich fillers’ and 5 activities in their own right.

All of them are and have been my favourite start-of-the-course activities but they can be adapted to different topics and used throughout the year.

Most of them require only the basic resources and little preparation.

Some, although admittedly not all, will also work in our online classrooms.

None of them are how-did-you-spend-your-summer-themed because I never do it in my first lessons (and definitely won’t do this year since a) we did spend the summer together studying English and b) other than that we were stuck at home or at the dacha, growing cucumbers and carrots and feeding birds…) but they can be made so, if needs be.

You can find them: HERE!!!!

Ideas for the first lesson with primary can be found here

I hope you have fun using them. Looking forward to your feedback, too!

Happy New Academic Year!

Happy teaching!

P.S. Activities for Pre-primary coming soon!

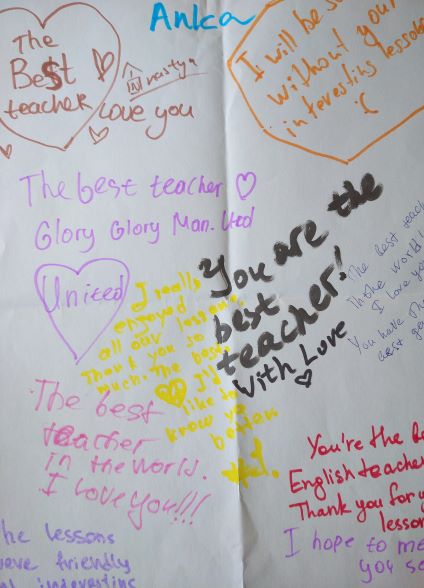
Crumbs #5 End-of-course Goodbye-Letter

This is one of my favourite end-of-course activities for all young learners.

Instructions

You need a piece of A4 paper per student. You can use regular white or colourful photocopying paper.

Write the names of the students on the sheets, one per student, and put them up in the hallway, ideally at a distance from each other. Have a card with your name, too but keep it in the classroom. It will be used for demonstration.

Show your card and tell the students that everyone has a card like that in the hallway. Explain that they are going to walk around and write something for everyone.

If necessary, pre-teach or revise some language, for instance ‘You are…’ and adjectives or ‘Thank you for…’.

Clarify the rules: a) we don’t come up to the card with our name, b) we write something for everyone, c) we can leave anonymous notes or we can write our names, d) we only write nice things, e) if we have nothing nice to write, we only leave a smiley

Give our markers, line up and go out. Monitor and keep an eye on the clock. This part of the task takes about 15 minutes with a group of twelve.

Ask the students to go back into the classroom and quickly collect the letters. Give them out in the final lesson.

Why we love it

  • It is a great opportunity for the students to read and to write something that they really care about and it is a great souvenir from the course, handmade and personalised.
  • The students have a lot of freedom and can write as much as they want or only leave a smiley in case they really have nothing to say.
  • This activity can be adapted to the level and age of the students. It can be done in the classroom, with the papers being passed from student to student, until they make a full circle and return to the owner and the youngest kids can only draw some simple shapes for example a smiley, a heart, a sun, a star and their name.
  • The first time I did this activity, I planned for the kids to re-write the letters before handing them out to the addressee but they stopped me (‘But Anka, this is much cooler and more beautiful!!!!”) and they were right!
  • I keep my card on the board but I don’t actively encourage the students to write something for me, too. Somehow they always do anyway))

Happy teaching!