Five ways of encouraging kids to get involved in a task, Maths and more

So, apart from being a teacher of English, a teacher of Art, a teacher of Science (occasionally), I am also (drum roll) a teacher of Maths, year 1 of primary (or Key Stage 3).

I am aware that perhaps not too many of my readers have Maths on their daily timetable but I decided to share these ideas nonetheless. It is because they are all rooted in the different ways of encouraging children to get involved in the activities that are challenging, tiresome and not always easy-peasy-lemon-squeezy.

For myself I simply wanted to leave a note and a record of the things we do, for future reference. On the other hand, I know that all of these activities have a lot of potential for the regular and the beloved ESL, for grammar and vocabulary practice or reading.

Treasure Hunt is a task that I have used many times over the years. It takes some time to prepare and to set it up, especially the first time, but once you do it and once everyone figures out the rules and procedures, it is a great task that my students have always loved and asked for if we stopped doing it for a while. The main idea of the task is that we go around the school, look for all the tasks hidden there and we solve them. Once all of them are completed, everyone returns to the classroom to check the answers. In the past, we used to collect new words, solve crossword puzzles with clues around the school. We used to look for answers to the quiz or instructions how to colour the picture. This year, we use it mostly for Maths, solving different addition, subtraction and multiplication tasks.

Usually, we go out as the whole class but this kind of a treasure hunt can be easily turned into a running dictation, with kids working in pair, one of them running, one – taking notes of the answers. This works especially well with really big groups.

As many as you can: most of my kids are huge fans of Maths and they approach the tasks with mountains of motivation. To be honest, I don’t really understand it, since my brain does not really feel happy around numbers and prefers words, languages and visual arts. But, I can almost risk saying it, my kids’ enthusiasm is infectious, so, in fact, I like teaching Maths.

‘As many as you can’ is one more task type that we do in class. It is super simple, it involves an A4 page of exercises that the kids work on individually. There is only specific rule and that is: everyone is allowed to do as many as they want or can.

I love this task because for the kids, it is an opportunity to approach a task without a lot of pressure and it works very well with a mixed ability group and for me it is an opportunity to see how well each and individual student feels about a particular topic. True, sometimes, the external factors get into the way and the number of exercises is affected by the kids’ mood or the levels of tiredness but, overall, it is a good indicator of how well everyone has learnt and how well they have assimilated the particular topic.

Oh, Petya: Petya is one of our invisible students and having him works very well in ‘find the mistakes and correct them’ tasks which we usually do at the end of the unit. I have already written about him before and you can find the post here.

Jigsaw puzzle is another idea that I have been using in our Maths tasks to encourage the children to go through the task from the beginning until the end. It is very easy to prepare because you basically need a page with the Maths tasks and another colouring picture (in the theme of the month, like Halloween or Easter). The colouring picture is cut up into pieces, into a number that corresponds to the number of tasks and they are put into separate envelopes. As soon as the kids complete one of the tasks, they can come up to the board, open the relevant envelope and take out one jigsaw puzzle. I also like to put the correct answer on the envelope, to give the kids a chance to also check their answers. Once all the exercises are complete, the kids put the jigsaw puzzles into a picture and we glue these into out notebooks. The pictures can be coloured in the end, as an option.

Password, password! is a variation of the previous task – we collect tokens for every exercise completed, only in this case, these are letters that, together, a part of a password. Kids work on their tasks, invidually but they take turns to come to the board to solve a task and to uncover one of the letters. This task works wonders for bonding and building the class community. Just like the colouring page, the password can be adapted in any way that fits the theme of the month, the number of the exercises or the number the kids in the class.

One of the first passwords that we did this year was: ‘We love Maths and we are fantastic!‘ I wrote it on the board, with the numbers for each letter and I used hyphens to break the sentence into words. But it can be anything!

Well, is it something that you could use in your lessons? Please let me know!

Yves Klein. Take two. Printing and roller work.

The man who can’t see the sun

Somehow, in this academic year, in our Art Explorers adventure, the days are filled with some ‘firsts’. Now and then, and more frequently that I would expect it to happen, we bump into something that we have never done before and something that we are trying for the first time and that we are experimenting with. I love it!

This time round, we experienced a mini-series of the same artist over two consecutive lessons. It is not that Monsieur Yves is such an inspiring artist that we simply had to give him a double Art slot. I mean, he is amazing and I am so happy that I have discovered him for myself and for my students but, surely, there have been many Great Artists that, theoretically, at least, should have been granted with that privilege, Malevich, Goncharova, Warhol or Picasso…A simple coincidence, that’s all it was. I got the amazing set of rollers and stamps but only in time for my older group, the younger kids on Mondays missed their chance. Since we had so much fun with the rollers, I simply decided to let everyone help! Then and only then, did it turn out later that Yves Klein himself loved using different tools…What a coincidence!

The Power of four elements

The language

The language stayed the same and we had a lot of time with the spinner and the verbs (you can read about them here) and, to be perfectly honest, the langauge input was kept short on purpose.

The artist

We just got back to the previous class and looked at some of his paintings again and I told the students that, apart from using the beautiful blue and painting with different body parts, Yves also used a variety of different rollers, stamps and other tools and that it is exactly what we would do.

Colourful frame

The art

The room was set up exactly the way we did last week, with the round table in the centre of the U-set of desks and it was basically our palette (have been covered in paper and painter scotched over before). I showed the students all of the tools and how they can be used. Because it was the last lesson in the series, I was also able to look back at the works created before. My special focus was this one, created by one of my older students because it combines pencil drawing, a variety of prints and a great roller work.

After that, we just got down to work and, in one line, it was just amazing.

Kids really enjoyed working with a new tool and experimenting with everything they had to offer. It was a good idea to cover the palette table with paper because it was the first place to try out rollers and stamps. This is also were they were mixing the colours to get new shades and colours. They were very careful and conscious while choosing the tools and combining them with the paints. We were talking about the process, a little bit in English and mostly in L1 and thanks to that I could see how their ideas were taking shape. That was precious. Or so I thought. Until the artists started to come up with the titles for their work. They did all of that in Russian and I helped them translate but hey, look at them, they are amazing…What is more, they were not created instantly. The kids really did put some work into creating them. Some students made a decision and then, upon more consideration, they changed their mind and came up with even a better, more suitable option. I was speechless and I continue to be. Why? Just look at the photos!

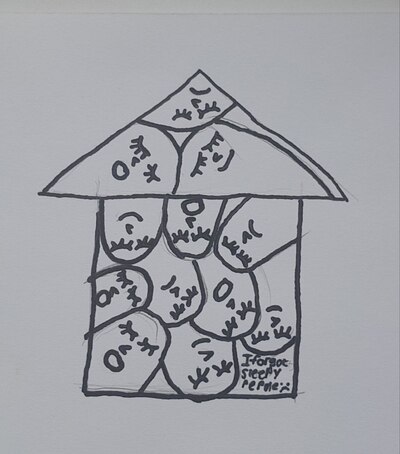
A worrying house

Crumbs #78 Making our own songs with kids.

A paintbrush, that took us all by surprise with how beautifully it caught and preserved the paint. We all kept staring at it for a few minutes, in admiration.

I have already written a lot about things to do with songs. Here you can find a post about the steps to take to properly un-sing a song and to make the language your spoken language and another one on creating your own songs for the use in the YL classroom.

Today, I would like to share with you a project that we have been a part of for the past two months and that I am hoping will continue until the end of the academic year: our own month song.

Ingredients

  • a song and a melody that will be used as a model, in my case it was January Song from Sing Play Create.
  • a group of kids and a teacher to manage
  • optionally: an audio of the melody, ours was Frere Jacques, it was easy to find.

Procedures

  • First, a story: Our lessons in December, with my year 1 kids, started with different Christmas songs as we had already abandoned the regular Hello songs somewhere in December. When January arrived, I wanted to devote a part of the lesson to a chat about things that we do in that month. And to introduce that slot, I was looking for a song. I found it and quite easily and it was perfect – short, call and response style and with a relatively simple melody. We sang this song throughout the entire month. Then, February came and I started to look for a song that we could sing. I did not find anything that would work for us, something easy and short, without too many cultural references that are not at this point relevant. I didn’t find anything that I could use. I decided we are going to create our own.
  • In the first lesson of February, I explained to my students the song situation and encouraged them to think about our own song. They made a real effort and we ended up with a song in 1 a and a slightly different song in 1b. I wrote the songs on the board and we photographed the board. Every day, at the beginning of the first lesson, I would take out my phone and start singing for the kids to repeat. Some of the phrases were familiar to kids, the others I helped to translate.
  • We repeated the procedure in March and ended up with two verses in both groups that we sang for a week.
  • The next step was of course the kids’ versions. I did not prepare them for that in any way and on one of the days, I simply asked: Does anyone have an idea for a new song? And they did. Right now we do it every lesson and there are always some kids who are willing to share their ideas.

Why we love it

  • The song is a perfect choice for creative singing (and speaking). It has got a simple melody which we already know very well. The song follows the pattern of call – response so whatever idea the leader comes up with, the group responds, by simply repeating the line.
  • The lines are short, easy to create and to repeat even for beginner children. It is an advantage, too that the verses of the song follow two patters: either a simple phrase or a short sentence so pretty much anything can be used. Some of the verses we created were like that: ‘March, March’ (only two words repeated), ‘Make snowmen’ (an imperative), ‘Birds and bees are flying’ (present continuous), ‘Flowers grow’ (present simple), ‘We are very tired’ (personalised sentences with the verb to be).
  • Some of my kids have an idea but they don’t have the language and that works, too. They sing the first line, in Russian, and I respond with the equivalent in English. It also helps with some verses that are not appropriate but are, at the same time, a result of my students experimenting with the language. We have had a few cases of a line like that appearing as a call and me replying with ‘La la la’ or with ‘Sasha is not singing’, to signal that some things are not be accepted.
  • Kids love this part of the lesson and, on a typical day, we have about 4 or 5 verses, sometimes more, sometimes fewer. Some of the kids sing the verses, some prefer to say them already and it all works.
  • I am just overjoyed because they are producing the langauge and in this previous week, we have seen an interesting new trend or even two. Some kids (following my example) started to create songs about how they feel on the day (‘March, March. Sunny day. I am very happy. But I want to sleep’) which is their extended and musical answer to ‘How do you feel today?’. Some children sang a song about their favourite month (usually related to their birthday). We had also a few crazy versions of snow in July and another Christmas in the summer. One way or another – lots and lots of language creativity.
  • Another thing that makes me really happy is that this creative activity appeals not only to my stronger students but also to some of my struggling students and, in general, is great for mixed ability groups. It is easy to create your song, for example by changing one or two words in the verses that your teacher or friend sang. That’s easy to do. Plus, all students are creative, even my beginner beginners. They have an idea and they want to share and since some of the ideas are shared every day, they stay. My student Sasha came up with the idea of a sick rainbow two weeks ago and now he remembers himself and encourages us to sing ‘The rainbow is sick’. We do.
  • Last but not least, this is our little tradition, our routine, something that we do as a community. And that makes it precious, too!

I am quite curious what is going to happen to this project in April and in May. It is already good and exciting and worthy of sharing but who knows what else is there for us…I will definitely be writing about it in the future!

Yves Klein and we don’t want one colour!

The language

Bearing in mind the artist and his approach to painting, I decided to choose the body as the focus for this lesson (and probably for the few lessons to come, too, although this still needs to be confirmed). For that reason, we have introduced and revised the body parts using the wordwall cards and then we played one of my favourite movement games: Shake your nose! It can be played with a dice and a list of six verbs or with an online spinner. The teacher needs to introduce and demonstrate the verbs. Afterwards, they spin the wheel, read the verb and choose the body part to perform the action. Naturally, the kids take over as soon as they are ready and ask the whole class to perform the silly actions: shake your nose, clap your feet, move your mouth and what not. Of course, everyone’s favourite is ‘freeze’:-)

‘Rabbit’

The artist

I have found Yves Klein only recently, while looking for something else entirely, and when I did, I was surprised, taken aback and mesmerized, all at the same time. Mesmerized – because he is just amazing, surprised – because I had never heard of him and taken aback – because Yves could be (or could have been) the inspiration for one of my favourite sci-fi characters from Alistair Reynolds’ Zima Blue. And I did NOT know that…

Anyway, Yves was introduced with this one photograph because it encapsulate everything we need to know about him, his favourite method and his favourite colour, all at once. We looked at a few examples of what Yves Klein created and we also talked about anthropometry but, because of the age of my students, we limited that to ‘painting with different body parts’ and ‘painting with things’. We did not look at any of the performances. That was enough to spark an interest and they kept asking questions, trying to imagine what the process would look like.

The kids got really interested in the blue rectangle and started to compare it with Malevich’s black square (I taught them well). Sasha, who wildly fights the idea of copying (which I am trying to convince her to think of as ‘inspiration’) asked: ‘Who was first, this Klein or Malevich?’. ‘Malevich’, I said. She rolled her eyes and commented ‘Plagiarism!’…

The art

Initially, the task looked very simple: try to become Yves, for one lesson and to prepare a monochrome picture, using only hands and fingers but all that started to change in the classroom, because I decided to read the room and adjust.

The classroom set-up needed a small adjustment in order to faciliate work. Our tables stand in one big U, with a lot of room in the centre. I brought an IKEA kids table, covered it with paper and decided that that would be our pallete, with four sections for the colours and for more room for mixing the colours. The kids were told to move withing the U, going from the round table to their work stations. This worked very well. We could use one set of paints, everyone was on the move and since the table was in the centre, the kids pretty much avoided bumping into each other and invading each other’s space. We had tissues on the ready but they were also allowed to go out to the nearby bathroom to wash the hands when necessary. We used the aprons to protect the clothes.

‘Different colours’

The younger kids were working only with their hands because it was only later that I bought a set of kiddies sponge rollers and stamps. I brought them to my Wednesday lesson, for the older students and these had a much wider scope of an opportunity to become Yves for a day, who also used a variety of rollers in his work.

One thing that I did not take into consideration (silly teacher!) was the fact that a new material in the classroom will have its own implications. First of all, my students really got excited about trying out what can be done with finger paints and with rollers and stamps. It is perfectly natural, you get a new toy, you want to play with it and see what it can do. Showing a new tool and setting boundaries in the way it is used is just unreasonable! That’s what I learnt last week.

‘Fox’

The other, related, thing is that I found sets of finger paints of only four colours, they had amazing shades. Blue was the most beautiful baby blue, green was more emerald than just simple green and the red one was something between ruby and light brick and they all looked very tempting. When I took the colours, a few students asked the same question, both in the younger and the older group: ‘Do we have to use only one colour?’ and they were so sad about it, that I really did not have the guts in me to go monochrome. I said that monochrome was recommended but that they could use whatever they wanted. The funny thing is that the kids did like the shade of the Klein’s blue and the whole approach to painting but, when it came to their own creations, they still wanted to be able to use all of them.

The lesson was a success (unless you want to consider the abandoning of the monochrome as a distaster, which I don’t). The kids got really involved into their interaction with the new tool and the new technique and it was great to see how they were experimenting and making their decisions as regards the task interpretation.

‘Without a title’

In the younger group, the students decided to ‘simply’ paint using fingers and hands, some used prints trying to compose a painting out of them. Many of my kids focused on experimenting with mixing the colours and interpreting the outcomes. The older students were more decisive regarding the topic of their paintings, once again depicting their favourite theme, a goose, a rabbit and a fox, in a new way. In both groups, many students created more than one picture because once we started, the ideas came flowing (here you will find another post, when we played with the younger group with all the stamps).

I used the finger paints but in a more limited capacity, only to write letters or to use dots, this was the first, fully-fledged lesson and I have to say – I loved the material. Not only does it wash easily, it is is very liquidy and flowing so it can be used in many ways. It is also perfect for printing as it dries very quickly and it can be combined with drawings or stickers and collage within the same lesson. Lots of potential there and we will definitely be coming back.

‘Goose’

There is a little post scriptum to this post here! Don’t forget to check it out!

Crumbs #77 Steve and Maggie, from a video to a game!

Ingredients

  • a series of lessons on professions for the primary school kids
  • a video from the Steve and Maggie channel
  • a set of cards or flashcards with different jobs

Procedures

  • Before we got to watch the video and to play the game, we went through a series of 4 lessons that were devoted to professions. During these lessons we inlcuded activities such as: introducing the vocabulary, matching the jobs with different accessories, miming the jobs, separate words and sentences in Present Continuous (‘A teacher is jumping in the toilet’), categorising the jobs and interviewing each other (‘Do you want to be a teacher?’), talking about what we want to be and don’t want to be, introducing a song, and even starting a project about one Alfonso Pomodoro (more on that later).
  • In order to make sure that we have some variety of resources and approaches, I also introduced a video from Steve and Maggie. I used it before because it is a nice story that includes a few jobs and some ideas why they are good or bad or easy or difficult and it can serve as a background for a whole range of activities.
  • This time round (and for the first time, too), I decided to use the video as a framework for a role-play. I wrote the mini-script on the board with ‘a Steve’ (‘I don’t want to be a teacher’, ‘Look, I am a doctor. I can…’ ‘I don’t want to be a doctor!’) and ‘a Maggie’ (‘OK. Abracadabra!’ and ‘5 minutes later’) and we read it together.
  • It was the first time we did any sort of a role-play with my students in year 1 and that is why I decided to do it as a whole class, with two students being involved at a time. I had only 5 students on the day and that is why it was possible. I modelled the game first and then the students were joining the pair of actors. Kids took out cards from the pile, at random, and acted based on that.
  • Each round involved two students and they had a go at three jobs with ‘Steve’ getting bored with all three jobs and deciding what he (or she) wants to be in the end. I have a mixed ability group but the stronger students could actually come up with some things that a profession can do as well as with a problem that would put them off. Some kids focused only on choosing the jobs and limiting themselves to ‘I don’t want to be a doctor. It is difficult!’

Why we like it

  • The game worked well. Even in its minimal version, it gave us an opportunity to practise the key phrases, ‘I want to be a teacher’ and ‘I don’t want to be a teacher’ as well as the jobs, both in speaking and reading.
  • The video created a great, easy-to-follow framework for our game and it was not necessary to create the context, the story did it for us.
  • It worked well in a mixed ability group because we could extend and minimise the amount of language
  • It was done as a whole class activity, with only two kids involved at a time but I am hoping that in the future we will be able to repeat it, in pairs or small teams.
  • It gave the kids an opportunity to be creative, not only while talking about why certains jobs and good or complicated but in choosing what they want to be in the end (‘I want to be a blogger’ or ‘I want to be a girl’ or ‘I want to be a student!’). One of my students also decided to use the card three times in three different rounds becuase ‘I want to be a judge!’.
  • We had fun and the element of surprise kept the kids in the audience interested. We laughed a lot!

Setting up the routine. Six months into the course

It has already happened! A few days ago, in the middle of a lesson, I suddenly realised that we are closer to the end of the game called the academic year and that one is now allowed to rejoice (‘Hurray! Almost there!’) and to panic a tiny little bit (‘Oh, my, do we even have enough time to finish everything?’), too.

The month of February has finished and it is the time to reflect on everything that is going on in the classroom. Please don’t forget to check the previous episodes in the series here.

Starting the lesson

This is the part of the lesson that is always the same: we say hello, we talk about how we are and we introduce the new students aka all the new toys that the kids have brought to school that day. The toys are usually well-behaved and they also want to share how they feel (= more production). After the longer weekends or the term-break we have also added another extension to share what we did. For that we use a few of the past verb forms that we know (I went, I ate, I saw, I liked, I didn’t) and we share our ideas.

The interesting thing is that on some days the kids also asked to repeat this stage of the lesson after the lunch break and it happened twice on rather difficult and emotional days. Somehow, everyone wanted to share how miserable and sad and tired they were. We did and I would like to think that calling out those emotions and validating them helped everyone a tiny little bit.

Songs

We still continue to sing As quiet as a mouse and What do you like to do? but our favourite thing about them is not the songs themselves but our variations and ideas. I absolutely love that they take so much pleasure in being creative and some verses are simply precious (‘I am as hungry as a dragon. Miss Anka, you’d better run away’) and even my not-so-strong and not-so-brave students take part.

I wanted to have a replacement for the January song but because I simply did not find anything interesting and fitting, we just wrote out own songs, with both my groups. We used the melody of Frere Jacques and with the help of the kids, we put the four verses together (‘February (x2). Make snowmen (x2). Spring is coming soon (x2) And holidays! (x2)’) and it quickly turned out that we have more ideas than we could fit in one verse so after singing the first part, we started to come up with more and more. This was easy, especially that the song follows the pattern of call and answer so it was very easy for the kids to lead it, too. We have even recorded a video for the parents.

Oh, I almost forgot, there is also Mr Jack Hartman who helps us practice multiplication tables (and here you can find a recent post on the songs that I use to get the kids to move)

Rules and classroom language

No major changes here and, guess what, walking around the room, is still the biggest vice and challenge and, surprise, surprise, we are still working on getting our 10th star. Two months in and we are still trying.

Story

February was a great month for storytelling. First of all, we had a story in our coursebook, about the Fox, the Mouse and the Rattlesnake. a traditional story. The kids really liked it and we had a great lesson.

We also did Dr Seuss ‘There is wocket in my pocket’ which my kids helped to read. I caught them red-handed a few times later on, as they took my copy off the trolley and went on to read themselves during the break. We also did a great story ‘Impossible‘ by Tracey Corderoy and Tony Neal.I did adapt the story a bit but I loved the message and the fact that the story gave us a chance to practise reacting to different ideas with ‘It’s impossible!’ and ‘Let’s try!’. It is also a great story to practise the words related to the natural world.

Then, there was also Norman, the Slug with no shell by Sue Hendra! I have almost forgotten about him!

February was also the month of the term break and that, for some of our students, meant a week of emotions which we did through storytelling. Here I am sharing some of the ideas from this week.

Socialising

February was a bumpy month. On the one hand, we had a few birthday parties and it was lovely for the kids to celebrate together, to eat together and to socialise. On the other hand, somehow, there have been different issues related to being friends, respecting or not respecting classmates, getting upset about little things, liking and not liking people.

Because of that we had a few ‘conversations’ which I led in the L1 in which everyone took part, shared ideas and we tried to arrive at some conclusions. We have also been doing a lot of pairwork with different partners. Pairing up did not always go smoothly (see the issues above) so that is why I announced that partners in round 1 and 2 are asigned by the teacher and in the final round everyone would be able to work with their best friend. That seemed to help a little bit. We have also done a few activities in which the whole class was cooperating such as a drawing running dictation and even a round of bamboozle which we played with points in a less competitive way, with the whole class collecting the points (and with some of the power-ups switched off). That worked, even with my Sasha who has zero immunity to anything mildly resembling a competition. I was really proud of them.

The other group also managed to play a few rounds of noughts and crosses and it went very well, apart from one minor meltdown which was not quite due to the game itself but due to a mistake that occurred in one of the teams). I was really happy because we managed to practise reading the key vocabulary and I will be able to use the game in the future, too. At least with one of the groups.

Creativity

Looking back, it seems that our February was not very creating, on the whole but we did some things:

  • we wrote a lot of songs and this way we produced a lot of langauge,
  • every camp lesson and our Art Explorers was pure creation
  • we made St Valentine’s Day cards
  • in February we had another lesson of running drawing dictation and we created beautiful pictures in our notebooks based on the notes-directions that we found around the school
  • our Norman lesson was followed up by a creative activity, making a poster with more ideas for shells for Norman

All in all, however, I am not happy with how little we did to express ourselves. A mental note taken, I (and we!) will be catching up on that in March!

Teacher

My favourite teaching memories from the month of February will definitely include everything related to storytelling. All of these were memorable lessons and I was happy that my students were so involved. A series of the most precious moments, no doubt! I also really liked (and still do) our song creations and that’s because my little students are producing the target language, they are having fun and, they are snowballing while doing that, reaching into their vocabulary like into pockets full of treasures, to pick out some gems. And the songs they make up are funny so we laugh a lot!

Apart from that, although February / March is still too early for such grandiose comments, I can see the progress my kids have made since September. Last week, I prepared an activity, a simple reading and writing task of four pieces and I was planning to do it step-by-step, led and guided by the teacher. That turned out to be completely unnecessary. The kids started and just went on, each at their own pace and order. I was walking around the room, monitoring and trying not to show how touched and proud I was. They were just reading and writing, something that was not possible a month ago. Another beautiful moment in a teacher’s life.

3 songs to get the kids moving

I have decided to write this post as a follow-up on the earlier post that I put together for novice teachers who are looking for inspiration for the soundtract to their VYL and YL lessons. I shared there my favourite hello and goodbye songs as well as my top five for the music and movement stage of the lesson. But that was almost four years ago and, of course, the playlist has grown longer and the time has come to share my new favourite songs that make us get up and move.

Why do we need these songs? Here are a few reasons:

  • the lessons are quite long
  • kids need some structured active fun to punctuate the lesson
  • and to balance the periods of the focus and hard word
  • these songs can also be the source of the language
  • they help to develop the gross motor skills, balance and focus
  • there is a huge multitude them, in different styles, genres and topics and these songs can be used to make the whole lesson consistent
  • they can be used as an additional support and a way of learning Maths, Science and literacy
  • they were written by adults who know kids and they have become real hits among my students

Danny Go!

Danny Go appeared all by himself. I went on holiday for a week and when I got back, he was already there, introduced by the subsitute teacher. I was not overly enthusiastic about it but the kids were and so we listened to my first Danny Go’s song Sharks in the Water! I suppose, if I were to describe it in one line, I’d say it is like a mini interactive computer game-like experience. The song tells the story (Danny is swimming to the island to get the treasure) and while he is doing that, he performs different movements which the kids had to repeat. Then, the sharks appear and you have to ‘jump out’ of the water. There is some vocabulary there but the biggest advantage of the song is that it is a perfect stirrer and it gives the kids an opportunity to develop focus, gross motor skills and coordination.

Danny has got many topical songs and in that he resembles Peppa Pig – there is an episode for every occasion (or almost) so I have been using this songs to accompany our songs on the topic of deserts, farm, jungle and what not. This is how we found out about such hits as ‘Pigs on the loose‘.

There is another type of songs that you can find on this channel and they are proper dance songs, for example ‘In the mood for food‘, with great movements and a bit more vocabulary input.

Jack Hartman

I have to be honest, Mr Hartman popped up ones or twice in my youtube searches but I did not find him appealing enough, visually, and I did not bother to click and to research. Until one day, when I was walking past by Miss Kate’s classroom and through the open door I saw the kids working out and counting, during the break time…Of course, I joined in! Jack Hartman was counting to 100, by ones and everyone was counting with him AND doing exercise, one type for every ten. I knew I had to introduce him to my year 1 kids.

Apart from different counting workout songs, there are also some alphabet songs, move and freeze songs and, the recently discovered series of ‘Multiply by…’, with a separate song for each table which help us practise and remember! And each of them in a different style so we are also getting educated musically, with rap, rock and roll, disco and reagge!

Dance Freeze!

The idea of all of the songs from the series is pretty simple: you have a few movements which you repeat until you hear the command ‘Freeze’. Your task is to repeat the movements, to listen and, when necessary, to freeze. It is a great and a very simple brain breaker because you get to jump, to dance like a robot, to dance in slow-mo, but because the original song has been so successful, new and new episodes have been added to practise sports, instruments, chores verbs and many more. The five basic songs lasted us a good few months and the channel ‘Scratch Garden’ has a lot more to offer. I am just going through their recordings…Like the ‘Stop Copying Me’ that I haven’t used yet and ‘The Sentence Song’ that will come in SO HANDY in our English lessons!

And, dear reader, here is the bonus! As you have noticed – these are not three songs but three wonderful channels that have a lot to offer! Let’s get moving!

Figurative and non-figurative art. Teaching English through Art

‘Calm night’ that started as an apple, if I remember correctly…

I am happy. As a teacher of English and a teacher of Art – I am happy. I have my Art Explorers classes twice a week, there are two groups so every lesson is not only taught twice and every idea trialled and trialled again. I am happy because I am getting better at coming up with ideas and with combining all the elements and finding the links between the artist, the language and the technique. And I can see how my kids are reacting to it and becoming more familiar with the paintings and more confident as artists.

I have also realised that all of us, we are more involved in the process and we are enjoying it more. The final product is important, of course, but so is the journey. It is all very rewarding and I am just happy that it is a part of my weekly schedule.
The art

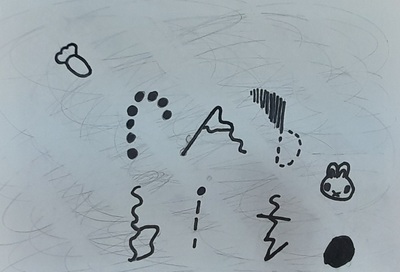
As usual, out of the three components, one had to be prioritised and, this time, it was the art itself. I wanted to give my students an opportunity to experience the process of creating a non-figurative art piece. We tried doing it a little bit in our Jackson Pollock lesson but there the lead was taken by the very specific technique. The outcomes, amazing as they are, were absolutely accidental, and only at the very end of the lesson, we gave our paintings their names.

This time, I wanted it to be fully conscious, purposeful and planned, from A to Z for the kids to understand how a figurative painting may become a non-figurative piece and the artist (aka US!) takes the responsibility for that.

In order to achieve it we did the following:

  • we decided what to paint. I suggested a fruit and veg still life since it was still our Fruit February but I allowed the kids to opt out of it if they really wanted to. Some did.
  • we made decisions about the composition and started to drip draw with the paints. I had a set of paints that I bought for the stained glass lessons but they turned out to be of a very bad quality, too watery, to liquidy and I could not use them for stained glass. They spent about five months in the drawer and last week I had already taken them out to bin them when the hoarder in me hesitated and decided to use them somehow. Since they were so good at dripping, dripping was what I chose to be their destiny. We used a technique we experimented with before, spread painting.
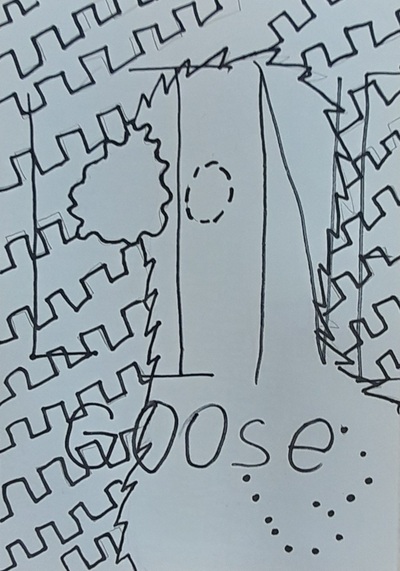
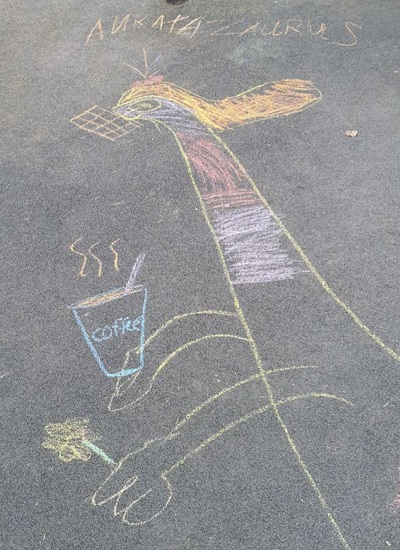
  • we drew the contours with drips of the paint (sharing the one set of paints, hooray to the social skills development!)
  • we photographed the ready picture
  • we used pieces of thick cardboard to spread the paint and a decision had to be made here to, regarding the movement (or movements) of the hand.
  • we gave the paintings a name. In most cases, it was a list of the items of the picture but some of the children came up with different names, not related to what the painting first was. Real artists, I am telling you!

As usual, the creation started with a quick modelling session during which I produced a painting of a watermelon and then turned it into a non-figurative item.

The artist

This was one of the lessons in which we did not have one superhero but a whole dinner party. I divided them into two groups to illustrate what figurative and non-figurative art is. Our definitions were very simply, in order to convey the message even to my youngest students. ‘Figurative’ was defined as ‘I can see real things’ and represented by a still-life by Cezanne, by Rene Magritte’s Son of Man, by an apply by Yayoi Kusama and a still-life by Ilya Mashkov. ‘Non-figurative’ was defined as ‘I can see shapes and colours’ and represented by a piece by Jackson Pollock, Kandinsky’s circles, Mark Rothko and Yves Klein that I have just discovered for myself.

I also brought two pictures that I created at home and I asked the students to guess what fruit I tried to paint by the colours that they could see or the shapes that were still visible, just to highlight the fact that the fruit might be only represented by a fruit, not necessarily by shape.

The language

The langauge in this lesson was, as in every lesson of this month – fruit and vegetables. Apart from that I wanted to play with the language and to reinforce the idea of looking at the world from a different perspective. In order to do that, we looked at a set of pictures of the everyday objects and fruit and vegetables, seen either under a microscope or in a close up. We did it as a guessing game, using the set of wordwall cards I put together. This was a lot of fun and I am definitely going to use this resource again!

Outcomes

It’s not going to be the first time I say it, here or in the real life, but this, indeed, was one of my favourite Art lessons ever. The rest you can see in the paintings my students created.

‘First colours of the rainbow’

Teaching emotions or Four stories to use in class with primary and pre-primary students

This was a week of our winter (or dare I say spring?) camp classes or, in other words, a week of alternative timetable and alternative activities at the school. It lasted four days and combined two programmes, the emotions activities organised and prepared by our school psychologist and run by the national language programme teachers AND the English language programme prepared and run by me and my colleagues.

I decided to put it together here, as an example of how a curriculum can be composed without relying on the coursebook. Our programme lasted 4 days within the same week but it equals 4 mini-modules, of two lessons each and, theoretically at least, this could amount to a month’s worth of classes and each of these could be further extended to give children an opportunity for more practice.

It needs to stressed that, because of the context of my school, none of the kids are real beginners at the moment and they have seen and used all of the structures and vocabulary before. None of them had to be properly introduced from scratch, for all of us it was a revision and that it why were could squeeze it in two lessons only.

Just as an idea, just for inspiration.

The house for the frog

Step 1: I’m happy, I’m sad.

Vocabulary: all the emotions (the number will depend on the age and the progress of students), the phrase ‘I am happy’. We also revised the extended characters (fairy tale characters and our favourite animals) and used them to make phrases such as ‘The princess is happy’, something that we would need for all the storytelling. The main vocabulary focus for us was the ‘rooms in the house’. We introduced and practised the new vocabulary and I prepared the Magic Bag with items from different rooms in the house.

Songs: there are many songs that include emotions that can be used here, for example Hello song, Open Shut Them 2 or Feelings and Emotions Song.

Story: There are many stories that could be used here, some of them with a bit easier content but I decided to use one of my personal favourites, Rhinos Don’t Eat Pancakes by Anna Kemp which is also available on youtube. I adapted the story, simplifying it a bit and while I was doing it, I asked the kids to help me with describing the main characters’ emotions.

Follow-up: We had two lessons and two main craft activities. The first one was a house which I described a bit earlier here, the other one was creating a crazy animal from different body parts.

Evaluation: The kids really liked the story, Daisy and her purple rhino are always a hit. The house went great, too, as some kids chose to draw the entire kitchen and some just went for a basic symbol for each room in the house. I also had a whole bunch of frog stickers so the houses ended up with having at least one reptile inhabitant.

Step 2: I’m angry.

Vocabulary: The emotions and characters were a part of every lesson in these series, with teh list of characters growing longer. Apart from that, there is also a lot of potential for body parts to prepare the kids to describe all the wild things.

Songs: There are lots of body parts songs, including Head and Shoulders, but one of my favourite ones is ‘This is Me!

Story: I chose ‘Where the wild things are’ by Maurice Sendak also because apart from the book in our library, it is also available in the form of a youtube video.

Follow-up: For this day, I planned the music and emotions activity that I described earlier on this blog for the first lesson. In the second half of the day, after the storytelling session, the kids made their own crowns to become the Kings and Queens of the Wild Things and they played the game that I found here on the Famly Blog in which the kids would take turns to dictate the group what to do.

Evaluation: Making a crown is super easy as it only requires an A4 piece of paper cut into halves, lengthways which the kids decorate, cut out the spikes (optional) and glue together and it is amazing how much fun it can bring. Every time I made crowns in class, they were very popular among boys and among girls, too. I was especially happy that the crown would later become an accessory in our game (which, by the way, is a great bonding and team building activity as the kids can make the group perform a complex dance or just a simple gesture such as bending a finger).

Don’t you just love a circle. At the farm.

Step 3: I’m fantastic, I can do it!

Vocabulary: The vocabulary input here was imposed by the story that I really wanted to use in class and this is how farm animals made an appearance in our lesson. We focused on introducing the names and practising. We did the sound quiz together and we played a simple guessing game in pairs, with a set of mini-flashcards for each pair or team. The younger and lower level students played focusing only on guessing the name of the animal and the more advanced were making simple sentences or questions to find out what their partner is talking about.

Songs: I was planning on using Old MacDonald’s but I changed my mind during the lesson and replaced it with the Eddie song that goes with the story.

Story: I have been using this story in class for about 15 years now and out of everything that you can find in Playway to English series, Eddie, the king of the garden is my absolute favourite. It is quite simple, very easy to understand but with a very powerful message.

Follow-up: In this ‘module’ we had time for only craft and I decided to revisit one of my favourite craft activities, Don’t you just love a circle, this time farm-themed.

Evaluation: The activities went well but this day at camp helped me realise that every lesson should include a craft activity, something hands-on, something that we will make and take home. I was planning to include it, initially, but then decided to abandon the idea, in order to make room for riddles and the quiz. It went well but not as well as the other days when two creative (or two paper activities) were included.

Our book about being proud

Step 4: I’m proud.

Vocabulary: I wanted to based this lesson on different activities that kids can do and those that can fill them with pride. The list was adjusted to what I expected my students to know and included the following: Reasons to be proud.

Songs: In my plans I had ‘Little bird’ that we have known for some time as well as the related game ‘Can you? Show me!‘ but, in the end, we did not have time for that. It would have been a great extension and an opportunity for practice, though.

Story: Our story lesson was based on Pip, the would be guide dog and its adventures which we followed with a video from a real school for puppies.

Follow-up: In the first lesson we made a book about being proud, with each page dedicated to a different skill. We went page by page in the following manner: read the sentence a few times, give ourselves a mark, in connection with how strong we are in the area and draw a symbol to represent the activity. In the end we stapled the pages together into a book. I loved watching my kids while they were assessing their own skills. We used the traditional scale we know from school but it was OK to extend it and that is how some kids awarded themselves with 7+ or even 100 for some skills. It was a beautiful moment.

In the second activity, we prepared diplomas that were handed in at the end of the session because everyone is fantastic and deserves five stars.

Evaluation: This was, by far, my favourite lesson of the series. One reason for it was the fact that I managed to find both videos and to balance a cartoon with a documentary on the same subject. The second reason was the fact that the lessons gave us an opportunity to talk about what we can do, to evaluate our skills and to be proud. I did underestimate the kids’ ability to draw for their friends and the ‘decorate your friend’s diploma’ did not go that well. They turned out to be too young and I should have predicted that, skip that element and focus on preparing the diplomas and handing them out on the last day of the camp. My colleague did the same activities with another group and it was a success. I did overdo it a bit. Lesson learnt.

Teaching Out of the Box. Teaching English through Art

Natalia Goncharova-inspired peacock

This article was published in the Modern English Teacher in the March / April issue of 2023 and it is one of my favourite pieces ever committed which summarises my (almost) two years in the classroom as a teacher of English and Art. I have included there all the main considerations and as many as ten different ideas for the classroom. (Although it has taken me a whole year to add it to the blog (rolling the eyes).

I am very proud of it and if you are not a MET member and have no access to the article, I can only recommend all the other lesson ideas that I have shared here, on the blog. You can find them here.