Things we did! Kids and the Past Simple.

The context at hand

If you have read this (relatively new) series before, you know that this year I am teaching in a slightly different context and that, beginning September, I said goodbye to the traditional EFL curriculum and the CEFR. On some days, it really does make my head spin, for example when I catch myself suddenly in the lesson on the prefixes im- and un- (but we really need ‘It’s impossible!’) or teaching the infinitive of purpose (but, it is a lovely and generative structure and the kids love using it and making silly sentences with it). On some other days, I gasp and I am in awe at my kids producing the language.

This was exactly the case with the Past Simple. I just wanted my kids to have it at their disposal, even if only for understanding. The Past Simple accounts for only (‘only’) 20% of the everyday use but it features heavily in our coursebook and in many of the stories we read or watch and, with time, there will be even more of it. So we started.

Presentation

First and foremost, I needed a proper context, something that definitely did belong in the past and something that we would want to talk about. My first attempt was the New Year’s break but somehow, when we got back, there was too much to share and too much to focus on. I decided to try again after a random weekend and then reinforced it right after the winter term break.

The presentation was very simple. I chose ten basic and most frequently used verbs, both regular and irregular such as: I went, I ate, I drank, I played, I rode, I listened, I watched, I liked, I played, I got. I prepared a very simple poster, in colour, with the pairs of verbs and we just tried to make some sentences to describe our weekend. The clarification was rididulously basic ‘I drink coffee’ – we do it everyday and ‘I drank coffee yesterday, on Sunday’. I also added an example in Russian, to show that we do the same in their first language, we change the verb form to signal that something has happened. We read the verbs, drilled a little bit and that’s it. I decided not to burden the kids with the differentiation between the regular or irregular verbs.

Since then, during the first lesson of the week, we have started to use these to talk about our Saturday and Sunday as we do until this day. I write a set of verbs on the board, usually up to 7, and everyone has to choose at least 4 to talk about the things they did at the weekend. About two or three weeks ago to all these ‘I went, I ate, I drank, I liked’, I added ‘I didn’t’ to broaden the scope for the kids. This way we get a chance to share the stories of our weekends and in the appropriate verb forms. Some of my students choose only the required four but some start their stories with ‘Can I talk about everything?’ and yes, of course, they can!

It was only this week that we started the topic ‘properly’. I added more verbs to the list and we started practising in a more focused way. See below for the activities that we have done so far.

Practice

  • Matching the verbs forms using the wordwall game
  • Reading the crazy sentences on wordwall. It is fun to give the correct answer but we are also having lots of fun with reading all the incorrect versions, with the easier version (choosing the correct verb) and the more challenging one (choosing between the present simple and past simple).
  • Mr Milk and his day. We use Mr Milk and all his friends, Mr Banana, Mr Apple, Miss Umbrella, Mr Juice and many more, to tell simple stories. Children take turns to make simple sentences with the verb forms that I show and this is how we tell the whole story. In the end, we decide if it was a good day or a bad day. I have made cards, double-sided, with the basic form and a symbol to help the kids remember the meaning and the past tense form on the back but the electronic cards can be used, too.
  • The idea of Mr Milk was also used in the boardgame that I put together. Every student could talk about Mr Milk or they could choose their own character. We played the game and talked about their days using the verbs on the board.
  • Tell me about yesterday, a simple dice game. The kids played in pairs, they had to roll the dice, choose one of the two verbs (I wanted include as many as possible, hence the double set) and make a sentence, crazy or not crazy, and address their partner, for example ‘I ate a pizza. And you?’ and compare their days this way, If there is time, the kids can change partners once or twice and to continue the game.
  • A song ‘Oh what a week‘, from Superminds / Quickminds 3 by CUP. We looked at the pictures and described the actions, we listend to the song for fun and afterwards, we listen again to number the pictures and we found all the past verb forms in the lyrics, to practise reading and to facilitate the singing / reading in the future. We have been singing the song since and, in a few days, we will also write our own version.
  • Storytelling #1, based on the Flyers materials. I have used the Charlie story before and I have written about it here but this time Charlie was just a warmer for us. I pointed at the pictures on the screen and gave the kids sentence starters with the verbs for them to complete.
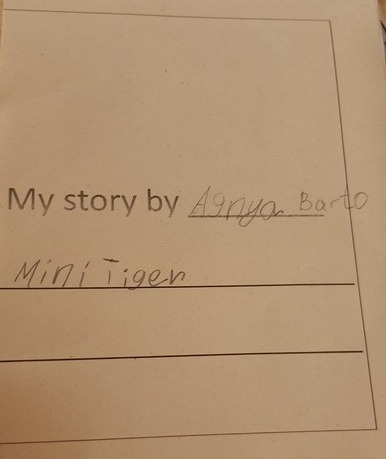
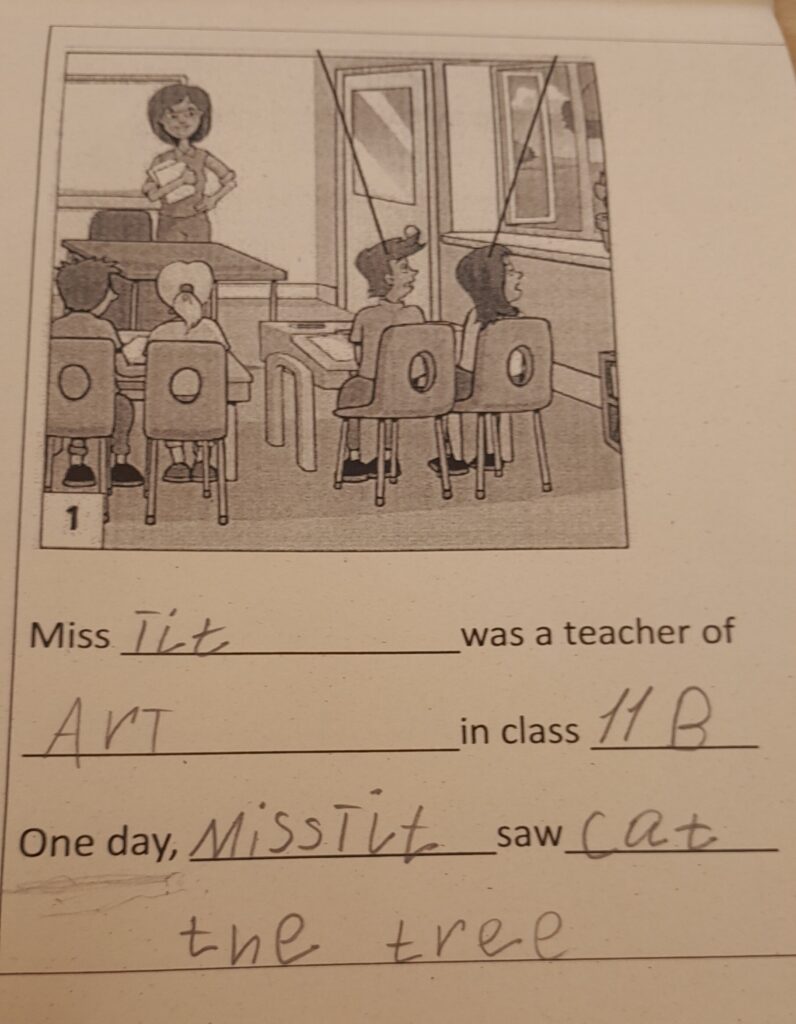
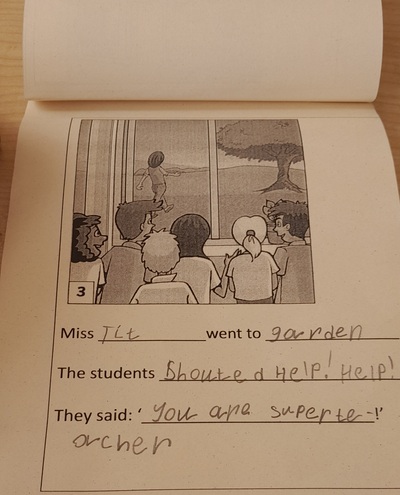
  • Storytelling #2, based on another set of Flyers materials. We looked at the pictures and prepared a list of words that we can see in the pictures. Kids were brainstoriming the ideas and I was writing them down on the board, in groups: people, places, emotions, objects and actions. Every word got its own number for the future reference. When kids need a word and ask for it, for example ‘Miss Anka, where is ‘students’?’, I can simply reply ‘It’s number 4’ and everything gets much easier. I printed the materials (see above), cut them up, stapled them together in booklets and gave them out, one per student. They we got down to writing our own versions of the story.
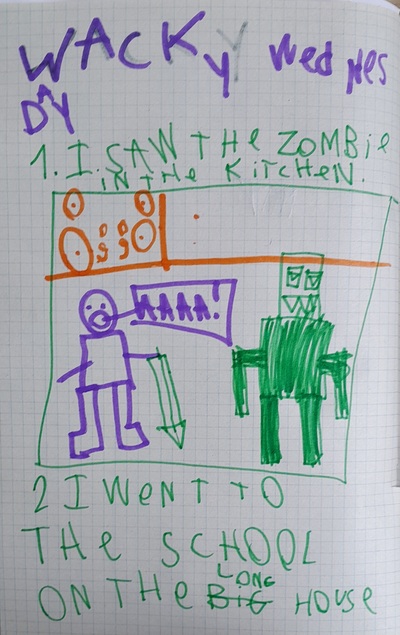
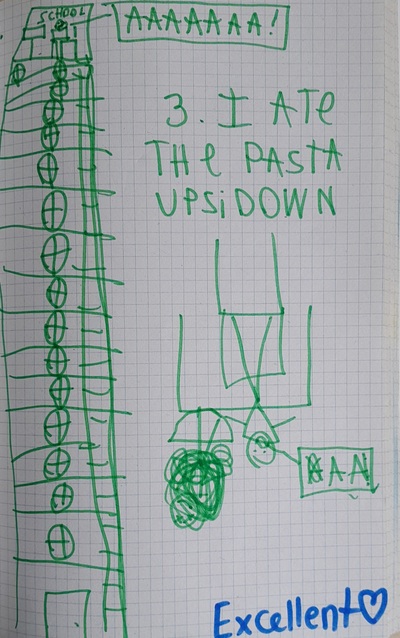
  • Storytelling #3 and the amazing Wacky Wednesday by Dr Seuss. It was a perfect choice for our classes because it includes some past tense, my kids love the idea of ‘wacky’ (or ‘crazy’) days, stories and ideas and we could actually do it on a Thursday which was a nice coincidence. We read the story because we have it in our library, I was reading and the kids were pointing at the wacky things in the pictures and we also tried to talk about these. The story is available also in a video format. In the end, we made notes in our notebooks about own own Wacky Wednesdays, writing only about three things: I saw, I went to, I ate.

P.S. A request!

It is very simple.

I would like to know a tiny little bit more about my readers. There are so many of you, popping in here, again and again, and the numbers of visitors and visits are going up and make my heart sweel with joy. But I realised I don’t know anything about my readers and I would love to know, a tiny little bit more.

Hence the survey.

Is it bigger? Is it smaller? Teaching comparatives to young learners

A new series!

Welcome to the new series on the blog! Teaching grammar to young learners is one of my passions, especially that the students are getting younger and younger and / or the context is changing and you find yourself faced with a challenge of coming up with ideas to engage, to present and to practise with people who are still not really ready to deal with abstract terms and the target language goes beyond the easy-peasy bits of ‘is’ is for one cat and ‘are’ is for many (naturally accompanied by gestures and flashcards).

I have been interested in that area for some time already and I have written about before (please check the other emails in that category) but in the recent months, this has been especially present in my life. This year I am teaching in a school with a bilingual programme, and I am a teacher both of the BNC and of the ESL to a mixed ability group and on a random given Monday I may need to teach past simple or comparatives who students who are not the A1 level yet.

Hence this series. I will simply be sharing ideas that I have created or adapted for my students and, naturally, the activities that have worked well. Let’s get started. Comparatives first!

The context at hand

This year I am teaching two classes of year 1 (and of year 3 of the British National Curriculum) and I am responsible for their BNC year 3 curriculum as well as their ESL classes. Consequently, we have about one million different aims and the two most important among them are the following: developing the kids’ language skills and realising the aims of the BNC. My students are 6 and 7, they are in their year 1 of the state education. They language levels vary from pre-A1 to early A2. In case you are wondering regarding the aims, bilingual education to non-quite-so-bilingual kids is a different planet and I am only at the start of my journey but the main objective is that we are going to be closer to bilingual when we get to our year 4. It is all a process.

The most practical implication for me as a teacher is that we do not follow a linear curriculum, typical of foreign language learning and, that, for example comparatives and, subsequently, superlatives, is our target language in the fifth month of our year 1. As one of the examples. That, in turn, means that I am teaching my very young kids some advanced grammar points and I am trying to do it the best I can. I am hoping that some of these ideas will be useful to my fellow teachers out there.

Ideas for teaching and practising comparative forms

Presentation

  • My students already know a range of adjectives, because we have learnt lots of emotions, adjectives to describe characters and also adjectives to describe objects. My main aim of it was to give the kids a range of vocabulary which we can use in telling stories, retelling stories and describing pictures, all a part of my storytelling campaign. However, it was absolutely necessary to choose a very narrow range for the grammar presentation stage of the lesson and for me it was ‘bigger’ and ‘smaller’, leaving behind, for now, the other short adjectives, the long adjectives, superlatives or the irregular adjectives. For now. As soon as we become familiar with one, we will move onto the other. For example, in one of the exercises, I decided to ‘smuggle’ longer and shorter, just to see how the kids react.
  • We revised all the adjectives and we had a short slot in which we described animals. I was showing some images and asking students ‘Is it big or small?’. All this time these two words were written on the board.
  • Afterwards, I stood right in front of the board and added, in a different colour, -er, to our words, changing them into ‘bigger’ and ‘smaller’ and then I uncovered it, faked surprise and asked ‘What happened here? What’s this?’ and I elicited the letters, asking the kids to read the new words. Afterwards, I demonstrated with these flashcards aiming at showing the difference between ‘big’ and ‘bigger’ and, naturally, ‘small’ and ‘smaller’ using a set of flashcards. It could go along the following lines: ‘Is the tiger big or small?’ ‘It’s big’. ‘Yes, it is. But, look, the elephant is BIGGER’. The same was done for small, with a mouse and a butterfly. I also used gestures to highlight the meaning. With these two adjectives, I tend to move my hand up, gradually for ‘bigger’ and move it closer to the floor or the table, gradually, for ‘smaller’. We repeated the same conversation about some other animals, trying to elicit the structure from the kids.
  • The next step was putting the key sentence on the board by adding flashcards to our words on the floor, creating a sentence made of visuals and words. The great advantage of this activity is the fact that you can adapt and create the sentences by replacing the flashcards and reading the sentences together. That, actually, will be the first controlled practice activity.

Practice

  • Bigger or smaller?, a guessing game: the teacher holds a pile of flashcards with animals, all the cards face de teacher takes out one card and shows it to the kids. Then the teacher asks ‘Bigger or smaller?’ and the kids make their decision, saying out loud ‘Bigger!’, ‘Smaller!’. Afterwards, the teacher takes out a card at random and the class check. Afterwards, the game continues with another card. The main aim of the game is to drill the key words in a simple way and to reinforce the idea. It can also be done with number flashcards or with school objects flashcards.
  • Who is bigger?, a simple movement activity in which the students compare themselves, in pairs, and the class decide who out of the two is bigger. The aim is to produce simple sentences, to personalise the target langauge and to involve the whole group, because, of course, only the students in the classroom are able to tell who, in fact, is different. It might be a good idea to think about the careful pairing of the students, choosing those who get on with each other or are friends to minimise the negative impact of ‘being smaller’. I also like to pair myself up with the kids and to highlight that they are going to grow bigger and bigger and bigger (one more chance to use the target language!). I have also ducked or sat on the floor, as a joke, so that the child could be bigger than me, at least for a moment.
  • Magic Bag, an object description game that we have already used in our classes. This time, however, the kids put their hands into the bag to describe the object they are holding but this time they do it twice. In the end, they have to objects they have to compare using ‘bigger’ and ‘smaller’ or any other adjectives at the later stages of this unit.
  • Who is bigger? Who is smaller?, a simple flashcard games whose main aim was to get the students to produce full sentences with bigger and smaller in a more active way. The game starts with the teacher taking out a card with an animal and letting each student take one, too and to keep it secret for now. The teacher reveals the card and says ‘I am a dog. I am small. Who is bigger? Who is smaller?’. The kids take turns, to reveal their animals and to produce the sentence. At the same time, they get up and take their place on the left of the teacher (if they are smaller) or on the right (if they are a bigger animal). In the end of the round, all the kids stand in line, at the board, lined up, from the smallest to the biggest animal. Since they take turns they can produce all the relevant sentences, i.e. ‘I am bigger than a dog. I am smaller than a tiger’ and so on. We play this game a few rounds. It might be necessary to give out one card per pair of students if the group is big.
  • Draw it!, a reading and drawing activity that I created to give the students a chance to reinforce the idea of the concept behind comparatives and to check understanding. The only thing that is necessary for this game is a piece of paper (or a notebook) and markers and crayons and a handout which you can find here. The paper is printed (only one copy) and cut up, all the cards end up in a bag or in a box. The kids take turns to take one of the cards, they read the sentence, a few times and everyone is drawing a relevant picture. The teacher monitors. The game can be later develop into a more SS-centred activity, as soon as the kids ready. In this adaptation, the key structure is written on the board: _____is bigger than_____ and _______is smaller than ______ and the kids themselves take turn to dicatate a sentence to draw.
  • What is bigger?, a reading and writing activity, also on a higher level in which I wanted to encourage a more creative and a more productive approach to the target language. You can find the handout here. This was the first more advanced activity which we did together, with a whole set of different adjectives at the same time. And the kids were ready! Everyone got their copy of the handout and they were supposed to trace the comparatives and then to create their own sentences with their own choices.
  • Wordwall activities were included in these lessons, too, to give us a chance to practice the target language. Here are some of those that I used: missing words (only bigger and smaller, I had to help read the sentences), let’s compare (either using only the basic bigger and smaller but also to give the kids a chance to use more complex structures, if they are ready, this btw is an activity that I found in the community resources on wordwall and adapted), and a simple set of cards to play ‘Bigger or smaller’ but on the screen.

All of that, on top of whatever you have in your coursebooks. The next steps will be: adding more of the short adjectives and then, eventually, the long adjectives, too. But, as they say, that is a story for another day…

*

Alisa and Petya, my new invisible students.

Image from www.bullionstar.com

It might be the best way of closing the blogging year, with all these invisible kids. Better than ‘the teacher in distress’, why-has-this-year-been-so-difficult and if-I-stay-in-teaching-it-will-be-because-of-the-kids-and-if-I-leave-it-will-be-because-of-the-adults (after Bored Teachers) that I have been in recently. Let’s try to stay positive, let’s try to give the floor to Alisa, Petya and Pasha instead.

The concept of an invisible student is not a new one…

I have had one in my classroom for a few years now. Long enough to have collected enough material to write a post about, four years ago. Pasha, because that is the name of the first and the original invisible student, has been long enough to have collected his own experiences and now he could write his own resume and tell stories of his adventures in the various classrooms. You can read the original post here. Btw, this is one of top ten most popular posts ever on the blog.

This year has been a fun one also because I started teaching in a new environment and in a new context and a real life Pavel has appeared in one of my groups. It is unavoidable that, after all these years, whenever I say ‘Pasha’, I feel like addressing my invisible student. And I giggle. That also meant that I had to give up on using that concept in that same form in my everyday teaching. It was not an issue because we had other things to worry about. I did not need an invisible student. Then, one day I did and the Invisible Student came back. Two of them, actually.

Enter Petya and Alisa

This year, apart from everything else, I also teach English and Maths according to the British National Curriculum in a bilingual school. I love it but there are also certain challenges that I had not had to deal with before September. One of them is definitely extending the range of ways of encouraging and motivating children to work and to be involved in what we are doing. I have noticed that, apart from the fact of the specific requirements related to the specifics of the subjects (that are different to the regular ESL or EFL), there is also the question of the specific challenges related to teaching Maths in English or to having classes (almost) everyday and having to come up with different approaches four times a week. Which is a higher demand for creativity than in your typical twice-a-week EFL classes. Among others.

Over the last few weeks, I have been teaching some more demanding topics, such as punctuation (English) and subtraction with regrouping and I have been bending over backwards in order to trick my kids into getting excited about these (if we are to perfectly honest here).

During one of the 1-1, me and my brain, brainstorming sessions, I decided to go for ‘play the teacher and find a mistake’. English was first and it was relatively easy to prepare a handout for my kids to trace, to find mistakes and to re-write in the correct from, with all the punctuation marks and capital letters. I set it up, gave out everyone a red marker and asked them to look for things that were ‘not so good’. Everyone got a red marker and we worked beautifully on it.

However, I have two groups at school and when I got to my second lesson with that material, I already knew that it has a certain potential and, feeling inspired, I decided to upgrade it and the lesson started with ‘Listen, there is this boy called Petya. He has a problem…’ Of course, before making copies for everyone, I signed the paper with ‘Petya’. This tiny little adjustment made a huge difference. I was looking at my kids, working dilligently and reacting to the content and I was making mental notes.

Naturally, when, a few weeks later, I decided to use this same approach in my Maths lesson, I knew that there would be a student and how I am going to set it up. Here are a few notes about it, in case anyone wants to use it.

Alisa, the girl who struggles with Maths

  • The first step: to prepare the set of tasks. In our case it was a double-sided handout with sums, addition and subtraction, up to 1000, two- and three-digit numbers, with and without regrouping, as the final task of the unit and the final task of the year. All of these had solutions, as if Alisa had done them, some were correct, some were incorrect, with small and huge mistakes. On the top of the page, there was the student’s name (Alisa) and the room for the teacher’s name, to sign by those who were to check the test.
  • Step two: we could hide it under different, serious-sounding names (‘setting the context‘, ‘involving the students’, ‘generating interest’) and they all apply but what I really did was to tell the kids a story. In one of the groups we even played the monster game (aka ‘hangman’) to guess the title of the story (Alisa’s problem). I told the class a simple story about a girl from year 1 (year 3 in KS3) who is a nice girl and who is trying hard but who still has some problem with Maths. And, most importantly, how we want to help her with checking her test and looking for all the mistakes and, maybe, the things she did well.
  • Step 3: we outline the procedures. On the one hand, these were the three simple steps (‘We check it’, ‘We correct it’, ‘We give a grade’) because I wanted to ensure that they really do go over all the sums and correct them and do the Maths, instead of just ticking and crossing things. Together we also put together a set of symbols to mark with, for example: a tick (V) = it’s OK, a minus (-) = it’s not OK, three exclamation marks (!!!) = very bad and a star = excellent.
  • Step 4: the real work, the hard work: we give out red markers and we get on checking Alisa’s test, individually or in pairs, depending on the personal preferences. The teacher is circulating, monitoring and helping.
  • Step 5: a spontaneous add-on, just because we had a few minutes left: a role-play, in which Alisa’s mum (me) calls the teacher (all kids, in turns) to find out how her daughter is doing. We had smaller groups because some kids had already gone on holiday and we could actually do it with all the kids.

My Oscar-worthy lesson or why I loved having Alisa, the invisible student in my class

A few days have passed since I taught this lesson twice and I have had a chance to reflect and to talk about it with a few colleagues and I think I can safely say that if there was ever a lesson taught category at the Oscars, I would submit our adventures with Alisa and I would definitely hope to win or at least to make it to the list of five nominees. Here is why.

  • The kids were fully involved, every single one of them, my Maths-loving kids and my oh-no-Maths kids, too, the strong learners, those who are just learning and even those who are struggling. Everyone. I was moving among the tables, supervising and helping and eavesdropping on what they were saying to themselves or to their classmates and I was giggling and welling up and beaming, rejoicing their enthusiasm and patting myself on the shoulder for the idea.
  • The reason for that was the story that I told and the context that was this way created. It was not just a handout, just a piece of paper with a set of tasks on that miss Anka brought but a real adventure that everyone was taking part in, with a real girl that we were helping, with red markers and the power that comes with it, with the responsibility the kids were taking for marking Alisa’s efforts and for assessing how well she did.
  • The activity involved the whole child, all the students as humans and as learners, as people who were given a serious task and serious responsibilities and who were also taken into the set-up, for example through accepting their ideas as regards the set of symbols for marking or the grades that they had to make a decision about and, in the follow-up activity, the fact that they were given a chance to be the teacher, during the whole activity and during the follow-up role-play.
  • The exercise was a very effective tool to get my students to do Maths. They zipped through the addition sums (which was not surprising) but they also worked very well with the more challenging problems i.e. subtraction, especially subtraction with regrouping. High five to me for mixing the tasks, addition and subtraction, with and without regrouping. There were different levels of difficulty and the more challenging tasks were beautifully smuggled with the easy-peasy ones.
  • It worked very well as an assessment tool for my kids’ Maths skills. After all, in order to be able to check something, you need to have enough knowledge and skills, and not on the basic, superficial level. Especially that the task included a mix of correct and incorrect tasks that they had to read, check and correct. And they all did! I was so proud of them (and of myself) especially that when they were commenting, they did say things (in their L1), such as ‘Oh, no, Alisa, how could you not notice that!’ or ‘But, no, Alisa, it is easy!’ or ‘No, why did you do this?’. I am not sure if they were aware of how their skills have developed and I think I will have to include this element of noticing own progress as part of the lesson in these kind of lessons. However, even without it, this element, my little kids have learnt. They have learnt. I was touched.
  • In the days after the lessons, I could not decide (and still can’t) what was more touching or inspiring, the skills that were proved to have developed or the fact that during the entire lesson, my kids showed a huge potential for empathy and understanding for Alisa’s problems with Maths. They were not only dealing with the task to help her but I loved eavesdropping on how they were reacting to it. There were plenty of comments along the lines of ‘Oh, but look, she tried to do it, here and here’ or ‘Oh, she almost got it right!’, trying to find something positive in her test. On the other hand, they were just so genuinely happy when they found a sum that was solved correctly. Here and there, now and again I heard cheering and ‘Miss Anka! She did it! from different corners of the room. They were like real teachers celebrating their students’ achievements.
  • And one more thing that made me just laugh out loud was how the kids were grading the overall Alisa’s effort, beautifully out of sync with her actual progress and the number of tasks complete. Some of them were overly optimistic and appreciative, the others overly critical. I just let it be. For now.
  • And the role-plays, that made me laugh, too. We have not done any phone conversations language so it was just jumping in at the deep end and using the language that we know. But I loved it, as I could see how my students tried to communicate in a new situation, wtih limited resources (communication strategies, hello!) although, all in all, our poor Alice is in trouble. In 99% of cases, her parents will have to come to school to talk to the teacher. Which just shows that that is, in my students’ world, the worst that can possibly happen.

I don’t know why but I have a feeling that both, Alisa and Petya will be back in our Maths lessons and in our English lessons…