Little people get bored quickly and when they do, they start for looking alternative ways of getting occupied. The thing is, teachers get bored, too and this is when they start looking for alternative ways of getting entertained. Today, five ideas with plasticine. Very much adaptable.
Idea number 1: Fruit salad.

Pick up a paper of plastic plate (paper plates are better because it is easier to label them with kids’ names. If you are using plastic plates, it is necessary to use permanent markers) and show the kids.
Pick up a piece of yellow plasticine, knead it and roll it. Shape it up as a banana. Show it to kids, ask ‘What’s this?’, elicit the answer. Ask all the kids to repeat ‘It’s a banana’. Put it on the plate.
Wait for the kids to ask ‘Yellow, please’, take a piece for yourself, repeat the whole procedure from the very beginning. Knead and roll together, shape it as a banana.
Continue with other fruit. You can include as many as you have time for.
If the kids are young, it might be easier to make 2D fruit, rather than 3D. In that case, put the banana on the plate and press it.
Idea number 2: Rainbow
Get the plasticine ready. Since you are going to use the specific seven colours and only these, you can get all the pieces ready, one of each colour per student. It will make the lesson go more smoothly.
It might be a good idea to prepare a handout for each student, a very simple one – a piece of cardboard with the smallest arch, in pencil. The rainbow is quite easy but, still, some students might struggle. Once the first one is ready, all the other ones will be built on it and it will be easy.
Show the first colour, ask the kids to name it. Pick up a piece, show how to roll it with the palm of your hand and when it is ready, pick it up to show everyone and then put it on the arch on the handout and press so that it sticks. Pick it up to show all the students.
Give out the pieces of paper and pieces of the first colour. Take one for yourself, too. Roll the first piece together and repeat all the steps together.
Continue with all the colours until the rainbows are ready. Don’t forget to sing the rainbow song when you finish.
Idea number 3: I have a pet!
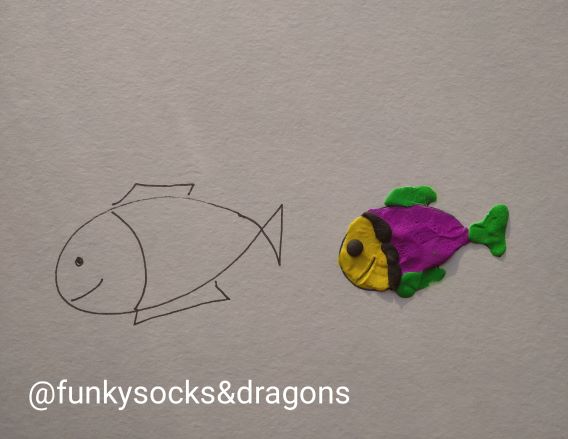
This activity is an example of ‘colouring with plasticine’. I used it in a lesson on pets but of course it can be almost any topic.
Prepare a set of pictures to colour (black and white clip art😊) and make sure you choose them carefully. They have to be small enough (or else children will need a long time to complete the task) but at the same time not too detailed (or they will be extremely challenging to do). Make a few copies of each so that the children have a choice. You can also let the students decide before the lesson and prepare a copy of their chosen pet.
Pick up a piece of plasticine and practise the key verbs for the lesson (knead, press, smear). Ideally, the kids would also practise on a piece of paper before they start colouring their pet.
Pick up your pet. Choose a piece of plasticine, knead a bit, press to paper and smear it, covering the chosen area. Show the kids. Pick up another piece and go on with colouring your picture.
The kids choose their pet and ask you for the colours they need. This is the main communicative aim (Can I have blue, please? Here you are. Thank you).
Kids show their finished pet and introduce them to the group (This is my pet. It is a cat. His/her name is Misha).
This particular activity was a part of the pets unit and in this particular lesson, we watch Peppa episode so we finished with me giving out medals for the best cat, the best fish, the best lion etc. The kids glued them to their posters.
Idea number 4: I can write!
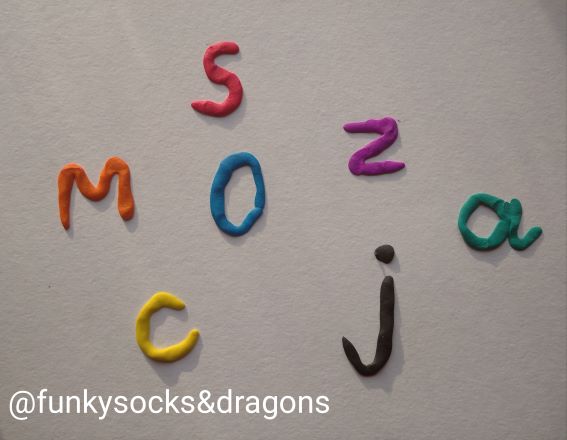
When students are beginning to learn about the letters and beginning to write, it is a good idea to let them experiment with many different alternative ways of writing and different materials. Plasticine is one of them and even the younger students can participate and enjoy ‘writing’ with it.
Decide which letter you are going to write. Write a big one on the board and practise writing the letter in the air and on the table. It might be a good idea to start with the easier letters such as c, o, b, i.
Get the kids’ attention, pick up a piece of plasticine and say ‘Let’s roll’ (sometimes we joke that we are making spaghetti) and show the kids how to do it with the palm of your hand. When the piece is ready, form the letter on the paper and press. Show the kids the final product.
Let the kids choose the colour they want to work with. Repeat the stages (Let’s roll, Let’s make a letter, Press).
The advantage of this activity is that you can make one, three or ten letters during the same letter, depending on how fast the children are able to work.
Idea number 5: How many?
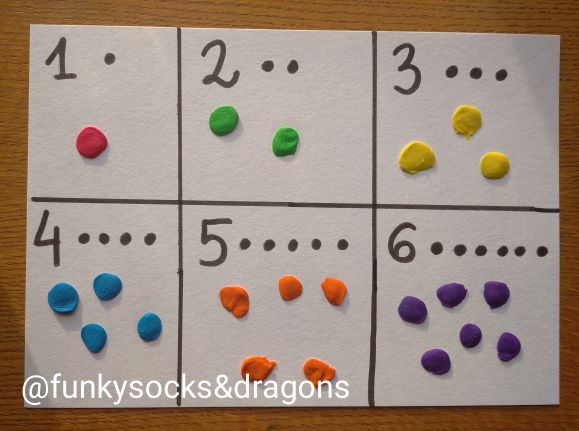
Prepare the handout (a piece of cardboard, divided into sections, each section with a number, 1 – 5 or 1 – 10, depending on the topic and the level).
Show one copy to your students and read all the numbers out loud.
Choose one of the numbers, choose one of the colours. Tear off small pieces of plasticine and attach them, one by one to the handout, in the section with the number, counting out loud.
Give out the handouts, one per child, ask them to find the number and point at it. Give out the pieces of the colour you have used. Monitor and count out loud with everyone as kids are tearing off small pieces and attaching them to the handout in the appropriate section. Collect all the remaining plasticine.
If possible, ask one of the students to choose the number and the colour. Make sure everyone has a piece of plasticine, get the kids ready. Start to tear off and count out loudly and attach the pieces of plasticine to the handout.
Continue with all the numbers.
And all the useful tips…
- Make
sure that you are using plasticine of a good quality. It doesn’t have to be the most expensive
thing available on the market but also not the cheapest one as this tends to
flake and stick to hands and tables and that’s very frustrating for the little
ones. - I am
not a fan of using all the fancy colours like golden, silver and all the
fluorescent greens and yellows. The kids are drawn to them but there is
something in the colouring affects that quality of the clay. But it is up to
you. - Make
sure you get the plasticine ready before you give it out. Even some of the
older kids might struggle with kneading it and softening it before it is
pliable enough to play with. Sometimes you might have to kneed it yourself
before the lesson but most of the time it is enough to leave it for a moment in
the sun or near the radiator. - Give
out small (A5) pieces of cardboard to roll the plasticine on but the younger
kids can roll it directly on the table. This way they won’t have to deal with
holding the piece of cardboard and the table is big and stable. All the
leftovers that get stuck to the table can be picked up with bigger pieces of
plasticine. - It
might be easier to work on cardboard, rather then on regular paper. It is more
durable and easier to ‘draw’ on. It holds plasticine better, too. - Get a
packet of wet tissues and keep it in the classroom. Making a train and going to
the bathroom to wash the hands at the end of the lesson is always a good idea
but some kids might not like the feeling and will be impatient to clean their
hands as soon as possible. Wet tissues will come in very handy here! - As
with all the craft activities – do it at home first, before you take it to the
classroom.
P.S. A box of playdough costs about a dollar…