Ingredients
- A3 paper
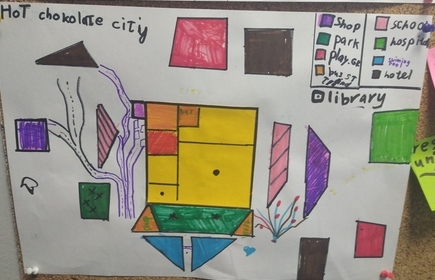
- a yellow square aka the city centre for each pair
- pencils, rulers, crayons, markers
- a very detailed plan and careful staging (see below)
- post-it notes (two different colours)
- the materials to set the context based on the material from Superminds 5 by Herbert Puchta and Gunter Gerngross from CUP
Procedures
- The introduction to the project was based on the material in the coursebook.
- Afterwards we made a list of places in the city (I was taking notes on the board). Then, the kids were chatting in pairs, creating questions for each other: Which one is more important in a city, X or Y? Why? This was a fun activity, the kids were coming up with sometimes impossible pairs and providing justification for their choices.
- I divided the kids into pairs and explained that we were going to design a good city. Each pair got a set of questions about their city and they were to discuss these with their partner. The handout was cut up into three pieces and they were given out, bit by bit (or rather, that was the plan. In the end, I only gave out the first part, the other phrases and questions were simply written on the board for everyone to see). I was only monitoring and asking follow-up questions. We did not have a whole class feedback.
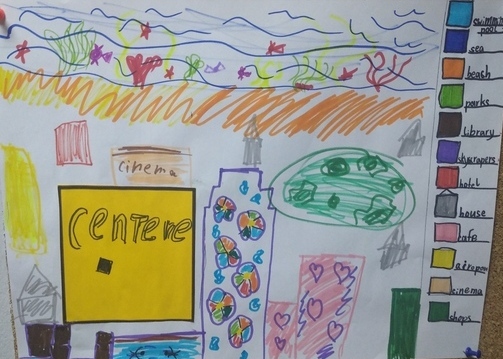
- I gave out the A3 sheets and the yellow square. I explained that it is the city centre and I asked the students to decide where it is in their town and to glue it on. I did it on my model. I drew the map legend box and I drew two items on my plan. Afterwards, I gave out materials and the students started to work.
- The negotiation language and the steps (stage 2 of the handout) was displayed on the board. I planned it differently but, in the end, I decided not to give this part of the handout out. There was no room for it on the tables anyway.
- The kids were working on the project for about 10 – 15 minutes, until the end of the lesson.
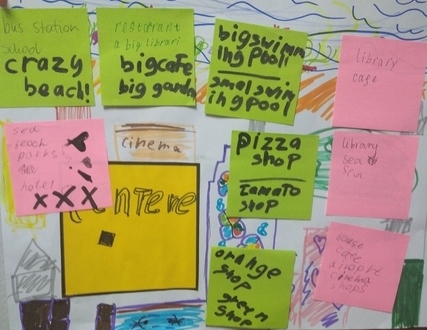
- At the beginning of the following lesson, the kids sat down with the same partner and each pair got a set of post-it notes, pink to write what they like about the city and green to write about the things that the city should have. We circulated the projects, kids worked in pairs, looked at the plans, talked and made their notes on the post-it notes, discussed what they liked about each city. They also made suggestions and all their ideas were written down on the post-it notes which they attached to the plans. Each pair had a chance to talk about all of the other posters.
- In the end, the posters returned to their owners and the designers had a few minutes to look through the comments.
- In the very last stage, each pair of designers was asked to provide feedback on the feedback they received. They did that by answering the following questions: Which are the favourite places in your city? What should your city have? Do you agree? Why? This was the only part of the project that was done in front of the whole group.
- In the end, the posters were displayed on the walls.
Why we like it
- I personally really liked this project because it was a diversion from a traditional approach to a project in which the students work in pairs or teams to produce something and then present it to the rest of the class and in which a creative stage is followed by a productive stage. I have decided to give up on this format almost entirely and, instead, to minimise the creative stage and to maximise the production without limiting it to the post-project phase.
- Throughout the entire project, the kids produced lots and lots of language, they were making suggestions, expressing views and commenting on the other students’ suggestions. There were at least three layers of material created by the students, in one format or another.
- In hindsight, I do believe that there were even more opportunities for the further extension of the project by comparing the real cities the kids know and whether they would be a good place to live, by making suggestions how the city they live in can be made better or by ‘visiting’ one of the other cities and writing letters or postcards from their visit…
- I was glad that I decided to keep the creative part of the project, even if in a limited format. They students really did enjoy designing their cities, drawing and colouring, even though in my eyes (a boring teacher here) they should be the first to go as not very generative.
- It looks like my kids also enjoyed the project. They were asking after the lesson whether I would put the posters up (I did!) and, a few days later, whether we are going to have any more project lessons (we will!)
Happy teaching!