How do you feel today?
Easily, the emotions (and adjectives) have always been a great passion of my professional life. One reason is that they are a little bit unappreciated in the early years EFL world (a personal opinion) and they can make a huge difference in communication, even for the little speakers. The other reason is that they help the kids describe how they feel and, apart from that making them want to talk because they are sharing something personal, that is a precious something for the teacher to know. Having 9 happy preschoolers and 1 angry preschooler in the classroom or having 5 happy, 3 sleepy and 2 sad preschoolers makes a huge different and, whether you want it or not, it will have an impact on your lesson. Basically, it is better to know than not to know, in order to prepar and to adapt, if needs be.
And then we found the song…
It was only last week that, together with my students, we were trying to remember what was our first Hopscotch song. It was, probably, The Fractions Song. What a hit! Itt really (really) helped us get the concept and to memorise the fraction vocabulary. Not to mention the catchy music and the hilarious plot. And when, after about three weeks of listening the song, we found out that each (more recent) song includes bloopers…we were collectively in love.
I had never heard about that channel before so I got down to researching and I found piles and piles of treasures. Some went into the category ‘subjects’ and some, the really delicious bits, into the category ‘oh, my, the langauge we are going to pick up here!’. One of the latter, was the Feelings Song with as many as 56 beautiful adjectives.
Quite a few words, actually, and some of them from the higher CEFR shelves so I decided that we will just sing the song and aim for picking up a few words, such as hangry, disappointed, overwhelmed or inspired.
It was only much later that I decided that the song will fit perfectly in our end-of-year concert as it has a plot, all the emotions have been neatly divided into groups, like almost 5 acts of the play, there is an introduction and a funny ending, too. And a beautiful message. So, having sung and listened to the song for about two months, we took to staging it and really looking into the other words.
A conversation
At this point in the game, we had been starting every single day with a conversation about our emotions. ‘How do you feel today?’ ‘I am…because…’ and to help us with it, we use about twenty different emotions such as angry, sad, sleepy and confused which we have on posters on the walls of our classroom.
I made into two additional lessons in which we learnt and revised the feelings from the song (or most of them, I still decided to skip a few). We went through all of them, clarified the meaning, practised pronunciation and devoted time to talking about our own examples when people might feel disappointed, overwhelmed, angry or inspired.
A self-reflection
I admit, initially, I only wanted something to write. My kids, now in their year 2, when putting letters in the Latin alphabet is no longer scary or tiresome, take pleasure in writing (insert: a little joyful dance that I can actually say this!) and we are now working on writing neatly, without mistakes, remembering about the punctuation marks and spacing. We write the date and the topic and we sometimes take little notes. This is exactly what I wanted to do last Tuesday, just write something neatly. I figured out that it will be a feasible and open-ended task if we all finish the sentences: I always feel…I never feel…I sometimes feel…I rarely feel…
It was amazing how the kids took time to think and to decide how exactly they feel in certain situations.
Showtime!
Somewhere in April, when we started to discuss our plans for the end of the year concert, I realised that this is the song that I want us to do. Initially, I was even considering turning it into a theatre show, with a few acts (one act = one set of emotions) and some conversations in-between, a musical of sorts. But then, the end of the year itself, the tests, the whirlwind of May took over and I decided to scale down. The plan was as such: we are going to sing the entire song and we will present the emotions to the audience as there will be parents and younger kids.
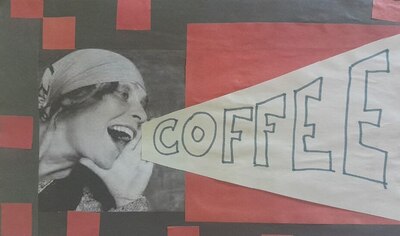
In order to turn it into ‘a video’, we started to prepare illustrations for an emotion or for a pair of emotions. I prepared the cardboard (A4) and the drawing materials, I also wrote the emotions on them, in big letters and I prepared a few examples, to show the kids that the emotions can be illustrated either by the situation (i.e. our ice-cream drops onto the floor = we are disappointed) or the associations (i.e. the rainy day, colour blue, wilted flowers = we are sad). We got down to work.
I think, in the end, we prepared about 40 illustrations and all of them were absolutely brilliant, either because my kids can really draw well or just because it was a fascinating experience to be going through the creative process and the creative decisions with my students. Some emotions were more difficult to draw (I dealt with them), some were really popular and so we ended up having about four pictures illustrating ‘love’.
I put them into groups, as they are in the song, and put them into a chain with coloured paper that had the text of the relevant verse on the back. Two of my more responsible students were assigned as the holders and as the verse would come up, they would pick up the big and beautiful streamer from the floor to present to the audience. And to peek at the lyrics.
The video finishes with the bloopers in which the emotions (represented by a cookie-like creature) are thrown out and up (Attention: don’t keep them in, don’t bottle them up, deal with them!) and we had a few ridiculously funny conversation how we could illustrate that without frightening the parents or the little kids with the year two kids suddenly making the ‘throwing up’ gestures…But we decided to go for the amazing streamers throws that one of my students suggested.
We rehearsed and rehearsed and rehearsed and my kids actually sang the whole long song, almost entirely from memory and it was a really touching moment, for all of us. Not only because we loved the song and because it was the end of year 2 but also because, while we were singing, it was already obvious that our school was to close down, for ever, and, naturally, we had A LOT OF different emotions to deal with at the time, all of us, kids, teachers and parents.
It was beautiful, it was touching and everyone was amazing. We gave a good show and we created fantastic memories. That is what will matter in the long run.
Happy teaching!