My house! A project in primary once more!

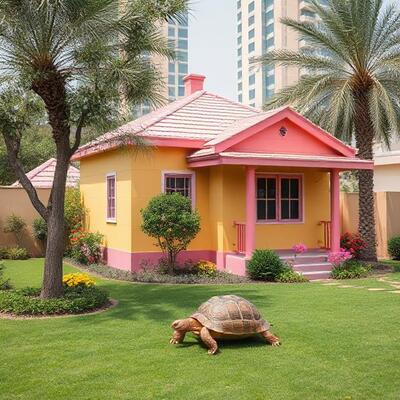
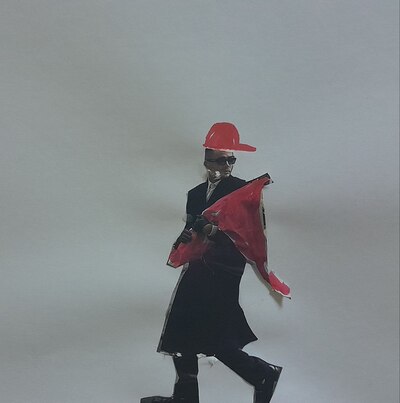
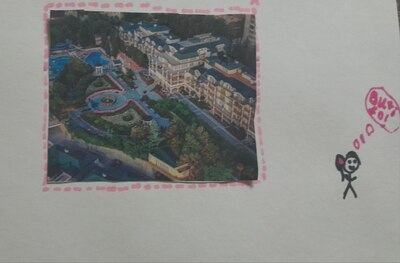
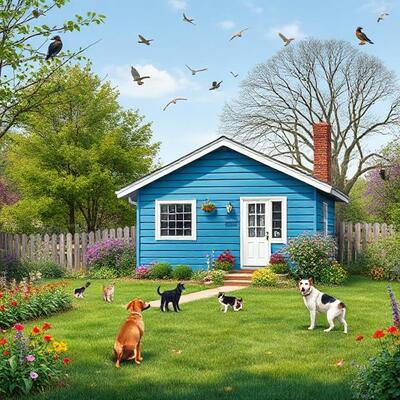
One of my student’s design. Created using deepai.org

I decided to share this idea here because I love how this whole idea happened, from just one little Maths exercise into a fully-blown, multi-media, multi-subject project. It is not a story of careless teacher who did not plan the lesson properly, rather a story of a lesson that, suddenly, blossomed and a teacher who saw the full potential.

Step 1 or I only wanted to make Maths a bit more exciting

The year 2 in Maths has been, so far, quite an adventure. Especially after we survived addition, subtraction, multiplication, division, fractions and decimals… After those first six heavy duty months of the academic year, the lighthearted Maths came up. I mean, it is still fun, measurements, statistics and geometry, all of that is amazing and we learn a lot but after everything we did before, it is just easy-peasy.

This project happened when we were in the unit of Area and Perimeter and while working on a task from the coursebook ( ) which was pretty easy and straightfoward: ‘to design a garden of the area of 80 m2 and calculate its perimeter’, I realised that my students were really enjoying the task. Truly, madly, deeply. They started to add flowers, trees, huts, colours and some random animals. Maybe it was because while explaining area and perimeter, I drew my own farm and a pig and a chicken…All in all, they got a lot more into it than I expected. There was definitely a lot more potentatial.

That is precisely why for the following lesson I decided to give them a summer hut to design and to draw and to calculate. The main aim here was to follow very specific directions and information and to put together a house in which all the rooms have specific size but they can be of any shape the little architects wanted. It was amazing to see how, again, they got into it but how, at the same time, they already wanted to do more and get more freedom and to add their rooms. Obviously I had to promise that we would design our proper houses when we will have the freedom to do almost whatever we want.

Our project has properly took off in the third lesson. The task my students got was to design a house they wanted: decide which rooms they want to have apart from the main set (the kitchen, the living room, the bedroom, the bathroom and the veranda), make a decision about the area of each of them, to calculate the total area of the house and not have it exceed the allowed area of 200 m2 and use the remaining part of the lot on the garden, the swimming pool or the garage. The main focus here was the Maths and calculations. The follow up task would have to be calculating the perimeter, too.

In order to make the task easier I looked up 200m2 houses with real designs, to understand how big this house can be, how many bedrooms and rooms can be fit in and how it could be organised. The first thing that came up was a lovely website from New Zealand and that is exactly what we used. I printed one of the plans and colour-coded it for the kids to better understand it and we had a look at it during the preparation for the house.
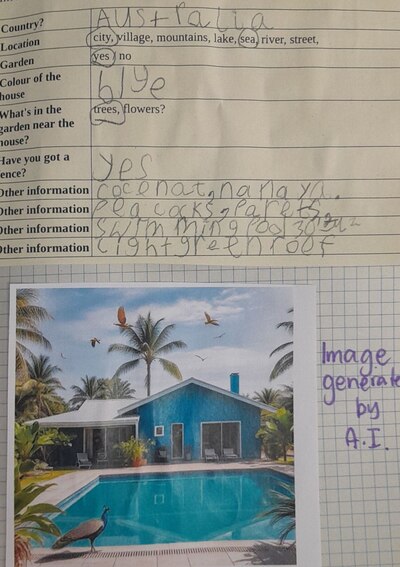
The description and the photo, already in the notebook.

Step 2 Visualisation or ‘Let’s draw it!’

The design could not be done without the floor plan because that is where the real fun starts. I realised it when I was preparing my house plan. Guess what: design is not easy! Putting together all the rooms in some kind of a reasonable shape, the walls adjacent and location of all the rooms…Because I designed my own house, I could prepare the kids better for the task. The following things had to be taken into consideration:

  • the area of each room and the total maximum area of the house, the calcuations we had to make on the way
  • the colour-coding of the rooms to make the design clear and easy to understand
  • the scrap paper to calculate and to draw on not to destroy the actual design
  • the pencils, the rules and the erasers for all the kids and to tell the students that it might be necessary to fix their desing as you go along because your ideas can change
  • to allow and encourage the kids to check and to compare their projects and to exchange ideas to inspire each other
  • to model and to share ideas about the non-standard rooms like the cinema room, the library, the secret room…

This would have already been great because they really got involved in the task and the houses already became precious. And, of course, we met our Maths aims: calculating and measuring. Somehow, during the lesson, we had a student who had already finished and, automatically almost, it turned into a conversation about the house and the student really enjoyed talking about it. I decided on the spot that there must be more lessons and a proper presentation.
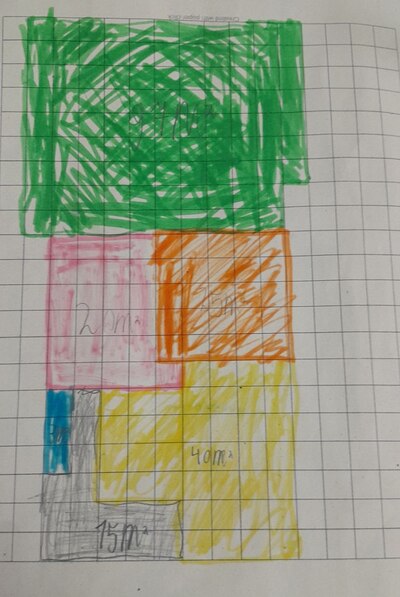
The floor plan.

Step 3 or ‘Tell me about it…’

Truth be told, I am kind of lucky because I have four lessons of Maths a week and four lessons of English so that gives me quite a lot of flexibility and freedom. I have the time that I can devote to the projects. On Thursday, our final day of the week, we usually have English and Maths and I decided to use both lessons on finishing the project.

In the first lesson, we were finishing our designs and preparing for the presentation. I told the children that we are going to rehearse in the classroom and then, in a separate classroom, my amazing T.A. will make making short videos of the presentations.

I prepared a template for the kids to use and it was both on the board and on the handout that they took into the recording room (‘Hello! My name is…and I am an architect. This is my house. The area of my house is…The perimeter of my house is… In my house I’ve got…My biggest room is…and my favourite room is… The task was easy / difficult and it was interesting / boring because…Thank you).

My more independent students rehearsed together and I helped out some of my less independent students. Then, my T.A. was taking the students into a quiet room and recording the little videos.

While I was preparing this stage of the lesson, I realised that I needed some grand finale and a reward for all this hard work.

Step 4 or ‘We need a real illustration’

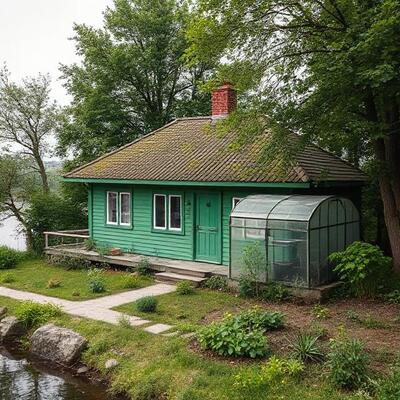
As you can see from the photos, the drawing of the outside of the house was a part of this project as, initially, I wanted the kids to simply create it themselves. However, they got so involved in the design and creating of the floor plan that asking them to draw another picture would be too repetitive. What is more, it is not so easy to draw the house in the time we had left for this lesson and ‘just drawing’ does not lead to any language production. And using the A.I. certainly does!

Now, I know that there are many disadvantages of using A.I. and there has been a lot of talk in the recent weeks of how it abuses the copyright and how environment-unfriendly it is but it is a perfect solution for the young writers and so I decided to use it again in my lessons*).

I explained for the kids that an A.I. engine would create the images of the outside of the house if we prepare detailed descriptions for it. Everyone got a small handout and they had to make more decisions about their design: the location of the house (country, city, etc), the colour of the house, the surroundings, the garden, the fence etc. I took their notes home and typed them up and then brought the pictures to class. We had a lot of fun looking at all the photos and trying to guess which house was whose. Indeed, this worked very, very well.
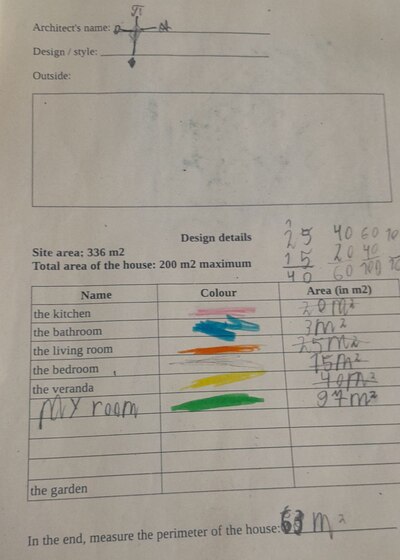
The serious details.

Instead of a coda

We had a great time with the project and I am very happy with how it turned out

  • My students drew, calculated, read, wrote and spoke a lot.
  • We managed to include almost all language skills and at least three different subjects.
  • The kids had a chance to express themselves creatively and to make independent decisions but also to be the real scientists, to follow instructions and the rules, to be accurate.
  • It was important to add the last bit, the outside of the house because this was where my students really let themselves be creative. As can be seen in the photographs, the gardens filled with flowers, trees, dugongs, peacocks and dogs and the kids were really specific about the location of their houses, too.
  • I could not watch the videos being made, I only watched the final product and it was a real pleasure to see the kids speak freely and independently, adding some details and getting into a real conversation. I was really proud of them and, in a way, this project was their end-of-year project and I can say they all learned a lot.
  • We shared the videos with the parents so I hope it will also help everyone remember this year and the progress we made.
  • For me, as a teacher, this project will be a memory of how a real, fully-fledged project developed in the making and that the most important thing is to keep my teaching eyes open for new options and for all of the potential that it may hold. Knowing everything from the beginning is not always an advantage. There might always be more that is possible.
  • The basis for the project were very simple handouts that you can see in the photographs. We kept them all in our portfolios (aka the notebooks). The videos were shared with the parents digitally.
  • All of the activities described here took a total of 5 lessons. I am not sure if this is everything that a teacher can set aside for a project but I decided to keep everything in and, as always, we adapt to everything that is possible in a specific context and with a specific timetable and a number of hours a week available.
*) Do I feel guilty? No, not really. My A.I. footprint is minimal – all my words come right from my brain, I only use the visual creations and very, very rarely. The total of times I have used A.I. for my projects is still under ten. I think I am fine, for now.

Advertising April: Great Artists at work. Andy Warhol

The language

This time, I decided to let the topic and the language lead the way in all the lessons this month. On the one hand, it has already proved to be a great way of revising the structures we know (I like, Do you like, adjectives) and, even more importantly, it will help us aling what we know beautifully with our artists and their ideas.

Andy Warhol and the idea for the lesson (that I owe to my friend, just like this whole idea for the series that was born during a conversation) was that instead of focusing on Andy, we focus on food and creating our amazing combinations of it. No suprise then, that the lesson had to include the amazing ‘Broccoli Ice-cream’ from Super Simple Songs and our own version of it, too, which we created with a set of flashcards. The kids were taking turn to pick out two flashcards randomly from the pile and sing a new version of the story (‘Do you like bananas? Do you like sandwiches? Do you like banana sandwiches?’). And the rest of us reacted.

The artist

‘Miss Anka! It’s him!’ It is precisely when the Art teacher smiles, upon hearing a comment like that! The kids were super excited to see Andy again because most of them have already met him, either in our Chebourashka lessons and our Christmas tree lessons or both.

This time, we invited Andy again, to introduce him as an artist and as a copywriter and the art director, too. As usual, I used a presentation (this one here) to show his advertising portfolio and the kids were calling out the products advertised.

We also looked at all the soup cans, read the flavours and chose our favourite one.

The Magic Soup

The art

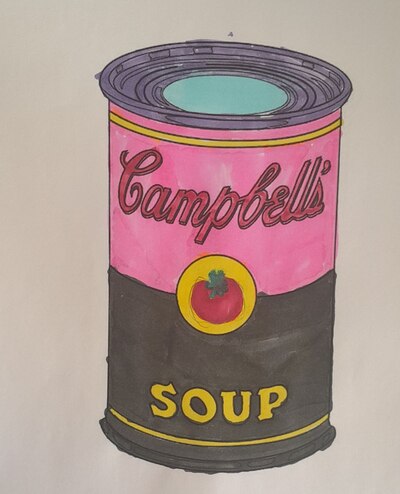
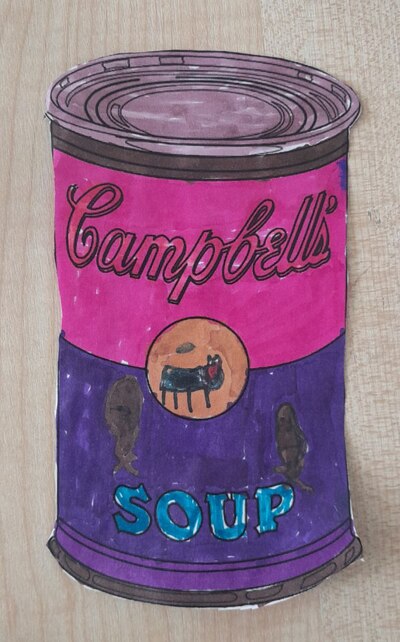
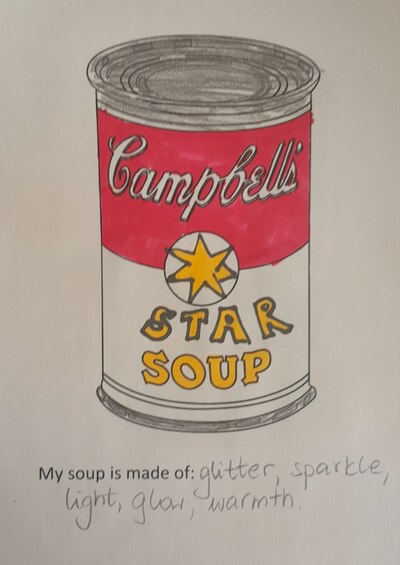
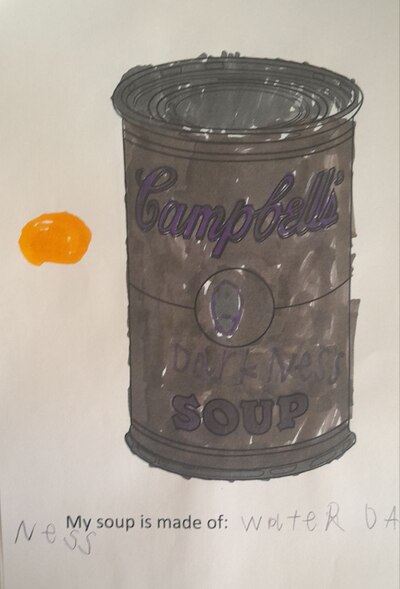
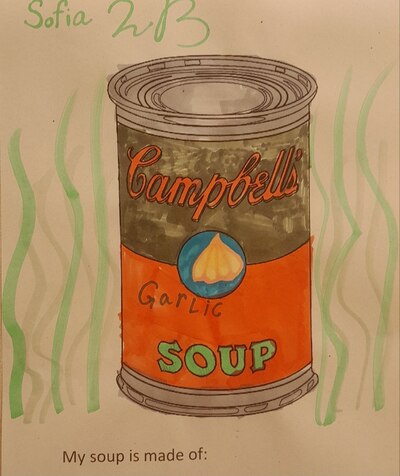
I showed the children the template of the Campbell soup can (I got mine from Fine Art Coloring Pages Archives · Art Projects for Kids, Thank you!) and explained that everyone can create their own. We made a list of all the decisions to make: flavour, name, logo, colours. This time I did not prepare my own model (I did not have a template available before the lesson, a rookie mistake) but I decided that this time we will have a chance to brainstorm together and that it might also be a source of inspiration for my students. It also so happened that I had my older / smaller group first so I prepared my soup cans with them and when I already ran the second lesson, with my younger / bigger group, I had lots to show to inspire them and it all worked out just fine.

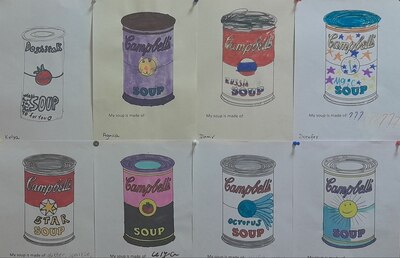
I was really happy because all the kids could accomplish this task and we had a lot of different types of soup posters and our noticeboard looks like a print by Andy.

The Zombie Version of Campbell’s

All the kids worked very well, also the young ones and most of them had a very clear idea of what they wanted to get from the very beginning. The selection of colours took a bit longer but it was also beautiful to see how they were all coming together.

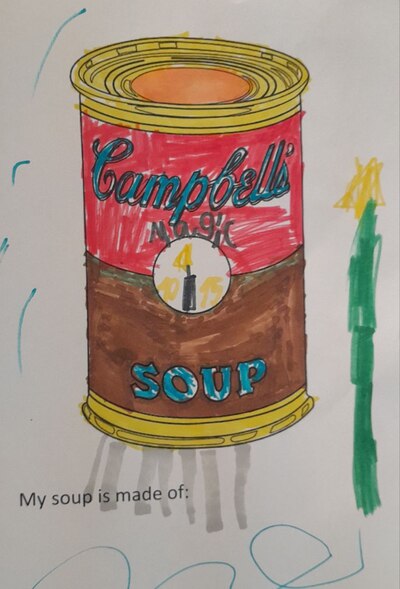
Not to mention that I love all the final products and, again, I could not but keep repeating ‘Oh, that is a lovely idea!’ My students treasured their creations, too! It was one of those lessons when I had to beg to at least get the permission to photograph the posters because so many of my students just snatched their works to take them home as soon as possible. At least I have the photos!

I was planning to ask the kids to make a list of all the ingredients but, somehow, it did not always work out. Next time, I will have to ask the kids to start with the writing, before we get to create properly.

But look at that! We’ve got some magic soup, some tomato soup, some garlic soup, some sun soup, some octopus soup as well as some darkness soup and some zombie soup. I am happy. I hope that Andy would be happy, too! Just look at all these colours!

Just a little bit of Art (in your English classroom)…Erik Bulatov once more!

This time, I did not teach my regular Art lesson. Last Thursday, in the middle of a regular unit but at the end of the term, with all my kids already tired and looking forward to holidays and with the first properly spring days outside of our windows, I decided to let our hair down and engage into some creative activity as part of our regular English lesson. Yay to great ideas!

The language

This time round Erik Bulatov joined us in our regular English lessons. At the moment, we are in a fanstastic unit ‘Going places’ (Global English, CUP) and we have already revised the transport, learnt some less traditional transport, we did our Big Transport Tournament (choosing the best one, in qualifiers, quarter-, semi- and finals which was basically a lot of speaking) and now we are comparing the transport (‘Are they similar or different?’). We have also worked on the verb ‘to get’ and all its meanings (aka ‘The best verb in the world’).

And then I needed something lighter, more fun and more creative for the last lesson of the term.

The artist

I taught this lesson before, twice, in different ways (the previous posts can be found here and here). I reused the presentation I prepared before even though some of the students have taken part in my Art Explorers lessons already and it worked well.

We talked a little bit about the meaning of words and the meaning of pictures and I introduced the Artist of the Day. We looked at his paintings and the meaning and how Bulatov tried to show his ideas through words and through images.

I have also showed the kids again the images in Portuguese I created for the previous lesson (in the posts mentioned before).

The art

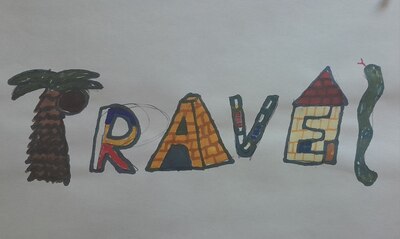
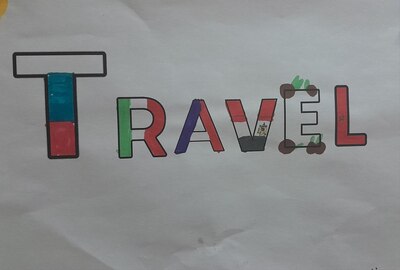
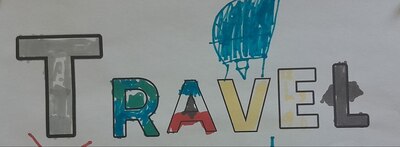
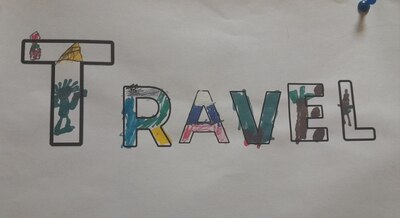
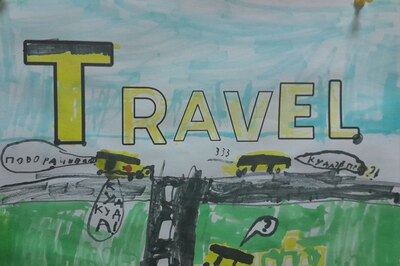
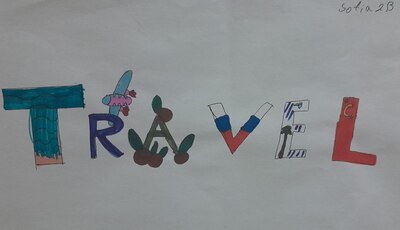
I showed the students the template I prepared, just a simple word TRAVEL in block capital letters and together we brainstormed their own associations with the word. Afterwards, I explained that their task will be to illustrate the word in such a way so as to show the word speak: as a word and as a visual. And that all ideas are good ideas. I gave out the pencils and the markers and they got to work. They were working and I was just supervising and helping with the content as we had to do some research to look for images or for information.

Afterwards we had a short presentation for everyone to see all the ideas (‘This is my poster. I’ve got…because…and…’) and when all of them were done, we also had a feedback session. I wanted to praise everyone together, as a group, apart from all of those individual praises I gave while monitoring and I also wanted to highlight that we had lots and lots of different ideas and that they were all precious. One of the students suggested choosing the best poster but I objected. I explained that all of the posters were great and so different that it is impossible to choose one, the best, they are all great.

Apart from that I also wanted to ask the students for their feedback and whether it was easy or difficult to use the words and images in such a way. This was also a precious part of the lesson.

It is also important to mention that this lesson, untraditionally, was longer as it took more than 1 academic hour that we normally spend on Art in our Art Explorers. I could do it because we had a double English on that day and it was absolutely necessary as only a few of my students are the regular creators and I did notice that these did have a different time management mode and ideas generation mode. The others needed more time to make decisions, to generate ideas and to execute them. Which is something to bear in mind. If it hadn’t been the last day before the term break, we would have created in one lesson and carried out the presentation + feedback on the following day.

The teacher watches and ponders…

Oh, this was one wonderful lesson!

I was really really curious how my regular class would react to the Art content as out of all the students only three or four attend the Art Explorers regularly, all the other ones do not have the chance to stay for the afterschool classes and only some of them attend our term break classes when these take place.

But it went well…I mean, it is a good lesson and, for me as a teacher, it has been tried and tested so I was confident and I knew that great things might come out of it. But the kids took well to it. They were curious about the artist and his paintings, especially that they were in Russian and they were interested and invested in answering the questions I asked.

The brainstorming session, something that we rarely do in the Art Explorers, also helped because it helped the (potentially) less creative students generate ideas or, at least, to see that there is a range of interpretations to choose from. To be honest, some of the kids really surprised me with their ideas and their interpretations as they were fresh and spot-on.

The presentation was a great idea, and again, something we rarely do, because only in our classes we have more time and a relatively even levels of English for everyone to produce and to understand but it was also worth it. I need to think of how to smuggle elements of it into our Art Explorers classes.

My favourite part, however, apart from the creation, was the feedback and all of the comments the kids made. The general consensus was that sometimes it was easy and sometimes it was not to come up with the ideas and to deal with their execution. I really loved the fact that there was such a variety of the interpretations and they the kids had a chance to see everyone else’s angle, too, further broadening their horizons. Some of my favourite ones were the following: travel represented by the sights from around the world, travel represented by things that we need to travel, travel represented by the flags of the countries that the artist likes, travel represented by the flags of the countries that start with the letters t, r, a, v, e and l, travel represented by the travel associations that look like the letters of the word or, even, travel represented by the potential problems which you might encounter while travelling…

The most beautiful line and the one that I will finish this post with was a question from one of my students, one of those cool one, the older ones, the ones who do not attend the regular art classes. It went like that:

‘Are we going to do it again?’

Movement March. Humans!

Oh, I was so not sure what to do with March this year…Last year we did ‘Monochrome’ and so repeating and extending the theme was an option, of course, but I wanted something else. I was brainstorming with me, myself and this is how I stumbled on the idea of movement. M is for movement!

The funny thing is that when I get those ideas, the theme for the month, it is never a fully-fledged curriculum. I starts with the word and the alliteration and then I go on brainstorming and coming up with ideas. For instance, right now, half-way through ‘the unit’, we have had two great lessons but I still don’t know what we are doing with the rest of the month. The only thing I know is that the ideas will come to me, for sure.

The language

As regards the language, I decided to continue our theme from the previous month, the verbs and the Present Continuous, because I have a cunning plan of turning it all into picture description and, eventually, into storytelling. We still play our ‘What are you doing game?’ and describing different pictures, in the most simple of ways. And we also sing Pete the Cat’s, Rocking in my school shoes.

The artist

In the first lesson of the month, we did not have one Artist of the Day. Instead, I introduced a few different creators who helped us illustrate how movement can be depicted in art: through humans, shapes and lines, colour, nature, texture, animals and even words. This is, probably, the biggest number of artists that I have ever manged to squeeze in one lesson with Chagall, Bulatov, Hokusai, Kandinsky, van Gogh, Samokish and Riley. Seven. Wow!

It was lovely to see that my kids recognised some of the paintings as we used van Gogh, Bulatov and Chagall before…

Here you can find the link to my presentation.

The art

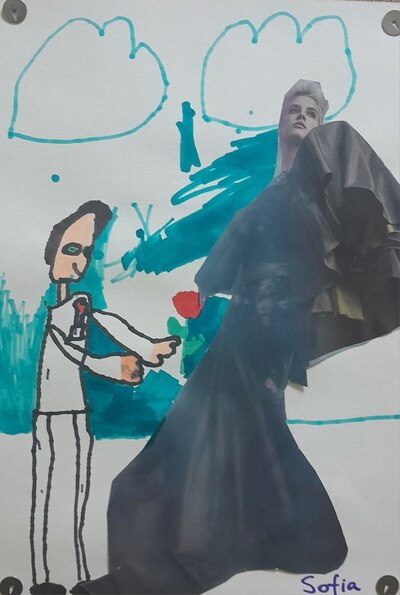
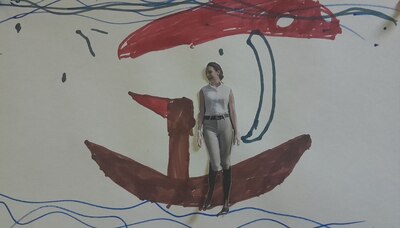
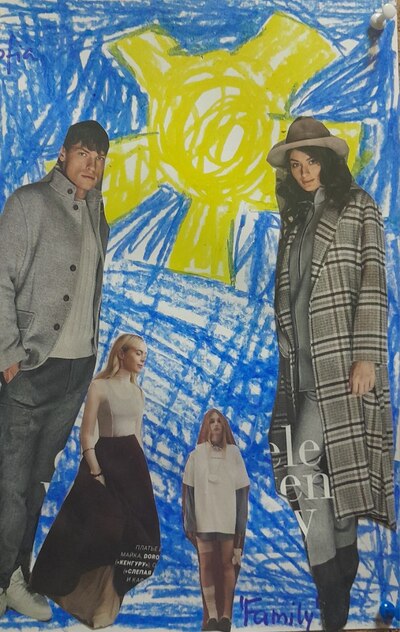
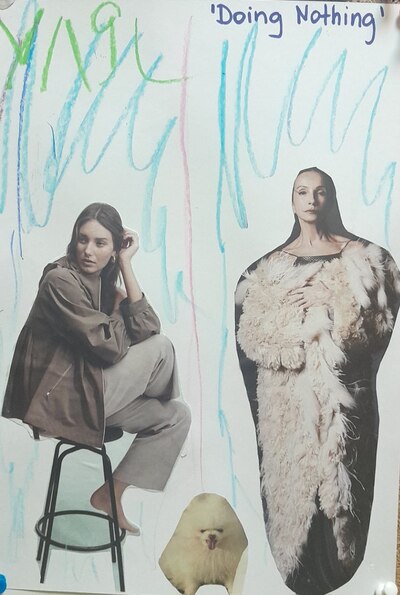
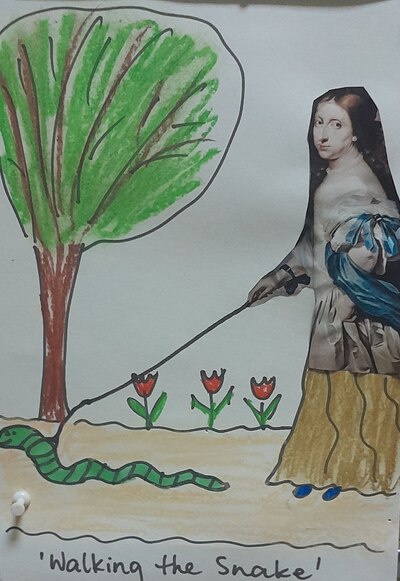
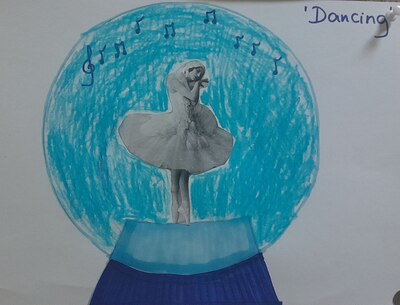
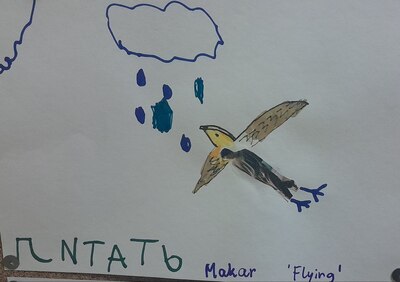
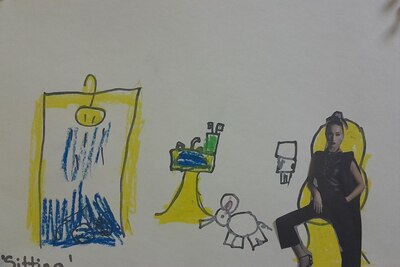
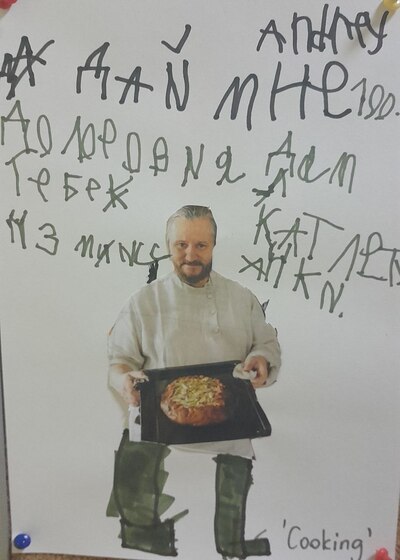
We started with looking at my example that I prepared before the lesson and called ‘Walking the snake’ to illustrate the idea and the whole project: choosing one or more of the characters from the photographs and giving them a new life – a new activity, a new environment and a new movement.

Then we outlined the main stages of the whole process (1) choose the photograph(s), 2) choose the new settings, 3) draw and glue or glue and draw, 4) think of the title) and we got down to work.

And I was working with the kids, creating my own pictures, to better illustrate the stages and to help them generate ideas for theirs.

If I were to summarise this lesson and my associations with it, it would be through the smile that appeared on my face every single time I walked past the noticeboard in the hallway where our pictures were displayed for a few weeks. Every single time. And that’s because they are beautiful.

The movement in the pictures is more or less distinct but all of the characters are doing something in their new settings although sometimes we know it only from the title of the picture (‘Doing nothing’). One of my students also tried to make a moving picture in the form of a simple puppet. Some of the pictures were even controversial (if you look closely, ‘Sitting’ is set in the bathroom) but it met all the requirements of the task and I had to accept them. One of my students, one of the more creative ones, took the task to a brand new level and focused not on the humans but on the place and, of course, I allowed that as I was very curious what will come out of it.

I would really like to use this technique and this task in one of our regular lesson, I just need to think what piece of grammar I can combine it with…

Soft skills in the YL classroom. Communication

Why bother?

For us, it was a very simple story of cause and effect. We have a crash situation in my class (yes, I know, I know, they are only seven and eight and I was really hoping that this situationship could wait until year 4 or at least year 3, alas) and I noticed that, among all the other issues that was causing, the two were just fighting with each other. Obviously, it looked like fighting only to the untrained eye. What they were doing, in fact, was just an exchange, communication, only in the clumsiest and in the most unwanted of ways that one could possibly think of. They were obviously drawn to each other but instead of talking, they were just punching, pushing and what not.

On top of that, I noticed that the whole class, both groups, being still children, lack the social skills in general, although, after a year and a half in my classroom, they are, admittedly better now at playing in pairs and in teams. Hooray.

That is how I decided to take the game up to a new level and to start, slowly, developing their soft skills. I haven’t really done much of that in the classroom but everything needs to start somewhere and since we have a good team in our school, I can plan my lessons and consult them and reflect on them with our school psychologist.

In the long run, I would like to spend two or three hours a month (45 min times 3), doing ‘something else’ in class, developing certain social skills and soft skills and helping my students become better group memebers.

Our lessons are run in English but I speak my kids L1 so it is understood and accepted that at times, my students might reply in Russian, although, the aim is to use English as much as possible. I am including all the materials here.

In order to mark these lessons as special ones, we completely changed the set up of the room. The tables were moved to the walls and we were able to sit all together in a circle.

All the aims

  • talk about effective and not very effective communication and reasons for it (we used ‘good’ and ‘bad’ initially, then switched into ‘effective’ and ‘not very effective’
  • talk about different ways of communicating with examples
  • try communicating in different ways (controlled and freer)
  • talk about the different problems in communication and solutions
  • create our own code of conduct

Lesson 1: The ways in which we communicate

Step 1: We play hangman or monster game to guess the word ‘communication‘, talk about what it it is

Step 2: What is good or bad communication (effective and not very effective)? What happened here? We talk about the pictures in the presentation (slides: 2 – 7, description included in the notes). I based those on the real events and issues that we have to deal with on daily basis that are somehow connected to communication.

Step 3: We introduced and revised the vocabulary related to how people communicate. I chose these ten different ways in order to cover the basic ones (body language, words etc) and to include a few alternative ones, too, such as dance or music. I have included all of them here, in the wordwall cards. We went through all the words and illustrated them all with our ideas, mine and kids, to demonstrate that we already use a lot of them on daily basis.

Step 4: The practical part: We took turns to pick a communication method at random (cards I prepared) and an animal (the leader’s choice) for everyone to try their best to show the animal. At this point, I wanted it to be very controlled and not a game, to take the pressure off and to experience how different communication methods work. After each round, we were discussing the experience, a certain animal and a certain method using the language we know (it’s easy, it’s very easy, it’s difficult, it’s very diifficult, it’s impossible). It worked very well and we had a lot of creative fun.

Step 5: The quiz. In order to summarise the lesson and to do something together and to get back to the case studies from the beginning of the lesson, we did a quiz to discuss the better solution in each situation. There is an obvious answer in each situation but I was also accepting all the ‘But, Miss Anka, what if…’ ideas.

Lesson 2: Effective communication

Step 1: Revise all the communication methods using the cards and our examples

Step 2: The practical part #2: I prepared some simple sentences that the kids are familiar with for the task that was a bit more challenging and at the same time involved more decision-making from each child. The students, taking turns, came to the centre, picked one message to convey and then had a moment to choose the most effective way of communicating it. The class were to guess the exact message. The students were demonstrating, the class were guessing and the most interesting part of it was the experience itself. Sometimes the chosen method was not the most effective (for example, communicating with gestures is not always easy if the message is more complex) and more methods had to be added.

Again, at the end of each round, we talked about things that were easy and difficult, for the communicator and for the listeners.

Step 3: Problems with communication: We looked at the second part of the presentation to answer two questions: What is happening? Why is that a problem? In order to outline some of the potential problems with communication.

Step 4: Solutions: What can we help to communicate better? (based on the slides): listen, speak not too loud and not to quietly, take turns, use the right language.

Lesson 3: How we feel about it

Step 1: Revise all the communication methods and play the game from lesson 2 again, with a diffferent set of sentences. You can find my set here.

Step 2: ‘Why is communication sometimes a little difficult?’ is the question that I wanted the kids to answer. They came with quite a few good ideas, some based on what we talked about in class before so it was kind of a revision for us, too. But it was also a way for us to get to the topic of the day, namely the connection between the communication and the emotions. This is when we started to use our presentation (slide 3).

Step 3: This step was intended as a speaking activity and language practice for us but also, as regards the soft skills, there was also another aim: for the kids to realise that different situations may generate different emotions for different people. That is why we were looking at the photographs (slides 4 – 14). I have prepared quite a few pictures but we didn’t use a lot of them in both groups. Some generated more reaction from the kids, some not so much but we did produce some English and very very quickly in the game there were different reactions and different points of view. For example, even the very first picture, a very positive one did. Generally it made us happy (because we like presents, because we got great presents for Christmas) but also a bit sad (because we cannot see what the presents us, because these are not our presents and because we don’t know if the children like their presents or not). It was a lovely lesson because we got to see how differently we look at different situations and I cannot really tell you how many times I get to say ‘Great. This is your opinion’ or ‘Well, this is how you feel’, validating pretty much everything that was said.

Step 4: Summary with slide 14. I decided to keep it here and make it stand out although a lot of discussion was done so far anyway and it was a very simple summary: we have different emotions in exactly the same situation.

Step 5: Different emotions in communication. The linguistic aim of this part of the lesson was reading practice. For that reason, I chose a very simple conversation, with the language that we are familiar with and that we have been doing recently. There was nothing very challenging here and the kids could focus on the accuracy, intonation, pronunciation and enjoying reading a text that is all accessible to them. As regards the soft skills and communication aims, I wanted the children to notice the connection with how easy or difficult it is to communicate in different situations when the emotions of the people involved play such an important part.

To achieve all that we used an activity that I have been using for years in our regular English classes, the emotional reading. What you need is a dialogue (you can find mine in slide 16), a die and two sets of emotions (you can find our ideas in slide 17). We start with reading the dialogue with our regular, natural voices (one of the kids helped me), then we roll the die to assign the emotion for each player and then we read our dialogue in pairs, trying to portray the particular emotion. Depending on the time available, this stage can be repeated a few times. If appropriate, in the final round, all the kids can choose their emotions.

In our ‘regular’ EFL lessons, this is a lovely way of encouraging the kids to read, again and again, in preparation for a role-play, here I wanted them to focus on their emotions and the difficulties.

Step 6: Feedback. This was probably the most important step, as regards the soft skills aims for this lesson, because we had a very simple discussion about how these different emotions in our little dialogues made us feel. Our question, the same for all of the conversations, ‘Was it easy to communicate with X when he /she was happy / sad / angry? Why?’ A lot of these were done in English but, of course, my students are only children and A1 – A2, so they sometimes did resort to their L1. And that’s OK.

I have to say I absolutely loved these debates. Not only did my students put their hearts into re-enacting the emotions assigned and it was obvious that they loved this kind of an activity (mental note: we need to do more of them) but we got a lot of ideas for why emotions might make our communication a bit complicated. It turned out that when we are sad it might be difficult to talk because people speak very quietly and it is difficult to understand them but, surprisingly, when they are happy and excited, they might be speaking too fast or too loudly and that does not make things easy. Not to mention that when we are tired or sleepy or ill, things get even more complicated especially that it might not always be obvious to everyone.

Lesson 4: Things to do, things not to do aka RULES

Step 1: Modal verbs for talking about the rules: We revised the grammar points that we covered in the regular English lessons. We used two activities that were a success. One of them was a set of pictures on wordwall and the activity ‘What’s the rule?’ when the kids had to guess the rule symbolised by a sign. The other one was a simple bamboozle with places (we know these already). The kids had to name the place and give an example of one rule related to this place, things we can, must or mustn’t do there.

Step 2: What’s wrong with this conversation? We looked at seven photographs illustrating different problems with communication (powerpoint here) in order to outline what can go wrong and as a lead-in to formulating what we need to do in order to communicate successfully. I encouraged the kids to use Present Continuous here but that is not the only option, of course. You can see that I have outlined my own ideas (see the notes for the powerpoint) but the kids came up with a lot more ideas. For example, in slide 1, my main idea was that we cannot speak too quietly because it will be difficult to hear us. To my kids, however, this picture looked like a pair of friends trying to have a private conversation, sharing secrets while someone is eavesdropping on them…Same with the slide number 2. For me it was someone not listening and paying attention (teacher’s trauma, ahah) whereas my kids saw in it a man who is busy working and who cannot take part in any conversation at the moment…Fair enough, all valid points, these answers were accepted. The main aim here was to generate a few ideas for the following creative stage.

Step 3: Our communication, our rules. This was a writing task that can be done in pairs, teams or individually and its main objective is to generate ideas for Our Rules Poster. The hope is that after we have gone through the whole cycle of lessons, considered all the aspects of effective communication, we will be able to draft our own ideas that later will help us all communicate better.

The task was to do some thinking and write down five ideas later to be collected and edited and typed up by the teacher and displayed on the wall of the classroom. Which will help communicate effectively, without offending anyone and without any communication breakdowns ever again. Basically, they lived happily ever after.

Teacher says

Overall, I am very happy with the series and I am planning to continue including a series of lessons devoted to developing social skills in my amazing monsters. Simply because we need that.

As I mentioned before, I was able to use the help of our school psychologist (miss Katya<3) who helped with generating ideas for lesson 1 and who found time to come and observe our lesson 4 and to talk to me about it later and the outcomes, things we have achieved so far and things that we can expect in the future. These can be summarised as: ‘it went well’ and ‘we are taking baby steps and eventually we are going to get there’.

As a teacher of English, I am really happy because we managed to revise and practise a lot of language: Present Continuous, emotions and modals for rules. I was preparing these lessons being aware that we would not be able to carry them out entirely in the target language simply because we are not native speakers or advanced learners. I assumed that there will be ideas and concepts that we will only be able to express in our L1 and that was not a problem. However, having said that, I was really (really) happy with the language that my kids produced. They spoke in English and they spoke A LOT for their level. I’d say, about 80% of these lessons were carried out in the target language.

As a teacher of YL, I was really happy that we have sowed some seeds here. We looked at different ideas, talked about emotions, interacted, experimented and expanded our Zone of Proximal Development in the area of soft skills and, hopefully, we will be reaping what we sowed.

As regards my students, I am still to ask them what they taught of these lessons but, just from my observations, I can say that the reaction was positive. The children were involved, they were not scared to share ideas and to try new things, such as new emotions or ways of communicating. They also enjoyed the different format of the lesson and a different seating arrangement, too.

Now we will just keep looking at Our Rules Poster, remind ourselves that what we all want is effective communication and that we can do it. Fingers crossed!

And, by accident almost, this series turned into a mini-series on Splat the Cat and the Cat in the Moon which also deals with communication and looking at the world from different perspectives.

Practice, practice, practie. Our favourite vocabulary games

My primary group are now in their second year, around 7 and 8 years old and anywhere between A1 and A2, all mixed together. And, on top of that: cheeky, rowdy and creative. These have been our favourite vocabulary games this year.

Have you got any…?

Materials: a set of flashcards

Procedures: this game was inspired and very roughly modelled on the popular game ‘Go Fish’. I have already written about it here, in one of its versions. The main aim is to guess what cards the other teams or players have, by asking the appropriate question. I really like using ‘Have you got?’ because it matches pretty much any vocabulary set but there are other options possible. Please check out the post devoted to the Sheep Game.

What have you got for lunch?

Materials: a set of visuals, I use wordwall displayed on the screen, such as those here.

Procedures: the game starts with writing the key questions on the board. In the original form of the game these were: What have you got for lunch? Do you like it? Is it a good lunch for you? The teacher displays the pictures on the screen and asks the students the questions. Some of the lunch options are regular, some are crazy. Some look unusual but kids love them. The main aim of the game is to express opinion and to use the key words.

The first few times we play, we do it together, as a group but the idea is to get the kids used to talking about the pictures in pairs, so that everyone has a chance to express their opinion. This year I came up with the idea of The Cafe -we all sit at our tables, in pairs or threes and we have a little, quiet chat only with out partner, without disturbing anyone. And, surprise, surprise, my rowdy bunch did get the idea!

I have only used it with food so far but a new topic is coming up (clothes, animals) and I am planning to expand the activity with different questions.

Riddles

Materials: a list of words (handouts or displayed on the board) or, possibly, a set of flashcards

Procedures: Kids work in pairs or small groups. The leader chooses one of the words and describes it in three or five sentences. The other students guess which word they speak about. It is a good idea to display on the board the set of all the basic structures that can be used. All ideas are good ideas! Food items can be discribed using some of the following structures:

  • You eat it.
  • You drink it.
  • You eat it for lunch / breakfast / dessert. It is a snack.
  • You eat it hot / You eat it cold.
  • I like it / I don’t like it.
  • It is round / square / big / small.
  • It is yellow / green / etc.

It is a game that is most effective later in the unit when the kids have already assembled some structures and ideas about a certain vocabulary set and they can really enjoy playing it.

I have already written about riddles on this blog and you can find these two posts here and here.

Similar or different

Materials: a list of words (handouts or displayed on the board) or, possibly a set of flashcards

Procedures: Kids work in pairs and they take turns to choose a pair of any two words for their partner with the same question in every single round ‘Are they similar or different?’. The child answering the question makes a decision and justifies it in a way that is appropriate. All ideas are good ideas! We are now in the unit of food unit so for example the food items can be both lunch dishes, two drinks, two items starting with the same letter, having the same number of letters, having the same colour, being the same category (two fruit) or two things that students like etc.

We don’t play this game in the first lesson with the vocabulary but later in the unit in order to give use a chance to accumulate some additional vocabulary during the unit, just like in the case of ‘Riddles‘. In order to raise the level of challenge, we use each word only once, to make sure that we go over all the words. This game usually has a very slow start but as the kids are adjusting their way of thinking of the words and trying to come with more and more unusual combinations and connections, it speeds up and is becoming more and more fun.

Pairs

Materials: a list of words, a poster or a set of flashcards

Procedures: This is, in fact, a variation of the game described above, however, in this version each student is in charge of their own choices and they have to think of their own way of justifyin why the two words are a pair. All ideas are good ideas, as above, and the players have to play using each word only once.

‘Competitive games in the YL classroom’

This article, just as the earlier post here, has come to be as a result of the many (many!) conversations with my trainees and what I observed in my own classroom. It is fair to say that it has become my latest professional passion / obsession / interest. The post that I have written here (‘A balancing act. Non-competitive EFL games for kids‘) is one of my proudest moments on the blog but was just the beginning of the whole story. And one of the top 10 articles on the blog!

The article that I wrote for the Modern English Teacher (Issue 33.6 Nov-Dec) is a continuation of this research anad the search for solutions. It is, unfortunately, only available to the MET subscribed members but I am really proud of it and I can definitely say that the solutions that I came up with and the ideas that I suggest really do work. After a year and a half pretty much all of my YL are now ready to play competitive games. I do recommend!

Autumn gloom and classroom management. Setting up the routines in year 2

Well, miss Anka, you did not do a good job. The classroom management that was supposed to be updated monthly got abandoned. The end of October happened but everything else happened, too so the post didn’t. Here is a two-month reflection then.

Starting the lesson

The start of a lesson has become more SS-centred as I am barely involved. There is now a very interesting role to play, namely the one of the Hello Master. This is the student who takes over the teacher, sits in the centre of the room, starts with ‘5, 4, 3, 2, 1. Hello everyone!’ and asking everyone how they are. In November and December this person is also responsible for changing the numbers on our CountDown to New Year’s Day poster. Apart from that we have two Helpers and two more additional roles, the Game Leader (who helps with choosing the game, divide the class into teams etc) and the Decision Maker (aka the one who helps out with solving any doubts, if we have any). The kids love that and they sometimes ask me to assign a special role to them or they remind me that ‘Miss Anka, I haven’t been the Hello Master for a long time!

We still write the lesson plan on the board and the What time is it? and we still sing the Month Song, about how we feel, about the weather and everything related. I started to put up on the board some pieces of language because there is so much language emerging. It is absolutely necessary to keep it in memory, a bit.

It has also become a tradition for us to add a few more names to our list of students on the board. Sometimes our birds feature there (we have a well-frequented bird feeder), sometimes the toys that the kids bring, sometimes even the weird presences i.e. Poor Toe (aka a personalised version of the toe that one of my student hurt). But that means that they kids feel more involved in the lesson and they speak more.

Classroom management and rules

Our rules haven’t changed at all. They are still hanging above the board, we revise them in the beginning of the lesson and we refer to them when necessary but no new rules have been added.

Rewards chart

Our rewards chart is not quite a rewards chart but an activity chart which we use to mark attendance, activity, language production, cases of unwanted behaviour (like before, a simple description) and special rewards for great ideas, fair play, being a good friend and so on. I now simply take a photo of the board at the end of the lesson to use it later on, for assessment or to share with the parents.

We have also started using a greater variety of symbols, stars, suns, flowers, hearts. Yesterday, we managed to get to about a half of the solar system on the board, for different tasks. Basically, one more way to motivate the kids.

Reflection and feedback

These photos and notes are very useful because I have to add marks and note participation in our electronic journal for the parents but I also use them to give feedback to kids.

At the end of every week (which for us is Thursday), I take notes in every student’s notebook, giving them a mark for the week for English, for Maths and for behaviour. This is also my opportunity to thank them and to praise them for something special they did during the week. It is now our tradition to look at these notes in the beginning of the lesson on Monday. I also noticed that I started to comment on these notes during the week, on random lessons for example to praise some students for the behaviour that improved or the behaviour that needs improvement.

I realised that the notes from our tests are too rare and the notes from the electronic journal may not get through to the children as the parents are the main recipients and I needed a direct channel between me and the students. Hence the feedback.

We have been doing it for three weeks now and I know that these notes matter to kids. I keep them secret, written on a page that has been folded etc, but they announce everything to everyone anyway. They do anyway when they have something to be proud about.

Story and songs

To be perfectly honest and depressing as it is, we haven’t had lots of songs recently. We sing the Multiplication Songs from Jack Hartman in every lesson but we haven’t learnt any new songs.

In the same way, we have done lots of reading (fiction and non-fiction) but none of them were real stories. Oh, no! How did it come to that? I have no excuse and I am just deeply unhappy that I let it happen. Sigh.

Socialising

We have been interacting a lot in the classroom:

  • every English lesson starts with the sight words reading practice which we do in pairs. One student is the teacher, the other is the student and I sometimes ask them to give each other grades.
  • we did project presentation in pairs and small groups (asking and answering questions about the perfect house)
  • pairwork games such as riddles
  • Hello Master is my absolute number 1 when it comes to the favourite parts of the lesson, the one that kids do all by themselves, with the teacher being merely an observer
  • we have even played some team games and I am really proud of my kids because now they are ready to do it, on most days.
  • we have also been changing the seating arrangements and pairs since we have had some changes and the group needs a chance to be formed again, from scratch almost.

Creativity

This is the area that I am happy with because we have done enough in that area.

  • we celebrated the Craft Day (which, apparently, falls on the 16th November, at least here) and that is why we made beautiful monster bookmarks
  • we celebrated the Thanksgiving Day and we made our Thankful Turkeys, with feathers made of everything that we are grateful for (The list, for my kids, includes: mum, dad, gran, grandpa, brothers, sisters, pets, Adidas and Roblox).
  • we described and drew our Ideal House and they turned out great, especially that we were getting ready for the project day, reading, looking at photos and talking about all the unusual buildings and rooms from around the world that I could find
  • we wrote out first article in English about a special place. There wasn’t much creation per se since we wrote about real places but we had so much fun researching that and the final product, our journal, looks amazing.
  • I have also noticed that more and more of my kids have been wondering into my classroom during the long break in order to do creative things, using all the resources I have in my magic cupboard.

Teacher

Over those last few weeks, I have been a very tired teacher and I did a lot to save the energy and to use it wisely. Listening to music, chocolate and careful choices while lesson planning helped me do that.

At the same time, I have also been a very happy teacher because I could see how much progress my students have made in English and in Maths. This has become especially clear in all the speaking lessons because the unusual houses and rooms really made the children curious and willing to express their views. That, together with all the cool adjectives that we learnt. During our speaking lessons, I would give them stars for participation and beautiful English and it was just beautiful to see how fast my board was filling up stars. They had ideas and they wanted to share them, in English. A truly joyful moment!

I have also been a very happy teacher noticing how my students are growing up and getting better at dealing with their emotions during our competitive games, learning to be in a group, getting over their own insecurities and being proud of their achievements. We are not a perfect group, the picture perfect class (Well, wait, do I even want us to be that?) and we are not even at the OK stage (not consistently, anyway) but we are getting there. I hope.

Working with sight words. A handful of crumbs for the primary students.

This is a post dedicated to my trainees and course participants because, as it often happens, good ideas surface while talking to other teachers. Thank you! And I hope you find it useful)

About sight words

If in one line, sight words are those precious bits of the English language that, in a way, are exceptions are they do not follow the rules of phonics and which, at the same time appear in the English language with a high frequency (hence another term used to refer to them ‘high-frequency words’) which makes them very relevant to anyone learning to read and write. ‘Sight words are the glue that holds the sentences together’ (sightwords.com) which makes them a necessary part of literacy development, even if they had to be learnt by heart.

There are two lists of these words, the Dolch Sight Words List and the Fry Sight Words Lists and they are organised either by the year (Dolch’s) or the frequency with which they appear in English (Fry’s).

Available resources

There are lots of resources available for parents and for teachers of the English as L1. Naturally, just like in the case of phonics, we need to proceed with caution as they were created for children who already communicate in the language so the meaning of all of these does not need to presented, clarified and practise. Here are some of the

Sight words in primary EFL (a very objective take)

It is some kind of a paradox that sight words do not make even a cameo appearance in our mainstream coursebooks for primary. Or perhaps it is not, actually. After all, despite all the changes and developments that have taken place over the last two decades (my time in EFL), literacy development over all of the years of primary still falls under the category ‘Areas for improvement’.

Year 1 is usually well-taken care of (or at least it is the year 1 coursebooks that have shown the greatest progress in the area) but the same cannot be said about levels 2 – 4. It seems that once the kids are out of year 1 and once they have gone over the few phonics sets, they are all ready to read and write pretty much everything, as long as it has the appropriate lenght and more or less the vocabulary and grammar that follows the curriculum of the level.

It does not work like that and it is not only my opinion. Every time I run a course for primary teachers and meet teachers from a variety of backgrounds and contexts (bilingual, freelance teachers, state school teachers, private langauge school teachers), they all come with the same problem that could be summarised as: ‘How do we teach the kids to read? My students are in year 3 and they still cannot read. The book does not help. I don’t know what to do.’

Yes, as teachers, we are going to be supplementing, staging and facilitating the process and the kids will eventually learn to read and write but it would be wonderful if this area had more systemic support and attention.

Enough of this whining. Let me tell you how we approach sight words with my students:

  • Year 1 of instruction is fully devoted to phonics and sight words are put on hold. The reasons for that are simple. First of all, phonics have to have the priority and I don’t want to overload the students who are taking their first steps in English and in literacy. Second of all, I am taking my time to ensure that when we start working on sight words, kids are not complete beginners and may actually know some of the words they are to learn and to practise. This is also the time when we start moving from sentence reading / writing to text reading / writing and these words really do make an appearance. We start learning and practising sight words in year 2.
  • I divided the words in my own (very subjective) way, according to the categories such as grammar words, adjectives, verbs, etc, to facilitate recognition and memorisation and to enable to come up with meaningful practice activities, something more than just reading. So far I have been using Dolch’s list but I am going to upgrade it, as soon as we get through it. The lists have been colour-coded, printed and laminated and we take one list per week.
  • Read and put your hand up: the introductory exercise, the children are looking at the list and I read the words, one by one. The kids listen and raise their hands if they know the word. The aim of this activity is for me to understand where we are with the words regarding their meaning. Naturally, if we find something new, we explain them.
  • You’re the teacher, I am the teacher: kids work in pairs. They take turns to lead the activity. ‘The teacher’ points at the words in the table, ‘the student’ reads them out loud.
  • Line by line: we work as a team, kids take turns to read one line of the sight words. If the kids are quite strong, they can point at two or three words at the same time.
  • Knock, knock!: one more copy of the sight words is displayed on the door of the classroom. Kids read a number of words on entering the room (i.e. 3 or 5). The words can also be colourcoded, randomly or by the level of difficulty, i.e. 5 words per colour (depending on the list). Kids choose themselves which colour they want to read.
  • Bingo!: teacher prepares a set of cards with the words in question and hands them out among students (4 or 5 cards per student). The teacher reads the words in a random order. The child who has the card with a certain word puts it up to signal to the teacher (‘I’ve got it’) and they put the word away. Whoever runs out of their words first is the winner, like in a regular Bingo game.
  • Make a sentence: this activity requires a bit more than just a list but there is so much potential that I decided to invest time in preparing the resources for it. You will need two sets of cards, one with sentence starters made out of sight words (i.e. I have, I can, I like, I don’t, Do you, I will, I didn’t…etc) and the second set with adjectives (i.e. blue, green, long etc). Kids pick out one card of each and show to their peer for them to make a full sentence made out of these two bits and their own ideas.
  • Invisible sentence: kids work in pairs, like in ‘You’re the teacher! I’m the teacher!’ but instead of just reading the word, the student who is a student makes up a whole sentence or a question with that word. It takes a few rounds of practising together on the board for the children to get the idea, for example with teacher and one of the students taking turns in choosing the word but once they get it, it is a marvellous activity and, apart from practising reading, the kids also put them into context. If there are still some less familiar words or even the unknown words, this is a perfect opportunity to fish them out and to clarify them.

There are just a few of them but we have just started our adventure with sight words. There is more to come, for sure!

To be continued…

How to plan for kids without bending your back backwards. A five-step manual

This post here is my response to the challenge set by my teacher-friend Michael. Challenge accepted. Let’s go, 5 steps.

Lesson aim

The first-est step. Always.

The session devoted to lesson planning on our YL course is called ‘What do you want teacher?’ and that is for a reason. Making a decision why we enter the room and what we want to achieve by the end of the lesson is key. Is the vocabulary the focus or is it a grammar point? Or any of the skills? What is the context? Do you want to focus on the language or the most important thing on the day is the work we put in developing social skills or building the routine? It might be something suggested by the book or chosen by the school curriculum but not always. And even it is, there is always room for adjustments and adaptation. At the end of the day, there is the teacher and there are the students in the classroom that matters most. The programme and the coursebooks are to be adapted.

After the aim is selected, there are more follow-up decisions to make, namely the selection of the focused task (aka the main productive activity) of the lesson?

That’s it, done. The main thing is done and it probably took about 5 minutes. The next step will be looking for things that will help make it happen.

Books basics

The coursebook and whatever it contains is already partially included in the previous step. Most of the time, this is what we use, for convenience and just because we can. The coursebook is not the enemy of course and there is a lot of useful material. Though, not all of it.

I presume the main activity has already been chosen and the next decision is regarding all the other exercises, activities, audio and visuals that are there (and in the workbook and teacher resource packs) that either match or don’t our aim and our focused task, or, in other words, our A or the lesson and our Z.

The most important thing to remember and the thing that is on constant repeat during our sessions and in my conversations with teachers is: the book is not there for us to follow to the letter and to cover and to include all the exercises.

Things you can repeat

In every lesson for YL there are certain elements that we can and that we should repeat because they help us construct the framework and the routine. They include either the elements of the routine: the hello song, the how do you feel today, the rules revision, the homework check, the goodbye as well the elements that are short-temporarily fixed: the songs we are singing in September, the games we are playing in the unit of toys, the story we are reading in the chapter on the jungle animals. All of these will feature in the lesson over a month. It is good to included them in the plan, keeping them on the side, in order to be able to use them.

The missing bits

Having got that far in the lesson planning, it might be the time to figure out how much time we have already taken out of the lesson time and how much time we already have left. Then, look at all the activities there are in the coursebook, all ready and waiting to be used, and, only if necessary, to replace them with some other activities, from another sources or self-designed.

Most of the time, the coursebook will do the job just fine.

Something for the balance (bits)

What I like to do at the very end, when the lesson is already ready, to have a quick look at everything, to check it for the contents and for the balance and variety

  • the ratio of interaction patterns
  • the ratio of different activities: songs, stories, creative and hard work
  • the ratio of new and familiar
  • the ratio of settlers and stirrers

And, when something is off, I fix it. Done!

Instead of a coda

Here are a few words of wisdom from a grandma teacher and trainer / mentor / observer:

  • we want good lessons to be our everyday but that does not mean that every single lesson needs to be an Oscar-worthy (or a Nobel prize-worthy) unit at the cost of the teacher’s sleep, peace of mind, family life or salary. Yes, I sometimes invest a little bit more into my teaching, in terms of planning, resources and time but, after all these years of experience, I also have lessons that are ‘just regular, no fireworks’.
  • we sometimes plan lessons and as soon as we get to school, out of the blue, we come up with something entirely different and it is the best lesson ever. Yes, that happens, but (here comes a very subjective line), it is the result of all the brainstorming and thinking that has already taken place. Otherwise, it wouldn’t have happened.
  • designing your own activites does not have to take ages and it does even require a teacher to be super creative. I personally find it much easier to prepare something for my lesson from scratch, rather than spend hours of looking through materials and resources to match the needs of my group and then, on having found it, still waste time on adapting it to what we (my kids, my course and our lesson) really need (here you can find some of the posts on material design).
  • our coursebooks have a lot of different resources and pictures among them which can be used in a million different ways with very little effort. A picture is an actitivity and you can read about it here, here and here.
  • in general, being a lazy teacher has a lot of benefits. You can read about it here.
  • here you can find another post about the everyday lesson planning