Five ways of using craft in the pre-primary classroom

Before the craft.
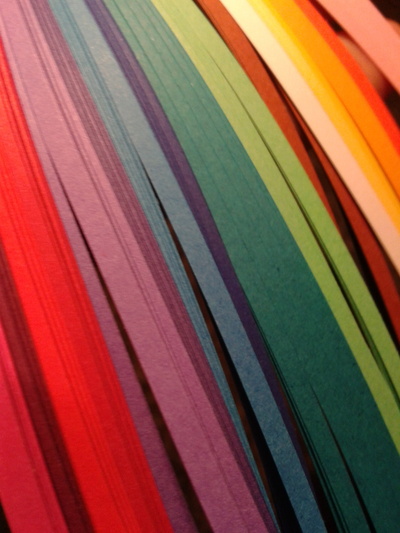
A set of quilling paper strips

This is the second part of the Craft ABC series. You can find the first part here.

The main activity and the target language practice

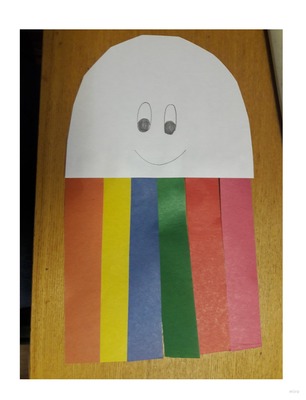
This is a craft activity that features in the lesson to provide opportunities for the target langauge practice. As an example I have decided to choose our beloved jellyfish that is the first craft activity that I do with my first-year students, in one of the first weeks of the course. This is the time when we learn and practise colours with flashcards, colourful blocks and realia in general, with simple stories, videos, wordwall games and songs. A craft activity is yet another way of ‘recycling’ the target vocabulary and of giving the students an opportunity to be exposed to it and to use it.

The jellyfish is a super simple craft and even the youngest kids can draw the eyes and the smile on the head (which can be a semi-circle cut out by the teacher or a half of a paper plate) and then to attach the tentacles to the back of it. Kids are really motivated to make their own jellyfish and to drill and call out the colours and to ask for the following one, in a very simple way (‘Blue, please’). As a result, lots and lots of language is produced and everyone leaves the classroom with a creature they made herself. What’s most important, the jellyfish looks good even with the most crooked smile and the most inexpertly glued tentacles. And even if there are only three or four colours used, with the youngest kids.

The follow-up of a story or a song

Craft in this case is an opportunity to reinforce the ideas, concepts, vocabulary and structures introduced in a song or in a story. Or, to put it differently, a story or a song is not introduced only as a starter or a side dish but it becomes the topic for the entire lesson.

The three examples in the photos come from the lessons taught based on the Playway to English 1 by Cambridge University Press. The first one is a flower we made together while retelling the story from unit 7 (The Little Seed which you can also find here) and although we were not able to use all the original story lines, the kids could use the basic ones such as It’s sunny, It’s raining. The little seed is sleeping (at the beginning), The flower is growing (while making the stem) and so on.

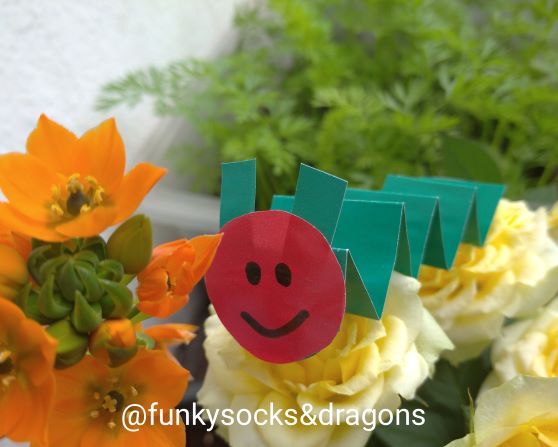
The second example is everyone’s favourite Very Hungry Caterpillar which is a storybook we use in year, to accompany either unit 7 (Weather / Spring) or unit 9 (Food). You can find more information on this version of the caterpillar here.

Last, but definitely not least, is a simple craft that was a follow-up of the amazing Super Simple Song called ‘Are you hungry?‘ and it can be used either with the topic of fruit (Playway to English 1, unit 3) as it goes nicely with the theme of the song of monsters sharing fruit with their hungry friends or, in a wider context, with food in general (Playway to English, unit 9). The craft activity becomes the more palpable and 2-D version of a song and it can be used in a mini-role play, sung or spoken, depending on what the kids are ready for.

Props preparation

This type of a craft activity does not have a lot of potential as regards maximising production although the kids are quite likely to use some functional language, the staples of craft (Are you ready? Let’s sit down, Blue, please etc). This type of a craft activity is also quite short, compared with the ones mentioned so far but that is exactly the point. The craft activity is only a prelude. Everything important is to happen later with the finished product used as a tool.

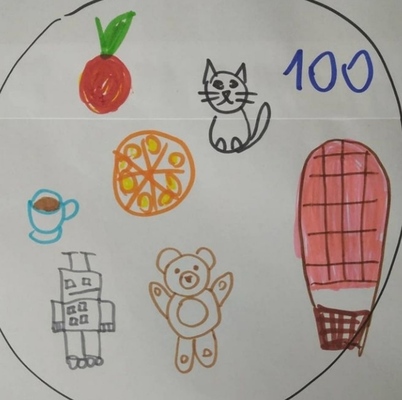
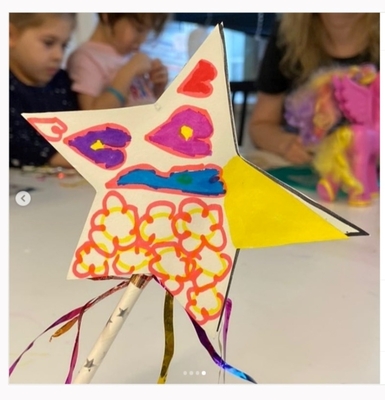
The best example here will be our magic wand. It is simple and easy to make and can be used as a part of a shapes lesson (though, really, there is only one shape involved). The abracadabra TPR activity (Abracadabra, 123, you are…) is a game we play from the very beginning of the course. When the kids are ready to take over, we make a wand for each other and use it in a game and at this point, the kids get to lead the game for real, waving their own, freshly-produced wands and we all mime whatever there is to mime. The langauge is produced and lots of it (Abracadabra, 123, you are…swimming, dancing, flying…OR you are a cat, a happy cat, a hungry dinosaur…) but it is not directly related to the making of the wand.

A part of a Science, Maths or Art lesson

Craft can be also a part of a CLIL lesson or a Maths, Science or Art lesson, depending on whether we are dealing with the EFL or the ESL or bilingual programmes. In this case, the craft activity will create an opportunity for the students to put into practice or to reinforce the real knowledge or skills they have acquired in class, making it more practical, kinesthetic and hands-on.

Below, three examples of such craft activities.

The first one is a Maths lesson in which we were learning about and practising measuring. Apart from working with the rulers and measuring tapes and checking how long our cars, teddy bears, desks, noses and fingers were, the kids also got a simple handout with a section of a certain length and it was their task to measure the strips of paper with rulers, cut of the appropriate piece and glue it underneath.

The second one is one of the lessons devoted to animal habitats which we studied in our Science class. Apart from categorising animals and talking about the habitat, we also did a craft activity in which we created the habitat (here the polar region made of a sheet of blue paper, waves drawn, ice made of cotton pats and the animals glued on). After a series of lessons we had a set of habitats.

The third piece here is one of the activities we made as part of the Kids in the Avangard. In this lesson Paul Klee was our artist of the day and we created our own version of his Cat and Bird.

The non-linguistic aims

Sometimes craft activities have a non-linguistic main aims. Because of their obvious relevance to kids’ lives and the excitement that they generate, they can be used to help kids develop as humans and this can be the reason for their inclusion in a language lesson.

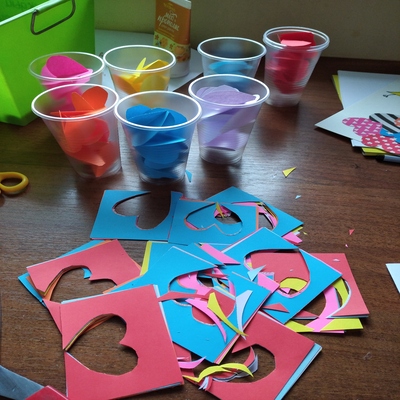
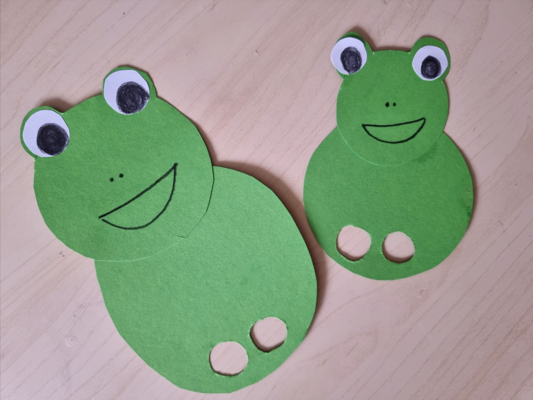
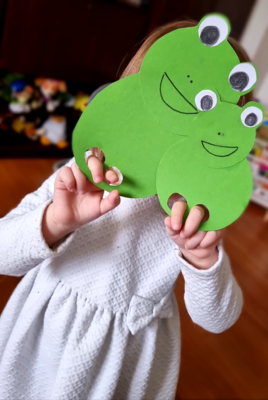
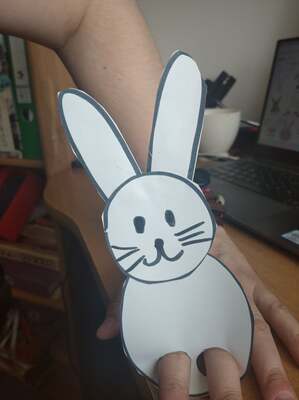
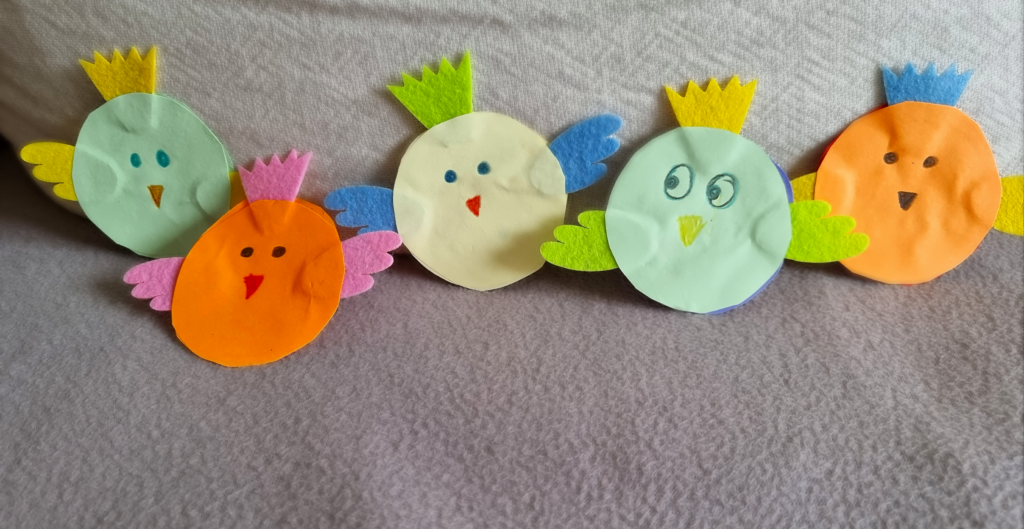
The first activity here is one of my favourite craft activities ever. It can be used in many different thematic lessons but its main advantage is that because, due to its design, it requires a detailed micro-staging and, on the one hand, it can help kids work on their ability to focus and to follow teacher’s instructions in order to be able to turn their circles into cats, dogs, frogs and bees. On the other hand (and it has worked absolutely every single time), it brings an immense sense of achievement and confidence in kids’ own skills since a random circle can become so many things.

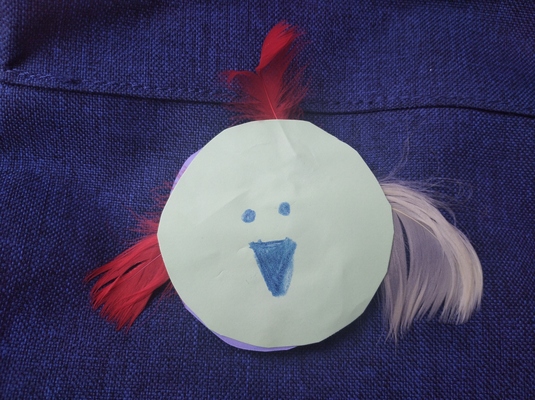
The other activity presented here is an example of a festive craft that finds its place in the classroom as part of the seasonal celebrations. Despite the fact that sometimes this vocabulary will be used in class only in a year, when the holiday comes up again, it connects the lesson to the celebrations at home and in kindergarten and it is the easiest way of bringing these festivities into the EFL classroom.

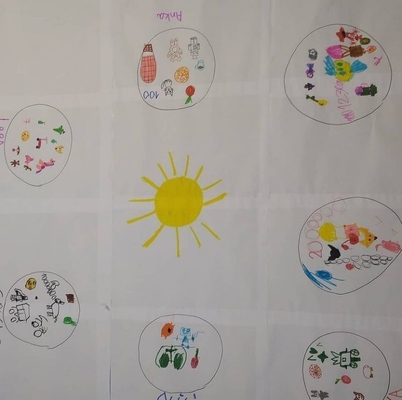
The final activity, our solar system was a wonderful activity that we all enjoyed and one that helped us produce lots and lots of language. However, believe it or not, that was not the reason why we did it. This was our first real whole class project because the kids got an opportunity to work on something together, sharing resources and sharing the space and we produced one huge poster that nobody would be taking home in the end.

Happy teaching!

Craft is…what the VYL world is all about

Just one of the shots taken in the middle of a working day, before a craft lesson…

Craft has been present in my classroom life for as long as I can remember. Looking back, I can see all the pieces I made with my superstars in Moscow over the last thirteen years, the robots we constructed at the summer camp in Tuscany in 2009, some 3-D houses we made with my Navarran babies in 2008, or the magazines I put together with my cousin, my first student ever, somewhere in 2000…What’s more, craft has been present in my life since my own primary school. I loved the Art lessons, I loved the Craft lessons. I even loved the Technology classes, although craft then involved: weaving a mini rug, building a birdfeeder and making a chair for a doll.

You could say that the foundations for my future career have been built pretty early and that I have had a lot of opportunities to perfect my fine motor skills and to fall in love with craft (truly, madly, deeply). No wonder that I would try to smuggle it into my lessons.

It was only a week ago, actually, while preparing yet another session for a teacher training course, that I saw craft with a fresh pair of eyes and I saw it for what it really is: the VYL world (or the pre-school world) in a nutshell, everything that is beautiful about it, everything that can be enjoyable about it and, inevitably, everything that can go wrong with it, too.

The simple truth is that: kids love craft

Craft lessons and craft activities are these parts of the lesson when kids can do something for real, not the coursebooks, not the handouts or worksheets, not the time when you need to stay focused but the creative, the beautiful, the fun part. And, one more important factor – something that is different every single time!

If you add to it the variety of materials that are included, the variety of techniques and that, more often than not, you end up with a real product, a book, a house, a puppet or a collage, which you have created yourself and which you are allowed to take home, it is not a surprise that kids love it.

Ah, we haven’t done anything for such a long time‘ was something that I heard one of my students mumble to herself when she saw me reach out for the coursebook as soon as we sat down at the tables. As a teacher, I was taken aback. Because we did DO things! We sang songs, we read stories, played with flashcards and we did have good lessons. In my student’s eyes, however, all that meant nothing at all, because, indeed, somehow a long time had passed since the previous craft lesson and that, at least for this one student, was the real thing, the something!

If you want to read more on why kids need craft activities, have a look here.

The simple truth is: many teachers don’t like craft

  • A craft lesson takes a long time to prepare.
  • It is messy, both during the preparation stage (see the photo above) and during the lesson.
  • The teachers might not have a full access to all the resources necessary, even the simple ones so they end up buying these themselves
  • Classroom management is a bit more tricky in the craft lessons, as there are more elements to manage and the kids might get too excited.
  • If not planned properly, craft lessons can turn into a mayhem, with kids not producing the target language or even not completing the task.
  • Craft activites are not very well taken care of in the mainstream coursebooks and in the teachers books and so there is no resource to learn from.
  • If the craft activity has not been chosen properly and if it is too complex for the students or if it is not planned properly, students might struggle with completing it or they might destroy in and in such a case there might be tears of a child in despair or tears of a disappointed child.

Craft is what the VYL world is about

Teaching pre-schoolers, compared with the other age groups, will require more of your time in the preparation stage and it will be more demanding as regards the class time. It might require you to include the things that teachers, as adults, have no interest in and which they will still include because that is what can be beneficial and effective with students of that age. In the same vein, some things will have to be excluded even if teachers love them, also because of the age of the students, they will simply not work.

There is only one thing to be done…

…and that is: careful planning and Carol Read’s MADFOX (Management, Appropriacy, Design, Flexibility, Outcomes, Excitement) which you can read about in the ‘500 Activities for the Primary Classroom‘. It is a wonderful tool that will help prepare for a craft activity in the EFL or ESL lesson, primary and pre-primary. Actually, this framework will work well with any type of an activity or a set of materials, stories, songs and games.

One of my earlier posts (and my first acronym W.O.R.L.D🙂 might also come in handy while choosing a craft activity for the pre-primary EFL /ESL lesson.

The most important thing to remember everything gets better with time. The lesson planning become easier and less time-consuming. The kids know the teacher, the lesson format and their peers better and that is an important factor contributing to the success of the activities and, last but not least, if you decide to reuse a particular type of a craft activity for the second or third time, the students will also be able to deal with it better as they will have done it before.

There is hope))

This post is only the first part of the Craft ABC series. You can find the second part here. Don’t forget to also have a look at all the posts in the craft section on this blog.

Happy teaching!

Crumbs #31: Circle IS the best shape aka Frogs Etc

@ Magdalena

Ingredients

  • Two circles cut out of cardboard (regular photocopying paper is too thin and flimsy), with the two holes for fingers also cut out before the lesson.
  • Glue to glue these together
  • Crayons, pencils or markers to draw the appropriate body parts

Procedures

  • Show the kids the finished product, introduce the frog, chat with the kids
  • Show the kids the smaller circle, show how you decorated it.
  • Give out the pencils / markers.
  • Give out the small circles, decorate it with the kids.
  • Give out the bigger circle, decorate it, if appropriate.
  • Collect the pencils.
  • Show the kids how to glue one on top of the other. For the younger kids, it might be a good idea to draw a small cross on the top of the bigger circle, to signal where the kids should put the glue.
  • Give out the glue sticks. Kids glue their circles together.
  • Glue the additional body parts, when appropriate.
  • Collect the glue sticks.
  • Play
@ Magdalena

Why we like it

  • It is super easy! These frogs here, in the picture, were produced for a child (a huge Frog Fan), rather than with a child, and that is why I went a bit crazy with the eyes but there are the simpler versions of it)
  • These two circles can become many many things: a frog, a bear, a cat, a dog, a monkey, a rabbit or a snowman, with little adaptations.
  • The task does involve a lot of pre-cutting but the rest can be done by the kids during the lesson.
  • Once the toys are ready, they can be used to play, as any other puppets with all the structures that the kids are familiar with and with those that match the topic of the lesson, at the very least, ‘Hello’, ‘My name is’, ‘I like…and you?’ and it is always great when you can maximise production.

Happy teaching!

Crumbs # 30: Circle IS the best shape in the world aka About chicks

@ Magdalena

It was a typical day in the life of a small scale Mary Poppins. I set out for a shift at the volunteering centre and, as an experienced one, I could not imagine to go unprepared, even if minimally. I thought that, at the very least, we can do some circle magic. I could not take everything but I had a big pocket and so it got filled in with three glue sticks, an envelope full of circles, a small packet of colourful feathers (that was a nice coincidence that I had it). A4 paper and a box of markers did not fit in one hoodie pocket.

When I arrived and started the shift, it became obvious very very quickly that the place is not ready for any craft activities because, apart from one small table and a few little stools and a box of coloured pencils, there was nothing. Or, rather, there was only me and my pocket.

There is some beauty in that, really, when you get to see how your brain starts to get involved in order to think of a solution. Sure, THAT was not about sending a man to the moon or putting together a new recipe, but, still. I was building a grid for our version of hop-scotch and sorting out toys, and the brain was trying to imagine what I can make out of the contents of my pocket. A little chick, that’s what.

Ingredients

  • lots of circles, cut out before the lesson out of colour paper, regular type, cardboard might be too thick. As for the size, this time it is officially: the Size of the Bottom of a Mug, colourful, for the kids to choose from, two pieces per child
  • glue
  • something to draw (markers, pencils, crayons)
  • colourful feathers (I got them in the stationery section of a regular supermarket, you can buy them in any craft activities), but they can be replaced by strips of colorful tissue paper (also those unevenly torn), three per child, if you use the feathers or as many as you want, if you use the strips of the tissue paper

Procedure

  • ideally, for the smaller children especially, it would be a good idea to put a cross on one side of each circle, so that it is absolutely clear on which side children should put the glue
  • each child chooses two circles
  • choose the circle that will be your front, draw the eyes (two small circles in the most basic version), and a beak (a small triangle)
  • take the other circle, cover the cross side with the glue
  • place one of the feathers on the top, for the little ‘fringe’, on top of the glue, so that a part of it is on the cirlce and a part of it stands out of it
  • repeat the same with the other feathers, by putting each of them on two sides, for the wings
  • take the front circle, put it face down, cover the cross side with a lot of glue
  • place it (more or less carefully), on the top of the back circle and the feathers, press
  • use the birdies to play, the kids can use them as puppets, say hello, introduce themselves, ask how they are, and use any other structures that they already know

Why we like it

  • is very, very easy, I have done it with two-year-olds (with a tiny bit of help) and with eight-year-olds
  • there is more potential for decoration (a more complex bird’s face, legs, tail etc)
  • the main focus of this lesson (or activity) can be playing with the chicks as making them will take only a few minutes
  • despite being very easy to produce, this craft has a lovely ‘wow’ moment and it lies in the fact that such simple elements put together can gives a lovely little bird.
  • below, you can also see the ‘proper Easter, made with mum and aunt’ version, with professional wings, made of felt. They look pretty and we made them only because I found this set in a shop. Here, it might be a good idea to let the chicks spend the night in the middle of the book, to make sure that they stick properly (felt is a bit thicker and it will need more encouragement, especially if you are using just the regular glue)

Here are some other circle-based craft ideas

Here are my own Frogs Etc, my snowman, and all the circle ideas.

Here is a lovely bear craft, here a ladybird craft, and here a caterpillar, too and here, a bunch of other activities, probably too complex for the EFL classroom but definitely worth looking at.

Crumbs #18: Our Solar System. A perfect group project work for early years. Perhaps)

This started as an activity for the CLIL lesson devoted to space and Yuri Gagarin but after I published it on Instagram, one of my friends suggested that it might be a great idea for the end-of-year revision activity. And it is that, indeed. Thank you, Rory!:-) Hence this post.

Ingredients

  • An A1 piece of paper although, to be perfectly honest with you, it never is that. Every time I have made any murals (and that’s what this activity really is), the preparations started with a pile of A3 sheets of paper, a roll of scotch or a glue stick. It is easier and faster (no shopping trips) and more adaptable (because the teacher is in charge and the poster can be made bigger or smaller, depending on the size of the group or the theme of the project).
  • Creative materials of your choice – pencils, markers, finger paints or watercolours. This time we used markers, in my opinion better suited to the age of the kids and the task.
  • A place where all the students can draw simultaneously. In my classroom, we use the space in which we normally do the movement activities because we have a big carpet there and it is always a lovely variation to our everyday routine, both for the little kids or the teenagers that like visiting another classroom from time to time. A big conference table or a set of desks put together will be a great solution, too.
  • A decision as regards what language, vocabulary and structures, you are going to focus on in the task. In the original task, we created our planets with all our favourite things, our favourite number, colour, food, drink, animal, transport etc.
  • It is necessary to stage the activity carefully. The kids sit down on the floor around the poster, the teacher draws the sun in the centre and counts the kids and then draws one planet for each child around the sun. In the first step, each child chooses a marker and writes their name. Then the teacher ‘dictates’ the first topic and the kids draw it and say what they are drawing. In my classes, we use the song for that ‘What’s your favourite colour?‘ by Super Simple Songs and its variations because it offers the question – answer set (‘What’s your favourite…?’ ‘I like….‘). For some kids it is necessary to sing, some are better prepared to respond to questions without the support of the music. The teacher waits for everyone to finish each stage and the fast finishers can be encouraged to draw more than one item, to look at other students’ drawing, react to them (‘Do you like…?’) etc.
  • Round-up: If there is time, the students stand in a circle around the poster, first at their own planet and then, on ‘1..2..3! Let’s fly!‘, they move one planet to the left. Everyone reacts to what they can see on the new planet, for example ‘I like…‘ This stage can be repeated a few times, depending on the time available. Afterwards, the poster is displayed on the wall. It can also be used as part of the presentation for the parents in the following lesson.

Why we love it

  • First and foremost, it is a great project for the whole group and it really does contribute to building the community and that is because of the fact that we all sit around one big piece of paper and because of the concept of this activity – a solar system of which all the students and the teacher are a part.
  • It might be especially suited as the first project work for a pre-school group as everyone has a chance to contribute to the project but it is automatically clear that no one can take the final product home, as first of all, from the very beginning it is obvious that there is only one copy, that it is too big and that all the planets stay a part of the system and cannot be separated. Frequently, this issue can be the biggest problem with the project work for the youngest of students as they become attached to their creations and the first question they ask is ‘Anka, but can we take it home?’. Not this time.
  • The activity itself in its original version is very flexible as its timing will depend on how long the children are interested. Perhaps only three elements will be included, perhaps ten. The format of the activity also helps with staging as the children do not know what is to come and will not start going ahead of the group.
  • The song format helps to encourage the kids to actually produce the language, especially that in our case we used this question-answer set beforehand so at the time of this particular lesson, the children were already used to it and used to responding to it.
  • It can be used with all age groups and levels as the language content can easily be adapted either to more complex ways of discussing favourite things, drawing their own planets to practise the vocabulary of the natural world (with a more extensive presentation at the end of the project), creating a planet which is a symbolic representation of each student. For the older students, the planets can be filled in with words, rather than with images.

Happy teaching!