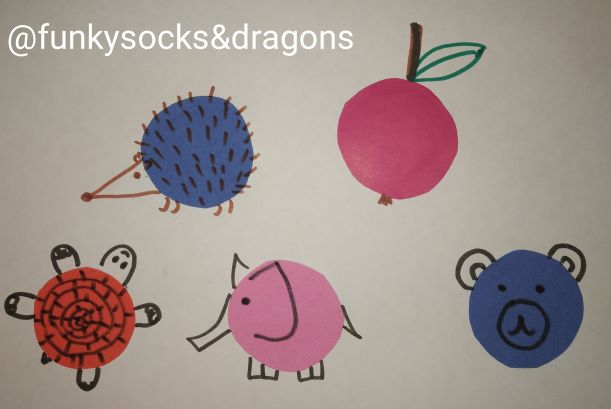
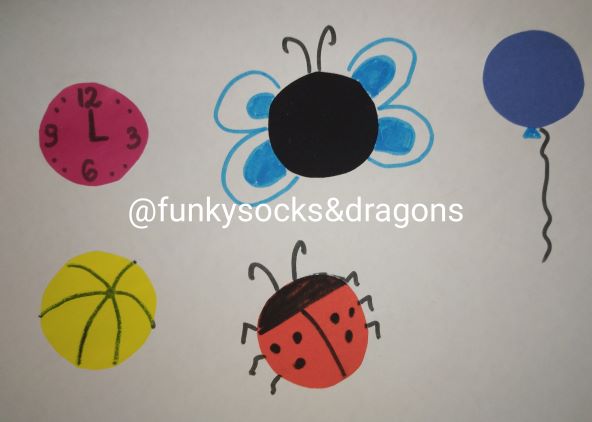
Crumbs #6 The easiest craft in the world aka Don’t you just love a circle?

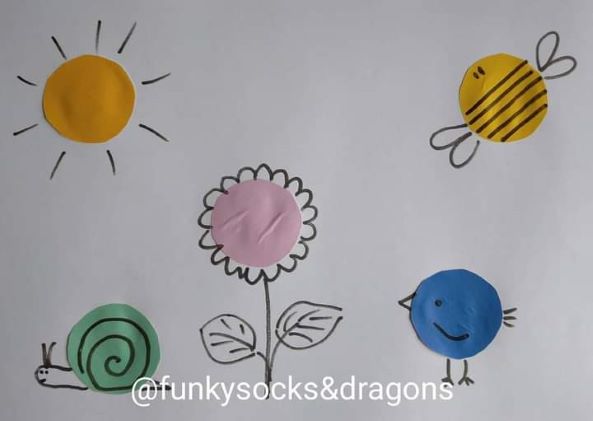
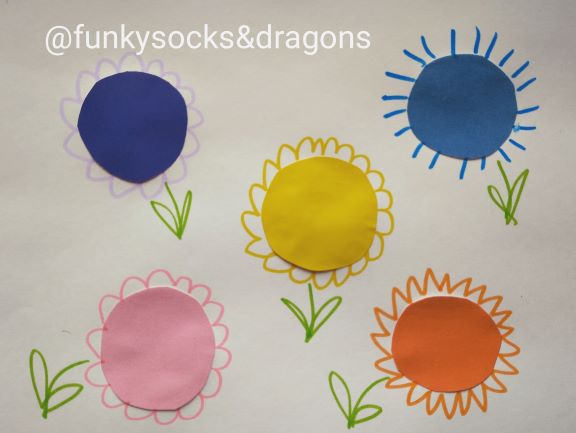
Level 1 – 3 Pre-primary: In the garden

Instructions

Get the coloured paper ready. The basic photocopying paper will do but for a more sensory experience paper with different thickness, texture or surface.

Cut out a pile of colourful circles, about 3 cm in diameter but if the kids are really small it is better to make them a bit bigger, they will be easier to handle.

Prepare A4 sheets of paper on which you are going to stick things, glue sticks and markers that you can use to draw on your paper.

Choose a circle, glue it onto the paper, decorate it so that it resembles what you want it to resemble. Use simple instructions while demonstrating (‘Glue’ ‘Turn over’ ‘Stick’ ‘Draw). Give out the paper, the glue sticks and the first circle. Monitor.

Proceed with the following circles.

With the older students, it is fun to let the children decide what their circles are. And then learn the new words – whatever they draw.

Don’t forget to talk about your pictures, count all the blue circles and all the butterflies))

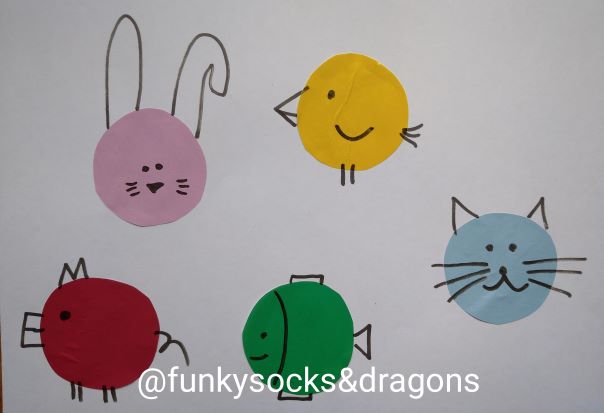
Level 1 Pre-Primary : Pets

Why we love it

  • It is super easy to prepare and to complete.
  • There is no set duration of the task. It can be kept very simple and short, limited to only three items or extended to six or seven, depending on the age of the students, level, motor skills development.
  • It can be easily made more or less challenging by grading the level of complexity of the drawings.
  • It can be adapted to many different topics. I have used it with the topic of shapes (focus: circle), spring (accompanied by the KidsTV123 song ‘In the garden’ https://www.youtube.com/watch?v=RCClYcU97PA) and in the beginning of the course with level 1 to practise the first colours.
  • It helps to develop cognitive skills (perception: noticing the shapes in the world around us, transforming the shapes into things we know etc)
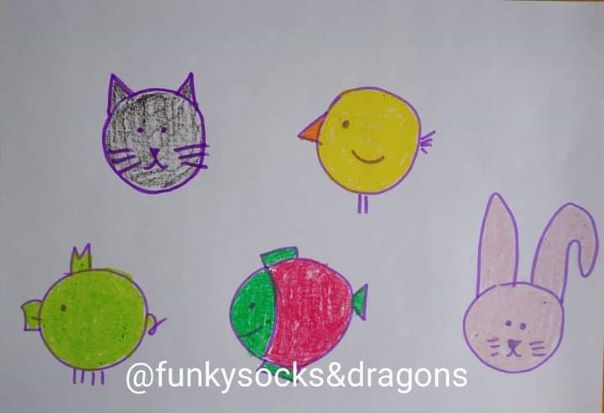
  • If there is no time to cut out all the circles (or if the teacher has not done many craft activities and wants to start with something not as complicated), a template with circles can be used instead. In this case, the kids will only draw and colour.
Level 1: Pets, no-glue template
Assorted circle-related randomness
Assorted circle-related randomness part 2
Level 1 Pre-primary: Colours (lesson 3 of the course)
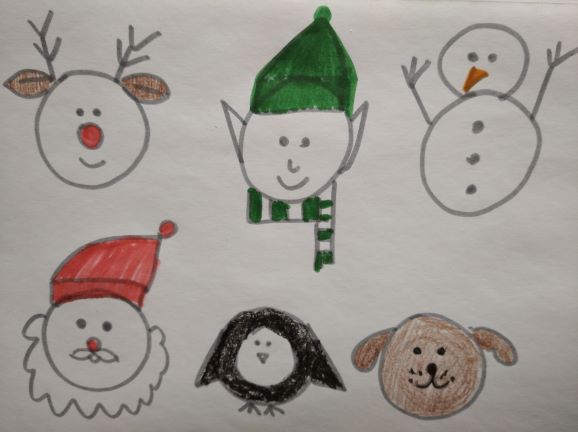
Christmas edition (the puppy is here because this is my student’s favourite thing:-)

Happy teaching!

The first VYL lesson survival kit

My first VYL teaching experience…

…was in Spain. There were eleven kids in the group, we met for two real hours but only once a week. Some of the students were five and some were six and already in school which, of course, made everything a bit easier.

Our classroom was not quite what you would call a VYL teacher’s dream come true. We had huge, wardrobe-size tables that no one, save for Hulk, possibly, would have been able to move and they were so big that when my students sat down, they were barely visible. There were only eleven little heads bobbing above these huge tops…

In terms of the space, we had a tiny strip of the floor in the aisle and another one between the first row and the podium with the teacher’s desk stood because, of course, there had to be a podium. I did not speak my students’ first language and they were beginners in English.

If that had not been enough, just before the first lesson, I was informed that one of my students was allergic to most foods, and the allergy was so strong that we were not allowed to bring anything edible into the classroom, not to put his life at risk. I was also told that, should I notice anything suspicious, any potential symptoms of an allergic reaction, I should immediately leave the classroom with my underage students (one of them unwell) and run about 200 meters along the hallway to fetch the person who was qualified and equipped with the injection that would save his life.

As a result, naturally, I spent the entire academic year stressing out to the maximum of my brain’s capacity. Because something might happen to him, he might try to tell me and I might not understand. And perhaps I don’t run fast enough to get to the office room on time…Or I have to leave all the kids in the classroom and it will be a huge traumatic experience for them…I was dying before, during and after the lesson and perhaps because of that I managed not to focus too much on the potential methodological failings of my first year with the little ones. We had fun, we learnt a lot and my kids were amazing. And, probably, because of that experience, I am what I am today. Alvaro, Jesus, Luz, Uliana, Itziar, Amalia, Oihana, Beatrice, Andre, Eva, Maria. The amazing students.

If you are about to start teaching English to preschoolers…

Let’s start from a happy ending because there will be one: you will start teaching a new group of preschool beginners, they will fall in love with you and with learning English. You will get the access to a source of pure, undiluted life energy twice a week. You will adore teaching the future to speak a foreign language. The parents will be grateful, the kids will start shouting their first words as soon as they enter the school. The songs you teach will stay with them forever and they will sing them while in the car on the way home. And, many many years later, while they are taking their FCE or CAE exam in a few years’ time, they are going to look back and smile thinking of their first English teacher. See? A happy ending.

Before you get there, though, and it is still a long, long way from now, you just have to survive the first 45 minutes of the first lesson.

Surprise!

That is potentially the biggest problem that during that first lesson anything can happen, literally anything. Some kids will have already started kindergarten so they are used to staying on their own, with ‘a stranger’. Some children have started ballet classes or swimming lessons so they know that mum is not always around and, instead, there is another adult and that they will be ‘learning’. Some kids have had a conversation with their parents that prepared them for this new experience and now they know what to expect. Some children may have even learnt a few words, some red, blue, green, pink and onetwthreefourfivesixseveneightnineten, usually like that, as one word. Some are ready.

However, it will be only some of them and this year, due to the pandemic, possibly fewer than in a regular year since for quite a few of them the academic year and the socialising would have been interrupted. The thing is that you really need to meet them in person and then start discovering them all by yourself.

What can go wrong?

Well, let me think and reminisce a little:

  • tears as soon as you enter the room (for the first two weeks straight, actually)
  • running in the hallway screaming (in their L1) ‘I don’t want to learn any English’.
  • lying on the carpet for 40 out of 45 minutes of the lesson time, looking at you but absolutely refusing to interact in any way whatsoever
  • covering their ears when you speak English
  • responding to you in Turkish (the L2), not in Russian (the L1) and not in English (the foreign language, that was a fun one!)
  • leaving the room to bring the nanny in
  • hiding under the table. Standing by the door during the entire lesson
  • speaking very very quietly
  • asking to see mum every ten minutes
  • asking why you don’t speak Russian
  • hugging the bear and not letting go

Just to name a few things.

Ten things that you can do

One. Do not panic.

Being experienced does give you some heads-up, true, but it is a bit nerve-wracking anyway, no matter how many years you have on your resume. It is quite likely that the first lesson will be an awkward one. It’s ok.

Two. The parents are on your side.

It might not always be possible but it would be great to meet the parents and let them know what you are going to do during the first lesson. Ask the parents to stay at the school, close to the classroom. You will be on your own during the lesson but it is good to know that, should it come to the worst, you can just open the door and call Masha’s dad or Tima’s mum to help you deal with the tears or the unwanted behaviour. Keep the doors of the classroom closed and collect the kids in the hallway. Line the kids up and find out what their names are. Say hello and count everyone. Open the door to the classroom and take the kids in, one by one. The parents will help you here, they will wait with their children and keep an eye of them while you are organising the students in the room.

After the lesson, take the kids out and explain the homework to the parents, too.

Three. Get ready.

Prepare a lesson plan, trying to predict what can go wrong, with the classroom management, instructions or materials and to prepare a plan B. I have found it very useful to put up a poster on the wall with a simplified version of your lesson plan, big font and colour-coded, something that you will be able to glance at without turning your back or taking the eyes off your group.

Get all your resources ready and in order. You will have your plate full as it is so you don’t need to wonder where the pencils are or try to reorganize all your papers when the kids are already in the classroom.

Four. Priorities.

One of the most important things during the first lesson and during the first ten or even twenty lessons, is working on the classroom routine. Your students have no previous learning experience of that kind. They don’t know what is expected of them because they literally, have never done that before. Go step by step, especially between the stages or when you are moving between the parts of the room. In a few weeks’ time, yes, you will be able to say ‘Everyone, let’s make a circle’ but for the time being, do get up, stand where the circle is supposed to be and call Petya. Wait for him. Then call Misha, wait for him to come. Then Marusya, wait for her to join the circle…Don’t worry that you are wasting the precious lesson time. No, you are not. You are establishing the routine and investing in the future.

Five. Your basic teaching tools.

Don’t forget that you have the most important teaching tools on you – your face, your hands and your voice. Use them to help you, to show the kids what to do, to praise them or to discipline them. They don’t speak the language, yet. Your face and your voice and gestures must match the message you want to convey, your soft voice and a smile for praising, your other voice and a serious face when you want to tell them that something should not be happening.

Six. Model.

Demonstrate. Model. Show. Always. Verbal instructions and ICQs (instruction checking questions) matter, too but your students will not know any of the words you are using and modelling will be essential. No matter what your activities are, give the instructions and do it first yourself, possibly a few times. If you are going to use a handout, prepare two spare copies for yourself – one to complete before the lesson and to use as the finished product to show the kids what the aim is and another one to be completing with the kids during the lesson.

Seven. Peer observations

Ideally, there would be enough time for you to arrange a live peer observation session with somes more experienced colleagues. Watching real kids during a real lesson can be especially beneficial, and even more so if you can have a look at the lesson plan and to talk to the teacher after the lesson. Arranging peer observations of the online lessons should be even easier to manage. In the school where I work, we also record lessons for teacher training purposes and we keep them on the database. This way, the newly qualified teachers can access them easily and watch them from home.

If none of these is available, there is still youtube and lots and lots of videos of teachers who want to share their activities and favourite tools. Every little does actually help. A lot!

Eight. Do the reading.

There might not always be enough time for the extensive reading and research before the first lesson but you have to start somewhere. Have a look at these two posts, on the methodology videos and the literature devoted to teaching English to very young learners.

Nine. Smile.

No matter what, keep it up. Smile.

Ten. Bring the ferret.

Last but not least, to quote a great mainstream Hollywood manual into the work with the very young learners ‘The kindergarten is like the ocean. You don’t want to turn your back to it’. Kind of.

But, actually, go on and re-watch the Kindergarten Cop with your teacher’s eyes. Especially the ferret bit…

Have a good one! And remember – the second lesson will be better than the first and the third one – better than the second one. I promise!

Happy teaching!

P.S. Here you can read about how I plan my lessons with pre-schoolers and here about our entering the room routine.

There is one more, newer post, with more focus on the teacher during the first VYL lesson.

The Unthinkable or About choosing to stay online with VYLs.

To online or not to online, that is the question?

No, not really. That, for sure was never a question!

Not for me, that is. I am a dinosaur teacher and I had always been against teaching pre-schoolers online. Or, actually, teaching online in general. If, before the 15th of March 2020, you had asked me what I thought about it, my answer would have been as short as it would have been decisive. No.

No. No. No.

I love my beautiful classroom, all the puppets, the flashcards…My rucksack that makes me look and feel like a proper Mary Poppins, the box with all the precious junk. How we sit in a circle to read a story and how we make stuff or play with a Magic Bag…

But, then, hey-ho, the pandemic happened and I and we just moved online. Just like that. Just to prove that the EFL teachers are the most amazing species. Just to see whether one can, in fact, develop professionally, at a head-spinning pace, learning about new approaches, techqniues, platforms, games, tools, tricks, websites, solutions…and about their effective use in the online EFL lesson.

Yes, indeed, one can. In March many of us (including myself) had very little or no idea about the online classes but look at us now. Superheroes!

But guess what? The Universe had other surprises in store for us (I mean, of course, it is 2020, the year of surprises), like this idea, here…

‘Can we just stay online?’

I don’t know about you but I have spent the last 100+ days dreaming and daydreaming of going back offline. But while I was doing this, the other stakeholders had their own ideas and this is how we (the parents, the admin and the Mary Poppins here) found ourselves discussing the options and, actually, willingly, considering choosing to stay online with the youngest children, regardless of the situation in the city.

Well, that was a bit unexpected, to put it mildly. However, once I got past the stage of the initial shock, I was able to look at it all in a more objective way (as in: not blinded by my own old age and stubbornness:-) and actually see some of the benefits, for all of us.

So here goes, in no particular order

Pre-primary online is better because…

  • We can do it! A good quality online classes for pre-schoolers are not a marketing spin. Impossible is nothing! We learn, we are engaged, we have fun, we produce, we develop, we bond. We are loving it and we are looking forward to the next one. You only need to want to make it work and just like with the regular classes, everyone needs time to get used to each other, the routine and the rules of the game.

  • It’s virus-free. Covid 19 aside, little children get ill more frequently. That’s just the way it is. It does happen that they might not be entirely healthy when they come to their afternoon English lesson or that, being ill, they miss a lesson here and a lesson there and they do not make as much progress as they could have. The online classroom is a perfect solution here: we can all participate, even if we sneeze and cough and the school and the teacher do not lose money over the classes that would have to be cancelled.

  • It lowers the affective filter. There were a few students in my groups this year who definitely benefitted from moving online. In the classroom, they were amazing and a pleasure to teach. They participated but at the same time struggled, now and again, with being separated from mum. They simply flourished in the online classroom. I can see how much more confident and at ease they are, sitting in their own chairs, in their bedrooms, with cats, toys and, most importantly, with Mum at an arm’s reach. What’s not to like here?

  • It is less stressful for the teacher. It is a little know fact that VYL teachers, in the course of their career, develop a set of eyes around their heads and can produce a pair of additional arms, on request. They are ready for everything that is happening, for everything that is to happen and for everything that might potentially happen, too. Why? Because acting in loco parentis is a huge responsibility. And a lot of stress, even for those experienced teachers. The online classroom comes with an army of the best teaching assistants there are: mums, dads, grandmas, sisters, brothers and nannies. The kids are safe, every single one of them.

  • Parents like being in the classroom. So far, the classroom has been this galaxy far-away which the parents had no or very little access to. Of course, teachers talk to parents, they explain the homework, they give feedback. They share songs and send out the invitations to the open lesson, twice a year. Now, however, the whole course is one big open lesson and the parents are a part of it. More even, they are having fun. Not because they want to interrupt or tell the teacher off, not to take over and not because they do not trust the teacher and would rather keep an eye on things. It’s because they can finally see how their children operate in the world of the foreign language, how they become more independent and how they are learning new things and making progress.

  • Parents can get properly involved now. The parents are there, they learn our songs, they play our games and they see exactly what we practise and how. If there is time and willingness, they can easily extend the English lesson time, take it ‘out of the classroom’, this way contributing to their children’s progress. During the lesson time, they can be involved in too, helping the teacher model the activity but also helping their child understand that, yes, you can sometimes speak to your mum in English, too.

  • Flexibility and frequency. 45 minutes in the real classroom is just enough for the little people. 45 minutes in front of the computer screen might be a challenge, especially if they audience is only 3 or 4 years old. For that reason, we decided to experiment and chop the lesson time into smaller bites. Now we meet for thirty or even fifteen minutes at a time but more often. The students are involved throughout and stay focused, the financial expenses or profits are the same, and such lessons are very easy to plan. The most important thing, however, for me as a teacher, are the benefits for the learning process. When you are 5, you learn quickly but you also forget quickly, so by increasing the frequency of the lessons, we create better conditions for learning and can expect better results. It is already happening!

  • The lesson time = the speaking time. The ‘time constraints’ mentioned above as well as the online format had an impact on the lesson structure and routines. The students have the coursebooks but it is used only at home, for revision and for homework. When we meet in our online classroom, it is to learn new things, to listen, to sing and to speak and speak and speak. And I really like that way.

Much to my amazement, I am a happy online teacher but that doesn’t mean that I have stopped dreaming about the offline world or that any decisions have been made. It’s too early, anyway, so I am still on the fence, just ‘sitting, waiting, wishing’, like in a song.

What about you? Has this been your experience, too? Have you noticed any other benefits of the pre-primary EFL online classes? I would love to hear from you.

Happy teaching (online or off:-)

The W.O.R.L.D. or What is an ideal craft activity for the EFL classroom?

A post for those who have been contemplating using craft activities in their pre-primary lessons, especially for those who have not started yet or those who have tried but have not really been quite successful with it.

First of all, let’s get started from the facts.

Fact number 1: kids love craft and no wonder they do – you get to creat; you produce something real and you can take it home. Even if your creation has a limited durability and appeal and after some time (a day in the playroom and a week on the fridge door) it gets destroyed and lands in the bin or it gets folded carefully and is stored in the ‘Ania/kindergarten’ box.

Fact number 2: teachers are a little bit more cautious with expressing their love for the craft activities. Some of them do, of course, but there are still quite a few who don’t really appreciate all the hurdles you are required to jump over in order to get to the finish line called ‘A great craft EFL lesson’. Because it can get messy, because it requires more preparation than other acitivities and because it needs to be planned properly to ensure that you don’t spend the lesson colouring and cutting and NOT using the target langauge.

Perhaps that is also the reason why even the most recent coursebooks for primary and pre-primary (which shall not be named here) do not really seem to promote craft activities as much as they should in my humble and very subjective opinion. Alas.

Why craft?

There are many great blog posts and articles on the advantages of using craft, I am not going to be attempting to reinvent the wheel here. Here are those that I have found useful. Have a look yourself.

  1. Kids and Arts and Crafts https://www.teachingenglish.org.uk/article/kids-arts-crafts
  2. Arts and Crafts with Young Learners https://www.teachingenglish.org.uk/article/arts-crafts-young-learners
  3. Using Arts and Crafts to teaching languages to young children https://www.teatimemonkeys.com/using-arts-and-crafts-to-teach-languages-to-young-children/
  4. Adding Language to Crafts https://www.englishclub.com/efl/tefl-articles/adding-language-to-crafts/
  5. R. Bastianoni, The Linguistic Benefits of Using Crafts in TEYL http://www.teyl.org/article16.html

Planning a lesson with a craft activity

If you are looking for a manual how to set up a craft activity and what to think about while planning it, then you should definitely start from reading the introduction to the craft chapter in Carol Read’s 500 Activities for the Primary Classroom where she outlines the principles of the MAD FOX (which, by the way can be used as a framework for all of the VYL and YL activities). Strongly recommended!

Where to find a craft activity?

Well, this is the best news ever: nowadays, finding out about available craft activities is really a piece of cake. There are plenty of websites, blogs, Instagram accounts written by and for:

  • The teachers of English as a foreign language
  • The parents of young children
  • The teachers of kindergarten

There are also multiple groups on facebook, vkontatke (or whatever is your local equivalent), pintrest and just the good old google or Yandex search enginge.

How to choose a craft activity for the EFL lesson?

Well, this is where the W.O.R.L.D. might come in handy. This is an acronym that I made up for myself and for one of the workshops that I was giving a few years ago. Also, because I really wanted to have an acronym:-)

Here it is!

W is for ‘WHY?

Probably the most important question a teacher can ask while planning a lesson with a craft activity: why am I even doing it? It is great to include craft only for the sake of ‘the variety in the classroom’, but I strongly believe that a craft activity must have a follow-up, that it cannot be an end in itself. After all, we are language teachers and not art teachers.

An ideal craft activity is only the preparation for the proper language exercise, it is our way of getting the kids interested in what we are doing and using the finished product to encourage them to engage in a language activity. If this element is missing, there should be a really good reason for including it in your lesson. Is there?

O is for ‘On their own

No matter how amazing an activity looks in the photograph or the video, no matter how beautiful and colourful it is, no matter how strong its ‘wow’ effect might be, there is no point of bringing it into the EFL classroom if your students cannot complete it on their own.

Perhaps, the assembling process is too long and too complex and the materials too small and too flimsy and your students will not be able to complete it all by themselves. If it is a 1-1 lesson, sure, you can help but let’s take ‘the worst case’ scenario, a lesson with a group of 8 students, each of whom gets stuck at precisely the same moment in the activity and the teacher having to help every single one of the 8 students at 17:25:04…No. Not worth it.

R is for ‘Recycle

It will not always be possible but in order to justify the time and work invested in preparing and carrying out a craft activity, it should be possible to recycle ‘the product’ in one of the following ways:

  • The same product is used throughout the course to recycle the particular vocabulary set, story or functional language phrases
  • The same product is used throughout the course with different vocabulary sets, for example the boardgame the children made is used to practise vegetables, then fruit, then transport
  • The same type of product can be made again, with different vocabulary or structures, for example mini-flashcards booklets, flapbooks, window decorations. If the format of the activity is used later on in the year, setting it up and executing it will be much easier because both the teacher and the students will be familiar with it.

L for ‘Language

First and foremost, we are the teachers of English and our main aim and priority should be the development of the linguistic skills in our students, regardless of how old there are. In the same vein, the main advantage of a craft activity is how it contributes to generating language.

Level A: the exposure. This is of course, always there, teachers speak, students listen. No matter what they do, they are also develop their listening skills and the ability to focus. So, technically, any craft activity will score high in that area as the teacher gives instructions and students follow them. What’s more, it is instantly obvious – the kids are leaving the room with a card, a puppet or a mask hence they have understoon the instructions. Good but not good enough.

Level B: the functional language. All craft activities have their stages, the students are encouraged to ask for the coloured pencils, glue, scissors, react to the teacher’s praise, sometimes praise their friends’ work and this is how some functional language comes into the picture and students are given an opportunity to practise it in context. Better but not good enough still.

Level C: the production. In an ideal craft activity, the making of is only the first step towards the follow-up stage in which the finished product will encourage them and will give them a chance to speak English.

D is for ‘Duration

Realistically speaking, how much time of the lesson time is the activity going to take, from the moment it is presented to the moment the last scraps of paper end up in the bin and the crayons, scissors and glue back in the box where they live? 5 mintes? 10 minutes? 15? 20? More than 20?

I am not going to try to discourage anyone from those longer craft activities because they need to be seen in perspective, together with all the other pieces of the puzzle, but it needs to be remembered that the longer the activity lasts, the higher the chances that kids will lose interest, that they will find alternative things to do, start chatting in their L1, get bored and tired and that, basically, it will be increasingly difficult to manage them and to get something out of the activity.

The potential time contraints apply to teachers’ too, actually. How much time and effort does the teacher want to spend on preparing the activity? Will they inolve the whole family into pre-cutting and pre-folding the night before? Will it be really worth it?

What is the ratio between the before-the-lesson preparation time, the activity-in-class time and the follow-up production stage time?

For that reason

  • Cutting out a bunch of grapes that takes twenty minutes to complete: no
  • Making a complex puppet that takes half of your lesson so that you could use to say ‘hello, my name is Mitya’: no
  • A set of tiny little bits that have to be carefully glued onto the piece of paper: no
  • A picture to colour: no (not when it is just that ‘a picture to colour’)
  • Goggly eyes: no
  • Food craft without consulting parents first: no
  • Draw your…: no
  • Glittter: no (but that’s just me) and any ultra fancy materials that teachers would have to purchase themselves in specialised shops: also no

Anything else you would like to add? Anything that you don’t agree with? Please, let me know!

And don’t forget to pop in here to read about one ideal (and tried and tested) craft activity for the EFL preschoolers.

About a caterpillar, sometimes hungry, sometimes not. An ideal EFL craft activity?

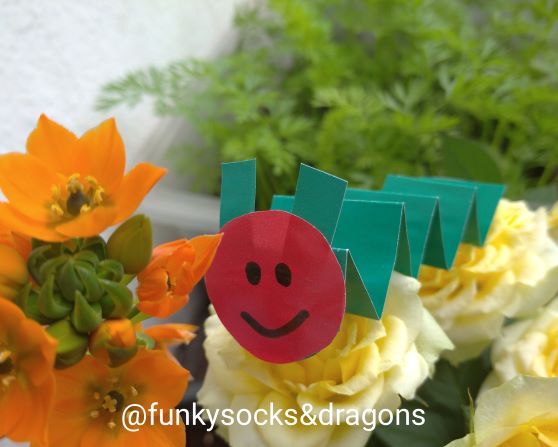
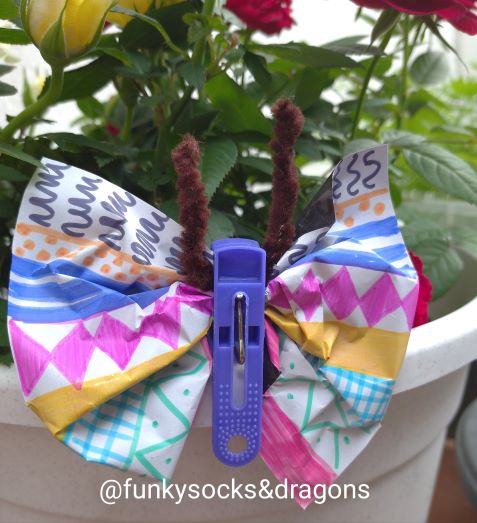
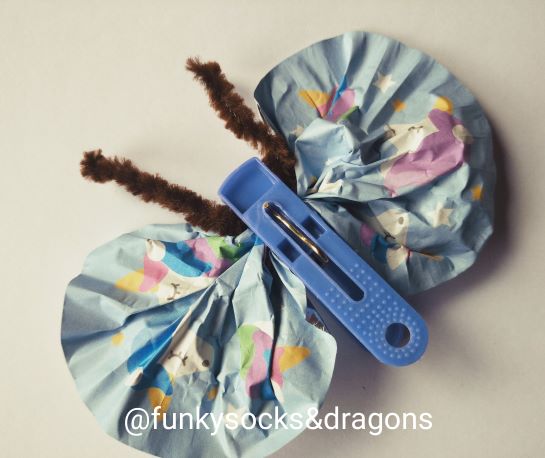
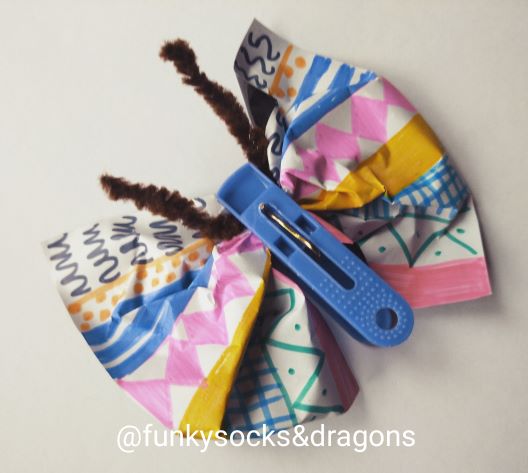
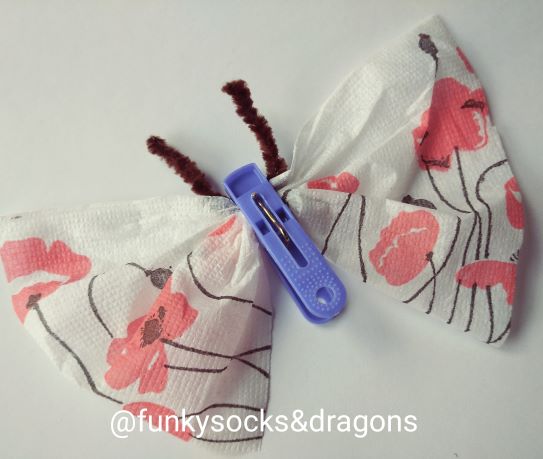
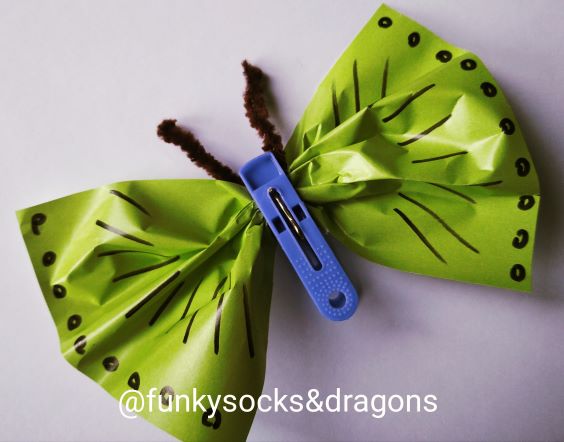
Despite the fact that there are piles and piles of amazingly beautiful craft ideas for the caterpillar – butterfly lessons, such as https://www.k4craft.com/paper-caterpillar-craft-for-kids/, https://www.firstpalette.com/craft/cupcake-liner-butterflies.html or https://www.craftymorning.com/cupcake-liner-clothespin-butterfly-craft/, I have decided to design my own in order to comply with W.O.R.L.D principles aka my own acronym for craft activities (you can find it here)

W is for ‘Why?’

With this particular craft, the making of is only the introductory stage, namely the activity in which we are use the final product to generate even more language.

O is ‘On their own?’

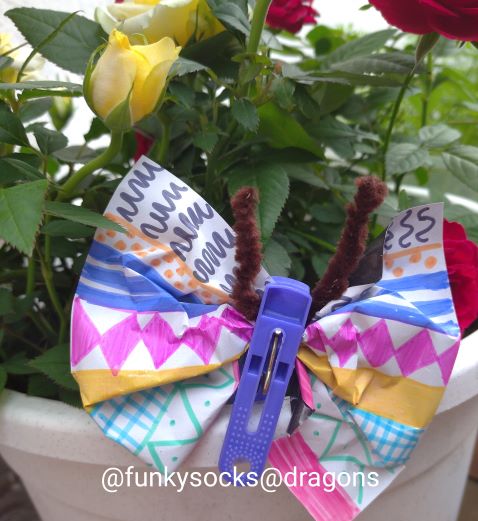
I wanted something that my little students will be able to work on and complete on their own, with as little of my involvement as possible. Partially it is connected to the fact that we are developing learner autonomy, also in the EFL classroom, partially due to the fact that with six or eight children in the group, a craft activity can quickly turn into a nightmare experience if the teacher is required to help make eight caterpillars at the same time. The caterpillar still looks very caterpillary and sweet even if the folds are not very neat or even. The butterfly can be squeezed into the peg by even very young hands without much damage to its beauty.


R for ‘Recycle’

Most caterpillars and butterflies will most likely be taken home because it is not always easy to convince the little kids to leave their precious creations behind, in the classroom, at night, all by themselves, but as long as there is at least one caterpillar and one butterfly left (teacher’s), they can be invited to participate in all the class activities over and over again, with different topics, vocabulary and structures. Not all of us have the luxury of having a teacher assistant in the classroom but the caterpillar and the butterfly can play the part – model the activity, get involved in classroom management, give instructions and so on.

L is for ‘Language

No matter how much fun we have making something in class, first and foremost, a craft activity is an opportunity to use the target language, either while producing something or while playing with it.

This particular buttefly and this particular caterpillar were used in different lessons. We used it to retell the story of the most renown hungry caterillar from Eric Carle’s story, we used it to talk about a lesser known caterpillar sleeping through different weather days only to wake up as a butterfly (Playway to English 1 by CUP, Activity Book, page 37) as well as six caterpillars wreaking havoc in Mr Smith’s garden (Playway to English 3 by CUP, Student’s Book, page 54 – 55). The same duo accompanied me in a few spring lessons, accompanied by the great song from Kids TV 123 ‘In the garden‘ while we were practising the structure ‘I can see’ as well as the Science lessons on the butterfly life cycle.

D is for DURATION

I have used the same craft activity with my three year-olds and with my six year-olds and with everyone in-between, with only slight adaptations. This particular caterpillar and this particular butterfly are expected to take about 7 minutes of the lesson time and are made on two separate occasions in order to facilitate staging and classroom management.

The tissue paper version is more 3-year-old friendly and it does not involve any folding or careful handling. The older kids can be prepare a more intricate butterfly, by colouring a rectangle of regular white or colourful photocopier paper, coloured paper or tissue and decorating them with leftover stickers. As for the caterpillars, they can be pre-folded for the younger children, the teacher can also draw the lines where the folds should be and glue the heads on before the lesson.

Step-by-step staging

Caterpillar

  • Show the final product
  • Demonstrate how to fold it, use simple instructions (‘fold’, ‘press’)
  • Hand out the strips of paper
  • Fold the caterpillar, making another one together with the kids, step by step, pause if necessary, to let the kids catch up
  • Glue on the head
  • Draw the eyes and a smile

Butterfly

  • Show the final product
  • Give out the paper you are going to use for the wings, decorate it (markers, crayons, leftover stickers)
  • Make another one together with the kids
  • Take a peg, open it, show the kids how you squeeze the wings inside (with the wings made of paper, it will be necessary to demonstrate how to gently gather the wings in the middle and how to crumple the paper), close the peg.
  • Give out the pieces of pipe cleaners
  • Bend them in half
  • Open the peg, put the antennas in

Happy teaching!

How to un-sing a song.

Can you imagine a VYL or YL lesson without a song? I really hope you can’t😊 I should probably make a list of all the reasons why we need songs in EFL/ESL and see how many there are. Some other time.

The most important one for me is that a song, any song, is a plethora of words and structures sprinkled with some music. When, after a while you take away the music, your students, even the little ones are left with a discourse. Almost.

So while we listen to songs for pleasure and while we include them in our lessons just because they are fun, for me, the teacher, there is the secret agenda, the master plan, what the Tiggers do best…But before all that happens, a song needs to make an appearance. Or an entrance…

There are many ways of introducing a song.

When I was a little teacher, I always went through the same routine of introducing and practicing vocabulary and structures first and only when the kids were ready, I would ‘summarise’ it all with a song.

Not anymore.

Sometimes I start with the song because it already includes absolutely everything I need for a successful language presentation – lots of repetition, colours, gestures, even the written form. A good example here is ‘Do you like broccoli ice-cream?’.

Starting with a video is another solution. When I first found ‘What do you like to do?’, I wasn’t sure how to go about it because it included all these amazing verbs but there were so many of them that I would need a separate lesson to go through all of them and to prepare the kids for singing. I opted for the lazy teacher approach and we just watched the video first to simply enjoy the story the song is telling. I introduced the main structure then and verbs, in batches, as it were. The kids joined in singing with the verbs they had already known and slowly we filled in the gaps.

It is entirely up to you. This year, when this song was introduced, my students already knew ‘I can see’ from the previous units and all the verbs because we had used them in different games. I had to focus only on the names of the animals.

They can be introduced, with (electronic) flashcards, gestures or plastic animals, if you have them and this stage can be done (or in some cases even: should be done) in a separate lesson, to give the students a chance to become familiar and comfortable with them.

Then comes the song itself. You can simply just watch the video and listen to the song but there are certain advantages of playing the video with the sound off. This way, the kids can focus on the plot and the concept and the teacher can slowly introduce the lyrics, pausing and asking the students to repeat or to reply, again, depending on the group. Don’t forget about the gestures, too.

Afterwards comes the real proper song, this time, hopefully, with more students participating via gestures, humming or maybe even singing.

A song is never just for a lesson. It is a real waste not to reuse the old hits because the more we sing them, the better we know them and the more we can just enjoy them!

But this post is about the follow-up activities

These activities will be an opportunity for further language practice contributing to the song becoming ‘ours’ but they will also build the road to the world in which these verbs, animal names and ‘Can you…’ questions are just the language that the kids use, freely and creatively…

Here are some examples of the games and activities that can help achieve that.

One: Pelmanism game

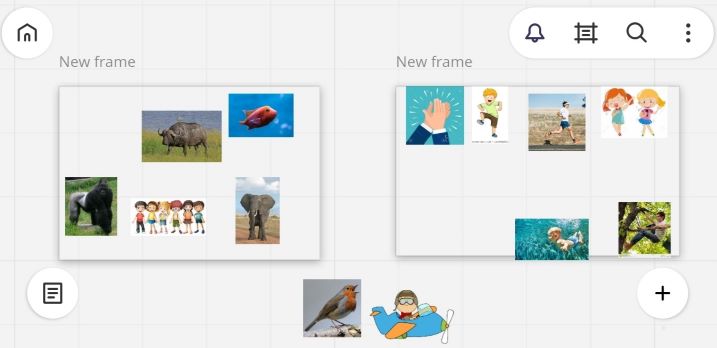
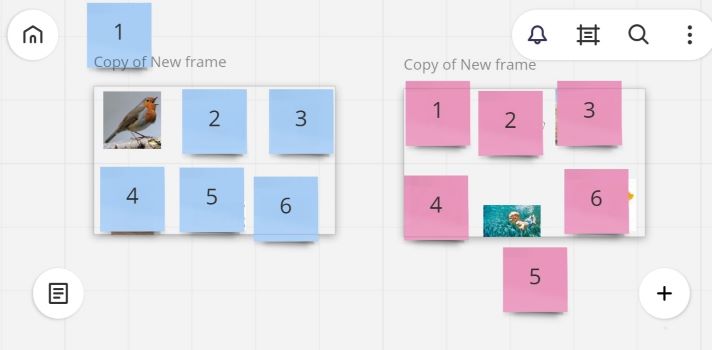
In the classroom, we use small cards, colour-coded. In the online classroom, it takes only a moment to prepare a set of cards in your powerpoint or on the miro board.

In the beginning it might be a good idea to play teacher vs kids. The teacher picks one blue card and the students, in turns, choose one of the pink cards to be uncovered. The numbers make the game a little bit less challenging and in the online classroom they help the students make decisions and say which card they want. Once both cards are uncovered, the teacher starts singing ‘Little bird, little bird, can you swim?’ and the kids reply ‘No, I can’t’

When the kids are ready, they take over and choose both cards, still singing and practicing the key structure and vocabulary.

When my students got to the point when they were completely comfortable with the structure, we used the verb cards to interview all the other animals that we know, using flashcards or toy animals.

This can be easily done in the online classroom, too, because the teacher can use the google images, the finger puppets or just any toys that the kids have in their rooms.

Two: Handouts, homework or classwork.

To reinforce the knowledge of the lyrics of the song and also to check the kids knowledge of certain animals, I prepared a set of handouts. These can be set as homework, if the parents have the way of printing them, or they can become and activity that you do on the screen with the whole class.

Handout a focuses on the animals from the song, handout b takes the song out and uses the other animals that the kids know. Handout c can be done with the kids suggesting the animals and asking and answering questions about them. All three include people, too (I can, my mum can, my teacher can).

We normally circle the things that each animal can do but the same handout can be used to make affirmative (circle) and negative (cross) sentences about each animal, too.

Three: Dice game

This is a TPR game that can be used during the movement stage of the lesson, from the very beginning. It uses the same visuals as the handouts. The teacher rolls the dice and ask the kids the question ‘Can you clap?’ Kids answer ‘Yes, we can’ and mime the activity. After the first few rounds, the students take turns to roll the dice and ask the question. If the kids know more verbs, the original seven verbs can be replaced with some other activities.

Singing it or saying it?

During one of my first classroom research projects at university, I did look at the scaffolding techniques that a teacher (myself) uses at the different stages of using a song with little kids and it was only because of that research and the fact that I had to record my lessons and analyse them in detail that I could look at that issue and to find the exact answers.

It turned out that during the first lesson, all eight children were using the structures from the song in a creative communicative game but because it was a new song, all of them resorted to singing the question and the answer. A few lessons later, when everything was familiar, only one still preferred to sing. The other seven were already comfortable enough with asking the questions and answering them without the support of the music. This might be an indication for the teacher to start with singing but slowly move towards spoken language, allowing the students to transition whenever they are ready.

P.S. There is craft, too but this is a post for a different day😊

Happy teaching!

Links

Yes, I can. Super Simple Songs https://www.youtube.com/watch?v=_Ir0Mc6Qilo

Do you like broccoli ice-cream? Super Simple Song https://www.youtube.com/watch?v=frN3nvhIHUk

What do you like to do? Super Simple Songs https://www.youtube.com/watch?v=nddRGDEKxA0

www.supersimple.com/song/yes-i-can Check out their websites for lots more handouts.

And here are the links to my handouts: https://drive.google.com/open?id=1GywvxbJohMINsDV9jOymZwc7ZLC4WPB_

If you are interested in the topic of language production in pre-schooler, make sure you check out the posts on pairwork in pre-school, discourse clock, activities based on developing cognitive skills and Colourful Semantics in EFL.