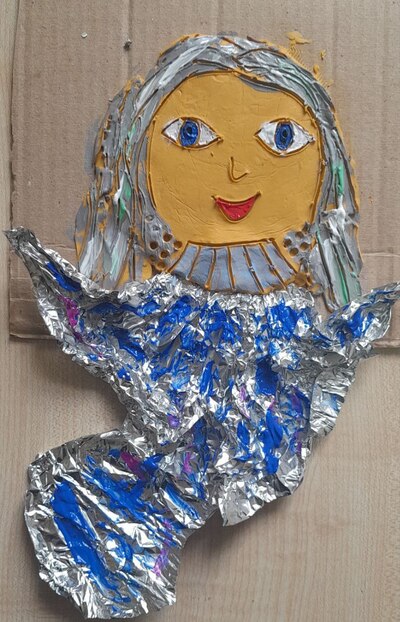
The Aztecs, fabrics and print! Teaching English through Art!

The langauge

This lesson was a part of our winter camp – a series of lessons devoted to ancient civilisations taught over a week, with each day being devoted to a different country and culture. We had a lot more time than in a regular EFL class because we could spend the entire three lessons focusing on the History, the Art and the Culture each day. Not to mention that each day was packed with the L1 activities in the particular theme, further reinforcing the vocabulary, the concepts and the ideas, turning it into a real experience for the kids.

For that reason, we had a lot more time to explore the language and all our History lessons of this programme followed the same plan: listening to the music of the civilisation to experience the culture, learning the key vocabulary, doing some written work and, the most important part, comparing the life of ancient Greeks, Romans, Aztecs and so on to ours, using Present Simple and Past Simple, which helped us practise a few key verbs throughout the whole week and to really learn some interesting things about a particular culture. It was also a great opportunity for the kids to share their questions and, equally, the knowledge which they already had.

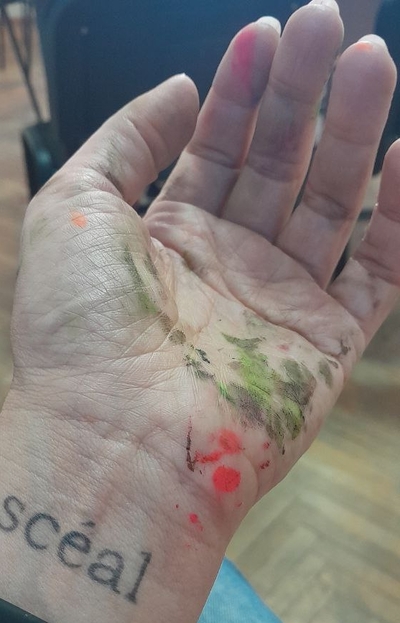
‘Tell me you are the Art teacher without telling me…’ (and the kids left with their hands clean!)

The artist

Sadly but not surprisingly, we did not have ‘an artist’, not one with a real name. Instead, just like with many other lessons of this particular week, we invited a whole nation to our classroom. We talked about the beautiful Aztec prints that are still popular today. I showed the kids a few examples and we called out the colours and the types of patterns there. The kids automatically started to share which one was their favourite, too.

We also looked at a few printing plaques and outlined what ‘a pattern‘ is.

The art

My choice of the resources and techniques for this lesson was influenced by a few different factors. I decided to combine the Aztec love of cotton and amazing fabrics and patterns, the Aztec love of printing and the amazing colours. And this is how we ended up with our lesson.

There were so many precautions and instructions that I really ended up giving a step by step lecture and a demo, while at the same time discovering the technique, having never done it in class before. I cannot show you the video but there is a lot of ‘awnnn’ coming from the kids and a lot of ‘I just looove it’ coming from the excited teacher.

This is what we did step by step:

  • I prepared the fabric (simple cotton, pre-washed, dried and ironed it at home and cut it up at school) and I attached the pieces to the tables. We did not have the frames (which would have been amazing), but I scotched each piece to the table using the thin painter’s scotch, along the four edges, to ensure that it is properly attached but also to make sure that we have the natural frame for each piece. I also put a piece of newspaper or paper underneath to protect our tables and to make sure that the excess paint is soaked up by that, when necessary.
  • I prepared the tools: plastic forks, knives, spoons, chopsticks, paintbrushes and a few foam stamps I had. Later on we also added a few big shells and some crumpled tinfoil, just because we found it at school.
  • We also got the aprons ready, the wet tissues and an additional piece of paper per two students.
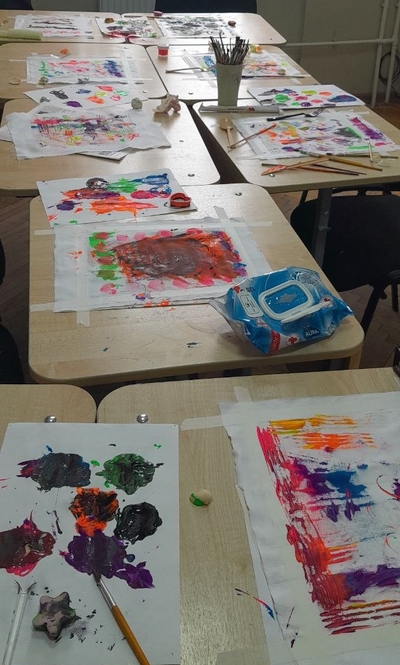
  • It is also worth mentioning that we rearranged the tables and put them all together into one big piece in the centre of the room to avoid a situation when the kids need to move around to exchange the colours or tools and spilling the paint all over the room.
  • I put up another piece on the board, for me to use as a model. Again, I used scotch+fabric+paper underneath and it worked very well.
  • The next step was a set of my instructions. I had to focus on: not getting up and moving around (the teacher will bring everything), being careful with the paint and wiping it off your hands immediately, wiping off the paint off the tools once you stop using them and sharing the tools and waiting patiently for your turn.
  • Afterwards, I demonstrated how we work: choose a tool, dip in the paint on the spare piece of paper that we used as a palette (easier to throw out than to wash), print, clean your hands and the tool and repeat.
  • At the end of the lesson, the kids went to wash their hands and went for a walk, I was cleaning up myself (always the case with the acrylic paints).
  • We needed the classroom for our lesson #3 so I moved the pictures to dry in peace to another room that was empty at a time.

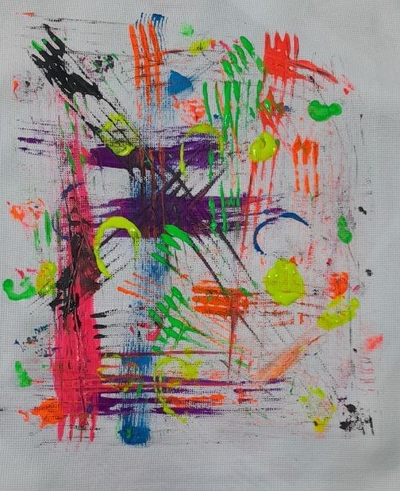
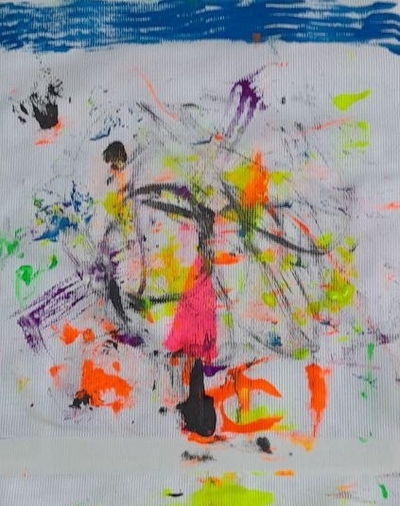
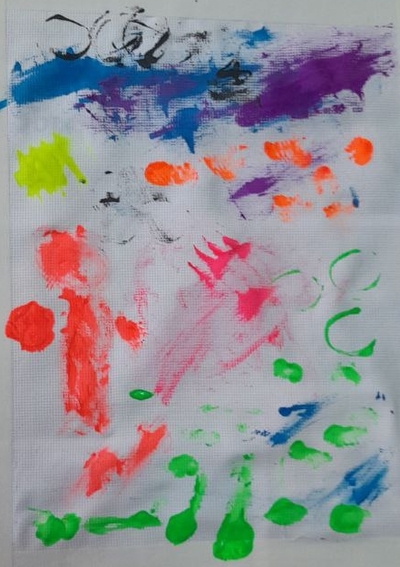
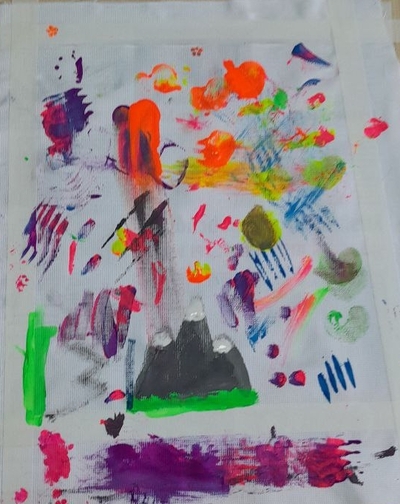
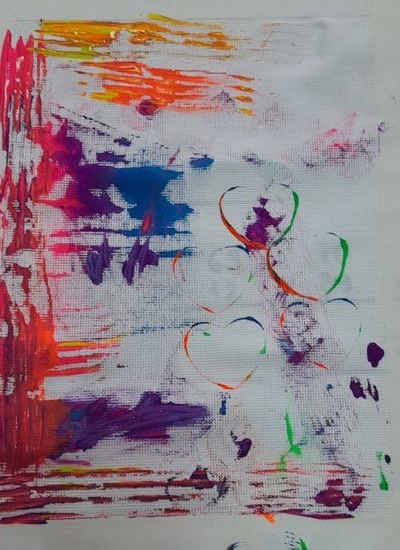
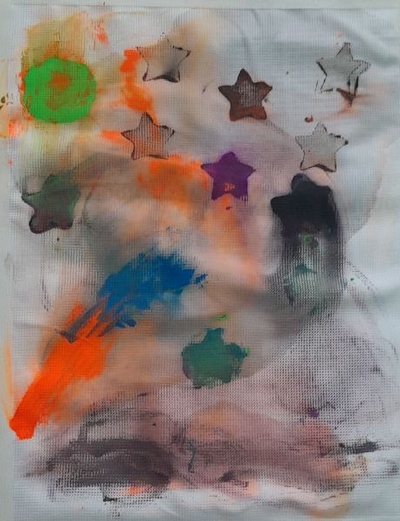
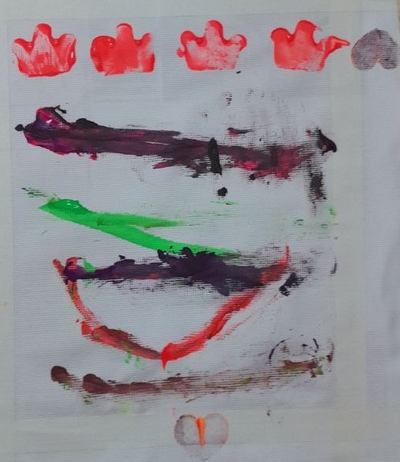
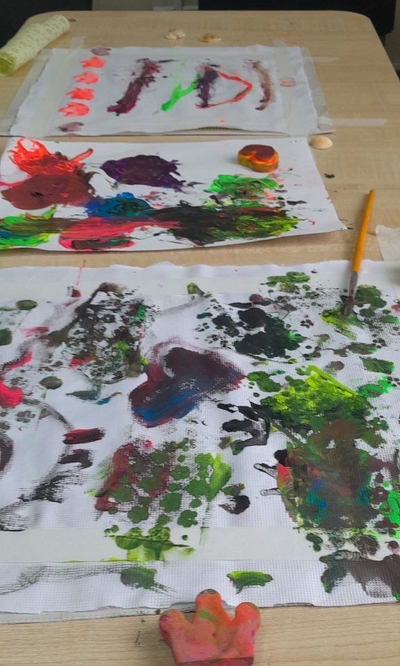
I don’t really need to tell you that this lesson was a success, you only need to look at the photos that accompany this post. I absolutely loved how it went, how we worked and where we got with it. It was not an easy task, logistically, but it was absolutely and definitely worth it.

I was really impressed with how well my kids worked regarding all the rules, cooperation, sharing and being careful with the materials. True, I have no idea how many times, within those 45 minutes, I said ‘Wash the tools!’, ‘Wash your hands!’, ‘Show me your hands!’ and ‘Who needs blue / a fork / a flower / a heart?’, but they were absolutely amazing. So much more gratifying that these were not my regular Art Explorers kids and, nonetheless, they were great. The hands remained cleaned, the tables were generally clean and no clothes were injured or harmed during all our creative activities. I made sure I told my kids that I was really proud of them.

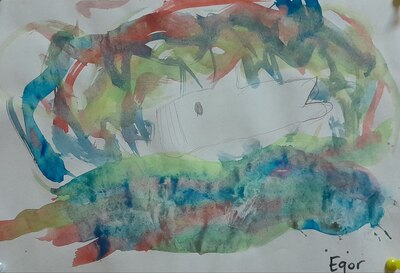
Now, the printing was one ridiculously enjoyable and one surprisingly innovative process. The children took my model into consideration and they tried to follow in my footsteps in the beginning but every single one of them took their own steps towards experimentation and their own interpretation of the process. And, despite the fact that we were working with the same tools and techniques, we ended up with a set of different pictures.

All the kids were visibly enjoying the process and it was great to see how they were not only sharing resources but also the ideas and the new solutions that they came up. Some of the works were directed by the colours, some by the tools that were used, some just by the silly ideas that we had out of nowhere.

Despite the fact that it all looks random and abstract, the pictures are the outcome of an organised creative process. In one of the cases, one of my students was debating with himself, along the lines of: ‘Something is missing here…Something is missing here…What is it?’ but because he was doing it out loud and a few of us got into a conversation, sharing our suggestions. That was a beautiful moment and the final product is, indeed, fantastic.

The best compliment to the lesson, I think, is one of the comments that my student made. He was peeling off his picture and looking at from all the sides. I asked him what he thought of it and if he liked it. ‘I want to buy a frame for it. Are frames expensive?’, he said and that is just the best thing that I could hear, I guess.

Another quote came from my admin staff. They were very much impressed with what we created and they asked: ‘Miss Anka, can we display them on the wall?’. I didn’t answer, I only started to laugh because all of my students, every single one of them, asked me during the lesson (and sometimes confirmed once or twice): ‘Miss Anka, are we taking it home?’ Too precious to leave behind, even for a day. I didn’t even try to convince them, I just made sure I had photos of all the fabric pictures.

My thoughts were of a slightly different kind. Looking at my students works, I was thinking, again, of a real gallery exhibition…

P.S. My favourite things: the Art Aftermath!

Hearts and Jean-Michel Basquiat

The language

February is our Fun Cartoon February but language-wise I decided to focus on Present Continuous to work on verbs and to get us ready for storytelling later on in the year. This is also a great TPR-friendly structure that comes in very handy and gives us a chance to move a little bit when we meet at around 4 pm, already a bit tired after a whole long day at school. We have a set of basic activities for that, tried and tested, that include making sentences based on stencils, Pete the Cat and his ‘Rocking in my school shoes’ (video and song) and a miming-guessing game (the calss asking:’Sasha, what are you doing?’, Sasha demonstrating and the kids guessing).

The artist

The day has come! Jean-Michel Basquiat is here! It has taken some time for him to arrive (mea culpa!) but it is finally happening. I was racking my brain in order to find a match for February and my own alliteration challenge because I really (really) wanted to deal with Basquiat (and with Roy Lichtenstein and Keith Harring) as soon as possible.

I introduced him to my students in the usual way (name, photo, country, favourite thing) and we looked at a few of his creations, including one of the self-portraits, cats and his ‘Robot man’. Funnily enough, my kids found some of his pictures a bit scary. That is why we didn’t spend a lot of time on that and we moved on to his technique because that was, really, my main aim for this lesson.

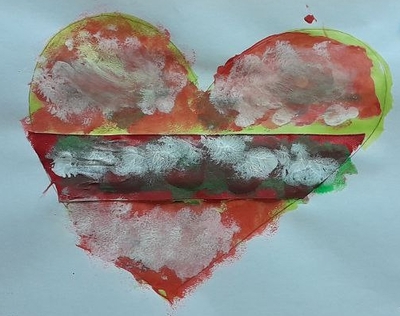
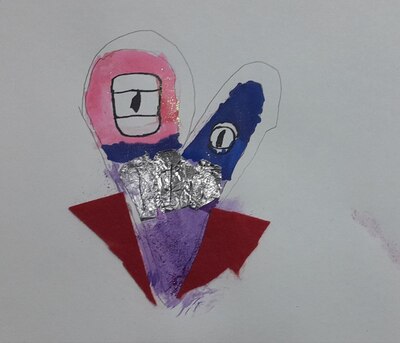
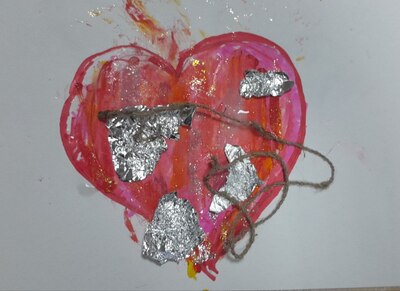
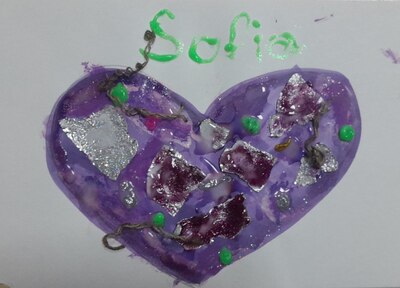
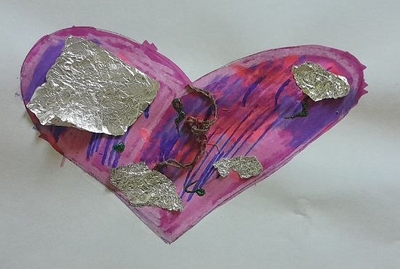
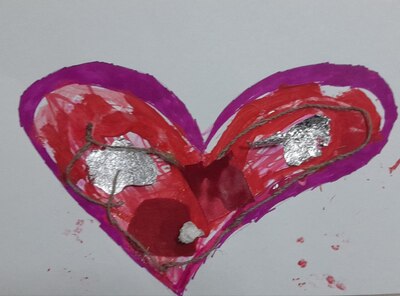
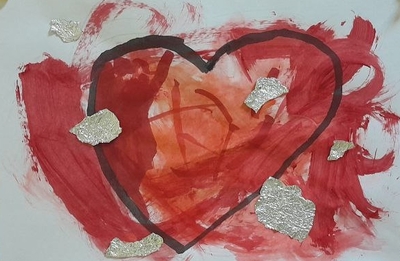
Before the lesson I prepared my own model of the heart because it made it a lot more easier to explain what ‘layering’ is all about. We looked all of the materials I prepared on the table and we tried to count how many I used in my picture and what they were.

My own piece

The art

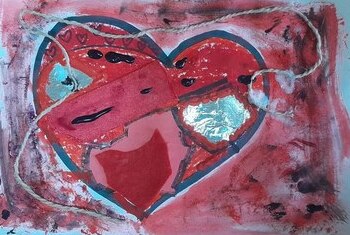
Apart from the number of layers that my picture helped with, we also made a list of stages that we need to go through and I wrote them on the board: 1. the draft with a pencil, 2. the outline with a marker, 3. and more: all of the other materials, as many as you want and 4. the final one: glitter. The only thing that was obligatory for everyone was the topic, a heart as we had our lesson in the week of St. Valentine’s Day that our school was getting ready for.

This was a great process art lesson, an amazing process art lesson, in fact. I experienced it myself, while creating my own heart. Apart from just having fun, working with all of the materials and resources and experimenting with them brought me a lot of pleasure. Certainly, I was hoping that my students will also be able to experience that. Guess what? They did!

Different children chose their own approach to the resources and the number of different materials and layers to work with. I didn’t want to interfere with that, even though some of them chose only or two resources. I tried to suggest other solutions but I respected their final decisions. This was an interesting balance to those of my students who went over the top and used absolutely every single material that I had prepared. Or more, just because they found some random bits of coloured paper in the glue box.

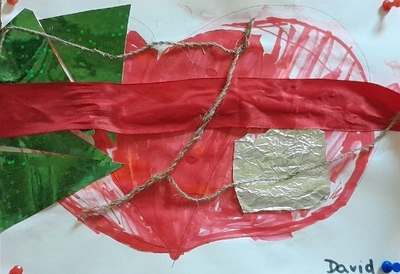
My favourite thing was probably the fact that the kids went into the task with a completely open mind, willing to experiment, to try new resources and the new combinations of resources and to learn from each other, as well. We discovered that tinfoil can be torn and cut, it can be coloured and glued or glued and painted over. I shared with the kids that you can paint with acrylic paints and a wet tissue and I looked at how they liked working with our almost professional acrylic paints and that a piece of string actually makes a difference. I myself added a few more bits to my picture just observing what my students were doing.

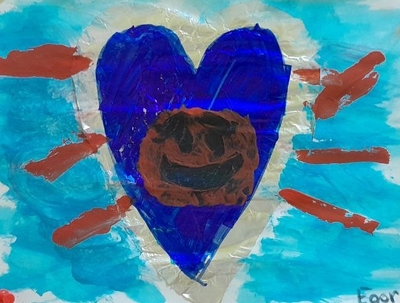
One of my students came to our class for the first time ever and it was lovely to see how unexpectedly creative he is and how beautifully he applied the technique to create his heart.

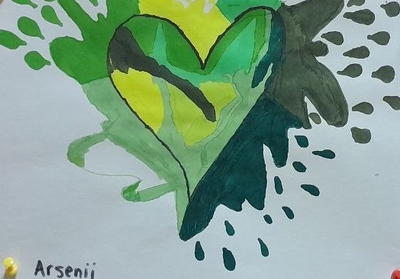
Have a look at the beautiful pieces in our gallery…

John Olsen, the sun and the jungle. Jungle January

The Erik Bulatov jungle-themed lesson is here. The Henri Rousseau – here.

The language

We continued with our January theme and the jungle, and we continued to focus on the animal vocabulary and the phrases with ‘I can’. We revised the animals and we played the animal riddles based on a video, guessing the animals by the sound (I can hear).

The artist

Our Artist of the Day this time came from Australia. We looked at his paintings and I told the kids a story of his travels to Europe and how him being far away from his own country made him realise that this is where the real beauty is. This was ‘the favourite thing’ for John Olsen – Australia. We looked at a few of his paintings to see the unique style; we compared the paintings and the same objects in photographs. This year, this was our first meeting with abstract paintings.

We also looked at different pictures of the jungle, to see what it looks like from the perspective of a bird (or as John Olsen would see it, if he painted jungle) and to see what colour palette we need (green!).

The art

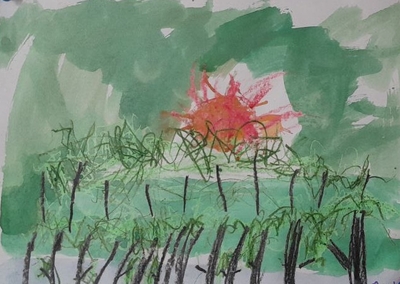
I have prepared my own version of the jungle picture, a la John Olsen, but I quickly realised that my kids were not quite interested in the abstract, non-figurative painting. For that reason, my painting was used only as a curiosity but everyone were allowed to paint the jungle in any way they wanted.

I demonstrated the technique that I have chosen for this lesson (crayons and watercolours, wet on wet or dry on wet) and we started to work. And, as usual, it was a joy to see them choose ideas, make decisions and work.

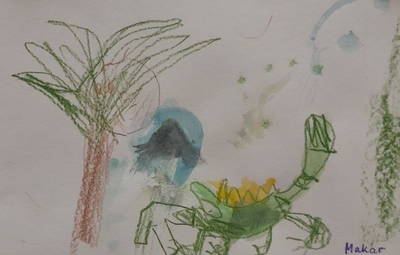
As could be predicted from their initial reactions, not one of my kids chose the abstract, not in the younger group, not in the older, either. Most kids worked with the technique I chose but I also had one student who asked for acrylic pens and one who only did crayons.

They were all invested in the process and I am really happy that we got so many beautiful and so many different paintings out of this lesson. I cannot even choose one picture that really ‘stole my heart’, although there usually is one. They are all special, each in their own way.

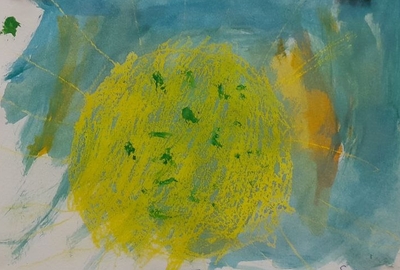
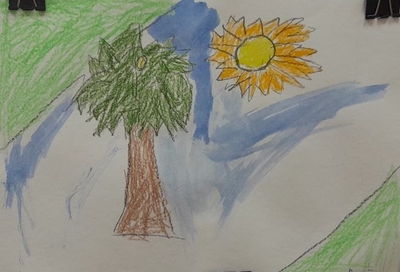
Every week, I have a few opportunities to interact with my students’ creations. First, when they are creating them – I am looking, then when I am editing the photos, then, when I am writing the post and then, usually after a few days, when I am uploading them here and posting. Every week, it is a chance to revisit and to notice something new. Initially, I thought that they did not really take John Olsen in, but now, on the 4th interaction, I can see that in those jungle of ours, the sun does play a very important part and, even when it is not always the centerpiece, it is very much present in their paintings. So, they did look and they did see!

Now, I am just wondering how to get them like the abstract art a tiny little bit more…

Henri Rousseau and a trip to the jungle

The peacock

The language

January is our jungle month (Jungle January!) and that is why we are talking about everything related. The first lesson can be found is here.

In this lesson we continued working with the verb ‘can’, still only with ‘I can see’ but we changed the focus a little bit. I wanted us to revise and to learn the names of the jungle animals, especially on their distinctive features. That is why we played a guessing game with the wordwall cards. In order to help us guess, I chose not one specific body parts, like in other games we played, but a very distinctive feature for each particular animal.

The tiger

The artist

We invited Henri Rousseu to join us in class again, this time as the main guest. We looked at his paintings (presentation slides 8 – 15), just calling out the names of the things we can see.

I also wanted to show the kids different ways of depicting a tiger, a painting, a drawing, a child’s drawing, a photo, a logo and the Chinese symbol that represents this animal. We looked at how they are different and how they are similar and we tried to outline their distinctive features: black and orange, stripes, four legs and a tail.

I also told the kids that Rousseau never travelled to the jungle or even out of the country and that, still, he decided to paint the jungle because he wanted to do and he did, the best he could. We talked a bit where he could have got his ideas from. I realised that he is a really good role model for us, the budding artists.

The anaconda and the peacock

The art

We started with describing what the task was: to choose one animal and to try to paint it using finger and handprint and our paints, focusing on these distinctive features that we would be able to tell that it is a flamingo, a tiger or whichever animal we choose.

I showed them a few examples of the finished tasks from the internet (see the presentation) as well as my model. Before the lesson, I printed a green hand on a piece of paper (also to check again how much time we will need to wait before drawing on the paint) and I showed it to kids. While they were watching I added the little bits with a marker and ended up with an elephant.

My attempt at an elephant

I also showed them how we would be working, moving from the paints station in one corner of the room, to the tables where I attached the paper for printing, I gave out the tissue paper and the wet tissues to clean our hands, too. I also showed them how we don’t need to smear the paint on the table (covered with paper) but that we can also spread it on the palm of the hand with a paintbrush. I prepared a paintbrush per colour and a few extras for the colours that we would mix.

And then we got down to work. The results, as usual are all over this post…

What I loved about this lesson was:

  • how the kids were discovering the material and the technique, thinking about and developing ideas as we went along
  • how they were learning from each other
  • how they experimented with the colours, mixing them and asking me to try getting new colours for them
  • how they made their decisions about the distinctive features of the animals they chose
  • and how sometimes they asked me to google the animals to check that they were doing a good job with certain body parts
  • how we discovered that even our dirty tissues were pretty and that they could be Art. ‘Miss Anka, can we do some more tissue Art?’
  • how children were making their own decisions. Some decided to choose very un-jungle animals, some loved the fingerpaint so much they they decided to use it in a more traditional way, with paintbrushes for colouring. And, as Pete the cat says, ‘It’s all good!’

Erik Bulatov once again. January Jungle!

Once a teacher, always a teacher. I decided to use this one as an opportunity for all of us to learn some words)

The language

On the spur of the moment, at one point before Christmas, I decided that our January theme will be the jungle. As in: January Jungle! (Or ‘Jungle January!’, we are using both terms interchangeably.

This means only three lessons but it took me about one blink to decide what we are going to be doing and I am not saying it to brag but to share the surprise because, without knowing, I had these three lessons already in my head. They were just waiting for their cue, apparently.

I decied that we are going to practise a lot of ‘I can’ with different verbs to describe sensory experiences and in the classroom that is actually very (very) far away from a real jungle, I hope we can at least manage ‘I can see’ (the easiest one of them), ‘I can hear’ (there are the sounds) and, perhaps, ‘I can smell’, with a fragrance or two, hopefully.

In the first lesson, we focused on the general vocabulary, related to the tropical forest. We learnt and revised the words (those here) and we practised guessing, using ‘I can see’ (using these cards). With the older kids, we also looked at some of the paintings by Henri Rousseau (a preface to the second lesson in the cycle) while describing the pictures and everything we could see in them (presentation from slide 11).

The artist

Our real artist of the day, however, was my beloved (no joke here), Erik Bulatov. I designed a lesson based on his works a few months ago, during the summer camp lessons. You can find it here, it is only of my proudest creations and I really do recommend it, especially that it lends itself to many different topics and age groups.

I knew that Erik Bulatov would be coming back and the jungle month seemed perfect for it.

We looked at only a few of his paintings (presentation, slides 5 and 6) and we talked about the main idea, that is using the words as visuals, or, as I have been putting it, ‘a word is a picture, a picture is a word’. Actually, it is for that reason that I chose those particular pieces by Bulatov, I needed some clear examples.

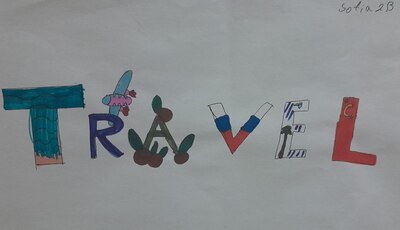
We also looked at two of my pictures that I created as models, ‘jungle’ in English and in Portuguese. I wanted the children to see that even though we don’t really know the word and ‘selva’ is unsimilar enough, we might be able to guess (or to decode) what it tells us. I also wanted them to see an example of how different letters can be shaped into the jungle animals and plants.

The art

Afterwards, we just got to work. In terms of resources, that was an easy-peasy lesson because it required only pencils, markers and paper. I did prepare a template with the word ‘jungle’, to speed up the process a little bit. Since, however, I am dealing with a very creative and independent bunch, as it turned out, some specifically asked for the permission to opt out of the template. And, as was to be expected, some asked for the permission to opt out of the jungle altogether. Permissions were granted and the photographic evidence confirms that.

We also used a bit of brainstorming (‘What fruit do we have in the jungle?’) and the internet research. This is a serious word but research it was for sure. We googled the fruit and some specific animals and items because the kids wanted to see them first before deciding which letter they could be incorporated into. I really loved to see the thinking that went into making these decisions. It was a process and they were really involved.

Balinese jungle (yes, that has been confirmed)

‘Jungle’ has only six letters but, still, it was too many for some of the students and, since we only had 45 minutes, they did not manage to finish their pictures, which, I suppose, can be seen as some kind of a failure, bad time management on the part of the student or bad monitoring on the part of the teacher…I’d rather look at it as an opportunity to see how my students were engaged. Those who didn’t finish either promised to complete the picture the next day, during the break or they came up with a pleading ‘Miss Anka, can I please take the paper home and finish there?’ It was important, it mattered!

I have also learnt that a teacher should research the topic a bit further before the lesson, even if only to refresh and to remember that, for example, there are jungles out there which, apart from toucans and piranhas or other tropical fish, might be recognised due to their volcanoes…I was surprised when one of my students started his ‘J’ as a volcano but then he told me that, ‘You know, miss Anka, in Bali…’ I accepted and ate my humble pie. And took notes))

Not the best quality but that is the only thing I managed to snap before the picture went home…

A story of one picture. Starry Night

The lesson aka the context

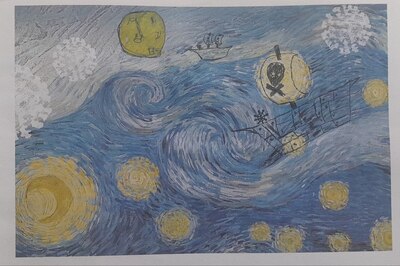
This is a lesson that I put together for last year’s Shapes in October series. This year I decided to recycle it during our Autumn Camp and the Yellow Day. The basic version of it is super simple and it involves making a collage of the van Gogh Starry Night background and stickers or drawings. You can read about it here. However, my colleague, miss Victoria, decided to upgrade the lesson and instead of the ready-made background, she asked her preschoolers to paint the the background first and then decorate it with stickers and drawings.

I went to their classroom during the break to check how the pictures have turned out and to take photos and I was amazed. Especially with this one. It did stand out because it used mixed media but not the stickers and the sky was like none other.

A little bit later in the day, one of the younger students wandered into my classroom to chat. She saw the collage my group made and shouted: ‘We made those, too!’ I showed her the photos I took and we finally identified hers. I was surprised and I was not surprised at all!

The student aka the artist

Sasha is seven and she is in year 1 of primary. She attended my Art Explorers last year regularly and she comes every week this year, too. She is one of my really creative students. On some days, she is reluctant to get started, on some others she takes her time but then takes off and on some other days, she just dives in at the deep end and creates as crazy. She is also the student who, most frequently, snatches her work as soon as we say ‘Good-bye’ and I am lucky to take a photo. I love it.

Whenever she starts to create, however, it is always of the highest standard, with a fresh look and a new angle.

The work and the creative process

Because it was miss Victoria’s lesson (according to my lesson plan), I did not have a chance to see the artist in action but because it was the autumn camp, we had more time and me and Miss Artist had a very interesting conversation discussing her painting.

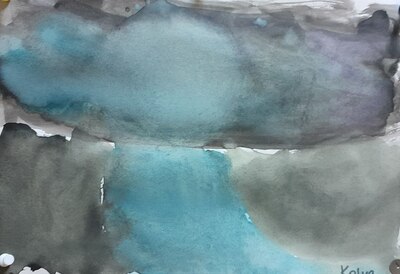
First of all, I was surprised with the technique that Sasha decided to use and the results that she arrived at because it was so absolutely different from what all the other children created. This is when Sasha explained that ‘I did what you taught us last year’, namely painting water on water (a technique that we experimented with last October and somehow she remember, mind blown!). This is how she got the beautiful background, the sky and the stars that blend into each other.

Sasha also explained that, looking at what her classmates were doing, she decided to add the drawings, the houses and the umbrellas, all that instead of using the stickers, showing that she has a lot of potential to become an independent artist capable of making her own creative decisions.

The teacher in awe

I guess every teacher is at the risk of getting emotional and touch whenever we can see that our work bears fruit and that our students learn and remember something that we are trying to teach them. I know I do.

That is why this day and this conversation were so important, because, in a way, this painting is the outcome of the time in the classroom. Sasha demonstrated that she remembered how to use a specific technique she learnt from me and she also showed that she picked up on the values that I am trying to promote in class such as keeping your eyes open, allowing yourself to be inspired by your teacher or peers, the curiosity and the open-mindedness that leads to experimentation and new outcomes…

I was a very happy teacher that day.

A story of one picture. The next Jackson Pollock, 8 y.o.

The Hedgehog in the Fog’

I decided to run this mini-series, as a part of my Teaching English Through Art thread, in order to preserve the memories and the creative process in a child as observed in my classes. Just stories from the classroom.

The lesson aka the context

It was one of our colour lessons, a colour-themed days on the autumn camp, White on Black, in which we used a mixed media technique to create ‘what you want’ which means that they could draw whatever and however.

It was one of those lessons that start with my students going ‘Whaaat?!’ looking at me taking out the resources of my bag (black paper, white chalk markers, white pencils, white tissue and glue and toothpaste and cotton buds) to ‘Look, miss Anka, look!’ because they have just discovered something more about the potential of all of these resources.

The kids could use one of these or all of these, in practically any way.

The student aka the artist

My student, Sasha, is eight, very clever, very creative and struggling with staying focused in our regular classes. And yet, in this lesson, Sasha stayed completely involved and on the task for about three hours straight (the lesson time and then the long lunch break). I was sitting there, monitoring and keeping an eye, trying to keep a straight face and my jaw from dropping. This expression, ‘I could not believe my own eyes’, it was created for this very situation.

The work and the creative process

The story started with a blank piece of black paper, A5. I noticed before that this very resource, so different from what we usually use, and so potent in its presence, just lying on the table, basically lots of Malevich’s black squares (well, rectangles) strewn all over the classroom, this very resource is already a statement in itself. It sets the mood for the lesson and it sparks creativity and inspiration instantly. The kids get their sheets and they immediately start interacting with them, turning them over, looking at the texture and turning it over and over again. This one never requires any tricks to get the kids into the task, the piece of paper does it.

As soon as we started, Sasha, without much hesitation, reached out for the chalk marker. I presume, it was all due to the fact that this one particular resource used to be out of bounds, ‘teacher only’, in the old classroom where we used to have a traditional board. Since we moved into the new classroom, with the electronic board and whiteboards, I have no use for them and I decided to use them in that Art lesson. Actually, those chalk markers apart from being a great tool for the teacher, they are also fascinating as a drawing or writing tool. They produce a neat, even line, you don’t need to apply to much pressure and, as my students quickly discovered, if you shake it, you can also produce splashes and spatters. In one word: lots of potential.

Splashes is what Sasha started with. He would shake the marker, look at the smudges that appeared and then he started to move the sheet, turning it upside down, shaking it, turning it around to help the liquid paint move further. To be honest, at this point, I did not think that ‘anything real’ would come out of but he was so engrossed in the process and he was enjoying it so much that I decided to let it be, instead of insisting on creating ‘something’. But, it really did remind me of another aritst, so I decided to show him a few works of Jackson Pollock and a few photographs from his studio and he was impressed. We looked but we also talked about finding your own style. Sasha was asking how you find it and whether I can suggest something to help him with defining his own style and I suggested ‘just working’ because things are defined and discovered in progress and at work.

Perhaps it was in an attempt to find your own style or perhaps only the next step in experimenting with the marker, but, all of a sudden, Sasha became really interested in dots and started to fill in the whole picture with them, all of the missing spaces, methodically, bit by bit. He even said ‘This really calms me down, these dots’. I decided to use it as an opportunity to bring up another concept, namely horror vacui and, again, we looked at some examples in the ancient Egypt paintings. And Sasha kept working.

It was somewhere at this point that I asked him to consider thinking of a name for his painting and at first he declined (‘I don’t know!’) and then he did what my students often do and go for the obvious (‘Crazy mess’). But it was not the end of it.

The painting was already quite something. I really liked the dots and splashes but the artist himself was still not happy and he kept experimenting. He realised that the chalk marker behaves like a proper chalk and leaves smudges on your hands or clothes and he decided to use it in a conscious way and he wiped the whole picture with his hand, not destroying it or rubbing off the lines or dots but covering it with a thin and delicate layer of white, kind of a mist.

This must have been the thing that gave him the idea for the actual name of the painting, namely ‘The Hedgehog in the Fog’, after a famous cartoon (and a book) by Yuri Nornstein, one of the most beautiful things ever made and my personal favourite. It was so fitting that I simply started to laugh.

Sasha continued to tweak the whole picture and then he left for lunch and when he came back, he showed me the finished painting. He also explained that he decided to add ‘the hedgehog’, a red dot, in the centre of the painting, to add one more reference, to Bansky, since that is the aritst and the concept that we did a few days earlier.

The teacher in awe

That is what I was. It is one of the many amazing things that happened in class that day but I love this story and this piece in particular because it beautifully illustrates how one child embarked on a journey of creative discovery and how he arrived at his finished product which, I have no doubt, is a masterpiece. All the hard work, all the focus, all the references and the curiosity that he demonstrated…I am proud of him and what he created and I am beyond happy that I could be a part of it.

Two months later…

…Sasha comes to me during the long break (he is ill and not going out to play outdoors) and asks if I can give him ‘the pen’ and ‘the paper’ so that he could draw another one of those pictures, like ‘The Hedgehog in the Fog’…And he was so happy when we found the last sheet of the black paper! I left him to himself and he kept working.

In the end, he kept blagging to everyone that he bumped into about the painting that he created ‘and that I decided to call ‘The Bear in the Fog because the first one that I have at home is called ‘The Hedgehog in the Fog’ and now I had to choose a different name…’

When it was my time to listen, I praised him, again and asked if he made the little dot pink.

‘NO! I made it red. Just like you told us last time!’, he said.

And he went on with his things and I was left with wondering how magical it is that my amazing permanently distracted Sasha not only heard what I was telling him (and the class) a few months before, about Banksy and about Warhol, but he also remembered it and made it his. Forever?

The Bear in the Fog’

Happy teaching!
Banksy. Red says: ‘Look!’

The language

This lesson was a part of our autumn camp, with each day dedicated to a colour. For that reason, in the language part of the day, we worked with the things that are red. We revised and learnt new words and we talked about things that we like and we don’t like. We did some literacy work, too.

The artist

I actually have no idea why it has taken so long for me to invite Banksy into our lessons but it was definitely worth the wait because this lesson turned out to be great.

I introduced the artist and showed the kids a few of his works. We also talked about the graffiti that can be art and the graffiti that is just vandalism (as brought up by the kids). Then we looked at the Girl with the Balloon and we talked about its different interpretations, sad or happy, and variations, with the balloon in red and in black.

I decided to present this work from the point of view of the red balloon and how the artist used it for the contrast and to draw our attention to the most important element. We also looked at the same effect that can be achieved in photography. For all of those stages I used a powerpoint. You can access it here.

The art

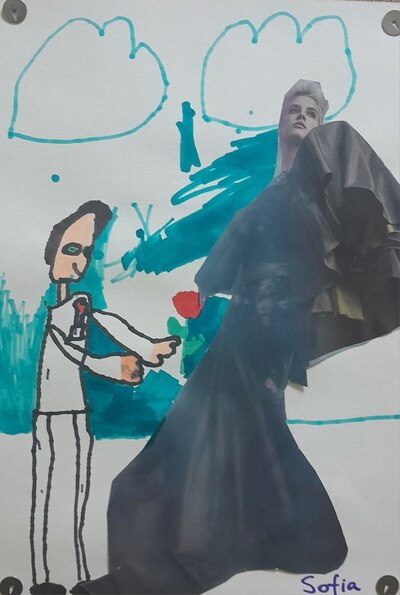
The task was very simple: white paper, black marker and a drawing of your choice, with one element of it in red. I suggested using a collage for the red but, in the end, most of my students went for the red marker.

I am really in awe with the results. The simplicity of the task and the basic resources gave the kids an opportunity to focus on the theme and the content (because, let’s be honest, sometimes, the resource and the method can be a bit disruptive) and they all chose their own way of dealing with it.

Among all the pictures created on the day, we have one copy of Banksy (with the author’s decision to make it a sad picture), we have a name logo (Halloween-style), a scene from the forest (in two copies because my student finished earlier and wanted to do the same picture on black paper), a map and a cartoon, on red paper.

It was lovely to see how involved my students were and how their creativity was taking flight, with every next step of the process as our lesson proceeded, how they moved from black on white to white on black or from black on white to black on red.

If you are looking for an easy lesson, with minimal resources and lots of opportunities, here is one for you!
One colour, many colours. Teaching English through Art

The language

The language in this lesson was not quite our priority. We did not introduce any new language items and I really wanted to focus on working with the colour and help the students see the variety of colours at their disposal. We sang the song, talked about how we are and we revised the colours, briefly.

We looked at different colours and their shades to understand that each colour is, in fact, a number of colours. My younger students counted the shades and the older ones had a lot of fun reading the names of the different shades of blue, red and pink. You can find my presentation here.

The artist

In this particular lesson we had a group of artists, to introduce a range of different paintings with one leading colour. We looked at van Gogh’s Starry Night (blue) and Sunflowers (yellow), we had Kandinsky’s Mit und Gegen (red), Levitan’s Forest Gave (green) and Sue Williams’ Pink Pentagon (pink). We called out the main colours in every painting and we called out the contrasting colours, too.

The art

I taught this lesson twice, with my younger group and my older group, with some differences.

The younger kids, pre-K and year 1, were working at a much slower pace. They needed more revision, they took longer to get into the task and they were

Everyone got a strip of paper, a mixing palette and a box of watercolours. The task was to create ten different shades of different colours. I showed them what I created for red at home and we also sat around my table for a moment to see in real time what happens if you mix yellow with brown and yellow with white or black.

They were involved in the task and they kept coming up with more and more unusual combination. Even those few kids who entered the room with ‘I will not paint today’ (there is always someone!) eventually got down to work and started to create. They kept calling me over and over again, to come over to check out the new shade. And we actually managed to get lots of language out of it. They were either telling me what they had mixed or I was trying to guess, judging by the final product.

The older students managed to complete two tasks: creating ten different shades of their chosen colour and then also creating a picture in their chosen colour. Looking at how it was going on, I decided not to speed them up and to focus and mixing the colours.

I think that next time I teach this particular lesson to the older students, I am going to focus more on the language and after creating our ten shades of X, we are going to come up with some interesting names for them. That will require preparing a slightly different page, with some room to write but it looks like a fun activity with a lot of potential. Especially that they already really enjoyed finding out about the official shades of different colours.

Afterwards, we went on to painting a picture with our chosen colour as the main theme. My model made at home was a picture of rowan, to showcase red. The one I did in class was a sunflower ready to bloom, to showcase green. We also talked about focusing on the main colour and choosing something of a different colour for contrast. My students decided to paint pumpkins (orange) and the forest (green).

The exercise of 10 Shades can be used as a warm-up activity to many other lessons. We used in our Turner lesson and in our green lesson, too. I am planning to do a lesson on red and still-life and I will include that element, too.

The funny thing is the mismatch between the actual lesson and how good it was and the photos and creations that we have to show. In case of my younger group, we ended up only with a few ‘dirty’ pieces of paper and nobody would even be able to guess that they were the result of experimentation and creative discovery. I wanted to display them on our noticeboard but what happened was that they were taken away from me, as soon as possible. Meaning? They were dear to the budding artists. As was the lesson, hopefully.

‘I am an artist!’ The first Art lesson of the year

Ha! ‘This was some time a paradox, but now the time gives it proof!‘ as Hamlet would say. Why? Because first I spend time preparing a post about the good first lessons in the Art Explorers world (which, by the way, is here) and then, the start of the academic year comes and my own first lesson, too and what is it that I do? That’s right, I start from scratch and do something else entirely. Because I had an idea, because I found a cool resource and because I really wanted to do it. But it was a good lesson so I am more than happy to share it here!

The language

This was the first lesson of the year and for a variety of reasons, I got both age groups in one lesson, my second graders and the pre-schoolers and year 1 kids, too, all together now, 15 children, 30 hands. Some of them I know very well, some are new to the school and they are of different ages and, naturally, of different level of language skills. Instead of trying to adjust it to any specific level or age, I just went for ‘let’s do what I want and see what happens’.

For that reason, I did not aim for practising any specific language point, not this time anyway.

The artists

The aim of this lesson was to introduce the students to the world of art and to try to understand and to brainstrom ideas of what it is to be an artist. I based this part of the lesson on the powerpoint which you can find here.

  • we looked at what different artists do
  • we tried to define what makes someone an artists, including my ideas and my students’ ideas
  • we looked at what ‘I’ve got an idea’ was for five of the artists: Picasso, Acrimboldo, Malevich, Vlaminck and Klein in the format of ‘everyone says…’ and ‘the artist says…’
  • I also found a funny cartoon based on Marta Alves storybook but we didn’t have to watch it. We will definitely use it in the following week.

The art

The creative activity in this week was based on a very special notebook that I found in my local stationery shop: a sticker paper notebook. I saw it, fell in love with it and decided to use it.

  • I prepared my own stickers berfore the lesson to show the students the finished product
  • I also made one more, simple sticker during the lesson, to walk them through the process: make a decision about the design, draw with a pencil, trace and colour with the markers and cut out, peel it of and stick (this part was optional and the idea was that the kids might also choose to take their stickers home)
  • We brainstormed a few ideas for stickers. ‘You can make what you like. What do you like?’
  • We got down to work.

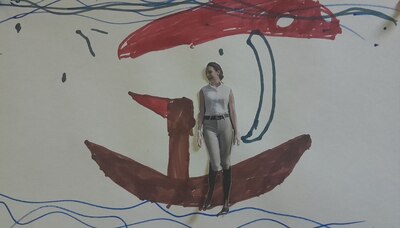
It went well and, indeed, there was a huge variety of ideas and the kids understood the assignment, they went for expressing themselves. Among the designs there were: stick people, cards, animals, hearts, stars, a rainbow, a sticker bracelet and a beautiful character from one of the favourite cartoons.

Regardless of how big or how intricate the drawings were, they all worked as they can be cut out in many different ways. Even if the picture itself is very small, the sticker can have a form of a square which is easy to handle.

This kind of a task is also perfect for mixed ability groups in terms of motor skills. Some of the students managed to make one sticker, some went on and created more stickers. It also happened that one or two students were picked up by their parents half-way through the lesson and it did not get in the way of the creative process. They simply picked up their sheets and took them home to finish work.

I am really happy with how it all went. The kids liked working on the stickers, as they were both easy and exciting to make. A perfect choice for a new group, too!