How we watched the paint dry. Bubble painting! Teaching English through Art

This was not a typical Art lesson for many reasons. First of all, it was a part of the camp programme, so I had a mixed ability group, with many children who have not created a lot with me. Then, it was an Art lesson that did not involve the Artist of the Day and, also, a lesson which was fully and thoroughly devoted to the process, perhaps more than any other lesson that I taught.
The language

This particular lesson was taught as a part of the summer camp programme which meant a lot more time for all of us, we had one lesson for the language practice and one separate lesson for creation. And one whole lesson for Science and experiments! It was a part of the Black and White day so in our English lesson, we talked about the things that are black and white, we did some acting, we talked about our preferences (Do you prefer a black and white zebra or a colourful zebra? based on the illustrations I found) and we wrote a poem about our favourite black and white things. We also had a fantastic Science lesson in which we were learning about what the colour black is made of and what the colour white (aka the light) is made of.
The art

Initially, I had a different idea for this lesson and I wanted to create two drawings (black on white and white on black) but we did something like that very recently and I needed something a lot more inspiring.

I did ‘waste’ some time thinking about the ways of making the connection between the colours and the art (something that is one of my favourite things, this kind of a brain-breaker) but, luckily, a few days earlier I was also researching new watercolour techniques and this is how I found a video on Lemon Creation ‘The most relaxing watercolour technique ever!‘. Then it was easy for the grey cells to make a connection: bubbles = white, bubbles = light, bubbles = colours.

I tried and tested the technique on myself, the day before. It helped me to understand the process better and to plan and stage it for the classroom full of kids. Not to mention that I had lots and lots of fun with it, as an adult. A delightful process that I really wanted to share with my kids.
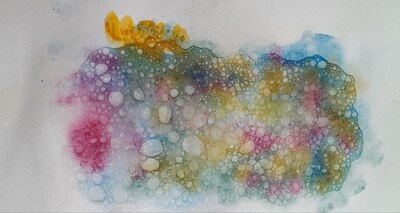
In the classroom, the next day, it went like that:

  • I showed the kids all of the materials (plates, spoons, straws, washing up liquid, watercolours, paper, paintbrushes) and I explained that we are going to make bubble paintings.
  • I showed the kids my creations, already dry and ready for all of us to see the final product.
  • The next step was the list on the board, all the stages with simple verbs, for each of them because, again, this is an activity whose success depends a lot on the careful following in the footsteps of the teacher, one at a time.
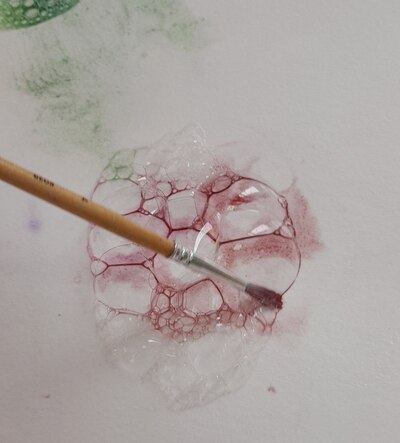
  • And, to further underline it, I produced one more picture in real time, with us following the instructions on the board and the kids watching the process, from the beginning until the end. Initially, I wanted to colour the bubbles only with the black paint, in order to keep in line with the theme of the day but I quickly gave up on the idea. Not because it is a bad idea but because adding more and more colour and looking at how they seep into each other and mix and dry was way too much fun to skip it.
  • Giving out cups and straws to all the kids and making out own foam would be a lot of fun but I didn’t want to risk anyone taking a sip of the soapy water by accident (and, mind you, that is very easy, even for an adult, I did it myself while in class, oups) so I decided that there will be only two Foam Makers, myself and my TA.
  • After we have given out resources, put on aprons and prepared the paper, we started to walk around the room with my teacher assistant giving out the foam to kids. At home I used a piece of cardboard but a spoon is a much better solution (Miss Nigina’s idea:-).
  • Children went on to infuse their bubbles with colour and only now and again someone would should ‘Miss Anka, more foam, please!’
  • Some of the kids named their paintings in the same lesson, some decided to leave it for later (‘Miss Anka, I haven’t finished yet’ as my 5 y.o. artist told me).
  • When we came back after the lunch break, we unpeeled all of the pictures, signed them, named them and decided who is taking theirs home and who is keeping theirs on the noticeboard.
If you haven’t figured that out yet from the first 500 words of the post, I am here to tell you that we absolutely enjoyed this activity.

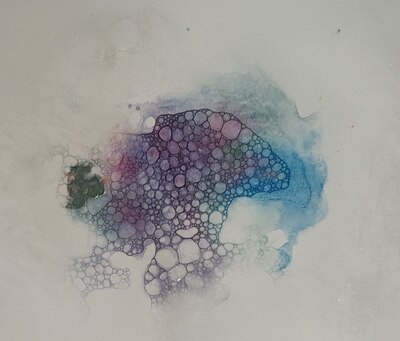
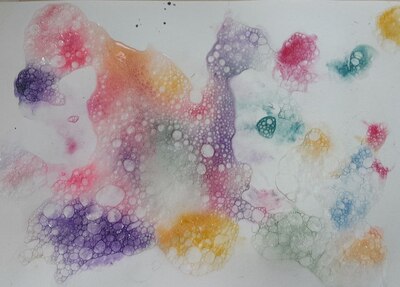
Yet again, we had an opportunity to learn to keep the pace and to follow detailed (but carefully-staged) instructions. We created these beautiful pieces that you can see in the photos and the kids were fully engaged. It is almost difficult to call it ‘painting’, it seems that ‘a show’ would be a more appropriate term as it was a whole performance that we created with the help of the bubbles and the watercolour. Observing how the paint seeps down, through the bubbles, colouring them and then drying and changing slowly…We literally watched the paint dry and it was an absolutely fascinating experience.

It was only after the lesson when I had a chance to look at the photos that we took during the lesson and the kids in all the photos are so focused, so engrossed, so into it…A beauty to behold!

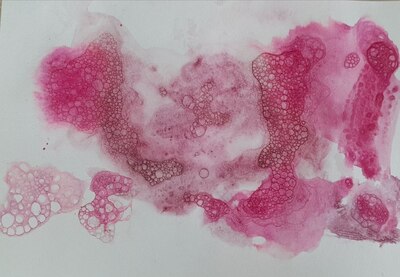
The study in pink that is the title photo of this post was created by my 5 y.o. firestarter who, when ‘forced’, stops plotting how to destroy the world and sits down to paint and ends up putting together the most amazing pieces. Like that one. I have already had a chance to witness it 6 times and every single time it is a wonder.

There many things that can be done with the finished paintings, with the use of markers or colours or even collage and we will definitely be coming back to it! Bubbles for everyone!

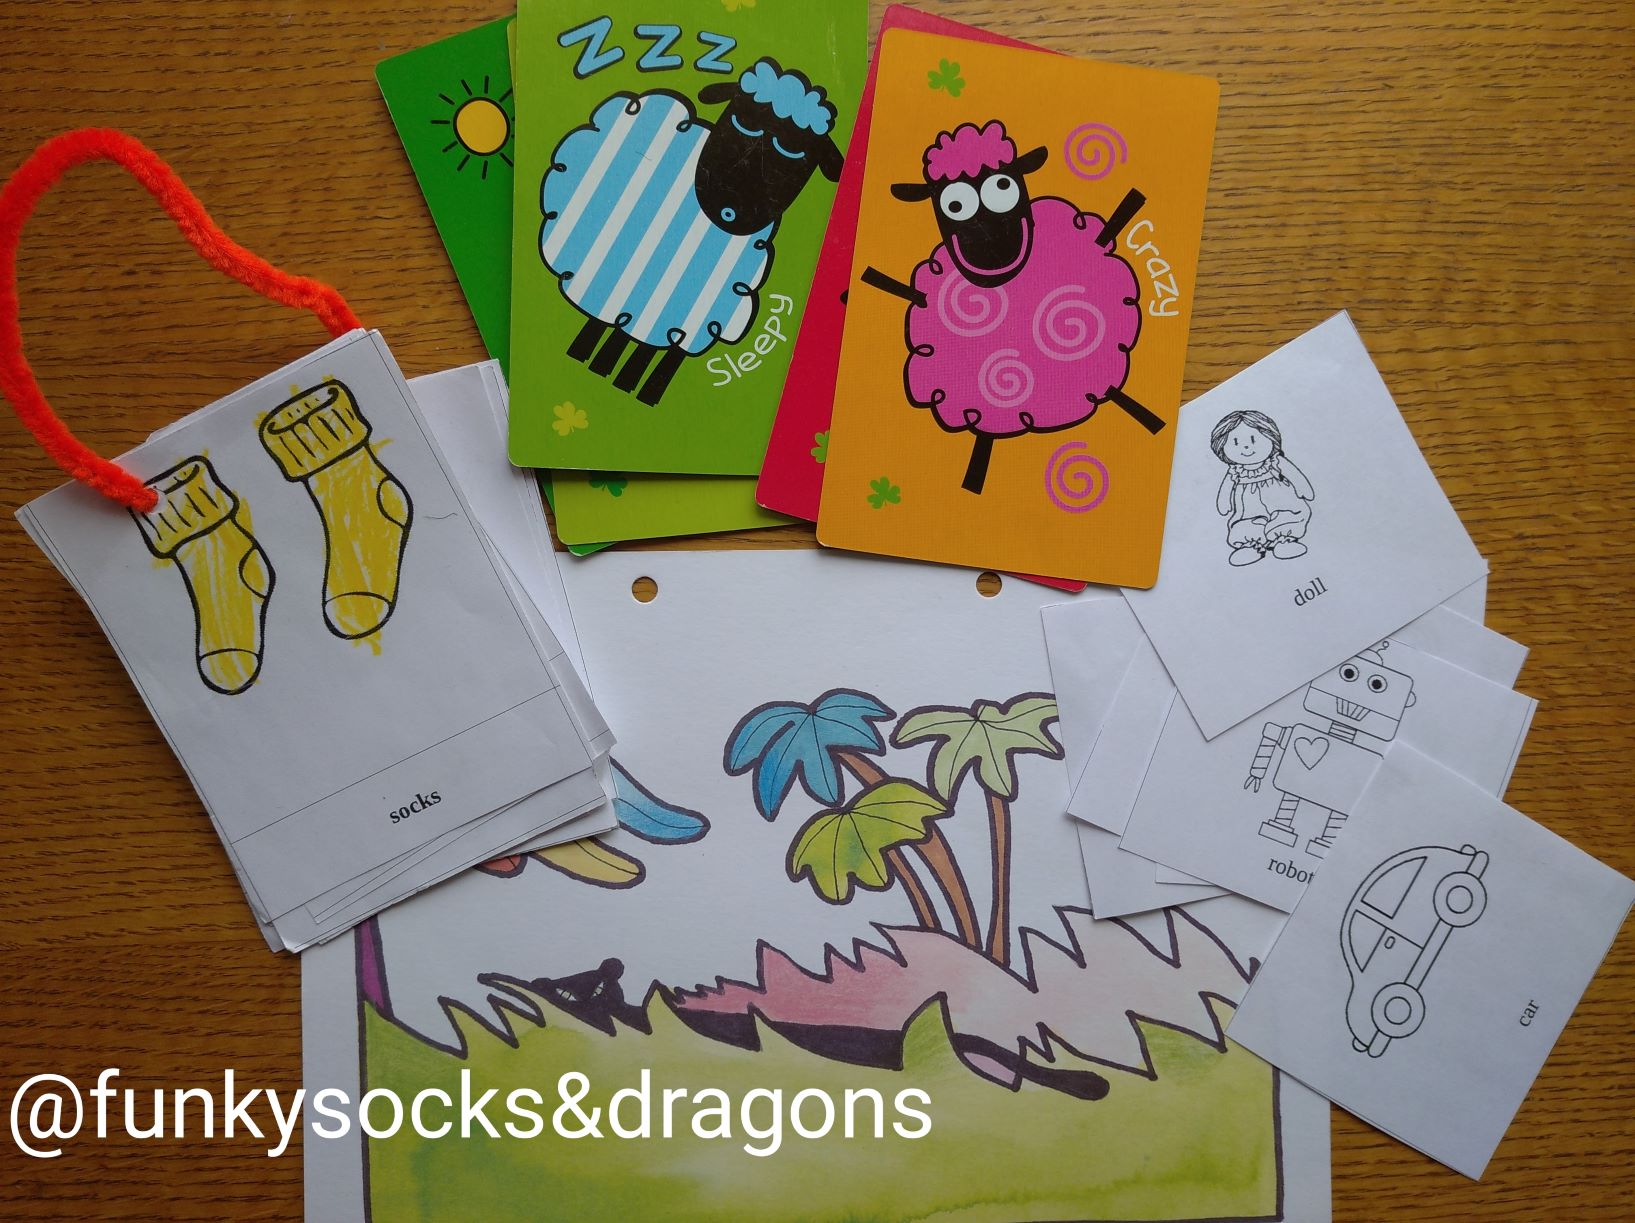
Your 10 basic flashcards games

One hundred.

It is the number of things in which you can manipulate the set of flashcards during the lesson and call it ‘a game’. That means that to teach, to introduce and to practise, to have fun and to change activities fast not to lose kids attention you really only need a set of flashcards and a table or a carpet. No more.

That means that you can mix and match, engage the kids and keep them involved for hours on end. Almost.

But before I take on the challenge of typing all those 100 up, here are the staple ten. The basics of the basic, the everyday. Five to practise receptive skills and five to focus productive skills.

Imagine that you have drilled all your words already (this will be another post, too!)

1. Finger up! (group)

Put all the flashcards face up on the table. Ask the kids to show you the indicative finger and put the hand up. This will be your punctuation mark here. Say ‘Finger up’ and all the kids and the teacher put their hands up, with the indicative finger out. Say ‘Touch the banana’ and encourage all the kids to lower their hands and put the finger on the banana flashcard. Then again say ‘Finger up’ and repeat with other words.

It is a great game especially for the beginning of a new unit or the beginning of the course as the kids will be basically following what you are doing and doing the same thing at the same time.

Variations: You can include different verbs i.e. pat the bananas, scratch the bananas, knock, stroke, etc.

Production: After a while, regardless of the variation, you let them lead the game and they are…producing!!!!

2. Yes and No (group)

Put all the flashcards face up on the table or on the carpet. Use your favourite punctuation mark. Point at one of the cards (banana) and ask ‘It’s a banana.’ ‘Yes?’, when kids start answering, by nodding or using their L1, provide the English word ‘Yes!’ and encourage them to repeat. Don’t forget to nod your head here. Point at another card (grapes) and ask ‘It’s a banana’ Yes?’ when the kids start answering, provide the English word ‘No!’ and encourage them to repeat. Don’t forget to shake your head. Repeat with the other words. The first time you play, it might be a good idea to use only singly words, to make sure that the rules of the game are perfectly clear but you can quickly start using full sentences, in singular and in plural, to model the language. There is no need to make things overtly simple.

Variation: Depending on the topic, it is a good idea to use the structures, too, for example with fruit: I like bananas (and picking up the banana flashcard), clothes: I am wearing jeans (picking up a t-shirt), I’ve got a kite (toys flashcards or pets) etc. This way they are not only going to learn to recognise the key words but they will be practising listening for detail with more challenge and getting a lot of exposure of the target language.

Production: After a while, regardless of the variation, you let them lead the game and they are…producing!!!!

3. Apple, please (group)

Give out all the flashcards, one per child. Use your punctuation mark and say ‘Apple, please’. Reach out your hand, towards the child who is holding the apple (if you can see who it is😊). After you have received it, say ‘Thank you’ and ask for another fruit. After a few rounds, add ‘Here you are’, too.

Variation: If you have a big group, you can ask for two words at the same time. Using a full question form is a good idea, too ‘Can I have an apple, please?’ All the flashcards on the carpet or on the table, and with calling the kid’s name to ensure that everyone gets a chance to play and that they don’t fight over cards.

Production: After a while, regardless of the variation, you let them lead the game and they are…producing!!!!

4. The duo (individual students)

Sit in a circle, put two cards on the carpet ie a banana and an apple, in a place where everyone can access them. Say ‘Masha, it’s a banana’. Masha picks up the banana flashcard and puts it away. Add another flashcard so that there are always two ie an apple and a pear. Say ‘Katia, it’s a pear’, Katia picks up the pear card and puts it away. The teacher adds another card etc.

Variation: You can change and vary the structures, even with the same set of flashcards i.e. with fruit: it’s a pear, I like pears, I don’t like pears, pears are green and so on. You can also ask the students to leave the flashcards that corresponds with the sentence and take away the incorrect one.

Production: After the kids have learnt how to play the game, nominate two students, they make simple sentences for each other. Then, another pair etc.

5. Get up! (pairs or trios)

Give out the flashcards to students, one per person. Go around the circle and call out all the words, one by one, slowly. Use your regular punctuation mark for starting an activity* and play the game. Call out two of the words (‘banana’ and ‘apple’) and motion the kids to stand up in the circle. Praise them and ask them to sit down. Call out two other words, wait for the kids, praise and ask them to sit down. Repeat with any combination you see fit. Then start calling out three words or even four. Kids listen and get up.

Variations: If it is a revision activity and they know the vocabulary, they can be holding two or even three cards.

If they already know a structure, instead of using single words, the teacher can use them in a structure, either very simple and generic ‘I can see a banana and an apple’) or something more connected to the set of vocabulary that you are practising ie I like bananas and apples.

Instead of getting up, the kids can also raise a hand, stamp their feet or clap their hands.

Production: After a while, regardless of the variation, you let them lead the game and they are…producing!!!!

6. Open your eyes (the group)

Put all the cards on the table or on the carpet, encourage the kids to call out all the words. Say ‘Close your eyes’ and make sure that they all cover their eyes, turn over one of the cards. Say ‘Open your eyes’ and call out all the words, in the end point at the card that has been turned over. After they guess, make sure everyone says the word out loud. Repeat.

Production: Let the kids take turns to lead the game.

7. Mime it! (whole class)

Very easy if you start preparing kids for it while introducing the vocabulary and helping them associate each word with a gesture.

Pick up one of the flashcards, say ‘3…2…1!’ and show the word for the kids to guess. Encourage them to produce a full sentence i.e. ‘It is a cat’. Let the kids lead the game as soon as possible!

Variations: If you have introduced some of the simple adjective you can start miming sentences. Pick up two flashcards (differentiated either by colour or size, to make it all go smoothly), say ‘3…2…1’ and mime the adjective and then the noun. Kids produce the sentence ‘It is a funny cat’ etc and it is quite likely that most of the sentences will be a bit ridiculous (but memorable).

8. Merry-go-round (group)

Start with one travelling flashcard. Have the kids sit or stand in a circle. Give the student on your left one of the flashcards, encourage and motion for them to pass the card to the student on their left. Let the card travel, then say stop and ask the student who is holding it to say the word out loud. Repeat a few times for them to get used to the idea.

Start the game all over but keep adding cards so that there are a few of them travelling. Say stop and have the kids call out the word they are holding at the moment.

Variations: There is a lot of potential for producing full sentences as soon as the kids get the idea and the key structure used will be related to the vocabulary, i.e. ‘I like’ with fruit, ‘I am wearing’ with clothes, ‘I can’ with verbs, ‘I’ve got’ with pets or toys, ‘I go to school by’ with transport etc.

This is also a great opportunity to teach the kids the word ‘nothing’.

9. Disappearing words (whole class)

Put five flashcards in a row, on the floor or up on the board, go from the beginning and call out all the words. Ask the kids to close their eyes and turn over the last card in a row. Call out all the words from the first one, in the same order and when you get to the last one, pause and wait for the students to say / shout / whisper the last word. Check quickly if they were right, show the cards to the kids, put it up covered again.

Ask the kids to close their eyes and turn over the last but one card. Ask the kids to open their eyes and call out all the words starting from the first one. When you get to the last but one, pause and wait for the kids to say the word, then the same with the fifth one. Proceed until all the words are covered up.

Variation: To help the kids remember, you can use a different gesture for each card, it can be either something related to the meaning of the word ie by miming the words or something that will help them remember ie knocking at the card, snapping, touching, clicking fingers, stroking it.

If you teach a big group, you can divide the class into two teams, one team will be holding the cards, one each, the other team will be guessing the words.

It might be also a good idea to use a full sentence ie I like to eat bananas, apples, peaches, plums and grapes, instead of single words.

10. Secret word! (whole class, pairs)

Revise the flashcards that you are going to be playing with so that the kids have a chance to become familiar with the images, the set of words and the colours. Then hold the flashcards to your chest. Ask ‘What’s the secret word?’ and model ‘Is it a kite?’ ‘No’. ‘Is it a doll?’ ‘No’ etc.

Variations: When they are playing the first time, they are quite likely to give you only separate words but it is worth encouraging them to produce full questions. You can either use ‘Is it…?’ or ‘Have you got…?’

Production: After a while, the students are given a chance to lead the game, first a student vs the rest of the group, later on in pairs, too.

*) ‘Punctuation marks’ are all the signals that the teacher uses to announce a start of a new activity. It can be clapping of the hands, it can be counting down from 5 to 1, it can be a bell, it can be snapping your fingers, it can be a chat ‘1, 2, 3! Eyes on me!’