Ingredients
- Fruit, washed and cut up into manageable chunks. The most basic set includes: apples, bananas, pears, seedless grapes, seedless oranges.
- A plastic plate for each child, a plastic cup for each child, a plastic spoon and a plastic knife.
- A set of tissues and a set of wet tissues.
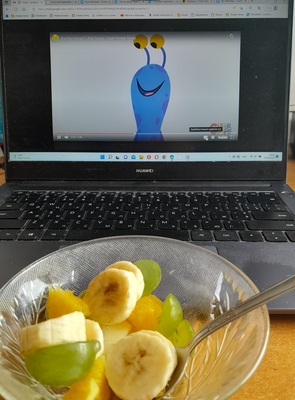
- Optional: a set of fruit flashcards and the video of the Super Simple Song ‘Are you hungry?’
Procedures
- Start with presenting the idea of the activity to the parents and agreeing on the list of fruit to be used. It is absolutely crucial that the parents are aware of the procedures and the ingredients and that they approve. In my offline classes, I normally send a message to find out whether the parents approve and then I send a list of specific fruit that I would like to use. I look for seedless oranges and grapes. The list of fruit does not have to be very long. It is going to be a great lesson anyway, even if only the basic fruit are used. Although, of course, the salad will look very appealing if we include more colours and adding some citrus such as orange will be beneficial as regards the flavour, even a little bit of the lemon or orange juice will bring out the flavours of all the fruit and it will blend them nicely. But it is not obligatory. In my online classes, the parents prepare the fruit that the kids really like and it might happen that our sets will vary.
- Wash the fruit and pre-cut them into pieces and chunks or ask the parents to do the same at home.
- Plan where (in the school or in the classroom) you are going to set up your salad production station. Ideally, it would be done in a separate room, where everything can be prepared before the lesson and where the students can relocate half-way through the lesson. In the online classroom, the kids can relocate to the kitchen or cut things up on the table in front of the computer. In the classroom or in the kitchen, prepare the working top first: wash the tables, cover them with a plastic tablecloth.
- Set aside the time for hand-washing. Line the kids up and go to the bathroom, wash the hands, dry the hands and go to the classroom.
- Give out the tools while pre-teaching the names and while introducing the basic health and safety rules i.e. a plate – it stays on the table, a cup – it is in front of the cup, a knife – be careful. It is a good idea to stage the giving out of tools ie: first the plates and the cups, then the first fruit and the knives, then clean up the plates and give out the teaspoons etc.
- Take out the first fruit, call out its name. Demonstrate how to cut it up, for example using the following set of instructions: 1) take a piece of apple, ‘Apple, please’ 2) put it on your plate 3) cut it up carefully 4) put the apple into the cup
- Repeat with the other fruit. Throw away the plates. Give out the spoons.
- Stir the fruit in the cup carefully.
- Start eating.
- Game 1: What’s this?: it is a fun game that involves eating and guessing which fruit we have fished out. Teacher can demonstrate how to play it: take some fruit from the cup, eat it without looking or even with the eyes closed and try to guess what it is. If modelled properly, with the teacher asking question ‘What is it?’ and trying to guess ‘It’s an apple’ etc, the kids will follow and will be playing in the same way.
- Game 2: Singing and eating: Play the song and pause at every fruit and ask the kids the same question ‘Are you hungry?‘ ‘Oh, look (name the fruit in the salad). Yum, yum, yum’. The only thing to remember here is to make sure that kids finish eating before we play the song again and to continue singing.
- Clean up, throw away the rubbish, clean the hands with the wet tissues.
Why we like it
- It is a great and relatively simple way of making the language real and meaningful. We learn about fruit and we do something with the real fruit. With many other topics creating this connection between the classroom and the real world is a bit more complicated, fruit (and food in general) is easy. After a few basic precautions are taken, such as the allergy check, the parents permission, clean hands and a safe working environment.
- It gives kids a great sense of achievement despite the fact that in the eyes of an adult that might look simplistic. One of my groups called it ‘a cooking lesson‘ and after the first salad, they kept asking for more of those.
- It is an opportunity to develop social skills (we are taking turns and waiting for everyone to finish), focus (we are cutting fruit slowly and carefully), fine motor skills (we are working with a knife, we are manipulating small pieces of fruit).
- It is an opportunity to eat in class and that is always fun but it is also something that we do together, as a group and, as such, it can be repeated regularly, although not necessarily with the salad every single time. It can turn into some ‘teatime‘ aka a lesson when we just have a little snack together. That name and the idea is also something that came from one of the groups.
- It is not an activity for the first lessons with a group
- If done properly, the lesson can lead to a lot of production. The ‘What’s this game’ was something that just happened in class, just because I really could not recognise one of the piece of fruit in my cup. I fished it out to taste it and I was simply blabbling to myself. The kids were watching and quickly followed suit. Together we turned into a real game and, since then, I played it with all my groups. The other game, based on a song, was something that we played in class for a few lessons, with our set of plastic fruit and it worked very well. The kids liked giving out fruit and pretending to munch on them. Moving onto the real fruit and the salad was a natural next step.
Happy teaching!