Story lesson ideas #1: The Little Seed

This post is a lesson I taught with a group of 4-year-olds in their first year of studying English, based on the materials from Playway to English 1, 2nd edition by Herbert Puchta and Gunter Gerngross from Cambridge University Press.

It was taken from unit 6 (The Weather) and it is called ‘The Little Seed’.

Story cards ‘The Little Seed’ Playway to English, 2nd ed by H.Puchta and G.Gerngross, CUP

Pre-Story

  1. Vocabulary revision and practice with flashcards, the weather dice, the song, the weather sounds etc. Kids sit in a circle, on little stools.
  2. New vocabulary introduction: a bee, a butterfly, a flower, a seed. We used finger puppets because these three feature in my garden finger puppet set (together with a ladybird and a caterpillar) which I once got as a present (thank you, Cheng <3). I put them on my fingers and we practised saying ‘Hello, bee!’ ‘Hello, butterfly!’ The kids got really excited so we did spend some time, playing with them, trying them on and saying ‘Hello, bee!’ ‘Hello, butterfly!’ These activities were done on the carpet, with kids sitting in a circle. I forgot to bring real seeds so this time, we skipped this stage but I am planning to include them in the follow-up lesson (see below). Of course, the same can be done with regular flashcards or handmade toy butterfly and bee.

While-Story

  1. Just look: I hold the cards and show them to the students, one by one, in silence. Kids just look. Sometimes, I draw the kids’ attention to some of the elements, by pointing at them. Sometimes, I point and say the words or encourage the kids to name things they can see but, really, that is not the priority here. I just want them to take the story in, to build it up in their heads, before we add the language layer to it.
  2. Listen: I play the audio and we listen to the story and look at the pictures. Again, I sometimes point to the key elements in each card. I also use the gestures to reinforce the ideas and concepts and to add another learning channel to the visual and the auditory. In this story we are using the following: hands together, under your cheek with the head slightly tilted (The little seed is sleeping), face up, as if enjoying the sun, with a smile and a happy sigh (It is sunny), hands moving up and down, with the fingers spread and wiggling (It is raining), hands going up and arms stretching high up for (The little seed is growing, growing, growing), pointing with one finger at the picture (Look, it’s a beautiful flower). Some of these gestures have been used so far (the weather), some are new. I don’t pre-teach them, the kids join in when they are ready.
  3. Listen and say: We retell the story together, using the cards. I lead but this time I pause frequently and elicit the words and structures that the students know or, alternatively, I produce the phrase and encourage the kids to repeat.
  4. What do you think? This is the stage for the students to personalise and to express opinion. Usually this is done through a very simple question of ‘Do you like the story?’ or ‘What’s your favourite…?’ In this particular story, we asked ‘Do you like the story?’ ‘Is it a happy story or a sad story?’ ‘Is it a beautiful flower?’
The finished product

Post-Story

  1. Look at my picture: I show the kids the final product and we try to retell the story once again, in its simplified version, this time focusing on the structures that the kids can reproduce: The little seed is sleeping. It is raining. It is sunny. The little seed is growing and growing. Look, it’s a beautiful flower.
  2. Craft: I give out the cards and we create the pictures with kids, while retelling the story. I create another picture, step by step, to model the activity for the kids. This stage took about 10 minutes. I was considering adding the butterfly and the bee but decided that it would take too much time and that is why they do not feature in the picture.
  • ‘The little seed is sleeping’, I give out a small blob of white plasticine, I stick it ‘underground’, ‘Stick and press’
  • ‘It is sunny’, I give out yellow markers. We draw the sun in one corner. We repeat the key phrase as we draw. The kids who have finished drawing can also use the gestures for ‘It is sunny’. I collect the markers.
  • ‘It is raining’, I give out blue markers. We draw the cloud and rain in the other corner. We repeat the key phrase as we draw. We use the gesture for ‘It is raining’. I collect the markers.
  • ‘The little seed is growing, growing and growing’. I give out a piece of green plasticine. We kneed it and roll it to create a string. ‘Let’s roll and make one piece of spaghetti’. We stick it to the picture, as the stem of the flower. ‘Stick and press’.
  • I give out two pieces of green plasticine, we make two blobs and attach them as leaves. ‘One leaf, two leaves’. ‘Stick and press’.
  • ‘Look, it’s a beautiful flower!’ I give out two big pieces of blue and red plasticine. ‘We need three red pieces’ ‘Let’s make the flower’ ‘Stick and press’. ‘We need three blue pieces’ ‘Let’s make the flower’ ‘Stick and press’

3. Let’s tell the story: We show the pictures and go through the story again. The kids are now better able to tell and show the story.

4. Homework: Kids listen to the audio at home with parents, while looking at the pictures in their books. They complete the task in the book by sticking stickers in the gaps.

5. Follow-up: In the following lesson, we are going to retell the story again. I am also planning to start our own classroom garden with some flowers and beans, water them and watch how they grow.

This lesson plan is, of course, one of the many many ways of using this material and teaching this lesson. Enjoy!

Some other materials, potentially interesting.

A little seed by Mabel Watts here

Growing Sunflower Time Lapse here

From a seed to a flower here – a lovely video that I used when I was teaching Maths and Science to pre-schoolers in one of the lessons devoted to plants but it can be used as a follow-up activity in the story lesson.

How to grow a bean plan from Learn English Kids here if you want to start your own class garden.

How plants grow – an interactive game that demonstrates how much water and warmth a plant needs to grow. On the one hand, it is kind of cool and very informative, on the other, however, I could not apply the water and warm fast enough and ended up killing the plant. It made me sad (yeah, really) so, eventually, I decided not to use it in class, either.

A post from Anastasia Bykova, which I found only after my own had been written. If you want to turn this story into a series of lessons, look no further. Lots of ideas for a classroom garden and a proper project – an animation film created with kids which is also available on youtube now. You can find it here. We are going to watch it next Friday.

Happy teaching!

Bête-noire aka my least favourite conversations.

Let me introduce you, dear readers. This is my Bête-Noire, a tiny little bundle of unhappiness.

View Post

Most of the time, it is fast asleep, lying peacefully somewhere in the attics of my heart, covered in dust bunnies. Until, all of a sudden, it is rudely awaken because I find myself in the middle of one of the following conversations…

And that’s not everything. There’s more, lots more. Sometimes there are no (silly) questions but what happens is a rather intensive listening / lip watching event, in order to evaluate my presumably low level of proficiency in English or to detect some serious issues with pronunciation which, potentially at least, could justify the VYL-ness or YL-ness of me.

Why? Who knows.

The funniest thing is that, usually, it is not the parents, the students themselves, the HR or the admin of the schools but our own EFL nation, the fellow teachers, the colleagues who initiate these threads in the conversation. And it is not even the trolling on the social media or remarks whispered behind one’s back, no! More often than not, these are the things that people just throw right into your face…They have just met you, you have just been introduced, they don’t know a single thing about you, apart from ‘Anka, I teach VYL and YL‘ and yet, here we go…

Although, really, it would be very easy to turn the tables and start asking questions such as those ‘What?! You are NOT teaching YL?’ or ‘So you only teach (insert any non-YL area of ELF)? Doesn’t it get extremely boring and repetitive?

Only of course, I would not do any such thing. Because it is rude and/or unnecessary…And, no, I do not want everyone to be passionate about teaching children. We all have our own preferences and areas of expertise, things that we like and things that we hate, things that we are amazing at and things we’d rather not do.

Guess what? People choose to teach kids.

It is 2021. Out there, in the big, wide world, there are fully-educated, native speakers or non-native speakers teachers of English, male and female, mums and non-mums, private language school teachers and state school teachers who choose to focus on and to specialise in teaching English to children.

Because it is… more interesting, exciting, creative, inspiring, rewarding, fun…Despite the fact that ‘you can’t really have a conversation with them‘ or despite the fact that ‘you can’t ever teach Present Perfect Continuous Passive‘.

Even as I type these words, I can see a long list of names, my friends, colleagues, mentors, trainees who I have had a chance to meet and to work with, people who are amazing professionals, able to work with any level and any age group but who have found their true calling in working with the youngest of the EFL learners.

Many of them have already build their professional portfolio and, on the way, have grown a thicker skin. Comments and questions, as those quoted above, annoying as they are, will not really cause much damage to the system. ‘Sticks and stones can break my bones...’and all that. These teachers will be able to come unscathed by casually mentioning the years in the classroom, the feedback from their students or parents or maybe also a DELTA, an MA degree, Cambridge exams passed, IELTS bands received, publications, conference presentations and what not. Thus signalling that there are some alternative conversations to be had. With some alternative interlocutors, perhaps.

These experienced teachers I am not concerned about. They are and they will be fine. More than fine, in fact.

What worries me is that somewhere out there, there are novice YL teachers or newly-qualified teachers or, indeed, some would-be teachers, having been exposed to this kind of narrow-mindedness, will get into thinking that an English teacher first of all has to choose only one area of specialism and that a choice between ‘a teacher of English to adults/exams/IELTS/Business’ and ‘a teacher of English to YL’ is also a choice between qualifications, professionalism, respect and the lack of them. Which it is not.

Dear colleagues, dear amazing VYL and YL teachers! Thank you for being in the world! Thank you for your enthusiasm, dedication, ideas, creativity and energy. Thank you for caring.

And don’t forget – you rock!

Happy teaching!

P.S. What a rant, hey?:-) If you want to read some more positive notes on being a VYL teacher, check out this post on the hidden perks of working with the little people.

The hidden perks of teaching EFL pre-schoolers

Author: Lisa, ca 2016
  • You will train yourself to be extremely well-organised. Never again will you forget to make a copy, to bring the crayons, to arrange the chairs or to pick up the realia from the teacher’s room. Why? Because once you enter the classroom and the kids come in, there is no going out, until the lesson is over. What’s more, all your toys and tools are most likely to end up in neat piles around the room, within an arm’s reach. One of the first things you learn in the VYL classroom is that there is never a minute to spare or, in that case, to look through the lesson plan or to search for the misplaced whatever. If it is not there when you need it, you just get on without it and make sure it is always there, in the future.
  • Apart from that, you will become very resourceful. No matter how carefully you prepare, things will happen and you will have think fast on your feet and come up of ways of making do without the CD player, the computer or the tablet, the glue or the storybook that got left in the bag. And you will, every single time and with time you will get amazingly good at coming up with last minute solutions. It will feel a lot like being about to do magic, actually.
  • You will become greener because you will find ways of recycling pretty much everything: milk cartons, chopsticks, ribbons, wrapping paper, pots, cereal boxes. Nothing will ever be thrown away. At your house and at your friends’ houses, too, possibly. Because as soon as they find out that you collect and recycle they will be bringing you things, including the unusual things that you will later try to use in class.
  • You will discover your hidden talents or believe in your so-far-unused talents for singing or drawing. Such a confidence boost! You will have to draw or sing at one point or another and what a revelation it will be to discover that those (little) people do not care which key you are singing in and they will just accept your involvement. As well as absolutely all your attempts at drawing a cat, a dog, a panda, a dinosaur…
  • Whether you were born with micro-staging skills or whether you have worked hard on crafting and polishing them, over every lesson with your preschoolers, eventually you are going to get there and you will rock at dissecting any random task or activity at a glance, down to the most minuscule details and, no matter how complex the task, your instructions giving skills and modelling will be simply first-rate.
  • You will enjoy any lesson with adults twice as much only because they: do not rock on chairs (even if they do, you are allowed not to care), they pick up the resources, flashcards, cards, notes and put them back together, with the paper clip on, they will not cry because there is only one pink pencil, they will open the book and find the page all by themselves, they will to the other side of the handout but they will still focus on the right page, they will not get irretrievably distracted by your earrings or by another student’s fluffy tiara…
  • You will learn that lesson planning should start in the classroom and with the students who are there, not just any typical 4-year-old beginners and not with the activities that the coursebooks authors intended for them. Typical 4-year-olds don’t exist and who turns up on Friday is Masha, Katya, Anya, Egor, Petya and Sasha. They are the lesson and if some pages of the coursebook are not compatible with the bunch in the room, these pages have to go. Good riddance.
  • You will quickly become a champion at devising a good plan B (or even a good plan C), to resort to in any given situation, an additional copy of the handout, a spare puppet in your Mary Poppins bag, a glue stick in the back pocket and, on top of that, three more ideas in your head. Just in case.
  • It is not going to happen automatically but once you believe and see that your little EFL students can go beyond one-word answers, beyond rehearsed and drilled lines and that they can use full sentences, complex sentences and can produce language spontaneously (because, yes, they CAN!), there will be no stopping you. Because if the pre-schoolers can, they absolutely everyone can! High five to the level of challenge!
  • Developing learners’ independence and involving them in the shaping of the lesson is something that the VYL do on daily basis. The kids learn to make decisions, choose their favourite games and songs and given the chance to be the teacher and lead the activities. This ‘democracy in the classroom’ (which I first heard about at the wonderful presentation given by Katherine Bilsborough) should be a part of the lesson with primary, juniors and teens. It really does work wonders!
  • A chance to forget about the traditional assessment in the form of tests, quizzes and standardised exams because the little people just don’t take part in those. Instead, the teacher can just focus on assessment for learning and start experimenting with all the alternative methods of assessment, better suited for the pre-literate, pre-school EFL students.
  • A unique opportunity to sing and jump and put on voices in the middle of the day and to forget about the world for a moment, about the mortgage, the heartbreak, the tiredness, the pandemic, about anything that is not the lesson and the students. Time out, for the teacher this time.
  • A new perspective on the world as you will be learning again to see the world from the height of 70 above the ground, getting lost among the pages of the book, forcing the pencil to stand still and to produce scribbles…Brand new world!

So here we have a resourceful, creative, green, well-organised, confident, calm, open-minded teacher who is great at giving instructions and planning student-centred lessons…Any student’s dream, right?

Happy teaching!

P.S. Here you can find another post on being a VYL and YL teacher…

Crumbs #15: Our new favourite vocabulary game aka General Kutuzov

As soon as I said it out loud, it turned out that in my classroom is a crowded place. Apart from the teacher (that would be me), my students (older and younger), there is a whole bunch of characters who simply are there.

There is Pasha (the invisible student), there is Angelina (our class puppet), there is Mr Milk (the little-known-superhero), there is the Flying Cow…And there is also general Kutuzov. To whom this game is dedicated.

The thing is, general Kutuzov is a personal hero of mine. Every time I find myself in the middle of a big project, with one million areas to oversee and to manage, while on the verge of going crazy (because I multi-task well only in the classroom and in the kitchen), I think of general Mikhail Illarionovich Kutuzov, one man managing troops, camps, provisions, civilians, and all that in the face of the approaching enemy (aka Napoleon). This thought calms me down.

But not only that.

We sometimes play games with my kids (duh!) and sometimes they get very competitive (duh!) and sometimes, instead of ‘just playing’, some of them take time to think, to ponder, to come up with some very clever strategies in order to win…Which, on one occasion, resulted in me saying ‘Oh, look, here is general Kutuzov, planning something’ and ‘General, Kutuzov, please, can you make a decision? Today?’

They giggled. They are eight but they got the reference. And general Kutuzov stayed with us. So now, when they want to comment on someone taking their time to think or someone coming up with a strategy, they call him or her ‘general Kutuzov’ which, to be honest, I am rather proud of.

And that’s what I called that game:-)

www.wikipedia.com

How to play?

  • The main aim of the game is to get from the START to FINISH, choosing your own route on the board.
  • Players move across the board and as they do, they have to explain the word in each box. They answer the question ‘What’s…?’ or ‘Tell me about ….’
  • It’s always good to put the key structures on the board, to support the production. In the animals game, with my A1 students, we used ‘It has got…(body parts)‘, ‘It can…(verbs)’, ‘It likes to eat(food)‘ and ‘It lives in… (habitats)’.
  • Students play in pairs or groups of three per board.
  • Players move one box at a time, to the left, to the right, up, down or diagonally up or down.
  • Each box has a number of points assigned and the students collect the points throughout the game.
  • I give the kids small cards, folded, on which they are to write their points and to keep them secret until the end of the game.
  • In the end, each player adds the points and we announce who the winners are, in each pair and in the class.

Why we love it

  • The game generates a lot of language and it keeps the students motivated and involved.
  • It is a competitive game but you can win it not because of good or bad luck but because you plan your movements well.
  • It is suitable for mixed ability groups as the students choose their route themselves and can, if necessary, avoid using the words they don’t know.
  • We played it in our offline lessons but it can be also used online, with the kids annotating on the screen. It would work best with individual students, small groups or big groups playing in teams.
  • It depends only on the players (or their teacher) how long the game is going to last. Naturally, the kids will try to get from start to finish and as soon as one player does it, the game is stopped and the points counted. At the same time, the teacher can set the timer at ‘ten moves per player’ or, simply, stop it at any given point in the game (with the same number of moves per player, of course), announce the end and count the points.
  • It takes a few minutes to prepare and it can be used with any kind of vocabulary, a thematic set (lower levels) or any random set of vocabulary taken from a story or a listening task.
  • The first time we play it, the game is teacher-led and we play with teams of students, on the board but once they get the idea, they can play in pairs.
  • No dice is necessary. Kids can either use checkers or colourful markers to draw their route across the board.
  • I have played it with primary school students (A1) and with my B1 teens, too.
  • The game can easily be made more or less challenging by keeping only two types of boxes (1 and 5 points, for example) or by adding more of those (1, 3, 5 and 10 points) and the number of points can reflect the level of difficulty of the word or phrase.
  • Players can move in any way they choose, one box at a time, but to make it more challenging, the teacher can exclude moving diagonally or any other of the movements.
  • The same can be applied to the rule of using the same box twice. It can be allowed or not.
  • I have thrown my kids at the deep end but I think that if I were to introduce the game again, in a new group, I would probably create a board of boxes worth only 1 point to highlight the importance of strategic thinking here. The kids figured it out themselves, though: the longer the route, the more points (the kids’ aim) and the more language produced (the teacher’s secret objective:-)
  • The board can be colour-coded. It will make it more attractive visually and it will help the kids understand where to move next, for example: a green box = 1 point, a blue box – 3 points and a yellow box = 10 points. Having said that, the black and white simple chart with points works equally well.
  • You can get my animals boards here: the colour-coded board and the points board.

Happy teaching!

P.S. The inspiration for the game might have been a listening activity in one of the old coursebooks by OUP called ‘I Spy’ which had a listening activity in each unit called ‘the maze’. Maybe or maybe not))

Crumbs# 14 The United Buddy Bears Art Project

The United Buddy Bears in Sofia AD 2011

Welcome to my favourite art project: The United Buddy Bears. I first met the bears face-to-face (almost because they are 2 meters tall so face-to-face, eye-to-eye is not so easy to do) in Sofia because we all happened to be visiting the city in spring 2011. They were an art project back then already (since 2002 actually) but after our encounter they also became an EFL Art Project.

The United Buddy Bears: Brazil

Ingredients

  • First of all, if you have never heard about the project, start with this article on wikipedia or the bears’ own website.
  • A set of photographs of some of the bears that I use in a quiz. The students are shown the photos and they are asked to look at them and guess the name of the country. Naturally, the set should include the kids motherland.
  • Depending on the age and the level, the follow-up stage might involve describing individual bears, especially the bear representing the students’ country or symbols in general, as well as talking about the bears they like or dislike.
  • The main objective of the project for the younger students (primary) is to draw their version of the bear to represent their country. First, it might be necessary to brainstorm and to introduce the vocabulary and concepts that people normally associate with the children’s country. In case of Russia, it is especially interesting as it creates an opportunity for the students to learn that they already know many of these words, for example balalaika, borscht, matryoshka and they only need to learn how to write them in the Latin alphabet. Then, the students decorate their bears using the template provided by the teacher and, eventually, present their bears to the group.
  • The older students are invited to design a bear that represents them. It can be a bear that will show their hobbies, personality, favourite sports, school subject or a band, or, really, any concept that they consider important. The sky is the limit here. The students present their bears to their friends, ideally in a mingling activity.
  • The templates can be taken from globalperspective.info, clipart-library.com or just teach the kids how to draw it.
  • In the end, all the bears are proudly presented on the walls of the school or the classroom.
  • In both cases, it might be necessary to start drawing and decorating in class, to make sure that everyone is on the task but to set the task for homework, with the presentation scheduled for the following lesson. Some students might need more time to complete their drawings or to prepare their presentation and that might help to solve this problem.
The United Buddy Bears:Poland

Why we like it

  • It works like magic. Or almost. Some of the bears are easy to interpret, some of them require a bit more of background information but this way they can serve as a springboard to learning about different countries. The set of bears used in the quiz can be easily adapted by choosing the more straightforward bears for the younger students.
  • Regardless of which project you choose, the students get a wonderful chance to personalise the content, either because they will be drawing to reflect their own interests and hobbies in the bear or because they will be creating their own version of the Russian bear. It is a very happy coincidence that the Russian bear (or the first Russian bear because later I did find some other versions) is rather ugly. As a result, all my students with whom I have ever done that project, all of them without exceptions, were deeply offended that it is supposed to represent their country and were more than eager to create their own, better and more beautiful bears. The one you can see below is the more beautiful, later version of the bear.
  • It can be adapted to different levels and age groups. I have done it with elementary primary students and with advanced teenagers.
  • It is an opportunity for the students to express themselves, to create and to produce the language.
  • It can be used to supplement the coursebooks and it can be done as a part of the extra-curricular programmes such as summer camps, CLIL etc.
The United Buddy Bears: China

Happy teaching!

The United Buddy Bears: Russia (the beautiful one) from www.buddy-baer.com

New kids on the block. Teens joining a group mid-year.

Tuscan Flying Beauties

A post inspired by a reader. Thank you @kids.in.english.

Where the inspiration came from

It was ten years ago. I was standing at the board, looking at my students working on a task,all of them, working hard, involved, a teacher’s dream, and yet…To my right – the bunch that had been in my group for the past two or three years, to my left – the three new students who had just joined us and in the middle – a beautiful wall, invisible but sturdy and getting thicker by the minute. They were not aggressive verbally or otherwise, they did not do anything mean, there was no bullying. They simply decided that they do not like each other. The ‘old’ kids – because they did not want any invaders, they ‘new’ kids – because they did not feel welcome.

I did not like it at all. I was looking at them (yes, a little bit annoyed because we had everything figured out) thinking ‘Not on my shift, people. Na-ah’. Today I would like to share some of the tricks that I applied and have been applying since then in the new-teen-in-the-group scenario.

Ideas for building and re-building a group

  • Change the seating arrangements during the first month or the first six – eight lessons with the new students. The main aim here is to enable everyone in the group to work with everyone else. It has to be initiated (or ‘forced’ if you prefer) by the teacher because the students will be acting as a group and might not have enough courage to break ranks in order to befriend the new students or to venture out and try to join the cool kids. It is a good idea to explain to students why this is done (‘we need to get to know each other’) and give them a specific time limit so that they know when they will be able to go back to sitting with whom they want. Even if, initially, the students do not like the hassle and the uncertainty that it introduces, they have a deadline and they know when things go ‘back to normal’. The burden is easier to bear.
  • Frequently group and regroup the students for activities and use a tool that will be completely arbitrary. These can be for example re-usable cards with the students’ names that are kept in a box or in a bag. Before the activity, the teacher (or even better – one of the students) simply picks out cards randomly and this is how pairs and teams are formed. This way, it is simply fair, impersonal and, every single time, there is a high probability that student A might end up working with their best friend. If they are lucky. Again, the burden is easier to bear. Both of these tactics will also help the teacher establish how the students work in different set-ups. It will be more important in case of the new students
  • It is a good always but especially during those ‘first’ days or weeks to include activities which promote team-work and cooperation, such as smaller or larger scale projects, ideally in every lesson. The students will be already mixed, the new with the old and it is quite likely that they will want to share the responsibility for the task and they will want to complete it. This will be their excuse, the teacher asked them and they are just completing the task, without losing the face since working with the new partner is not their own choice.
  • While cooperation works well, competitive games are even more effective. If the students have their favourite games, they obviously like to play and win. Since they will be put in mixed groups, the ‘old’ and the ‘new’ students together, they will be put in a situation in which they might have to cooperate with ‘a new friend’ to compete against ‘an old friend’. Of course, these two elements, the competitive and the cooperative, should complement each other and balance each other. Some of my favourite games include ‘the game of five’ and ‘stop!’
  • When we start working with a new group, some getting to know each other activities are in order. Here, however, the situation is a bit tricky. If there are three or four new students in the group, then we can easily use some of those. When only one student joins the existing group, it might not work that well. The majority of the group already know each other very well so they will not be motivated in taking part in it. What’s more, it will be rather obvious why it is added to the lesson and the new student might be accidentally put in the spotlight. Not to mention that if a few students join the group, separately, it would mean including these activities in a few lessons in a row and the students might be even less motivated to take part in them.
  • Instead, an activity in which the students can express themselves and share personal information is a much better solution. It can be, for example, ‘Who is X?‘, a task in which students would have to match the names of all the students in the group to a set of sentences (in any structure that is the topic of the lesson). If it is the Present Simple then the sentences describe daily routines ( X never does homework, X always wakes up early on Saturday), if it is the future then the sentences describe future predictions (X will live abroad, X will become famous, X will travel to Spain) etc. During the feedback, students will be mingling and confirming and justifying the sentences about themselves. The task that I really like to use for that is the United Buddy Bears art project but this one is a bit more difficult to add to any lesson in any level at any point when the new student joins the group. But not impossible))

If you have been in a similar situation and you have some great tips and tricks up your sleeve, please share them with the rest of us in the comments box! Thank you!

Happy teaching!

‘Dear Sasha’ or About journaling with YLs

created with Miro

It is the middle of one heavy-duty reading for the theoretical background for my first classroom research. I am already a bit tired because it takes time for a rookie scholar (if we want to use big words, if not – just a humble MA student). The eyes are struggling, the brain is struggling, even the spine is struggling because it’s been quite a few articles on the Zone of Proximal Development since the day broke. And, sadly, not all of them exciting. Alas.

But then, somehow, I opened a piece by H. Nassaji and A.Cummings from a few years back *) and, all of a sudden, I was wide awake and excited!

Why? The article is an account of a small-scale but very interesting research based on the dialogue journals that a primary school teacher set up for one of her young students – a 6-year-old boy from an immigrant family who already spoke English at the point of their arrival in Canada but he still struggled in comparison with his peers at school. The journals were a supplementary homework task and their main aim was an opportunity to develop the child’s literacy skills, catered to his immediate needs. The article is fascinating account of the nature of the Zone of Proximal Development and how it was changing in relation to the child developing langauge skills. Highly recommened!

This is how my researcher’s brain reacted. My teacher’s brain only sighed ‘I WANT ONE OF THOSE!’

And I got one. It’s been three years now and this is one of my favourite teaching projects. This is how we do it.

Ingredients

The main aim of this project is the development of young learners’ literacy skills, reading and writing. I normally start this project with my Starters students (that is the children who have finished the YLE Starters level and are about to start preparing for Movers, or, in other words, are at the start of the A1 level). The reasoning behind that timing is the fact that, most of the time, children can deal with simple tests, write single words or simple sentences within a specific structure (from among those that they are familiar with such as I like, I’ve got, I can) but cannot be considered to be fluent readers or independent writers. Not yet, anyway, but keeping the journal is definitely going to help them become these.

The journals are kept in simple notebooks which I buy for my students. I do not really introduce the idea to the students, apart from a short note, in the kids’ L1, glued into the notebook in which the journal introduces itself. It goes, more or less, like that: Hello! I am your new project – a journal! Please open me, read the notes from Anka and, if you want, write something and bring it back when you are ready! Anka will read it and write something to you!

This time round, since we are all on whatsapp, it was also followed-up by a note to parents which explained in more detail what it is and how I would like to run it.

In each notebook, on the first page, there was the first entry, from me. All of them consisted of only a few lines and said:

Hello student!

How are you? What’s your favourite subject / food / sport / colour / toy?

Write to me!

Anka

Procedures

Everything is super simple and straightforward: I give out notebooks, kids take them home, read, reply and bring them back. Then I take them home, read their notes and reply. Afterwards, I take photos of all the entries to keep the record, to be able to reflect on their progress and to save all the data. After all, travelling notebooks are in a grave danger of getting lost in-between the school and the house.

I do not correct any mistakes in the notebooks themselves, not to discourage the kids and not to destroy their entries with my scribbles. Instead, I focus on the delayed error correction and on the extensive input and additional practice based on the mistakes I spot.

It is very important to highlight that I really do not want the journals to become an additonal homework task. The kids are supposed to take part voluntarily and as frequently as they are ready to. In our everyday lesson procedures, whenever we check our regular homework, I also ask ‘Have you got the addional homework?’. I do not keep track of who brought what and when. There are no marks or points involved.

That means that each child is in charge of the journal and of how involved they want to be, they can write a little or a lot, they can write every week or every two weeks, they can draw or not. And, last but not least, they can opt out of being involved altogether.

Reflection

The journals are an amazing opportunity for the kids to develop literacy skills outside of the classroom. Each entry means additional opportunity to read a bit and to write a bit.

All of the entries are highly personalised and unique. The conversations that started from the same ‘What’s your favourite…?’ have taken different routes and turned into conversations about hobbies, families, books, food, sports and pets. Some of them are accompanied by drawings, some of them turned into scrapbooks that both the teacher and the student contribute to. What is more, although there is some scaffolding (ie the questions asked by the teacher), the students have a lot of freedom as regards the topic, the vocabulary and the structures that they want and will use.

They are perfectly suited to the needs of a mixed ability group. I have students who take time to read and to plan what they want to write and later to produce an entry for two pages. I have students who write only one sentence answer and their own question. I had students in the past from whom, at one point, it was easy to supplement the text with simple drawings in order to limit the number of words that they had to write but I was and I am extremely grateful and excited about any, even the smallest contribution.

Regardless of the volume of the text, it is obvious that the kids also learn from the experience as sometimes they write about the topics that are not included in our course curriculum, such as some unusual hobbies, less common although useful verbs etc, and this makes them look up the words in dictionaries which proves that the project also works towards expanding their vocabulary.

What is more, it has been obvious from the very beginning (with different groups) that the students really do enjoy taking part in this project to the point that at one point it even interrupted our classroom routine. As soon as I would give out the journals back to their owners, the kids would grab them, open them and start reading, completely engrossed in it and not paying attention to what was happening in the classroom. Did it upset me? Of course not! I know the feeling – when the book that you are reading is so interesting and so good that you don’t want to put it away. Only this time, it was not a book but our journal and our conversations. I was happy. But I had play with the routine a little bit – on some days I check the homework at the end of the lesson and on some days, we check the homework in two stages, first the homework for all and the journals at the end of the lesson only, depending on the day.

One more lesson learnt is that Kids Can! I am all for challenging the students and hoovering on the outskirts of the ZPD, stretching it gently and carefully but stretching it nonetheless, but since I started this project I have been surprised, time after time. For me, for a long time the main indicator of the students’ writing skills has been the YLE Cambridge tasks and writing assessment scales. While I still consider these to be relevant and useful, thanks to this experience, I was able to see that children, even at the age of 7 and on the level of A1 are capable of a lot more. If given a chance to produce and if the conditions are perfect.

Sample aka a few quotes

‘I’m happy because big holidays.’

‘My favourite food is pasta. I don’t like pasta’

‘My favourite toy is Lego. I like making cars, houses from Lego. I like teddy bears, too. What’s your hobby?’

‘I like to draw magic animals.’

‘I can cook, a little.’

‘I have got many, many, many toys.’

‘I love sharks because they are big and interesting’.

‘My favourite city is Moscow because Moscow is very good and has a lot of big houses.’

The beginning of a beautiful adventure

As I have mentioned above, I have been journaling for three years now, with groups and with individual students, primary and a bit older, too. It has been so successful that I started to use journals in the other areas of teaching and teacher training. More on that soon!

What about the students who don’t want to take part? Nothing. It is their choice and I have respect it. After all, I am this girl who has kept journals since since she was 13 (yes, there are still a few notebooks in my parents’ house, filled up with words, sketches and memories) but not everyone might like writing. Instead, I will encourage, I will praise and I will be completely over the moon when a journal comes back but that’s it. And I will be happy when they do their regular homework and I will absolutely melt when a five-year-old sister of my student also attempts a letter, inspired by our exchanges.

So, how about a journal for your students?

My youth in journals)

Happy teaching!

*) H. Nassaji and A. Cummings (2000), What’s in a ZPD? A case of a young ESL student and teacher interacting through dialogue journals, Language Teaching Research, 4 (2), p. 95 – 121.

A square peg in a round hole. New kids joining the group mid-year.

Back in the classroom

January, January. Here we are, are still dragging the residue of the Xmas – New Year laziness in our blood cells but the time is now to enter the classrooms briskly (also, because the school hallways is the only place where you can do ‘briskly’, the pavements outside are either icy or covered with snow or slush), with the new energy and to start the second half of the game.

Sometimes, let’s be honest, this YAY attitude is a show you put on (see the laziness residue) but if it doesn’t start with the teacher, then there is no or very little hope that it will be student-generated. After all, they don’t only have you, their after-school English classes, they also have the regular school, with the huge piles of homework and, this year’s special – they are back to the regular, offline classrooms, after three months of the screen’n’pjs education. This is the older students.

The younger ones, well, they have been attending regular classes, without any breaks, in most cases, but these, they come after not having seen you for two weeks. Will they be a little bit displaced and confused? Yes, they will. Will they have forgotten some of the class rules and routines? Most likely, yes. Will this first lesson after the winter holidays be to some extent like the first lesson of the course? It might be.

What to do with it? Not much, really. Just being kind to yourself and to your students and acknowledging the fact that it will take some time to warm up the neurons and to have them work at the top of their capacity. And a lot of revision, as regards vocabulary, structures, rules and routines. It is not that difficult to put together a great and meaningful ‘revision’ lesson and all the students will appreciated and enjoy doing something that is familiar (but not boring) and achievable (but still challenging enough). Before we get back to climbing yet another of our EFL Everests.

But that’s not really what I wanted to write about today

Imagine, dear reader, that to all the hoops that are already in place (a long break, sleepy students, tired students, all over the place students), you get one more: you find out that a brand new student will be joining your group. Or coming to do a trial lesson. Or just joining you for a catch-up lessons since he/she missed a few classes with their regular teacher.

I am not sure how common an occurence that would be in state schools, kindergartens or classes given by private tutors, or, even, whether it does happen in other private language schools. It does in mine and it is an interesting experience. Here are few thoughts from the last two weeks.

The teacher

It is a challenge, admittedly, because in a way we work the double amount, on the one hand dealing with the group, re-instating the kingdom from before, on the other hand, taking the new student on a brand new adventure and that might mean some temporary dissonace that will have to be managed.

It might also happen that the new student’s mum will want to take part in the lesson or that the new child will refuse to enter the classroom without her. How you react here will, of course, depend on the school’s policy.

It might be a good idea to invite the parents in or to have them sit in the hallway but with the door open so that everyone (the parent and the child) feel comfortable and it is equally important for the teacher to explain what is going to happen in the lesson and how the parents can help. What usually happens is, the child stays around mum in the very beginning and then, slowly, wanders towards the teacher and the group and, eventually, takes part in all the activities. This period of time might be different for different children and it is crucial that they are not rushed here, by the teacher or by the parents, and that they make the decision when to join all by themselves.

The best advice that I might give teachers (and that I give myself when I enter the room on a day like this) is to stay calm and to smile a lot, because things will get better soon. Of course, in 2020 – 21 even smiling might not such a straightforward solution, but even with the mask on, it is good to remember that it takes a few muscles to smile and that the smile spreads all over your face. Plus, it might be a good idea, to stand at a safe distance and to take off the mask just for a second, while meeting the child for the first time to let them see your face.

The activities

This is an interesting case, especially with the very young learners. As mentioned before, some revision is absolutely necessary in any lesson and especially in the first lesson after a long break. However, that might mean that the new students will be constantly at a disadvantage, because for example, they won’t know all the songs that everyone else already loves or to take part in all the games because in order to do so, they would have to be familiar with all the vocabulary and, of course, they are not.

For that reason, it would be good to start each activity with a quick revision of the vocabulary and drilling, to inlcude the games that will have a double focus, something apart from the language itself, for example langauge and CLIL (names of the animals and whether they are big or small or numbers and counting real objects) or language and cognitive skills (names of toys and looking for differences between two pictures or odd one out) because the new students will be able to participate partially at least, relying on their ‘previous knowledge’ not on the langauge only in order to complete the tasks.

What’s more, despite the overall focus on the revised, I would still recommend introducing some new material, in order to ensure that there is something which is new to absolutely everyone, the ‘old’ students and the new and that we all learn it, together, as a group. It doesn’t have to be a brand new topic, only a couple of new items to extend their vocabulary range in the topic of toys, a new song or a new story.

Using gestures is always a good idea, but it can be especially beneficial in the begining of the course, the new topic or when there is a new student in the group. They might not be able to produce all the words straightaway but they should be able to show them, if they know how.

As for songs and videos, in general, although there are plenty of advantages of using a mixture of both audio and video or even moving to using audio only, once the kids know the song very well, the videos will help to support the new kids for whom all is new. At the very minimum, they will be able to follow and understand the plot of the song.

The new child

Well, in a way, this is the most important person in the room as this is, definitely, the most confused, the most singled-out and the most vulnerable person in the room. The adults definitely know what is going on, what we are doing and why we are here. The other non-adults, albeit a bit out-of-sync perhaps, also seem to recognise the set-up and the procedures and they also know each other.

The reactions to this amount of ‘new and unfamiliar’ might vary, from a complete disregard for it (‘There are other kids, they do something, I want to do it, too! What, they use some strange words all the time? Nevermind! ‘), through one million questions in an attempt to take the situation in (‘Why?‘ ‘Who?‘ ‘What?‘ ‘Why?‘ ‘Why?‘ ‘Why?‘) to a complete refusal to take part (‘I can’t, I won’t‘)

As I said before, it is rare that the children are completely uninterested and not ready to be involved. Usually, it wears off during the first fifteen minutes so it is only up to the teacher and the parents to wait it out, patiently, while providing all the support necessary.

Apart from tthe smiles and the praise, all the new activities should be modelled and demonstrated with the other students. This way, the newcomers will have a chance to see the game in action before it is their turn to take part.

The group

This is, by far, the most interesting component of the whole set. No matter how unfocused they are, and how much they have forgotten, these are the students who have been with you for a few months and, almost automatically, they will become your teaching assistants.

You will be able to demonstrate the activities as well as the behaviour that you want to reinforce or, sometimes, too, discourage. What is more, they will naturally want to be involved and, even without you asking, they will give the new student the best introduction to all the lesson procedures, in the L1 and in a way that is best understood by a child.

It is actually a real joy to see them do that, with all the 3 or 4-year-old kindness and empathy:

‘Don’t worry, we all take turns. First me, then Anya, then Masha, then you. Don’t be sad.’

She doesn’t speak Russian. We speak English here.’

She will show us how to do it

And then we will read the story‘.

There is another reason why having a new or a guest student might be interesting. This is a truly unique (albeit unsolicited) opportunity for the teacher to see how much progress the group have made. Assessing preschoors is not as easy and straightforward as assessing other age groups, and comparing them against a beginner who is just starting to learn is fascinating. Even if seemingly, they are all still beginners, still pre-A CEFR and still in year 1, it is possible to see how much progress the children have made over a period of a few months. And it applies to all the areas, vocabulary, behaviour, social skills.

And two stories from the classroom, instead of a coda

The first one, from my preschool group a few years back. Over the course of the year, we got bored and started to come up with more creative names for things that we were using. No more of ‘orange juice’ or ‘cherry juice’, we were drinking ‘clock juice’ and ‘balloon juice’ and we were all using chocolate marker, cucumber marker, strawberry marker and sky marker, instead of all the traditional colours. It was all great and a lot of fun, until a new student joined. We just had to explain what was going on.

The second one, from my teens group. This time, it was not a new but a catch-up student. Who brought her phone and who did not switch it to mute. Whose telephone rang in the middle of the lesson, naturally. Who just picked it up and started a conversation.

We sorter it out later, of course, but before we did, I because a part of a beautiful classroom tableaux. I, in the middle, and a few of heads of my students, first turning towards the new girl and then right at me, with the same question in their eyes, ‘WHAT is she doing?!?!?!’

It made me giggle, inside. ‘Hm, look, it seems we have a code of conduct here.’, I thought. ‘And someone feels strongly about it.’ Good to know, eh?

As for the square pegs and round holes…Well, even if they that in the beginning, during the first lesson or the first two lessons, they never stay that way. The square pegs become a bit rounder and the round holes get a bit square-y. And that is the way to go!

Happy teaching!

Crumbs #13: Angelina, our class puppet.

First steps

I still remember my first ever lesson with pre-schoolers in Moscow. I went in prepared, a whole pile of flashcards, crayons, books, mini-cards at the ready. I wasn’t scared or panicky and the thought that we had to occupy ourselves for only 45 minutes was rather soothing. After all, I did teach in Spain, the group was much bigger and the lessons much longer and yet I survived. In a rather victorious manner.

But then the kids came in, only five of them, they sat down nicely and we started the lesson. And by that I mean ‘I’ started the lesson. They did not give me the register before the lesson, the admin left quickly, the door was closed and the parents were somewhere else. I was on my own.

The kids were sitting nicely, very nicely, just looking at me and absolutely not reacting to my smiles, hellos and communication attempts. They did not respond at all to my ‘silly teacher guessing game’ that I normally (and successfully) use to get the kids to introduce themselves at the beginning of the first lesson. I say my name, pointing at myself and then start with one of the kids (the brave-looking one) and start bombarding them with all the boy’s or girl’s names typical of the country that I can think of until I bump into the right one or until the child reacts to the silliness and introduces themselves.

Only this time, I was getting nowhere. Five pairs of eyes were looking at me, just looking at me and waiting for something else. Something else which I did not have. It did last only a minute or even less, in real life, but it felt like a whole eternity. And I did start to panic.

Luckily, among the rubbish that I did bring to class that day, I had a puppet, Max from Playway to English. And guess what, the kids did not want to talk to me but they were more than happy to converse in Max. In English, straight away, even without any special introductions in L1 and explanations that Max is from England does not speak Russian and so we have to make an effort. That was not necessary, they just wanted to talk to him. We did talk. Yay!

I don’t really like puppets, to be honest.

I don’t and I cannot even explain why.

I am actually good at all the puppet-related skils. I don’t have a problem with putting on voices, making faces and role-playing things with myself for the benefit of the 5-year-old audience. And anything in the classroom can find its own soul and voice, flashcards, masks, pencils.

But, really, I use puppets only in the beginning of the course, with new groups, when we have new students joining an already established group or when we were forced to move our pre-primary classes online.

Dex is then ready to help and Teddy sorts out most of the issues. Children feel more comfortable with something that is soft and pretty and right out of the world that they are familiar with and someone who does silly things and who can make them happy. Teddy and Dex are always at the ready.

However, as soon as we done with the first weeks of the course and we feel comfortable in the classroom, they visit less and less frequently. I don’t miss them but perhaps this is something that I should actually reflect on why we are not using puppets more. But there are exceptions, of course.

Angelina, my superhero

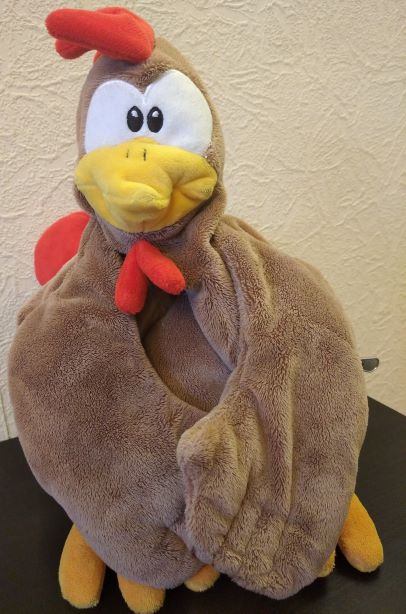
It all started in 2017 because this was the Year of the Rooster and, traditionally, the world filled up with toys, figurines, puppets representing this very animal. One of my friends landed one as a present and decided that my classroom will be the best permanent home for it or, actually, her, because, regardless of the Chinese horoscope, it is a she, a hen, Angelina.

At the time, my youngest group were already very big, already five years old, well-accommodated in the school and in the classroom and definitely beyond the stage when they needed a puppet to ‘feel better’ or ‘to break the ice’.

But I had Angelina and I really wanted to use it and, of course, I did. It was not one of the projects that you start with research and reading that lead to implementing an idea in the classoom to meet some specific aims. Here, we went topsy-turvy. I had a resource, I jumped in at the deep end, without any specific aims, observing, taking notes and reflecting. And learning a lot about working with preschoolers. Here is how Angelina changed my teaching life.

Angelina 1: When puppets listen, kids talk.

Instructions

  • Get a puppet, think of the name, the background, the voice and the movements. Our Angelina, for example, is not quite a puppet, rather ‘a fancy sweets container‘ as she has a big zipped pocket, in her bum (sorry) which I decided not to use it. I do not to put it on my hand. She normally sits in my lap and I hold her by the back, letting her express herself mostly through the head movements. Sometimes, with the use of my other hand, I use Angelina’s wings or wings which are quite dangly. She is, overall, quite expressive for a puppet))
  • Make the puppet a part of the classroom routine. Our Angelina sleeps in her house (this being a rather unappealing plastic bag hanging on the bookshelf). Right after the hello song and hello routine, we wake her up and invite her to join us in the circle. Afterwards, she says goodbye and returns to her house, to continue sleeping.
  • The main aim of Angelina’s visits is to provide an opportunity for freer speaking practice and to encourage the kids to produce the language spontaneously.
  • In practice that means that we ask lots and lots of questions and Angelina is telling us about herself. We start with ‘What’s your name?’, ‘How are you today?’ and ‘What’s your favourite….?’, later moving on to ‘Do you like…?’, ‘Have you got…?’ and ‘Can you…?’, although these are always only ideas and I make sure that all the contributions are welcome. I have not tried telling and retelling stories yet but that might be another option.

Why we love it

  • Angelina (or ‘a puppet’) is a fascinating way of getting the language out of the kids. They start producing the questions because they are really curious about the class puppet’s life and these questions start from the ‘traditional’ questions, often used and heard in class but they quickly become very creative and unexpected.
  • Kids naturally react to what Angelina says and we can use this opportunity to teach them and them a chance to express surprise (‘Wow’), disbelief (‘Really?’) or shock (‘Oh no!’).
  • There is some opportunity for emerging langauge learning, for example ‘wolf’ (things that Angelina is scared of), ‘corn’ (things that Angelina eats) and ‘planet’ (things that Angelina likes) that we might not have learnt otherwise because they do not really feature in our coursebook.
  • It is a woderful opportunity for spontaneous production since with this kind of activities the students are in charge of the content. Naturally, they will not be able to chat freely in English about Angelina (what with being 5, pre-A learners of English, with a limited exposure to L2) but from my perspective (I still teach these same, first Angelina, children, now we are seven and eight and A1 level), this was an important first step that has definitely contributed to my students’ current level of fluency and communicative skills.

Angelina 2: Our class puppet and her diary

Instructions

  • First you need to have had a class puppet for some time for the kids to become familiar with the puppets, their habits and interests. I introduced Angeling in year two and the diary in year three, but it will depend on the group and the children.
  • The teacher starts the journal. I used a sketchbook and filled in the first few pages with Angelina’s adventures. Each of them was a drawing and a sentence.
  • The teacher brings the journal to class. The group look at it together and talk about what they can see in the pictures.
  • After a few weeks, the teacher first explains the whole idea and the logictics to the parents: the kids, in turns, will be taking Angelina and the album home for the weekend and then, when they are ready, they will bring them back, with one more drawing added. In class, we are all going to look at it and talk about it.
  • To lessen the stress of having to draw in the official diary, I have used a template for the main character, an drawing from clip art library that I printer, cut out and glued to a few empty pages. This way we would always create a collage, the drawing of Angelina would be consistent and of a good quality and the students would only work on the scene itself.
  • The kids were only suppsed to write but some of the parents helped and wrote the key sentences.
  • When I introduced the idea, one of my eductional mums said ‘Youa are brave!’ and, I guess, by that she meant that I was risking Angelina getting destoryed, lost, stained or loved so much that she would never want to go back to school…Yes, that is something to take into consideration. The younger students might get too emotionally attached and we would be in trouble. Plus, there are the accidents of the everyday that we cannot predict or prevent. I did think about it and I still wanted to risk. Plus, I had located another copy of Angelina in our accountants’ room and I was ready to ask, bribe or steal, should anything really bad happen to our original SuperHen.

Why we love it

  • The kids loved taking Angelina home to play. Once she came back to school with a boyfriend (who stayed only for a day) but she also encouraged other kids to bring her toys. A parrot called Pepsi attended our lessons regularly, participated eagerly and sometimes asked for her own handout in order to be able to do her own homework. Which, accidentally, was always different from her human’s homework.
  • The project gives the kids a chance to be creative as Angelina can do absolutely anything while visiting. She can go to the park and she can fly to the moon, too.
  • It provides the entire group with a picture to talk about, to discuss and to ask questions about and the best bit is – we never know what it is going to be. As a result, we get yet another chance to use the language tools we have to talk and to learn new vocabulary, too.
  • No Angelina was harmed during the entire project. The kids took this responsibility very seriously and I was really proud of them.

Instead of a coda, another puppet story.

If you think that puppets and class puppets work only with the little kids, I would like you to reconsider.

In the classroom where we study with my older kids, we don’t have any balls and whenever we need to throw things (while playing games) we use soft toys. For that reason, we have a creature called ‘Flying Cow’, which lives on the top shelf, is a very sphere-like toy cow and, yes, it frequently flies.

Despite the fact that the students are well-past the primary age, Flying Cow always gets stroked, squeezed, hugged, patted, or, in other words ‘is shown affection’. Last year, while we were playing, the cow got thrown or caught rather too energetically and, as a result, suffered a tail injury (reads: it just got ripped off).

It was an interesting thing to see that all my seemingly teenage students gasped in horror at the damage done. As if Flying Cow would really be in pain. I did keep a straight face and acted like a good doctor ‘Don’t worry, everything is going to be alright. I’ll take her home and fix it.’ Which was met with relief.

Maybe not only the little kids?:-)

Now, dear teacher, take a careful look around. Is there anyone that could become your Angelina?

Happy teaching!

Bibliography

  1. Carolyn Webster-Stratton, PhD, Tips for Using Puppets to Promote Preschool Children’s Social and Emotional Development, accessed on 6 January 2021, from www.incredibleyears.com
  2. Christine Belifiore, Puppets Talk, Children Listen, accessed on 6 January 2021, from https://teachmag.com/archives/5618
  3. When Puppets Speak, Children Listen, No Strings, TeDxBermuda, accessed on 6 January 2021, from youtube.com
  4. Sandie Mourão and Gail Ellis, Teaching English to Pre-Primary Children, DELTA Teacher Development Series, pp 48 – 51

Crumbs #12 In my little house: A craft activity for one hundred occasions.

If I had to choose only one craft activity for all my classes, a proper all-rounder, for the younger and for the older, to serve a hundred purposes – that is the one!

Welcome to my little house!

First of all, I really did try hard, very hard to remember where and when I learnt how to make it and how to use it and who taught me and I can’t. I don’t know. For sure, it was Moscow, definitely my first year here but who and how? No idea. The only thing that I can do now is to say ‘Thank you!’ to this forgotten and now anonymous benefactor. I am, indeed, much obliged. Now, I am sharing.

Instructions

  • Two pieces of paper per student / house. In the samples in the photos I have used A4 but in the classroom, with my kids I tend to use both A3 and A4, depending on the main aim. If we are just glueing things, A4 works just fine. If we draw – A3 is bigger and offers more room for the kids’ drawings.
  • Fold the house. It is pretty easy and you can watch this video here, from Inner Child Fun to see how it is made. Emily is using origami paper but a regular A3 or A4 will work just fine!
  • Important: I normally do it myself, for all my students because even adults (like my trainees) might not be very good at origami-like activities and the house, although it is relatively simple, it does require some precision and if it is not applied, it is not going to look very well, unfortunately. Preschoolers will not be able to fold it and when I once tried with my primary school kids, I immediately began to regret it because some of them took the responsibility of the taks too seriously and were getting very nervous, predicting that they might not be skilled enough to manage the task. They did, in the end, with a lot of encouragement but I think it is just not worth it. We can still teach them how to do it, for them to practise and play at home but if you think of the lesson itself, the timing and the aims – just not worth it.
  • In my case, depending on the aim of the particular house (see below, there are plenty of options), I make one house myself, as a template, hand-drawn or using clip art images, and then I photocopy it to fold for each student. The advantage of it is that you can put in your house whatever you want. The basic design involves only the lines inside the house and the division into rooms, with numbers. That helps during the activities because you can ask your students ‘Go to room number 1’ and this way you make sure that everyone is on the ball and that they don’t glue pictures wherever they should not, for example, on the lines as that would get in the way of the house closing and opening.
  • Also, before the lesson, I glue the houses onto the garden page. This is especially useful in the case of the pre-primary students and in the case of those of my primary kids who have not done the activity before. Being glued on, the house is not as easy (although not impossible) to be dismantled and unfolded and it is just easier to manipulate in class.
  • I start with demonstrating my house, with all the theatre that I can muster. We look at it, we knock at the door, we open it and look inside. This can be done on the carpet or with the kids gathered around you so that everyone can see all the details.
  • I give out the houses and we start with drawing the door and writing the number (ask talking about them) and then drawing the windows (and talking about them). Make sure that all the students are more or less in the same place here. I normally only give out one colour per child (although they can ask for a different colour for the door and a different colour for the windows) or, with the older kids, with a pencil only. They will want their houses to be really pretty so erasing might be necessary and I really don’t want to waste time on colouring, this can be done at home.
  • The main task usually involves glueing things in different rooms, for example pets. For that, I prepare small pictures of all the pets, one set per child, on a tray (or whatever works as a tray) and a poster to put up, for everyone to see all the options. We start with room number 1 and I say, ‘Go to room number 1’. ‘I can see a cat (in my room number 1)’ after which I glue there the small picture of a cat. Then, the kids take turns and make similar sentences choosing their own animal from the set. They only receive a picture to glue after they make their sentences. When everyone is ready with room 1, we show our pictures, we say ‘I’m ready’ and move on to room number 2. And so on.
  • In the end, if there is time, we draw the sun, the tree and the flowers in the garden and we colour the house for homework. Also, if there are any leftover animals, these can be given out to glue at home (although, yes, that involves some more complex logistics, paperclips, small envelopes, not impossible though).
  • In the following lesson, we look at our houses and describe the rooms, the colours etc.
  • Variations: there are many of these. The house can be anything you want it to be. Here are some of my favourite ones:
  • Any set of vocabulary and almost any set of stucture, starting with ‘I can see’ and ‘I’ve got’, with some less obvious ones like the pictures of activities to practise Present Continous (‘I’m jumping in the kitchen’) or even words or word cards with the Past Tense forms which can be used later to tell stories for example ‘A strange Sunday’ (‘My brother slept in the garden’, ‘My dad danced in the kitchen’ etc)
  • Halloween or Christmas house – with the characters and symbols of each holiday
  • International House (accidental) – each room is a country represented by its flag and some symbole, these are drawn or glued, for older children
  • Rooms of the house – template is prepared with some furniture typical of each room, students can place pets in rooms (‘Where is the cat?’ ‘It is in the bedroom’) or family members (‘Where is mum?’ ‘She is in the living room’), add small objects to each room (‘Where is the lamp?’ ‘It is in the kitchen’, it is best to choose things that could be in any room such as lamps, pictures, chairs, rugs) and this version can be also further extented (‘Where is the lamp?’ ‘It is in the kitchen. It is on the cupboard’). The older kids can also draw these, making a regular or a silly house, too.
  • Secret Room – this was a follow-up activity in which I used the template which I drew with one empty box (empty, only because I could not, for the life of me, draw anything resembling a dining room). We did one of the activities mentioned above but the last room was to be drawn at home and it could be anything – a space room, a swimming pool, a library, an ocean zoom, a pirate room…
  • Where are you? – a template with the rooms, pre-prepared, each student gets a set of the leftover stickers or small cards, they put them somewhere in the house, in secret and afterwards they guess where their objects are. It can be used to practise simple prepositions and the rooms (‘Is it in the kitchen?’) or more complex ones (‘Is it in the living room?’ ‘Yes’ ‘Is it on the sofa / behind the chair?’etc)
  • Put your penguin in the living room on the sofa – a template with the rooms, pre-prepared and a set of stickers or small cards. The kids dictate to each other where to glue them, again, it can be used for simple or more complex prepositions, to get the kids ready for the Starters speaking exams. Later on, we compare our houses.

Why we love it

  • It is relatively easy to make and the kids love the fact that it is a real house.
  • It can be used with any vocabulary or structures (or almost)
  • It can be used with pre-schoolers and primary
  • It has to be prepared before the lesson for all the students but it is a good time investment
  • It is at the same time a focused task to be done in class and a homework task. The homework can involve only colouring and decorating it, talking about it in class but a writing task can easily be added for the older students (any template to be printed on the back of the garden, for example the focus can be such structures as there is, I can see, colours and furniture, my favourite room etc
  • It encourages the students to produce the langauge and it is easy to stage since you go from room to room
  • Lots of opportunities for adaptation, even if you repeat it with the same group. Every single time, it will be a different house.

Happy teaching!