Step by step! Year 2, one month in.

I decided to contiue with my reflection journal.

One thing is that someone else may find it useful, reading about the adventures of another teacher and realising that even for an experienced one, it is not (always) a bed of roses and that, regardless of the mileage, we work with what (or whom!) we have in the classroom, adapting methods, approaches and always being on the lookout for new solutions.

The other thing, however, is that I find it really (really) useful as a teacher. Even the very fact that I created a new post here and typed in the headings, that alone helped me see this whole month of teaching from a completely different angle. An instand reflection and understanding. It does not mean that I regret doing something or that I would introduce any major changes in the month of September. We did what we had to do but now I understand better why we did it this way.

September, back to school after three long months of no routine and no learning, that had to take its toll! I am beyond happy that my students could enjoy the summer freedom from their duties but it is true that you forget, at least some of the things that you have leant. And, mind you, not so much regarding the actual language or Maths, but, absolutely – definitely – thoroughly, when it comes to habits and routines.

Outcomes? You spent the whole month of September rebuilding it. Step by step.

Starting the lesson

As regards this stage of the lesson, we went for the principle of ‘something old, something new’. We start with our traditional ‘5..4…3…2…1…Hello everyone’ and talking about how we are plus talking about the weekend on Monday but now this part is now led by our ‘Hello Master‘. One of the students is chosen to perform this task in the beginning of the task. They sit on the chair in front of the class and ask the question ‘How do you feel today?’, not forgetting to follow up with ‘Because?’. Because? Because We Want More Language Production!

At this point, we are not using our handmade flashcards with feelings. Instead, I prepared the real ones, printed and laminated and they are displayed on the walls of the classroom. I did notice that some students look around to find something to really express how they feel. Thanks to that one of my students stopped answering ‘I don’t know’ (an answer which I used to accept, it is, after all, a valid way to feel for a human). Now he looks around and finds something to say. Usually, a few things, actually, which I am not surprised with as he is the one that seems to be able to feel a whole multitude of feelings per second. At least now, he can talk about it!

We have two other students chosen in every lesson, two Helpers, who hand out pencils, books, handouts and who help with cleaning up. Kids love helping and they treat it as a privilege. Naturally, I have to keep track of the names and roles, or else, I am in trouble.

Afterwards, we sing our Month Song, I start and then, whoever has an idea, they sing, too. I love this part of the lesson and I see that they really use it to express how they feel on the day or to joke about me or themselves. And it is all improvised!

Rules and classroom language

Aside from the feelings, we are now in our own classroom and we can display whatever we want on the walls, just the way I like it! So, aside from the days of the week, the months, the sight words and the feelings cards, I also added all the rules, so that we always have them in front of our eyes.

One of the Helpers always reads them in the beginning of the day and we refer to them during the lesson. The next step will be adding the real classroom language, all the verbs and phrases we need during the lesson. After all, we still have some room on the walls and they pay attention to what’s there!

Rewards chart

A rewards chart has become an important part of our lessons in September, as a visualisation of what they do AND as an instant reflection faciliation tool.

I did experiment with it a little bit, over the month of September, using what I have learnt so far (a post is here) and, let me put it like that, because of my students, I managed to learn even more about the effective use of a rewards chart.

In the end, after experimenting and finding quite a few things that don’t work with my current audience, I decided to keep it simple. We have a list of names, all of them with attendance (either a plus or a little comment ‘Where is Sasha?’ or ‘Sasha is ill’), some of them with the badges (Helper or Hello Master) and, as we go along through the lesson, I add stars for the completion of the tasks and, sometimes, special stars for some additional achievements, for the extra work that is optional. This week I also started to add some verbs that describe the kids behaviour, the unwanted behaviour. It is not a minus or a sad face, it is just a neutral description i.e. talks or disturbs a friend etc, and, of course, they are there only to signal that there is something that they should not be doing and, naturally, if they cease, I erase. It has worked so far and the language is as neutral and bland as possible. ‘Only facts’.

Last week I also used it in the end of the lesson, to thank those few of my students who were great players during our competitive game. However, for that, I used a different symbol, a big smiley. More of that a bit later.

We also keep a lesson plan, or actually 2. I have my own, on the board at the back and I write a short, funny version of it on the main board, for the students. We keep erasing bits of it as we go through the lesson. I normally wrote it as bullet points and changed it only this week, to a snake (a theme of the day) but one of my kids asked to go back to the bullet points list as it is, apparently, easier to read. OK, point taken, thank you.

Since we are still getting used to the life in the classroom, I had to go back to another item: ‘time left’ on the board as it really helps my students manage their attention and focus during the lesson. As I have written before, it is also an interesting resource of feedback for me, because, naturally, they ask more in some lessons and less in the others so, this is one more signal of how we are going on.

Songs and story

I decided to put these two categories together because this month, to some extent, we have abandoned songs and stories. Not fully, oh no, these are the two things that I love doing in the classroom and I would never give up on them. But the month of September saw fewere of them, in comparison of what we did last year.

We do have our Month Improvisation Song in the beginning of the lesson and the other song, taken from Superminds 3, ‘School is cool’ which we love, we love to change (‘School is not cool’) and which helped us practise school subjects. We also did listen to some of our favourites from last year but, overall, there were fewer songs.

The same applies to stories. We did Dr Seuss, ‘I’ll teach my dog 100 words’, to revise and to practise verbs and one long story, ‘Johnny’s Story’ from Superminds 3 which we read, listen to, talked about and created our own versions, too. I really wanted to use this one because it is quite long and I have a few Johnnys in my groups. We definitely can relate! But, again, only two stories in four or five weeks.

I have my reasons! Hear me out! It seems that, subconsciously, I wanted to cut down on the number of stimuli and new things in the lesson, based on how much we struggled with remaining seated. Literally. It helped a bit and we will definitely add more stories and songs in October!

Socialising

This was one aspect of our classroom life that we had to work a lot on. What the kids forgot, apart from the routine and rules, were the social norms and the bond and friendships, or, in some cases, the kind tolerance we had developed towards each other in year 1. Sigh.

As a result, we had to work on that A LOT in September and this is how we did it:

  • I experimented a lot with different seating arrangements. Throughout September, kids would sit with different partners every day. I wanted to experiment in order to find out the best and the worst combinations. In the beginning, we used the September words and it was random but after two weeks I started to assign seats (using the chalk marker) to write the names on the tables for everyone and reflecting after the lesson. At this point, after a month, we are pretty much aware of what works best and, aside from little changes, everyone has their own seat. Some kids sit in a trio, some in pairs, some in a pair but with tables apart and I have some outsiders who sit at the front but at their own separate island. That said, we also regroup, too, for some of the activities.
  • We have done a crazy amount of pairwork. Only last week, over three lessons, we did comparing pictures (Flyers), playing a dice game, playing a guessing game, comparing how often we do things based on our notes, played a team game various times, with different teams. They did well!
  • We did lots of competitive games because NOW WE CAN! I am so proud of my students that another article will have to come out of it! Because of all the work we did last year, over the summer with some kids and over those four weeks of September, the kids are now simply amazing at managing their emotions and taking the defeat without tears. It was not easy, not at all, but we made it. I am just so proud! We now have a habit of getting together in a team, thinking of a name and negotiating a lot while in-game, in order to achieve the best results. In that sense, that is also a thing that works towards being a part of a group.
  • I believe that also all the other things that we do, as one big group, that also helps to remind us that we are a team: our rules, our classroom, our cards, names, all of the rituals and traditions, our notebooks and books.

Creativity

We didn’t do any real projects apart from the first one, on day 1, but we were very creative in September. Starting this year, my school introduced a new lesson, the homework time, that is obligatory for everyone and serves as an opportunity to catch up on things that haven’t been finished during the regular lessons or completing some additional tasks. And, so far, that has been so much fun!

First of all, these are the tasks that my kids do with our T.A., so there is a different vibe to them. Sometimes, we do English and on some days Maths, depending on the day. Sometimes these are just ‘some more exercises’, the repetition and revision of what we did in class and how we did things in class but, often, these tasks are more creative, for example creating stories, sentences and Maths tasks for me. I am able to check them only the following day but when I do, I usually laugh a lot because my students are having fun, with Maths and with the language.

Having said that, the time for a real project is coming up!

Teacher

Over these few weeks of September, I have generally calmed down and got my feet back on the ground because we have been more under control of everything taking place. There are still a few issues to resolve but we are getting there, step by step.

I am really happy because I can see, on daily basis, how much progress my students have made. They are so much better at reading and they do remember quite a lot from Maths, too. Hooray to that! And onto the next one!

One colour, many colours. Teaching English through Art

The language

The language in this lesson was not quite our priority. We did not introduce any new language items and I really wanted to focus on working with the colour and help the students see the variety of colours at their disposal. We sang the song, talked about how we are and we revised the colours, briefly.

We looked at different colours and their shades to understand that each colour is, in fact, a number of colours. My younger students counted the shades and the older ones had a lot of fun reading the names of the different shades of blue, red and pink. You can find my presentation here.

The artist

In this particular lesson we had a group of artists, to introduce a range of different paintings with one leading colour. We looked at van Gogh’s Starry Night (blue) and Sunflowers (yellow), we had Kandinsky’s Mit und Gegen (red), Levitan’s Forest Gave (green) and Sue Williams’ Pink Pentagon (pink). We called out the main colours in every painting and we called out the contrasting colours, too.

The art

I taught this lesson twice, with my younger group and my older group, with some differences.

The younger kids, pre-K and year 1, were working at a much slower pace. They needed more revision, they took longer to get into the task and they were

Everyone got a strip of paper, a mixing palette and a box of watercolours. The task was to create ten different shades of different colours. I showed them what I created for red at home and we also sat around my table for a moment to see in real time what happens if you mix yellow with brown and yellow with white or black.

They were involved in the task and they kept coming up with more and more unusual combination. Even those few kids who entered the room with ‘I will not paint today’ (there is always someone!) eventually got down to work and started to create. They kept calling me over and over again, to come over to check out the new shade. And we actually managed to get lots of language out of it. They were either telling me what they had mixed or I was trying to guess, judging by the final product.

The older students managed to complete two tasks: creating ten different shades of their chosen colour and then also creating a picture in their chosen colour. Looking at how it was going on, I decided not to speed them up and to focus and mixing the colours.

I think that next time I teach this particular lesson to the older students, I am going to focus more on the language and after creating our ten shades of X, we are going to come up with some interesting names for them. That will require preparing a slightly different page, with some room to write but it looks like a fun activity with a lot of potential. Especially that they already really enjoyed finding out about the official shades of different colours.

Afterwards, we went on to painting a picture with our chosen colour as the main theme. My model made at home was a picture of rowan, to showcase red. The one I did in class was a sunflower ready to bloom, to showcase green. We also talked about focusing on the main colour and choosing something of a different colour for contrast. My students decided to paint pumpkins (orange) and the forest (green).

The exercise of 10 Shades can be used as a warm-up activity to many other lessons. We used in our Turner lesson and in our green lesson, too. I am planning to do a lesson on red and still-life and I will include that element, too.

The funny thing is the mismatch between the actual lesson and how good it was and the photos and creations that we have to show. In case of my younger group, we ended up only with a few ‘dirty’ pieces of paper and nobody would even be able to guess that they were the result of experimentation and creative discovery. I wanted to display them on our noticeboard but what happened was that they were taken away from me, as soon as possible. Meaning? They were dear to the budding artists. As was the lesson, hopefully.

Georgia O’Keeffe and her leaves

The language

The language aim for this lesson was autumn and, after we sang our hello song and talked about how we feel, we went on to learn about the different autumn symbols using the cards. With my younger group we also revised the colours and, for the first time ever, we talked about our favourite colours. With my older group we focused more on talking about our favourite autumn symbols.

The artist

Georgia has a very special place in my heart because she was one of the first artists that I brought to my English class, with her beautiful moon in NY. She often makes a cameo apperance in our group lessons but she has never had her own day, until last week.

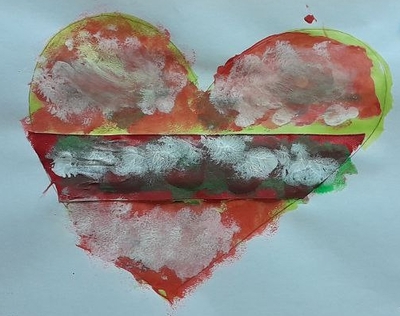
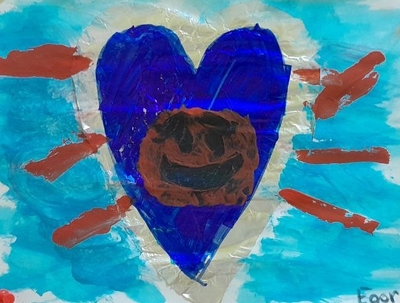
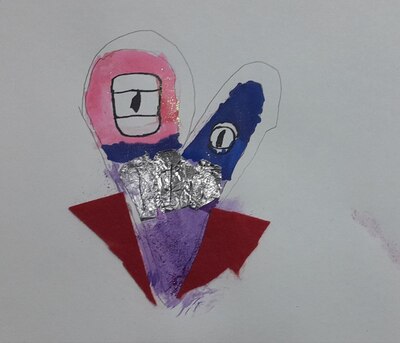
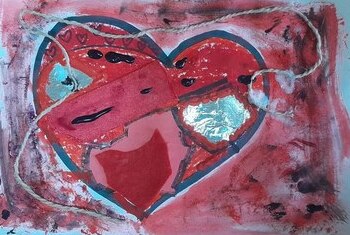
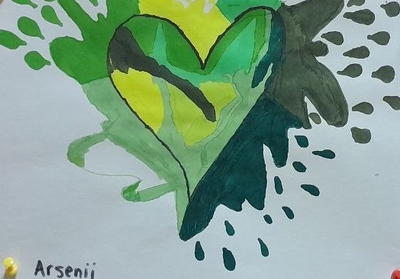
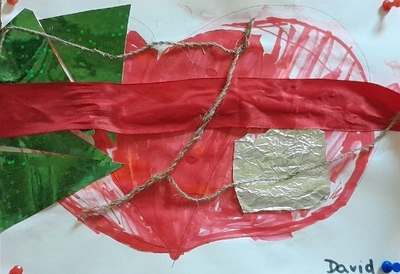
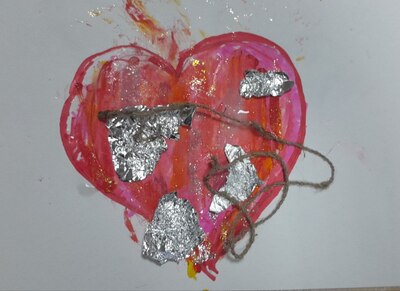
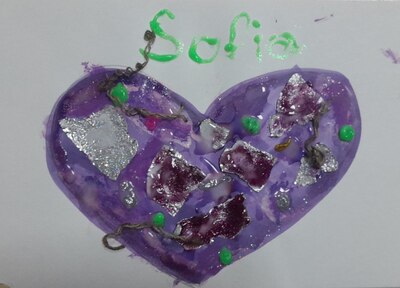
Her painting ‘Fall Leaves’ is so simple but so beautiful and rich in colour that it simply had to become the headliner, eventually. And it was a perfect choice for our first real autumn lesson, not only because of the season outside of the window but for our art in the first month of the new season, I needed a simple enough shape that would give us an opportunity to focus on and to experiment with the technique, namely: watercolours. Previously, for the same lesson, I chose a heart, this time, I wanted leaves.

The art

Since we are in the first month of the new academic year and I have many new students who are also beginner artists (or beginner artists in English), I decided to devote the month of September to a series of lessons that focus on different aspects of being an artist. We have already talked about what it means to be an artist and in this lesson, I wanted to show the kids that there are many things that we do with our paints. Make sure you also check out the other two lessons in the series: about a colour and the texture (still to come).

Before the lesson, I prepared three A5 pieces for each student (watercolour paper, painters scotch) on the table to signal how we are going to work, three pictures and three techniques. Drawing a leaf was a good choice because I wanted the children to focus on the technique, rather than on the drawing itself.

There are many watercolour techniques (you can find the links in the previous post here) but for this lesson I chose the following ones: wet on wet, salty water as the base and ‘a broken brush’, I prepared my own pictures at home, to show the children a finished product and I sketched a few shapes of different leaves on the board for the students to copy. If they needed it.

I wanted to use the three techqniues also to get the students ready to following my instructions and learning to go step by step as some of them still struggle with it and we will definitely need this skill for more complex projects in the future.

Every stage went in the following way: showing my example on the board, explaining and demonstrating the technique and the kids trying their hand at it. We used crayons to sketch the leaves (as they help to keep the paint ‘in order’) and we continued with the watercolours.

One of the first questions that I heard from two of my students in the older group was ‘But do we have to draw leaves? Can we draw something else, please?’ and, as luck would have it, only a day before I bumped into a post about free choice in the Art Class (like these here The Art of Education and Power Wood) and I just had to say ‘Yes’. I only asked them to stick to the main theme, ‘Autumn’. And they did.

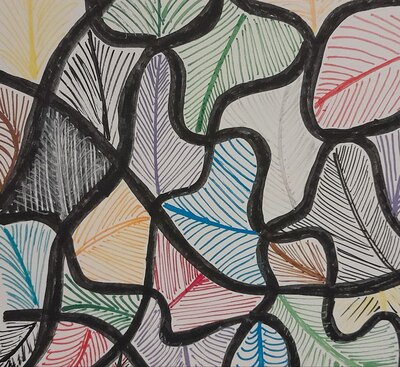
It was a great lesson. The leaves look great as you can see in the photos (at least those that I had time to photograph before they were snatched and carried home by the proud artists) and as for the joy of experimenting and discovering, well, you just have to take my word for it. It was just beautiful.

It also worked well as an activity in learning how to work in the Art classroom. I was happy with the choice. The three techqniues – activities created a framework and they helped with staging. We made one step forward as a group.

I am also very happy that I agreed to my kids making their own choice as regards the topic of the painting. I am happy because it made them more motivated and they created the most amazing pieces. I would have hated it if my being strict would have prevented these from happening. Which is going to be something that I will definitely think about every single time now anyone asks for a slice of freedom in the classroom!

One of my students, painting one of his leaves, said ‘It is a magic leaf!’ And, you know, it looks like one!

P.S. Here is a bonus! A new thing that can be done with a leaf. We have not done it in class, only experimented but there is a lot of potential here and it takes only a leaf and some glitter glue!

‘It’s tricky! It’s tricky!’ Back to school classroom management

About some ridiculous expectations

Well, it is not my first rodeo and, actually, it might be actually a good point in life to count properly how many rodeos aka Septembers there have been so far (I really don’t know) but, it turned out that I had been a bit naive about what to expect in the classroom on the 3rd of September. Or, in other words, my students managed to suprise me once more! Hooray to that. I suppose)

I knew that my students would come back having forgotten a lot and that we would not be able to pick it up where we left off, not after three months of no-school life. However, naively, I was hoping that they will remember something and that our September life will not involve starting off a brand new blank page. I was wrong!

The funny thing about it is that a few minutes into a lesson that was not necessarily bad but also not my dream come true, I kind of split my attention. There was a part of my brain that was solely responsible for the lesson taking place and the other one stepped back and started to look at the events the way a trainer would, connecting the dots and making mental notes about ‘the things to improve’. That was an interesting experience, I have to say.

This post today will have a format different to every other post in this series. I will try to analyse the things that did not go to plan and the solutions I already decided to put in place.

Things that I liked on the first real day

  • We talked about the things we did on holiday and it was great
  • We kept our Months Improvisation Song and now we are singing about ‘September’, I did my verse and the kids did theirs.
  • We did an introductory reading task and I was really happy with how it went. The kids really wanted to read (already a reason to celebrate) and to find the mistakes in the song.
  • We played our numbers spinner Maths game (‘I want…’) and it was very productive.
  • We made a mural about our favourite things that we will put up on the wall, Our Solar System. We sat together on the floor around a sheet of paper and we went on creating.
  • Even in the first lesson we had a good variety of interaction patterns: whole class, individual work, activities led by kids, collaboration on the project.
  • We have a special board where we keep the plan for the lesson.

Things that I didn’t like on the first real day

  • In one line, the kids were over-stimulated and out of control.
  • It was the first lesson in our new classroom, out of the previous set-up, associated with good habits and routines and there were too many new elements.
  • I allowed the kids to sit the way they wanted, with the friends they wanted to be around.
  • I decided to include the rules revision during the second lesson (for a reason) but I had to pay for that
  • I decided to include one of our favourite Maths games, to balance ‘the new’ with ‘the familiar’ but, I have to admit, there were better solutions, something else than a game would work better.
  • We used some of the favourite songs but I also included a new song, ‘Back to school’ but, in hindsight, I think it was not really necessary. It could have been left for a bit later.

What has changed since the first day aka Solutions

  • Nobody is sitting where they want anymore. This was my plan and I announced it in the first lesson that during the month of September we are going to have a different seating arrangement every single day. I prepared some September vocabulary cards and glued them onto the desks and a set of cards with the same words. Everyone coming into the room picks up one card and then looks for their place to sit. I want to experiment with different seating arrangements (especially that I am still working on the arrangements of the desks, too) and I want to check which combination works the best. There are some dangers involved, some tricky combinations to be avoided at all cost, but I am willing to take that risk, in order to learn. It was only yesterday that I saw a meme or a video on the social media in which teachers were saying that they let everyone to sit the way they want on day 1 specifically in order to find out who shouldn’t sit with whom. Plus we are also going to learn some cool September words)
  • Our rules have not been printed, laminated and displayed on the wall above the board. We have been reading and revising them at the start of every lesson. There are only few, my basic set: I sit nicely, I listen to the teacher, I speak quietly, I raise my friend, we are friends and Russian is beautiful but I speak English here. If we need, we will add to the list.
  • I have also decided to add another poster ‘How are we working today?‘ to help kids understand the different interaction patterns and modes of work. You can see all of them in the poster underneath and these are the terms that I am using to describe what the lesson is going to be about. They also help a lot with giving instructions to particular tasks. The most important differentiation at the moment is the one between ‘follow the teacher step by step’ and ‘you can make your own decisions’.
  • I reinstated the tool that we already abandoned, namely, the final stage of the lesson with the official announcements of the grades for the lesson, for work and for behaviour. We did not quite abandon them because I still needed my notes to add comments to the electronic journal for all my students but making formal announcements of praise and of not-so-good feedback was not necessary at the end of the previous academic year. This is back and it helps to summarise the lesson, to highlight once more the superstar behaviour and to explain why some grades are not very good.
  • We have a new call – response and last we used ;Autum leaves’ (teacher) – ‘falling down’ (students). They have already customised it and some of them respond ‘falling up’, just because it is funny. I need one more of those.
  • We sang a lot of our favourite songs during the other two days and I am planning to keep that trend for another week, without repeating, until we go through everything in our Songbook.
  • With one of my groups, I have put the games on hold for now, we are not ready yet. With the other one, the games are at the end of the lesson plan, in the ‘if time’ section. We need to get back into the school mode, back into the focus, before we start doing something more entertaining.

What’s next?

Not much, just the everyday and helping my adorable monster get back to the proper working mode. We will sing our songs, we will definitely do a story next week. We are still working without our books, rationing resources. We already have the beautiful notebooks, though, so there is a place to keep all the notes. Step by step!

‘I am an artist!’ The first Art lesson of the year

Ha! ‘This was some time a paradox, but now the time gives it proof!‘ as Hamlet would say. Why? Because first I spend time preparing a post about the good first lessons in the Art Explorers world (which, by the way, is here) and then, the start of the academic year comes and my own first lesson, too and what is it that I do? That’s right, I start from scratch and do something else entirely. Because I had an idea, because I found a cool resource and because I really wanted to do it. But it was a good lesson so I am more than happy to share it here!

The language

This was the first lesson of the year and for a variety of reasons, I got both age groups in one lesson, my second graders and the pre-schoolers and year 1 kids, too, all together now, 15 children, 30 hands. Some of them I know very well, some are new to the school and they are of different ages and, naturally, of different level of language skills. Instead of trying to adjust it to any specific level or age, I just went for ‘let’s do what I want and see what happens’.

For that reason, I did not aim for practising any specific language point, not this time anyway.

The artists

The aim of this lesson was to introduce the students to the world of art and to try to understand and to brainstrom ideas of what it is to be an artist. I based this part of the lesson on the powerpoint which you can find here.

  • we looked at what different artists do
  • we tried to define what makes someone an artists, including my ideas and my students’ ideas
  • we looked at what ‘I’ve got an idea’ was for five of the artists: Picasso, Acrimboldo, Malevich, Vlaminck and Klein in the format of ‘everyone says…’ and ‘the artist says…’
  • I also found a funny cartoon based on Marta Alves storybook but we didn’t have to watch it. We will definitely use it in the following week.

The art

The creative activity in this week was based on a very special notebook that I found in my local stationery shop: a sticker paper notebook. I saw it, fell in love with it and decided to use it.

  • I prepared my own stickers berfore the lesson to show the students the finished product
  • I also made one more, simple sticker during the lesson, to walk them through the process: make a decision about the design, draw with a pencil, trace and colour with the markers and cut out, peel it of and stick (this part was optional and the idea was that the kids might also choose to take their stickers home)
  • We brainstormed a few ideas for stickers. ‘You can make what you like. What do you like?’
  • We got down to work.

It went well and, indeed, there was a huge variety of ideas and the kids understood the assignment, they went for expressing themselves. Among the designs there were: stick people, cards, animals, hearts, stars, a rainbow, a sticker bracelet and a beautiful character from one of the favourite cartoons.

Regardless of how big or how intricate the drawings were, they all worked as they can be cut out in many different ways. Even if the picture itself is very small, the sticker can have a form of a square which is easy to handle.

This kind of a task is also perfect for mixed ability groups in terms of motor skills. Some of the students managed to make one sticker, some went on and created more stickers. It also happened that one or two students were picked up by their parents half-way through the lesson and it did not get in the way of the creative process. They simply picked up their sheets and took them home to finish work.

I am really happy with how it all went. The kids liked working on the stickers, as they were both easy and exciting to make. A perfect choice for a new group, too!

Dilemmas of an Art teacher. Choosing the task

I was typing of my latest posts, devoted to Katsushika Hokusai and it must have been a real inspiration blast, not only for my kids and not only for me as a teacher but also as a trainer or a blog author because it was exactly when I got an idea for this particular post.

I thought it might be a good idea to share how I make decisions about the artist, the materials, the language and the resources, with the hope that it might be useful for those of my readers and colleagues who are only taking their first steps in the area of Art (or teaching English through Art). This way this particular post will be a kind of a directory for anyone who might need one.

First of all, here are the starter kit posts that I have already posted here:

Starting with a new group

What you need is a simple task with very basic resources and, if possible, a tiny wow effect.Here are the topics that I like to use:

  • Claude Monet and the lillies garden, because of the little magic that the painting with watercolours over crayons without destroying the drawing does. Funnily enough, this lesson has never been described and added here, on the blog, although this is my first favourite lesson. For now you can read about it here but I promise to add it as soon as September comes and we do it again.
  • Hokusai and the wave, because the students draw something easy (a wave) three times and three different but simple techniques are used, too
  • Upgraded Picasso (if the template is used, in the offline classes) and it salty water with watercolour does its magic, too
  • Andy Warhol and Mickey Mouse or learning about the associations we have with different colours and emotions. It is based on a template and basically involves colouring but that is why it is an achievable task for everyone, the younger and the older students.
  • Joan Miro and the elephant collage (with a template) because it is a great opportunity to connect literature (Elmer! by David McKee) and the technique itself is very easy and achievable both for younger and older children

Step by step aka learning to listen

Getting the group to listen and to follow the teacher’s instructions, staying on the ball, pausing when necessary, waiting and managing your time, skills and materials is absolutely crucial for Art classes (although not only) and, of course, with a new group, this is also something that cannot be taken for granted and something that will have to be introduced, practised and worked on. Here are some activities that might be helpful with a new group:

  • Turner and the sky, the sea and the sun: this lesson has three main stages: talking about the paintings, mixing the colours to obtain 10 shades of blue and, finally, painting a landscape and because all three are relatively easy and achievable and require different types of materials, the teacher can give them out step-by-step and this way control the flow of the lesson.
  • Bubble painting because the art is abstract and everyone can accomplish it and it definitely has the wow factor and we had a very specific list of step-by-step instructions for us and it was a perfect example for the process painting.
  • Hokusai and the waves, mentioned above is also an activity that helps the children focus on the particular stages of the lesson
  • Salt dough because it is one more activity with obvious and easy to manage stages: looking at examples, creating, painting, decorating and cleaning up.
  • A heart and one hundred different watercolour techniques is easy and manageable because the number of the techniques can be adapted to the age of the students and the length of the lesson. The whole lesson is built around the teacher demonstrating a technique and the children trying it out themselves.

Bringing up little artists

Teaching Art is also about showing children the new opportunities and the new ways of doing things. Here are five beginner lessons that would help achieve that:

  • Salt dough is easy to make and easy to work with and it opens up the door to a brand new world of 3-D creations.
  • Tiny pictures was one of the real eye-openers of the previous academic year, for me and for the children.
  • White on black is another easy flip and doing something different. The resources might not be those that are always lying around (black paper and white marker) but they are not very hard to find.
  • Yayoi Kusama and the pumpkin because even though the first pumpkin is created exactly like the teacher’s, anything can be sitting inside and after the initial T-focused part, the kids can go on recreating the pumpkin and filling it with whatever they want. ‘You are the artist. You make a decision!’
  • Eric Bulatov and a word that is also a picture, one of my favourite lessons in the previous academic year and the one that I taught to a beginner artists group and that was effective aka it is appropriate.

Romero Britto and very happy animals. Teaching English through Art

The language

This was a part of a wonderful Brazil Day in our summer camp. We started the day with learning how to say hello in Portuguese and looking for Brazil on the map. Afterwards, we looked all the things Brazilian and we expressed our opinion using ‘I like’, ‘I don’t like’, ‘I love’ and ‘I don’t know’. I wanted the beginners to focus on the basic structure but I also have some more advanced kids and I encouraged them to also say why or why not. We used the the wordwall cards, we played pelmanism and a miming game. I found the video about the country, too, but we didn’t even have time for that as we still had to complete our passport page.

The artist

There is a special place in my heart for Romero Britto and his animals and he was a perfect match for this lesson. We talked about colours and which ones are happy or sad for us and then I introduced the artist and his works. I prepared a presentation in which parts of the animals were hidden and the kids had to guess their names.

We talked about the colours that the real animals have and the colours that Romero Britto used. Initially, I was considering extending the ‘analysis’ to shapes, too, but eventually, I decided to keep it simple and focus on the colour only.

The art

The task was essentially very simple: a colouring picture of one of the Romero Britto animals and working on including happy colours. I showed them a selection of animals (they are available on different sites) and everyone chose one and we printed those.

I decided to use watercolours because they are easy to mix and they dry relatively easy and we could add my secret ingredients: the glitter markers. The kids found some old ones in my box and they got wildly excited about them and that is why I decided to use them properly in class. I am not a huge glitter fan (reads as: I avoid it like the plague) but the marker version, mixed with paints is a bit more manageable and it does not spill as easily, unlike the powder.

We started to paint with the watercolours and as soon as we finished, the kids could pick up the glitter glue. I suggested using it as yet another paint as even a small amount can be spread over an already painted surface (even if it is not entirely dry) and it adds the glow and makes the picture even more beautiful and joyful. We had three different types of those glitter glue markers with different type of a sparkle, everyone got their two in the beginning and then they exchanged and shared.

Some kids worked a bit more slowly and completed only one picture, some others, the older ones, went on a bit faster and managed to finish two or even three of them. And they sparkled so beautifully in the sun!

For some time I thought that perhaps that kind of an activity will be too easy and too boring for the children but there were two elements that helped to prevent it. On the one hand, the complexity of the original picture and all the little shapes and patterns made the kids work in concentration and focused, they really wanted to do a good job. On the other hand, the glitter definitelly did add to the WOW factor.

The sun, the sea, the sky. J.M.W. Turner with kids

J.M.W. Turner is, hands down, one of my favourite painters and, definitely, one of the first ones that I fell in love with and it has taken way too long for me to introduce him to my students. But, finally, this day came. We are now in our summer camp ‘Travelling around the world’ session and we planned an England Day, there could be no other painter to bring to class. ‘It had to be you’, Turner, sir.

The language

On the day, we had to lessons which we could devote to England. The first one was a vocabulary lesson in which we learnt about the different things we can see and do in England, food, sports, symbols and sights. We also talked about the things we like and don’t like and we played a pelmanism game. We filled in another page in our ‘passport’ (every day we do one) we watched a short video about the top attractions in London to compare it with our city.

The artist

Introducing J.M.W. Turner was easy as we could compare him with Claude Monet and it went along the lines of ‘Claude Monet had a garden and there he went to paint and Turner lived in Margate, by the sea, so he went to the beach to paint the sea’. That is, of course, a huge simplification but it worked for my 6-8-year-old audience.

We looked at a few of paintings and talked about the colours and the sea (‘Is it day or night?’, ‘Is the sea calm / quiet or angry?’, ‘What colours can you see?’).

The art

This was the first lesson in which we had two separate creative exercises.

The first one focused on mixing the colours as I wanted the children to experiment with the paints we had in order to achieve a wide variety of blues which, later, would be used to paint the main picture. Everyone got a narrow strip of watercolour paper attached to the table, a box of watercolours, water, and a paintbrush. And the task: mix the colours in any way they want in ten different ways. I asked them to try out the paints on the paper.

Before we started, I showed them what I did for homework, namely about 20 different shades in my sketchbook. While I was monitoring and watching the kids, I realised that it was a great idea and that this could be a separate lesson. I just need to stage it in a slightly different way.

Turner in three short words

When everyone completed the task, ten different shades of blue, we got down to a real Turner. I drew a simple plan of what a Turner painting is (with all the love there is in the world): the sun, the sea, the sky and I asked the children to decide if it is a day or night, if the sea is quiet or angry, what colours they want to use and whether there is going to be a boat or not at all…

And we got down to work.

In methodology you call it ‘teacher monitoring the work of the students‘ and I do a lot of that but the truth is that I adore watching my kids work, take time to think, handle the materials, make decisions and focus on the beauty that they are creating. I cannot post the photos which feature my students, we take them only for the parents, but they are all so involved, so in the process, so concentrated, each in their own way.

What I noticed:

  • the 10 shades of blue was a great idea and it helped them see how many options there are and I could that they were using it later. One of our youngest ones also applied the same technique in the following day, with another teacher. He really learnt something!
  • everyone interpreted the topic in their own invidividual way
  • one of our oldest students was a beginner painter and looking at the way he held and moved the brush, I could tell that there hadn’t been much of painting in his life until our lesson. For him, this kind of an easy task was a good introduction into the world of Art and by the end of the lesson he seemed a bit more relaxed and confident.
  • the simple Turner was introduced to help the kids see the pattern in his paintings and to include all three elements.
  • it was an achievable task for the youngest (5 y.o.) and the oldest of my students (9 y.o.)

We don’t need no…enthusiastic teachers. The dangers of enthusiasm

Do I hear gasps of horror in the audience? Good. That is how I reacted when I said these words out loud, in a conversation with a teacher friend, retelling her some of the ‘recent events’…

Bear with me, dear reader and let’s see if you still gasp at the end of this post. Or maybe I will get you to at least look at the world through my eyes and give me a tiny little nod of agreement…

The ideal teacher?

Enthusiastic‘ is this one term that frequently appears on the list of words to describe an ideal teacher. Qin Zhang goes as far as saying that it is ‘generally recognised as one of the most essential and desirable qualities and characteristics of effective teachers‘ as one almost synonymous with energy or passion. What’s more, it is often presented as key to students’ motivation and engagement and, if you look long enough, you can even find advice how to be enthusiastic about what you teach (and in case you need it – use your voice and gestures, never admit that you don’t like your subject or topic or that it is not important). Enthusiasm then – a key factor in teaching.

Or is it?

Reading all these articles made me want to jump up and shout ‘Objection, Your Honour!’

My definition of a teacher, and especially a YL teacher, is slightly different and, surprise surprise, enthusiasm does not feature there as one of the necessary qualities. I put this list together based on years of mentoring and training of teachers who were either novices in general or novice teachers in the early years ESL/ EFL world. I based it on my own experience, the things that worked and the things that didn’t. I read about it, too, of course.

On my list, I have resilience and stamina and a variety of skills, I have resourcefulness and patience, I have creativity, energy and calmness and all three elements mentioned by my gurus such as Sandie Mourao (2018): the level of language, the knowledge of child development and of the appropriate methodology. A YL teacher is also someone who can teacher up or teacher down. But ‘enthusiastic’, well, somehow I didn’t think of including it. Truth be told, only recently did I begin to understand why.

Case studies

To illustrate that, I will use three case studies, from my professional life as a teacher, a trainer, an educational manager in all the contexts, countries and schools where I have worked and, at the same time, in none of them. The stories may have happened but in the way you think, not in the place you can guess and not with the people you know. No identification with actual persons or places is intended or should be inferred.

Case study 1: A senior teacher is asked to prepare a programme for the summer camp session. This senior teacher does not really have a lot of experience in the area and with this age group and, somehow, they do not bother to ask for advice, recommendations or support from more experienced colleagues. They just put it together, as best as they can because they really, really want to and they believe that something’s gotta give.

The programme has more holes than a slab of some Swiss cheese. There are no real ideas, no lesson plans, no support for the teacher or any attention or knowledge of any methodological principles. The only thing that there is – the enthusiasm and the Wow Factor . The camp lags from one day to the other, the teachers are confused and lost and just doing their best. But, because they are dedicated and passionate, they pull it through.

Execution mode: atrocious and unecessarily exhausting.

Aims: met as in: the world did not fall apart.

Case study 2: A teacher orgnises an excursion for her students, to the cafe, to celebrate. It is not a big group of students, there are four adults accompanying the kids, the paperwork is ready. However, the teacher doe not bother to check and to plan the route, there and back, because they are in the city city, not far from the school and the place is reacheable on foot. On the way there and on the way back, the group wanders around, they have to stop a few time to check the google maps, everything takes forever and on the way back, they take yet another shortcut and, to add insult to injury, they are caught in a blizzard.

Execution mode: messy and unnecessarily exhausting.

Aims: met (meaning: the world did not fall apart and there were a lot of lovely photographs)

Case study 3: An adult student stays after a lesson to talk about a relative who would like to work as a teacher. The contacts are exchanged and the potential applicant is advised to get in touch with the recruitment department of the school. She does and only later doe it become obvious that the enthusiastic would-be teacher has not graduated from the university yet, her studies are not even remotely related to education, she has never every taught in any capacity and does not even have any official confirmation of her language level. For all these reasons, naturally, the school does not hire her. However, she is advised to take a language test and consider starting the basic teaching qualification course. The potential applicant does not reply to these in any way and, her relative, the adult student who comes to the following lesson iss obviously disappointed and she tries to plead, with her teacher. ‘But she is so eager to start teaching. She really, really wants to be a teacher of English. It would be a dream come true...’

Execution mode: a great range of mixed feelings.

Aims: not met. I hope this person found her path.

Put the enthusiasm on the back burner!

It is easy to image that all of the directors, all of the managers, all of the parents and all of the trainers would love to see their teachers full of energy, stars in their eyes, joy in their gait, impatient to start doing their favourite thing, teaching! To impart knowledge, to help the kids learn, to help their students grow! That’s absolutely important and I hope that all my teachers, readers, colleagues have a chance to experience it on daily basis, this passion for what you do. I, personally, cannot imagine a life in which you to work without a tiny spark of happiness, just to do something in exchange for the salary. There are lots and lots of things that I do, solely out of pure enthusiasm and there are lots and lots of things that my colleagues and teacher friends do, on daily basis, that are not reimbursed financially.
But.

Enthusiasm cannot be the only resource available to a teacher. If it is and if it is there to cover up and to make up for all the other adjectives (such as organised, supportive, qualified, skilled, realistic, methodologically sane, planned, reasonable and professional), then I would like to make an objection and a strong one, too!

If we were talking about a different profession, nobody would even consider hiring a person to do the job of a doctor, a driver or a hair-dresser if the only thing they had to show for themselves was their enthusiasm or serving a disgusting cake on a pretty plate and claiming a Michelin star or two. It would not be a good idea to organise a festival without checking all of the bits, pieces and options and going for it just because we really, really want to have it.

No because it does not work like that in other areas and we should not have to deal with that in teaching, either.

Personally, I find it very, very tiring, as a teacher, as a trainer and as an educational manager. Mostly, because, in most cases, it translates into mess, confusion, teaching and learning below standard and last minute preparations and fixing problems as we (happily) go along. Perhaps, on my part, it is some kind of professional OCD but I like things to be in order.

This is not a post against enthusiasm and pession. Let’s not take it off the list, let’s just put it on the back burner, please.

References

Instructor’s Corner #3: Teaching with Enthusiasm: Engaging Students, Sparking Curiosity, and Jumpstarting Motivation | National Communication Association (natcom.org)

An enthusiastic teacher of English – How I see it now (wordpress.com)

Being an Enthusiastic Teacher – Swansea Academy of Learning and Teaching

What makes teachers enthusiastic: The interplay of positive affect, self-efficacy and job satisfaction – ScienceDirect

Sandie Mourao (2018), Research into the teaching of English as a foreign language in early childhood education and care, In: S.Garton, F.Copeland, The Routledge Handbook of Teaching English to Young Learners, Routledge, p. 429.

Crumbs #81 Making sandwiches aka a different type of Food Art

Ingredients

  • anything that you want to use to make sandwiches, we used: toast bread, blueberries, cucumbers, carrots, cherry tomatoes, cheese slices
  • a few pictures to get the inspiration from, for yourself and for your students. There are lots of websites with creative sandwiches for kids but I wanted something simple that we could all make and that is why I just looked for illustrations on google. If you are looking for something more intricate, you can have a look here and here.
  • two plates for each child and a small plastic knife
  • we made the sandwiches in our lunch room

Procedures

  • We started with the picture that I created during our previous lesson, my own vegetable print and I asked the kids to guess which vegetables I used in another lesson on the same day (here) and we connected them to the flashcards of vegetables we had on the board. Before the lesson I also put up more flashcards, of all the other items to be used in our sandwiches, and we spend some time working on those, drilling and playing a game.
  • Important: before the lesson, I sent the list of ingredients to my administrators to ask them to buy everything we needed and to inquire with the parents if everything was ok and to check against the allergies that our students might have.
  • I told the kids that we would be making sandwiches and I showed them a few different patterns but I also stressed that everyone would be making their own monsters.
  • We relocated to the lunchroom, washed hands and sat down. The vegetables had already been washed and cut up: cucumbers into julienne and slices, carrots into julienne and slices, cheese into slices. Cherry tomatoes and berries were only washed and dried.
  • I was making my own sandwich, modelling what can be done and my T.A. was bringing plates with more and more veggies. I did my best to encourage the kids to ask for certain vegetables and we did it))
  • At the end, we went through all of the veggies to check that everyone used everything. (“Have you got any carrots?’)
  • Then, we went on to eat!

Why we like it

  • It was the most ideal follow-up of our lesson 1 (vocabulary) and lesson 2 (making print art with vegetables) and, finally, we could eat in class.
  • It was a great way of practising our target vocabulary, practical, hands-on, productive because we really, really used the language.
  • Apart from what I planned for this lesson, namely using the functional language in the context (‘Bread, please’), we also started to sing a new version of the Broccoli Ice-cream, using the combination of the things on the table and then tasting to check what we really think. And, guess what, it turns out that carrot cheese, blueberries cheese and blueberry carrot are all yummy!
  • The kids worked very well together, they reacted well to changing the set-up and the type of an activity. Nobody got overwhelmed or overexcited, they were patient and waited for their turn and they used the langauge. I was really proud of them.
  • Last but not least, we made sandwiches (some kids more than 1) and we ate A LOT of vegetables. I was worried for a while that dry bread might not be the most popular item but I did not want to include any spreads of any kind and it turned out not to be necessary. Actually, during the previous stages of the lesson, I asked whether the kids liked all of the items we had ready and I was lucky – everyone liked everything! But, even if not, they were not required to use or to eat all of the ingredients.
  • As for the creative element, I was laughing a lot during this lesson because my students and their monsters were just amazing and very creative. I showed just a model but I didn’t want them to follow directly in my footsteps. We all looked at our plates and everyone, clearly, had their own idea of what the monster should look like.