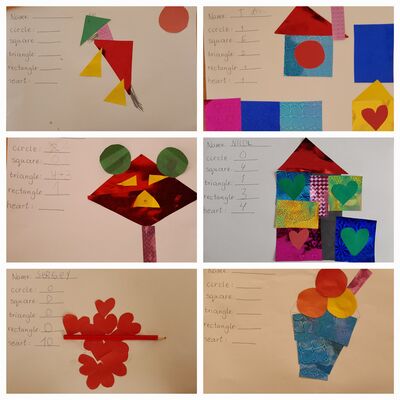
Ingredients
- A set of shapes of your choice, cut out of paper before the lesson
- An A4 piece of paper with the list of figures that will be included in the activity.
- A glue stick for every child, a pencil to take notes
Procedures
- Naturally, this project involved some pre-lesson preparation: the handout, the glue and, most of all, all the shapes which needed to be cut up and sorted out. I used 5 separate boxes to make sure that they don’t mixed and are easy to select and to abandon.
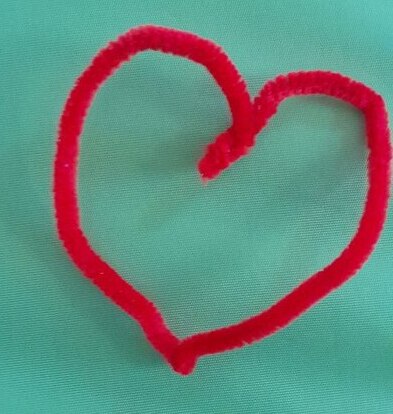
- We had two lessons devoted to shapes and so we could do all of the following as a preparation for the project: introducing the shapes, looking for the shapes in the classroom, song Can you see a circle? from Super Simple Songs, looking at Shapes Monsters from Twinkl, to recognise and to count them, making shapes from pipe cleaners (the example of which you can see above), working on the sequence (‘circle, square, circle, square’) and, as a direct example for our creativity, looking at some transport made of shapes (also found on Twinkl).
- The next step was a set of instructions. At the moment I work with a teacher assistant and I saw it as an opportunity to use this resource in setting up the project. I prepared my instructions to use the simplest language possible but I still asked my TA to translate sentence by sentence. The main elements were these: We are doing a project. We have five shapes (displayed on the board). You can make something for yourself. Maybe a flower, maybe a car, maybe a monster (referring to everything that we saw in class). All ideas are good ideas. You can use 10 shapes (gesture). Please sit down and think. I will call one student to come here and choose shapes. Sasha, come here, choose 10 shapes. etc.
- Afterwards, with Sasha choosing her shapes, two students helped with giving out the handouts and the glue.
- Everyone kept working on their shapes, I was walking among them, helping and monitoring and as soon as they were finishing, I would come up and ask them to count all the shapes they have used.
- In the end, the kids were showing their projects to each other but it was not a formal stage of the lesson. Ideally, we should have finished with everyone showing their work and presenting ti with a simple ‘I’ve got…’ but, unfortunately, in our case, we ran out of time.
Why we like it
- In general, it is a simple project with a lot of potential and it can be used in a variety of lessons.
- In a Maths lesson, like ours, it is a an opportunity to see the practical use of shapes and to balance the serious studying with a more creative task. It also involves shapes recognition and counting. It was also an interesting follow-up and development on the previous lessons in yet another way: we looked at shapes, we counted shapes in shapes pictures, we looked for shapes in the classroom and we made shapes out of pipe cleaners. These last two activities were especially exciting for the kids and that was my cue for a more hands-on activities.
- In an English lesson on shapes, this activity could also work very well, especially that there is the early literacy activity which, potentially, can be extended. The kids can be asked to copy the words from the board and, in this case, the ‘handout’ will not be necessary. The kids can also be asked to write the name of the picture they created, especially if they work within a vocabulary framework, for example toys, pets, animals or transport, although, admittedly, this would put a kind of a harness on the creative thinking here.
- In an Art lesson, this activity can be connected with any artist who liked shapes for example Kandinsky, Malevich, Mondrian, El Lissitzky or even Picasso. Apart from the main art project, there would also be an input session devoted to the Artist of the Day. If you are looking for ideas, please have a look here, at Teaching English Through Art.
- As a first project, this lesson was a wonder (and please forgive me blowing my own trumpet here!). The kids got the idea and they really took to it. Everyone interpreted the task in their own way and created some lovely pictures, some of which are an inspiration for me as a teacher, for example to draw the shape first and use the shapes to create a proper collage or to make a list of all the shapes necessary beforehand, in order to facilitate and to promite the Thinking Time stage of the project. Please make sure you have a look at the examples below.
- The kids got involved in the project, even though there were a few who were slightly reluctant in the beginning. However, as soon as it became obvious that, really, all ideas are good ideas, they started to work on their projects.
- The next time I do this project, I will make sure I prepare my own model. I was planning to do it but then the teaching day started and I simply forgot. It would have helped with the instructions and the whole project, including the counting of the numbers and the final presentation.
- As regards the choice of the resources, it seems that it was also a good idea to go for a more exciting type of craft paper, as regards the gloss, the texture, the print or a mixture of these. It really adds up to the success of the project. It might be also a good idea to consider an A3 paper for the base, the A4 might be a bit limiting, although A3 is definitely a more tricky size to carry around, to take home or, even, to put up on the wall.
- It really was a way for all the kids to exercise their creativity and I am very proud of my students. Some of the creations are simply brilliant and they helped me learn something new about my students. It is also a signal for me to use more of these activities.
Some noteworthy examples of creativity from my kids
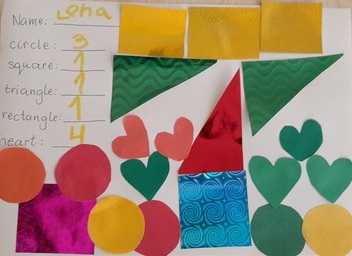
This is Lena who was the student to plan her project properly, out of her own accord. She prepared a list of ingredients necessary and, as you can see it does not quite match the number of the shapes used. We fixed it later, after the photo was taken, by writing: circles: 3 + 3 etc.
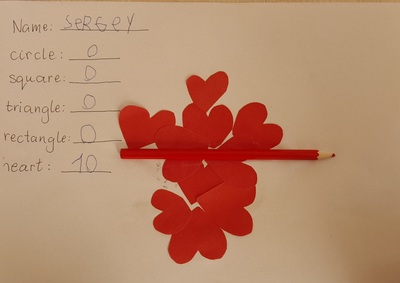
This is Sergey who decided to take a completely different route and to create a proper work of art, made of hearts only and with a red pencil which is also glued to the paper.
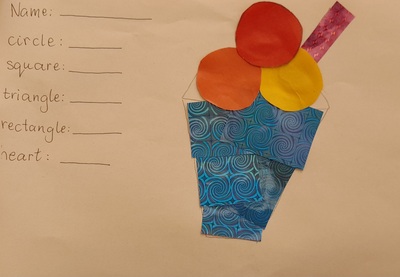
This is Sasha, who was initially very uninspired by the task as he prefers listening. However, after a while, he figured out how to combine the two. He drew an ice-cream cone and then, once it was ready, he came to choose his shapes. This is a lovely approach and I will definitely be using it in the future!
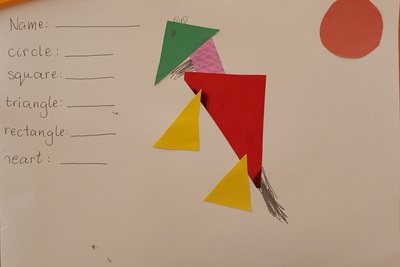
This is a beautiful example of how creative kids can get. Sasha, whose most favourite thing in the world are horses, found a way of creating a horse with the shapes we had. It shows a high level of development of symbolic representation as well as creativity. We see a horse in it hence it is a horse.
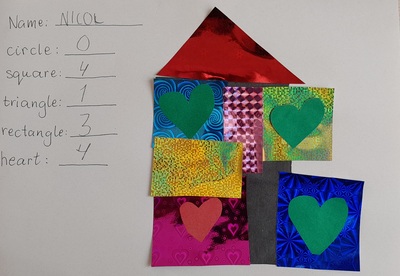
This is a picture by Nicol, quite simple one, just a house, we might say, but it is just wonderful because of the paper used and because of the consistent use of hears as windows.
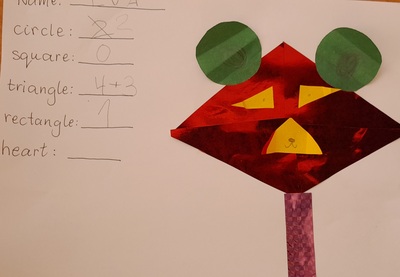
And another wonderful picture, a bear, in which Sasha, decided to use a variety of techniques, including drawing and elements of origami to create a 3D eyes and muzzle for the bear.
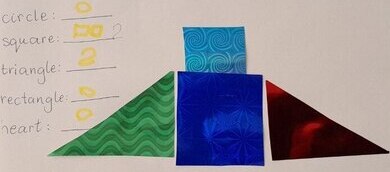
This example comes from Sasha, who decided to go for a seemingly simple design of a structure, made of only four shapes. However, it was nothing but simple! The big blue square is in fact glued expertly along three edges to create a pocket into which the small blue rectangle could be put in and taken out. Sasha was extremely proud of his example and I was proud of him.
Happy teaching!