DIY Rulez! Listening homework tasks.

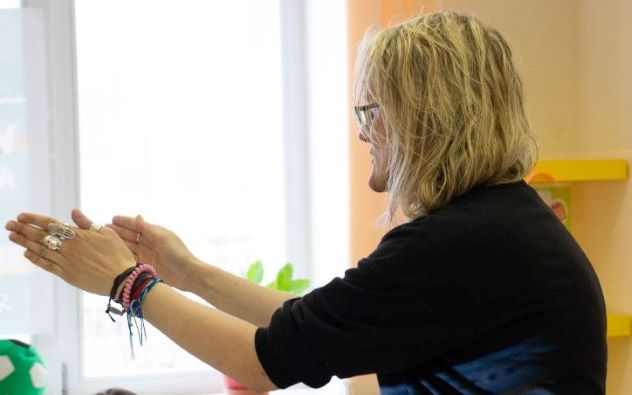
DIY is the answer, in most cases. Especially in the VYL world.

All those missing, lost or non-existent flashcards, magic wands, puppets, handouts, balls, hats, masks, storybooks that we just nevermind-gonna-make-my-own-then (it really should be a verb).

DIY was the answer, an obvious answer and, yet, an answer that, on this particular occasion, took quite ages to land on the table and to become obvious.

The equation? A group of very young learners, studying online, helpful parents (but no printers at home so no customized handouts), a coursebook (but with tasks that I could make work only in the classroom), no ready-made material (and two steps away from regretting the decision to use the book altogether).

The first fifteen minutes went by peacefully, filled with sighing and staring blankly at the page in the coursebook. The next fifteen minutes were similar, only the sighs became more desperate and angrier.

Not happy at all. Until…Nevermind, gonna make my own then.

This time: Listening homework tasks! It’s been only a month but I am absolutely loving it!

How to?

  • Minimal requirements, your phone recording app will do.
  • Usually two takes are enough to record (although, suspiciously enough, as soon as I start, there is always a police car or a fire engine whee-yoo-ing just outside my window)
  • After a first few exercises, I started to type up ‘the script’ and it made everything much smoother.

Why?

  • An opportunity to take English out of the classroom and a recording that the kids can listen to as many times as they want to
  • Extended exposure to English, especially in the area of the functional language that the teacher can create, shape and enlarge as the course progresses
  • A great support for the parents, to help them work at home with the child and to structure it properly
  • Any picture, any illustration or any photograph in the coursebook (or online) can be used as the basis for it.
  • Widens the range of homework activities (see the ideas below)
  • Amazingly, it is also a great tool to practise scaffolding for teachers because you have to dissect an activity and verbalize all the procedures in simple English and only then you start think of all the micro-stages and you can hear what your students might hear.

Some of the activities we have done so far

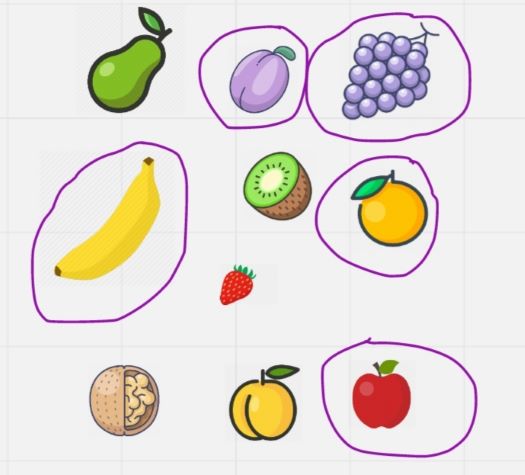
  • Identifying pictures (pre-primary): It is a simple riddles game, based on an illustration with the key vocabulary. Most coursebooks for pre-primary include a page which introduces all the new words. In the example that I am sharing with you, I also managed to incorporate a verse from song ‘Are you hungry?’ by Super Simple Songs.
  • https://www.youtube.com/watch?v=onlENphATDQ

  • Dictation (pre-primary) It is better to use a black and white picture, perhaps from the workbook
  • Any illustration can be used for this kind of an activity. A chapter usually starts with an illustration of all the key woIt’s a teddy. Brown (children circle the bear brown)
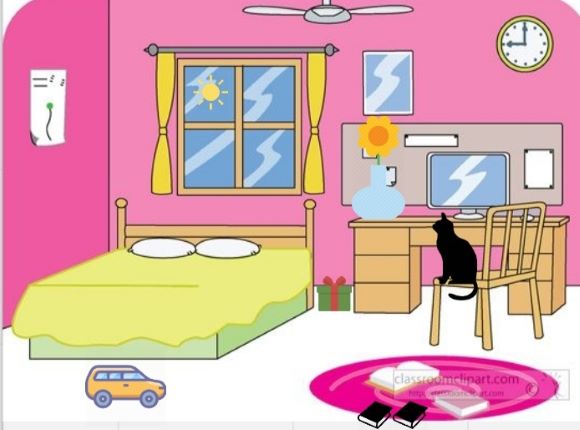
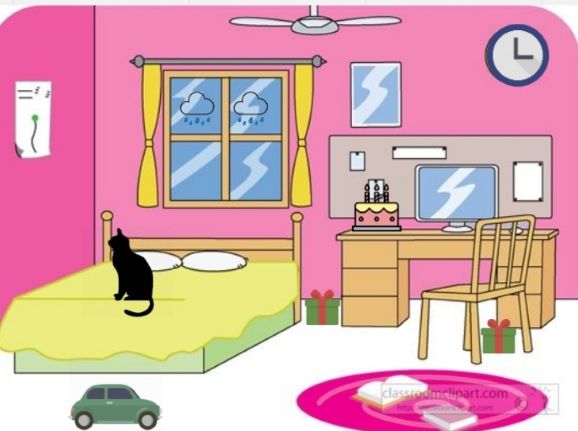
  • Identifying differences (primary). Additional listening and speaking practice in the format inspired by the YLE. You can use set of pictures from Movers or Flyers, a set of illustrations for Movers or Flyers story or your own set prepared using the miro board (my example uses a picture from classroomclipart.com and the miro icons). Students listen and describe how their picture is different. The same activity can be prepared using only one picture. In that case, the students are listen to the sentences about the picture and correct the mistakes, for example: In my picture, the white cat is sitting on the chair.https://www.youtube.com/watch?v=wTBhq4TkE_M

  • Find a mistake (primary). The audio is a follow-up to the story / text done in class, record a summary of the story with some mistakes (and with pauses between sentences). Children listen and correct the mistakes. This is also an opportunity to expose them to a lot of past tense.The following task was prepared to follow-up a cartoon lesson from Superminds 1 by Cambridge University Press. https://www.youtube.com/watch?v=DbwiidV_i7Y

  • Ask your mum! (pre-primary) Here, the audio is only used to set up a conversation between the child and the mum. A set of pictures (for example a picture dictionary at the back of the book) can be used as the worksheet for the kids to mark the answers they get from the parents, for example: ask ‘Mummy, do you like carrot?’ (and circle / cross the fruit that mum likes and doesn’t like, these symbols have been used in class before, the kids are familiar with them). https://www.youtube.com/watch?v=onlENphATDQ

Happy teaching!

How to see a city. From the series: Teaching English through Art

source: www.izi.travel

A while ago, I was teaching my first teens group in Moscow, an amazing bunch of students that I had a privilege to take from A2 to FCE and that I referred to as ‘my monsters’, though never to their face. And this is how this project came to be.

It could be called an attempt at a CLIL lesson. It could be said that the not-yet-dead-historian in me was behind that project but the truth is that, at the time, I was simply bored out of my wits the coursebook we were ploughing through and I wanted something else.

And, inspired by Kenneth McHoan, a character from the Crow Road by Ian Banks and one of his lines (‘He is my son. I’ll fill his head with anything I like’), I decided to teach Art.

The lesson that I am sharing today is the first in the series of ten lessons ‘How to see…’ that I taught as part of our general English course. The group that I trialled it with were B2 young teens but, since then I had a chance to teach it both to adults and pre-teens, C1 and end of A2 levels.

Why we liked it:

  • I had lots of fun, accompanied in the classroom by my favourite artists.
  • I did enjoy the change, in the curriculum and the pace, and it did feel great to be teaching a subject, in English, not just the language.
  • The students did enjoy it, too, being given a chance to have an opinion and to express it, freely and the fact that one painting could generate so many different views. 
  • Last but not least: although it did not happen overnight, I did realise that when my students were given a chance to talk about Art, all of a sudden, they were using the vocabulary from a higher shelf and really working hard on communicating what they thought in a beautiful way.

Lesson 1: How to see a city

Language focus

Aim: to introduce the language and the approach the students will need to be able to deal with the task. Normally introduced in the lesson beforehand, to allow sufficient time for practice and to make sure the students feel relatively confident using in the Art lesson itself.

  • language to express opinion / to agree / to disagree
  1. expressing opinion: I think, In my opinion. The way I see it.
  2. agreeing: I think so. I agree. Exactly. That’s true.
  3. disagreeing: I don’t think so, I don’t agree. I am not sure.
  • Three sheep: the name I gave to a trick I learnt from Rafael, to teach your students how to construct their discourse, how to express and justify opinions, even for the lower level
  1. Sheep 1: the opinion itself (I think)
  2. Sheep 2: reasons etc (because, so, and, but)
  3. Sheep 3: an example from the real life

Setting the context

Aim: to help set the context for the Art lesson

  • T shows the students a few photographs from New York
  • Questions to discuss
  1. What can you see in these photographs? Do you know the city?
  2. What is New York famous for?
  3. Have you ever been there? Have you seen any films set in New York? Have you read any books set in New York?
  4. Is New York similar to or different from Moscow? Is it similar to or different from any other cities you know?
source: wikiart.org

Interacting with the artwork: stage A

Aim: to provide an opportunity for the students to interact with the painting in a freer way, to provide opportunities for speaking

  • T divides the students into two groups and assigns a painting, group A to work on Frida Kalho’s painting, group B to work on Georgia O’Keefee’s painting
  • Each group can be divided into pairs, depending on the group dynamics
  • The students are discussing their painting, answering the following questions:
  1. What can you see in the painting?
  2. Is it a happy / sad / angry / depressing / scary painting? Why?
  3. In your opinion, how did the artist feel about New York? Did they like the city they lived in? What makes you think that?
  4. Could this image be used in tourist brochures to promote the city? Would it make a good postcard or a souvenir?
  5. How does the painting make you feel? Would you like to have it on the wall in your room? Where could it hang, in an office, in a hospital, in a shop or in a museum?
source: museothyessen.org

Interacting with the artwork: stage B

Aim: to provide an opportunity for the students to interact with both paintings

  • T mixes the students so that students from group A can work with students from group B, in groups or new pairs
  • Students show each other their painting and report their personal and their group’s opinions
  • T gives out new questions for the students to discuss
  • Which of these two paintings do you like more? Why?
  • Both of these paintings show New York in a very different way. Why do you think these artists had such a different view of the same city?

Open class feedback

Aim: to report back to class, to compare views

  • T leads the open class discussion, all the groups present their views, focusing on the two different ways to portray the same city. The teacher reveals that both paintings were painted at approximate the same time (1933 and 1925)
  • Error correction

The mini-lecture

Aim: to present the background information to provide the background for both paintings

  • T gives a short lecture, adapting it to the level and the age of the students, highlighting the main points
  • Both painters were not New Yorkers by birth, they came to the city with their husbands, one from exotic Mexico, the other from a small town in the prairies in Wisconsin.
  • Frieda felt alienated in the city, she didn’t like it, she missed home, she stayed only to accompany her husband
  • Georgia lived with her husband, in Manhattan, on the 30th floor, in Hotel Shelton and painted and sketched what she saw from her window.
  • Perhaps these are the factors that influenced both artists.
  • Questions from students
  • Error correction

The follow-up

Aim: to give the students an opportunity to look at their own city and reflect on how their feelings might influence the way they see the city

Part A

  • T divides the students into new teams / groups of 3
  • Students discuss the following questions about Moscow / own city:
  1. Do you like Moscow? Is it a good city? Would you like to live here in the future?
  2. What are the main tourists’ attractions?
  3. What are your favourite places in the city?
  4. If you could change something in the city, what would it be?
  • Open class feedback

     Part B

  • T gives out different paintings / photographs of Moscow / own city
  • Students discuss the following questions
  1. Look at these three different ways of showing your city in a painting/photograph. Which one is the best? Why? Which one is your least favourite?
  2. If you painted a picture of the city or if you were to take a photo to represent it, what would you include?
  • Open class feedback
  • Error correction

The follow-up: homework

Aim: to present an alternative way of looking at a city: through its inhabitants

Option A: Based on the photographs by Stan Raucher who photographs people on the metro in different cities

  • T selects the photographs / a photograph, appropriate for the age/ level of the students, hands out
  • SS at home prepare to talk about the photograph
  1. Who are the people in the photograph?
  2. What are they doing?
  3. What are they wearing?
  4. How are they feeling?
  5. Where are they going?
  6. Which city are they from? Why do you think so?

Option B: Based on the stories from Humans of New York, a project that interviews the people in the streets of New York and retells their storiesT selects the story/stories, appropriates for the age/level of the students, grades the language, if necessary, hands out to students

SS at home read the story and prepare to talk about their character:

  1. What is the name of the person?
  2. Where is he/she from originally?
  3. What does he/she do?
  4. What do we know about this person?
  5. What makes this person special?
  6. Would you like to meet this person?

In the following lesson, students report back, in pairs/teams and they choose the most interesting story / person / photograph.

Resources:

Frida Kalho, My dress Hangs there, 1933

Image and the basic information about the painting:

https://www.fridakahlo.org/my-dress-hangs-there.jsp

For more information on Frida Kalho see:

https://en.wikipedia.org/wiki/Frida_Kahlo

https://www.wikiart.org/en/frida-kahlo/my-dress-hangs-there-1933

https://worldhistoryproject.org/1933/3/frida-kahlo-paints-my-dress-hangs-there

Georgia O’Keefee, New York Street with Moon, 1925

Image and the basic information about the painting

https://www.museothyssen.org/en/collection/artists/okeeffe-georgia/new-york-street-moon

https://www.wikiart.org/en/georgia-o-keeffe/new-york-with-moon

For more information on Georgia O’Keefee see:

https://en.wikipedia.org/wiki/Georgia_O%27Keeffe

https://www.artsy.net/artwork/georgia-okeeffe-new-york-street-with-moon

Yuri Pimenov, New Moscow, 1937

Image and the basic information about the painting

https://izi.travel/en/3185-yuriy-pimenov-new-moscow-1937-the-state-tretyakov-gallery/en

https://en.opisanie-kartin.com/description-of-the-painting-by-yuri-pimenov-new-moscow/

For more information about Pimenov https://soviet-art.ru/soviet-artist-yuri-pimenov/

Stan Raucher

https://www.dailymail.co.uk/news/article-3615702/Photographer-Stan-Raucher-captures-everyday-lives-ordinary-people-metro-systems-world.html

Stan Raucher’s photography https://stanraucher.com/metro

Humans of New York

https://www.humansofnewyork.com/

10 ways in which you can use gesture in your pre-primary classroom.

The Gesture is King!

How can you tell a VYL teacher?

It could be the Mary Poppins’ bag full of markers, stickers, a storybook and random treasures that they carry. It could be because you can catch them hum ‘Baby Shark’ or ‘Broccoli Ice-Cream’ while they think no one’s listening. It could be also that it is difficult to catch them in pretty tights and dresses because many an outfit was destroyed by clumsy little hands. By accident but irreversibly, too.

Look at the hands, too, a lot more expressive than those of an average teacher, hands that constantly gesture and motion, a habit that is difficult to drop even outside the classroom.

It is true that Total Physical Response stopped being the new black a few decades ago and nowadays referring to learning styles is looked down on or even mocked. Nonetheless, the gesture is one of the vital components of the pre-primary classroom, simply because it works and it helps the teacher and the students to communicate more effectively, especially if the students are 5-year-old beginners.

One: participation

Throughout their pre-primary adventure with English, the students will always be pre-A level but as the course progresses, their vocabulary range will grow. But in the first few weeks of the course those kids really are a clean slate. Thanks to gestures, however, they can participate and be involved in class activities.

They can for example wave ‘Hello’ and ‘Goodbye’ to the teacher or other children, silently, they can participate in ‘Head, shoulders, knees and toes’, touching or pointing at the correct body parts because they will be mimicking the teacher’s gestures and not because they know exactly which part of the body is the head and which ones are toes.

That is why including gestures will be important in the beginning of year although they can be used to the same effect at the start of each unit. Students, still not familiar with the new vocabulary, will react to it by miming ‘cat’, ‘dog’, ‘princess’, ‘sheriff’, ‘book’ etc. Before they are ready to produce the words orally.

Two: clarification

Little students cannot use a dictionary or translation into L1 because sometimes the teacher does not speak it. In that case, the teacher has limited resources to clarify the meaning of the new words. The visuals and the realia will help, of course, but adding gestures is definitely going to reinforce the meaning. Two hands together with palms touching and moving apart (a book), fingers of one hand scratching the air (a cat), the arm touching the nose and waving (an elephant and its trunk), a hand cupped around the nose (a clown), two hands touching above the head (a house) and so on…

Three: memorising

Almost automatically, adding these gestures will help to ensure that the kids will remember the words better. There is evidence that suggest that sign language and gestures in general active additional neurons and the information can be stored and retrieved more effectively.

Four: support for production

Once the gestures have been introduced and become a part of the classroom reality, they can be used by the teacher to support the language production by the students. While they are trying to answer a question or to make a sentence and if they experience any difficulty retrieving the word or the structure, instead of whispering the word or giving the L1 equivalent, the teacher can hint at the word by producing the familiar gesture, assisting the student but not actually saying the word.

Five: asking for clarification or support

Similarly, their use can also be extended to asking for clarification or support by the students themselves. Chances are that after the children have become familiar with the gestures used in class on daily basis, they will be using them actively, too.

This was one of the surprising discoveries I made during a classroom research for my MA degree. When a communication breakdown occurred, my five-year olds did resort to familiar gestures to ask for a word they wanted to use but forgot. They still remembered that the word ‘long’ was accompanied by two hands flying apart or that the word ‘sandwich’ was demonstrated by pressing two hands together, one on top of the other, even though the words themselves had not stuck in memory. The produced the gestures asking for my assistance and then, provided with the word, went on with the sentence.

Six: imagination, creativity and symbolic representation

The development of symbolic representation in pre-primary children is an important stage of their growth as human beings (Bruce 2004, p. 170) and introducing and using gestures is one of the ways in which a teacher of English can also contribute to it.

It is fascinating to observe how, at first, very young learners only imitate the teacher and reproduce the gestures exactly, as they are introduced and how, later, they move on to creating their own ways of representing certain words or phrases. And how the teacher can actually learn from the students here because their 5-year-old ways of miming a clock, a flower, a pumpkin or a melted ice-cream are much better and much more interesting!

Seven: instructions

This is, probably the most straightforward way, used from the very first minute of the course. The students, entering the classroom don’t know any English and can’t react to all the teacher’s instructions if they are not accompanied by some gestures: one or both hands being lowered for ‘sit down’, hands palms up being raised for ‘stand up’, waving the hand towards the chest for ‘come here’.

Eight: classroom management

Naturally, gestures can be used to praise the students or to show disapproval for any unwanted behaviour. Both thumbs up or a high five (or a double high five for really special occasions) show the teacher’s approval, both palms crossed at wrists might signal ‘stop’, the index finger put across the lips will work as ‘silence please’.

The gestures may vary, from class to class or even from culture to culture. What matters is that the teacher is consistent with the gestures they use with a specific group. Examples? For my youngest students the small waving hand (something similar to the way the Queen would wave hello) became a sign of warning, although I seriously doubt that anyone else would ever read it this way. For my group, however, it was closely related to our rewards chart, kids’ names on it and stars or smileys drawn next to them. Sometimes, during the lesson, I would indeed wave my hand slightly, to remind them that if they don’t stop misbehaving, I might erase one of their stars. And it worked, for us.

Nine: emotions

Knowing how your students are feeling is very important in general, but especially with the pre-primary children as their reactions and participation will be closely connected to whether they are happy, sad, angry or scared. The teacher should be able to read those emotions but children will also be taught to recognise and to express them, in English.

The first lessons will start from the the basic adjectives accompanied by gestures (a big smile and arms up in the air for ‘I’m happy’, a sad face and fingers drawing the tears rolling down the cheeks for ‘I’m sad’, a frown and stomping for ‘I’m angry’, eyes covered with both hands for ‘I’m scared’) but then more and more of them can be added. These emotions can help the teacher, too, for example to signal that they are happy with students’ achievements or sad when they are misbehaving…

Ten: bonding and creating a community in the classroom

Last but not least, everything that we do together in class, helps the children to bond and to create a community in the classroom, with its own rules and ‘traditions’. Not only songs or stories can be used that way but also all the miming games. They are easy, everyone can participate and they are a great stirrer, too.

After the teacher’s modelling and after everyone becomes familiar with the game, the kids, one at a time, are allowed to lead the game and to suggest what you all could mime. And this is when the real fun begins.

It doesn’t have to be very complicated, only the emotion adjectives and fruit, pets, school objects, anything you are studying at the moment. Have you ever tried to mime a cat? Probably yes. Have you ever tried to mime a happy cat, a sad cat, a sleepy cat? Yes? Then you should definitely try to mime an angry pencil then!

I wonder if I have managed to convince you, dear reader, that the gesture is the absolute king of the VYL world…

Happy teaching!

T.Bruce (2004), Using symblos,in: T. Bruce, Developing Learning in Early Childhood, London: Paul Chapman Publishing, pp 170 – 195