
The language and the artist…
…were completely given up on in this particular lesson. I was considering looking for someone who created something that we would be creating but I quickly realised that the process will be the more important part of the lesson and, again, because of the materials and of the many stages, we will need time. I just wanted to make things out of the salty dough.

The art
While I was preparing for the lesson, I considered different scenarios, also the one in which we make our little things and leave them to dry for a week and decorating them during the following lesson. There are microwaves at the school but I did not want to use them. I wanted to keep everything as simple as possible and after experimenting at home at the weekend and testing the drying and colouring and I had a solution. I also tried to paint my dough while still wet and that went well, too.
I made the dough at the school, just before the lesson. I didn’t have any bowls there but I used one of the big plastic boxes and even though though it did get stuck to the box and dried up a bit, I washed it easily after the lesson. There are many recipes out there but I used this one here.
I prepared the working stations for my kids (a double spread of the newspaper scotched to the table) and got changed into our aprons.
I showed the children the dough, I explained the ingredients I used and I repeated my basic health and safety drill that is the title of this post. I showed them the tools that we had at our disposal (cookie cutters of random shapes and two small bottles to be used as rolling pins) and paintbrushes that were to be used in lieu of the little knives to shape up our creations.
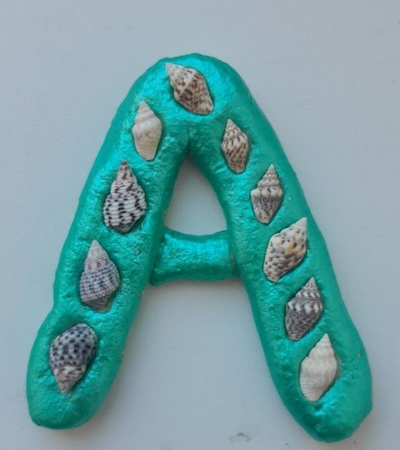
I also showed the children the photos of different things that I made at home while trialling and testing: a letter A, a snail made out of one piece of rolled string of dough, a flower made out of blobs etc. I wanted the kids to get at least a vague idea of the opportunities that the dough presented.
On the board I wrote out the main stages of the lesson and they went as follows: 1. Look (at the model), 2. Make, 3. Paint, 4. Transfer to the window sill, 5. Dry. I wanted to make sure we are all on the same page and that we all finish in time.
I told the kids that since we are experimenting with a brand new material and technique, everyone can make whatever they want. ‘Anything?’, they asked, incredulously. ‘Anything! Go on, experiment and have a go!’ And they did!
The outcomes
It is possible to go through the whole process in 45 minutes, from instructions, through creation to painting and cleaning. Some of the students did finish early but we made sure everyone waited for everyone else to finish before moving on to the following stage.
The paint was dry within minutes but the cookies (that’s what the kids started to call them) were still to fragile to be transported so they were left on the window sill until the following day, when we packed them into plastic zip lock bags.
Once the creations were ready, we transfered them onto A5 pieces of cardboard, for painting, drying and safe travelling later on.
For colouring we used acrylic paints, with a pearl shine and that made them look even prettier. I was really proud of all my students because we took all the necessary precautions and there were no splatters or spatters. Our clothes, tables and chairs were safe.
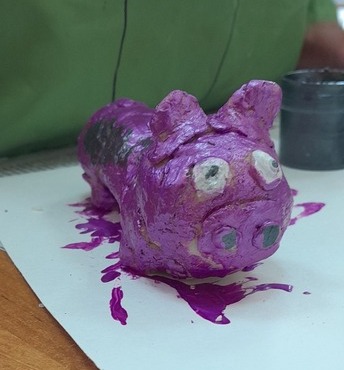
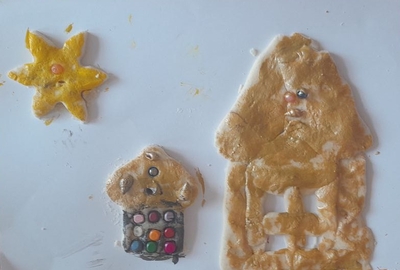
The kids’ creations simply blow my mind. As usual, my amazing artists looked, thought and then went on creating in their own style. Most of them are simple cookies, cut out with a cookie cutter and painted. Some are decorative pieces, like the three hearts made for mum. One of my students thought of making a necklace and she even made a whole for the ribbon. Some students decided to create 3-D figures of their favourite things, some of them very elaborate. And of course they snatched them even before I could take a photo…
Guess, we are definitely doing this again! I am not sure when but we definitely are! Maybe they will be Christmas decorations, maybe little pumpkins for Halloween, maybe Easter egs! The salty dough will be back!

Even more things that can be done with salt dough (updated 18 August 2024)
I happen to have a 1-1 lesson with one of my students and, knowing that he loves making and creating, I decided to spend this time with craft and salty dough. Somehow, this was a very creative lesson as we could make, try and experiment and the ideas were bouncing off, back and forth. We have tried:
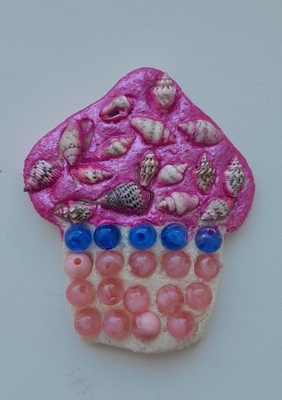
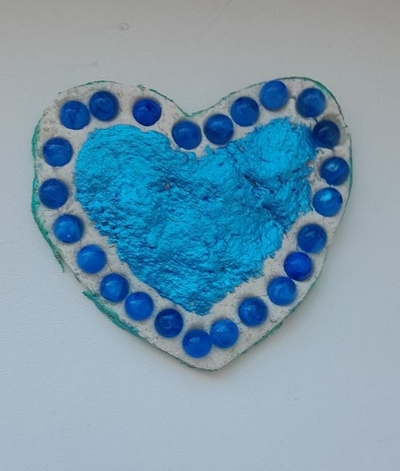
- using shells and beads as decoration
- applying beads onto an already painted surface (good idea!)
- applying beads and shells, then painting with acrylic paint and wiping the surface gently with a wet tissue (good idea!)
- constructing a piggy bank on a frame of a glass jar. Not sure what I can say about it, the shaping went well, but the piggy bank is still drying. The success of this one will be determined later)
Happy teaching!

P.S. A request!
It is very simple.
I would like to know a tiny little bit more about my readers. There are so many of you, popping in here, again and again, and the numbers of visitors and visits are going up and make my heart sweel with joy. But I realised I don’t know anything about my readers and I would love to know, a tiny little bit more.
Hence the survey.