Ingredients
- The most important thing is a set of words to represent each letter / sound of the alphabet. Some teachers like to use the set from a song to make it possible to use and reuse the same set of words and to help the students memorise and practise them in an easy way, in class and outside of class. One of these more popular songs is this one from Kids TV 123, Phonics Song 2. I use the song, too, although I created a different set of words for myself and for our teachers with b is boy, g is for girl etc. What is more, in our exercises we use a wider range, too, as an opportunity to revise all the words that the kids already know. Sometimes b is for boy and sometimes b is for banana, ball, blue or black.
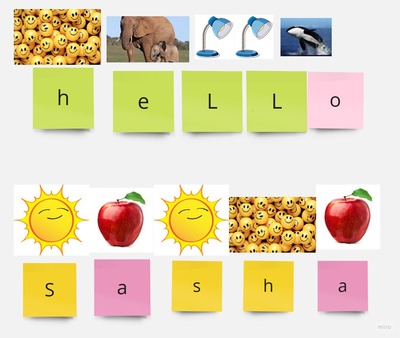
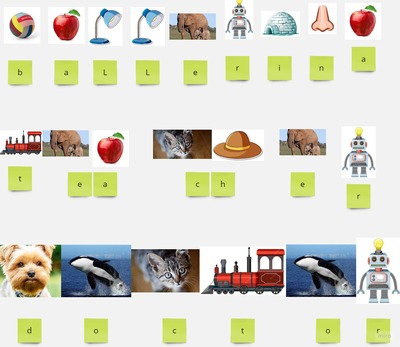
- The other thing that is necessary is a place to display the words. It can be a whiteboard, a noticeboard, a powerpoint or, as in the case of my online classes, a miro board. All the photos presented here are the screenshots from my miro board from the past two weeks.
- Depending on the type of display, a different set of resources will be necessary. In the classroom, I simply draw and write on the whiteboard. As regards miro, I duplicate pictures and post-it notes. It would be possible to do the same using a set of specific flashcards and letter cards. In this case, the words could even be displayed on the carpet or on the table.

Procedures
- The teacher chooses the word(s) for the lesson and prepares the visuals to represent them.
- The pictures are drawn on the board or arranged on the miro board.
- In class, the students, aided by the teacher, sound out all the pictures (‘What’s this?’ ‘Apple’ ‘Ok. Apple starts with …aaa or ooo’ ‘A’).
- The teacher writes the letters as the kids call them out.
- When all the letters of the words are on the board, the students try to read them as one word, supported by the teacher.

Why we like it
- This game is introduced as a part of every lesson, as a starter or as a final game and normally two or three words are used.
- We start playing the game only when the kids are familiar with all the letters / sounds of the alphabet and alongside the traditional phonics and sight words work, not instead of it. It is a way of encouraging kids to read the familiar words that might not and do not fall into all the patterns of the phonics system and which are not going to be as frequently used as the sight words.
- In a way, it is a decoding activity that is made fun and achievable with the use of the familiar visuals and it has worked well as a transition from sounds to letters through an intermediary of the carefully chosen images, before we are ready to decode words using only letters.
- Kids enjoy this activity and they quickly improve their skills. In our lesson yesterday, my student Sasha started to call out the sounds in the sequence of the pictures so fast that I could not catch up with typing the letters. Recently, we made even more progress. She just looked at a series of pictures and called out the hidden word out loud, not even bothering to wait for me. I guess that means that we are ready for the next step.
- The next step and the development of the activity will be decoding secret words with a mix of letters and visuals before we finally move to reading only letters.
- The choice of words used is up to the teacher. It makes sense to start with the easy, short words, the students’ names, the familiar cvc words or the frequently used words such as sight words or the functional words (‘Hello’, ‘Bye’, ‘Thank you’ etc). The decisions made here are in no connection with the phonics or the sight words that we currently work on. Most frequently, these represent some of the target vocabulary or the words that are interesting for the student (hence all the Frozen characters here).
Happy teaching!