‘Students draw…’ is one of the YL-related lines that is my personal pet peeve…You can see it in coursebooks, teachers’ books, in lesson plans and on the social media. The idea is that a bunch of seven-year-olds (or younger) will have their teacher give out the pencils and they will hear their teacher say ‘draw (insert your word)’ and they will just sit down, get an idea and complete the job in five minutes without any issues and (AND) afterwards they will be ready to talk about their pictures, to present their work or do whatever goes under the productive part of the project.
What a joke! It looks good on paper and in theory and in a real classroom it is going to translate into a neverending, unproductive, very often full of blood, sweat and tears task because the little people simply do not have the drawing skills, the time management, the imagination and the self-control necessary to complete the task that the adults imagine them to do and, more often than not, they will really want to do it well because they care, they love a project and they love drawing and those zoo animals, monsters and princesses that they were told to create. Or, quite possibly, they don’t like drawing, they are into other creative areas and they will devote precisely a total of sixty seconds to that task having then announced ‘I have finished’ and already on the lookout for other things to do. While their more involved peers are still busy and far from finishing, leaving the teacher with a room full of self-induced mixed ability group.
Is there a solution to that? Yes, there is. There must be. This ‘students draw’ has been on my mind for a very long time and there are some ways of handling it, the first of them – taking the coursebook and the ideas with a pinch of salt. Or two. The second of them, working on the staging and the clever way of keeping the activity in shape and everyone on the ball.
This is one of my solutions. It has worked very well with both groups and I am already thinking how to adapt it to other topics. As soon as I do come up with something and as soon as I trial and test, I will be adding to this post. For now, only one topic: the dinosaur.

Ingredients
- Paper and pencils or markers for the children
- A set of cards that help to shape up the drawing process, like the one that I used in a lesson in which we created our dinosaurs.
Procedures
- It is noteworthy that the lesson in which we actually draw the dinosaur was only one of the series of lessons taught over a period of three weeks and was proceeded by a few lessons in which we introduced and practised new vocabulary, did a mini-research and described the appearance of different dinosaurs. After our dinosaurs were ready, we added a fact file, did lots of quizes on dinosaurs and, eventually, had a role-play aka an interview about a dinosaur. The drawing lesson was just a part of a long chain of activities.
- The teacher asks the kids to open their notebooks and get the markers or pencils ready or give out the paper for the drawing, depending on the set-up in your context.
- The teacher tells the students that they are going to create a dinosaur, their own dinosaur and that they will listen to the teacher and make decisions. It might be a good idea to show the children the cut-up cards and to tell them that each card is a decision about a dinosaur.
- The teacher is supposed to draw their own dinsoaur, either on a piece of paper or on the board.
- The activity starts with everyone drawing a circle or an oval for the dinosaur’s body in the middle of the page.
- The teacher picks up the first card (i.e. ‘draw a long neck’ OR ‘draw a short neck’), the teacher reads it out loud and makes their own decision, announces it out loud and draws the neck for the dinosaur. The teacher then checks with all the students, in turns, what choice they have made, making sure they say out loud what they have decided to do. The kids draw, the teacher monitors.
- The activity goes on, with the teacher doing one more round and then the students taking over and reading and dictating for the class and the teacher.
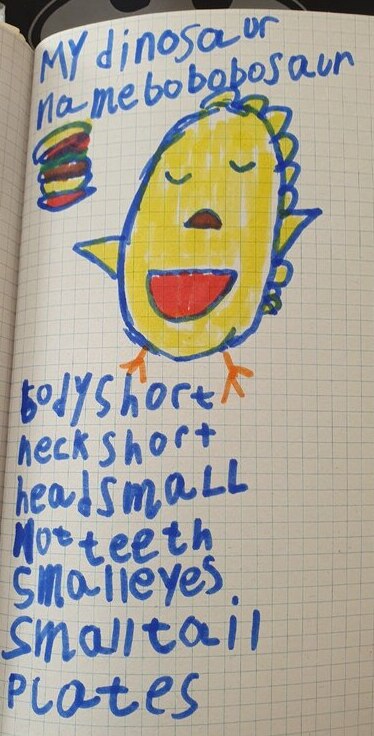
- In the end, the student come up with the name for their dinosaur with the suffix -saurus (although it is, of course, not the only suffix used to created dinosaurs names).
- The lesson finishes with all the students introducing their dinosaurs briefly and only in the following lessons do the students proceed with working on their dinosaurs (facts, role-playes etc).
Why we like it?
- I loved how this format worked in the classroom. It was well staged and it helped me manage the children and their creativity, without losing control and without anybody finishing ahead of time or going on for too long. It was also a perfect combination of teacher-centred and of individual creative choices for every student.
- I had quite a few cards to use but I was prepared to use all or not all of them, depending on how focused or interested my students would have been. In the two lessons / groups I did it with, we managed to go through all the cards (aka decisions).
- The kids were prepared for the task, vocabulary-wise and we also could use it to practise it further, through reading, confirming, checking etc. The words were out there, in the air, throughout the entire lesson.
- The kids absolutely loved their dinosaurs. Some of them even managed to finish their first dinoasaur, and draw another one.
- It worked very well also as the preparation for the more productive part of the project, our interviews – role-plays in the following lessons.
- Kids also enjoyed the fact of being responsible for making the decisions, step by step, while creating their dinosaurs.
- I will definitely be applying this particular approach to our projects in the future.
Happy teaching!